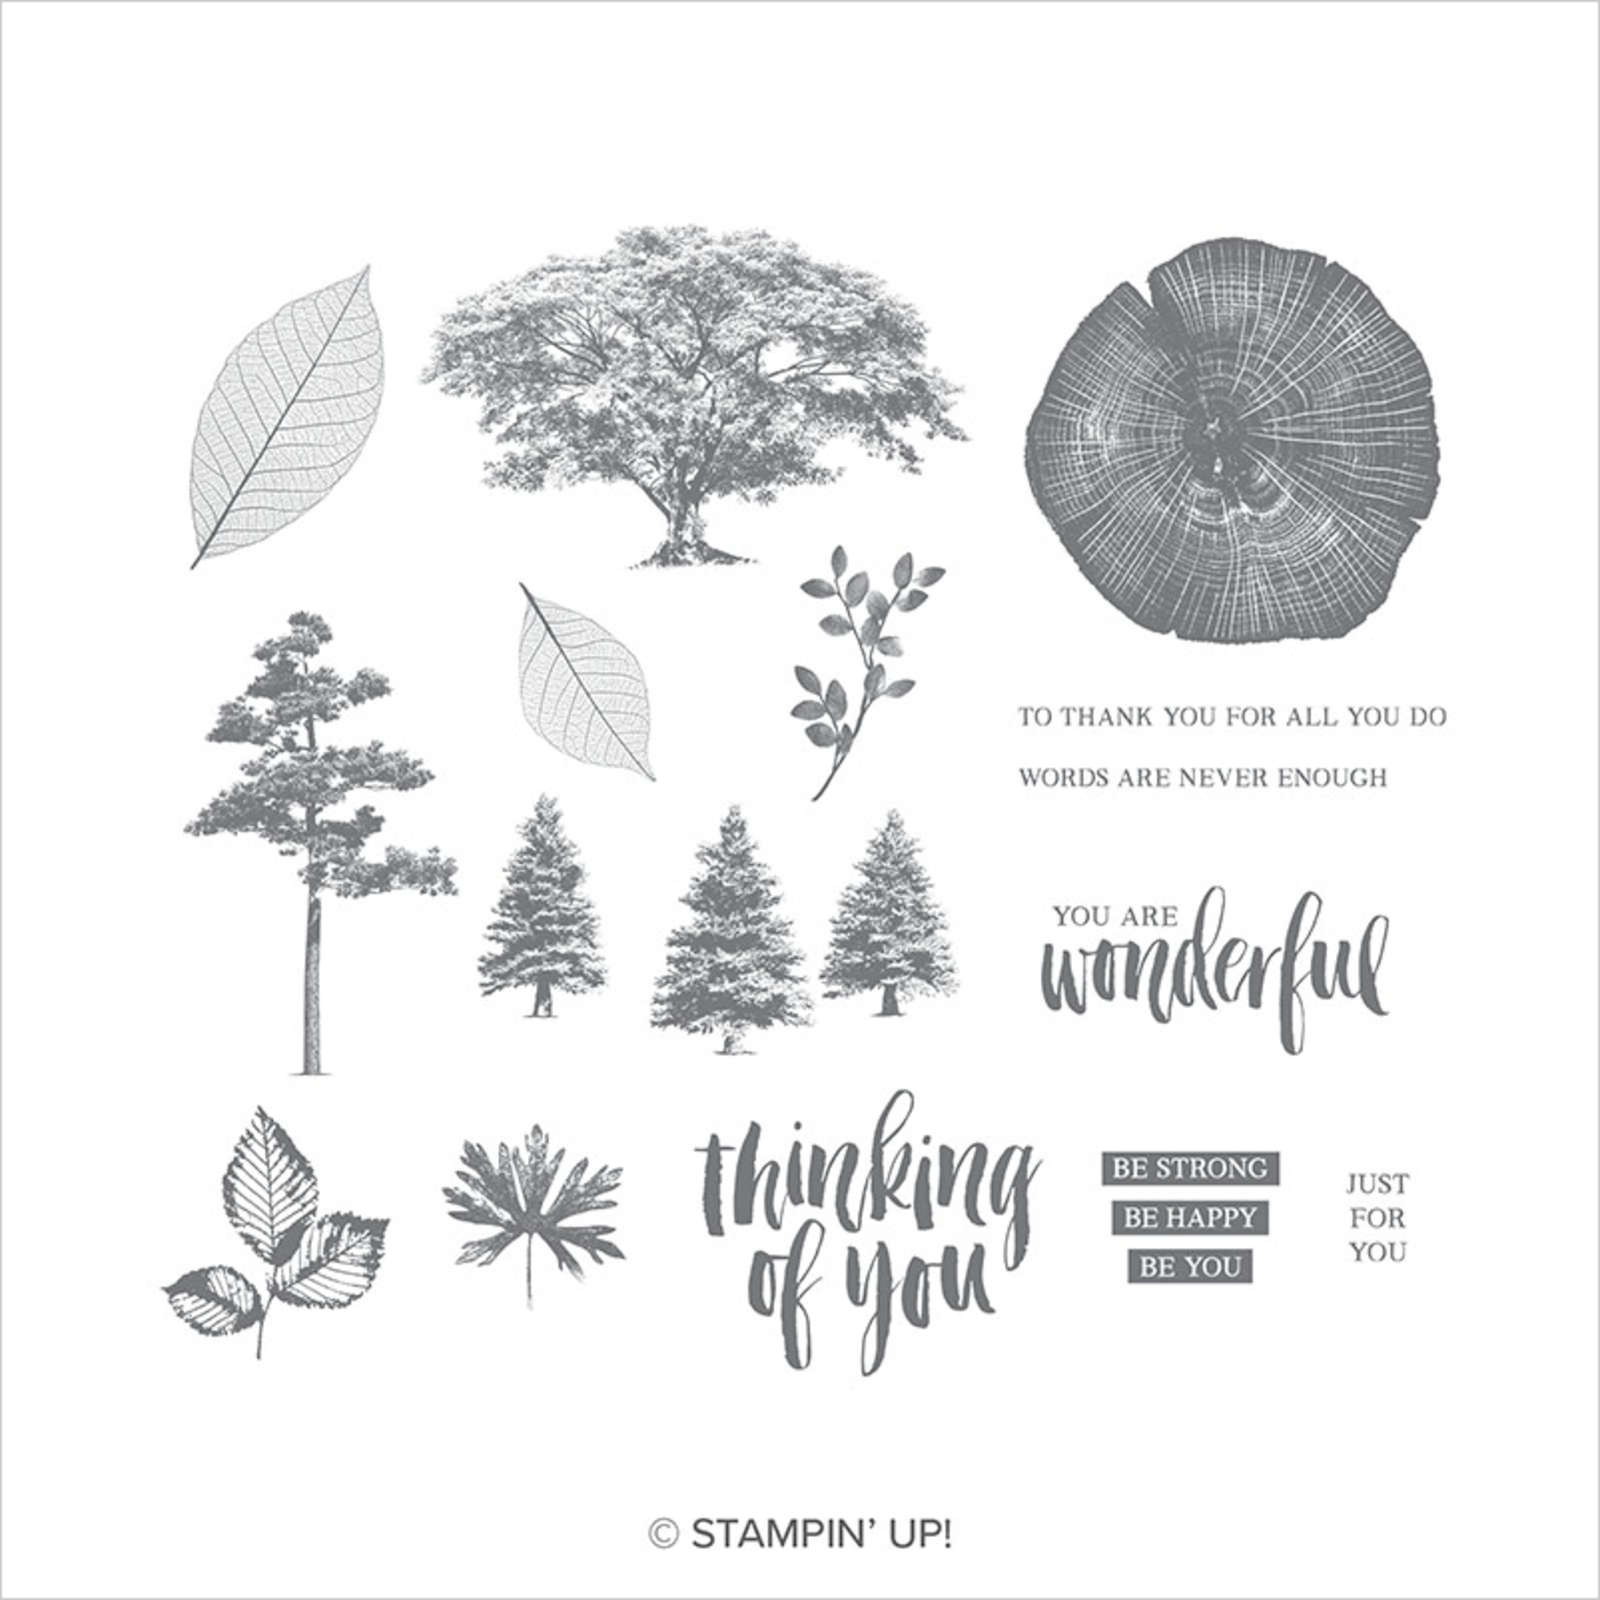
Wonderful Mountains
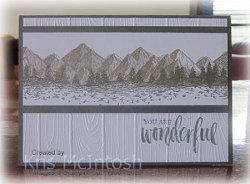
Today’s card was inspired by one I had saved on Pinterest which uses retired Stampin’ Up! stamps but inspired me to take out my Mountain Air stamp set. I loved the neutral colours used on the card on Pinterst so my first card uses neutral colours.
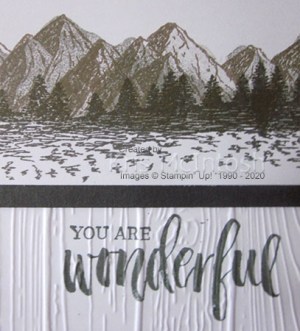
I stamped the greeting from the Rooted in Nature stamp set onto the lower right hand corner of Whisper White card using Basic Gray ink. I embossed the stamped Whisper White panel using the Pinewood Planks Embossing Folder. I attached the embossed Whisper White card to scored and folded Basic Gray card.
I stamped the solid mountain image from the Mountain Air stamp set onto a 5cm wide strip of Whisper White card using Smoky Slate ink. I stamped the detailed mountain image over the top of the solid mountain image using Gray Granite ink. I added the trees from the Mountain Air stamp set using Basic Gray ink. I attached the stamped panel to Basic Gray card and then the embossed Whisper White card.
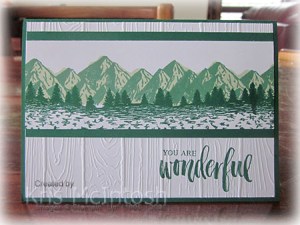
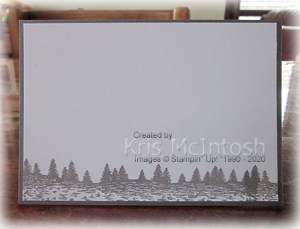
To decorate the inside of the card, I stamped the tree image from the Mountain Air stamp set across the bottom of Whisper White card using Basic Gray ink. I loved this card so much that I just had to create another one this time with a little more colour. This card uses Soft Sea Foam ink for the solid mountain image with the detailed image stamped in Just Jade ink.

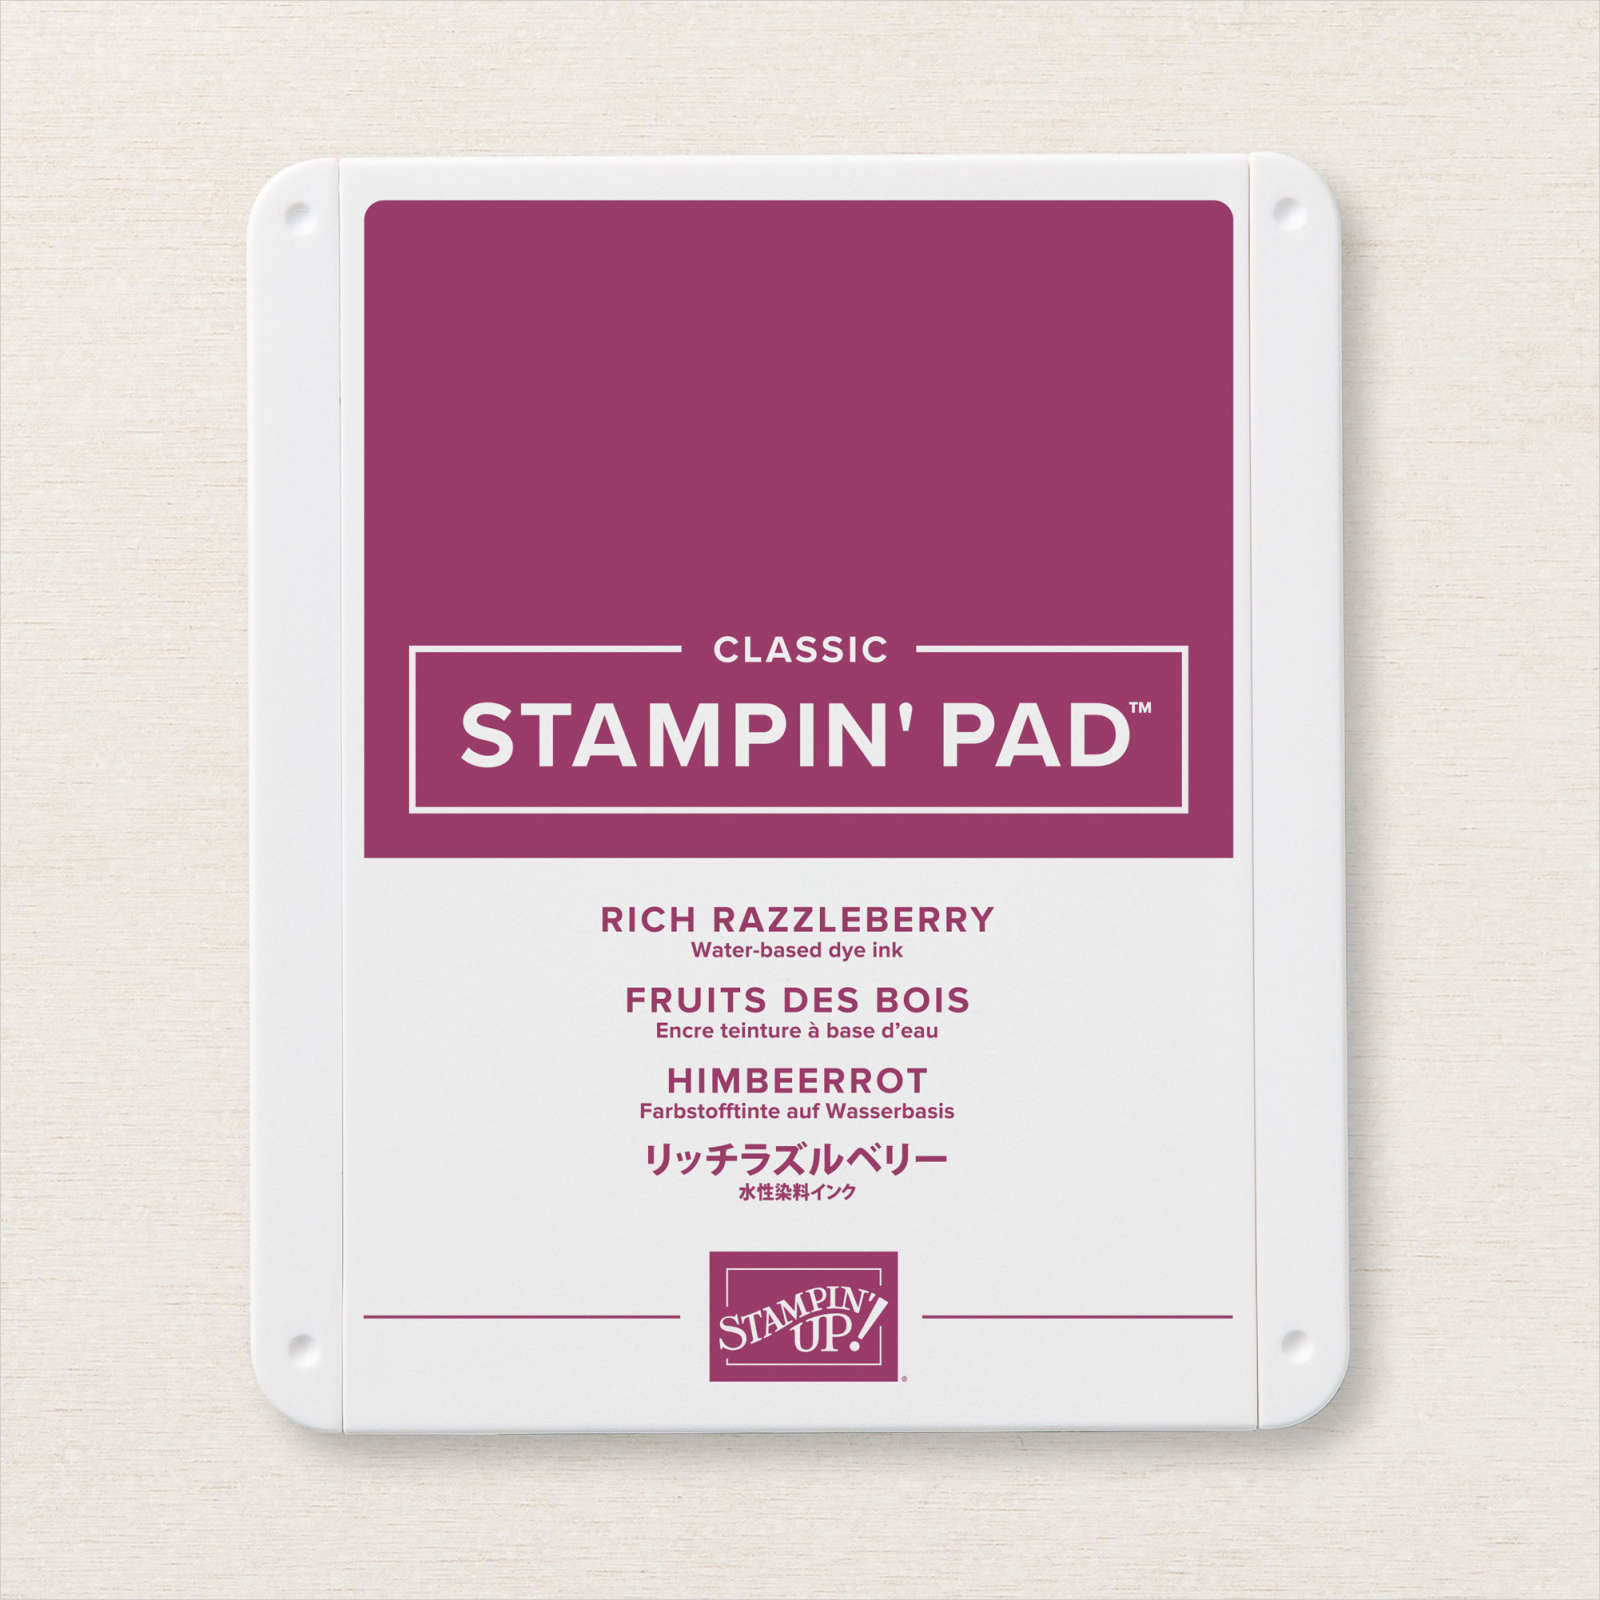
I stamped the tree image from the Mountain Air stamp set and the greeting from the Rooted in Nature stamp set using Shaded Spruce ink. I used Shaded Spruce card to create the card base and layers. I was kind of on a roll, so I just had to do one more! This time, I stamped the solid mountain image from the Mountain Air stamp set using Rococo Rose ink. I stamped the detailed mountain image using Rich Razzleberry ink and the tree image using Blackberry Bliss ink. The base card is Blackberry Bliss and the greeting from the Rooted in Nature stamp set is stamped using Blackberrys Bliss ink.

I think these cards are amazing, so thanks to Amylovesnormajean who posted the original card. I really would love to know what you think of my take on this card.
Bye for now,
Kris
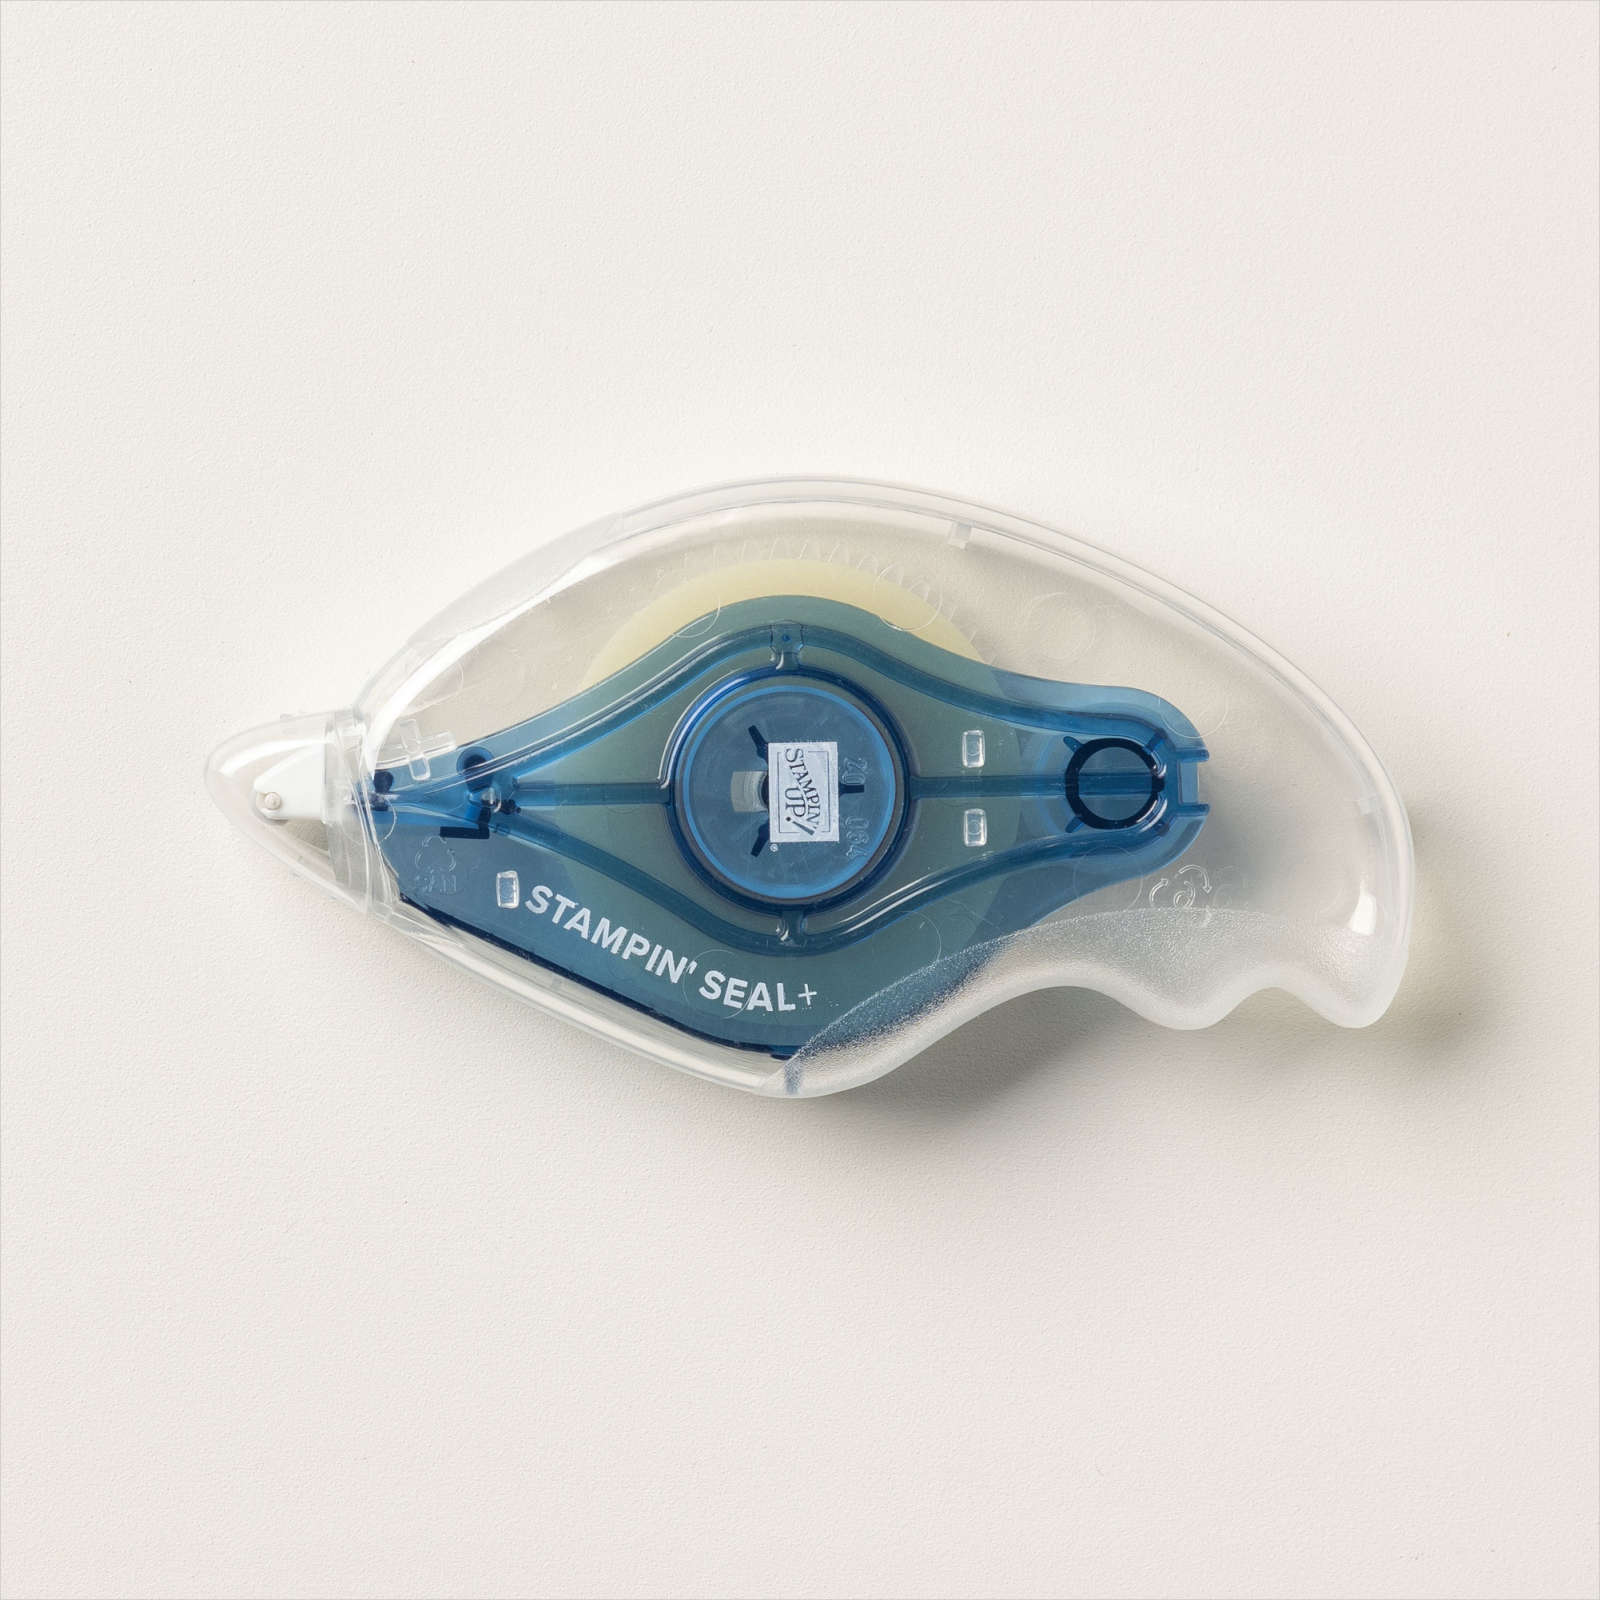
Product Used:


A Christmas Tree
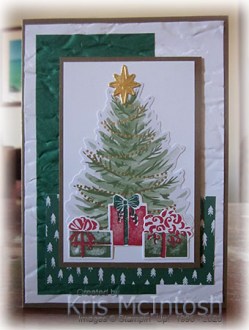
Remember when I shared the Tag Buffet Project Kit with you, I said that there was a lot of pieces left over, well today I thought I would share a card I made using up some of the Christmas Tree die cuts. I attached Shaded Spruce card to the left hand side of Whisper White card and embossed the panel using the Old World Paper 3D Embossing Folder. I attached the embossed card to scored and folded Soft Suede card. I attached a piece of Classic Christmas 6″ x 6″ Designer Series Paper across the bottom of the embossed card.
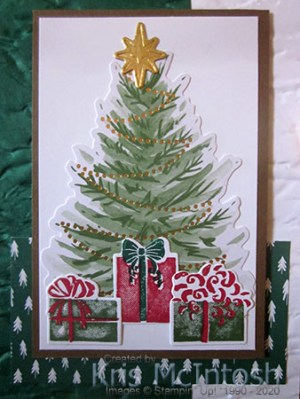
I attached the Christmas Tree die cut from the Tag Buffet Project Kit to Whisper White card and then Soft Suede card. The image panel is attached to the card front using dimensionals.

I stamped the present image from the Most Wonderful Time stamp set onto Whisper White card using Real Red ink and again using Garden Green ink. I stamped the bow image onto the Real Red presents using Shaded Spruce ink and onto the Garden Green presents using Real Red ink. I used the co-ordinating Most Wonderful Time die to cut out the presents. I attached three of the presents across the bottom of the Christmas Tree. I cut Gold Foil using the star die from the Most Wonderful Time dies and attached it to the top of the tree. To decorate the inside of the card, I attached the three remaining presents and stamped the greeting from the Tag Buffet stamp set using Shaded Spruce ink.
Did you know that when you have used all of the product from the Most Wonderful Time Medley you can purchase a refill pack. Such a good idea. I hope you enjoyed today’s card.
Bye for now,
Kris
Product Used:


More Curvy Christmas

Today’s card once more uses the Curvy Celebrations product suite. This time I am also using some of the Classic Christmas Designer Series Paper which you can purchase as part of the pre-order beginning today. I stamped the tree image from the Curvy Christmas stamp set across Whisper White card using Shaded Spruce ink. I stamped the greeting from the Curvy Christmas stamp set below the trees using Real Red ink. I cut a piece of Real Red card using the dotted die from the Curvy Dies. I embossed the piece with the dots and the piece without using the Subtle 3D Embossing Folder. I attached the piece without the dots below the greeting and the piece with the dots above the stamped trees.
I also cut the edge of the piece of the Shaded Spruce paper from the Classic Christmas Designer Series Paper using the dotted die. I attached this panel over the Real Red panel at the bottom of the card front. The whole Whisper White panel is attached to scored and folded Smoky Slate card.
To decorate the inside of the card, I attached the small portion of Shaded Spruce Classic Christmas Designer Series Paper I had cut off to create the panel for the front of the card to the bottom of Whisper White card. I stamped the tree image from the Curvy Christmas stamp set above the Designer Series Paper.
I am really starting to love the layers you can create using this product bundle. Only a couple of days to go until you too can purchase these amazing products. You can get all the details about the stamp sets, dies and Designer Series Paper by downloading the PDF here.
I hope I am inspiring you to take a look at these great new products.
Bye for now,
Kris
Product Used:


Forever Birthday
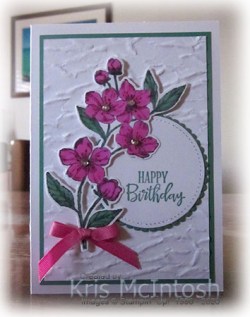
Today’s card uses the beautiful floral image from the Forever Blossoms stamp set. I love this large floral image! I embossed Whisper White card using Old World Paper 3D Embossing Folder and attached it to Just Jade card. The whole panel is attached to scored and folded Thick Whisper White card. I stamped “happy birthday” from the Peaceful Moments stamp set onto Whisper White card using Just Jade ink. I cut out the greeting using one of the circles from the Stitched Shapes Dies.
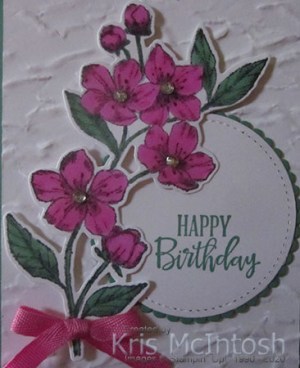
The greeting is attached to a Just Jade scalloped circle cut using the Layering Circle Dies. The greeting panel is attached to the right hand side of the embossed panel. I stamped the floral image from the Forever Blossoms stamp set onto Whisper White card using Memento Tuxedo Black ink.
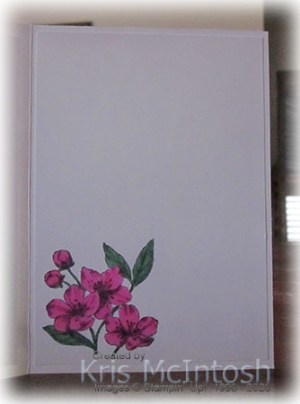
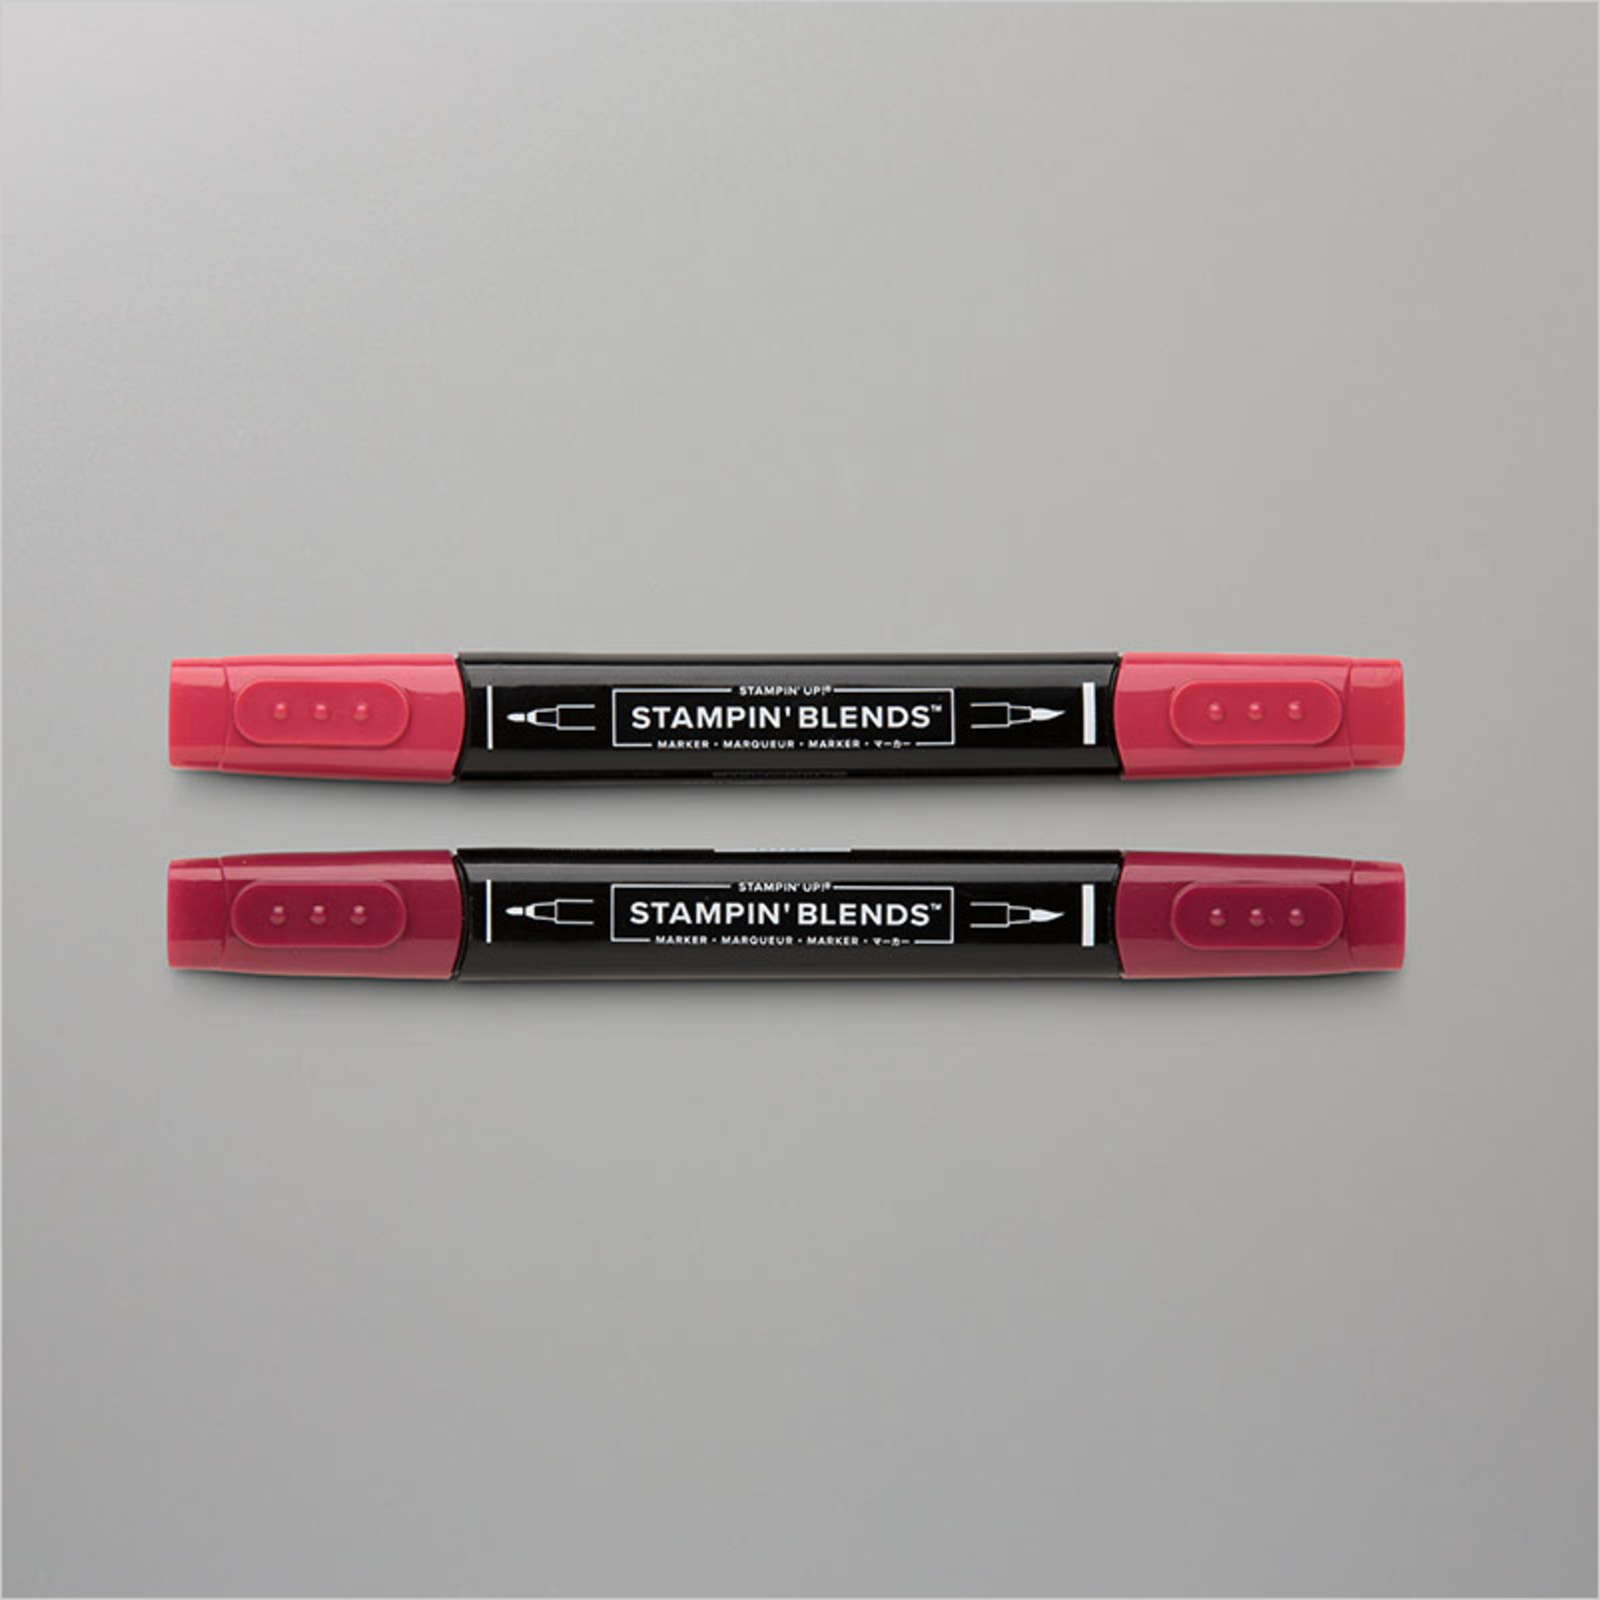
I coloured the image using the Magenta Madness and Just Jade Stampin’ Write Markers. I cut out the image using the co-ordinating Cherry Blossoms Die and attached it to the left hand side of the embossed panel using Mini Dimensionals where necessary. I tied a bow in a length of Magenta Madness 1/4″ In-Colour Ribbon and attached it over the end of the floral image using a Glue Dot. I also added some Basic Rhinestones to the flower centres. To decorate the inside of the card, I inked just the top section of the floral image from the Forever Blossoms stamp set using Memento Tuxedo Black ink and stamped it onto the lower left hand side of Whisper White card. I coloured the image using the Magenta Madness and Just Jade Stampin’ Blends.
I think the colours in this card are just gorgeous. I hope the lady this is destined for loves it as much as I do.
Bye for now,
Kris
Product Used:


Homecoming
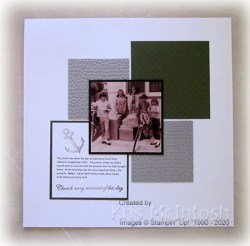
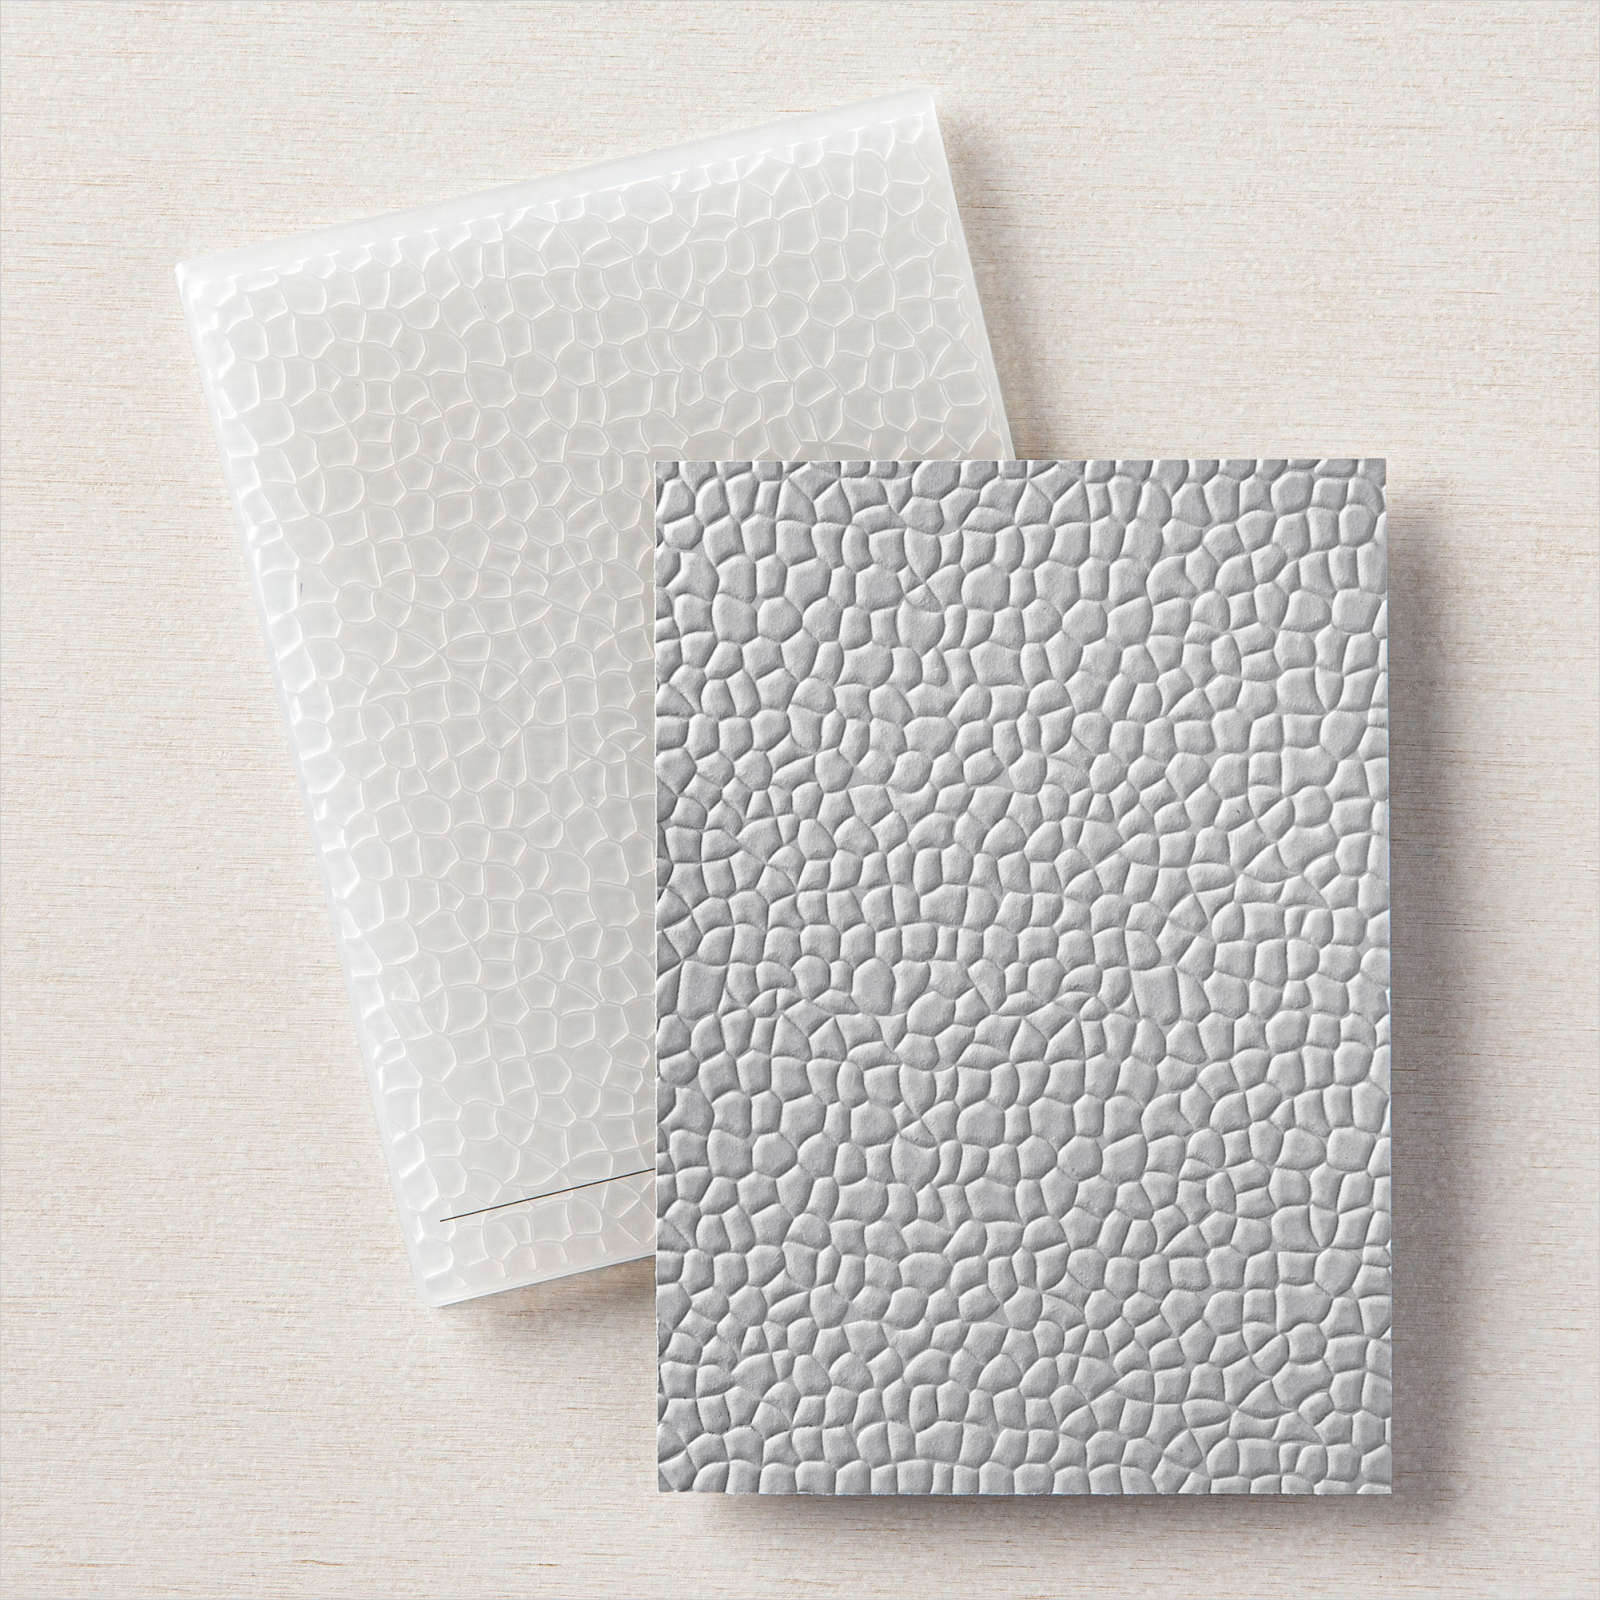
Today’s page shows off a photo of my sisters, my cousins and I on the day my Dad returned from Vietnam in 1967. We were so excited to receive our presents! Now of course I am more excited by the fact that he came home safe and well and is still with us. I began by embossing a larger square of Mossy Meadow card using one of the Wrapped in Texture Embossing Folders. I also embossed two squares of Gray Granite card using the Hammered Metal 3D Embossing Folder.
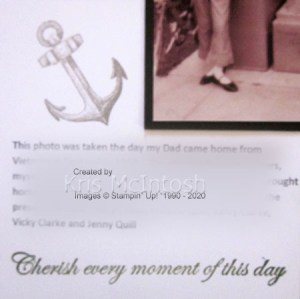
Each of the embossed squares are attached to a Whisper White 12″ x 12″ page. I printed the journaling onto Whisper White card and added the anchor image from the Sailing Home stamp set using Gray Granite ink. I also added the greeting from the Forever Blossoms stamp set using Mossy Meadow ink. The journaling panel is attached to Mossy Meadow card before it is attached to the Whisper White page. I attached the photo to Basic Black card and centred it over the attached panels.
I hope I am inspiring you to create some simple memory keeping pages to get your photos out of the box on the shelf or from the computer to share with your family.
Bye for now,
Kris
Product Used:


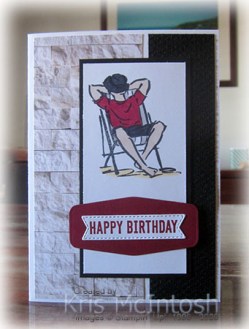
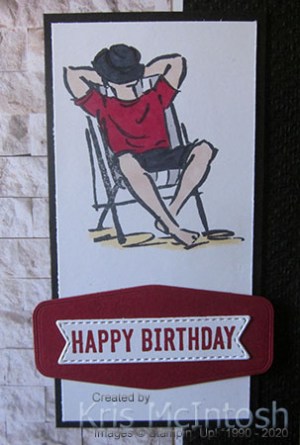
Happy Birthday Jae
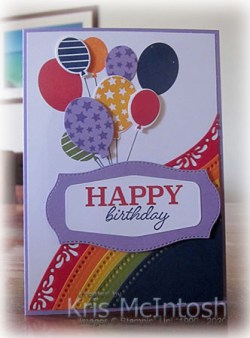
Yesterday was my Granddaughter Jae’s birthday and I thought I would share the card I made for her with you. I decided to use the Curvy Dies to create her card. I based the card loosely on a sketch challenge at Case This Sketch which has long expired but it immediately made me think of the Curvy Dies. I cut Real Red card using the detailed border die from the Curvy Dies. I also cut Pumpkin Pie, Crushed Curry, Old Olive and Night of Navy using the dotted border die from the Curvy Dies. I attached the Real Red piece onto the lower right hand corner of Whisper White card and trimmed away any excess. I layered each of the other pieces on top and trimmed away any excess. I stamped several of the balloon images from the So Much Happy stamp set onto the Whisper White card using Crushed Curry, Night of Navy, Old Olive and Real Red ink.
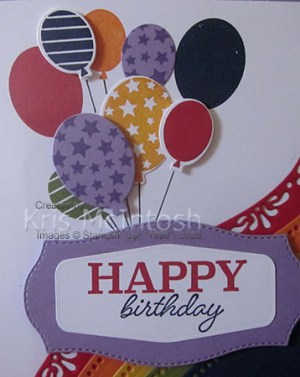
I used a ruler and my Basic Black Stampin’ Write Marker to add balloon strings. I stamped several more balloons onto scrap Whisper White card using Real Red, Crushed Curry and Night of Navy ink. I cut out the balloons using the co-ordinating Happy Dies. I also cut two balloons from Highland Heather card using the same dies. I stamped the Highland Heather balloons with the “star” image from the So Much Happy stamp set using Highland Heather ink. I attached the Crushed Curry balloon and small Highland Heather balloon flat onto the card front. The other balloons are attached using Mini Dimensionals. I once more drew in the balloon strings where necessary using a ruler and the Basic Black Stampin’ Write Marker. I stamped “happy” from the So Much Happy stamp set onto Whisper White card using Real Red ink.
I stamped “birthday” from the same stamp set underneath using Night of Navy ink. I cut out the greeting using one of the Tasteful Labels Dies. I also cut Highland Heather card using another of the Tasteful Labels Dies. I attached the stamped label to the Highland Heather label and then the card front using dimensionals. The whole panel is attached to scored and folded Highland Heather card.
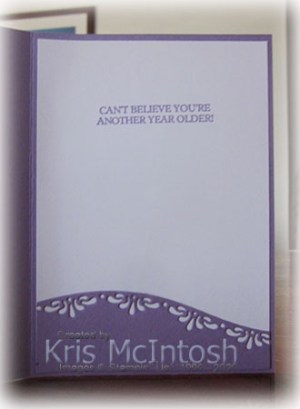
To decorate the inside of the card, I cut Highland Heather card using the detailed border die from the Curvy Dies and attached it across the bottom of Whisper White card. I stamped the greeting from the Itty Bitty Birthday stamp set using Highland Heather ink.
This card has so much going on, colours and dies and stamping, but, I love it and so did Jae. I’d love to know what you think.
Bye for now,
Kris
Product Used:


Pop Up Birthday
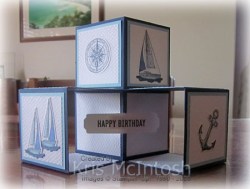
Yesterday on my Facebook Live, I shared my way of creating a Pop Up Cube Card. Today’s card is another one using my templates. I began by cutting all of the pieces for the cube bases from Night of Navy card. I cut any layers from Balmy Blue card and then all of the Whisper White pieces. I embossed all of the Whisper White pieces using the Tasteful Textile 3D Embossing Folder. Each of the smaller Whisper White panels are attached to the Balmy Blue panels before being attached to the card base. The larger Whisper White panels for inside the cubes are simply attached to the Night of Navy card.
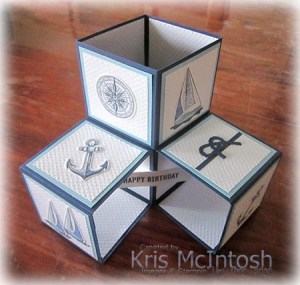
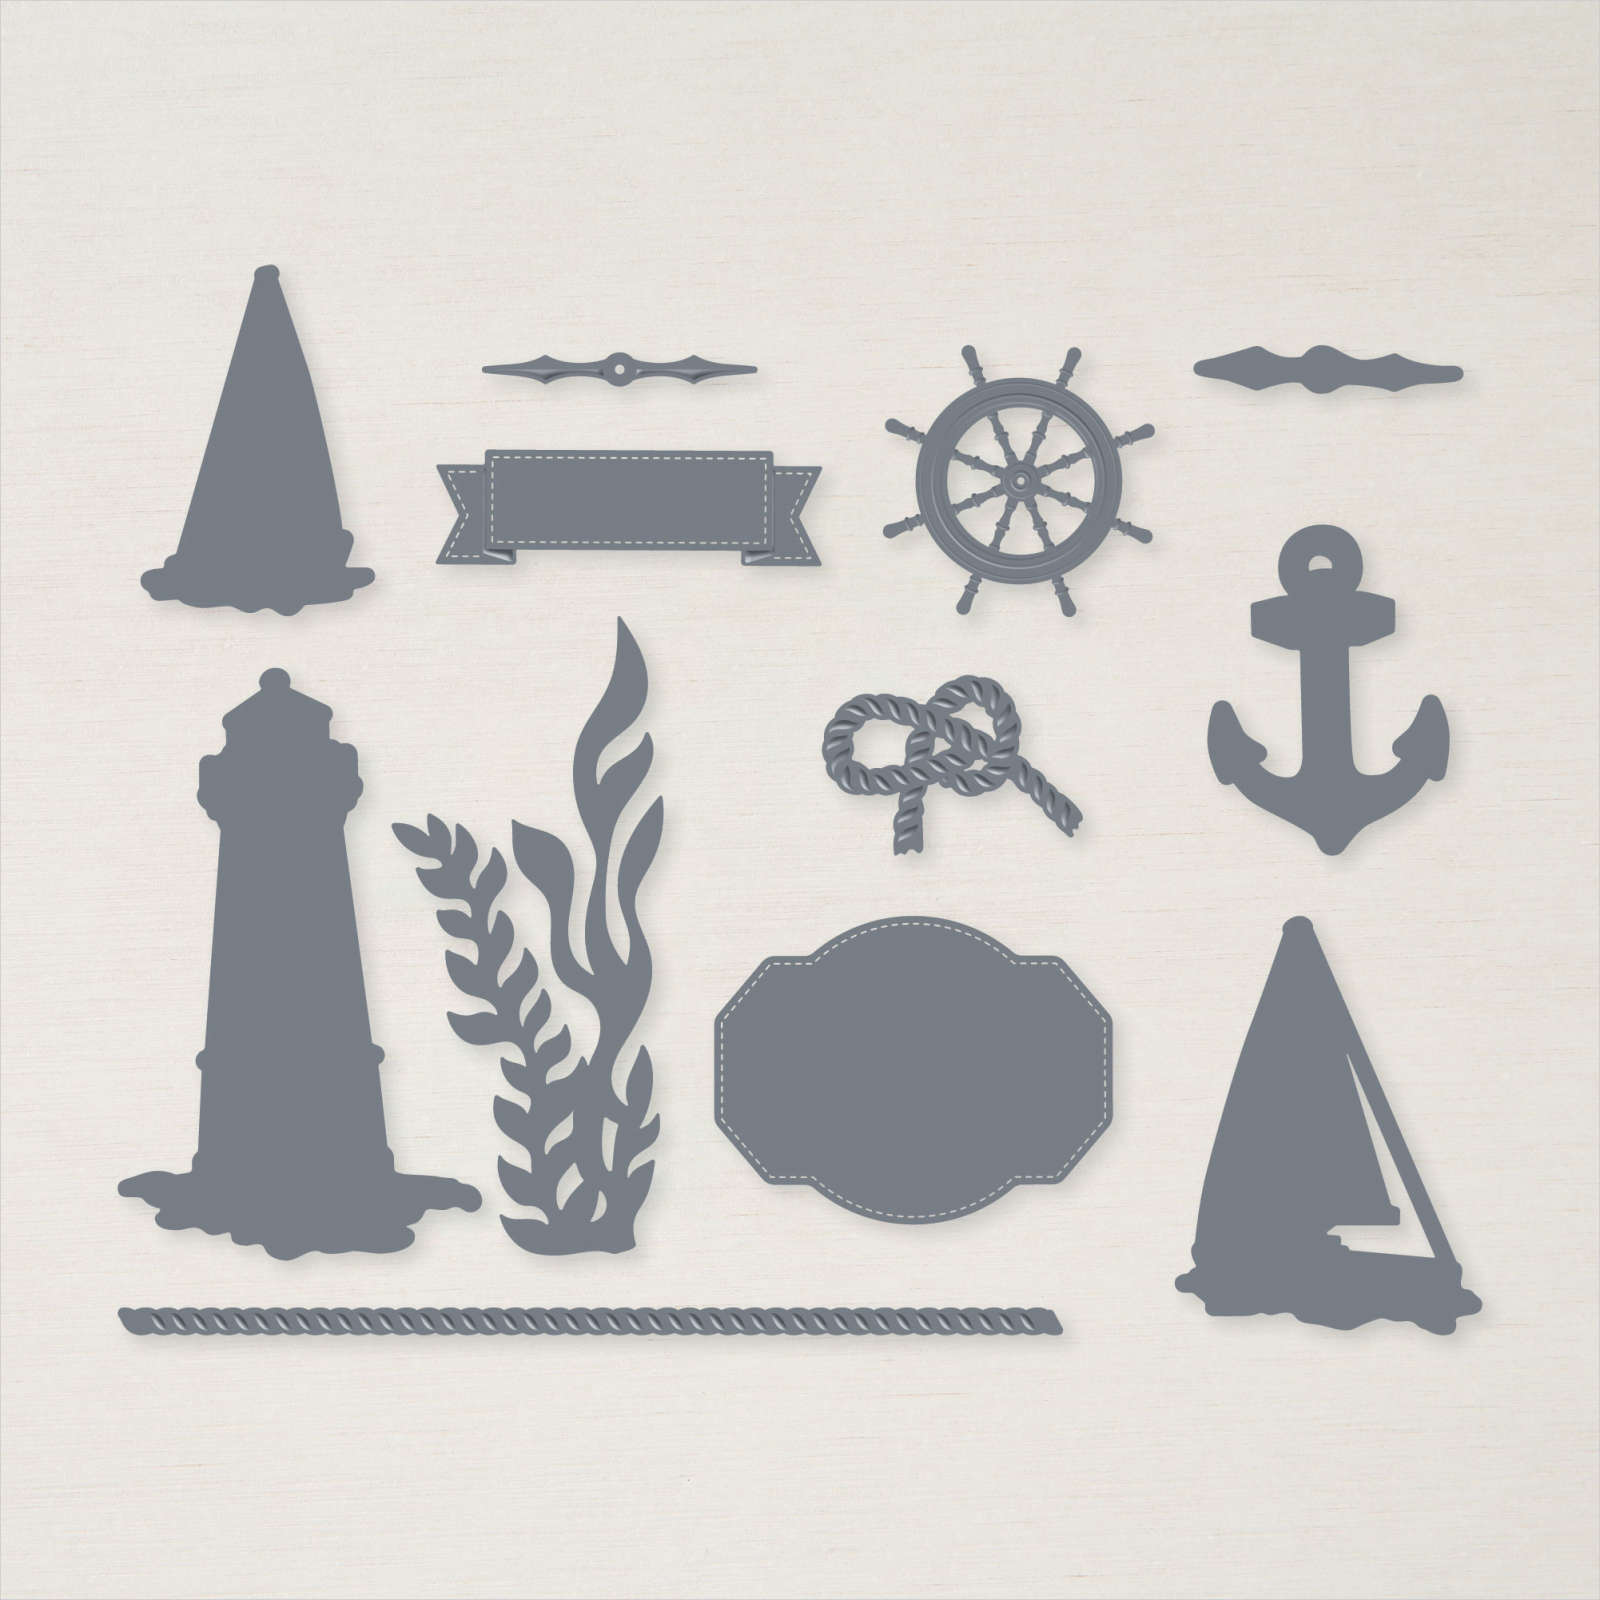
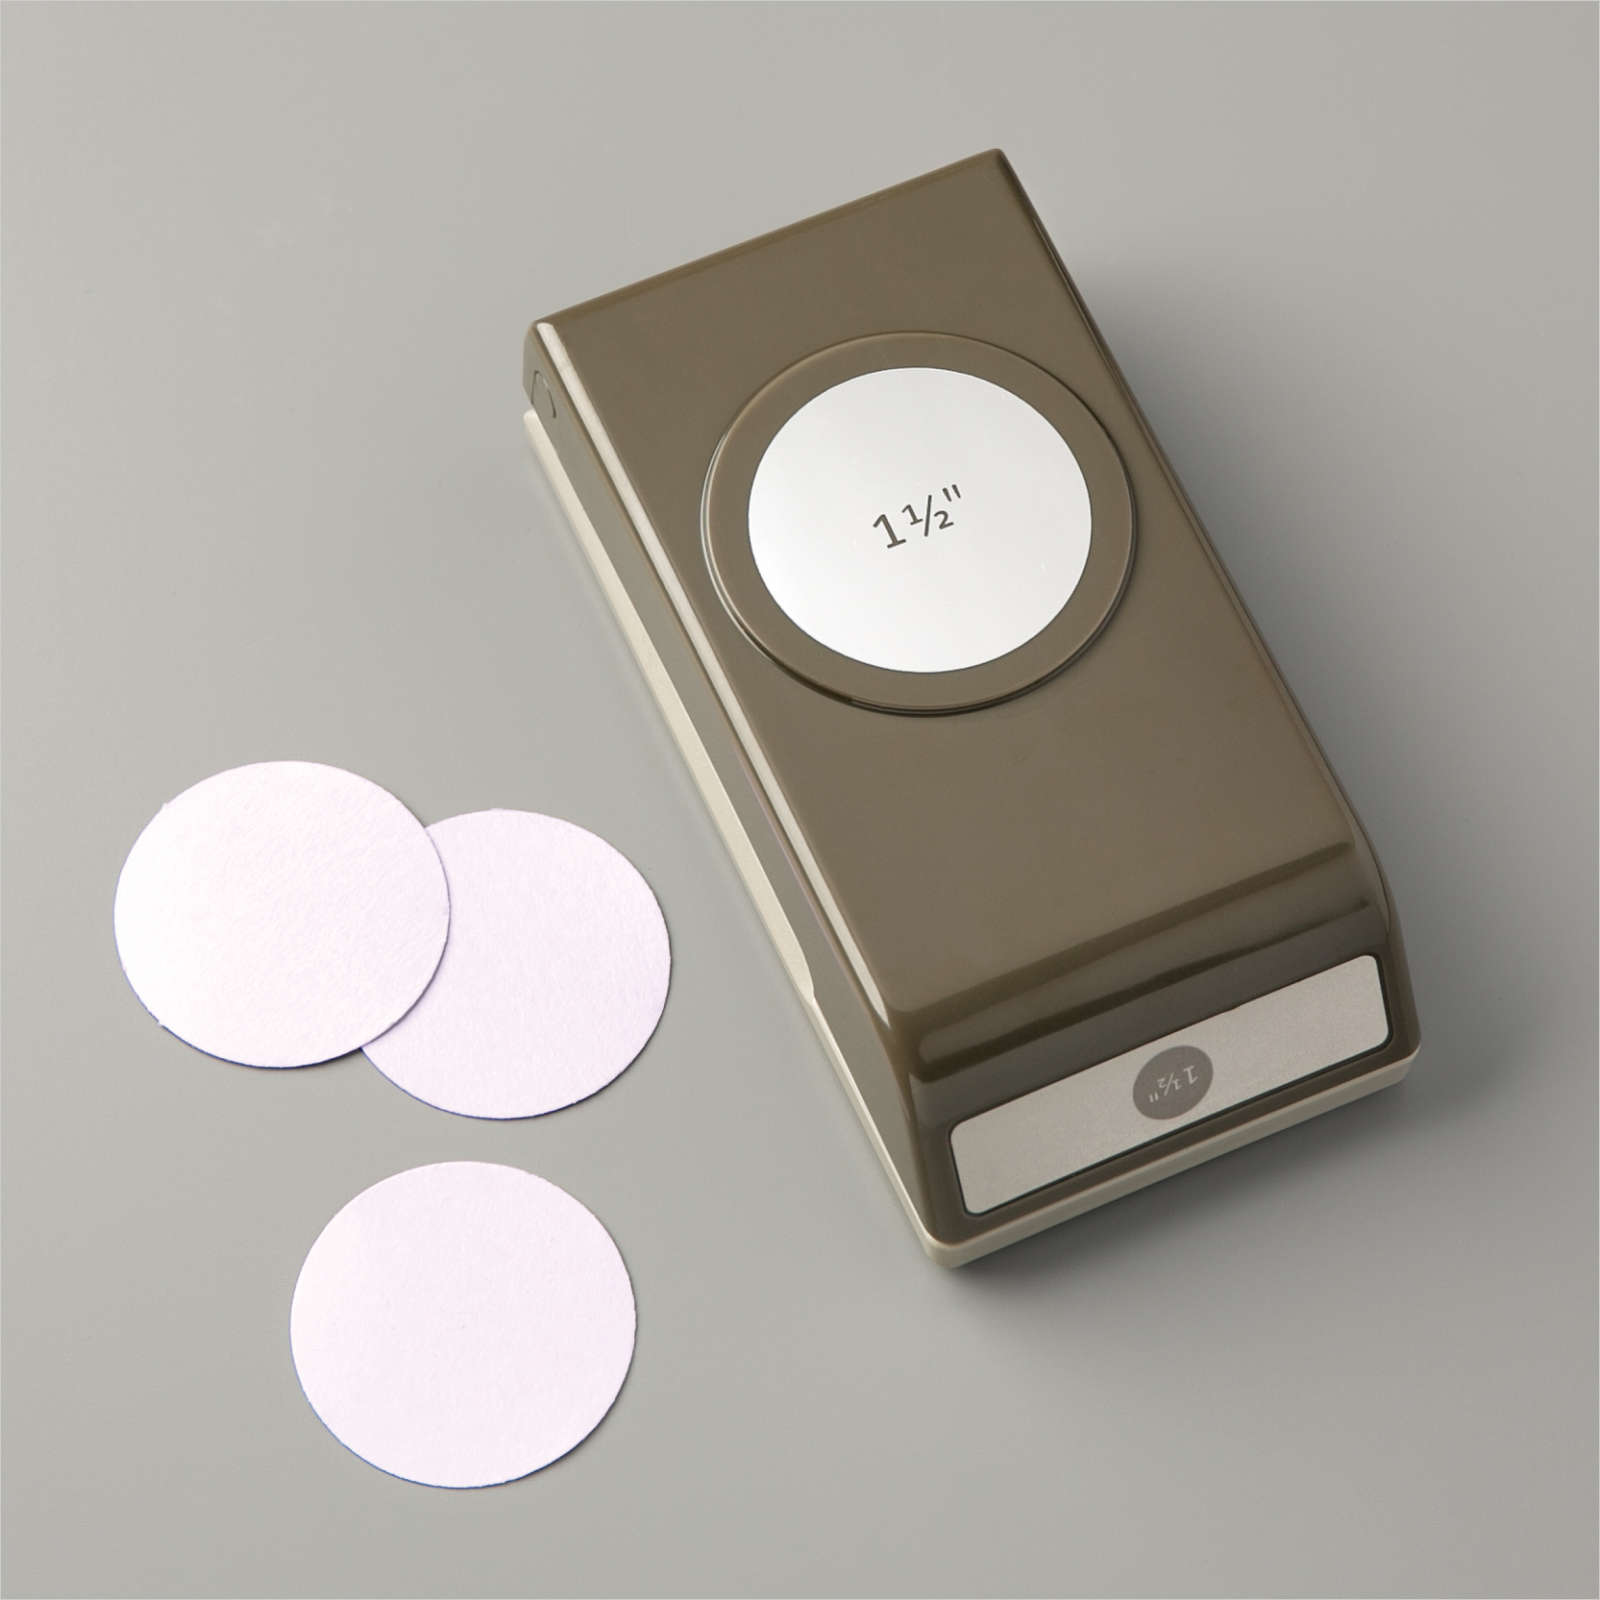
I stamped the two anchors and the compass image from the Sailing Home stamp set onto Whisper White card using Night of Navy ink. I cut out the anchors with the co-ordinating Smooth Sailing Die. The compass is punched out using the 1-1/2″ Circle Punch. I stamped the large ship and two small ships from the Sailing Home stamp set onto Whisper White card using Memento Tuxedo Black ink. I coloured the images using Night of Navy and Light Balmy Blue Stampin’ Blends. I cut all of the images out using the co-ordinating Smooth Sailing Dies. Lastly I cut Night of Navy card using the rope and knot dies from the Smooth Sailing Dies. All of the pieces are attached straight onto the relevant panels. I stamped “Happy Birthday” from the Itty Bitty Birthday stamp set onto Whisper White card using Night of Navy ink.

I punched the ends of the banner using the Lovely Labels Pick a Punch before attaching the greeting to the inside of the smaller cubes.I love this style of card and have now made quite a few. I will let you in on my little secret. I created templates for each of the cubes from some retired card. I attached the panels where they need to go and the tabs for the greeting panel. This allows me to add most of my pieces to the card bases before I create the cubes and attach them together. The only thing I have to add once everything is assembled is the greeting.
You can download a copy of my basic instructions with photos of the templates here.
Bye for now,
Kris
Product Used:


A Good Man Birthday
I used a sketch that I saved on Pinterest to create today’s card. I added a piece of In Good Taste Designer Series Paper to the left hand side of scored and folded Thick Whisper White card. I embossed a piece of Basic Black card using the Tasteful Textile 3D Embossing Folder and attached it to the right hand side of the card front. I stamped the image from the A Good Man stamp set onto Whisper White card using Memento Tuxedo Black ink. I coloured the image using Dark Basic Black, Dark Cherry Cobbler, Dark So Saffron, Light Smoky Slate and Ivory Stampin’ Blends.
I attached the image panel to Basic Black card and then the card front. I cut Cherry Cobbler card using one of the Tasteful Labels Dies and attached it to the card front across the bottom of the image panel.

I stamped “happy birthday” from the Itty Bitty Birthday stamp set onto Whisper White card using Cherry Cobbler ink and cut it out using another of the Tasteful Labels Dies. The greeting is attached to the centre of the Cherry Cobbler Label.
To decorate the inside of the card, I stamped another greeting from the A Good Man stamp set onto Whisper White card using Cherry Cobbler ink. I attached a narrow strip of Basic Black card behind one long edge of a piece of the same In Good Taste Designer Series Paper. The designer series paper panel is attached across the bottom of the stamped Whisper White card.
I love this card, the neutral colours with the pop of red is really stunning.
Bye for now,
Kris
Product Used:


Something to brighten you day
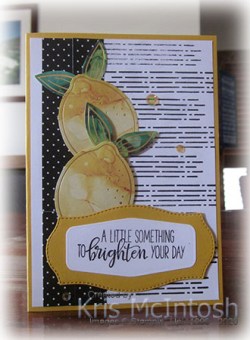
Today’s card is created using the left over pieces from my Paper Pumpkin Box of Sunshine. I stamped Whisper White card using the background image from the supplied stamp set using Basic Black ink. I attached four of the strips of black and white card to the left hand side of the stamp Whisper White card. I attached one die cut set of leaves and one lemon over the edge of the black and white card.
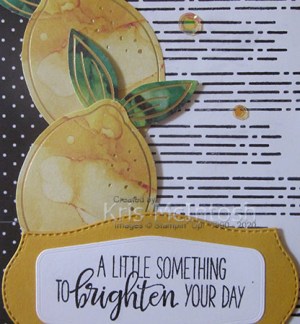
I attached one set of leaves to the back of another lemon die cut before attaching the whole piece to the card front using dimensionals. I stamped the greeting from the supplied stamp set onto Whisper White card using Basic Black ink.
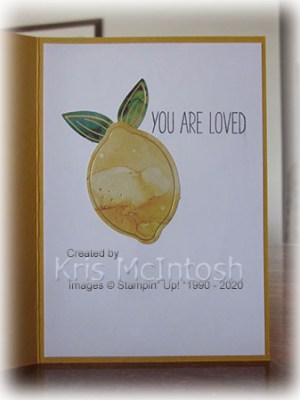
I cut out the greeting using the Tasteful Labels Dies. I also cut Crushed Curry card using another of the Tasteful Labels Dies. I attached the greeting onto the Crushed Curry label and then the card front using dimensionals. I added three of the sequins to the card front to finish off. To decorate the inside of the card, I attached one set of die cut leaves and one lemon to Whisper White card. I also stamped another greeting from the supplied stamp set using Basic Black ink.
Turned our pretty well, don’t you think?
Bye for now,
Kris
Product Used:
Father’s Day
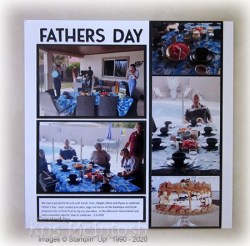
Today’s page is a very simple one, just lots of photos and a small amount of journaling. We celebrated Father’s Day with brunch at our daughter’s home. The three photos on the right of the page are attached to a long strip of Basic Black 12″ x 12″ card which is unfortunately not available at the current time. Each of the two remaining photos are also attached to Basic Black card. I printed the journaling onto Whisper White card and it is also attached to Basic Black card. The title is cut from Basic Black card using the Playful Alphabet Dies. I bet you can tell I love these dies! They are the perfect size for my memory keeping pages.
I’d love to hear what you think. Is it too simple?
Bye for now,

Kris


