‘Tis The Season….
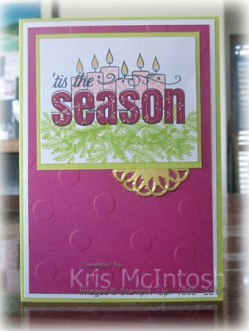
….to be jolly. Don’t you just love Christmastime. I know it’s still a way off, but not so very far now. I’m sure most of you are thinking about Christmas, even if you haven’t started planning for it. Anyway this is the last of this series of cards using the Merry Patterns stamp set. Once more this card is created with one of the sketches saved to my Card Sketch Pinterest Board.
I embossed Berry Burst card using the Polka Dot Basics Embossing Folder and attached it to Whisper White card and then scored and folded Lemon Lime Twist card. To create my image panel, I first had to stamp the greeting from the Merry Patterns stamp set onto a post-it-note and cut out the letters.  I stamped the same greeting onto the Whisper White card using Memento Tuxedo Black ink and added the post it note letters to cover the word “season”. Once covered I stamped the candle image from the same stamp set using Memento Tuxedo Black ink.
  With the masks still in place, I stamped the fill images for the candles using Powder Pink ink. I also stamped the fill image for the candle flames using So Saffron ink. With the masks still in place I stamped the leaf image across the card underneath the candles and over the masks using Lemon Lime Twist ink. I removed the masks and stamped the word “season” using Berry Burst ink. The image panel is attached to Lemon Lime Twist card. I have also attached half a Gold Metallic Foil Doily behind the lower right hand edge of the image panel before attaching to the card front.
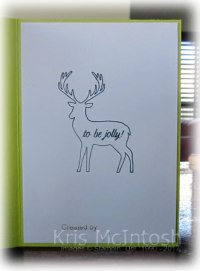
To decorate the inside of the card, I stamped the reindeer image using Memento Tuxedo Black ink. I also stamped “to be jolly” inside the reindeer image using the same ink.
I think the masking was worth the effort to create the image panel, don’t you?
Bye for now,
Kris
Product Used:


A candlelit Christmas

Today I am sharing the second of the cards I have made for my upcoming classes using the Merry Patterns stamp set. As you know this stamp set is only available until the end of the month and only if you place a workshop or individual order for $450.00. Sooo, if your wish list is still long for product from the Holiday Catalogue then why not place an order to qualify for this fabulous stamp set. Don’t forget it won’t be long till the Holiday Catalogue ends and who knows if you will be able to purchase what’s on your list after that.
For this card I used another of my trusty Pinterest card sketches and embossed Whisper White card using the Holly Embossing Folder. I attached a piece of the Be Merry Designer Series paper to the left hand side of the embossed card and wrapped the right hand edge with Gold 1/4″ Natural Trim before attaching to scored and folded Rose Red card.  I stamped the candle images onto Whisper White card using Black Archival ink. I filled the candles by stamping the images in Rose Red ink and Garden Green ink. The candle flames were filled with Crushed Curry ink.
  The image is cut using one of the Ovals from the Stitched Shapes Framelits Dies and attached to a Rose Red scalloped oval cut using the Layering Ovals Framelits Dies. I attached the stamped panel to the card front before attaching a bow which is tied using the Gold 1/4″ Natural Trim using a Mini Glue Dot.
To decorate the inside of the card, I attached a narrow strip of Rose Red card behind one long edge of Whisper White card embossed using the Holly Embossing Folder. The embossed card is attached to the bottom of Whisper White card before stamping the greeting from the Hang Your Stocking stamp set using Garden Green ink.
Merry Patterns is such a cute stamp set. I love the dimension you get from two step stamping. I know you can’t wait to get your hands on this lovely stamp set, better hurry!
Bye for now,
Kris
Product Used:


Just Add Ink Sketch Challenge #380

I’m on a roll creating Christmas Cards for my classes at Beachmere and I found the latest sketch challenge at Just Add Ink. I love playing along with their challenges as often as I can, unfortunately I missed the deadline for this one. Anyway since it is nearly the end of the promotion for you to be able to earn the Merry Patterns stamp set, I thought I would share a few cards made using this stamp set and this will be the first.
I started by embossing Whisper White card with the Cable Knit Embossing Folder which I attached to scored and folded Soft Suede card.  I attached a piece of the Be Merry Designer Series paper to the right hand side of the embossed card. I added a strip of Gold Glimmer Paper to the embossed card as well. I stamped the reindeer image onto Whisper White card using Soft Suede ink and then stamped the “fill” image using Crumb Cake.
  I have found that for this “fill” stamp you need to have a fairly dry ink pad. If it is too juicy it just fills the pattern and you can’t see the detail in the “sweater”. Anyway, once stamped I attached the image to Soft Suede card and then to the card front using dimensionals.
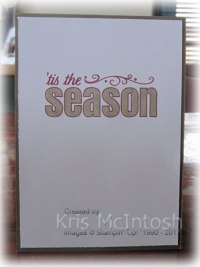
To decorate the inside of the card I stamped the “tis the Season” greeting using Cherry Cobbler ink. I then coloured the “season” using a Crumb Cake Stampin’ Write Marker.
Love the finished card, especially as the designer series paper has tiny reindeer on it as well. Thanks again Just Add Ink for the inspiration for my card.
Bye for now,
Kris
Product Used:


More Trees
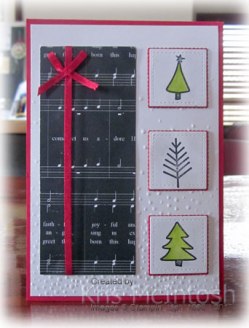
This is the last of three cards I made using the Watercolour Christmas stamp set and my trusty sketches. You might ask “Why Three?” Well we make three cards each week at Beachmere and if I do three from the same stamp set, I can spread them across three weeks and be a little organised ahead of time. This time I embossed Whisper White card using the Softly Falling Embossing Folder and attached it to scored and folded Real Red card. I wrapped a piece of the Merry Music Specialty Designer Series Paper with a length of Real Red 1/8″ Solid Ribbon and attached it to the left hand side of the embossed card.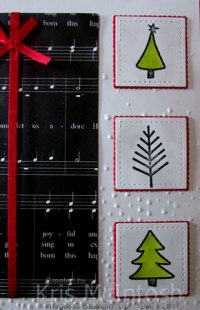 I took another length of the Real Red 1/8″ Solid ribbon and tied a bow over the ribbon attached to the Designer Series paper. I stamped the three tree images from the Watercolour Christmas stamp set onto Whisper White card using Black Archival ink. Two of the trees are coloured using an Aqua Painter and Lemon Lime Twist ink. The images are cut out using the smallest square in the Stitched Shapes Framelits Dies and attached to a Real Red scalloped square cut using the Layering Squares Framelits Dies. The image panels are attached to the right hand side of the card front.
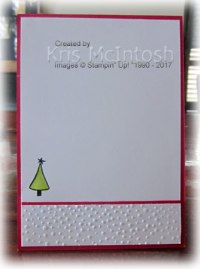 To decorate the inside of the card, I embossed a strip of Whisper White card using the Softly Falling Embossing Folder. I attached a narrow strip of Real Red card behind one long edge of the embossed card and attached it to the bottom of Whisper White card. I stamped the tree image from the Watercolour Christmas stamp set just above the embossed panel using Black Archival ink. I used an Aqua Painter and Lemon Lime Twist ink to colour the tree.
I’m so happy with this card, in fact all three cards I created in this series. I truly love the Watercolour Christmas stamp set. The large greetings and the small tree images are just so versatile. I bought this stamp set to create the cards in the Watercolour Christmas Project Kit but I am using it for so much more. Maybe you have this set on our wishlist or maybe you have been inspired to take advantage of the Designer Series Paper Promotion this month and get some free.
Bye for now,
Kris
Product Used:


Lots of Trees
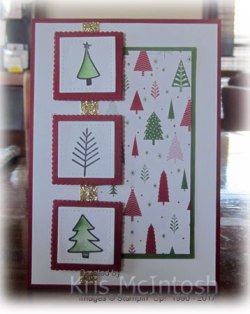
This is the second card I made using Watercolour Christmas. This one uses the Be Merry Designer Series Paper from the Annual Catalogue. I attached the Designer Series paper to Garden Green card and then to Whisper White card. I attached a narrow strip of Gold Glimmer Paper over the left hand edge of the Designer Series Paper panel. The Whisper White card is attached to scored and folded Cherry Cobbler card.  I stamped the three trees from the Watercolour Christmas stamp set onto Whisper White card using Black Archival ink. I coloured two of the trees using an Aqua Painter and Garden Green ink.
  The images are cut out using the smallest square from the Stitched Shapes Framelits dies. I attached the images to Cherry Cobbler scalloped squares cut using the Layering Squares Framelits Dies. The images are attached to the card front over the Gold Glimmer Paper using mini dimensionals.
To decorate the inside of the card I stamped the greeting from the Watercolour Christmas stamp set using Black Archival ink.
To be honest, I don’t think this particular pattern was one of my favourites in this Designer Series paper but I love the effect of the trees on trees, don’t you?
Bye for now,
Kris
Product Used:


Season of Cheer
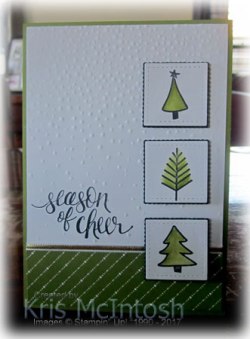
You all know that I am a big fan of Pinterest and one of my favourite things is saving card sketches to my Card Sketch board. I decided to go through the sketches and find some that would suit the Watercolour Christmas stamp set. This is the first card I created.
I stamped the greeting from the Watercolour Christmas stamp set onto the lower left hand side of Whisper White card using Black Archival ink. Once stamped I embossed Whisper White card using the Softly Falling Embossing Folder.  I attached a piece of the Merry Little Christmas Designer Series paper to the bottom of the embossed card. I attached a piece of Gold 1/8″ Ribbon across the top of the Designer Series paper and attached the panel to scored and folded Old Olive card. I stamped the three tree images from the Watercolour Christmas onto Whisper White card using Black Archival ink and cut them out using the smallest square from the Stitched Shapes Framelits Dies.
  I coloured the trees using an Aqua Painter and Old Olive ink. The images are attached to Basic Black scalloped squares cut using one of the Layering Squares Framelits Dies. I attached the trees to the card front using dimensionals.
To decorate the inside of the card, I stamped the verse from the Watercolour Christmas stamp set designed for just this purpose using Black Archival ink.
I love the colours in the Merry Little Christmas Designer Series Paper and love the finished card. What do you think?
Bye for now,
Kris
Product Used:


Stylin’ Stampin’ INKspiration Challenge
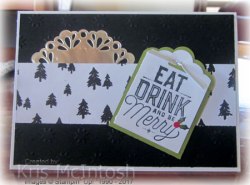
Here I am with another challenge card and I must say this one at Stylin’ Stampin’ INKspiration gave me a chance to step outside my comfort zone. I love the Merry Little Christmas Designer Series Paper and with it as the starting point, I created my mostly Black and White Christmas card. I embossed Basic Black card using the Oh My Stars Embossing Folder and attached it to scored and folded Thick Whisper White card. I cut a Silver Metallic Foil Doily in half and attached it to the top left hand corner of the embossed card.  I cut a strip of the Merry Little Christmas Designer Series paper across the card front, covering the cut edge of the doily. I stamped the greeting from the Merry Little Labels stamp set onto Whisper White card using Archival Black ink. I used an Old Olive Stampin’ Write Marker to add a little colour to the centre of the leaves. I punched a Real Red circle using the Holly Berry Builder Punch and attached it over the stamped holly berries.
 I punched the top of the card using the Scalloped Tag Topper Punch. The stamped tag is attached to a slightly larger Old Olive tag and then the card front using dimensionals. I tied a knot in a length of Silver 1/8″ Ribbon and attached it to the tag.
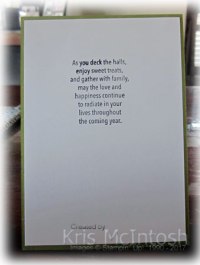
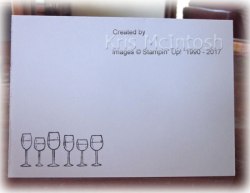
I decided that to decorate the inside of the card I would play on the words in the greeting and stamped the row of wine glasses from the Half Full stamp set. In keeping with the black and white I merely stamped in Archival Black ink and didn’t add any colour.
I have a few friends who will appreciate this card, have you?
Bye for now,
Kris
Product Used:


Freshly Made Sketch #307

The sketch challenge at Freshly Made this week, gave me an opportunity to use the Best Birds stamp set. This is a lovely stamp set but sadly rarely used by me. For today’s card I started by embossing Whisper White card using the Petal Burst Embossing Folder. I stamped the tree branch image from the Best Birds stamp set onto Whisper White card using Archival Black ink before colouring the image using an Aqua Painter and Garden Green and Soft Soft Suede ink pads. I cut the image using the matching Birds and Blooms Thinlits Die. I cut Rose Red card using two of the Layering Circle Framelit Dies to create a frame for the card front. 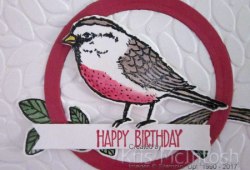 The tree branch is attached behind the Rose Red circle with a couple of the leaves resting on the front of the frame before attaching to the card front. I trimmed the end of the branch to match the edge of the embossed card and then attached the panel to scored and folded Rose Red card. I stamped “happy birthday” from the Sunshine Sayings stamp set onto Whisper White card using Rose Red ink. I trimmed one end with the Triple Banner Punch. The banner is attached over the tree branch using Mini Dimensionals.
  (Oh how lovely it is not to have to cut the dimensionals in half all the time.) I stamped the largest bird from the Best Birds stamp set onto Whisper White card using Black Archival Ink and coloured the image using an Aqua Painter and rose Red, Crumb Cake and Crushed Curry ink. The bird is cut out using the matching Birds and Blooms Thinlits Die. I attached the bird to the card front using dimensionals so that it’s feet just sit on the edge of the greeting banner.
To decorate the inside of the card I stamped the background image from the Best Birds stamp set onto the lower left hand corner using Crumb Cake ink. I cut Soft Suede card using the smallest bird from the Birds and Blooms Thinlits Dies and attached if over the stamped background.
I think I am going to have to use this stamp set more because it is so sweet and with the matching framelits there are a number of different bird images to use on my cards.
I’d love to hear what you think.
Bye for now,
Kris
Product Used:


Case this Sketch

The sketch challenge at Case This Sketch this week gave me another opportunity to play with some Washi Tape. I love how easy it makes creating lovely cards. I used the Washi Tape from the Basics Pack 1 to add two rows diagonally across the Whisper White card. I stamped the greeting from the Teeny Tiny Sentiments stamp set above the Washi Tape using Rich Razzleberry ink. I added three more rows of the same Washi Tape diagonally across the Whisper White card above the greeting. The Washi Tape panel is attached to Rich Razzleberry card and then scored and folded Thick Whisper White card.  I stamped the stem image from the Daisy Delight stamp set onto Whisper White card using Old Olive ink. I stamped the solid flower onto the stem image using Blushing Bride ink. I stamped the detailed flower image over the top using Rich Razzleberry ink.
  I used one of the ovals from the Stitched Shapes Framelits Dies to cut out the image which is attached to a Rich Razzleberry scalloped oval cut using the Layering Ovals Framelits Dies. The image panel is attached to the card front using dimensionals.
To decorate the inside of the card, I used the Whisper White card from which I had cut the image panel for the card front as a mask I attached it to the inside of the card using repositional adhesive. I used a sponge and lightly added some Blushing Bride just around the edges of the oval. I removed the mask and stamped the same images used to decorate the front of the card.
This card is super simple but so sweet. I love how the daisies compliment the Washi Tape, don’t you?
Bye for now,
Kris
Product Used:


October Promotions
Well this is certainly going to be an exciting month for Stampin’ Up! customers. There are not one, but TWO customer promotions for this month. There is also another Demonstrator only promotion which is also available to be selected in your starter kit. So if you are thinking of joining my team, contact me to find out all about this fantastic offer.
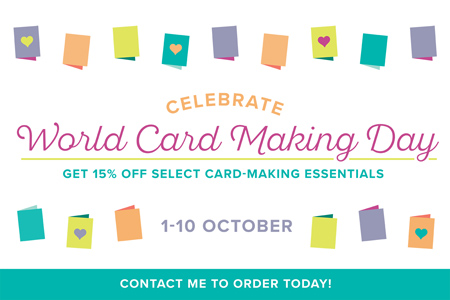
The first promotion runs from 1-10. You can get 15% off notecard & envelopes, selected stamp sets and if that isn’t enough you can order a Fast Fuse and get two refills for free. Now that’s fantastic value, don’t you agree. I’ve already placed my order to get a couple of stamp sets that have been on my wish list and I’ve saved money! You can click on the photo to see what stamp sets might be on your wish list.
The second promotion runs from 1-31st October and is a great deal on Designer Series Paper. We all love DSP and it’s fantastic to have lots to choose from. During October when you place an order for three packs of Designer Series paper from a selected list, you can get another one free. I know I love it when I can get something for free and I am sure you do too. Click on the photo to see the list of what’s available.

My Hostess code for the month of October is in the right hand side bar and if you place an order using the Code you will not only receive your order but you will also receive a gift from me.
Happy Shopping!
Bye for now,
Kris







