Hill End
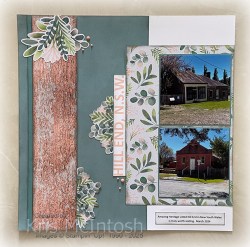
Today I am sharing the last of the three layouts that I created using the instructions which I purchased from Julie Carrier. This time the pages show off some photos taken at Hill End on a road trip we took back in February. This gorgeous town is heritage listed and all of the buildings are cared for by National Parks.
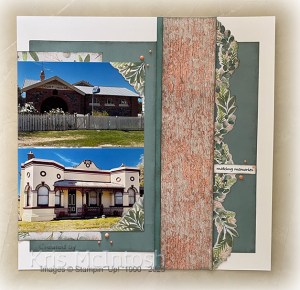
I followed Julies instructions to create the page but I did change out her title for one that I created. Again the Frames & Flowers Designer Series Paper forms the basis for the pages, along with one pattern from the Country Woods Designer Series Paper and some bling using the Ombre Matte Decorative Dots.

Memory Keeping is important to me because the pictures and stories help the generations to come know about not only my life but also my family life. I hope that I am inspiring you to try documenting some of your memories.
Bye for now,
Kris
Product Used:


World Card Making Challenge
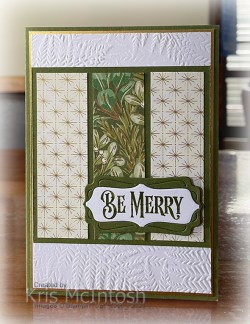
I belong to a Facebook Group called World Card Making Group and on the first weekend in October on each day you could join in and craft along with the presenters. They also had a number of challenges leading up to the weekend and I created the card I am sharing today using the sketch challenge from the Group. I embossed Basic White card using the Fern 3D Embossing Folder and attached it to Gold Foil card and then scored and folded Mossy Meadow card.
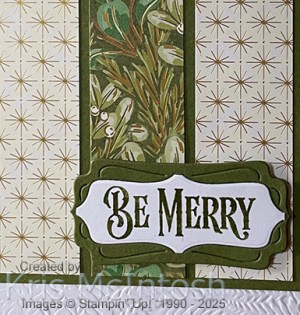
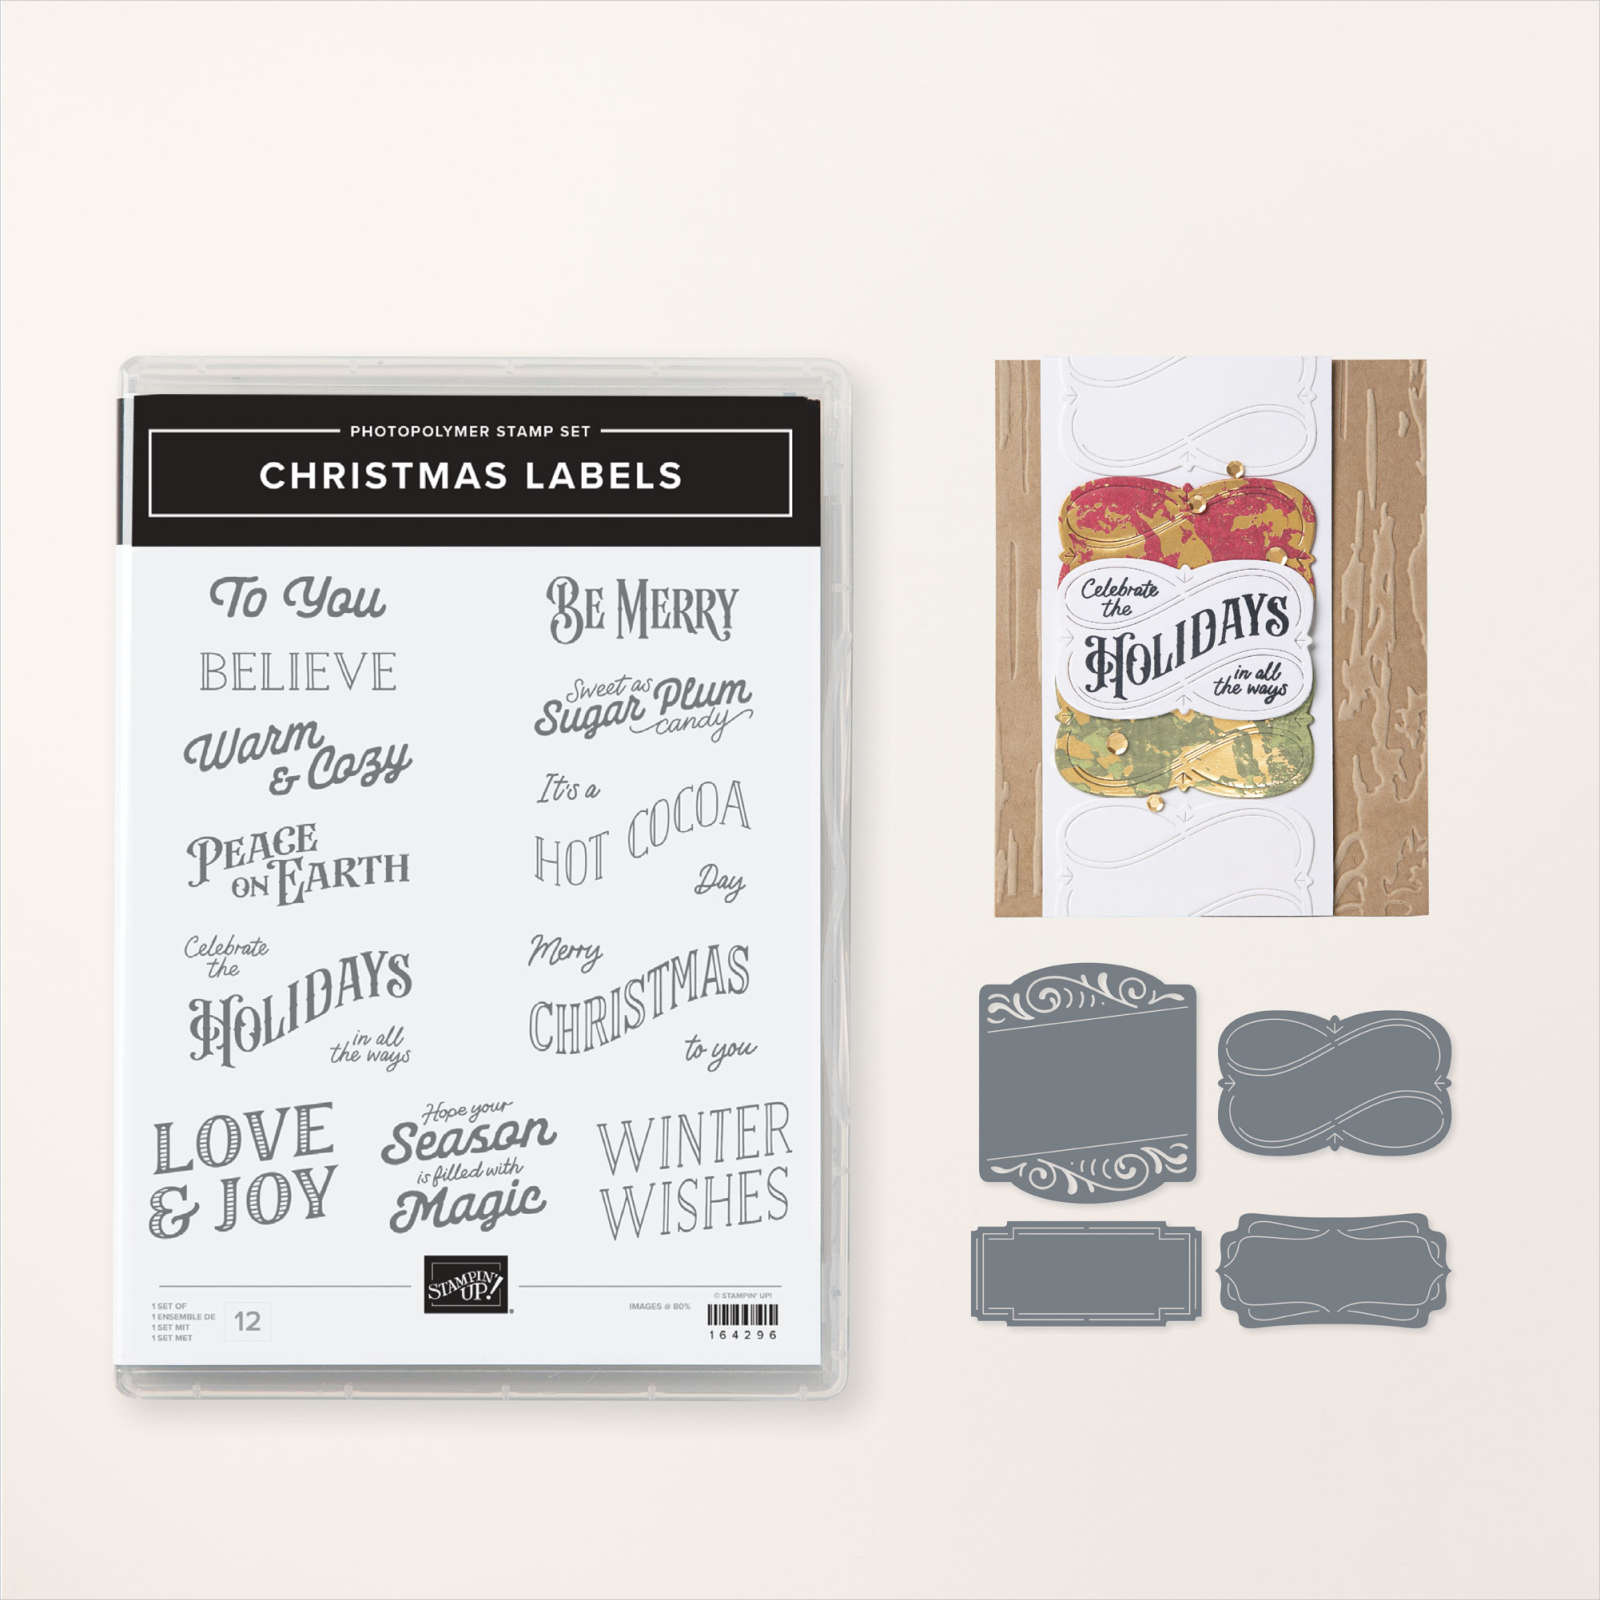
I cut three strips of paper from the Season of Gold and Green 12″ x 12″ Designer Series Paper and attached them to Mossy Meadow card. The Mossy Meadow panel is attached to the card front. I stamped “Be Merry” from the Christmas Labels stamp set onto Basic White card using Mossy Meadow ink.
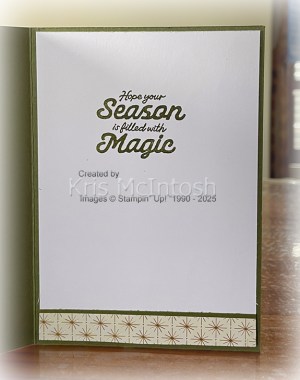
The greeting is cut out using one of the Christmas Labels Dies. I trimmed away the outside portion of the stamped panel and attached it to a Mossy Meadow label cut using the same Christmas Labels Die. I love how I was able to get the two layers to create the greeting banner. The greeting is attached to the card front using dimensionals. To decorate the inside of the card, I stamped the greeting from the Christmas Labels stamp set onto Basic White card using Mossy Meadow ink. I attached a narrow strip of Mossy Meadow card behind one long edge of a strip of the Season of Green & Gold Designer Series Paper which I attached across the bottom of the stamped Basic White card. I love challenges, however, I mostly run out of time to complete them before the challenge ends. I love that this challenge has no end date. If you are a Facebook user and would like some inspiration I recommend that you join the fabulous World Card Making Group.
Bye for now,
Kris
Product Used:


Ornament Christmas
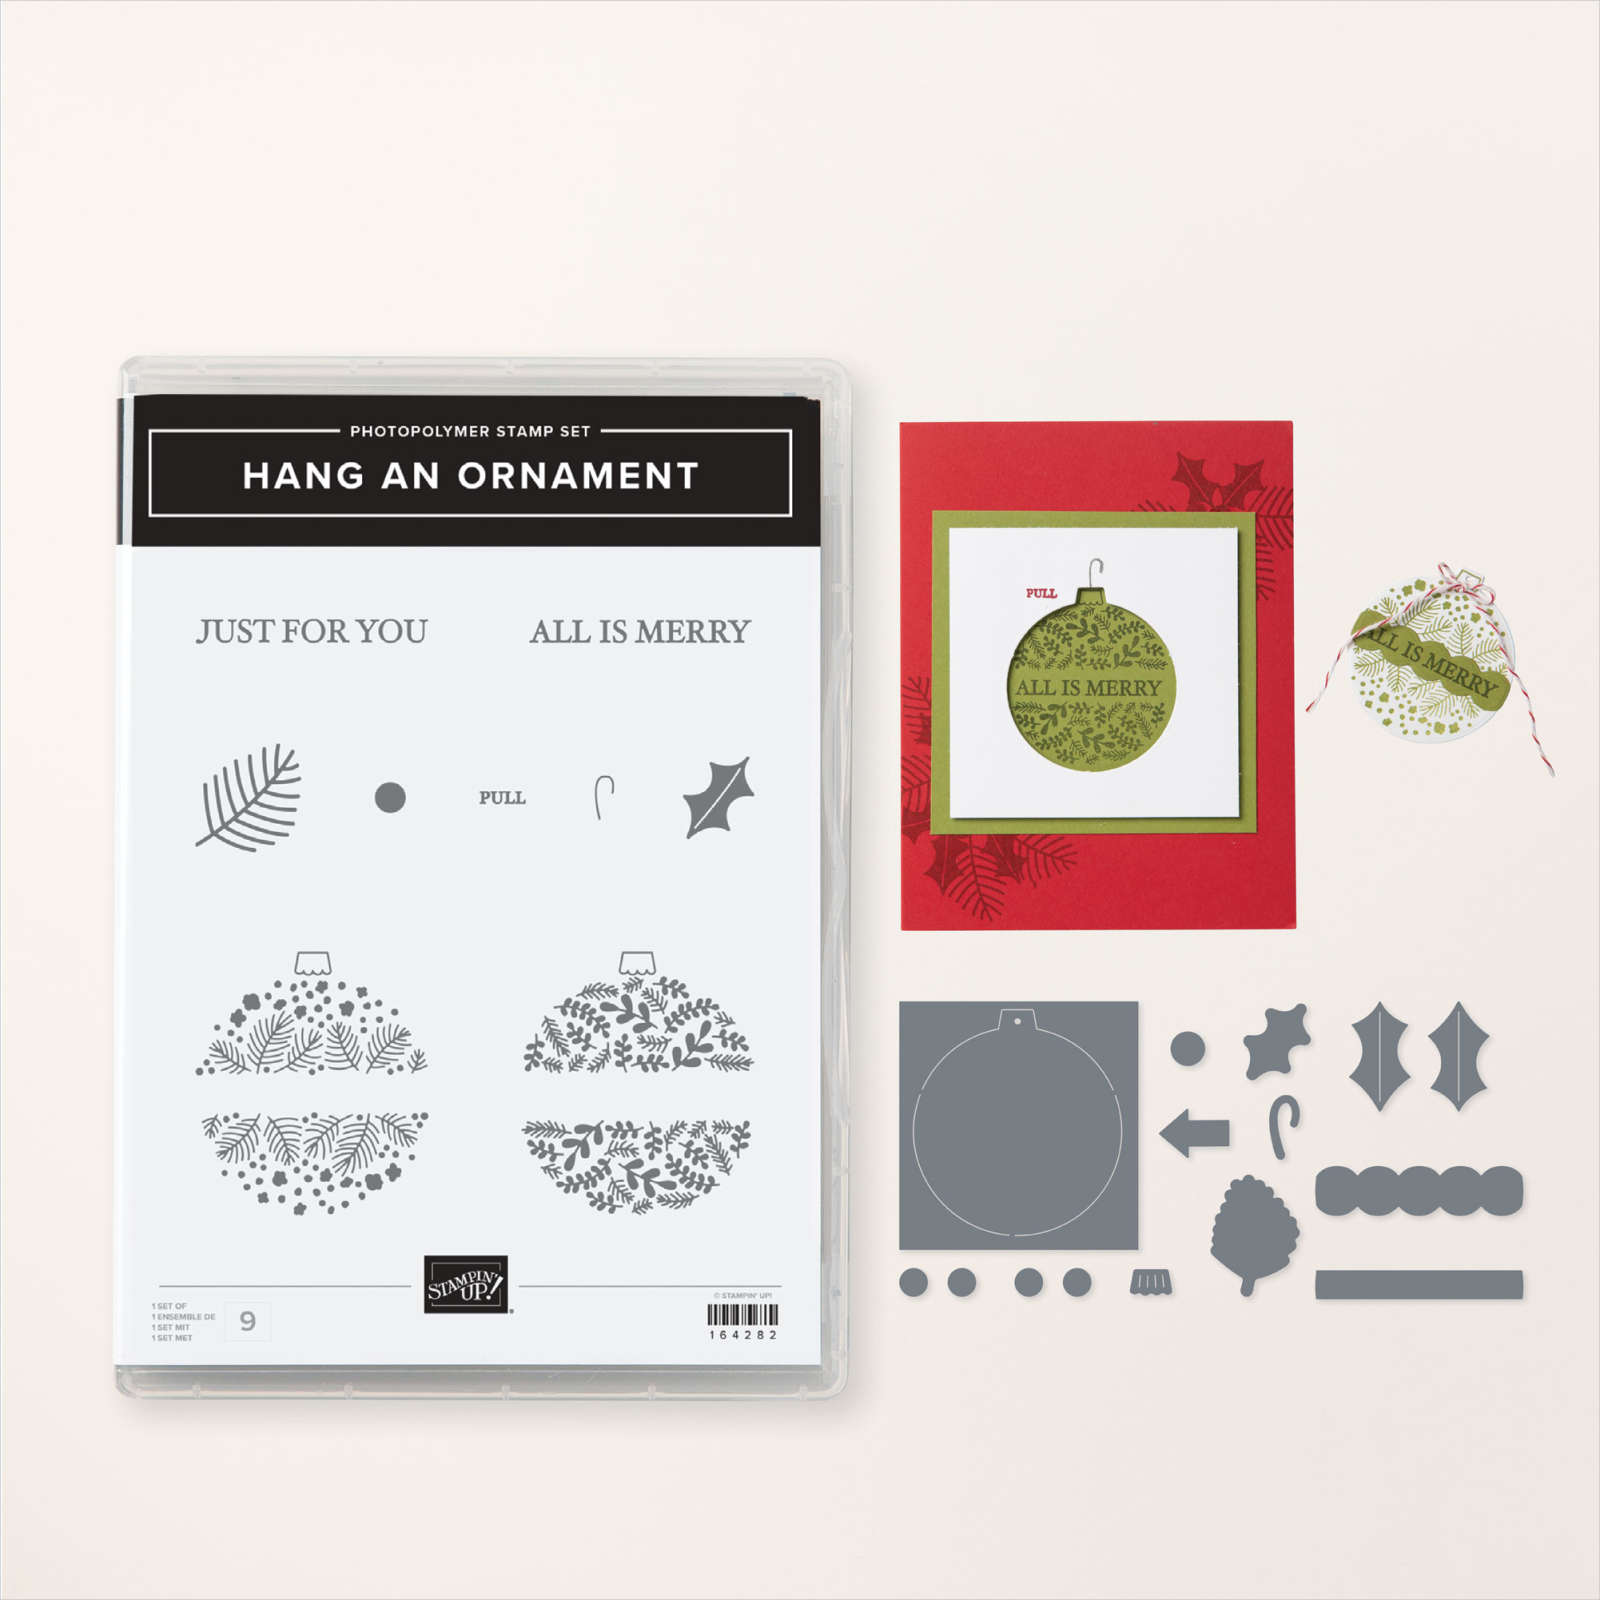
Today I have another card to share which uses the Hang an Ornament Bundle. I cut three pieces of Iconic Celebrations 6″ x 6″ Designer Series Paper using one of the squares from the Stylish Shapes Dies. I attached each square to a square of Mossy Meadow card before attaching them to the left hand side of Basic White card. The whole panel is attached to scored and folded Mossy Meadow card. I cut Mossy Meadow card and Basic White card using the Deckled Rectangle Dies.
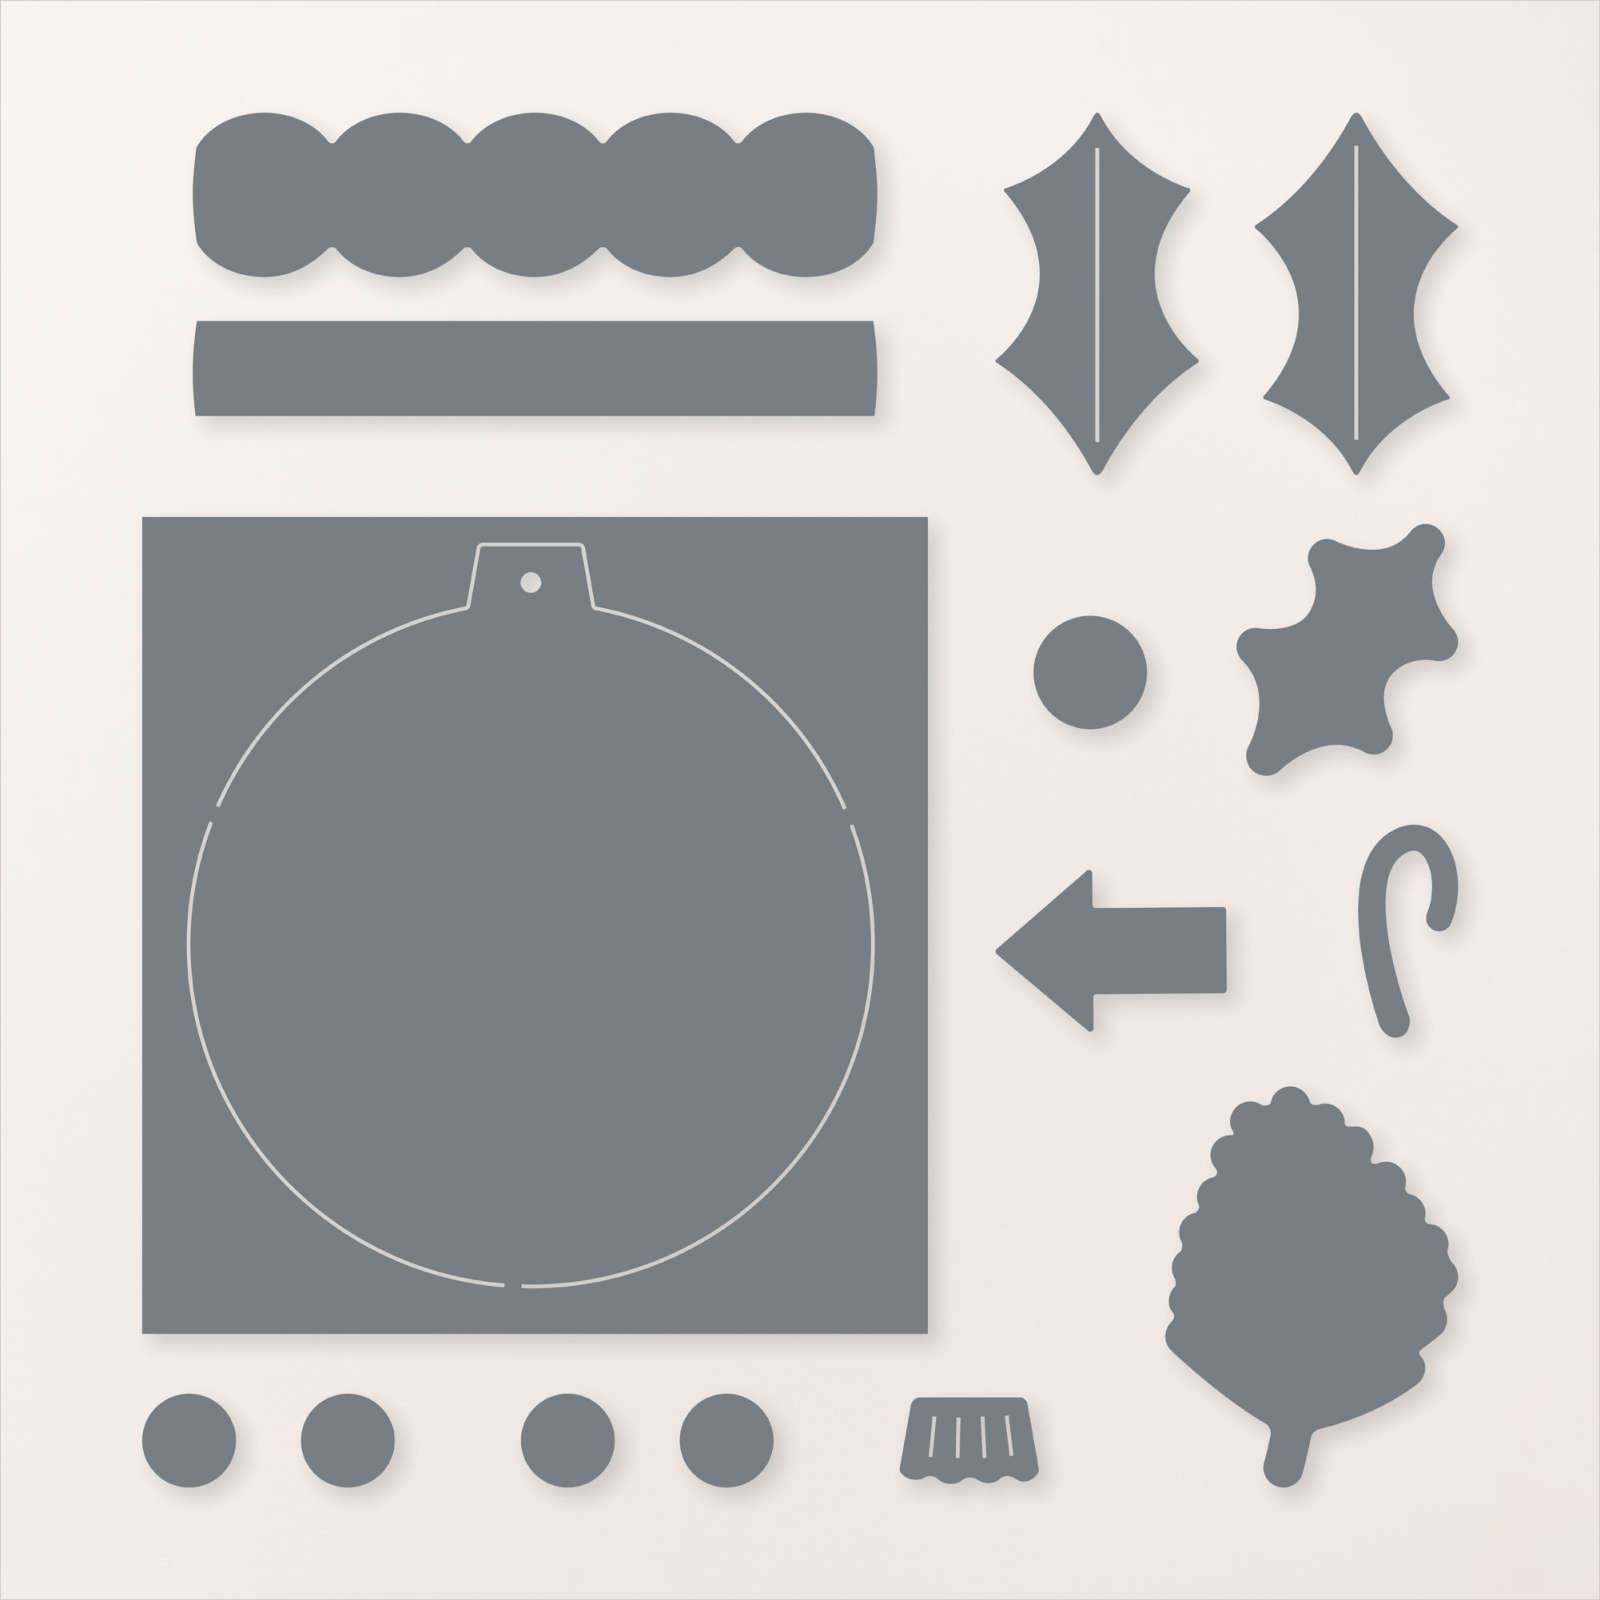
I stamped one of the ornament images from the Hang an Ornament stamp set onto the Basic White Rectangle using Mossy Meadow ink. I stamped “merry Christmas” across the bottom of the panel using Mossy Meadow ink and the Greetings of the Season stamp set. I cut Silver Foil card using the Hang an Ornament Die and attached it across the middle of the stamped ornament.
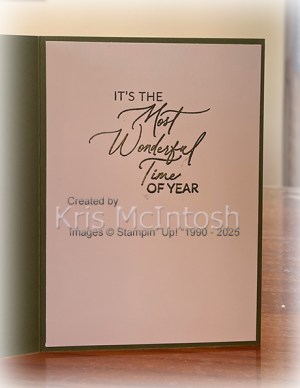
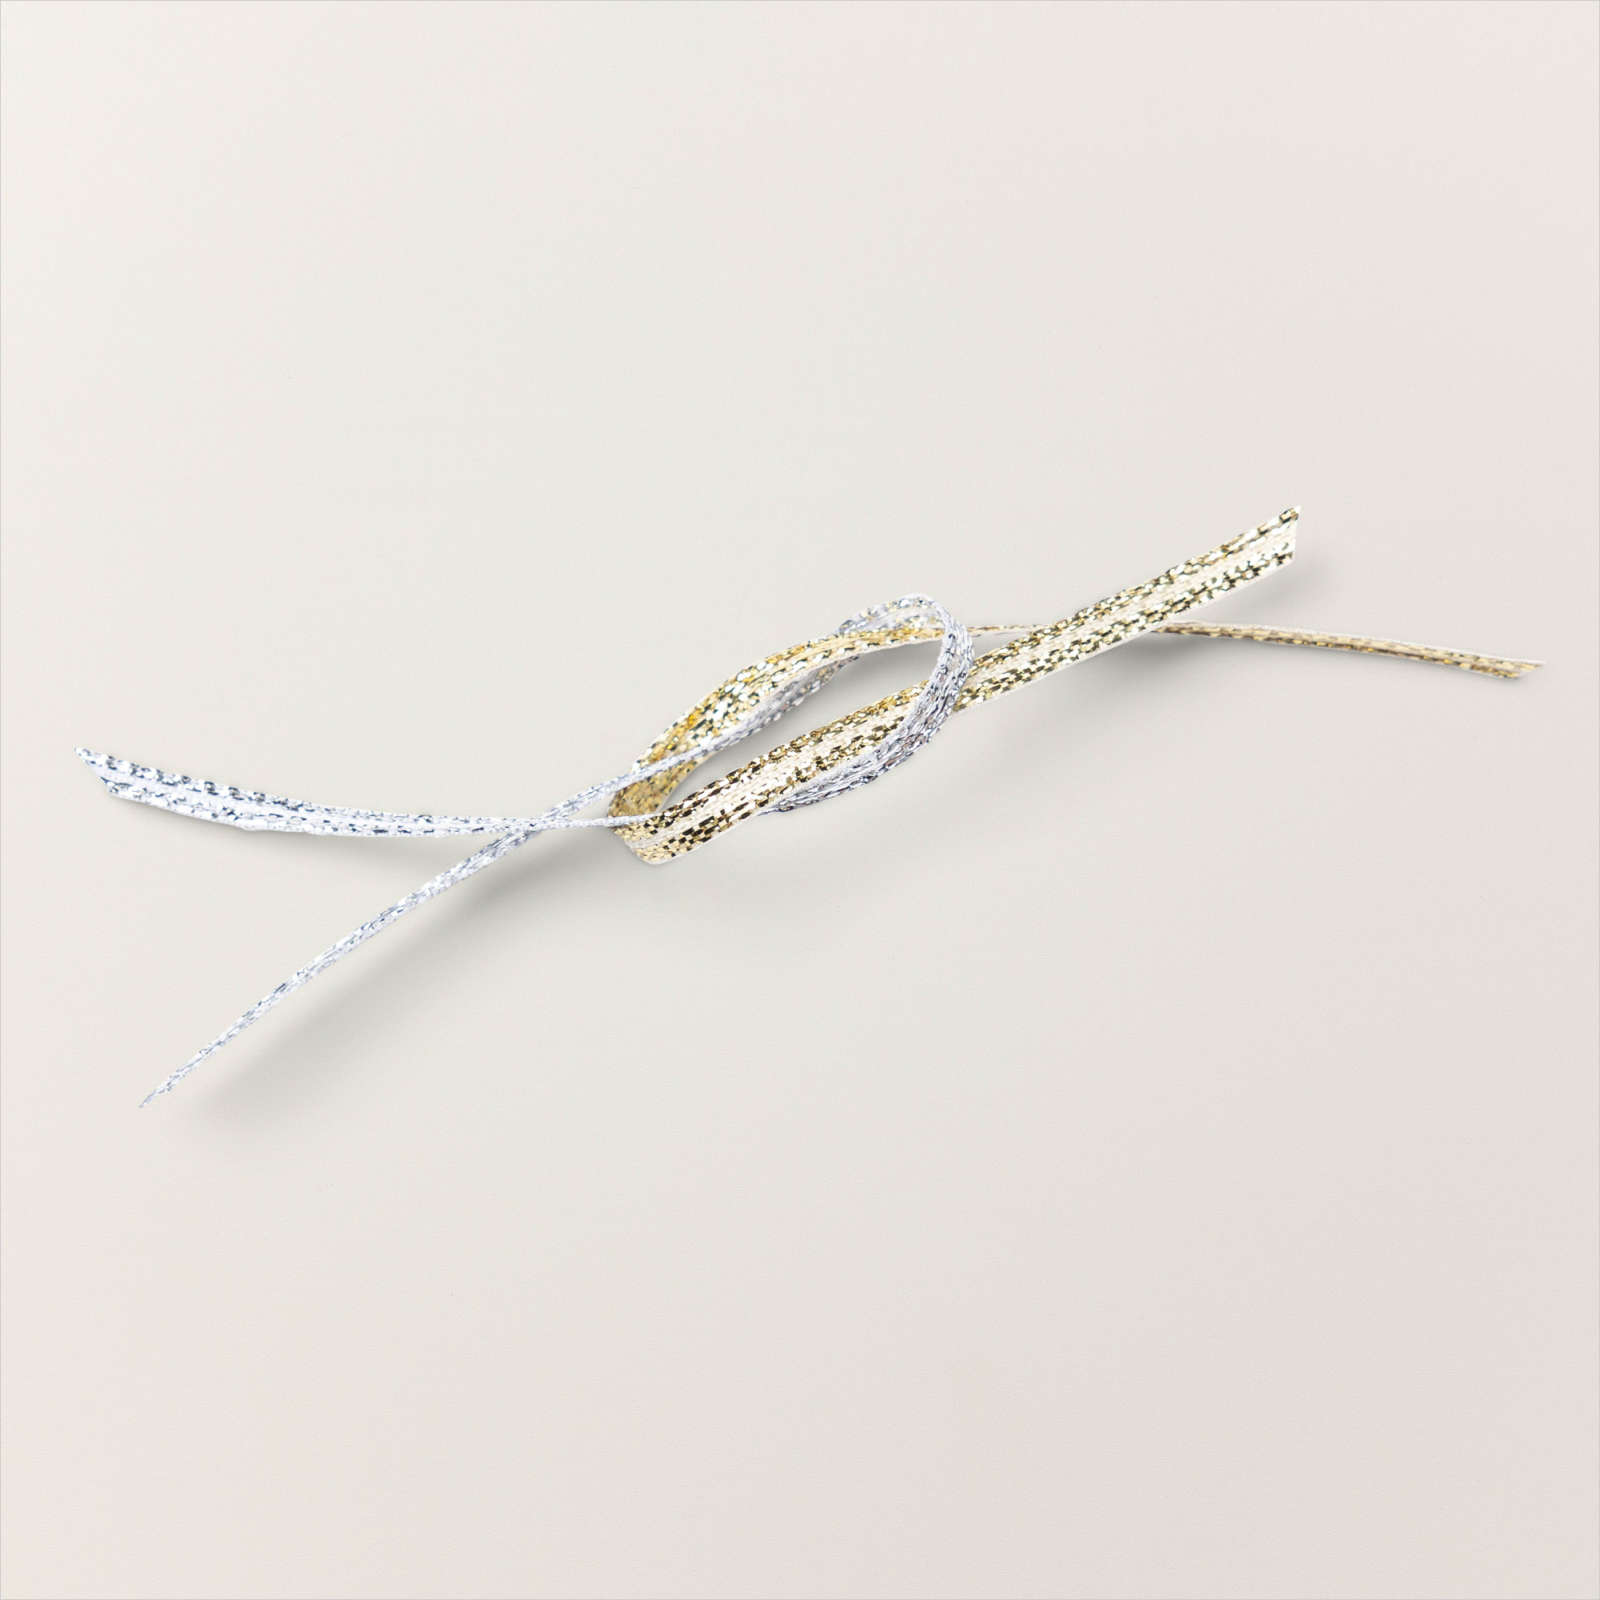
I cut Mossy Meadow card using the Hang an Ornament Die and attached it to the top of the stamped ornament. I attached the Basic White rectangle to the Mossy Meadow Rectangle and attached it to the card front using dimensionals. I tied a bow in a length of Silver Trim from the Gold & Silver 1/8″ Trim Combo Pack and attached it to the top of the ornament using a glue dot. To decorate the inside of the card, I stamped another greeting from the Greetings of the Season stamp set onto Basic White card. I love how the Mossy Meadow colour seems to pop off the card front and give so much dimension, don’t you?
Bye for now,
Kris
Product Used:


South Mission Beach

Today I am sharing a layout I created using the Lake Life Scrapbooking Workshop Kit which is available to purchase at a 30% discount while stocks last. This is a Close To My Heart product which transferred to Stampin’ Up! when CTMH closed down. Todays pages use the second double page layout from the kit and show off some photos taken on a road trip with my granddaughters back in 2018.

The kit came with the instructions for cutting the Designer Series Paper and also explained where to place the pieces to create the pages. Of course, you can change things up a bit and even add things that are not part of the kit to create something more unique or that suits your photos better. I did do a little more sponging than was suggested in the kit and perhaps not in the way that they instructed but I love the way sponging kind of softens the edges of the patterned paper.

I love how this layout has turned out and I know that we were all very excited to see the Cassowarys when we were setting up our caravan at South Mission Beach. The chick walked through first and then the Mum followed along. They are such amazing birds. The other layouts from the Workshop Kit are all created and I will share them over the coming weeks. Don’t forget to take advantage of the CTMH sale as the products are only while stocks last and they will definitely not be coming back.
Bye for now,
Kris
Product Used:
You can find the Lake Life Scrapbooking Workshop Kit here if it is still available.


Winterly Christmas
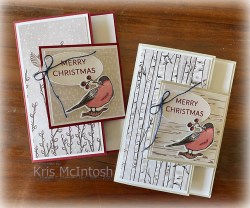
Today I have another two cards to share which I created whilst watching Vicky make her presentation on the World Card Making Group (Facebook). Vicky gave us dimensions to cut our card pieces to make this double flap card. I used Cherry Cobbler and Basic Beige for the card bases for my cards. I added pieces of Winterley Trees 12″ x 12″ Designer Series Paper to Basic White card before attaching them to the card front. The really good trick about this card is that with Vicky’s dimensions you are only using a standard card front piece to decorate the front panel and the inside panel of the card. I cut a second piece of the Winterley Trees Designer Series Paper for each card which are also attached to Basic White card and then the small right hand flap.
My birds are cut from the Winterley Trees Designer Series Paper as well before being attached to the card front using dimensionals. I die cut Basic White card using one of the Greetings of the Season Dies and stamped the greeting from the Greetings of the Season stamp set onto each one using Cherry Cobler ink. The greetings are attached to the card front using dimensionals and also placed so that the berries sit on the edge. I tied a bow in a length of the Blue Linen Thread from the Natural Tones line Thread and attached one to each of the greeting labels using a Glue Dot. I love these cards and can’t thank Vicky enough for the inspiration. If you like this card you might like to check out Vicky’s blog.
Bye for now,
Kris
Product Used:


Labeled with Love Birthday

Today I am sharing a simple card I created using the Labeled with Love stamp set and dies. I embossed Basic White card using one of the Fun Patterns Embossing Folders and attached it to scored and folded Misty Moonlight card. I cut a piece of Bright & Beautiful 6″ x 6″ Designer Series paper using the Iconic Imagery Die and attached it to the card front using dimensionals. I stamped the border label image from the Labeled with Love stamp set onto Basic White card using Misty Moonlight ink.

I stamped “happy birthday” from the same stamp set inside the border using Misty Moonlight ink. I cut out the greeting using the Labeled with Love Die and attached a length of blue linen thread from the Natural Tones Linen Thread to the back of the die cut.
The label is attached to the card front using dimensionals where necessary. To decorate the inside of the card I attached a narrow strip of the same pattern Bright & Beautiful Designer Series Paper down the left hand side of Basic White card. I stamped the greeting from the Labeled with Love stamp set onto the Basic White card using Misty Moonlight ink. You probably don’t realise that the layout for this card was inspired by Sketch Template Ten on page 22 of the Annual Catalogue. So thanks Stampin’ Up! for the inspiration.
Bye for now,
Kris
Product Used:
You can view the Natural Tones Linen thread here in my online store.


Visitors
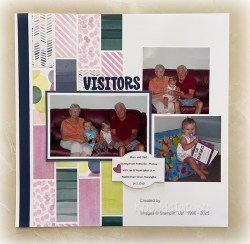
The photos on this page were taken a long time ago when my parents came to visit. It was lovely to see them with their great grandchildren. I cut strips of Bright & Beautiful 6″ x 6″ Designer Series Paper which I cut in half before attaching to the left hand side of a Basic White 12″ x 12″ page. I also attached a narrow strip of Night of Navy card between the Designer Series Paper and the left hand edge of the page.

I attached the main photo onto Basic White and then Night of Navy before attaching it to the page. I didn’t add card mats to the other photos. I cut the title from Night of Navy card using the Mini Alphabet Dies and attached it above the main photo. I printed the journaling onto Basic White card and cut it out using one of the Greetings of the Season Dies. I cut a piece of Bright & Beautiful Designer Series Paper with the heart die from the Iconic Dies and attached it to the journaling panel. The jounaling panel is attached to the page using dimensionals. Love, Love, Love the memories.
Bye for now,
Kris
Product Used:


Merry Christmas to You
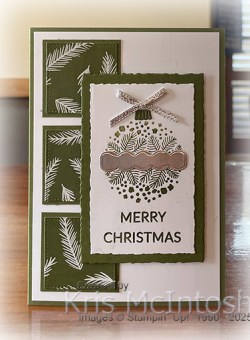
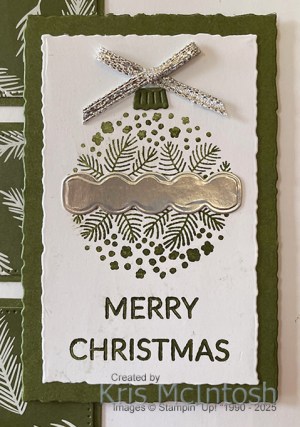
This week in my Facebook Live I shared some cards I created using the Christmas Labels Bundle. Today I have another card to share using this same bundle. For this card, I followed the layout of Template 3 on page 22 of the Annual Catalogue to create my card. I cut strips of the Season of Green & Gold Specialty Designer Series Paper and attached them to Basic White card. I wrapped the panel with Cherry Cobbler & Gold Satin Ribbon and tied a knot.

The whole panel is attached to scored and folded Mossy Meadow card. I stamped the greeting from the Christmas Labels stamp set onto Basic White card using Mossy Meadow ink.
I cut out the greeting using one of the Christmas Labels Dies and attached it to the card front using dimensionals. To decorate the inside of the card, I attached a narrow strip of Season of Green & Gold Designer Series Paper across the bottom of Basic White card. I stamped another greeting from the Christmas Labels stamp set onto the Basic White card before attaching the panel inside the Mossy Meadow card base. This is such a fun Christmas Bundle to play with. I just know that there are many different ways that these products can be used. I hope I have inspired you to take a look at this bundle to see how you can use it in your projects.
Bye for now,
Kris
Product Used:

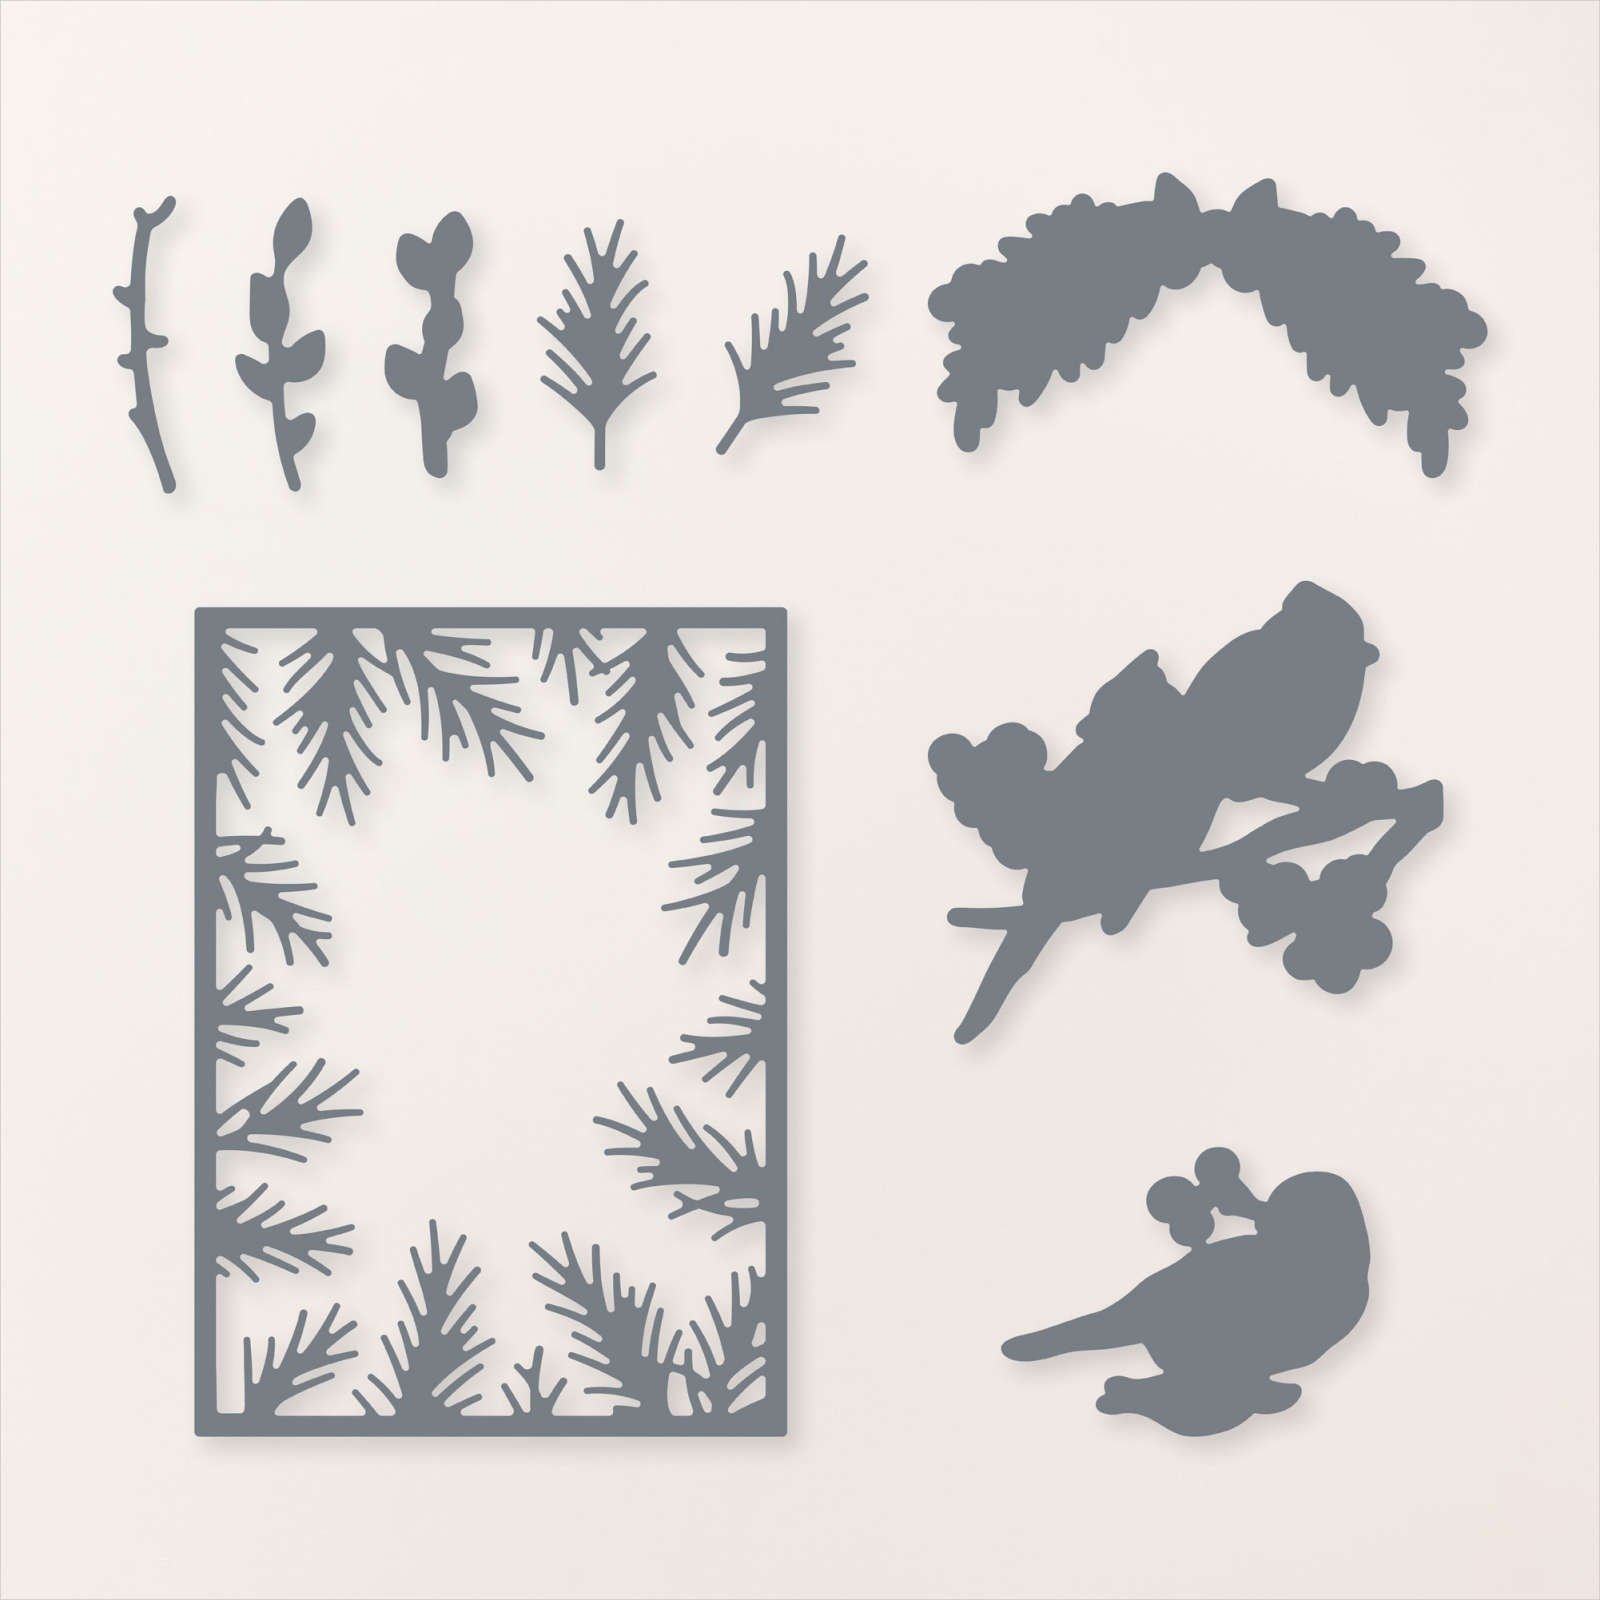
Winterly Tree Tops
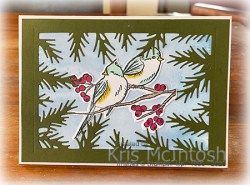
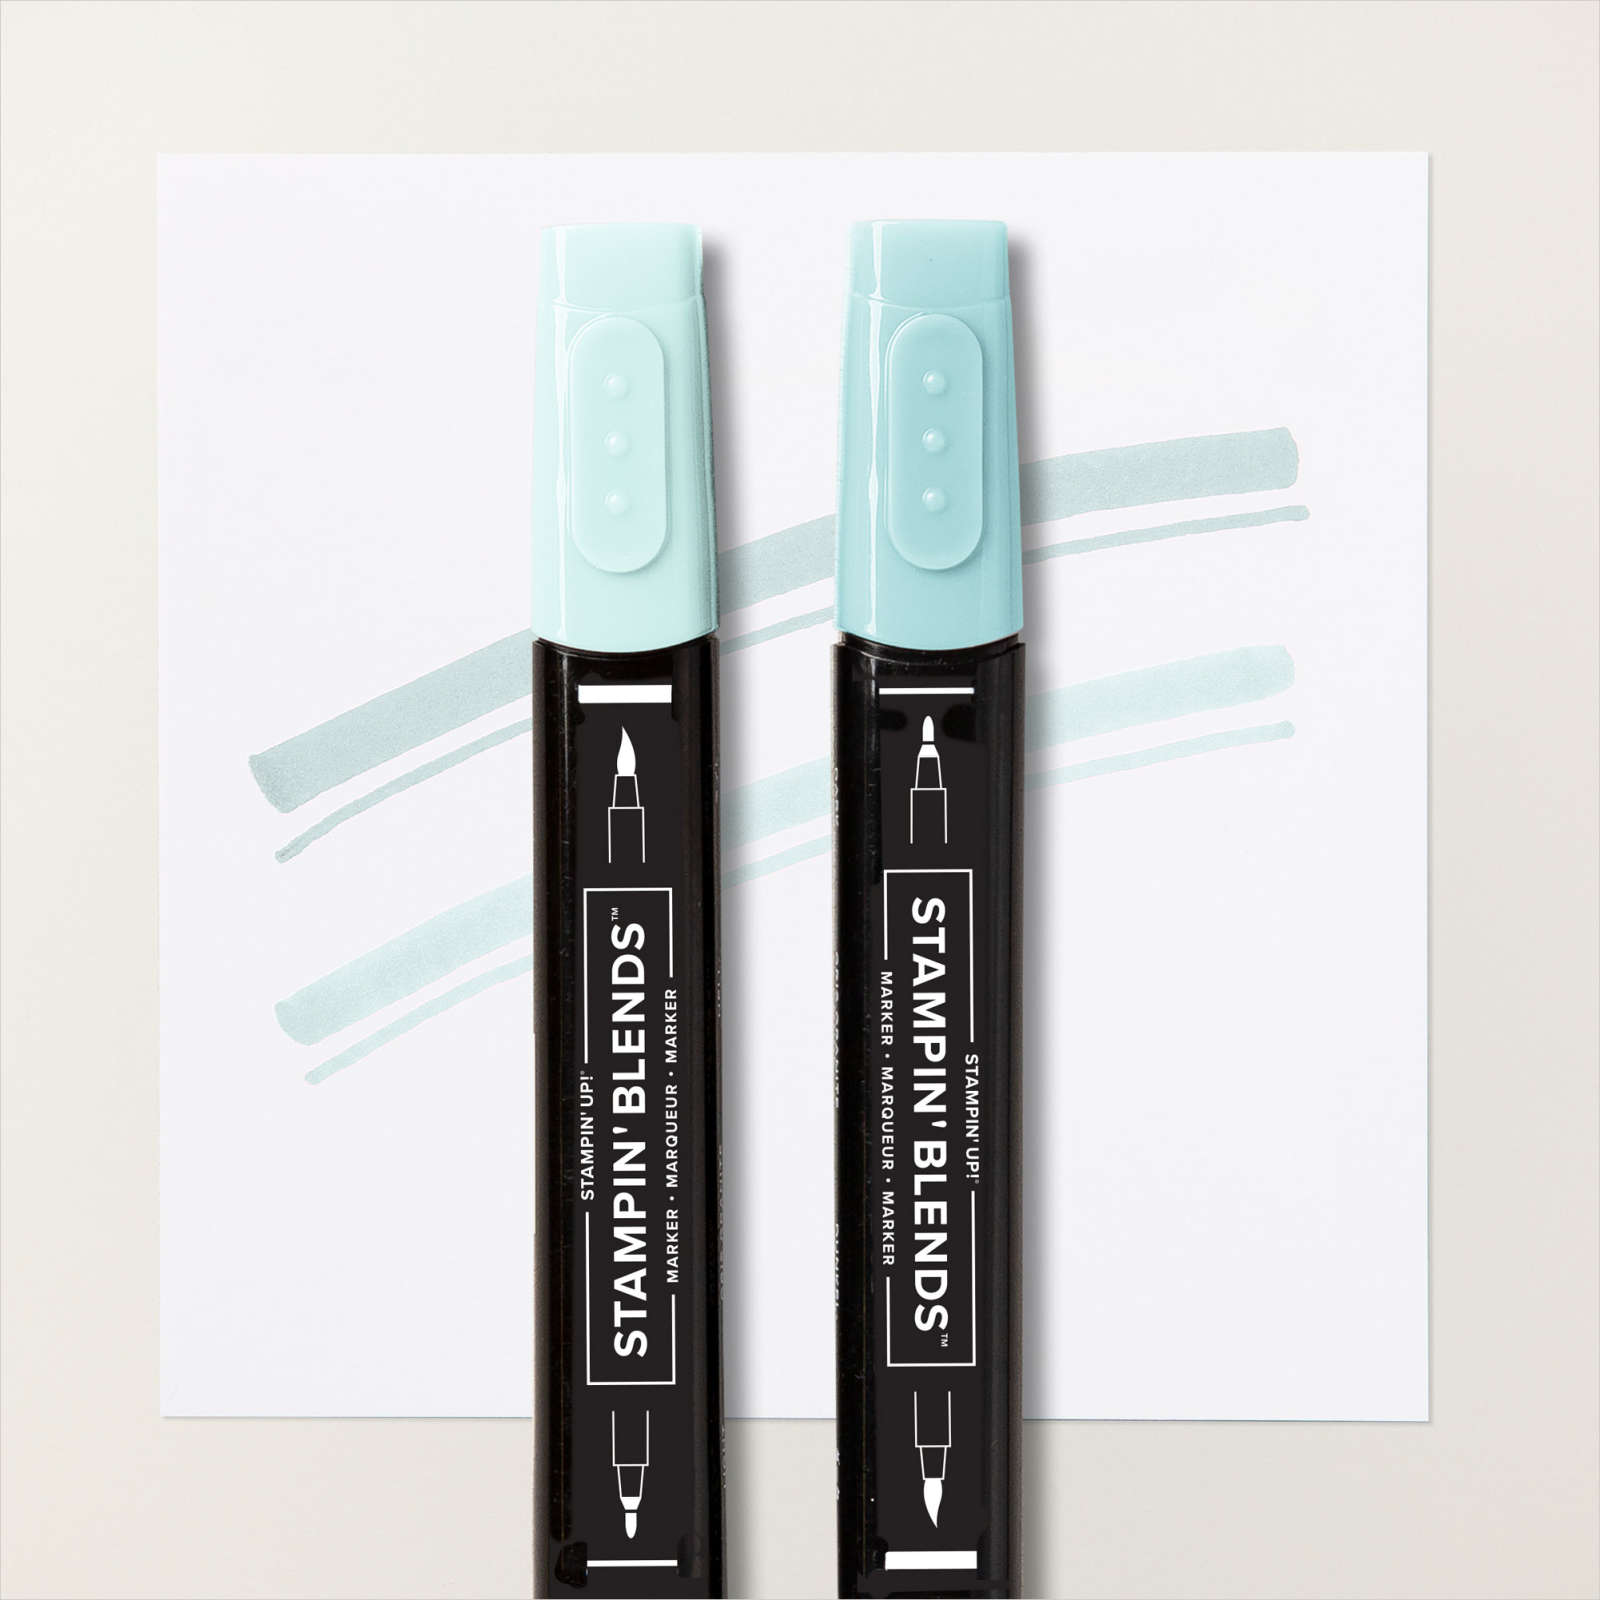
Today I have a card I created using the Winterly Tree Tops Bundle which is current in the new Mini Catalogue. For this card, I used my largest clear block and coloured it using the Azure Afternoon Stampin’ Write Marker. I spritzed the block with water and layered a piece of Fluid Watercolour Paper on top to absorb the colour.
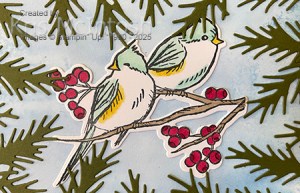
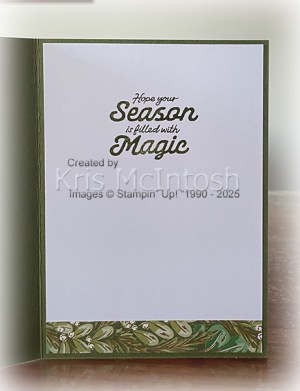
I let the paper dry and used the block to weigh it down so that it dried pretty flat. I die cut Mossy Meadow card using the leafy frame die and attached it to the watercoloured paper. The whole panel is attached to scored and folded Thick Basic White card. I stamped the double bird image from the Winterly Tree Tops stamp set onto Basic White card and used Pool Party, Daffodil Delight, Crumb Cake and Cherry Cobbler Stampin’ Blends to colour the image.

I cut out the image using the co-ordinating Winterly Tree Tops Die and attached the image to the Basic White card so that it sits inside the leafy frame. The whole panel is attached to scored and folded Thick Basic White card. To decorate the inside of the card, I stamped the single bird image onto Basic White card using Memento Tuxedo ink. I coloured the image using the same Stampin’ Blends. I stamped the greeting from the Greetings of the Season stamp set beside the bird using Mossy Meadow ink. This product collection is growing on me very quickly.
Bye for now,
Kris
Product Used:


Enjoy The Season

Today I have a double page layout to share with you that I created using the Reindeer Memories Scrapbook Workshop Kit. This particular kit also co-ordinates with the Reindeer Days Suite Collection in the current mini catalogue. I don’t have any of the products from the Suite Collection and I was able to create my pages without them. However, if you have this kit you could probably create more pages and add different embellishments if you wished.

The Reindeer Memories Scrapbook Workshop Kit contains enough product to create three double page layouts with a lot left over for creating extra pages or maybe some Christmas cards. The instructions walk you through cutting the different Designer Series Papers and also Two-Tone Card to create the three pages. I just piled the pieces for each layout together so I knew where to start. The instructions also give you measurements so that you know how to lay out the pieces onto the pages. The instructions also show you which die cuts and stickers to use for each layout. I have to admit that I did change some of the Designer Series Paper squares for some extra photos.
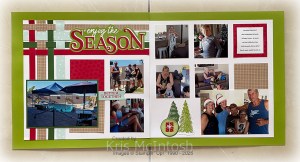
I also didn’t use exactly the same embellishments as indicated in the instructions but added some different ones to suit my page. I decided to print my journaling onto Basic White card and cut it out using one of the Stylish Shapes Dies before attaching it to the page. I love how simple these Workshop Kits make it to create bright and happy these pages. If you haven’t noticed these before it’s probably because they are not in any catalogue but you can view them in the new Scrapbooking brochure which Stampin’ Up! released in September or you can see them in my online store. If you need more information please do not hesitate to contact me or your local demonstrator.
Bye for now,
Kris
Product Used:


