Wine Bottle Decoration

Today I have a two in one gift giving idea. At this time of year a favourite bottle of wine or port can make a wonderful gift, however, I have great difficulty in wrapping these bottles! So this year I made these little decorations that you can add to your bottle and also add a chocolate, so a two for one gift!
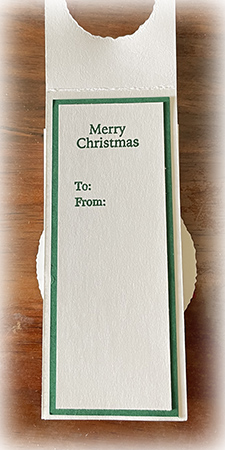
My decoration holds one of the chocolates you buy in a pack of five from Aldi. I used some paper that is retiring and the Merriest Trees stamp set and dies which are not retiring – yay. If you would like to create one of these for your Christmas Gift Giving, then you can visit my Free Tutorials page and download the PDF. I hope that you love creating these and come up with some great ideas.
Bye for now,
Kris
Product Used:


Myra
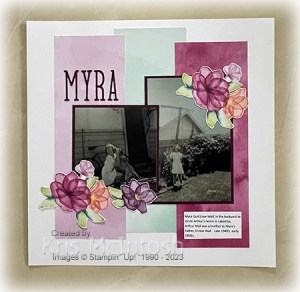
Today my page focuses on a couple of photos of my Mum in her Uncle’s backyard probably in the late 1940’s, early 1950’s. I attached three pieces of Delightful Floral 12″ x 12″ Designer Series Paper across the centre of a Basic White 12″ x 12″ page. I attached my photos to Blackberry Bliss card before attaching them to the centre of the page. I cut the title from Blackberry Bliss card using the Alphabet A La Mode Dies and attached it above the left hand photo. I cut the flowers from the Delightful Floral Designer Series Paper and attached them to the lower left and upper right hand corners of the photos. The journaling is printed onto Basic White card. I have to admit that I love this gorgeous Designer Series paper and I can always find an excuse to use it.
Bye for now,
Kris
Product Used:


Framed Art 2023

You have probably already noticed that I am posting a little more than usual and that is because I have a lot of Christmas projects that I want to share with you all. Today I am sharing the Christmas Framed Art piece that we made during our November class this year. I love putting these together because you can create the framed piece which fits into an A4 document frame or your can create cards using each panel. I love how bright and cheery this frame is to decorate during the Christmas season.
I also created cards using the panels and added them to the tutorial for my ladies so that they would have some ideas for using the panels if they didn’t want the framed art panel. I love how the cards turned out, especially the slim card using the Horse & Sleigh. If you would like to know how the Framed Art as well as the cards are made pop over to my Free Tutorials page and download the PDF.
Bye for now,
Kris


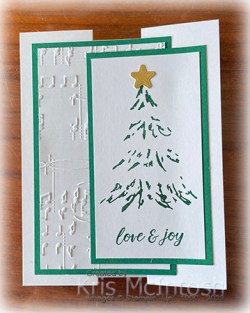
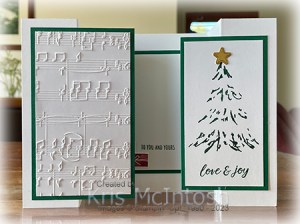
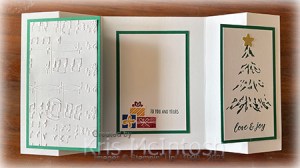
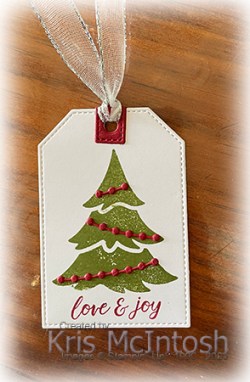
Love & Joy
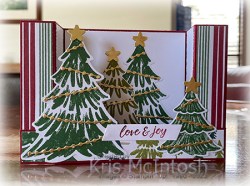
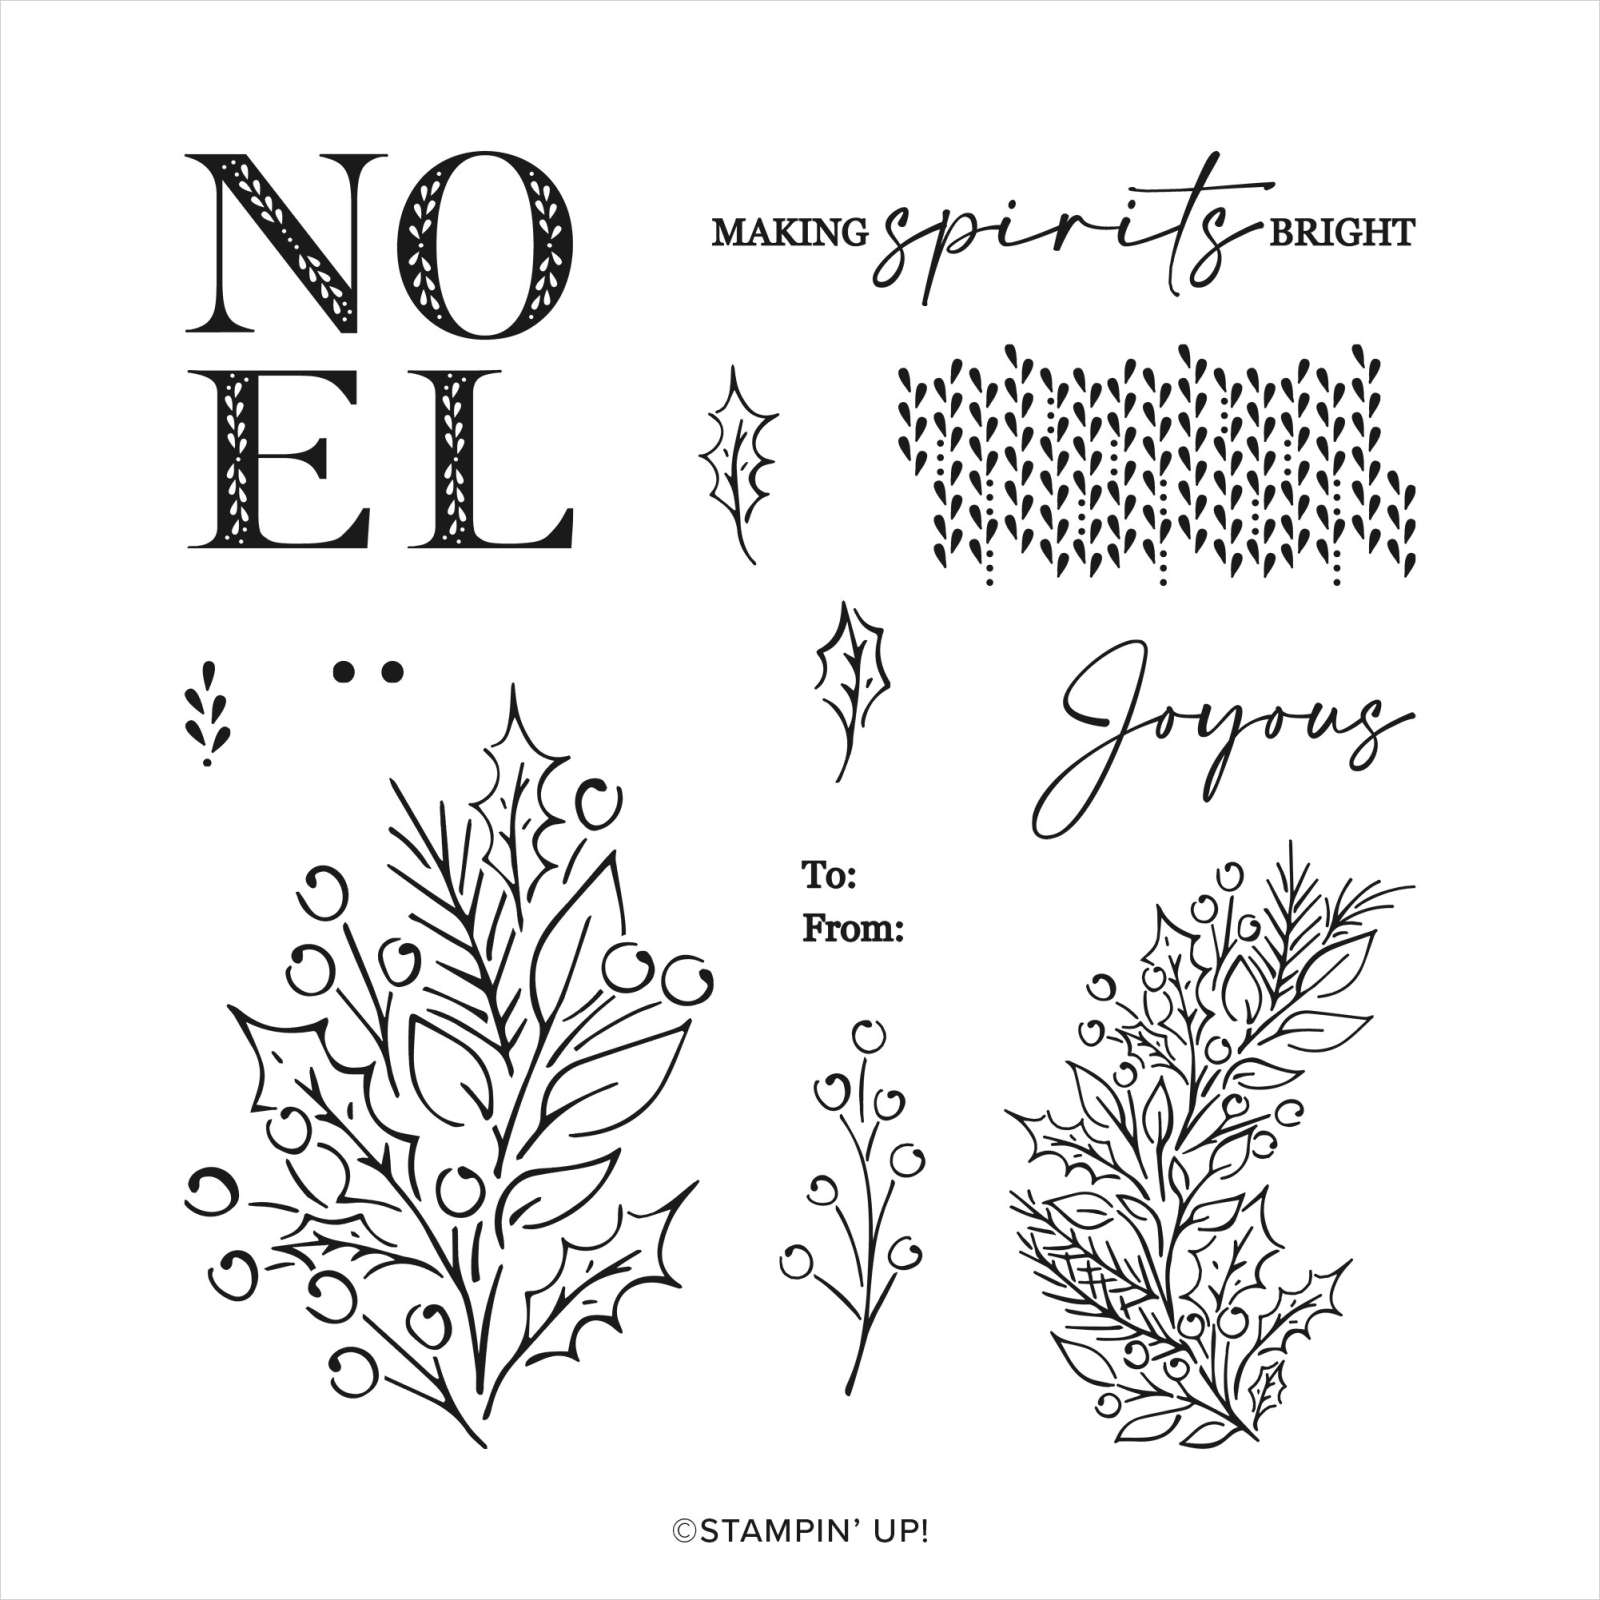
This week in my Facebook Live I shared some cards using the A Walk In The Park 12″ x 12″ Designer Series Paper. Today I have a Bridge Fold card using the same Designer Series Paper. I cut my card base from Cherry Cobbler card. I cut two pieces of the same pattern paper from the A Walk in the Park Designer Series Paper and attached one to each of the narrow outside panels. I embossed two pieces of Basic White card using the Fern 3D Embossing Folder and attached them to the narrow inside panels. I cut four trees from the A Walk in the Park Designer Series Paper using the co-ordinating Merriest Trees Dies.
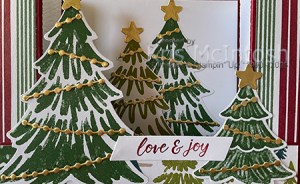
I cut the decorative pieces from Gold Foil card using the Merriest Trees Die and attached them to each tree. I also cut a Gold Foil star for each tree using the Merriest Trees Die. I attached two of the trees to Basic White card before attaching the panel to the central panel of the card base. I attached a narrow strip of A Walk in the Park Designer Series Paper to a strip of Cherry Cobbler card which is attached to the narrow outside panels of the card base to create the bridge. I attached the last two trees to the outside edges of the card base making sure to only add adhesive where necessary.
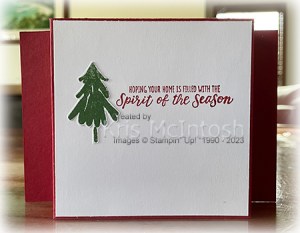
I stamped “love and joy” from the Merriest Trees stamp set onto Basic White card and used the banner from the Something Fancy Dies to cut it out. I attached the greeting to the bridge between the trees. I stamped another greeting from the Merriest Trees stamp set onto Basic White card using Cherry Cobbler ink. I fussy cut a small tree from the A Walk in the Park Designer Series Paper and attached it beside the greeting. I attached this panel to the back of the card to give me somewhere to write a message.
I hope I have inspired you to take a look at this Designer Series Paper which you can find on page 5 of the September to December mini catalogue. Stampin’ Up! donates $4.25 from each package sold to support those in need of support.
Bye for now,
Kris
Product Used:

Free Shipping

Tomorrow is a great day to stock up on supplies, like adhesives, inks and papers or really anything you like as any order over $65.00 will ship for free. Yay, I love to save money and get what I want at the same time, don’t you? So don’t forget this is for one day only tomorrow the 14th December. So don’t forget to head on over to my store and save some money. Happy Shopping!
Bye for now,
Kris
Love & Joy Fancy Fold
Today I have another card made using the Merriest Trees Bundle. This time I followed Terri Gaines fun fold instructions (I have used this fold before & I love it). This card was actually one that we made during my November Classes and the ladies loved it. I cut my card base from Thick Basic White card and scored it according to the instructions. I embossed a panel of Basic White card using the Merry Melody 3D Embossing Folder and attached it to Shaded Spruce card before attaching it to the left hand front panel of the card base. I stamped four layers of the detailed tree image from the Merriest Trees stamp set onto Basic White card using Shaded Spruce ink. I stamped “love & joy” from the same stamp set below the tree using Shaded Spruce ink.
I cut Gold Foil card using the star die from the Merriest Trees Dies and attached it to the top of the tree. The stamped panel is attached to Shaded Spruce card and then the right hand side of the card front. You need to make sure you follow Terri’s instructions when adding adhesive so that the left hand panel slides under the right hand panel. I stamped one of each of the present images from the Merriest Trees stamp set onto Basic White card using Cherry Cobbler, Crushed Curry & Blueberry Bushell ink.
I also stamped one each of the bow images from the same stamp set using Cherry Cobbler & Crushed Curry ink. I layered the present images onto the lower left hand corner of Basic White card before stamping another greeting from the Merriest Trees stamp set using Shaded Spruce ink. The stamped panel is attached to Shaded Spruce card and then the centre of the inside of the card.
This is such a fun card to create and I think it looks great as a Christmas card, don’t you?
Bye for now,
Kris
Product Used:


Merriest Tags
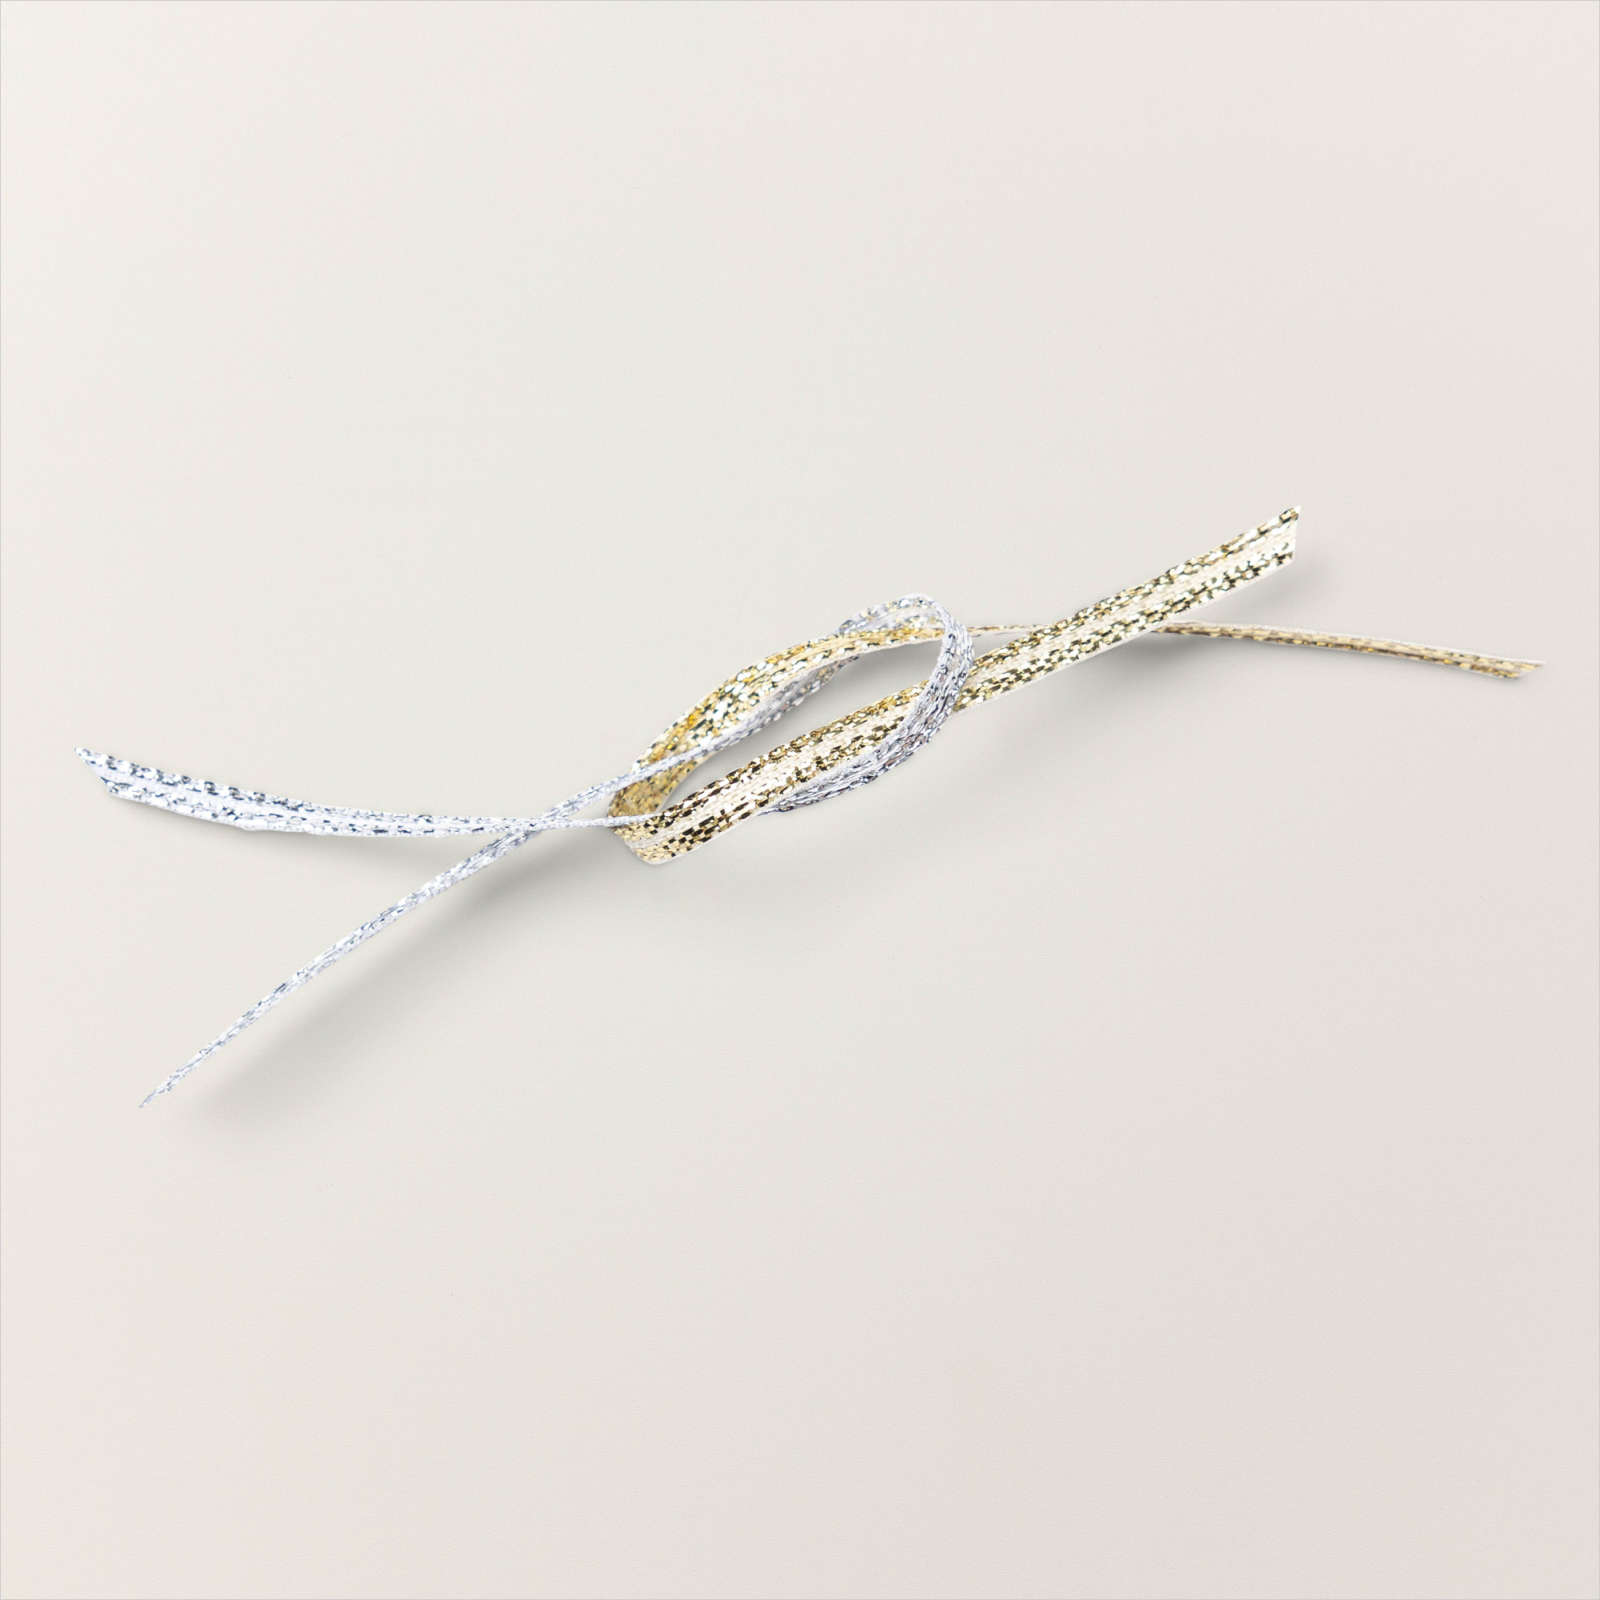
I am still playing with the Merriest Trees stamp set and thought I would make some tags using this fabulous bundle. I stamped three layers of the solid Christmas tree onto Basic White card using Old Olive ink. I created a back to front mask so that I could stamp only this portion of the image. I stamped the greeting from the Merriest Trees stamp set below the tree using Cherry Cobbler ink. I used the tag die from the Merriest Trees Dies to cut out the image. I also cut the tag reinforcement from Cherry Cobbler card and attached it to the top of the tag. I die cut Cherry Cobbler card (to which I attached Adhesive Sheet) using the tinsel die from the Merriest Trees Dies and attached the dies to the stamped tree image. Lastly I tied some Silver & White Sheer Ribbon through the top of the tag. I was so happy with this tag I decided to create two more tags. This time I stamped some presents and bows using Crushed Curry, Blueberry Bushell & Cherry Cobbler ink. The images were all cut out using the co-ordinating Merriest Trees Dies before attaching to the tags.

I think they all turned out great, don’t you? The first of my tag stash for this Christmas.
Bye for now,
Kris
Product Used:
Generations
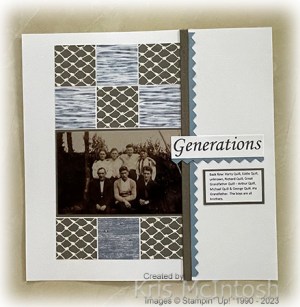
Today I am sharing another photo from my box on the shelf. This one is of my Grandfather and his brothers as well as my Great Grandfather. I attached my photo to Pebbled Path card and attached it to a Basic White 12″ x 12″ page. I cut pieces of the Let’s Go Fishing 12″ x 12″ Designer Series Paper into 2″ squares and attached them above and below the photo. I cut one long edge of a strip of Boho Blue card using one of the Basic Border Dies and attached it beside the photo and Designer Series Paper. I wrapped the edge of the Boho Blue Border with a length of Pebbled Path Textured Ribbon. I printed my title onto Basic White card and attached a strip of die cut Boho Blue across the bottom before attaching the panel to the page. I printed my journaling onto Basic White card which I attached it to Pebbled Path card before attaching it to the page. Another simple page, but I think it is quite effective, don’t you?
Bye for now,
Kris
Product Used:


Meandering Meadows

The Meandering Meadows 6″ x 6″ Designer Series Paper has some beautiful scenery which you can use to create beautiful cards with very little effort. Today I have to share two cards I created using just one sheet of this gorgeous paper. For the first card, I cut my card base from Thick Basic White card and trimmed down the front panel 2.5cm (1″). I trimmed the 6″ x 6″ panel of Meandering Garden Designer Series Paper to 14.3cm. I kept the narrow strip I cut off. I cut two pieces from the left hand side of the 6″ width at 7.5cm and 2.5cm. I kept the remaining panel. I attached the wide panel of Meandering Meadow Designer Series Paper to the card front and the narrow strip to the right hand side of Basic White card.

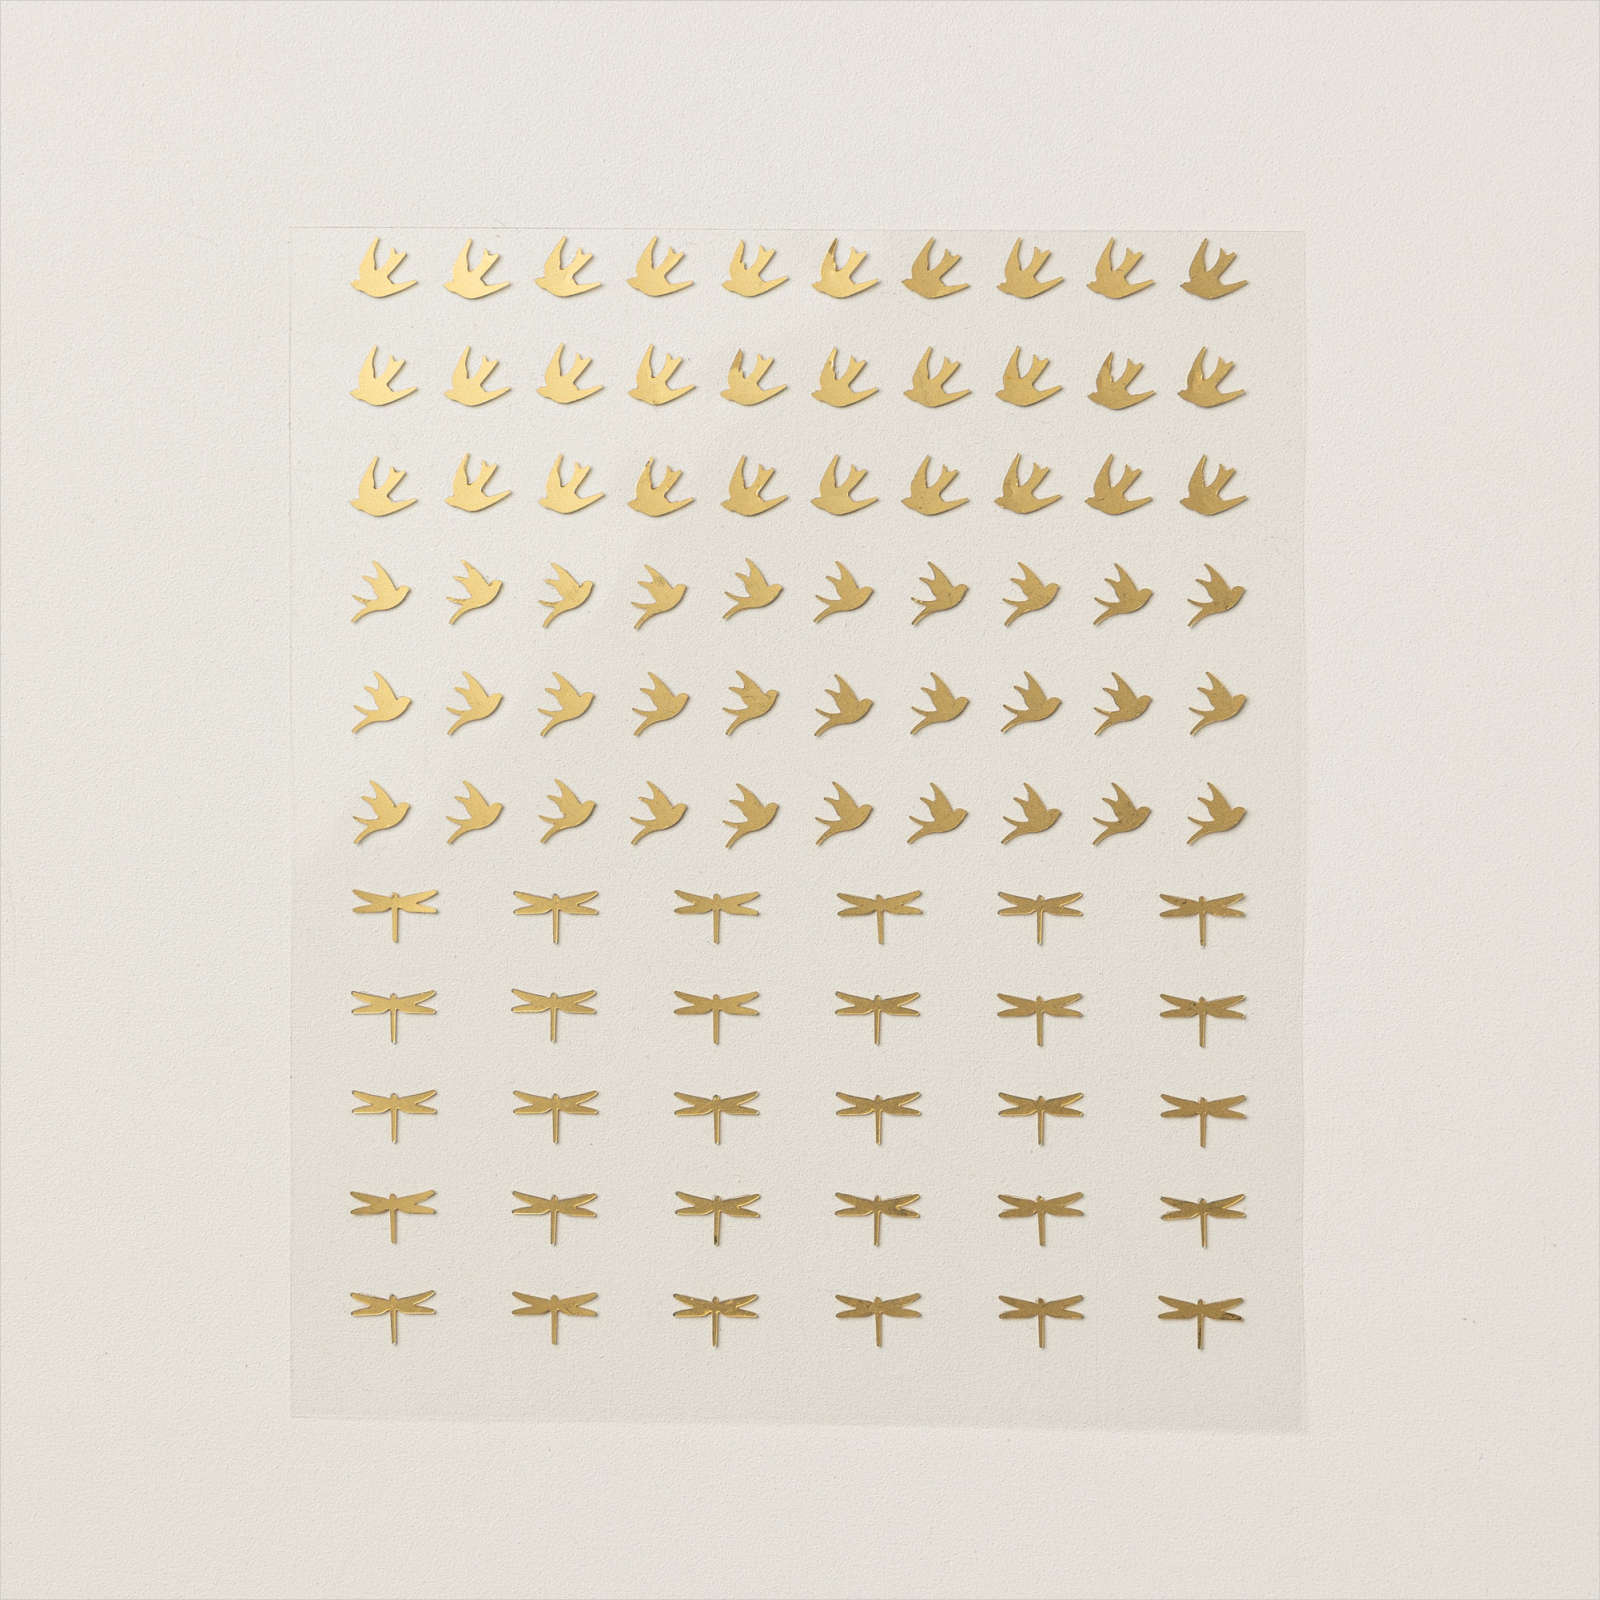
The whole panel is attached to the inside of the card. I stamped the greeting from the Artistically Inked stamp set onto Basic White card using Night of Navy ink and trimmed around the greeting. I attached the greeting to the card front. I added one of the birds from the Adhesive Backed Dragonflies & Birds to the greeting panel. I stamped the greeting from the Charming Sentiments stamp set onto the inside of the card using Night of Navy ink

To create the second card, I cut my card base from Thick Basic White card. I embossed Basic White card using one of the Elegant Eucalyptus 3D Embossing Folders, making sure that the embossing was on the right hand side of the card. I attached the large panel that was left after I cut the pieces for the first card and attached it to the left hand side of the embossed card.

The whole panel is attached to the card front. I stamped the greeting from the Artistically Inked stamp set onto Basic White card using Night of Navy ink. I trimmed around the greeting and attached it to the card front using dimensionals. I also attached one of the birds from the Adhesive Backed Dragonflies & Birds to the greeting panel. To decorate the inside of the card, I stamped the greeting from the Charming Sentiments onto Basic Whtie card using Night of Navy ink. I attached the narrow strip which I cut from the 6″ x 6″ piece of Meandering Meadow Designer Series Paper across the bottom the stamped card. I love how pretty these cards are and how super easy and quick they were to make.

What do you think, do you like this idea?
Bye for now,
Kris
Product Used:


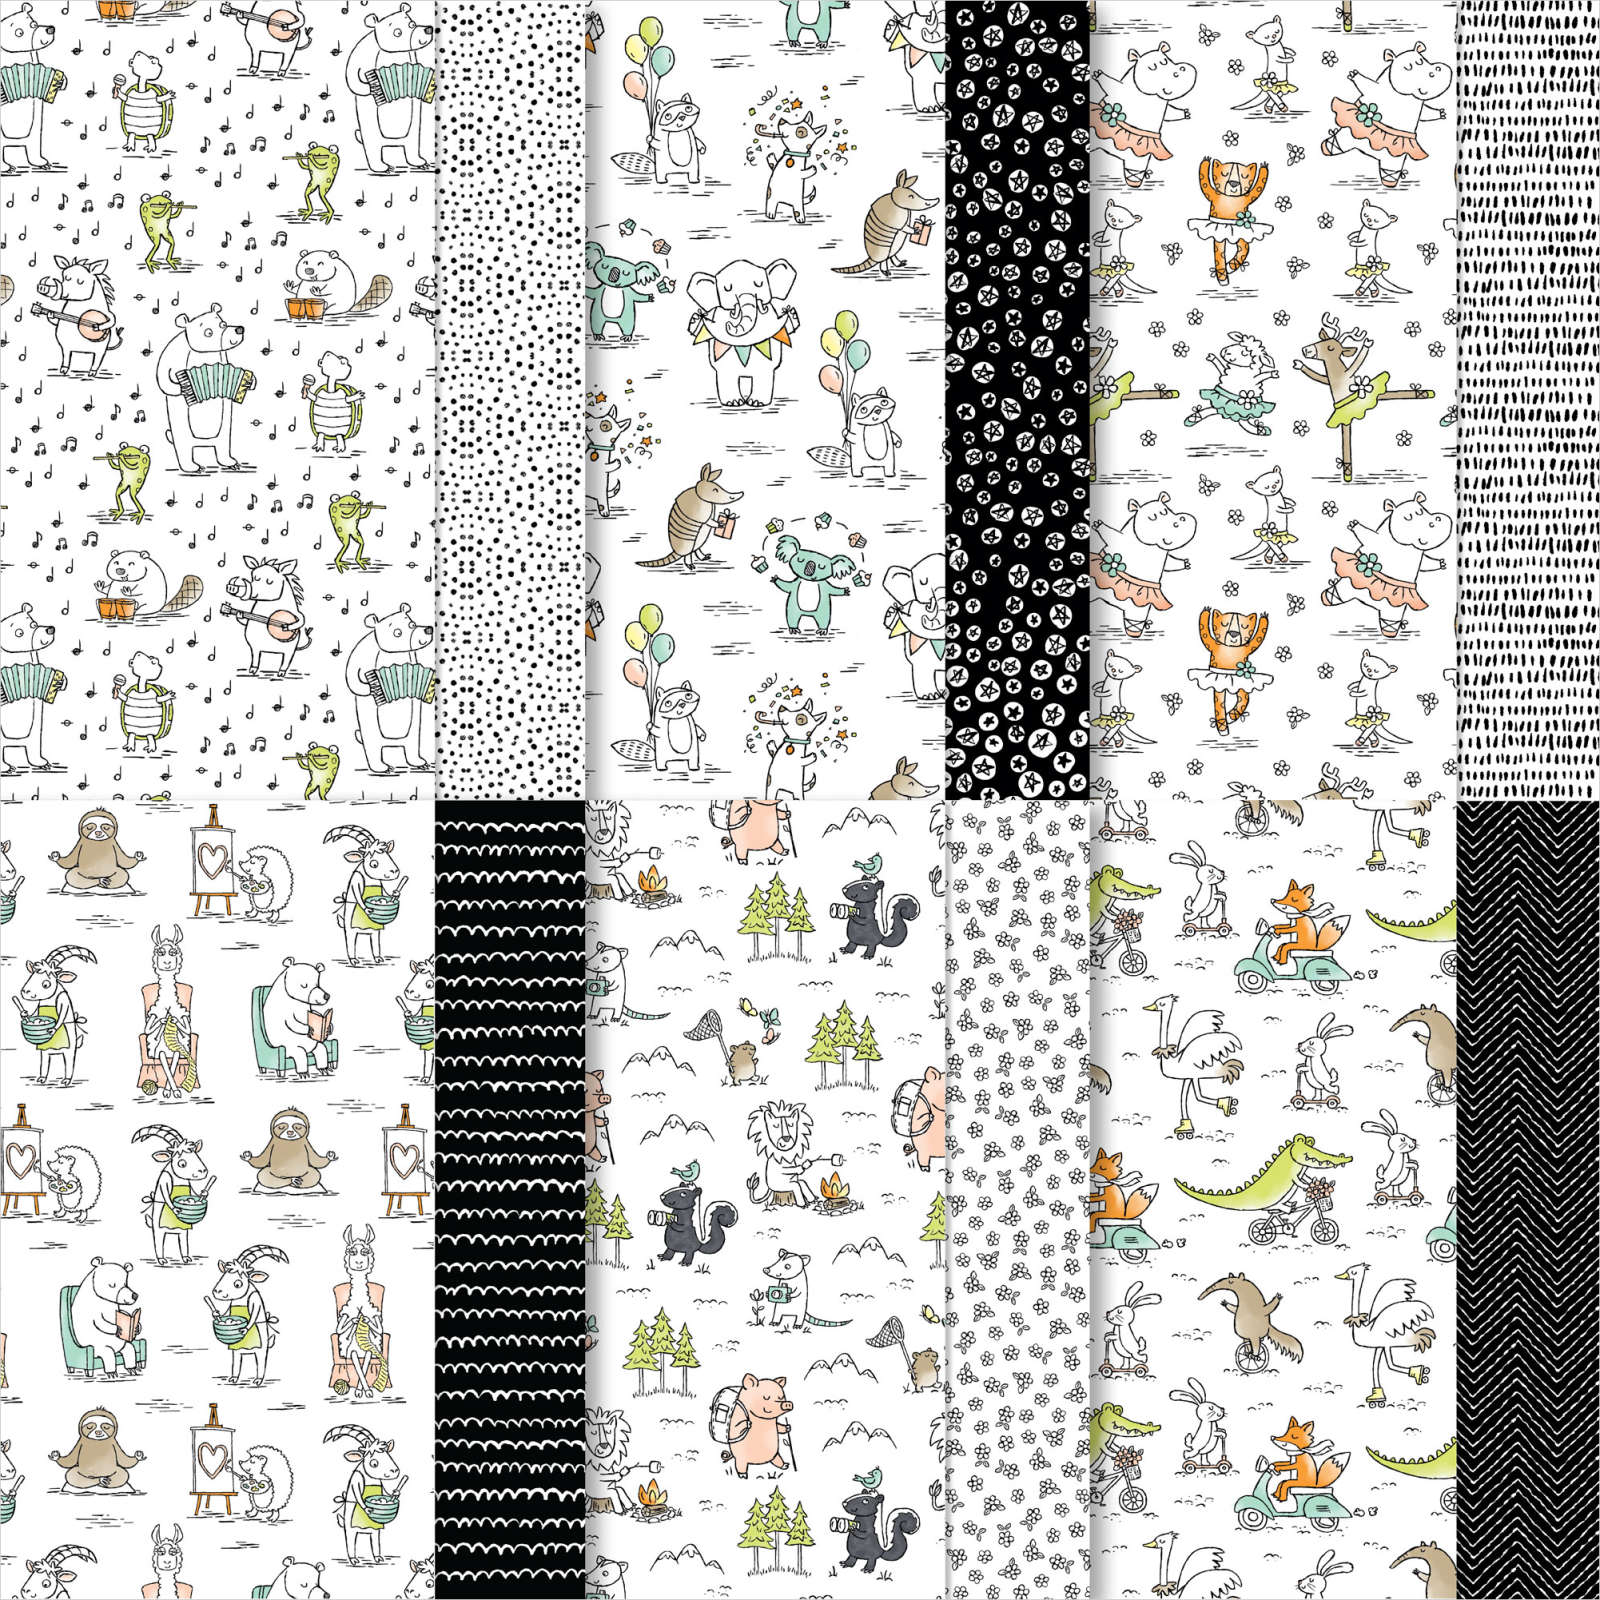
Zoo Crew

I love the Zoo Crew 12″ x 12″ Designer Series Paper from the Annual Catalogue because one side of each paper is black & white and I love black & white! However, I did not to buy the co-ordinating Zany Zoo Stamp Set and Dies. I decided that I do not make enough children’s cards and this paper has so many gorgeous images so today I have four cards to share using this Designer Series paper. I cut card panels in Pumpkin Pie, Pool Party, Lemon Lolly and Lemon Lime Twist (I got the colours from the Designer Series Paper). I cut up the four bases in the same manner and added one of each colour to four pieces of Basic White card. I made the Basic White card the same size as the card panels so you don’t see any white but it lets me align the pieces correctly. I used four different embossing folders – two from the Basics 3D Embossing Folders, Cane Weave 3D Embossing Folder and the Metal Plate 3D Embossing Folder.

I attached each of the embossed panels to scored and folded Basic Black card. I cut Basic Black and Basic White card using the Deckled Circle Dies. I cut four of the cute animals from the Zoo Crew Designer Series Paper and attached one to each Basic White circle. Each one is attached to a Basic Black circle and then the card front using dimensionals. I stamped the greeting from the Charming Sentiments stamp set onto Basic White card four times using Memento Tuxedo Black ink. I used the co-ordinating Sentiment Silhouette Die to cut out the greetings before attached them to each card front using dimensionals where necessary. To decorate the inside of each card, I stamped the greeting from the Heartfelt Hexagon stamp set onto Basic White card using Memento Tuxedo Black ink. I embossed a piece of each of the four colours using the embossing folders and attached each one to the bottom of a stamped panel.

I love how cute these cards are and will have to come up with some more ideas to use these cut little animals.
Bye for now,
Kris
Product Used: