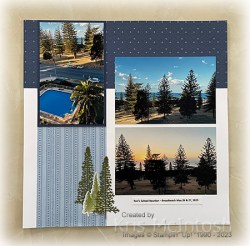
Miles

This was our last stop on our trip to Winton and back. Such great friends, I love spending time with. For today’s page I kept it really simple. I trimmed the photos to 6″ x 3″ and attached them down the centre of a Basic White 12″ x 12″ page. I printed “Last Night Miles” onto Balmy Blue card and trimmed it down to 2″ x 3″. I used the retired Detailed Trio Punch to round the upper right hand corner. I cut another piece of Balmy Blue card to 2″ x 3″ and rounded one corner. I embossed the panels using the Painted Texture 3D Embossing Folder before attaching them beside the top photo.
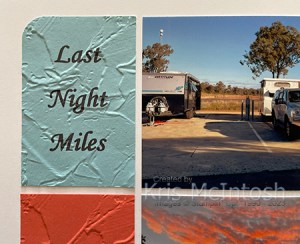
I printed “Good Times, Good Friends, 3.7.2022” onto Calypso Coral card. I cut a second piece of Calypso Coral card and embossed them using the Painted Texture 3D Embossing Folder. These panels are attached beside the second photo on the page. I stamped the greeting from the long retired Let’s Get Away stamp set onto Lost Lagoon card using Memento Tuxedo Black ink. I cut another panel of Lost Lagoon card and rounded one corner on each piece. The panels are embossed using the Painted Texture 3D Embossing Folder before being attached beside the third photo. As I said simple, but makes me very happy when I look at these photos.
Bye for now,
Kris
Product Used:


On The Ocean CASE
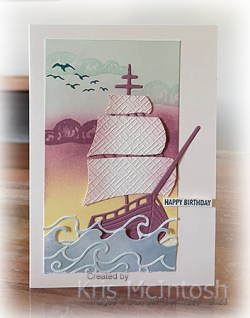
Today I have another card to share with you that I CASEd from the new Annual Catalogue. To begin I cut a piece of Very Vanilla card and used a blending Brush to add Pool Party ink across the top of the panel. I used a Blending Brush to add Moody Mauve ink below the Pool Party ink and then Lemon Lolly ink below the Moody Mauve ink. I stamped a couple of the cloud images from the On The Ocean stamp set onto the Pool Party section using Pool Party ink and onto the Moody Mauve section using Moody Mauve ink. I attached the coloured Very Vanilla card to scored and folded Thick Very Vanilla card.

I die cut a panel of the Hello, Irresistible 6″ x 6″ Designer Series Paper using the On The Ocean Dies three times to create the ocean. I also cut Moody Mauve card using the die for the boat and also the sail/mast from the On The Ocean Dies. I attached the boat die cut to the coloured panel with the ocean panels over the top. I die cut the sails from Very Vanilla card using the On The Ocean Die and embossed the panel using one of the Basics 3D Embossing Folders. I added a little Pecan Pie ink to the sails before cutting them apart. I attached them to the sail/mast die cut before attaching the panel to the card front. I stamped the bird image from the On The Ocean stamp set onto the card front using Pretty Peacock ink.

I also stamped “happy birthday” from the On The Ocean stamp set onto Very Vanilla card using Very Vanilla ink. I trimmed around the greeting and attached it to the card front using dimensionals. To decorate the inside of the card, I die cut the same pattern of Hello, Irresistible Designer Series Paper using the On The Ocean Dies and attached them across the bottom of a Very Vanilla panel. I stamped another greeting from the On The Ocean stamp set onto the Very Vanilla panel using Pretty Peacock ink.
I love CASEing the catalogue because Stampin’ Up! makes it so easy for demonstrators. As a demonstrator you can access all of the info on how to create each of the cards in the Annual Catalogue. How good is that. Another reason to join Stampin’ Up!
Bye for now,
Kris
Product Used:


Radiating Stitches

Today I have a card to share using the Radiating Stitches Dies which are part of the Online Exclusive products. I began by cutting Gray Granite card using the largest rectangle from the Radiating Stitches Dies. I then used the second largest rectangle to cut the centre from the die to create a frame. I cut Basic White card using the background die from the Two-Tone Flora Dies, trimmed it down and attached it to the back of the Gray Granite frame. The whole piece is attached to scored and folded Fresh Freesia card. I stamped three of the largest solid flowers from the Two -Tone Flora stamp set onto Basic White card using Bubble Bath ink.

I stamped the detailed flower images over the top using Fresh Freesia ink. I stamped three sets of leaves from the Two-Tone Flora stamp set onto Basic White card using Lost Lagoon ink. All of the flowers and leaves were cut out using co-ordinating dies from the Two-Tone Flora Dies. I layered the flowers and leaves onto the lower left hand corner of the Gray Granite die, attaching the largest flower and one set of leaves using dimensionals.

I stamped “happy birthday” from the Something Fancy stamp set onto Basic White card using Fresh Freesia ink. The greeting is cut out using one of the Something Fancy Dies and attached to the card front using dimensionals. To decorate the inside of the card I stamped the largest solid flower from the Two-Tone Flora stamp set onto the lower left hand corner of Basic White card using Bubble Bath ink. I stamped the detailed flower image over the top using Fresh Freesia ink. I covered the stamped flower with a paper mask and stamped the leaf image using Lost Lagoon ink.
I love how pretty this card is and I am sure to be using these Radiating Stitches Dies on lots more projects.
Bye for now,
Kris
Product Used:


Broadbeach
Today’s pages show off some photos from our recent catch up with Ron’s school friends at Broadbeach. We havent’ had a catch up since before COVID so it was lovely to see everyone again. I attached a piece of the same pattern from the Countryside Inn 12″ x 12″ Designer Series Paper across the top of one Basic White 12″ x 12″ page and the bottom of a second Basic White 12″ x 12″ page. I attached a strip of another pattern from the same Designer Series Paper down the outside edge of each page. I attached the portrait photos to Night of Navy card before attaching them to the pages. I attached two more photos to each page before adding any decoration. I cut the title from Night of Navy card using the Alphabet A La Mode Dies and attached them to the top left hand side of the right hand page.
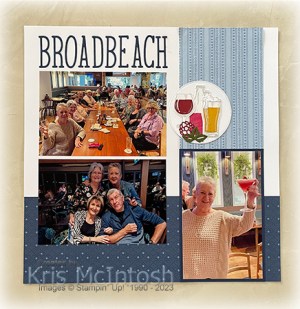
I stamped a tree image from the retired Mountain Air stamp set and cut it out using the co-ordinating and retired Majestic Mountain Dies. I cut Mossy Meadow card twice using the tree die from the Majestic Mountain Dies. The trees are layered together on the bottom left of hand side of the first page. I cut Basic White card using the largest circle from the Stylish Shapes Dies and attached it to the right hand side of the second page. I stamped the wine, bottle, beer glass and froth images from the Brewed For You stamp set onto Basic White card using Smoky Slate ink. I stamped the fill image for the wine glass using Cherry Cobbler ink and the fill image for the beer glass using Crushed Curry ink. I coloured half the bottle image using the light Cherry Cobbler Stampin’ Blend. I cut out the images using the co-ordinating Brewed Dies before attaching them to the Basic White Circle. I cut Cherry Cobbler card using the berry die from the Brewed Dies and Mossy Meadow card three times using the leaf die from the Brewed Dies. The die cuts are layered over the stamped images on the Basic White circle. I printed my journaling onto Basic White card and attached it below the landscape photos on the first page.
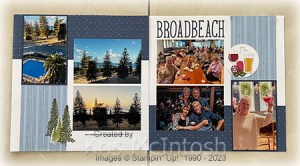
As usual it was great fun catching up with everyone and Broadbeach is a great venue for such things with plenty to see and do.
Bye for now,
Kris
Product Used:


Charming Thanks

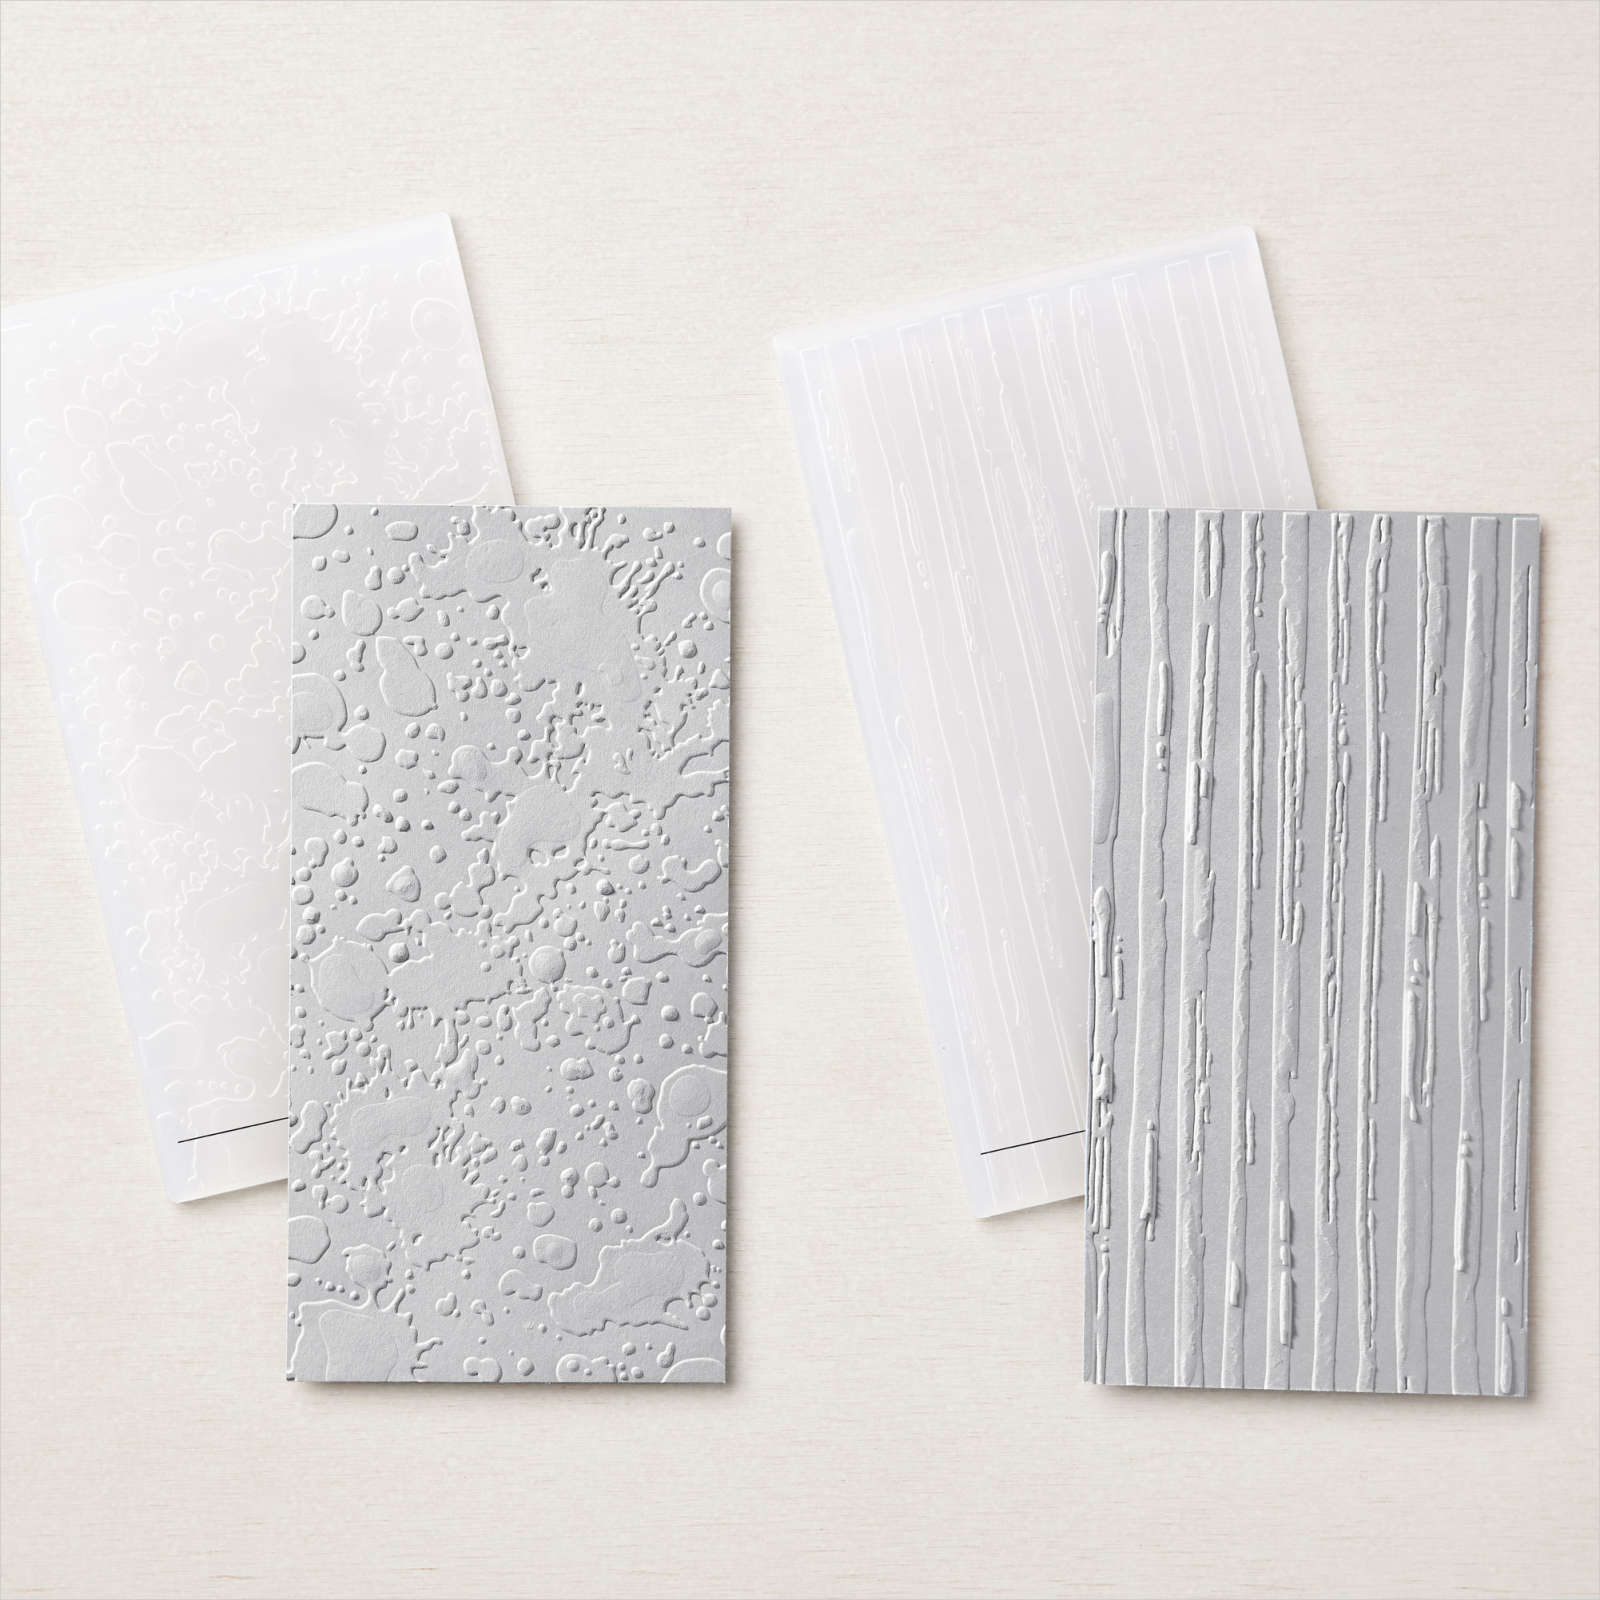
This week in my Facebook Live, I shared some cards I made using the Timeless Charm Bundle which is another new Online Exclusive. Today I have another card to share with you. I embossed Basic White card using the splatter folder from the Stripes & Splatters 3D Embossing Folders. I attached the embossed card to scored and folded Melon Mambo card.

I die cut Lemon Lime Twist card using one of the Deckled Rectangle Dies and stamped the greeting from the Timeless Charm stamp set onto the lower right hand corner using Memento Tuxedo Black ink. The die cut is attached to the centre of the embossed Basic White card. I die cut Basic White card using another of the Deckled Rectangle Dies and attached it to the card front using dimensionals.
I also die cut Basic White card using one of the floral dies from the Timeless Charm Dies. I used Dark Melon Mambo, Dark Lemon Lime Twist and Dark Daffodil Delight Stampin’ Blends to colour the flower before attaching it to the Basic White rectangle. To decorate the inside of the card, I die cut and coloured another die which I attached to the left hand side of Basic White card. I loved how this card turned and decided to create the same card using another of the floral dies from the Timeless Charm Dies.

For the second card, I also used the leaf/grass die to cut Lemon Lime Twist card. I think they both look pretty, don’t you? Don’t forget to check out the new Online Exclusives in my online store.
Bye for now,
Kris
Product Used:
I cannot get the icons to work for you but you can see the Timeless Charm Bundle here.


Drum Kit Birthday
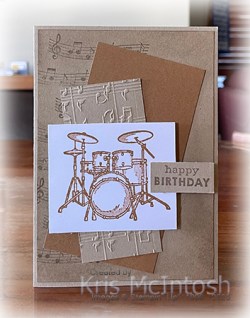
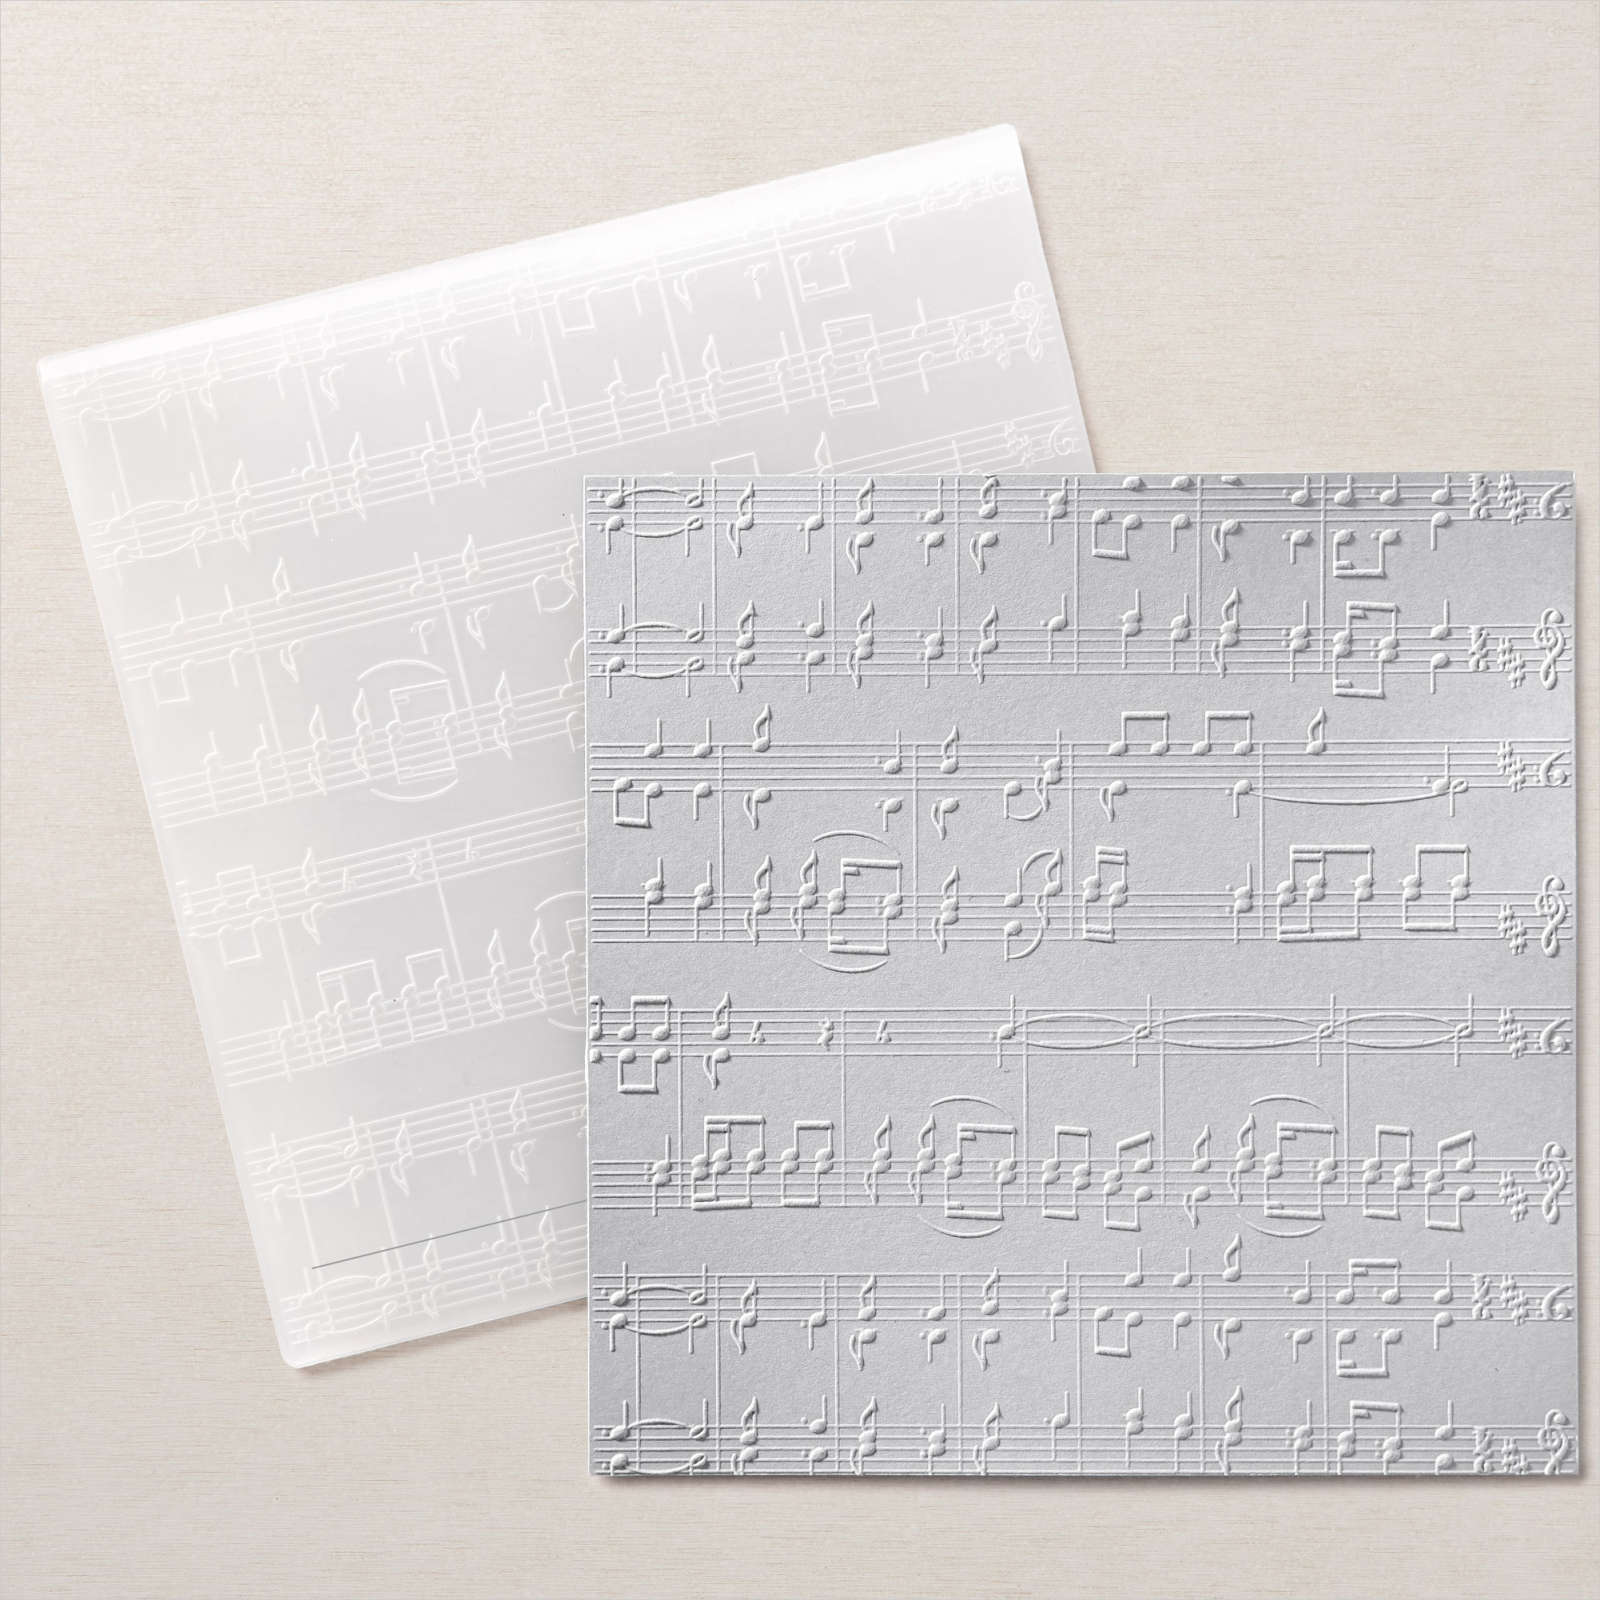
Today’s card was inspired by one I found on Pinterest by Tamara Bertram. I stamped the music image from the Enjoy The Rhythm stamp set down the left hand side of Crumb Cake card using Crumb Cake ink. I used a small Blending Brush to add Crumb Cake ink around each of the four sides of the stamped panel before attaching it to scored and folded Crumb Cake card. I attached a piece of Pecan Pie card to the card front as well as a piece of Crumb Cake card embossed using the Merry Melody 3D Embossing Folder.

I stamped the drum kit image from the Enjoy The Rhythm stamp set onto Basic White card using Pecan Pie ink. I attached the image to the card front using dimensionals in the corners only.

I stamped “happy birthday” from the Enjoy The Rhythm stamp set onto Crumb Cake card using Crumb Cake ink. I trimmed around the greeting and added it to the card front using dimensionals where necessary. To decorate the inside of the card, I stamped another greeting from the Enjoy The Rhythm stamp set onto Basic White card using Crumb Cake ink. I also stamped the music image below the greeting using Crumb Cake ink. Such a fun card to make, so thank you Tamara for the inspiration.
Bye for now,
Kris
Product Used:


My Dad
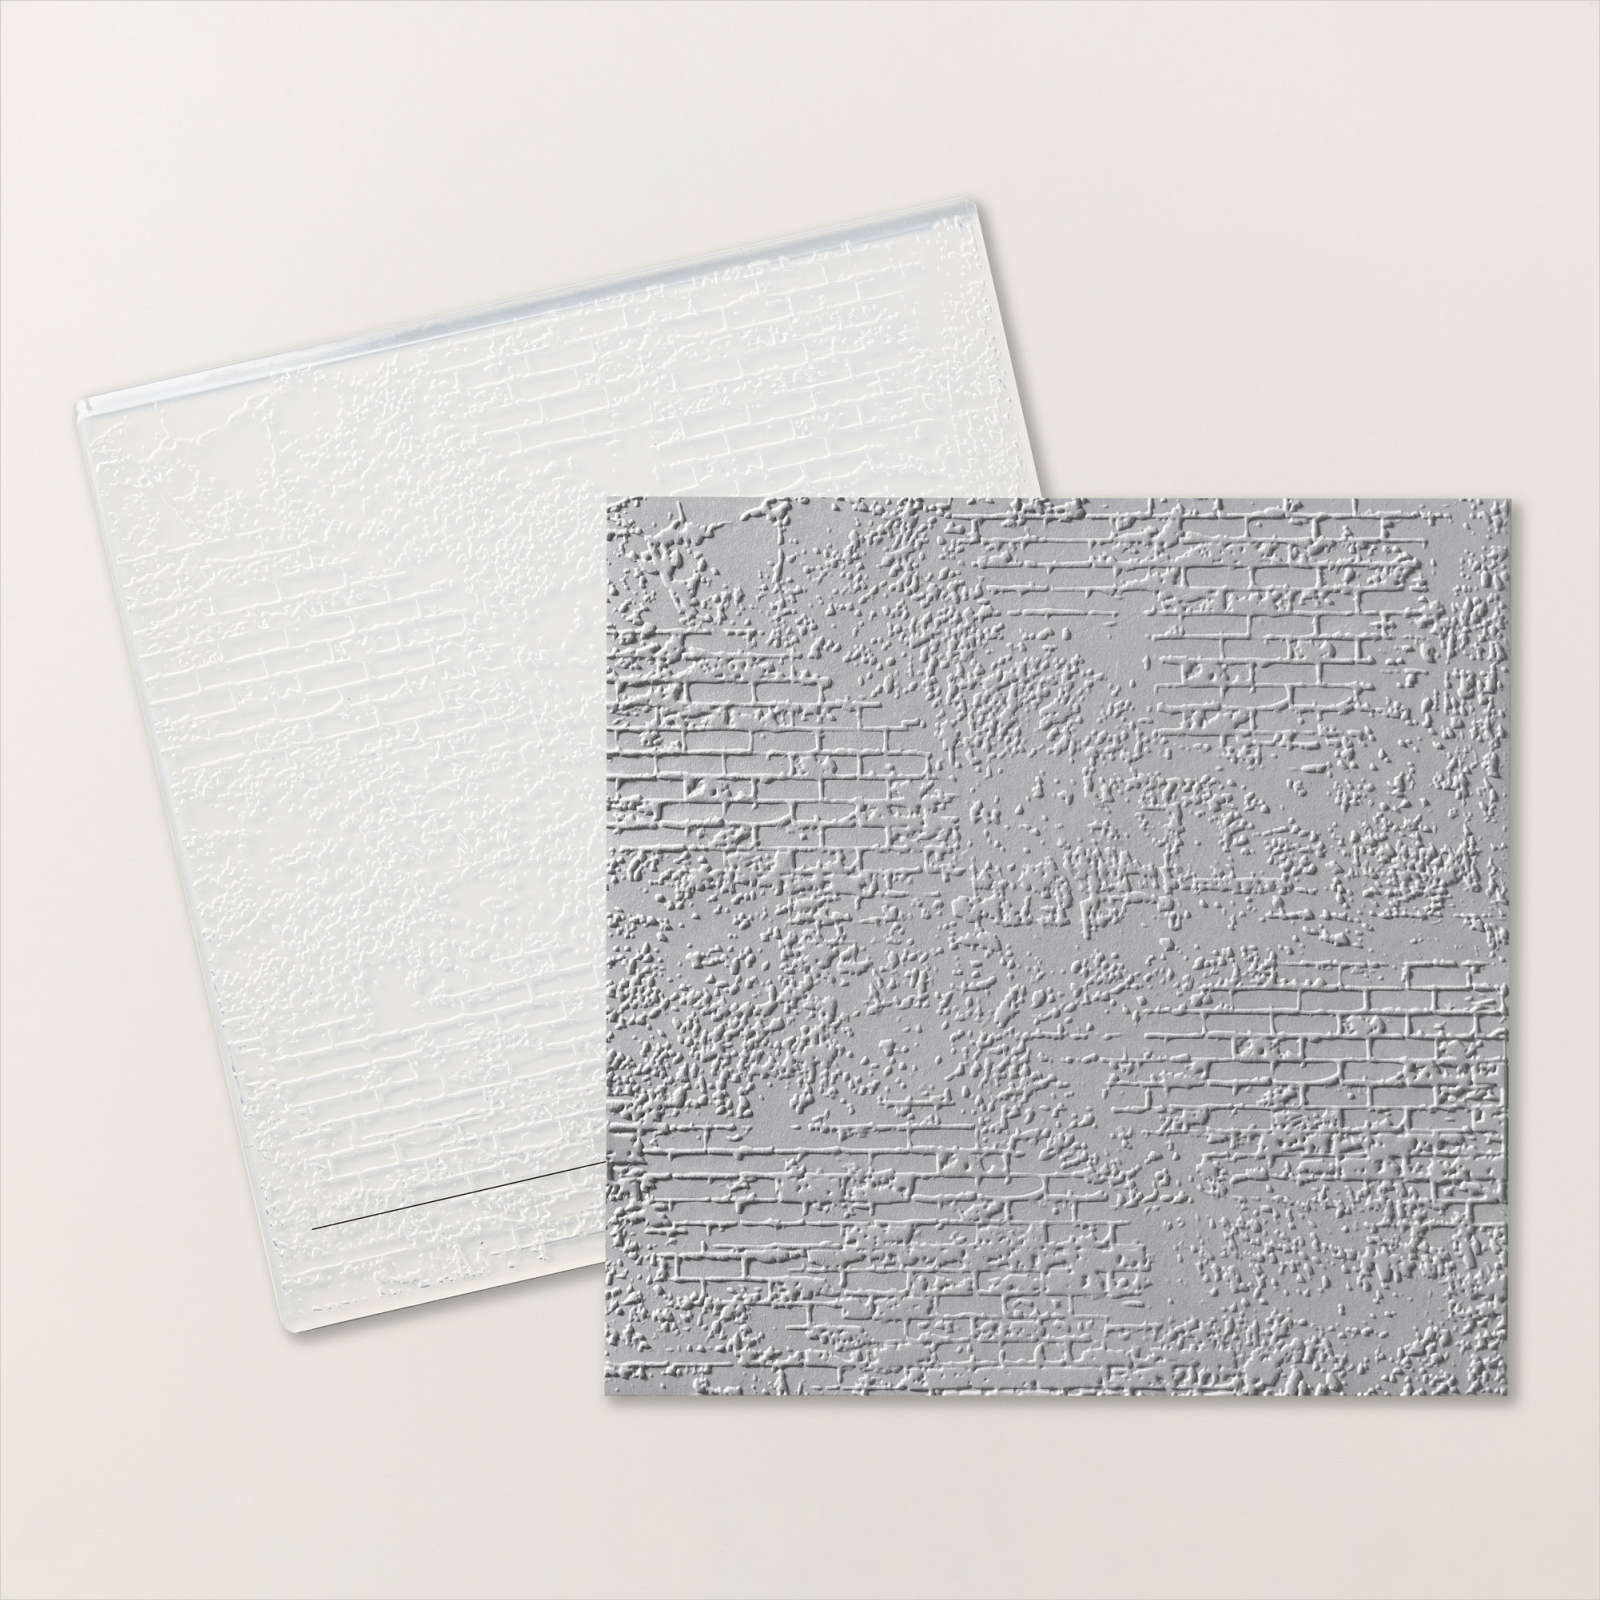
Today I have a couple of photos of my Dad when he was only little. One picture with his Mum and Dad and the second a little older. Not sure exactly when or where these photos were taken. I embossed a panel of Granny Apple Green card using the Exposed Brick 3D Embossing Folder and attached it across a Basic White 12″ x 12″ page. I used one of the Artistic Mix Decorative Masks to add Granny Apple Green ink to a piece of Basic White card using a Blending Brush. I attached the sponged card to the right hand side of the page.
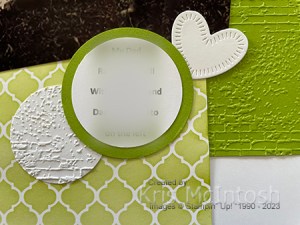
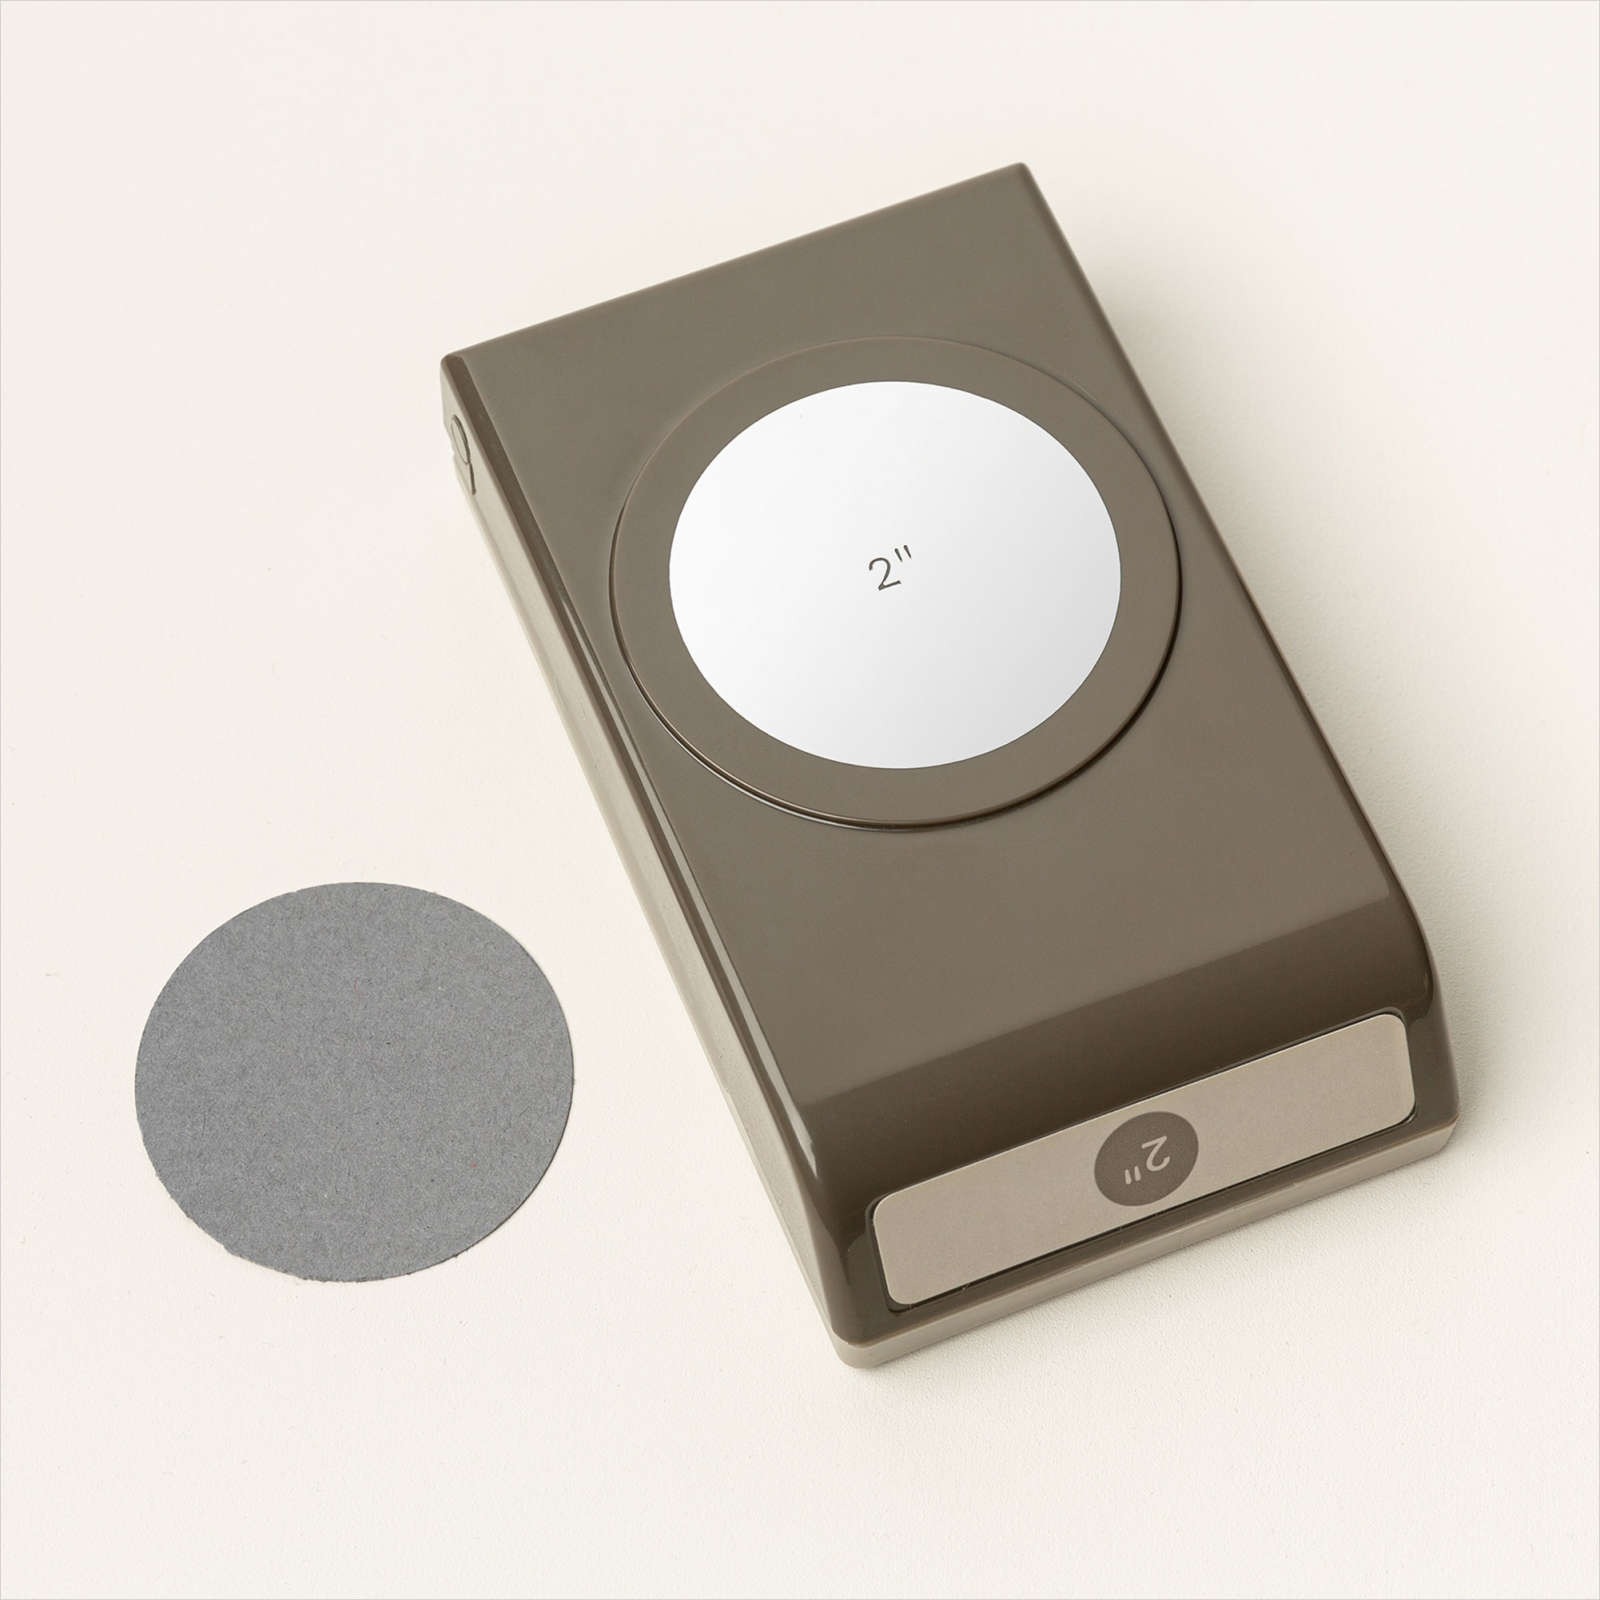
I embossed a 1-3/4″ Circle of Granny Apple Green card using the Exposed Brick 3D Embossing Folder and attached it to the top of the sponged card. I didn’t add card mats to my photos before adding them to the page. I printed my journaling onto Basic White card and punched it out using the 2″ Circle Punch. I attached the jounaling to a 2-3/8″ Circle punched from Granny Apple Green card. I cut Basic White card using the heart from the Radiating Stitches Dies and attached it to the bottom of the right hand photo. I embossed a 1-3/4″ Circle of Basic White card using the Exposed Brick 3D Embossing Folder which I attached so that it sits underneath the journaling circles. You know what I am going to say – another simple page but I feel lucky to have photos of my Dad when he was so young.
Bye for now,
Kris
Product Used:


Horse & Sleigh

Today’s card features the Horse & Sleigh Bundle an Online Exclusive product available from today. I shared some cards using this bundle and the co-ordinating One Horse Open Sleigh 6″ x 6″ Designer Series Paper this week in my Facebook Live. Today I cut my card bases from Thick Basic White card. When you add these pieces together you get a Double Z-Fold card. I attached pieces of the One Horse Open Sleigh Designer Series Paper across both of the card bases before I attached them together.

I stamped the sleigh image from the Horse & Sleigh stamp set onto Basic White card using Pebbled Path ink and cut it out using the co-ordinating Horse & Sleigh Die. I scored the die cut image and attached it so that the sleigh is on the front of the card and you only see the horse when you open the card. I stamped the tree image from the Horse & Sleigh stamp set onto Basic White card using Mossy Meadow ink.

The trees are cut out using the co-ordinating Horse & Sleigh Die before I coloured the trunks using the Dark Pebbled Path Stampin’ Blend. I attached one tree to the card front using dimensionals underneath the top of the tree and two trees to the last panel also using dimensionals underneath the top part of the trees.

I stamped the greeting from the Horse & Sleigh stamp set onto Basic White card using Pebbled Path ink and cut it out using my Paper Snips. I attached the greeting over the end of the tree on the front of the card. To create somewhere to write a message, I stamped another greeting from the Horse & Sleigh stamp set onto BAsic White card using Pebbled Path ink. I attached a piece of One Horse Sleigh Designer Series Paper across the bottom of the panel and attached it to the back of the card.
I really love how the paper is so pretty and creates a scene for you without even trying. I hope you are going to pop onto my online store and check out the other new product available from today.
Bye for now,
Kris
Product Used:
You can view all the products from this new release here in my online store.


Thinking of You
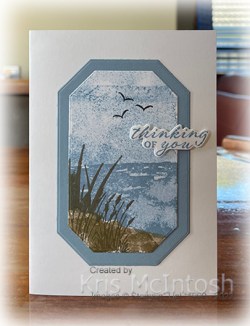
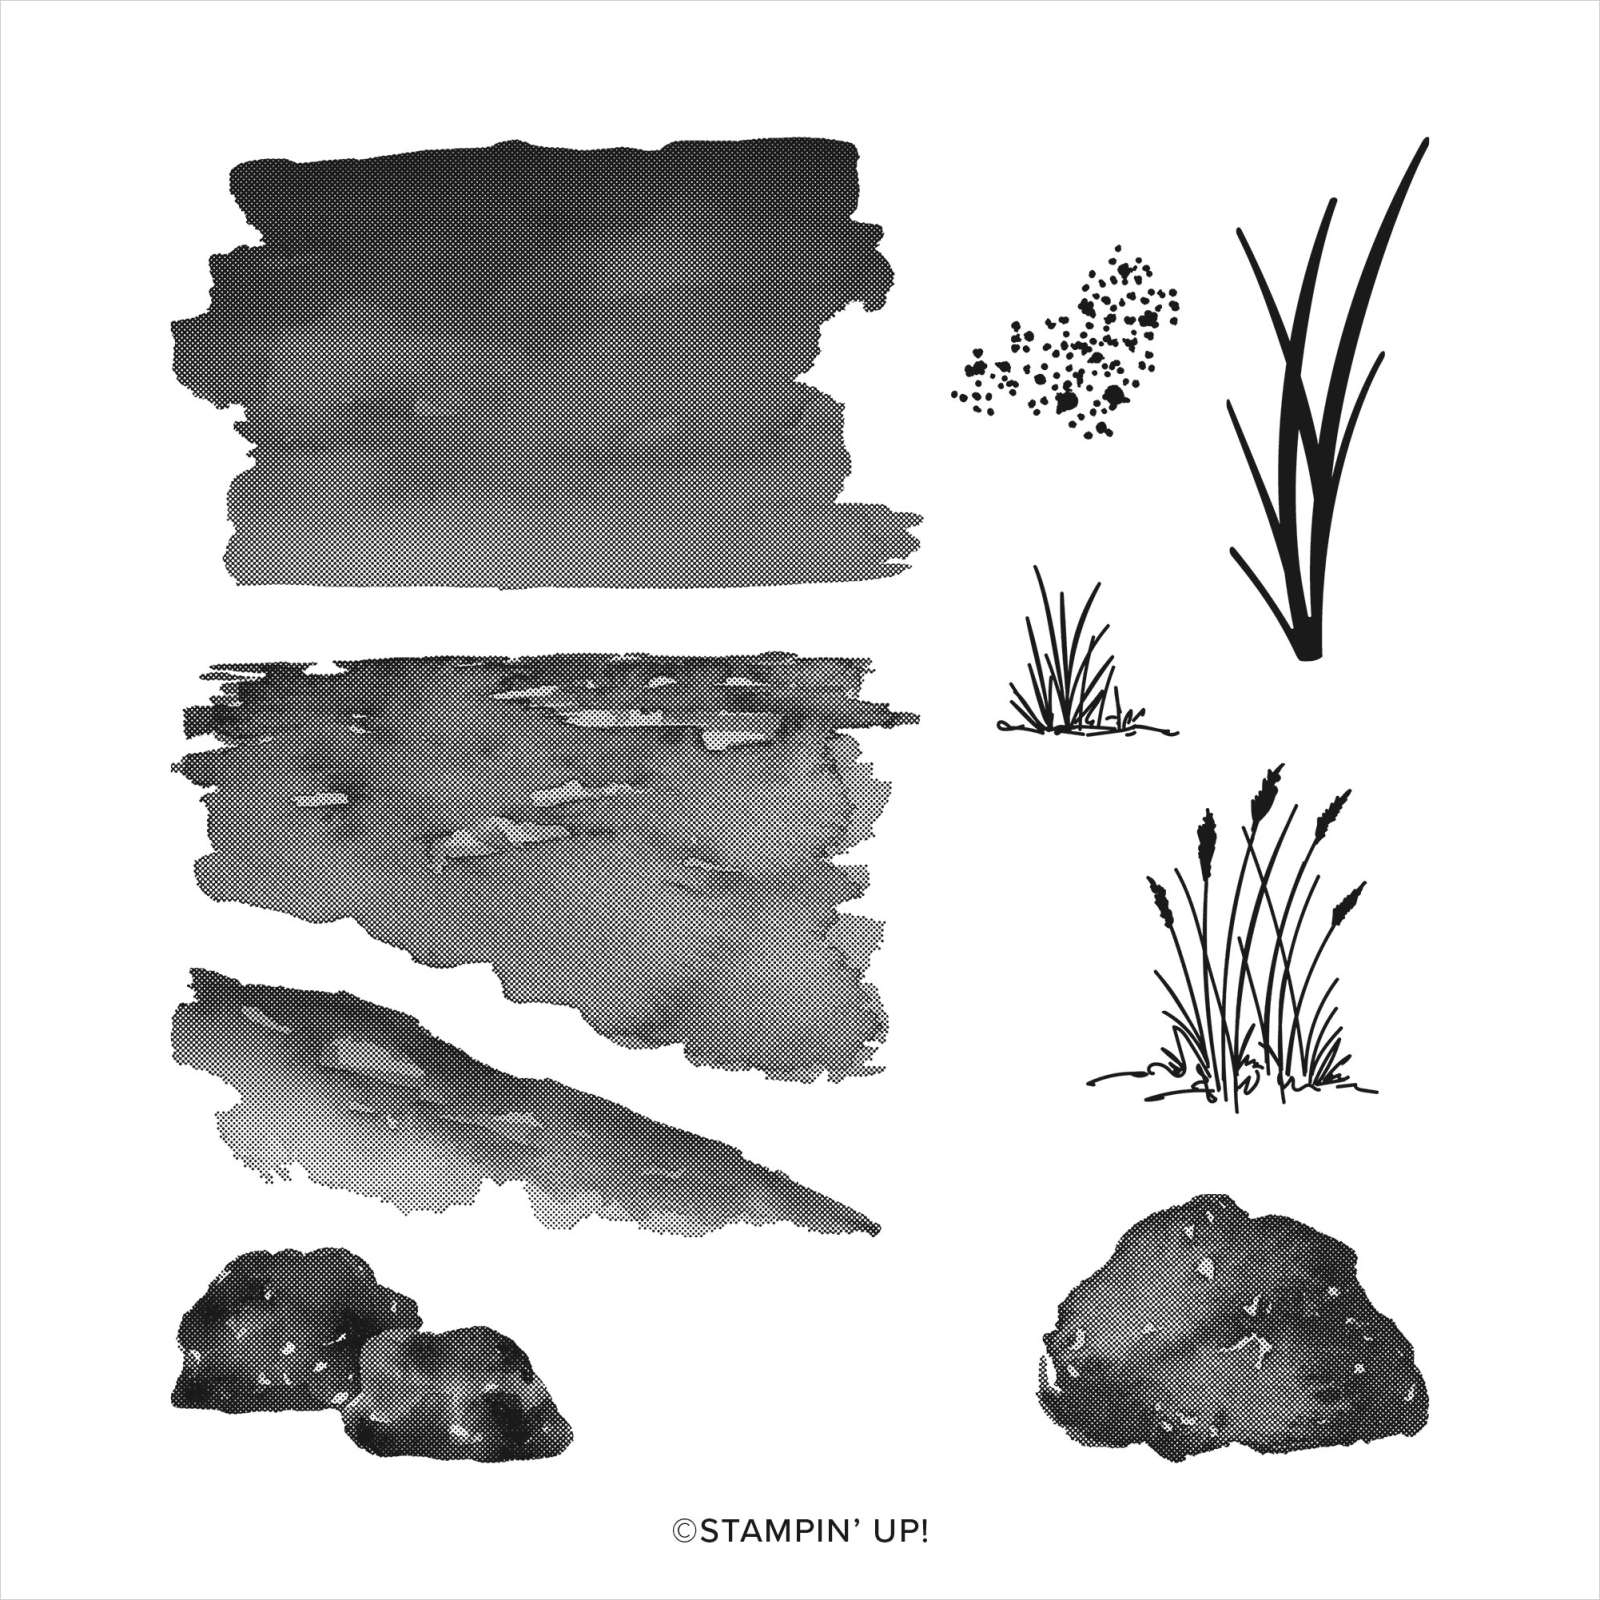
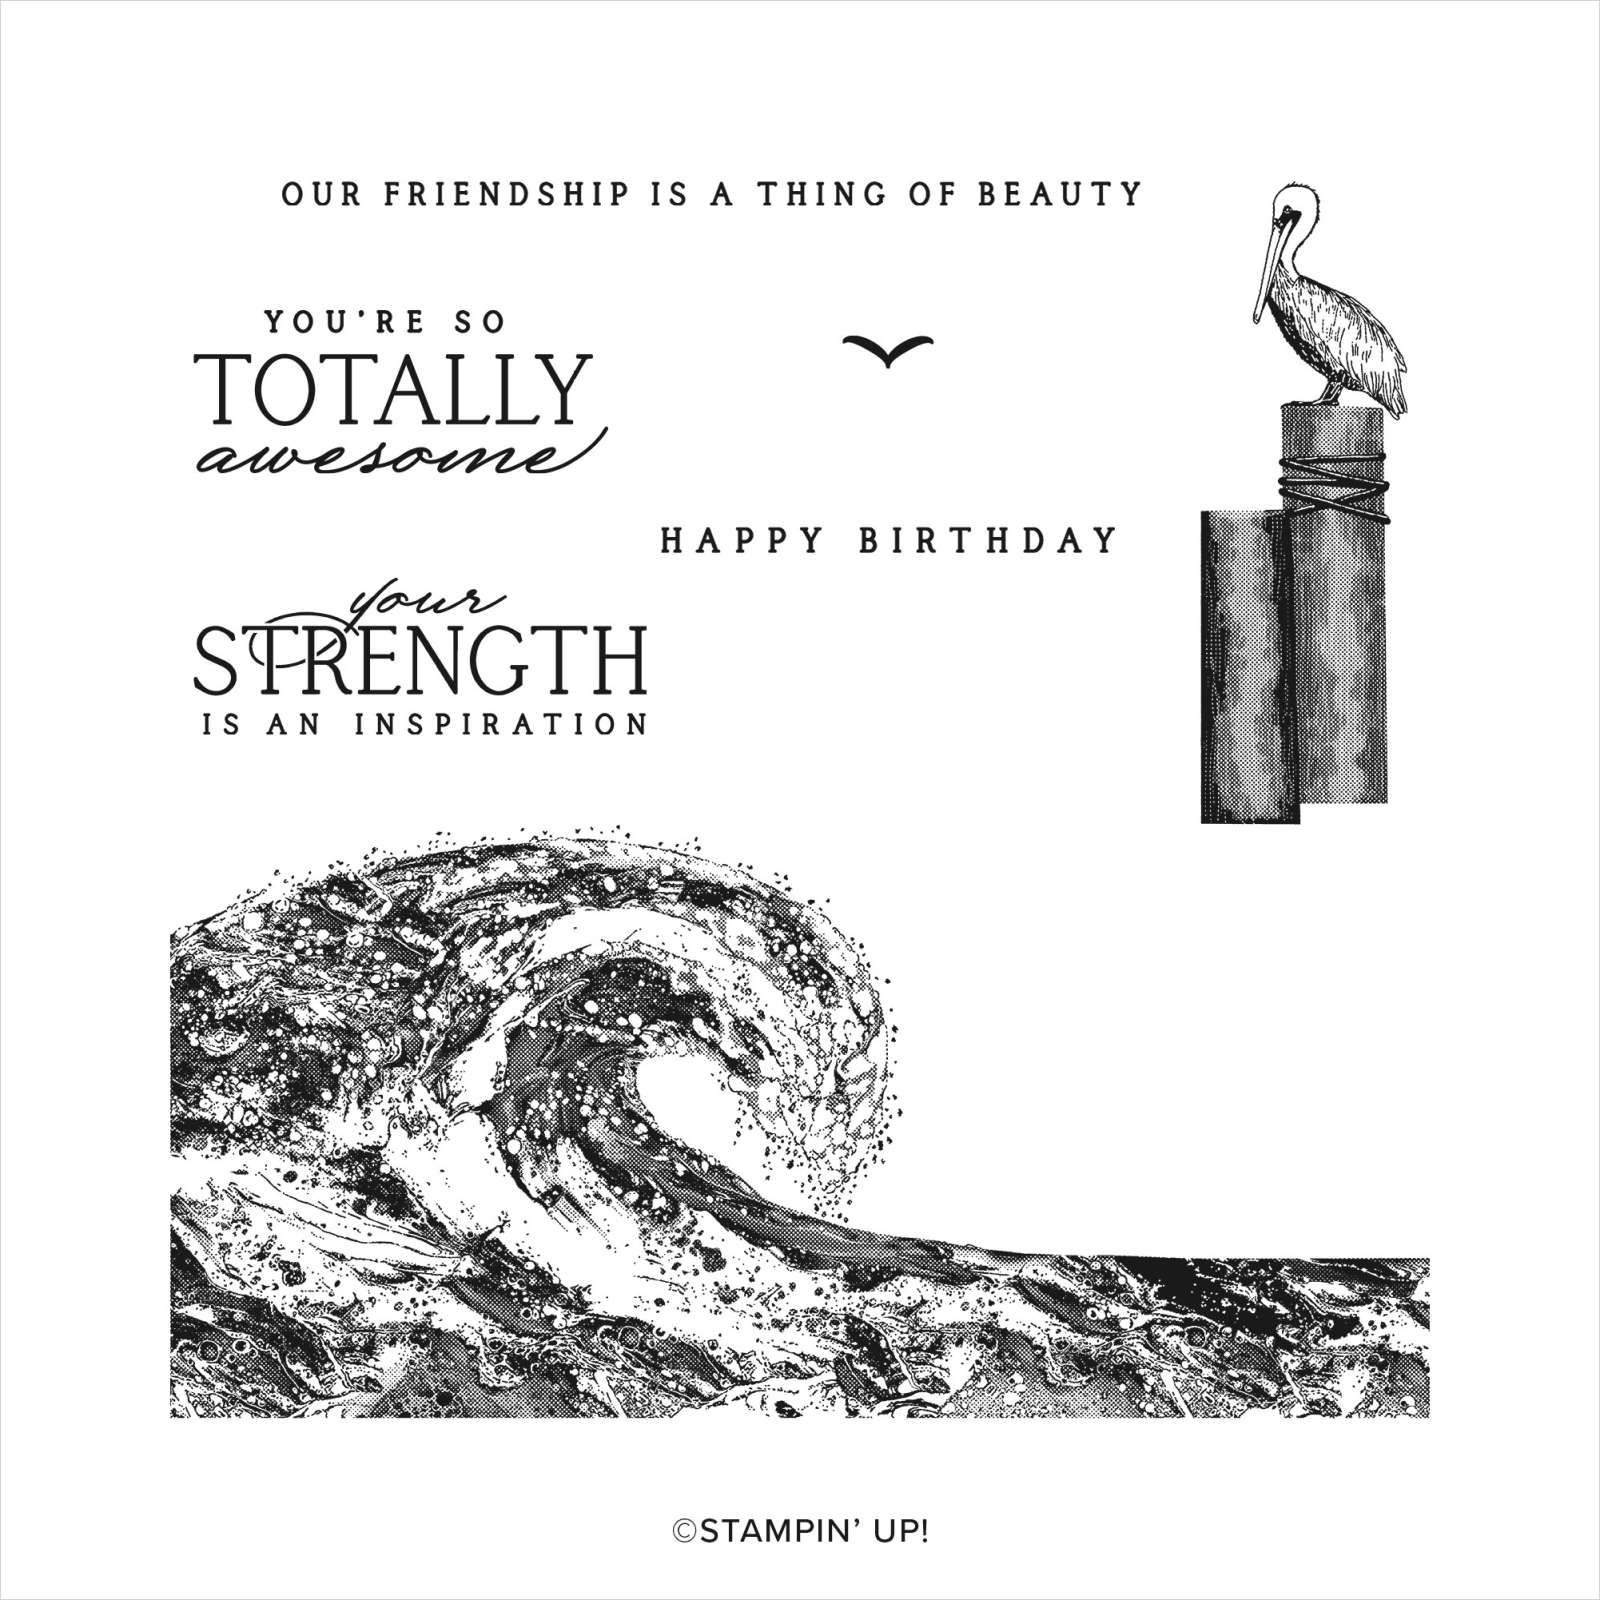
Today’s card is one I created using some new and some old product from the current Annual Catalogue. I decided not to buy the Countryside Inn Suite or the Countryside Corners Bundle. However, I did purchase the Countyside Corners Dies. I love they way they layer and just know that I will use them a lot. (Edited to note: I did succumb as you could see by my cards last week!) I decided to use the Oceanfront stamp set and stamped the sand image across Basic White card using Crumb Cake ink. I stamped the sea image from the stamp set using Boho Blue ink. I stamped the sky using the same ink but I stamped onto scrap paper first. I stamped the large rock and the double rock images from the same stamp set using Crumb Cake ink. I masked the large rock and stamped the large grass image using Pebbled Path ink.
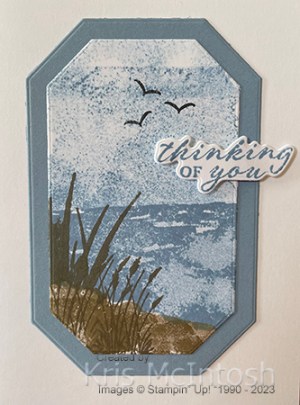
I removed the mask and stamped the smaller grass image from the Oceanfront stamp set twice using Pebbled Path ink. I stamped three birds onto the sky using the bird image from the Waves of Inspiration stamp set using Memento Tuxedo Black ink. I cut out the image using the third largest Countryside Corners Die.
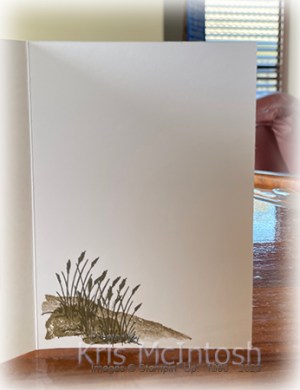
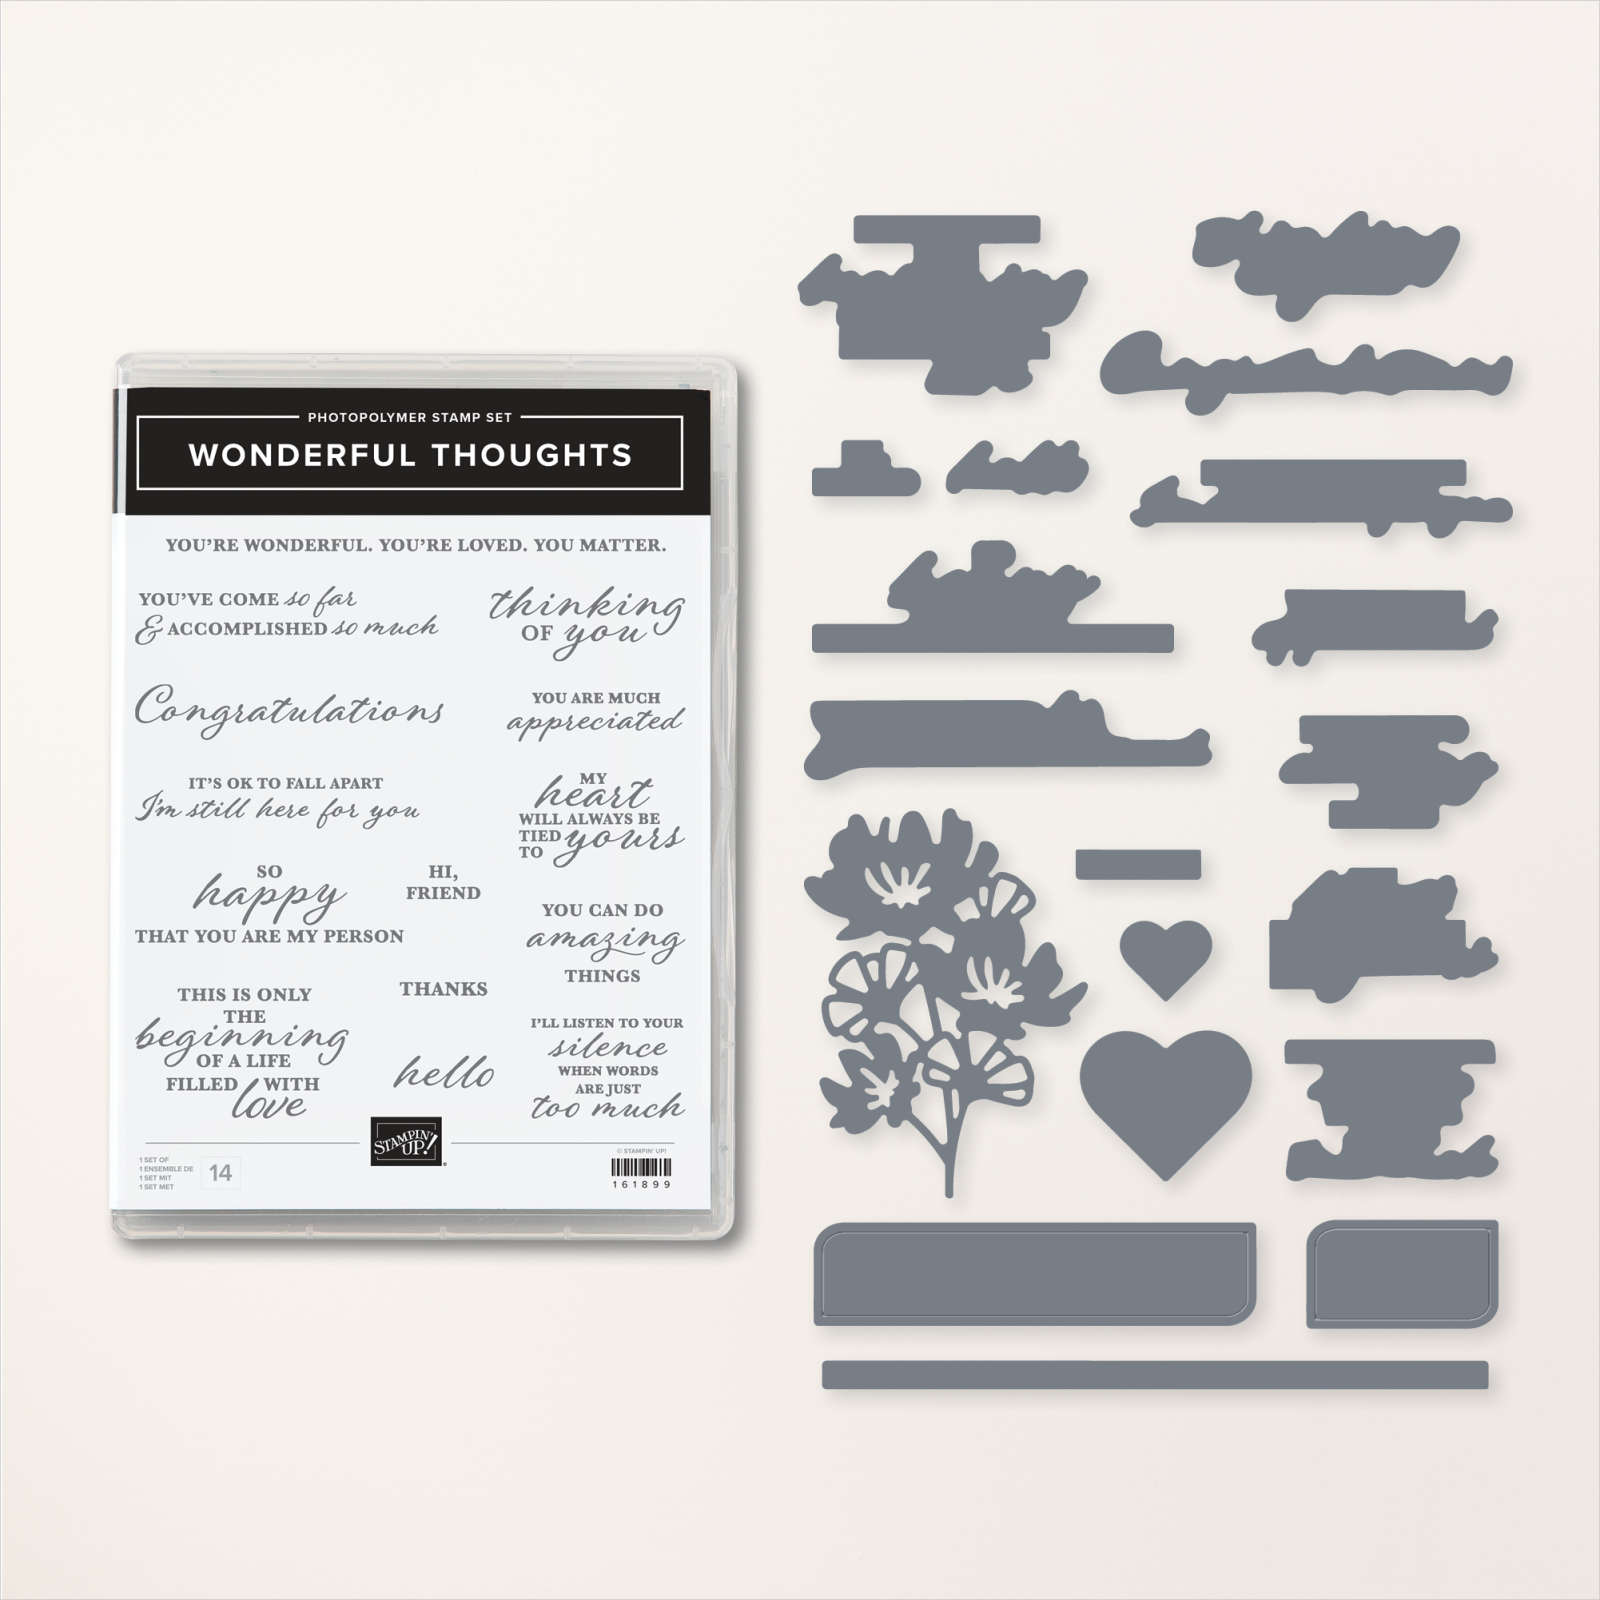
I attached the image to Boho Blue card cut using the second largest die from the Countryside Corners Dies before attaching the whole panel to scored and folded Thick Basic White card. I stamped the greeting from the Wonderful Thoughts stamp set onto Basic White card using Boho ink and cut it out using the co-ordinating Wonderful Thoughts Die. I attached the greeting to the card front using dimensionals. To decorate the inside of the card, I stamped the sand and double rock images from the Oceanfront stamp set on the lower left hand corner of the inside of the card using Crumb Cake ink. I stamped the small grass image from the same stamp set three times using Pebbled Path ink.
I just love the look of these dies, don’t you?
Bye for now,
Kris
Product Used:


Bonus Days

From the 6th July to the 31st July place an order of $90.00 with Stampin’ Up! and you will earn one $9.00 bonus coupon to spend from the 1-31st August. What a great deal for customers (and demonstrators too). We can spend this month and then get a discount when we spend next month. So when you place a qualifying order you will receive an email with the coupon code or codes (depending on how much you spend) which you need to keep so that you can claim them back on your orders in August.
So get out those wish lists and see what you need. Then from the 6th July place your orders. If you don’t have a demonstrator and you live in Australia then please feel free to shop at my online store.
Bye for now,
Kris


