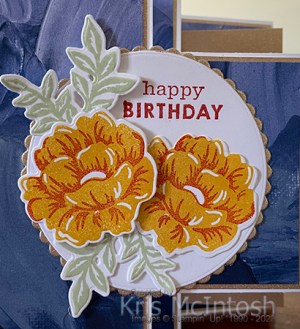
Candle Birthday

Today’s card is a case of this one on Pinterest by Jenny Maier. I embossed a panel of Crushed Curry card using the polka dot folder from the Basics 3D Embossing Folders which are an Online Exlusive item from Stampin’ Up!. I attached the embossed panel to Smoky Slate card and then scored and folded Rich Razzleberry card. I cut a circle from Basic White card using the largest circle from the Stylish Shapes Dies. I also used the die from the Sentiment Silhouette Dies to cut the circle before attaching it to the card front using dimensionals..

I die cut three solid candles from Basic White card using the Sentiment Silhouette Die and three candle flames from Crushed Curry using the same dies. I cut two detailed candles from Blackberry Bliss card and one from Rich Razzleberry card using the Sentiment Silhouette Dies.
I attached the detailed candles to a solid candle and then attached the candle flame. I used mini dimensionals to attach the candles to the die cut circle. I stamped the greeting from the Charming Sentiments stamp set onto Basic White card using Blackberry Bliss ink and cut it out using the co-ordinating Sentiment Silhoutte Die. The greeting is attached to the circle using dimensionals. To decorate the inside of the card, I stamped the greeting from the Charming Sentiment stamp set onto Basic White card using Blackberry Bliss ink. I love the finished result, so thanks to Jenny for the inspiration. What about you, do you like it too?
Bye for now,
Kris
Product Used:


Sailing
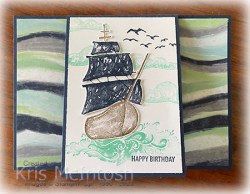
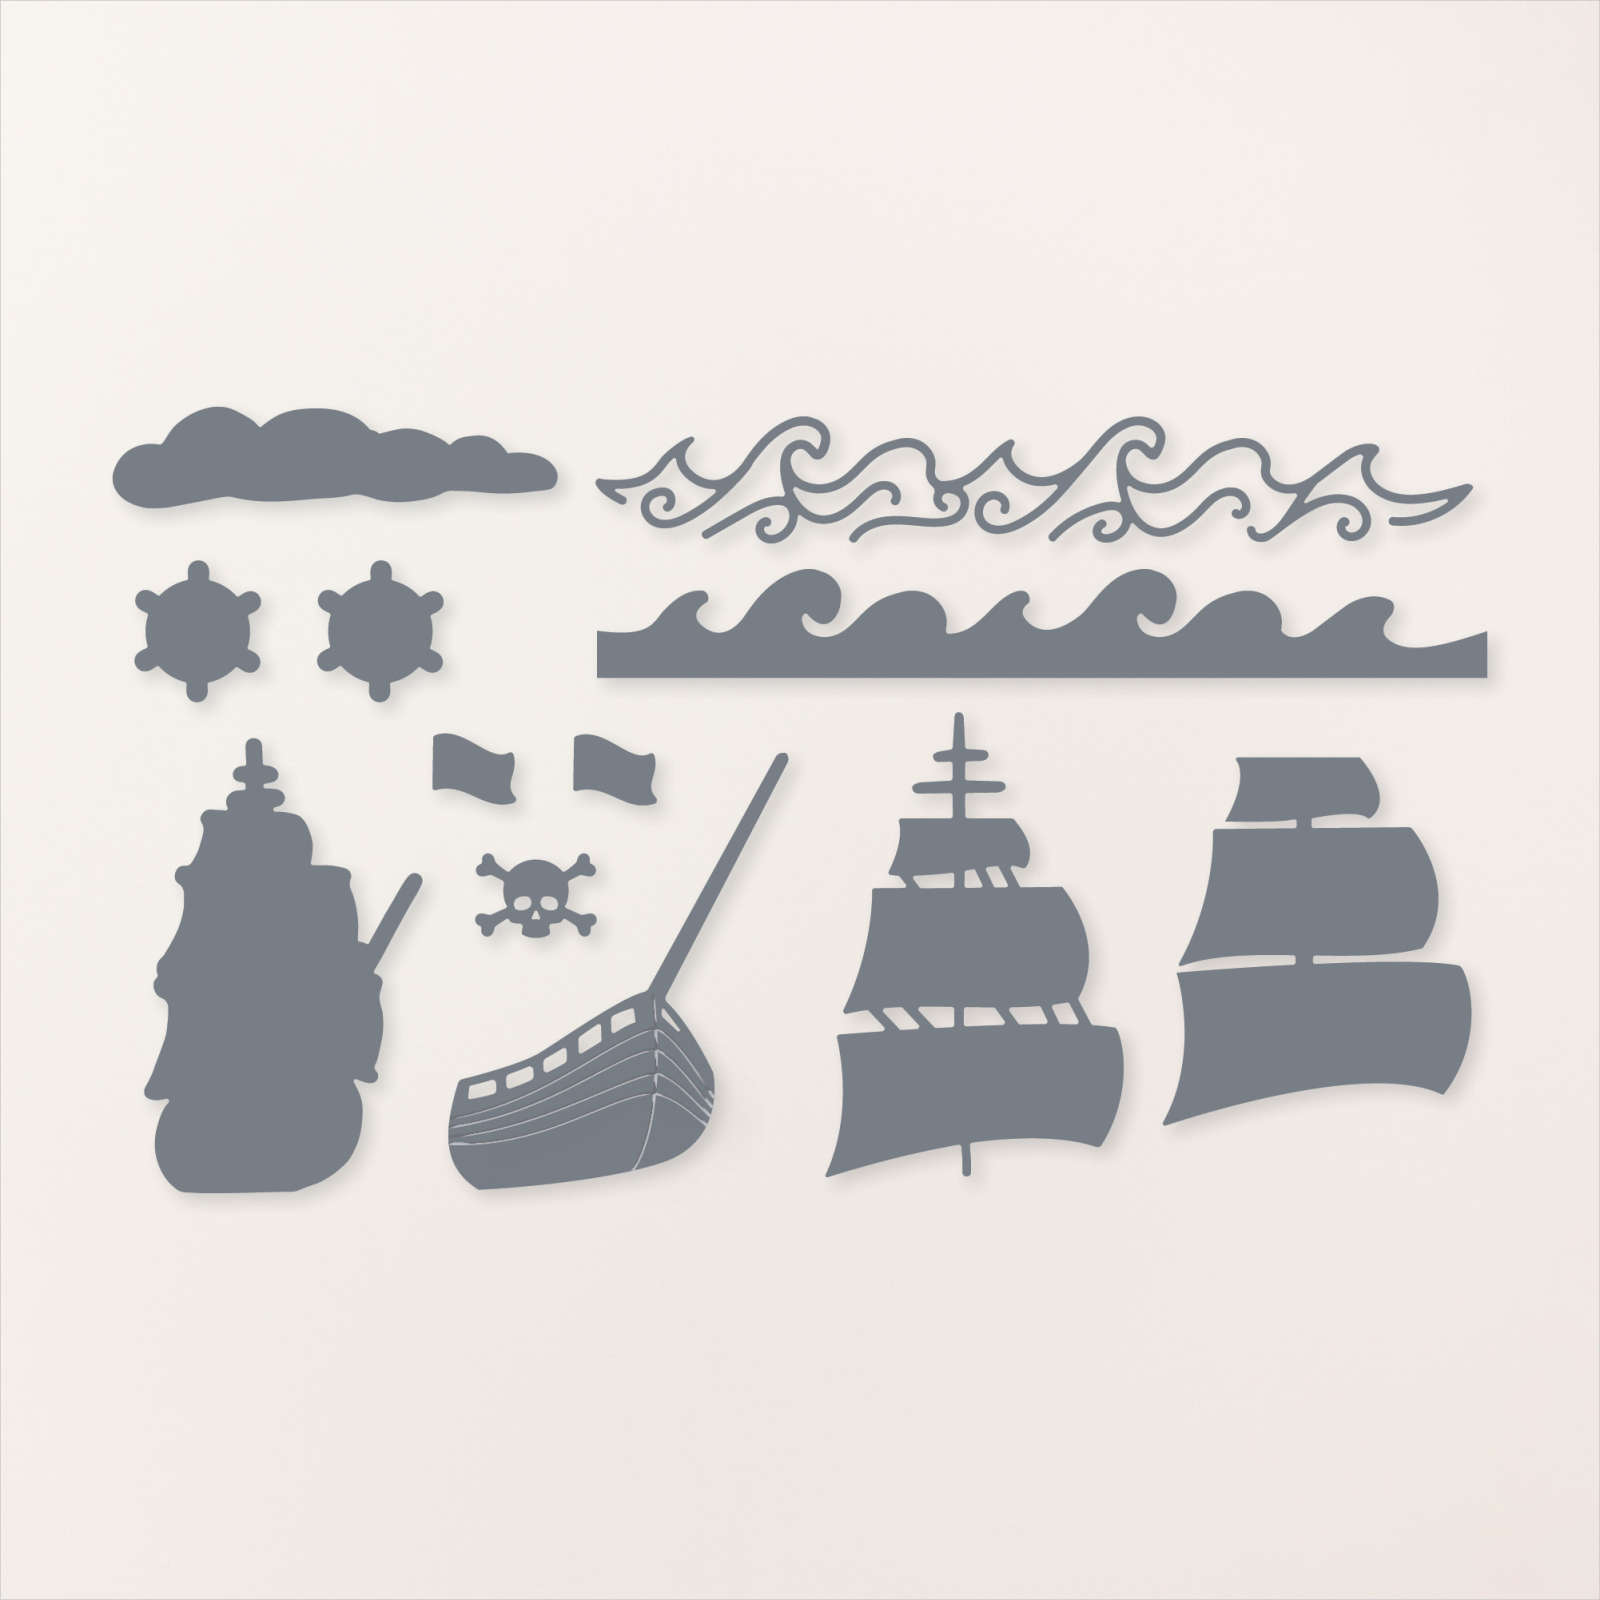
Today’s card uses the On The Ocean stamp set. This is a fun set which has carried over to the next Annual Catalogue. The stamp set has co-ordinating On The Ocean Dies. I attached a piece of the By The Bay 6″ x 6″ Designer Series Paper (retiring at the end of April) to a card base cut from Night of Navy card. I cut the central folding section from Night of Navy card and attached it over the centre of the Designer Series Paper panel.
To decorate the front of the card I stamped the ocean image from the On The Ocean stamp set onto the bottom of Basic White card using Coastal Cabana ink. I also stamped the cloud image from the same stamp set using the same ink which I stamped onto scrap card first. I stamped the bird image from the On The Ocean stamp set using Night of Navy ink. I stamped the ship image onto Basic White card using Soft Suede ink and again using Night of Navy ink. I cut out the whole ship stamped in Soft Suede ink using the co-ordinating On The Ocean Die. I cut the sails from the Night of Navy image and attached them over the Soft Suede image. The ship is then attached to the card front. Lastly I stamped the greeting from the On The Ocean stamp set onto the lower right hand corner of the stamped panel using Night of Navy ink.
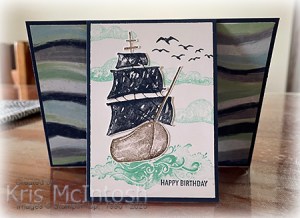
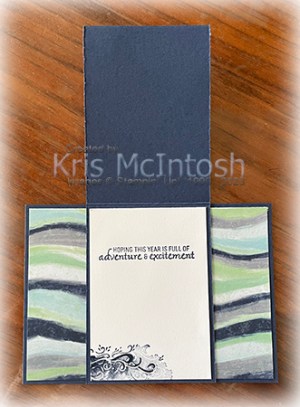
The whole panel is attached to the front of the small Night of Navy folding card. To decorate the inside of the card, I stamped the greeting from the On The Ocean stamp set onto Basic White card using Night of Navy ink. I also stamped the sea image from the same stamp set onto the lower left hand corner using Night of Navy ink. I love how this card turned out and I love that I can use the Designer Series Paper from a different collection with this stamp set. I’d love to hear what you think.
Bye for now,
Kris
Product Used:


In The City

I have had this photo of Sarah’s children for a long while and just love it. They had travelled into the city with their Dad to meet Sarah after work. I think the photo is taken in the Botanic Gardens. I attached a piece of the retired Heart & Home 12″ x 12″ Designer Series Paper to the upper left hand corner of a Basic White 12″ x 12″ page. I cut a piece of retired In Good Taste 12″ x 12″ Designer Series Paper into a banner and attached it the left hand side of the page. I attached another piece of In Good Taste Designer Series Paper across the centre of the page before attaching another banner cut from the same Designer Series Paper. I attached the photo to Basic White card and then another piece of In Good Taste Designer Series Paper before attaching it to the page. I printed my journaling onto Basic White card, fussy cut it and attached it below the photo. No journaling on this one just an approximate hand written date. I love how this page turned out, don’t you.
Bye for now,
Kris
Product Used:

Carry over Product

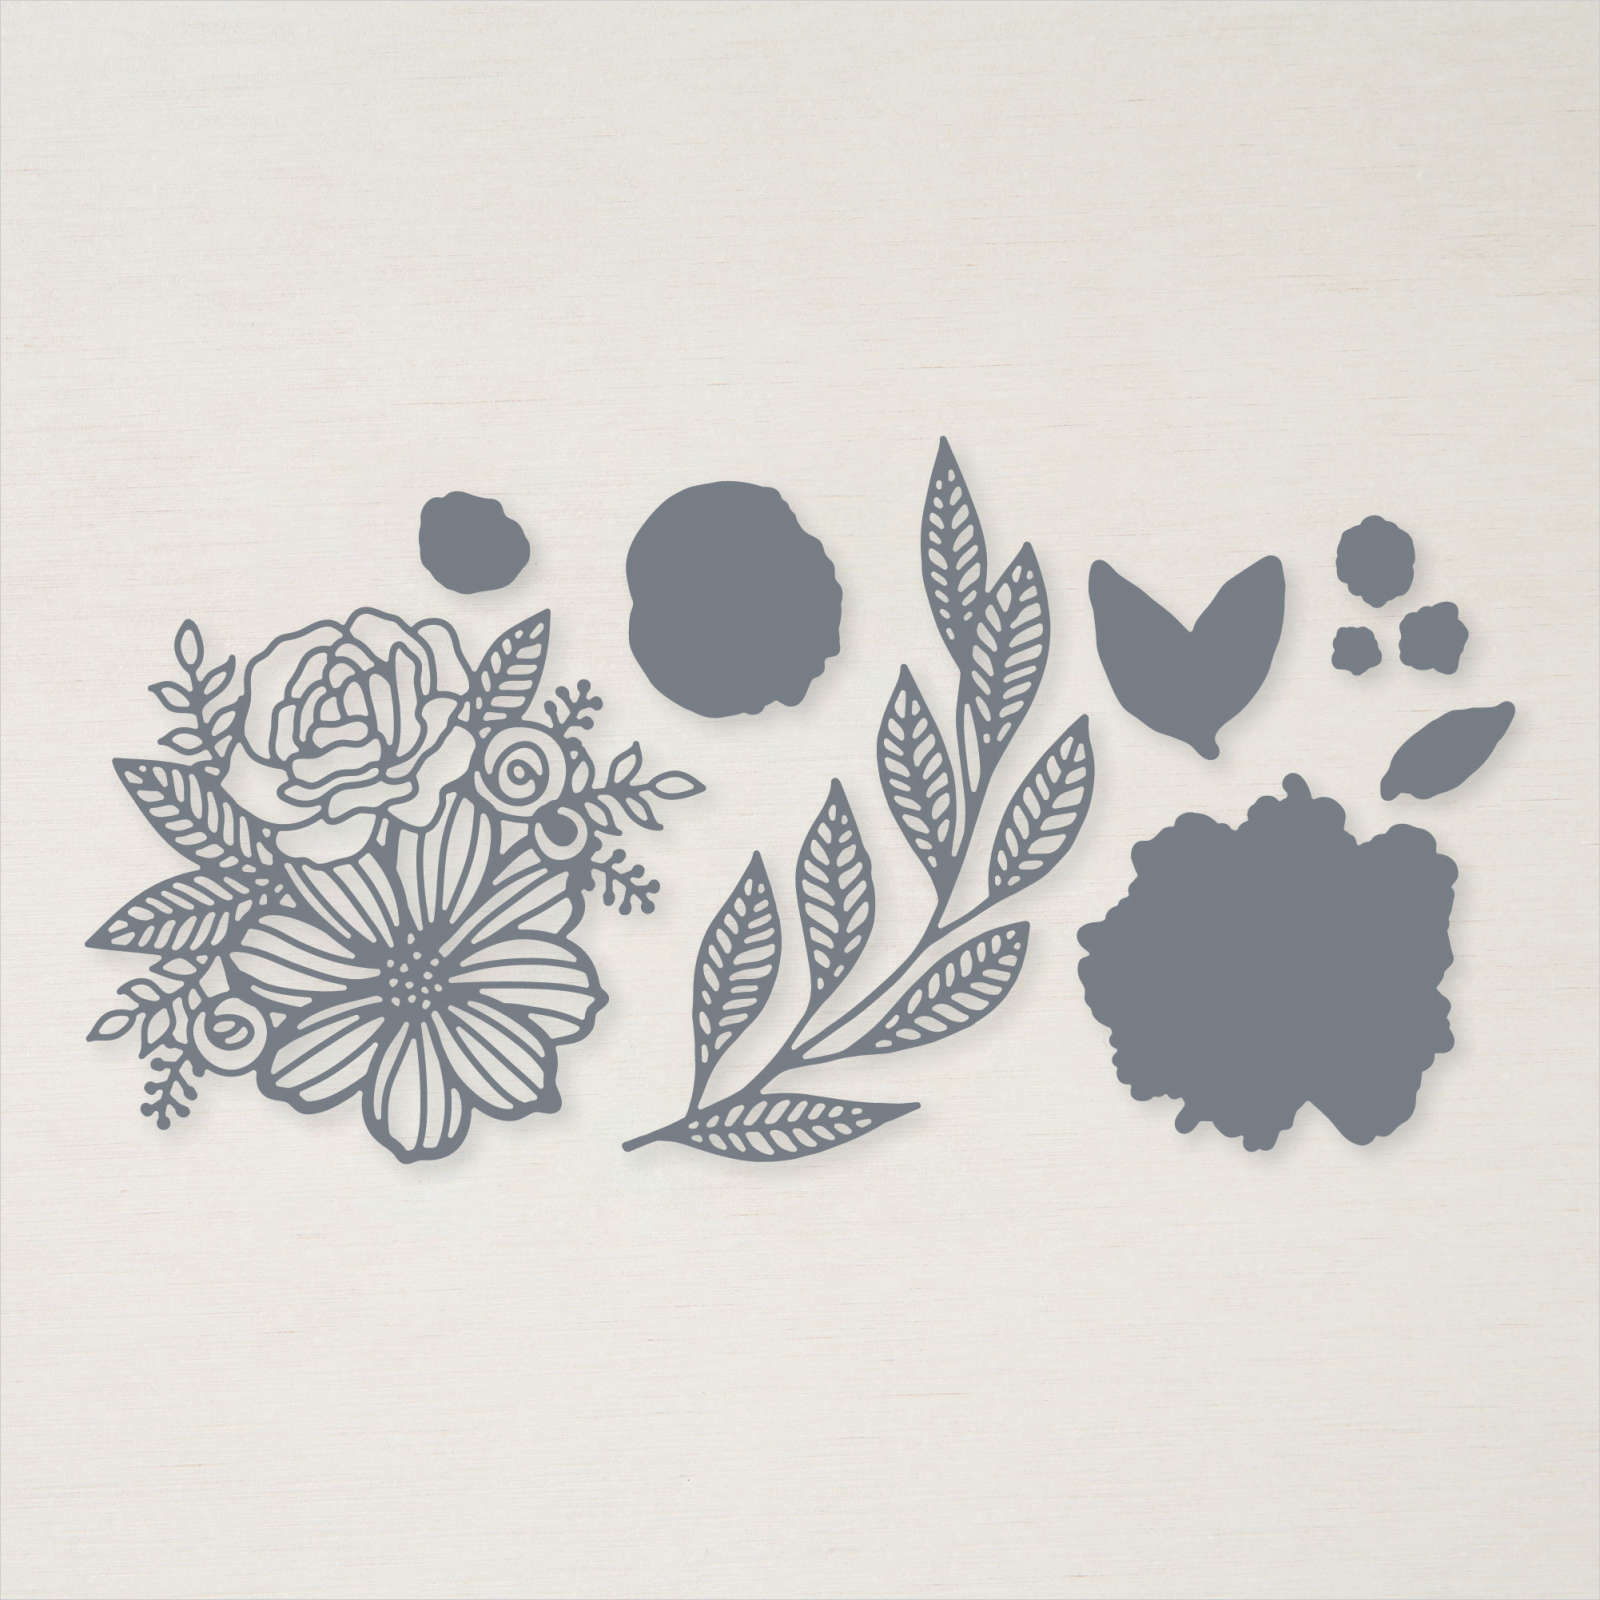
Today I have some cards to share with you that I made using the Artistically Inked stamp set, the Artistic Dies and the 2022-2024 In-Colours. These products can all be found in the new Annual Catalogue. I cut one long edge of Basic White card using one of the Elegant Border Dies. These dies can be found in the Online Exclusive category in my store. I stamped the large flower and the flower centre from the Artistically Inked stamp set onto Basic White card using Sweet Sorbet ink.

I stamped two of the smaller flowers from the Artistically Inked stamp set onto Basic White card making sure to stamp onto scrap paper first. I also stamped two sets of leaves from the Artistically Inked stamp set onto Basic White card using Parakeet Party ink.

I cut all of these images out using the co-ordinating Artistic Dies. I added the flower centre to the large flower using mini dimensionals before layering the flowers and leaves onto the Basic White card. I stamped the greeting from the Artistically Inked stamp set beside the flowers using Sweet Sorbet ink. I attached the Basic White card to Sweet Sorbet card and then scored and folded Thick Basic White card. I tied a bow in the Sweet Sorbet Metallic Woven Ribbon and attached onto the card front. To decorate the inside of the card, I stamped the flowers and leaves onto the lower left hand corner of Basic White card using Sweet Sorbet and Parakeet Party ink. Because I wanted to show all of the 2022-2024 In-Colours, I made a card using each of the other four colours – Parakeet Party, Tahitian Tide, Starry Sky and Orchid Oasis.
I am glad we have another year to play with these colours and products, aren’t you? I’d love to hear what you think of my cards.
Bye for now,
Kris
Product Used:


Tri-fold card variation

Yesterday on my Facebook Live, I shared some cards made using instructions I found on Maria’s Crafting Corner. It is a fun fold to play with and just slightly stepped up from a traditional tri-fold card. I cut my card base from Basic White 12″ x 12″ card following Maria’s instructions. I added layers of Gold Fine Shimmer Paper and Fancy Flora 6″ x 6″ Designer Series Paper to each panel. To decorate the front of the card, I cut Basic White card using the largest circle from the Layering Circle Dies and Gold Fine Shimmer Paper using the largest scalloped circle.
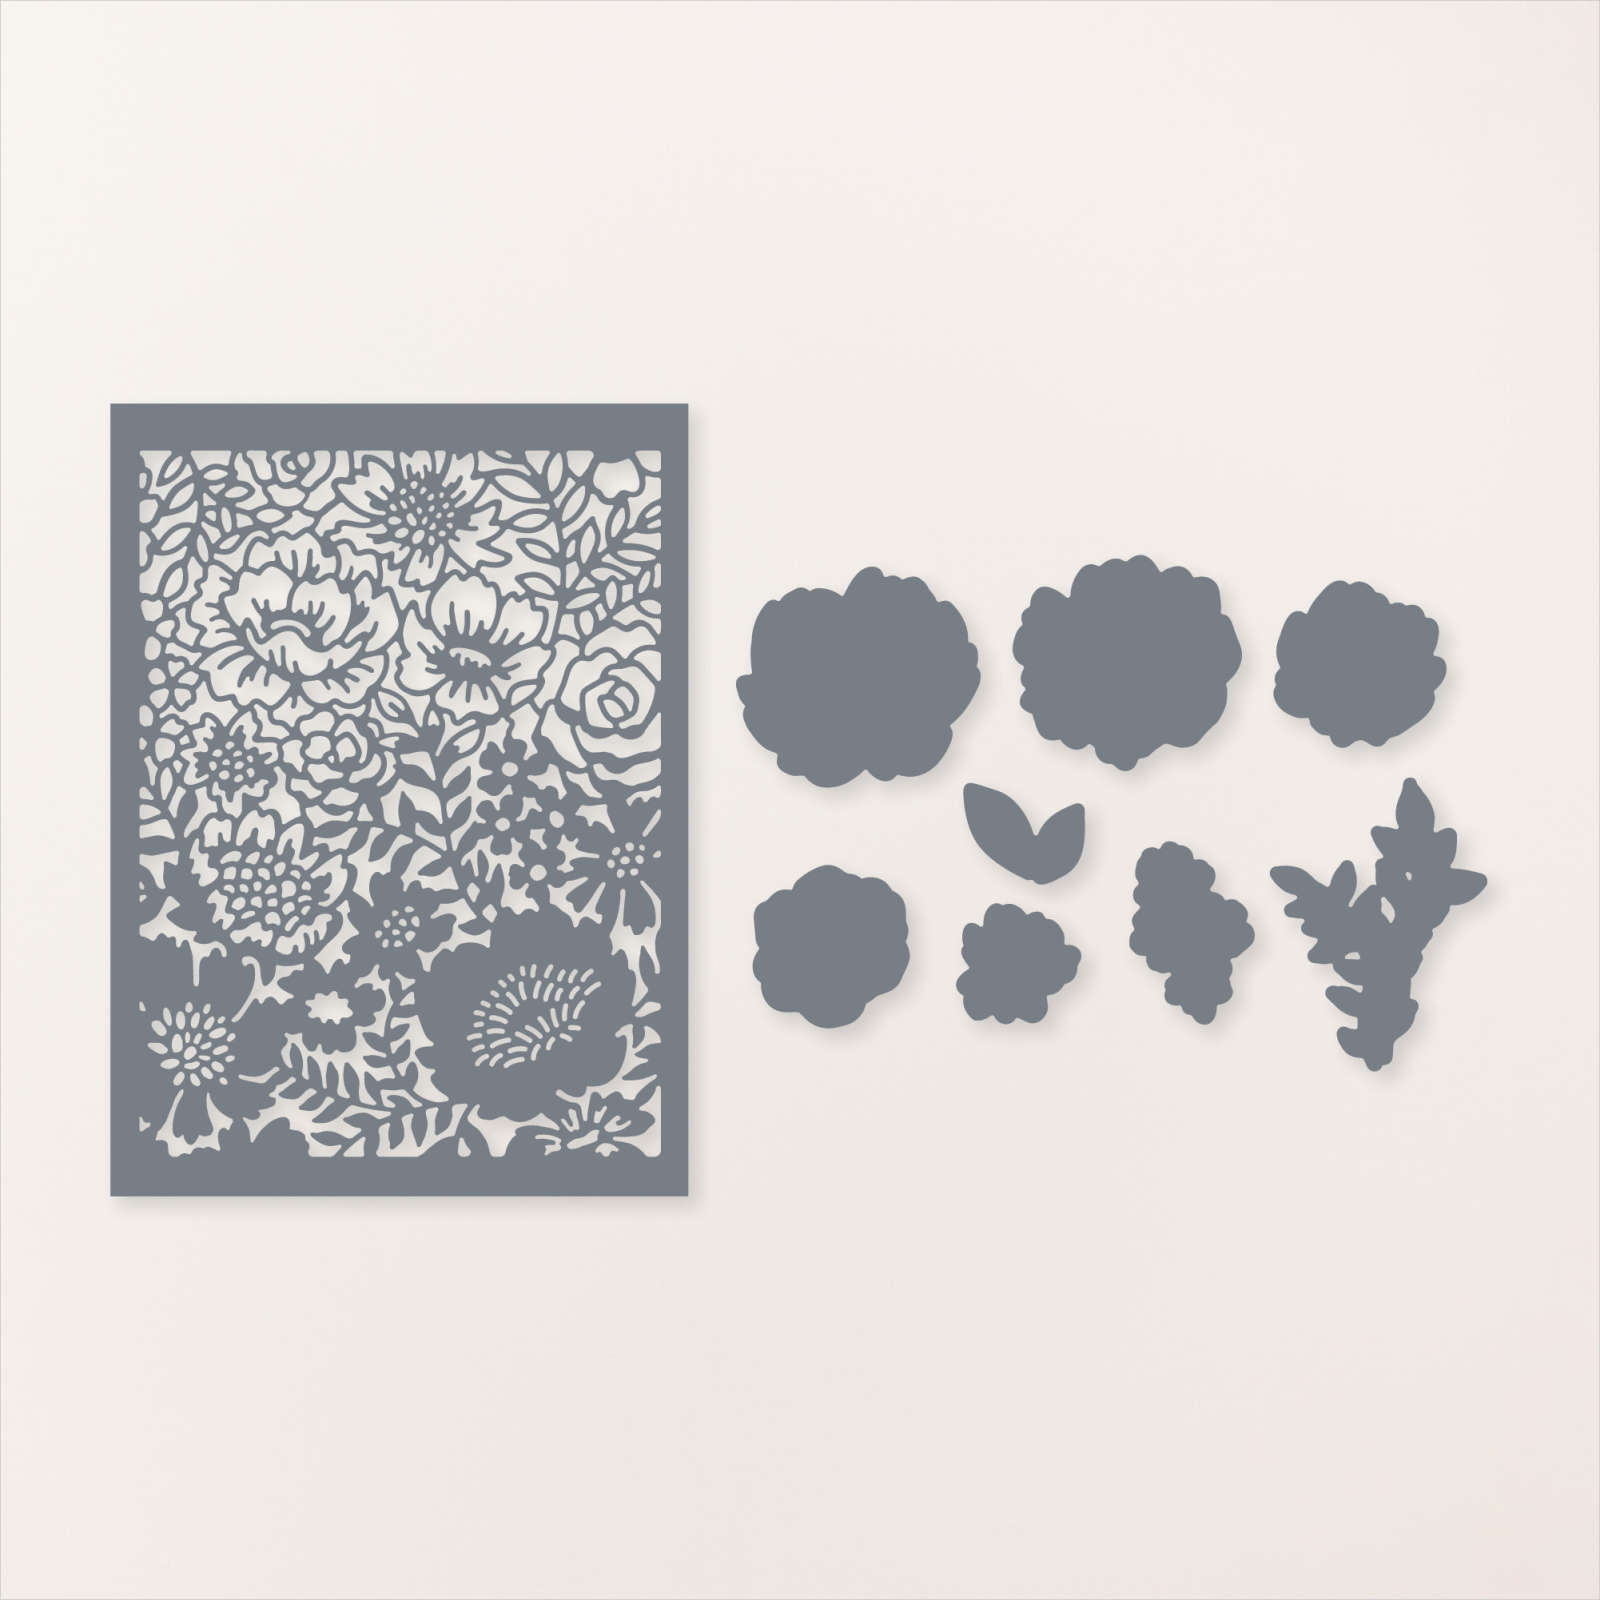
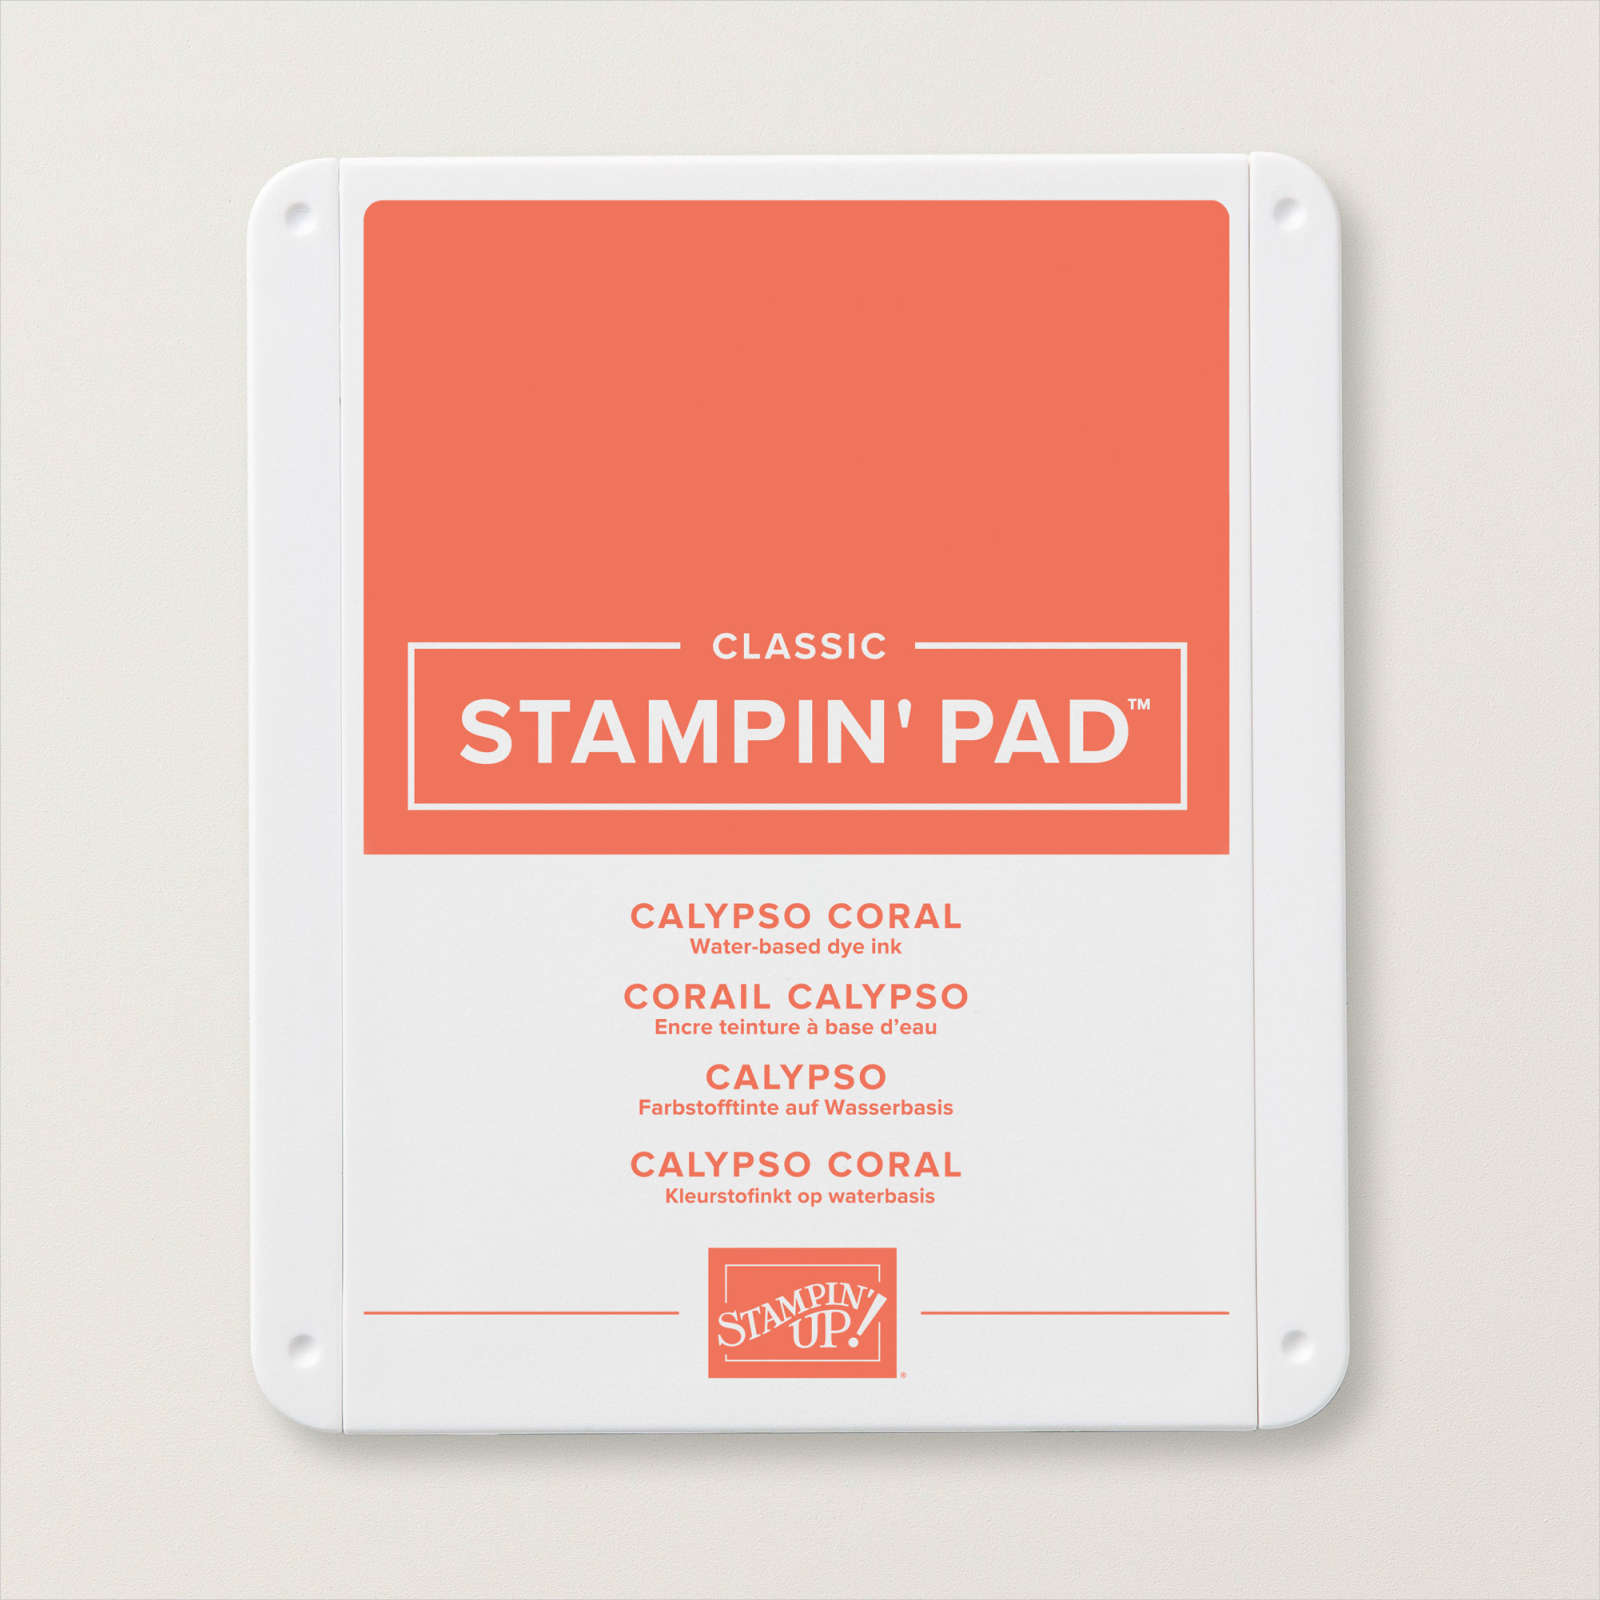
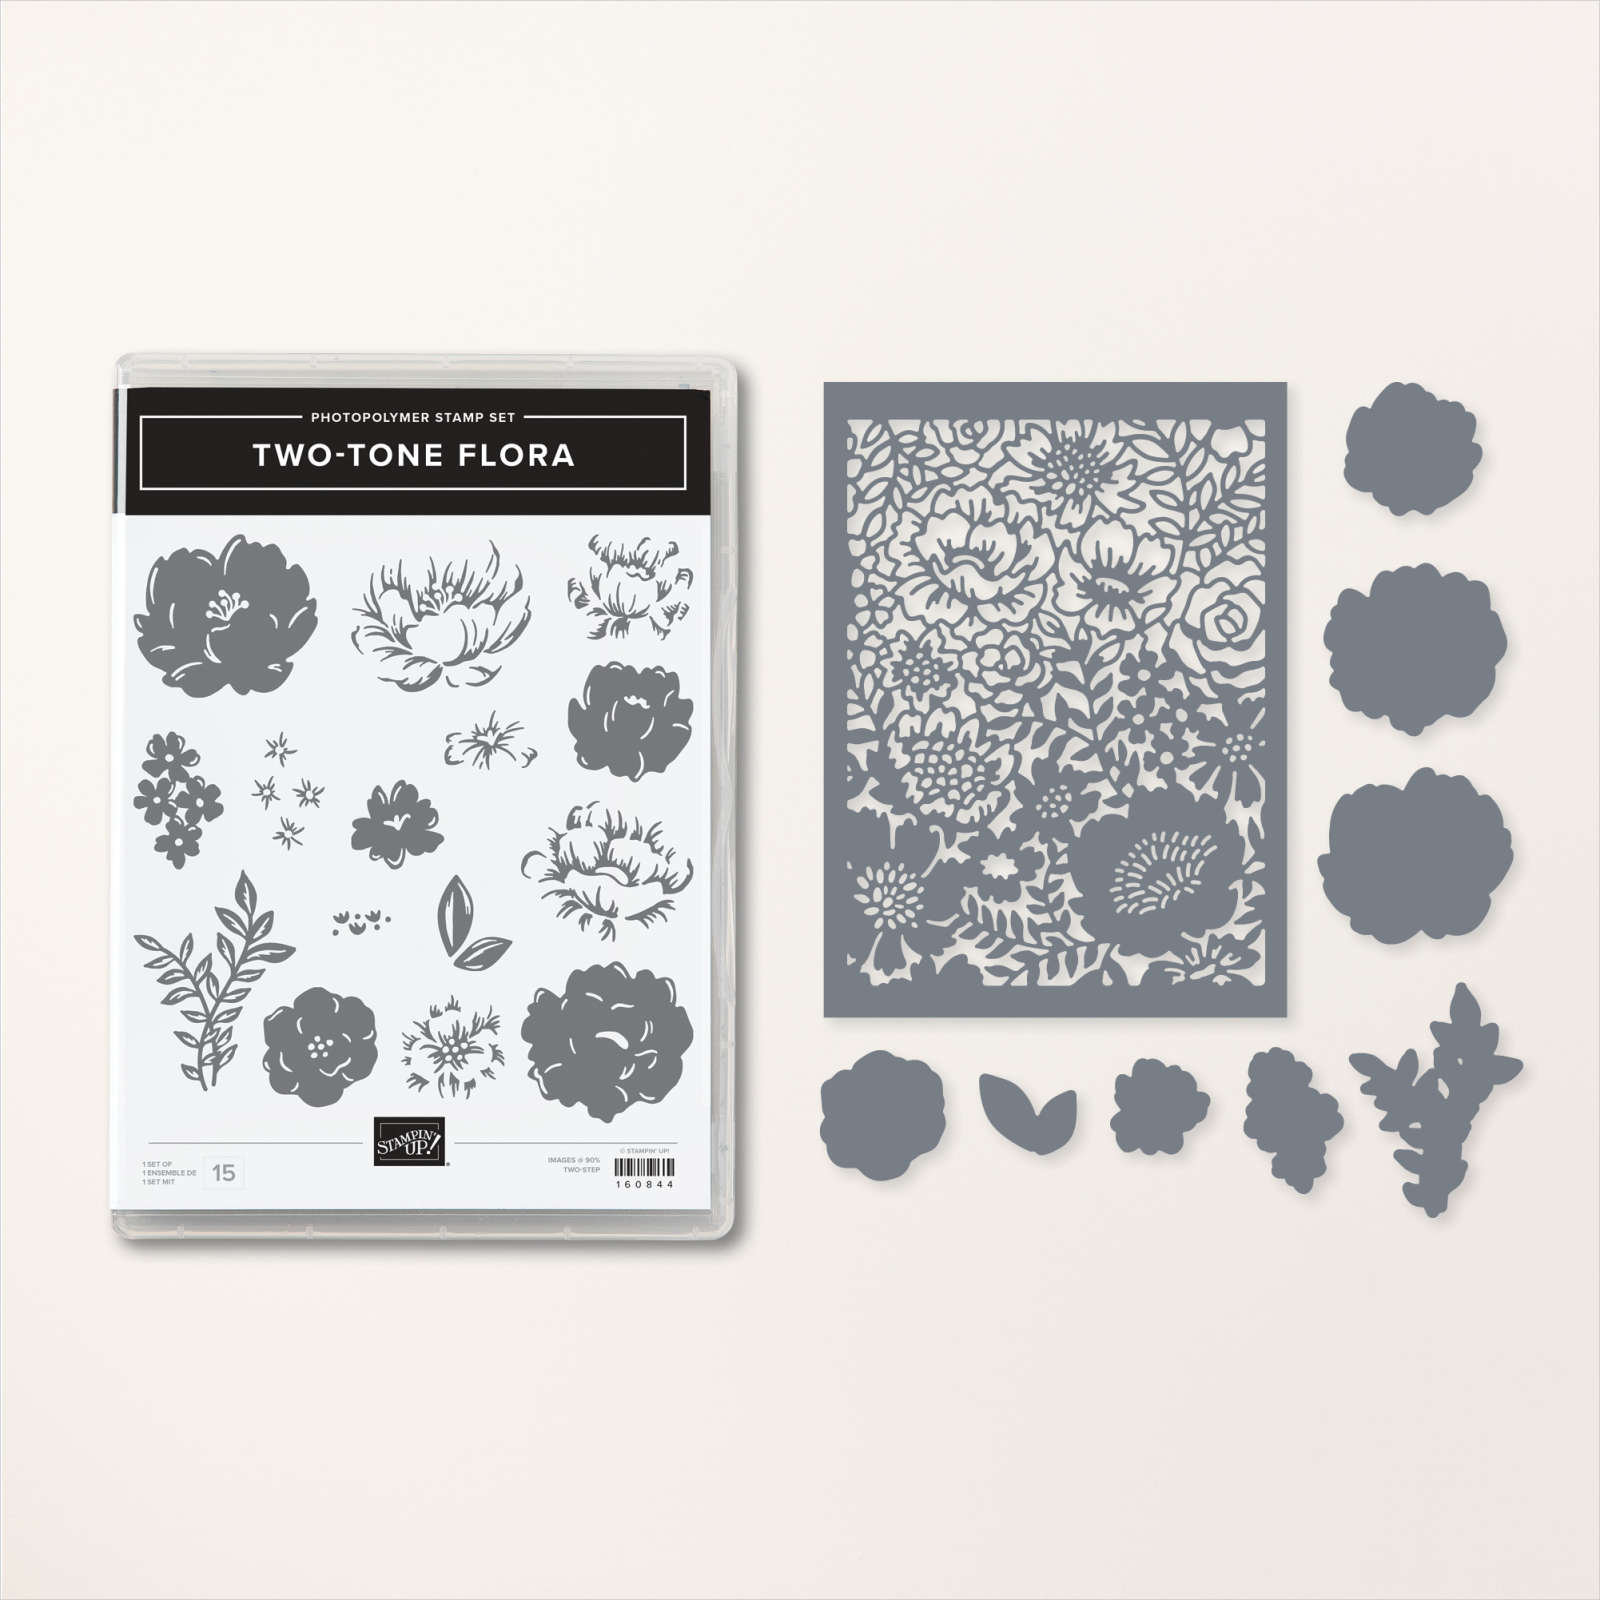
I stamped the greeting from the Enjoy The Rhythm stamp set onto the Basic White circle using Calypso Coral ink. I attached the circles together and attached them to the card front. I stamped the solid flower from the Two-Tone Flora stamp set onto Basic White card four times using Daffodil Delight ink.

I stamped the detailed floral image over the top using Calypso Coral ink. I stamped the leaf image from the Two-Tone Flora stamp set four times onto Basic White card using Soft Sea Foam ink. All of the images were cut out using the co-ordinating Two-Tone Flora Dies. I attached two flowers and two leaves to the stamped Basic White circle. One flower and leaf is attached using dimensionals. I created the second folding panel from the Gold Fine Shimmer Paper. I stamped a greeting from the Charming Sentiments stamp set onto the inside using Calypso Coral ink before attaching the panel to the card base. I attached the last two flowers and leaves to the front of the Gold Fine Shimmer Paper so that they don’t show when the card is closed.
What fun cards to create. I am sure I will be using this fold in the future.
Bye for now,
Kris
Product Used:


Free Shipping

Today for the day only, Stampin’ Up is offering Free Shipping on orders over $65.00. So now is the time to get busy and buy all those last minute products you really want and safe with Free Shipping. I have already placed my order, now its your turn.
Bye for now,
Kris
Flora Sympathy

Today’s card was inspired by a layout I saw online somewhere! I embossed a panel of Basic Gray card using the Painted Texture 3D Embossing Folder and attached it to the front of scored and folded Thick Basic White card. I attached a piece of Fancy Flora 6″ x 6″ Designer Series Paper over the embossed card. I cut a narrow strip of Daffodil Delight card and attached it across the front of the card using dimensionals. I cut Basic White card using the largest circle from the Layering Circle Dies and stamped the greeting from the Something Fancy stamp set using Basic Gray ink.
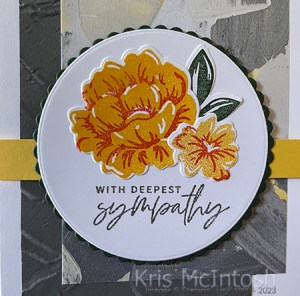
I stamped two different solid flowers from the Two-Tone Flora stamp set onto Basic White card using Daffodil Delight ink. I stamped the detailed images from the same stamp set over the top using Calypso Coral ink. I stamped the leaf image from the Two-Tone Flora stamp set onto Basic White card using Evening Evergren ink.

The flowers and leaf are cut out using the co-ordinating Two-Tone Flora Dies. I attached the flowers and leaf to the stamped Basic White circle before attaching it to an Evening Evergreen scalloped circle cut using the Layering Circle Dies. The image panel is attached to the card front using dimensionals where necessary. To decorate the inside of the card, I stamped the greeting from the Peaceful Moments stamp set onto Basic White card using Basic Gray ink. I attached a narrow strip of Daffodil Delight behind one long edge of a narrow strip of Fancy Flora Designer Series Paper and attached the panel across the bottom of the stamped Basic White card. Sympathy cards are the one card that I hate making when I need one, so it’s nice to have a few in my stash.
Bye for now,
Kris
Product Used:


Art Gallery

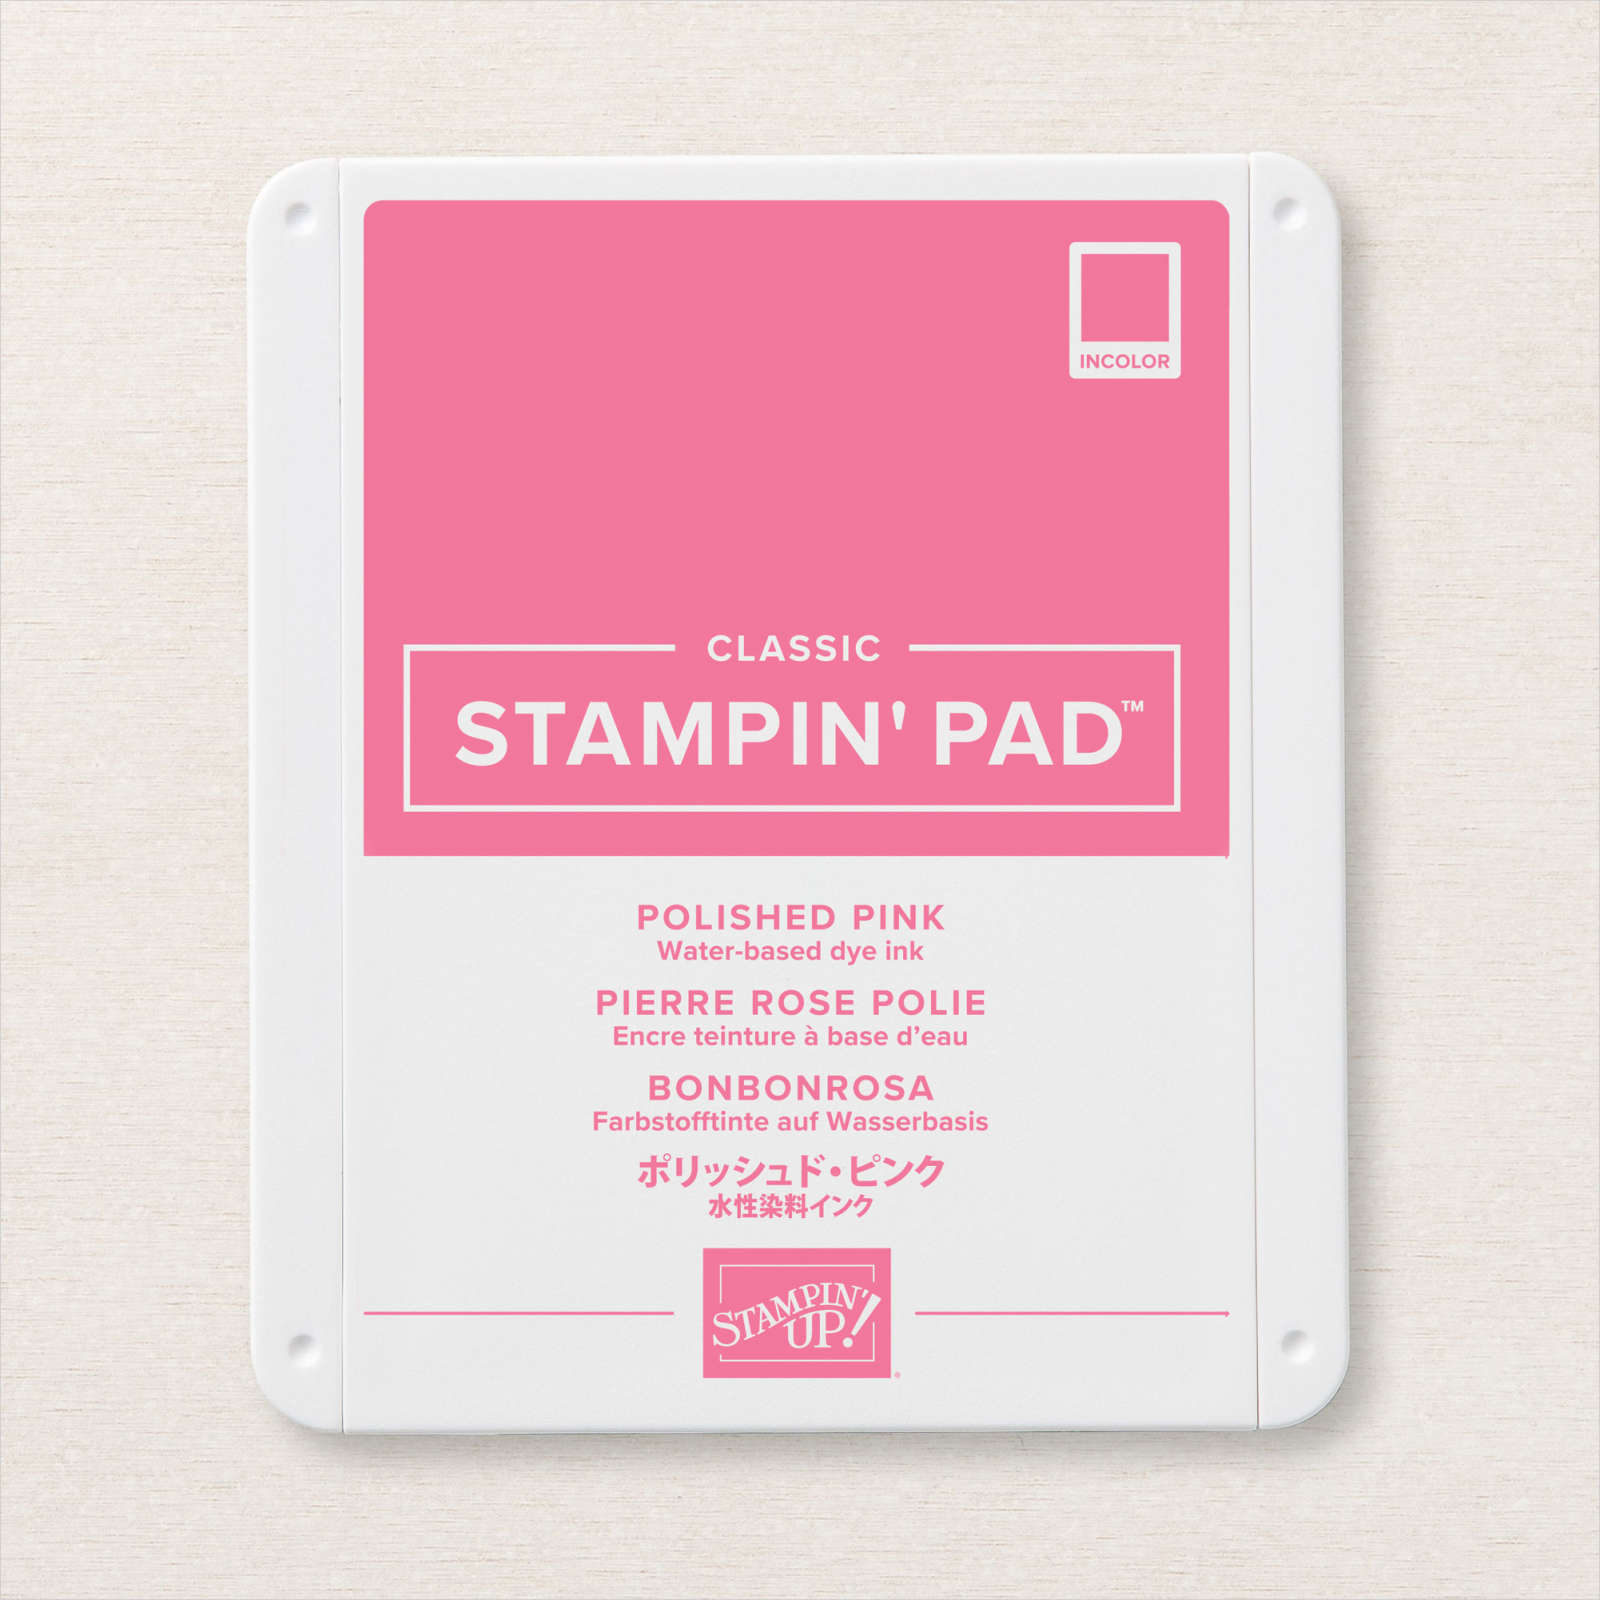
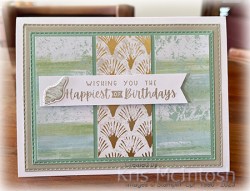
is another stamp set that is retiring at the end of April. I wanted to use this stamp set to show off the retiring In-Colours. I cut both sides of a Basic White panel using the Elegant Border Dies, which are an Online Exclusive product. I stamped the solid large flower from the Art Gallery stamp set onto the die cut panel using Polished Pink ink which I stamped onto scrap paper first. I stamped the detailed large flower from the Art Gallery stamp set over the top of the solid flower using Polished Pink ink.
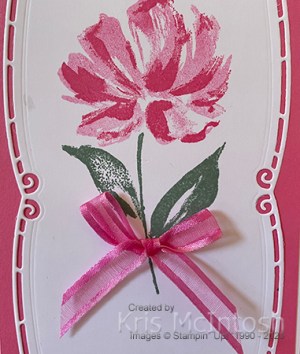
I stamped the leaf and stem image from the same stamp set using Soft Succulent ink. I stamped a greeting from the Art Gallery stamp set below the flower using Polished Pink ink. I attached the Basic White die cut panel to Polished Pink card and then scored and folded Thick Basic White card.

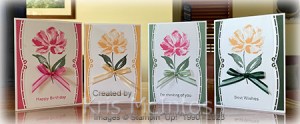
I tied a bow in a length of Polished Pink Open Weave Ribbon and attached it to the flower stem. To decorate the inside of the card, I stamped the small floral image from the Art Gallery stamp set onto the bottom of Basic White card using Polished Pink ink. I really love the finished result don’t you? Sooo, I created the same card using Pale Papaya, Evening Evergreen and Soft Succulent card, inks and ribbon. Here are all four cards together. So sorry to see these colours and this stamp set and co-ordinating Artistic Dies retiring. What about you? If you love them, you need to see what is still left to purchase.
As you can see by the list below quite a few things are already gone.
Bye for now,
Kris
Product Used:


Merry & Bright 2008

I found the photo for today’s page from my box on the shelf. I need to get more photos from this box onto pages! I cut strips from two different patterned papers using the now retired Sweetest Christmas 12″ x 12″ Designer Series Paper and used both sides of each paper. The paper strips are attached across the left hand side of a Basic White 12″ x 12″ page. I attached the photo of three of my grandchildren to the left hand side of the page. I cut the title from Basic White card using the Alphabet A La Mode Dies and attached it to the top strip of Designer Series paper.

I cut Basic White card using the largest circle from the Layering Circle Dies and attached it to the bottom right hand corner of the photo. I cut two candy canes from the Sweetest Christmas Designer Series Paper using the co-ordinating Candy Cane Dies. I attached the candy canes to the Basic White circle. I stamped the greeting from the Sweet Candy Canes stamp set onto Basic White card using Cherry Cobbler ink. I cut out the greeting and attached it across the centre of the candy canes. I have used retired products on my page but I have a lot of these products in my stash. I don’t think it hurts to use up what you have. I am sure you could adapt this layout to any occasion using some of the products from your stash. I can’t believe how much time has gone by since this photo was taken!
Bye for now
Kris
Product Used:


Bayside Birthday
I thought I would share with you a card I made using some retiring product and some product that will be carrying over to the new Annual Catalogue. Sadly the Stitched Rectangle Dies are tiring as are the colours Mint Macaron and Sahara Sand. Of course the By The Bay 6″ x 6″ Designer Series Paper is also retiring with the end of the current Mini Catalogue. So if you want or need any of the inks, markers, blends or card co-ordinating with these colours you need to get in early and place your orders.

They will only be available until the 4th May while stocks last. To create my card I cut three pieces of the By The Bay 6″ x 6″ Designer Series Paper and attached them to a piece of Mint Macaron card cut using the Stitched Rectangle Dies. I attached the panel to a Stitched Rectangle cut from Sahara Sand card before attaching to scored and folded Thick Basic White card.

I stamped the greeting from the Charming Sentiments stamp set onto Basic White card using Sahara Sand ink. Fortunately this stamp set and the co-ordinating dies are carrying over to the next Annual Catalogue. I stamped the three shell image from the By The Bay stamp set onto Basic White card using Sahara Sand ink and cut it out using the co-ordinating Dies. So glad that this stamp set and the co-ordinating dies are carrying over to the next Annual Catalogue. I coloured the image using the Light Mint Macaron Stampin’ Blend and attached it to the left hand side of the greeting. I trimmed the right hand edge of the banner into a “V” before attaching it to the card front using dimensionals. To decorate the inside of the card I attached a narrow strip of the By The Bay Designer Series Paper across the bottom edge of the Thick Basic White card.
Bye for now,
Kris
Product Used: