Merry Christmas Framed

Today’s card once again uses the Fitting Florets Collection. For this card, I cut a piece of Fitting Florets 12″ x 12″ Designer Series Paper to fit a standard A4 card front. I die cut the frame from the Designer Series Paper and attached the outside panel to a piece of Basic White card the same size. The additional oval frame is attached to the Basic White panel using dimensionals. The whole piece is attached to scored and folded Real Red card.

I die cut Basic White card using the Framed Florets Die and coloured it using Dark Real Red and Light Evening Evergreen Stampin’ Blends. The die cut is attached to the centre of the Basic White oval. I stamped “Merry Christmas” from the Framed & Festive Stamp set onto Basic White card using Real Red ink.
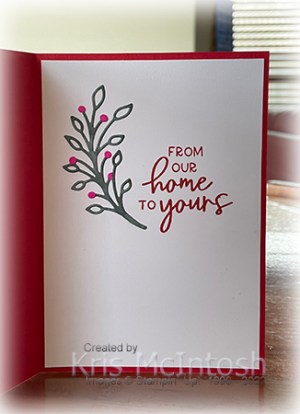
I trimmed the ends of the stamped panel and attached it to Real Red card which I also trimmed. The greeting is attached to the card front using dimensionals where necessary. To decorate the inside of the card, I stamped another greeting from the Framed & Festive stamp set onto Basic White card using Real Red ink. I attached a die cut, which I coloured to match the one on the front of the card, beside the greeting.
I am loving how this Fitting Florets Collection can be used for birthdays or for Christmas and I am really loving having some oval dies to work with. I hope I have inspired you to purchase this collection when you can.
Bye for now,
Kris
Product Used:


Barcaldine

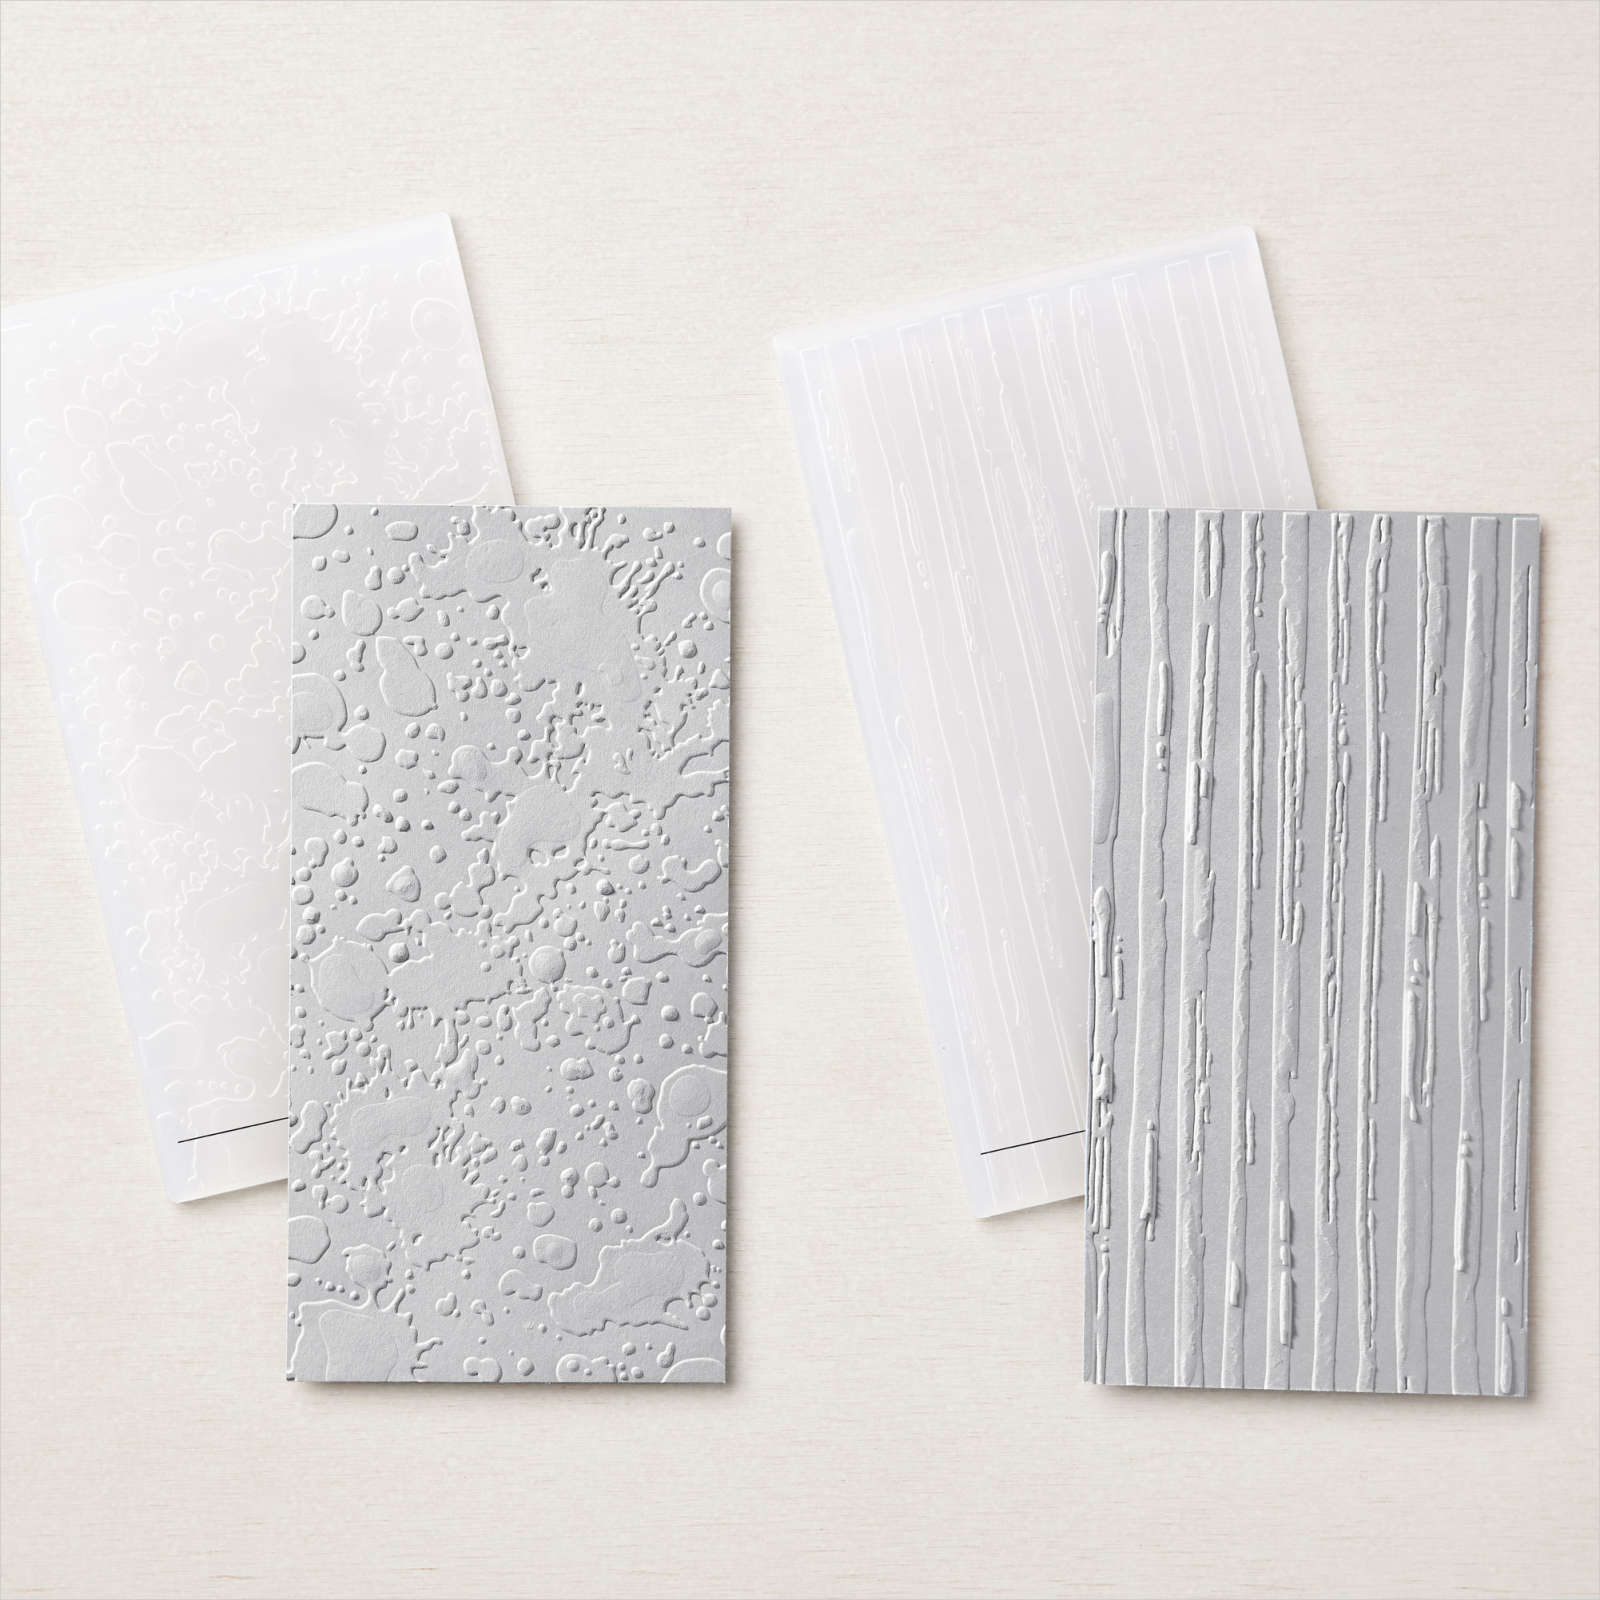
We had three nights at Barcaldine on our way out to Winton. Ron & I love staying here. The park is lovely and clean and they serve the best damper in the afternoon. I think that this was Kerry’s favourite stop on our trip as well. I attached a piece of Abigail Rose 12″ x 12″ Designer Series Paper across a Basic White 12″ x 12″ page. I embossed a piece of Smoky Slate card using the splatter image from the Stripes & Splatters Embossing Folders. I attached my photos to Basic Black card before attaching them to the page.

The title is cut from Basic Black card using the retired Playful Alphabet Dies. The journaling is printed onto Basic White card and attached to Basic Black card before being attached to the page. The last thing I add was the trees in the top left hand corner. I stamped the large and small solid tree image from the Beauty of Friendship stamp set onto Basic White card using Mossy Meadow ink which I stamped onto scrap paper first. I stamped the detailed images over the top using Mossy Meadow ink. I used the retired Beautiful Trees Dies to cut out the images before attaching them to the page. I know and you know what I am going to say – A simple page but one that I love. What about you?
Bye for now,
Kris
Product Used:


Beautiful Birthday

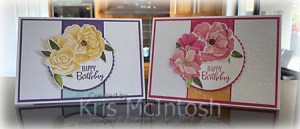
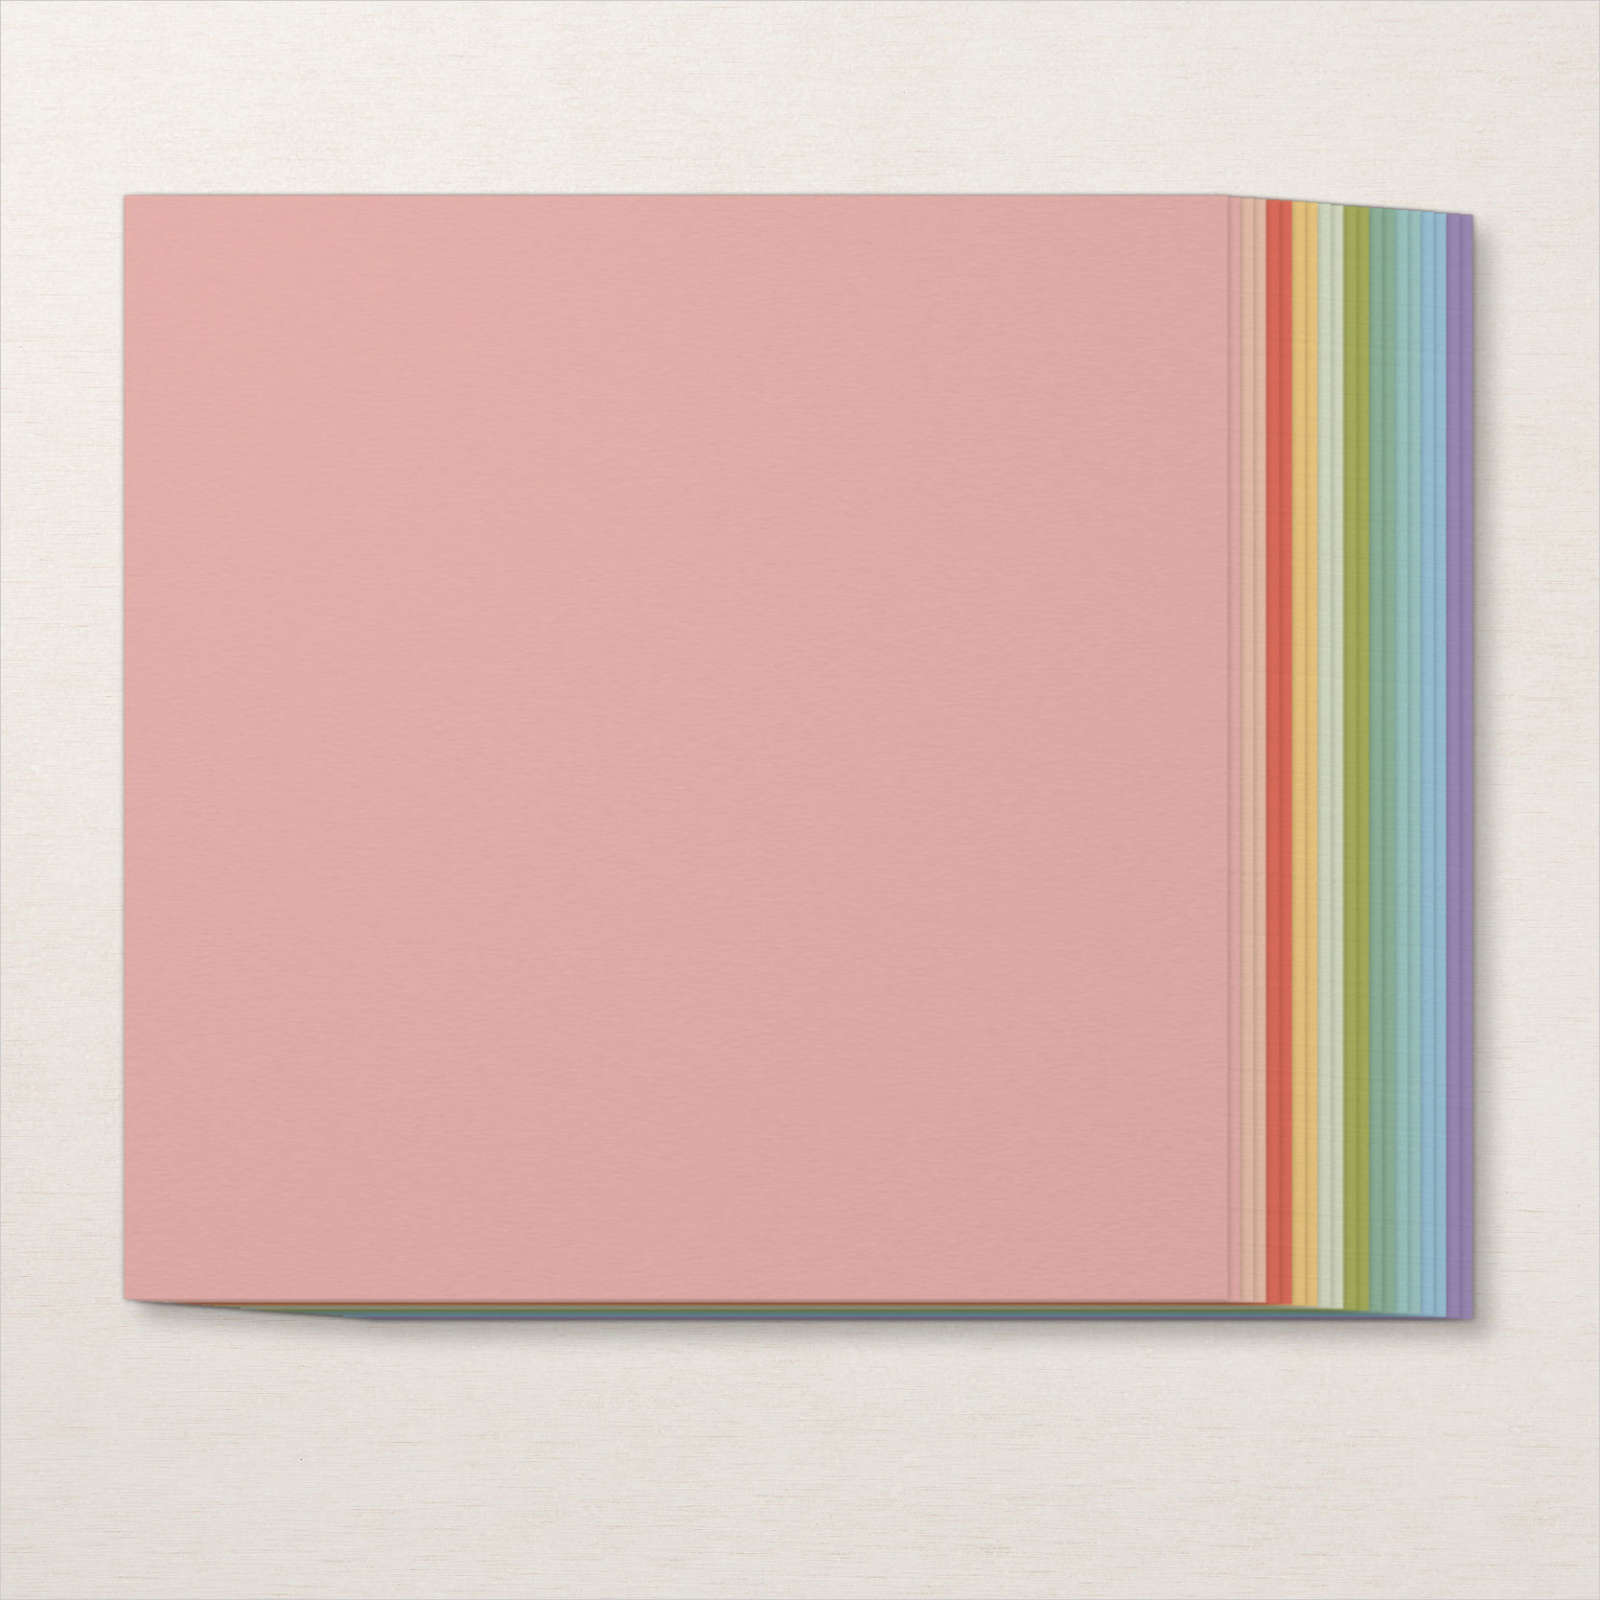
Today’s card uses product from the Fitting Florets Collection. This collection contains a stamp set and co-ordinating dies which are being released early from the January to July 2023 Mini Catalogue. It also contains another stamp set, designer series paper and Gold Adhesive Backed Swirls. Unfortunately when I placed my order the Gold Swirls were unavailable so I don’t have those to share with you. (Mine will arrive soon.) I attached a piece of the Fitting Florets 12″ x 12″ Designer Series Paper across the bottom of Basic White card. I attached a narrow strip of Soft Succulent card across the top of the Designer Series Paper before attaching the panel to scored and folded Soft Succulent card.
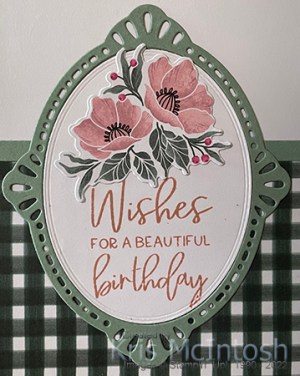
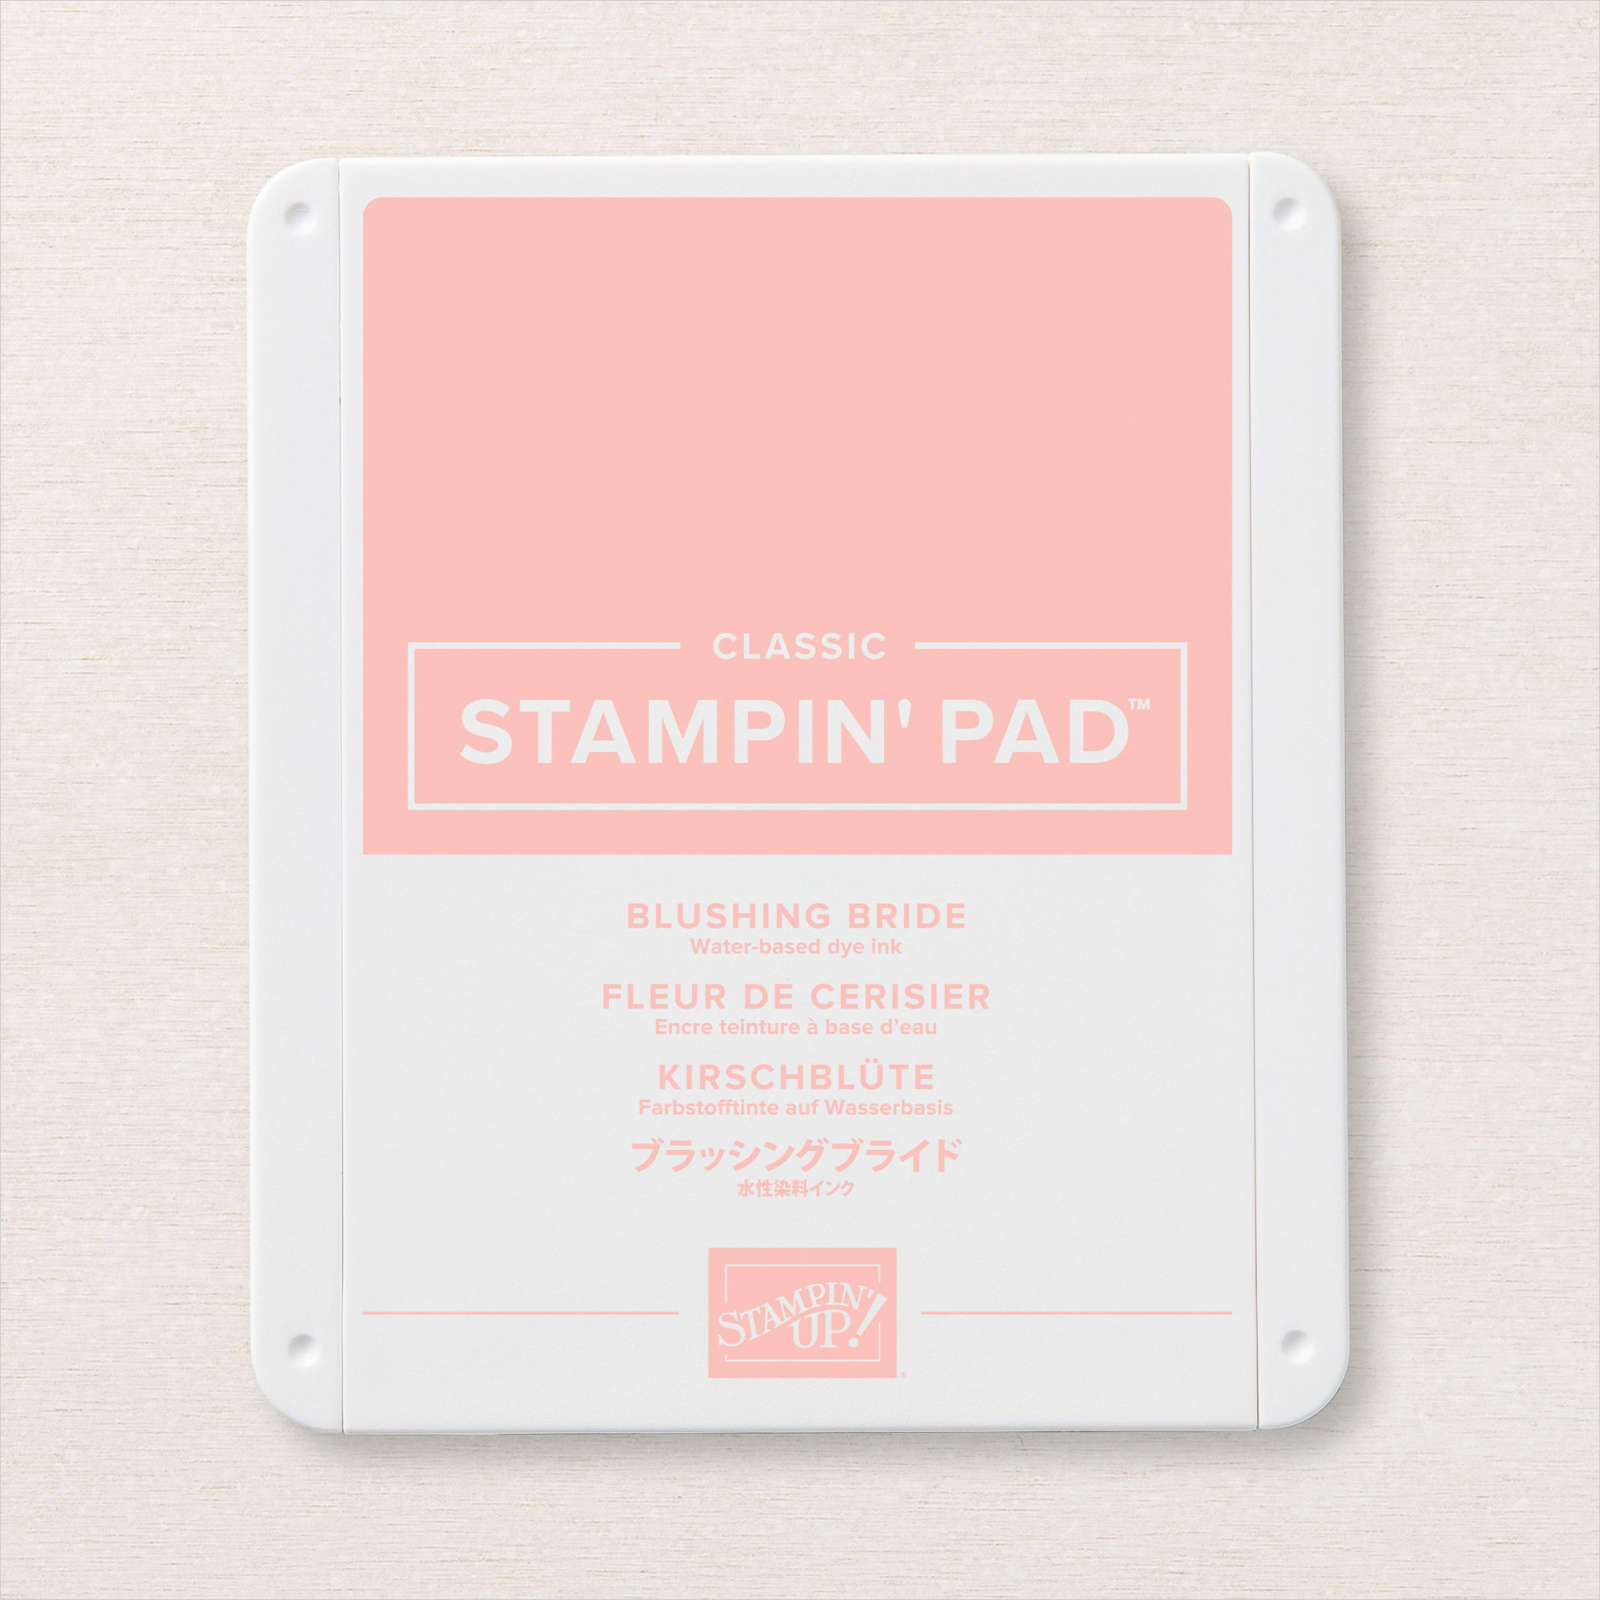
I used one of the frames from the Framed Florets Dies to cut Soft Succulent and Basic White card. I stamped the greeting from the Framed Florets Stamp Set onto the Basic White oval using Blushing Bride ink. The Soft Succulent frame and the stamped Basic White oval are attached to the card front. I die cut one of the pieces of paper from the Fitting Florets Designer Series Paper using the co-ordinating Framed Florets Die. I love how Stampin’ Up! has been co-ordinating at least one pattern from Designer Series Paper packs to be die cut with at least one of the co-ordinating dies. Fabulous! I attached the die cut flower to the stamped Basic White card.
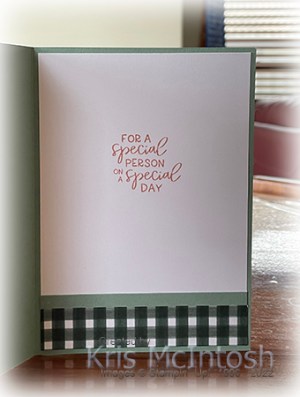
To decorate the inside of the card, I stamped another greeting from the Framed Florets stamp set onto Basic White card using Blushing Bride ink. I attached a narrow strip of the same pattern Designer Series Paper across the bottom of the stamped card. I also attached a narrow strip of Soft Succulent card across the top of the Designer Series Paper. The Fitting Florets Collection will be available to customers from the 1st November until the 4th January next year. Of course if you would like to take advantage of the sign up promotion this month, you can add this collection to the $283.00 worth of current product you can purchase for the price of $169.00. The Designer Series Paper, Framed & Festive Stamp Set and the Gold Swirls are only available for the duration of the promotion and of course while stocks last. So don’t delay placing your order (or joining up) to take advantage of this great offer.
Bye for now,
Kris
Product Used:

October Birthday

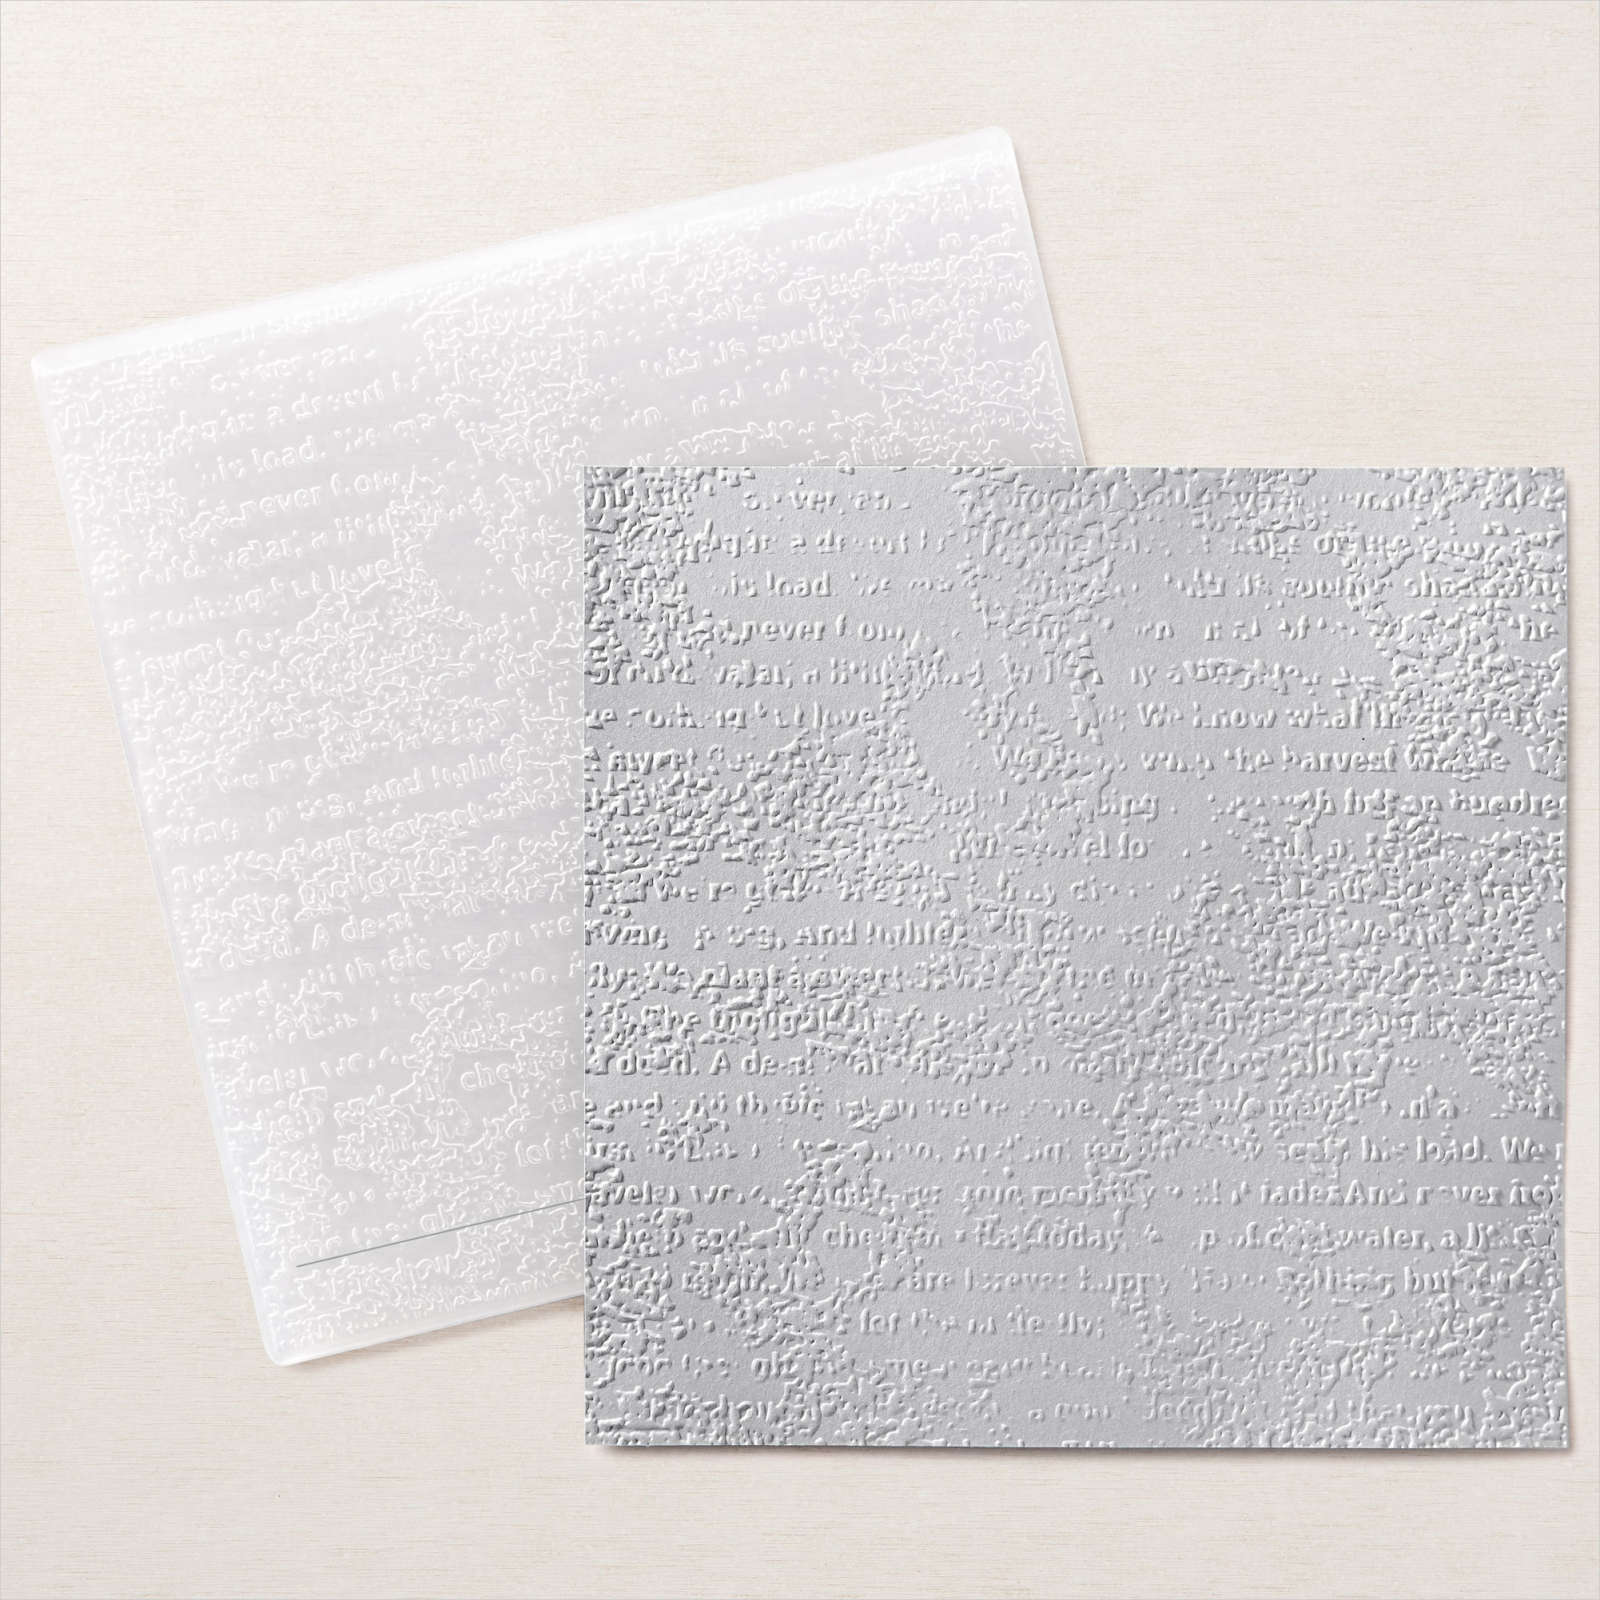
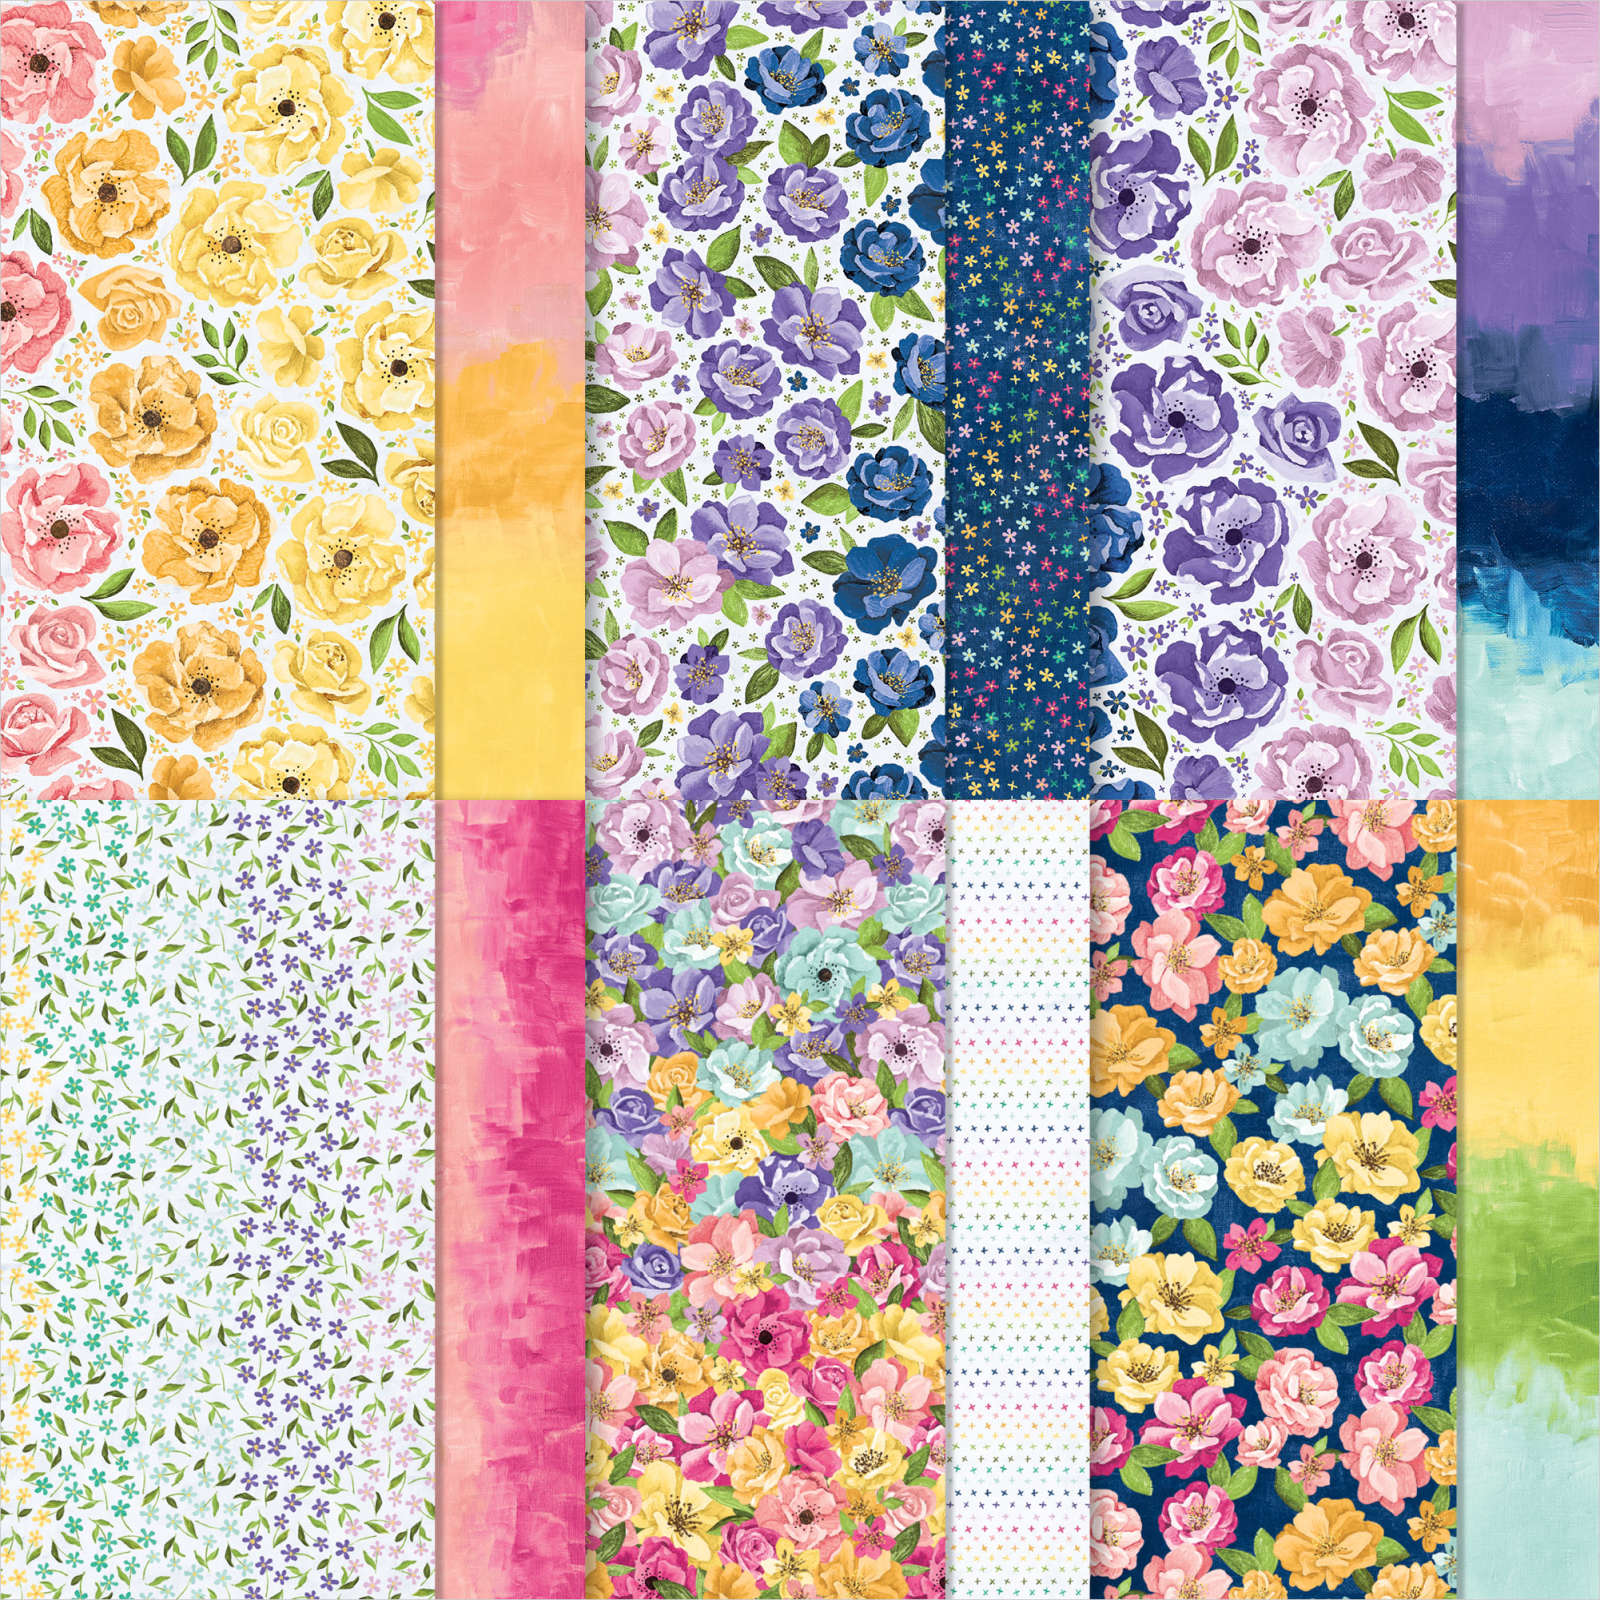
Today I am sharing a card I made for a special friend who is celebrating a birthday in October. I cut two pieces of Basic White card and embossed them using the Timeworn 3D Embossing Folder. I cut a piece of Hues of Happiness 12″ x 12″ Designer Series Paper and attached the panels to Gorgeous Grape card.

The whole panel is attached to a Thick Basic White card base. I cut Basic White card using the largest circle from the Layering Circle Dies. I stamped the greeting from the Peaceful Moments stamp set onto the circle using Gorgeous Grape ink.
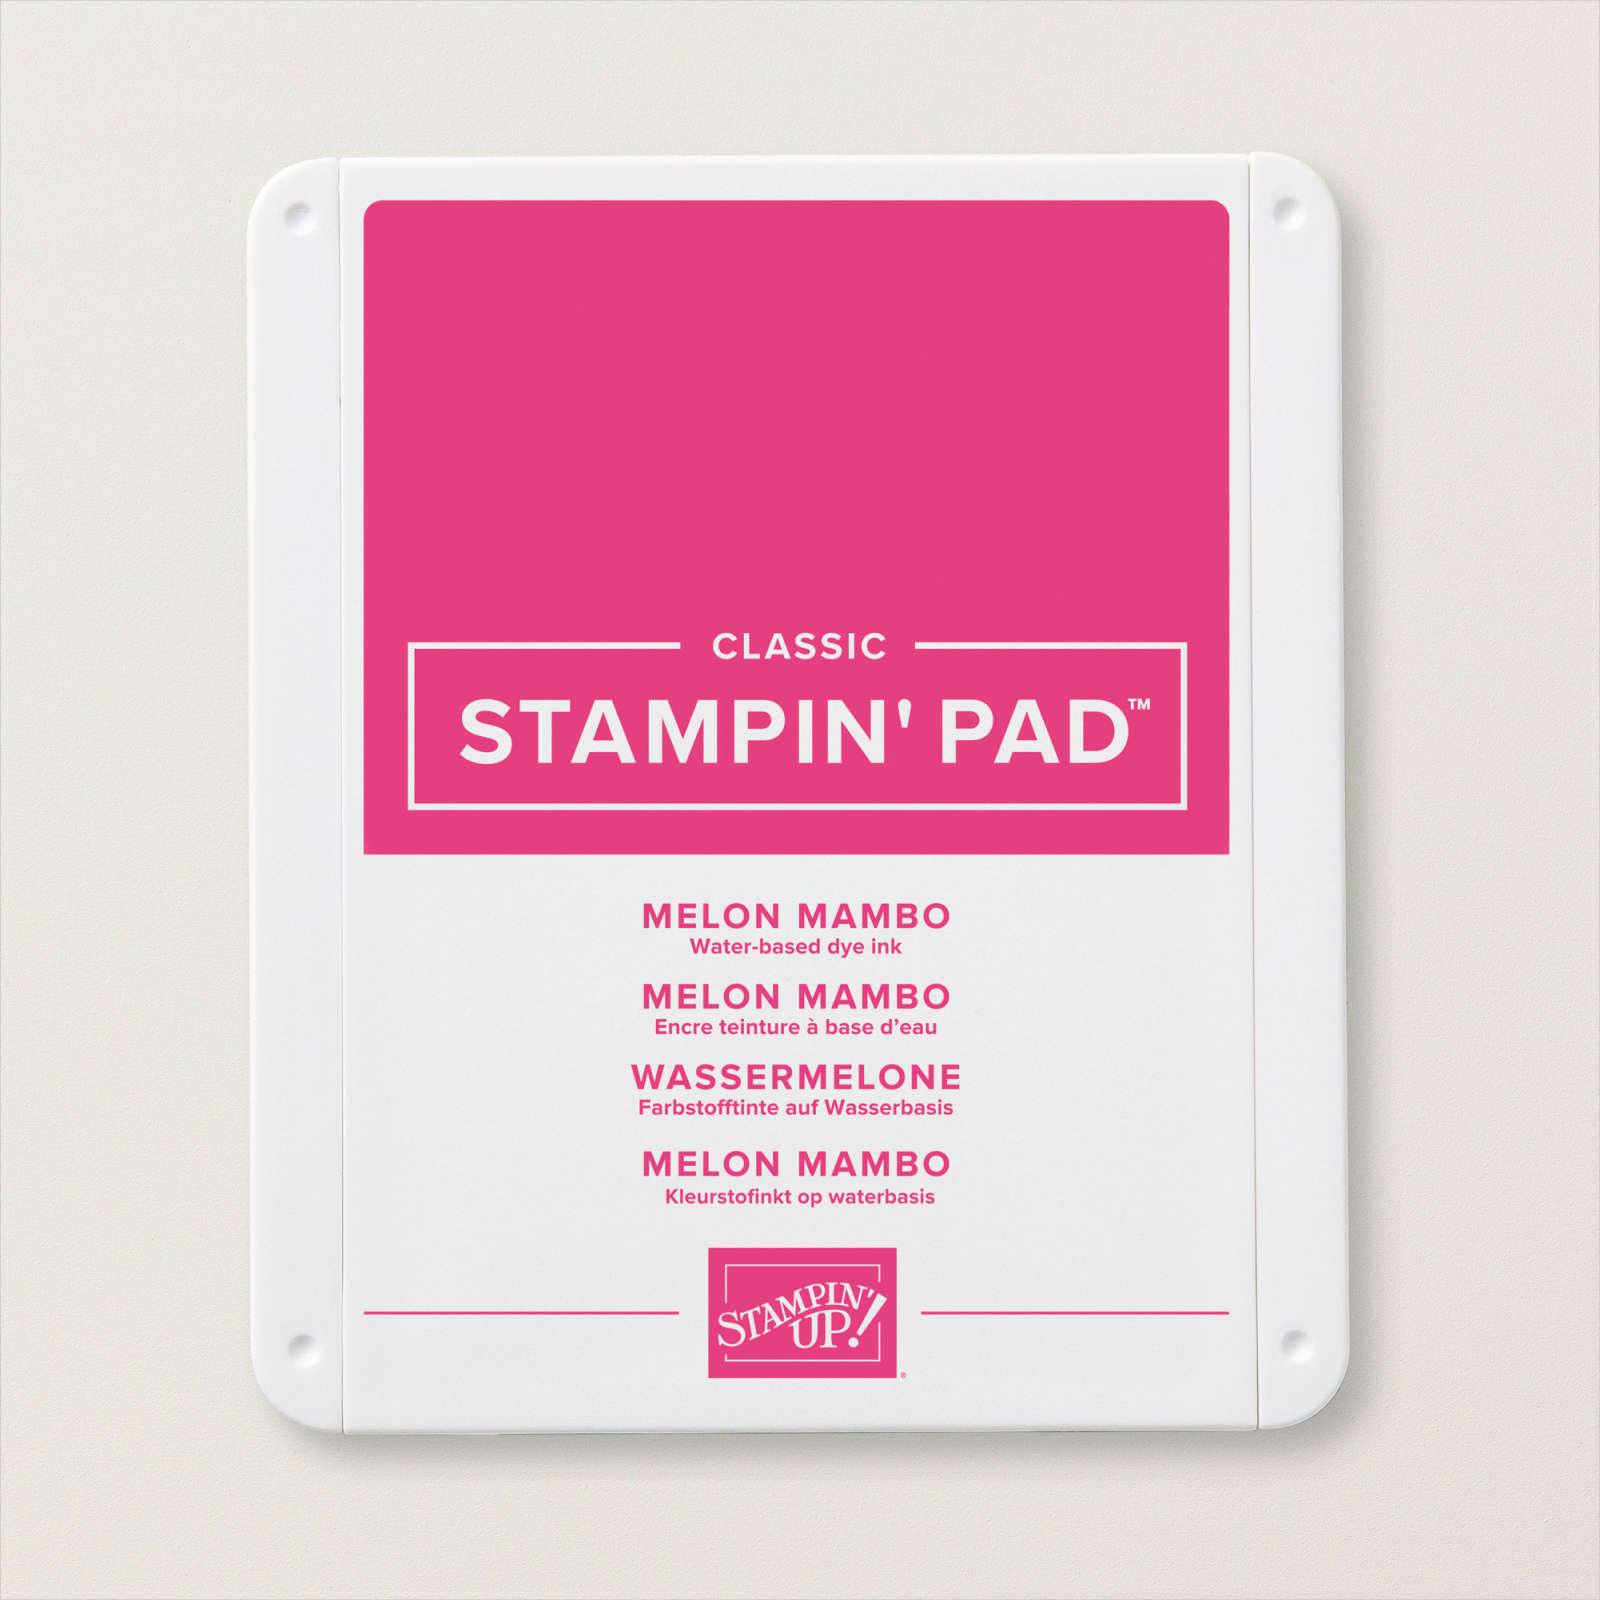
The panel is attached to a Gorgeous Grape scalloped circle cut using the largest scallop circle from the Layering Circle Dies. I cut three flowers from the Hues of Happiness Designer Series Paper using the Blossoming Happiness Dies. I also cut some leaves from the paper using the co-ordinating Blossoming Happiness Die. I layered the flowers and the leaves onto the stamped Basic White circle before attaching the panel to the card front using dimensionals. To decorate the inside of the card I stamped the greeting from the Peaceful Moments stamp set using Gorgeous Grape ink. I also attached another flower cut from the Hues of Happiness Designer Series Paper. I loved this card so much that I created another one using the same Designer Series Paper. However, this time, I used Melon Mambo ink and A4 card to create the card.
Don’t you think they look pretty?
Bye for now,
Kris
Product Used:


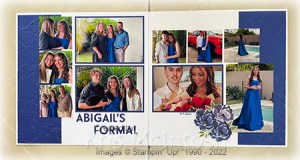
Abigail’s Formal
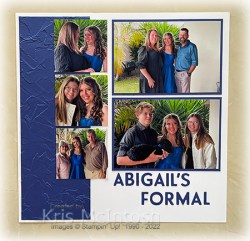
Today I am sharing some photos that were taken before Abi headed off to her formal. I cut two pieces of Starry Sky card and embossed them using the Painted Texture 3D Embossing Folder. I attached one to the left hand side of a Basic White 12″ x 12″ page and one to the right hand side of another Basic White 12″ x 12″ page. I attached some of the photos to Starry Night card before attaching them to the page.

I cut the title from Starry Sky card using the retired Playful Alphabet Dies. The flowers and leaves are cut from the Hues of Happiness 12″ x 12″ Designer Series Paper. I added the date using one of Stampin’ Up’s now retired Journaling Pens.
I love how these simple pages allow the photos to shine. Abigail looked so gorgeous and her Mum and Dad (and Nan and Pop) were so proud.
Bye for now,
Kris
Product Used:


Gorgeous Birthday
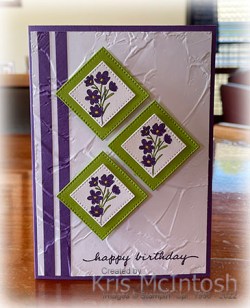
Today’s card shows off one of the images from the Happiness Abounds stamp set. I attached two strips of Gorgeous Grape card to the left hand side of Basic White card. I stamped “happy birthday” from the Happiness Abounds stamp set onto the lower right hand corner of the Basic White card using Gorgeous Grape ink. I embossed the panel using the Painted Texture 3D Embossing Folder and attached it to scored and folded Gorgeous Grape card. I stamped the floral image from the Happiness Abounds stamp set three times onto Basic White card using Memento Tuxedo Black ink.
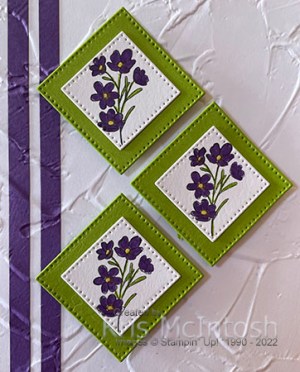
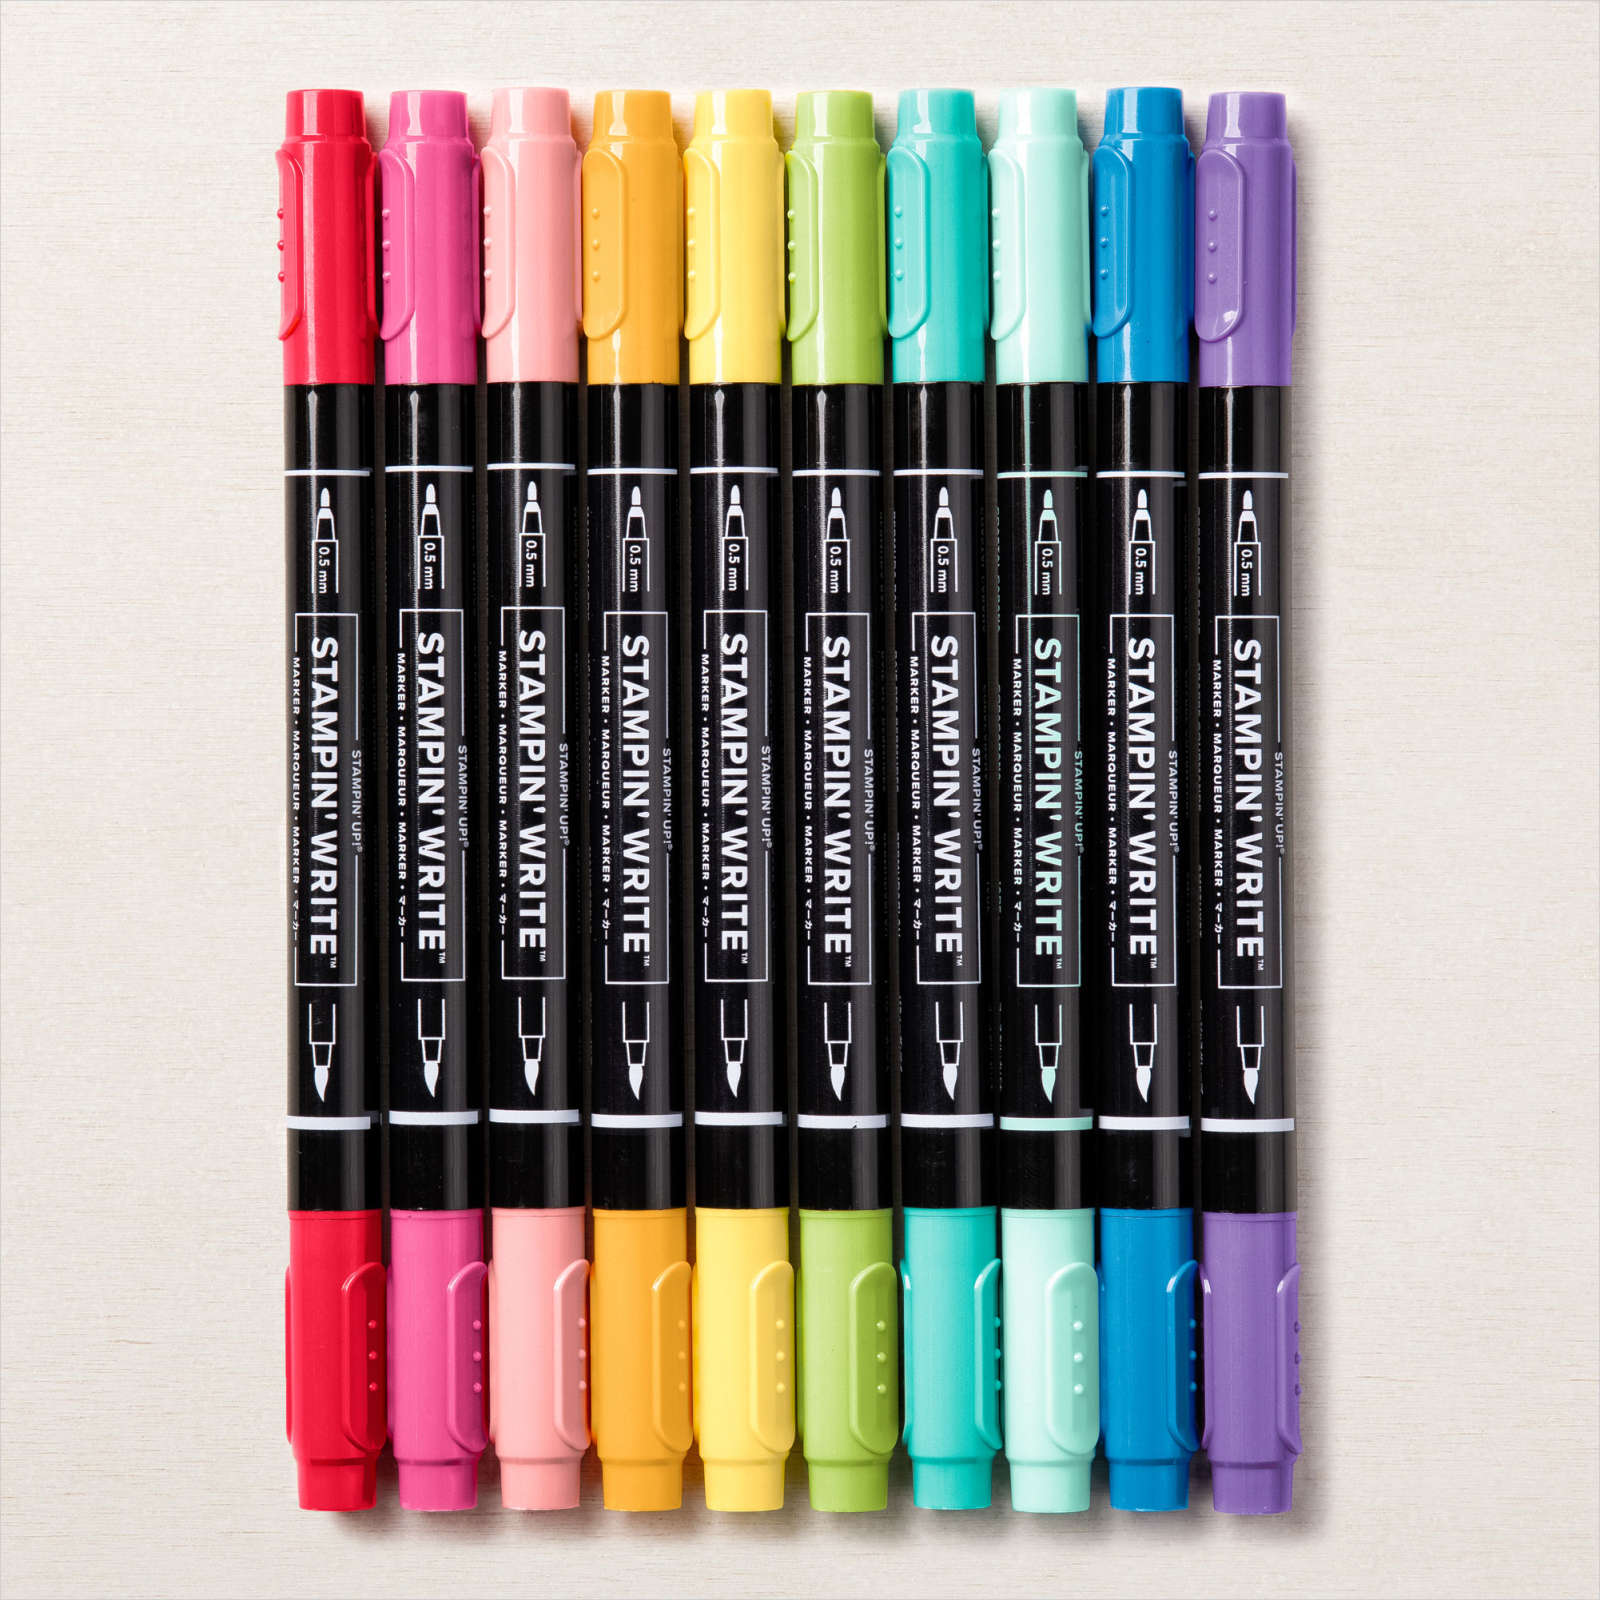
I coloured the images using Gorgeous Grape, Daffodil Delight and Granny Apple Green Stampin’ Write Markers. I cut out the images using one of the squares from the Stylish Shapes Dies. I cut Granny Apple Green three times using a slightly larger square from the Stylish Shapes Dies.

I attached the images to the Granny Apple Green squares before attaching them to the card front using dimensionals. To decorate the inside of the card, I stamped another greeting from the Happiness Abounds stamp set onto Basic White card using Gorgeous Grape ink. I stamped the floral image beside the greeting using Memento Tuxedo Black ink. I coloured the image using Gorgeous Grape, Daffodil Delight & Granny Apple Green Stampin’ Write Markers.
I love the finished card, so sweet and pretty simple to create. I am so loving the new Stylish Shapes Dies, which give us some squares (yay) but also some edged banners and edged circle dies. Thank you Stampin’ Up!
Bye for now,
Kris
Product Used:


Sending Love & Light
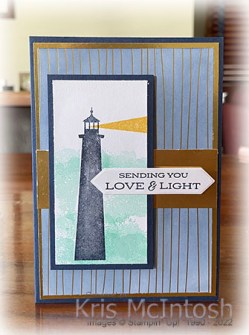
Today I am sharing the second card I made using the Lighthouse Point Bundle. Although this paper is not longer available to earn for free, I could not help including some of the gorgeous Silver & Gold 6″ x 6″ Designer Series Paper. I used a Blending Brush to add Night of Navy ink to a gold striped patterned piece of the Specialty Paper before attaching it to Gold Foil card and then scored and folded Night of Navy card. I also attached a strip of Gold Foil across the centre of the Specialty Paper.
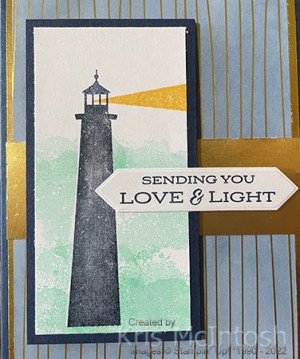
I stamped the solid lighthouse image from the Lighthouse Point stamp set onto Basic White card using Night of Navy ink. I covered the image using a Post-it-Note mask and stamped the circle like image from the Lighthouse Point stamp set over the top using Coastal Cabana ink. I removed the mask and stamped the light image from the Lighthouse Point stamp set using So Saffron ink. I attached the image panel to Night of Navy card and then the card front using dimensionals.
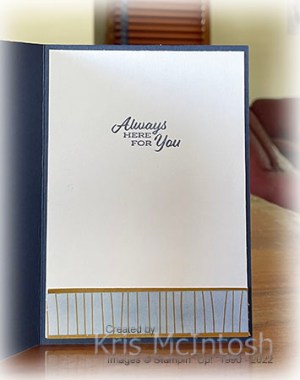
I stamped the greeting from the Lighthouse Point stamp set onto Basic White card using Night of Navy ink and cut it out using the smaller banner from the Lighthouse Dies. The greeting is attached to the card front using dimensionals where necessary. To decorate the inside of the card, I coloured a narrow strip of the same pattern Specialty Paper using a Blending Brush and Night of Navy ink. I attached the Designer Series Paper to a strip of Gold Foil and then the bottom of Basic White card. I stamped a greeting from the Lighthouse Point stamp set onto the Basic White panel using Night of Navy ink.
I really love the subtle colour you get when you add ink to this beautiful Specialty Paper, don’t you?
Bye for now,
Kris
Product Used:


Nana and Grandfather

Today’s page showcases some photos of my grandparents swimming in the pool in our backyard way back in the early 1970’s. I cut down a piece of Basic White 12″ x 12″ card and attached it to a Gray Granite 12″ x 12″ page. I attached a piece of Design a Daydream 12″ x 12″ Designer Series Paper to the left hand side of the Basic White panel. I inked the image from the Paradise Palms stamp set using an Early Espresso and a Mint Macaron Stampin’ Write Maker before stamping onto the upper right hand corner of the Basic White panel. I stamped the two large palm leaf images from the Paradise Palms stamp set onto Petal Pink card using Versamark ink. I also sponged Versamark ink around the edges of the panel before attaching it across the page.

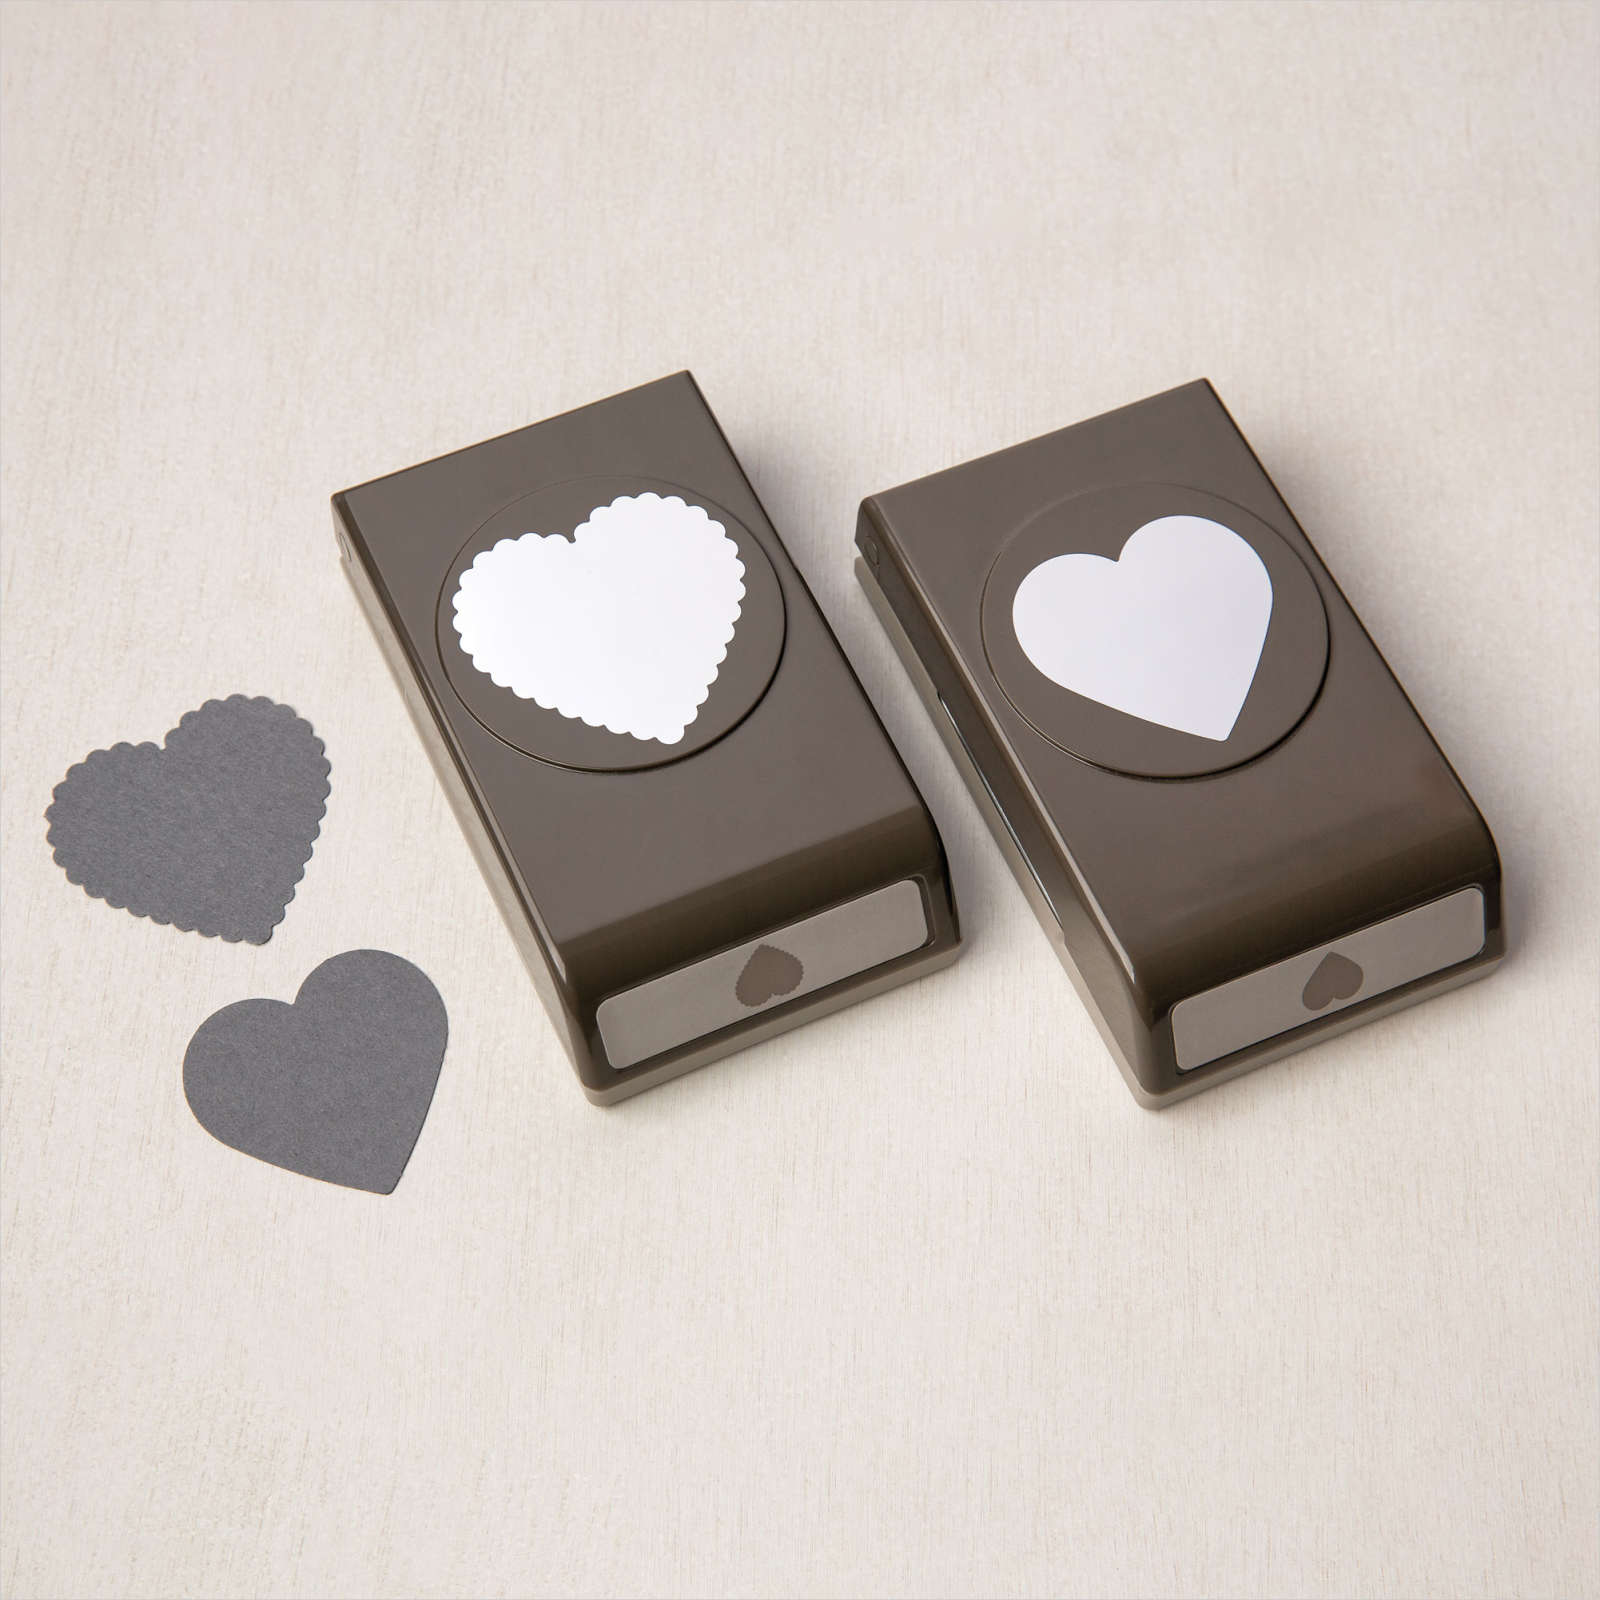
I attached a narrow strip of Early Espresso card across the bottom of the Petal Pink panel. I rounded the corners of my photos using the now retired Detailed Trio Punch. The photos are attached to Early Espresso card which also has the corners punched using the Detailed Trio Punch and attached them across the page. I printed the journaling onto Basic White use my computer and cut it into strips. I sponged Petal Pink ink around the edges of one strip of journaling and Early Espresso ink around the other strip. I attached the journaling across the bottom of the photos. The title is also printed onto Basic White card using my computer and then cut out using my Paper Snips. I punched Mint Macaron card using the plain heart from the Heart Punch Pack. I stamped the greeting from the A Grand Kid stamp set onto the heart using Early Espresso ink. I attached the stamped heart to a scalloped heart punched using the Heart Punch Pack before attached it to the lower left hand corner of the page. This is kind of a special page for me because I do not remember my Nana swimming ever!
Bye for now,
Kris
Product Used:


Framed Occasions

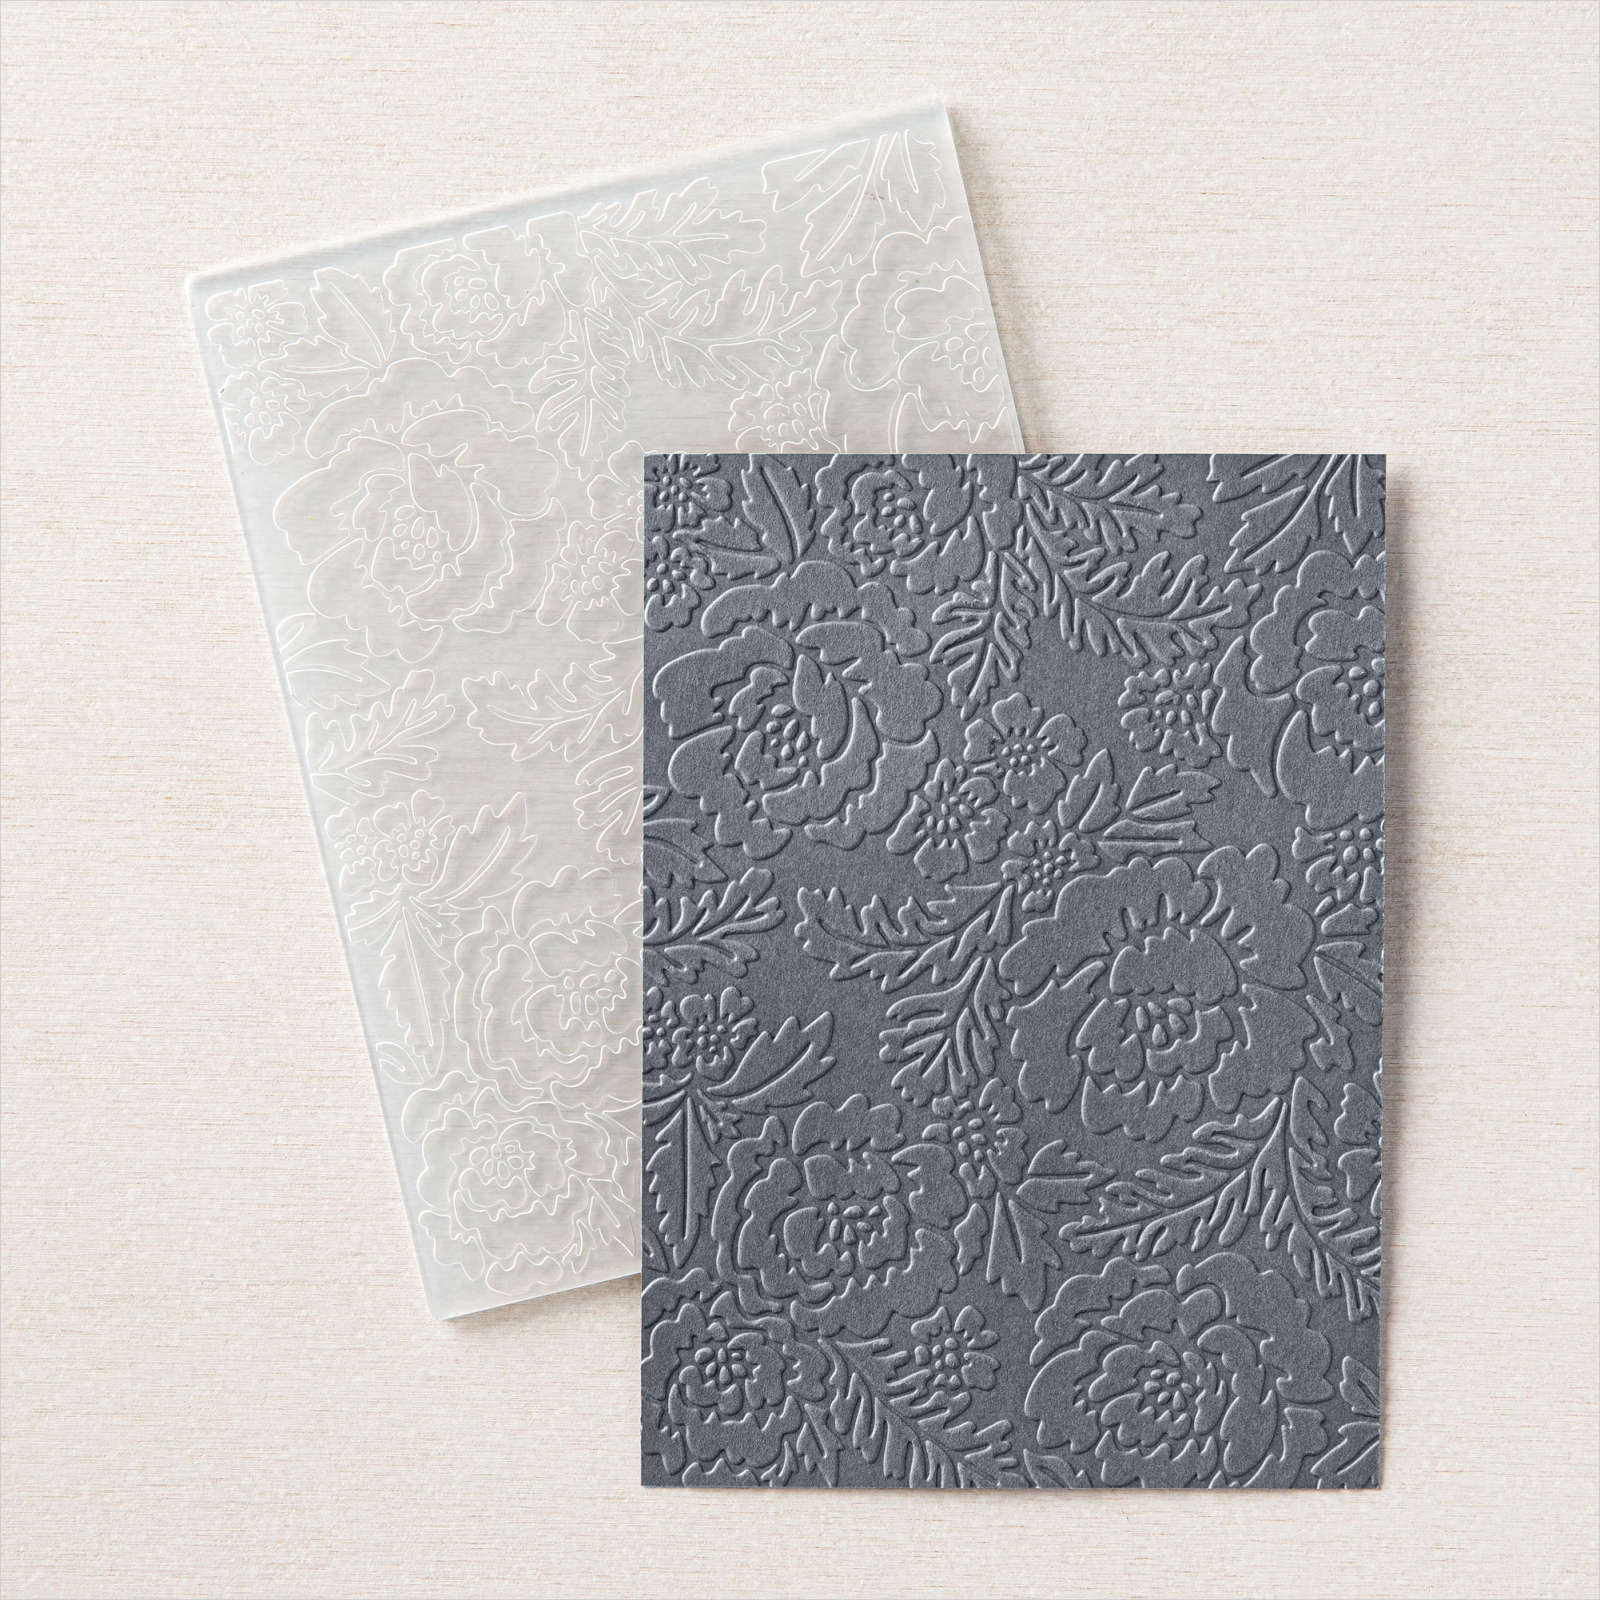
For today’s card I attached a piece of Blackberry Bliss card down the right hand side of Basic White card. I embossed the panel using the Pretty Flowers Embossing Folder and attached it to scored and folded Blackberry Bliss card. I stamped the greeting from the Framed Occasions stamp set onto a strip of Old Olive card using Blackberry Bliss ink. The Old Olive panel is attached across the bottom of the card front.

I cut three different patterns of the Design A Daydream 12″ x 12″ Designer Series Paper using one of the circles from the Beautiful Shapes Dies. I attached the three circles to the card front using dimensionals underneath the striped paper. To decorate the inside of the card, I attached a strip of the striped paper from the Designer A Daydream Designer Series Paper across the bottom of Basic White card. This is not usually a style of card I would create but I do love the way the Designer Series Paper works together with the embossing folder, don’t you?
Bye for now,
Kris
Product Used:


Starter Kit +
Joining Stampin’ Up! just got a whole lot better for the month of October. From now until the 31st October you can purchase $283.00 of any current Stampin’ Up! product for the crazy low price of $169.00. So if you have ever thought about becoming a Demonstrator and being part of the Stampin’ Up! family or maybe you just have a long wish list, this is the perfect time to join. You can be part of my team if you click on the join button here. Unfortunately you have to be living in Australia to join my team but if you have another favourite Demonstrator in your local area, then contact them to find out more about this amazing offer. Of course along with all your favourite stamps, inks, dies, papers you will be given all the things you need to become an active demonstrator if you wish to use them. Don’t forget once you join, all you orders going forward at subject to a 20% discount!
Have fun.
Bye for now,
Kris


