‘Tis the Season
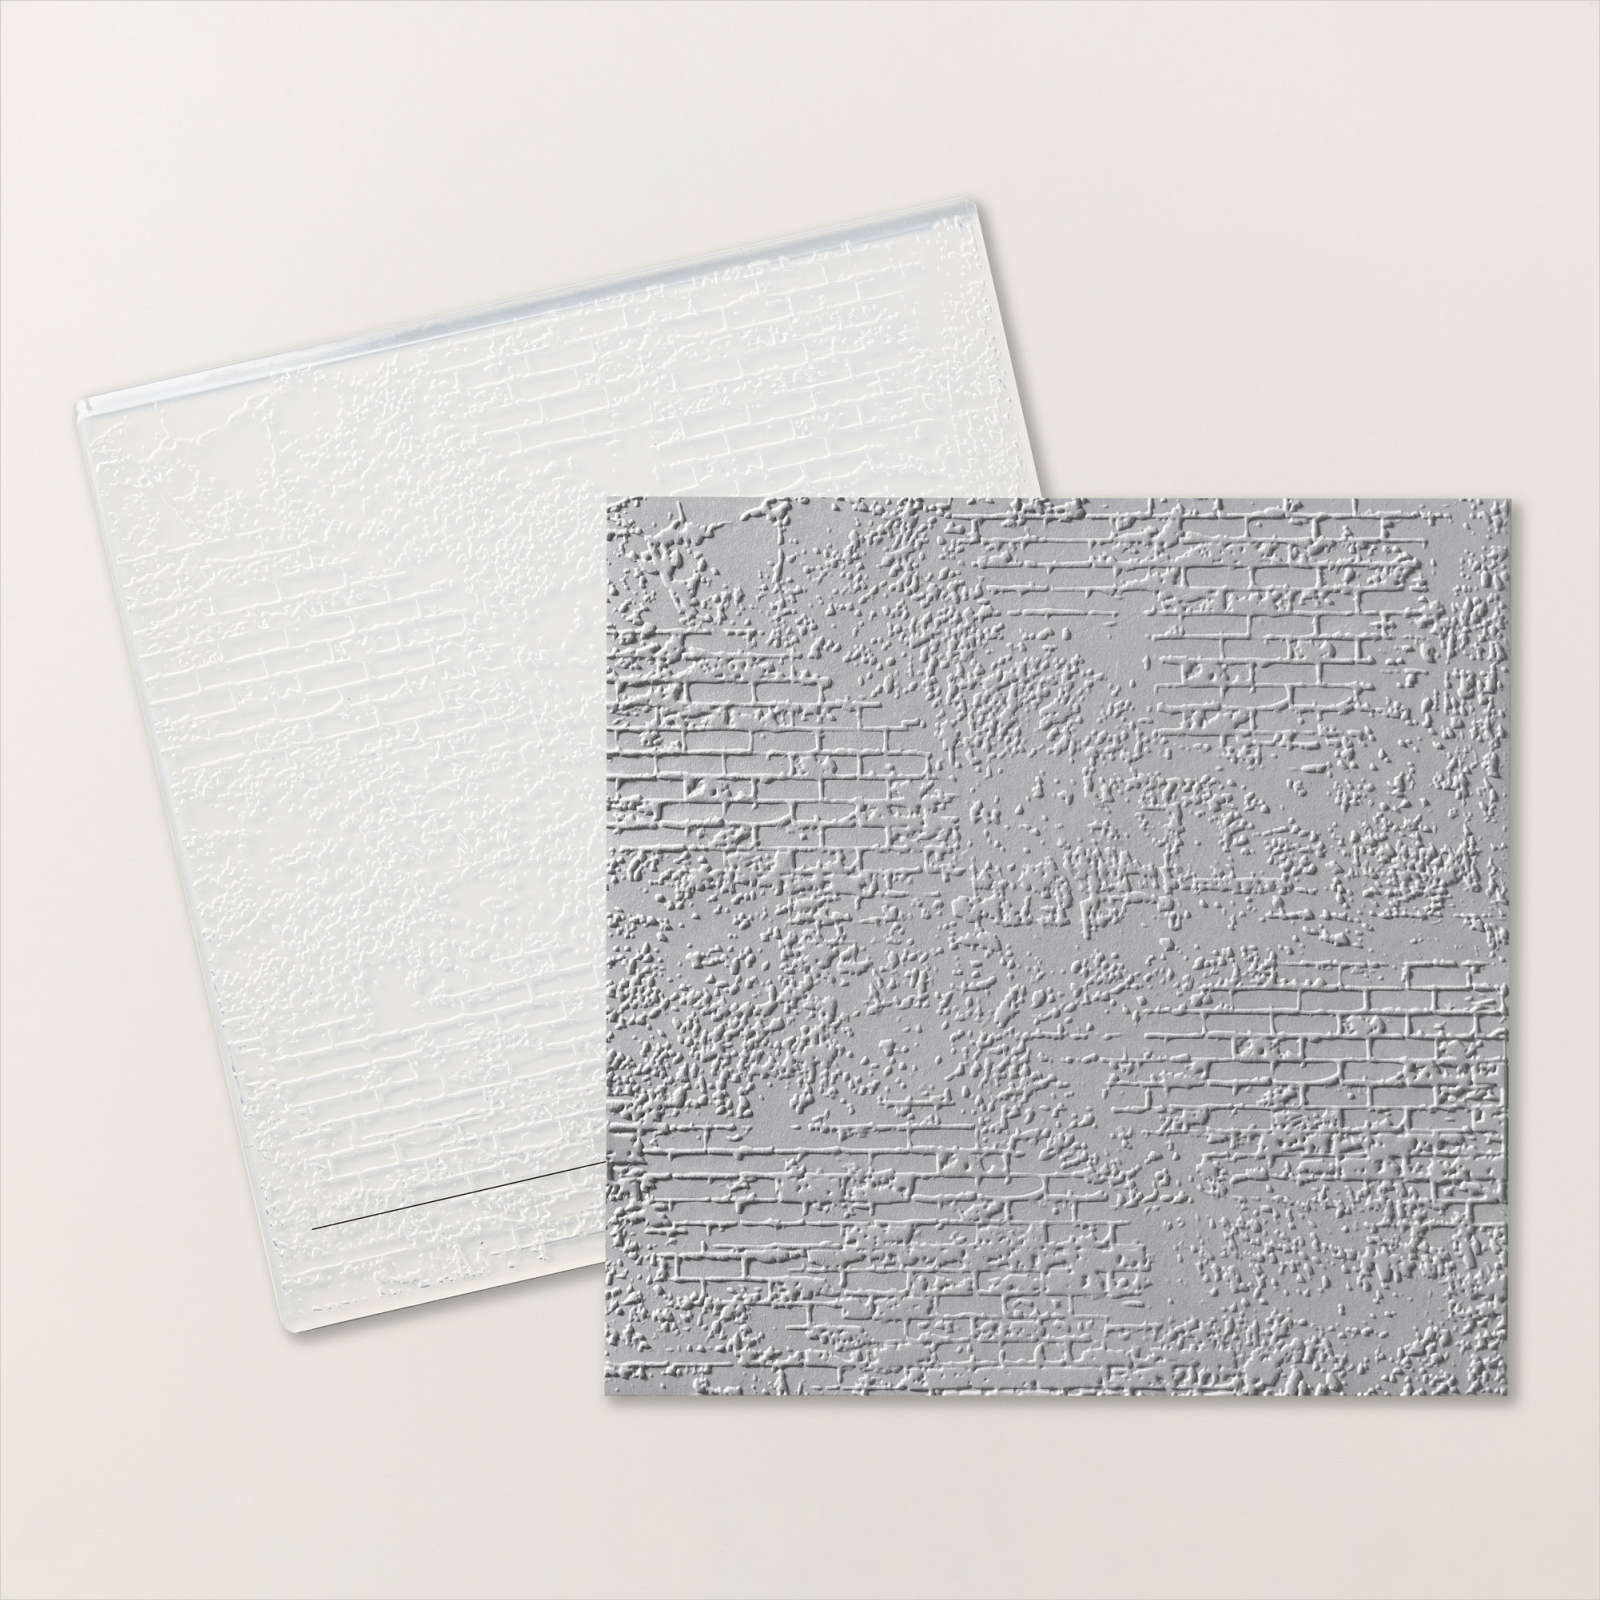
Today I have another card to share with you using the Ornamental Christmas Bundle which is an Online Exclusive. I embossed Basic White card using the Exposed Brick 3D Embossing Folder and attached a piece of Regal Distressed 12″ x 12″ Designer Series Paper across the bottom. The whole panel is attached to scored and folded Cherry Cobbler card.

I had stamped some trees onto a Basic White Note Card to share in my Facebook Live, however, the images had a few smudges. So I decided to cut out the trees which I had stamped using Old Olive ink and the image from the Ornamental Christmas stamp set. I attached the three tree image to the left hand side of the card front.

I had also stamped the greeting from the Ornamental Christmas stamp set onto the Note card using Cherry Cobbler ink, so I fussy cut the greeting as well and attached it to the card front. To decorate the inside of the card, I stamped the same tree image three times onto the lower left hand corner of Basic White card using Old Olive ink. I also stamped another of the greetings from the Ornamental Christmas stamps set beside the trees using Cherry Cobbler ink. I love how this card looks and love that I was able to turn a mistake into something pretty. What about you, do you love to turn your mistakes into a new creation?
Bye for now,
Kris
Product Used:


Woolgoolga
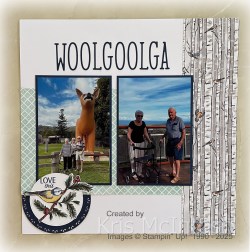
Todays pages show off some photos from our trip to Woolgoolga with Mum and Dad in April last year. I created my page using the 1, 2, 3 Layout from my October class. You can find these layouts on You Tube. I cut a piece of Nests of Winter 12″ x 12″ Designer Series Paper and attached it to White Willow 12″ x 12″ Card. I layered the photos on the left hand page onto Night of Navy card before attaching them to the page.

I added a Night of Navy mat to the 4″ x 4″ photo on the right hand page and attached my journaling. I used a 4″ x 4″ flip flap to add two photos. I used the Spotlight on Nature Dies to cut Night of Navy card and the Stylish Shapes Dies to cut Basic White A4 card. I layered the pieces together tucking the Night of Navy panels underneath the Designer Series paper. The bird images are all cut from the Nests of Winter Designer Series Paper.

The greetings come from the Month by Month stamp set which was part of the Virtual Album Retreat product and are all stamped in Night of Navy ink. I cut Night of Navy card using the Alphabet A La Mode Dies to create the title. I love how this layout shows off the photos from our visit and I love these 1, 2, 3 Layout ideas. You only need one piece of 12″ x 12″ Designer Series Paper to create a double page layout.
Bye for now,
Kris
Product Used:


So Very Sorry
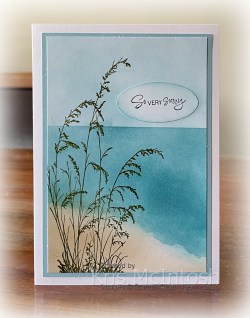
This week in my Facebook Live I shared some cards I created using the Prairie Grass stamp set. Today I have another one to share. I used a Blending Brush to add some Crumb Cake ink across the bottom of Basic White card. I added some Balmy Blue, again using a Blending Brush, making sure that the middle section was darker than the top part of the card. I stamped the image from the Prairie Grass stamp set using Mossy Meadow ink.

The panel is attached to Balmy Blue card and then scored and folded Thick Basic White card. I stamped the greeting onto Basic White card using Memento Tuxedo Black ink and used the retired Double Oval Punch to punch it out. I used a Blending Brush to add some Balmy Blue ink before attaching the greeting to the card front.

To decorate the inside of the card I added some Crumb Cake ink and some Balmy Blue ink using Blending Brushes. I stamped the image from the Prairie Grass stamp set over the blended ink using Mossy Meadow ink. I stamped the greeting from the Prairie Grass stamp set using Memento Tuxedo Black ink. I am pretty happy with the way this card turned out and I am sure I will have fun exploring other ways to use this stamp set.
Bye for now,
Kris
Product Used:


Floral Birthday
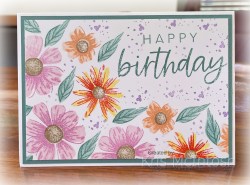
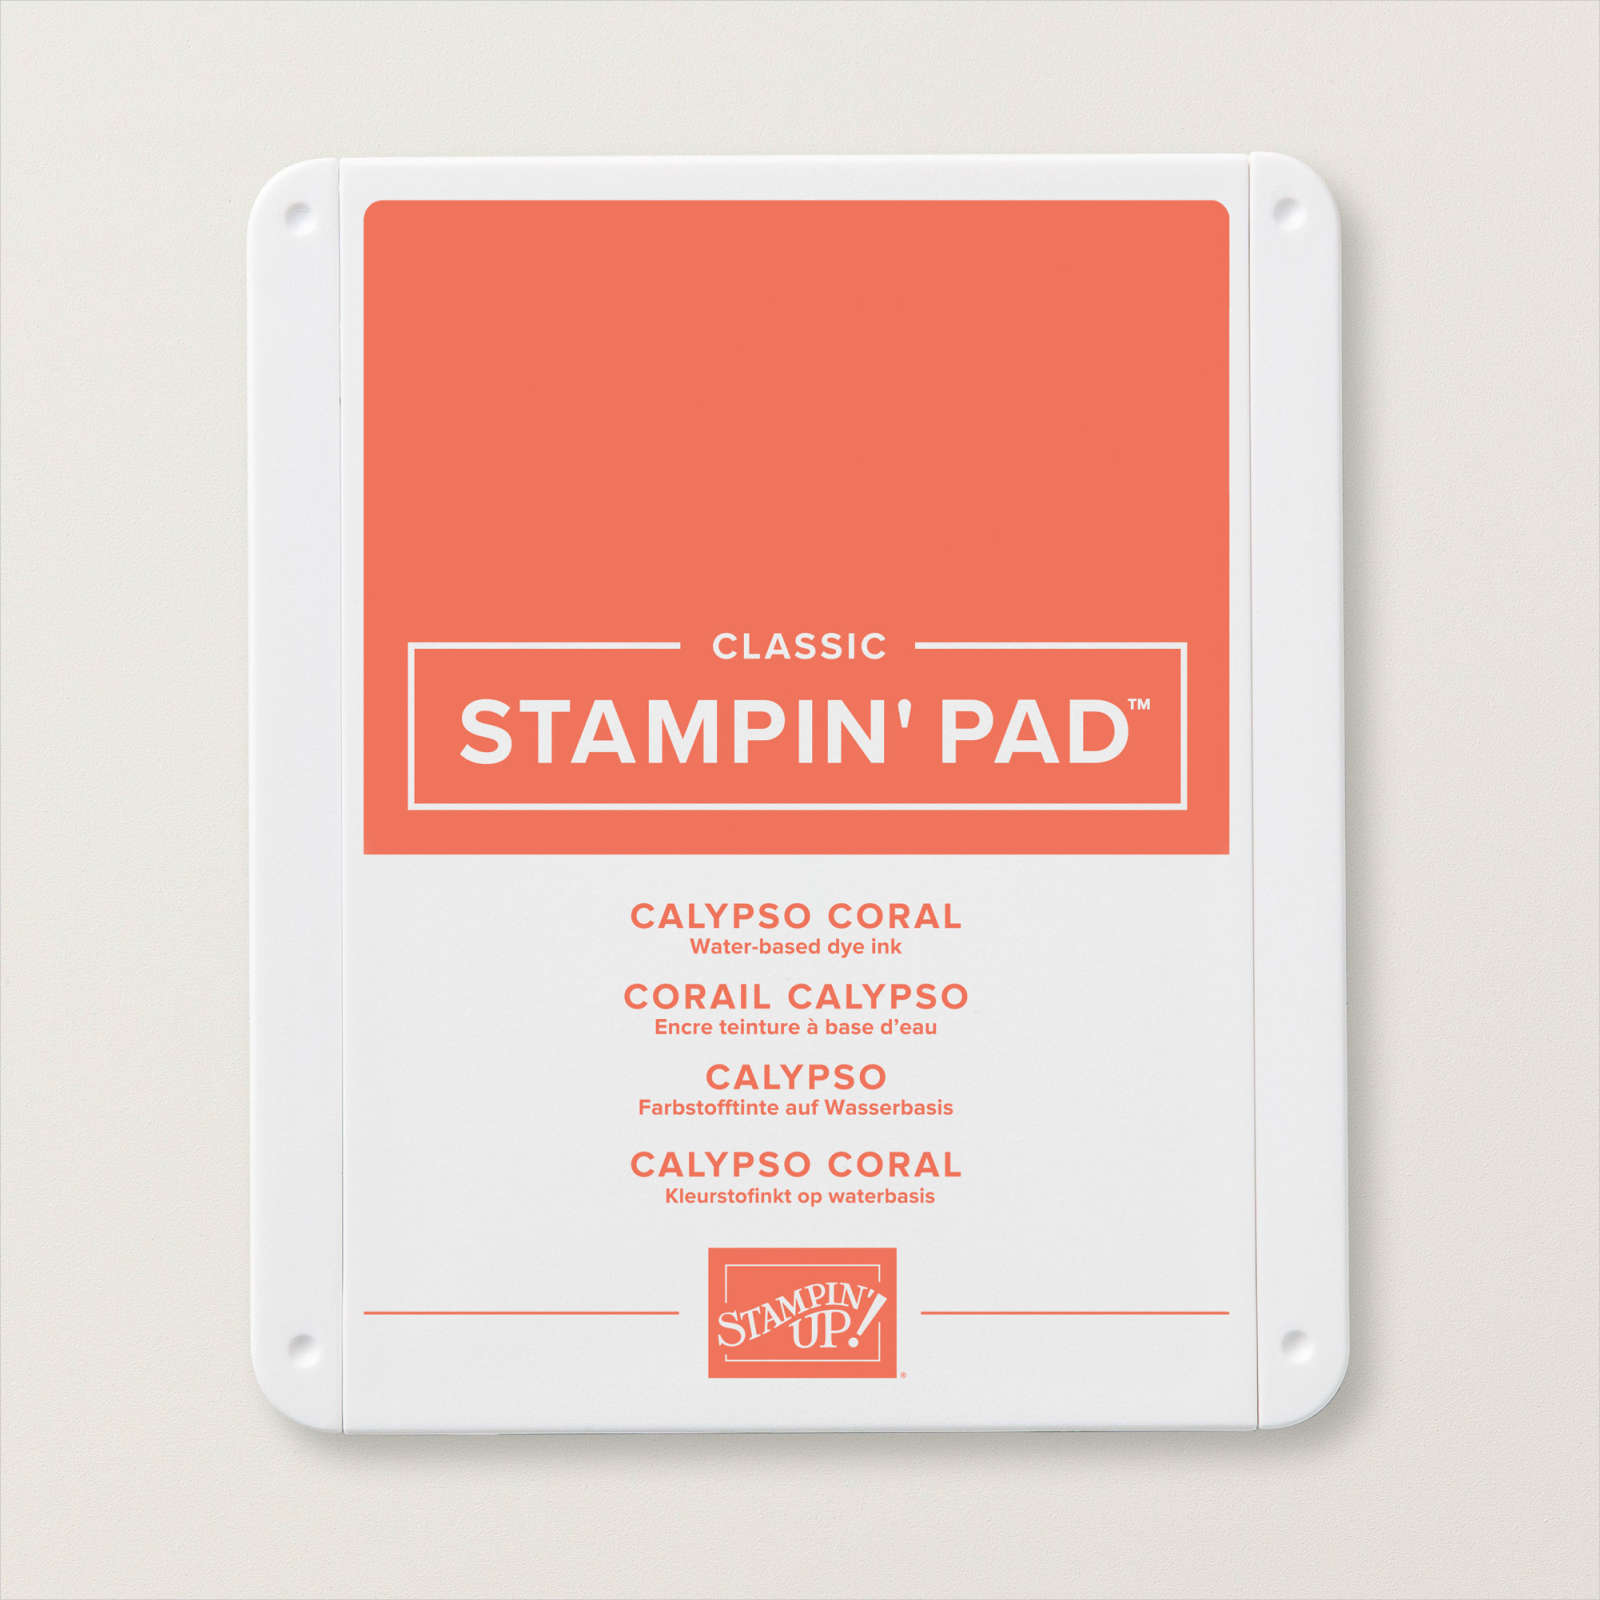
Today I am sharing a card I created using the flowers from the Impressions Abloom stamp set. I stamped three large flowers from the Impressions Abloom onto Basic White card using Bubble Bath & Fresh Freesia ink. I stamped the two mediums sized flowers from the Impressions Abloom stamp set onto Basic White card using Lemon Lolly & Calypso Coral ink.

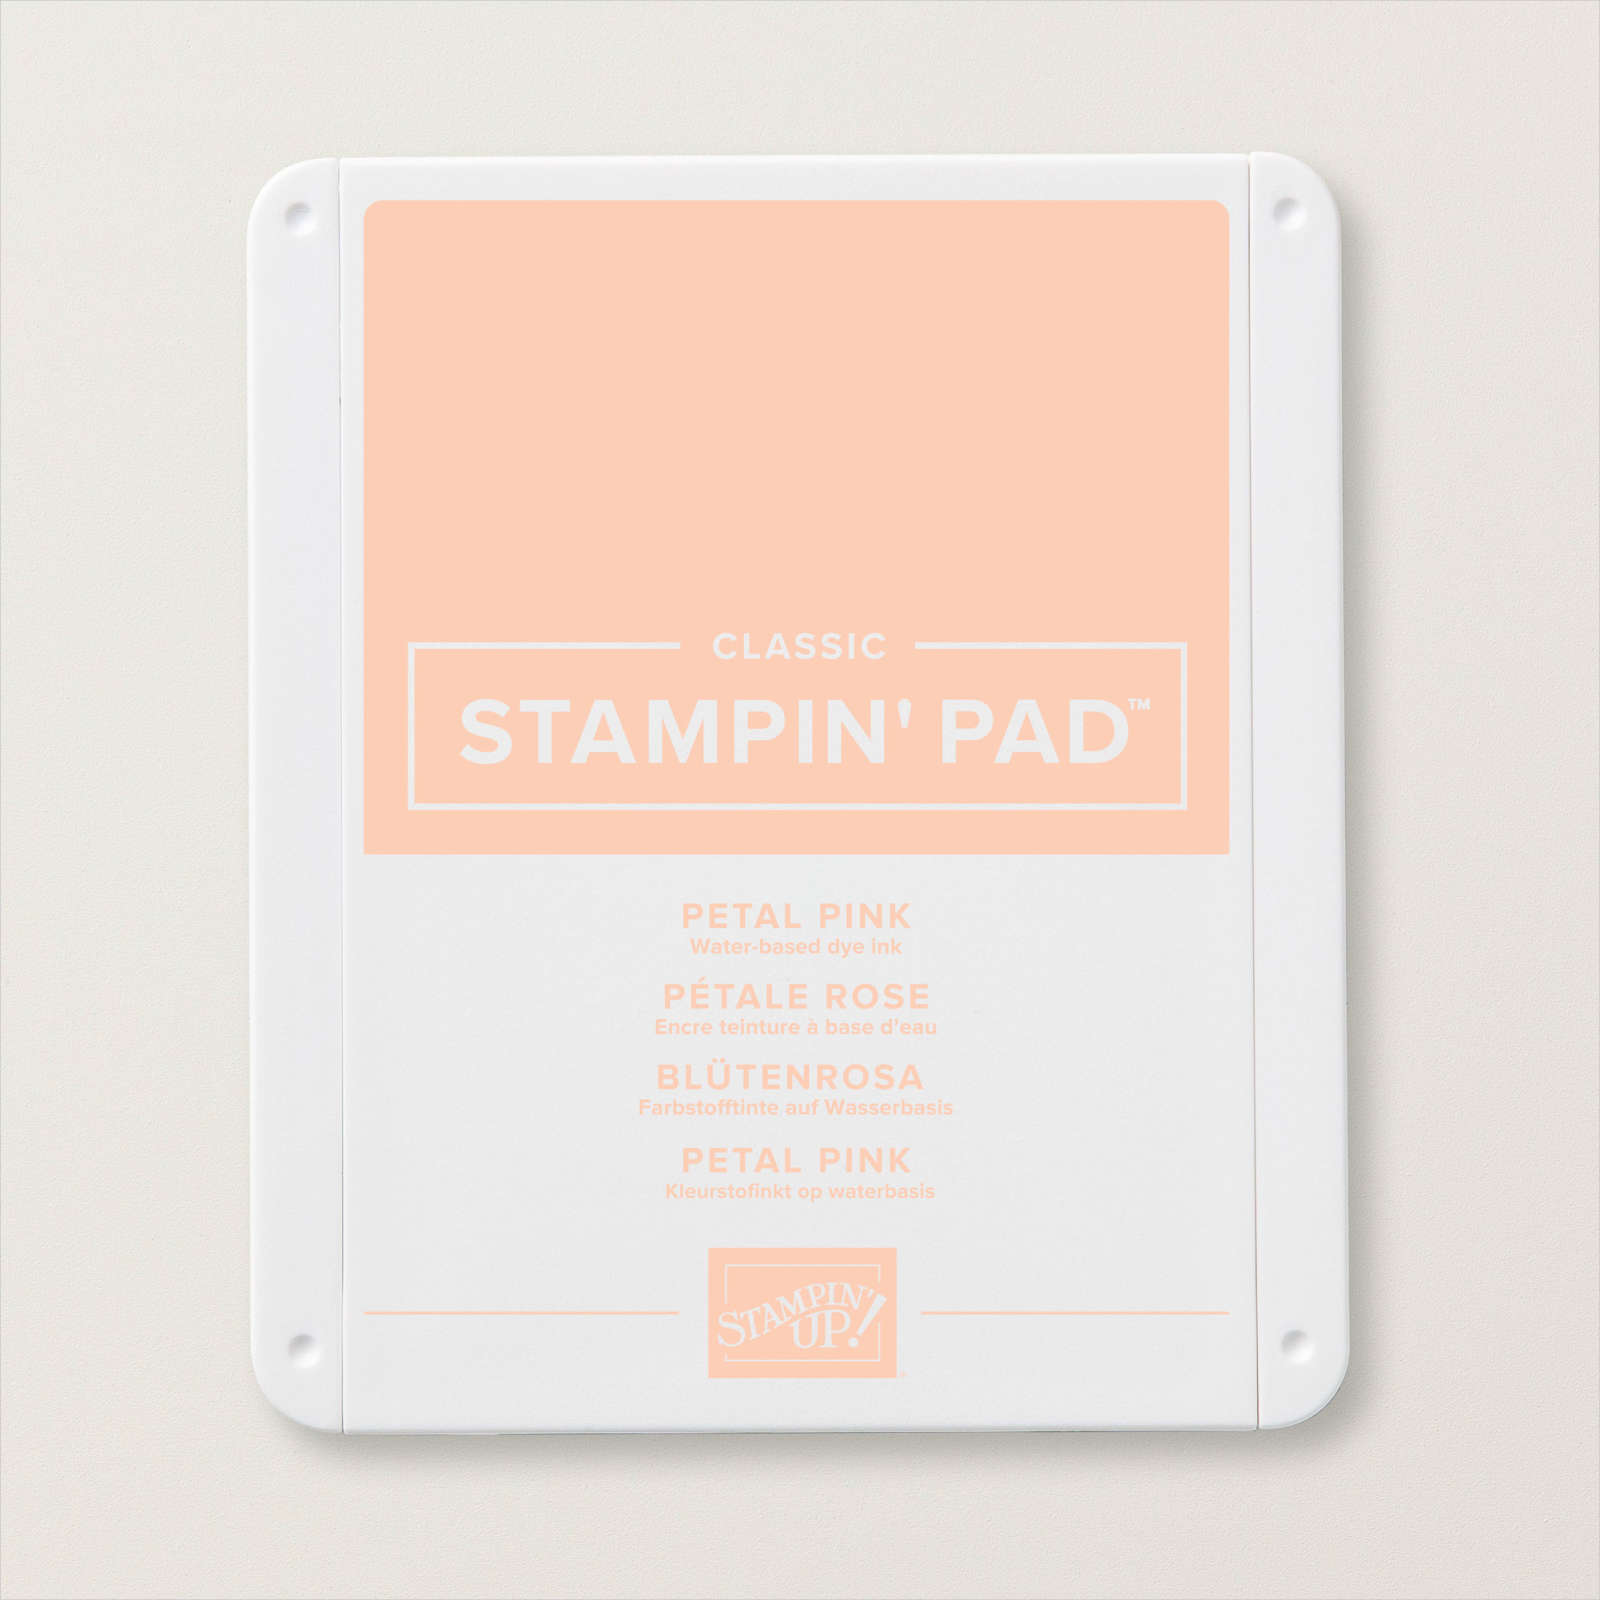
I stamped three small flowers from the Impressions Abloom stamp set onto the Basic White card using Petal Pink ink. All of the flower centres are stamped in Crumb Cake. I stamped the leaves from the Impressions Abloom stamp set using Lost Lagoon ink.

I stamped the greeting from the With You in Mind stamp set using Lost Lagoon ink. To finish off I stamped the splatter image from Month by Month stamp set from the Virtual Album Retreat 2025 using Highland Heather ink. The stamped panel is attached to Lost Lagoon card and then scored and folded Thick Basic White card. To decorate the inside of the card, I stamped several flowers, leaves and some more splatter using the images from the Impressions Abloom and Month by Month stamp sets and the same inks as the card front. Kind of busy but at the same time it looks pretty, don’t you think?
Bye for now,
Kris
Product Used:


Cairns
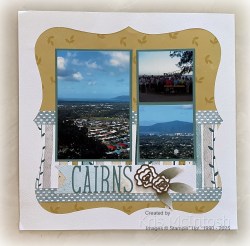
My page today shows off some photos from our first visit to Cairns way back in 2010. I used the third layout from the Everyday Happiness Workshop Kit to showcase my photos. I always cut my paper and create the basic pages so that I can use them when I find the right photos to add. For the title page I used the same flowers and leaves as the kit layout but changed up the banner and cut my title from Balmy Blue card using the Alphabet A La Mode Dies.

For the second page I decided to add a flip flap so that I could add my journaling underneath the photo, so I didn’t add anything to the journaling panel.

I did add the flowers, leaf and journaling panel in a different place to where they were placed in the instructions. I did use Pecan Pie to add colour to the flowers on the left hand page. I used Mossy Meadow to add colour to the leaves on the right hand page.

These are already die cut from a cardboard type of paper and so are quite thick and add so much dimension to the pages. I love how I am able to pull these layouts from my folder and add the photos when I find the right ones. What about you do you use the kits? Have you found them useful for your creativity? Although this Workshop Kit is no longer available, there are many others that you can choose from. Maybe I have inspired you to take a look if you already haven’t.
Bye for now,
Kris
Product Used:


Thanks
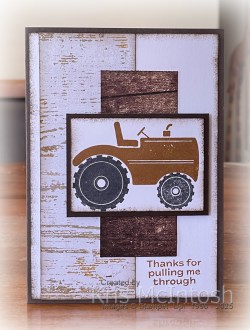
for pulling me through. This week in my Facebook Live I shared some cards I created using the Tractor & Co Bundle. Today I have another card created using the stamp set. I sponged the edges of two pieces of Country Woods Designer Series Paper using Early Espresso ink before attaching them to Basic White card. I also sponged the edges of the Basic White card using the same ink. I stamped the greeting from the Tractor and Co stamp set onto the lower right hand corner of the Basic White card using Pecan Pie ink.
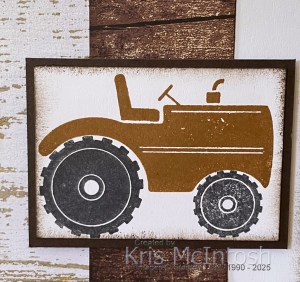
The whole panel is attached to scored and folded Early Espresso card. I stamped the tractor and seat images from the Tractor & Co stamp set onto Basic White card using Pecan Pie ink. I stamped the large and the small wheel images using Memento Tuxedo Black ink.
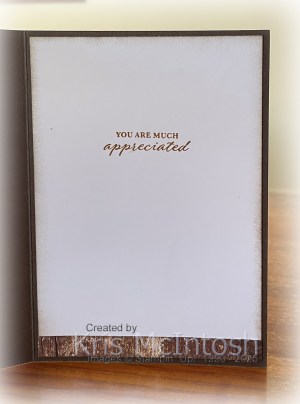
I sponged the edges of the stamped Basic White card using Early Espresso ink before attaching it to Early Espresso card. The whole panel is attached to the card front using dimensionals. To decorate the inside of the card, I attached a narrow strip of Country Woods Designer Series Paper across the bottom of Basic White card. (I did sponge the edges using Early Espresso ink.) I stamped the greeting from the Wonderful Thoughts stamp set onto the Basic White card using Early Espresso ink. Once more I sponged around the outside edges of the Basic White card before attaching it inside the Early Espresso card base. This set is so much fun and I know that I will be using it a lot.
Bye for now,
Kris
Product Used:


Free Shipping

When you place an order of $65.00 or more from today until Friday 24th you will get free shippng. So no additional costs on your purchases. A great way to stock up on those items on your wish list and save money. Who doesn’t love to save money? So place your order before 11.59 (AEST) on Friday 24th so you can take advantage of this great saving.
Bye for now,
Kris
Charming Birthday

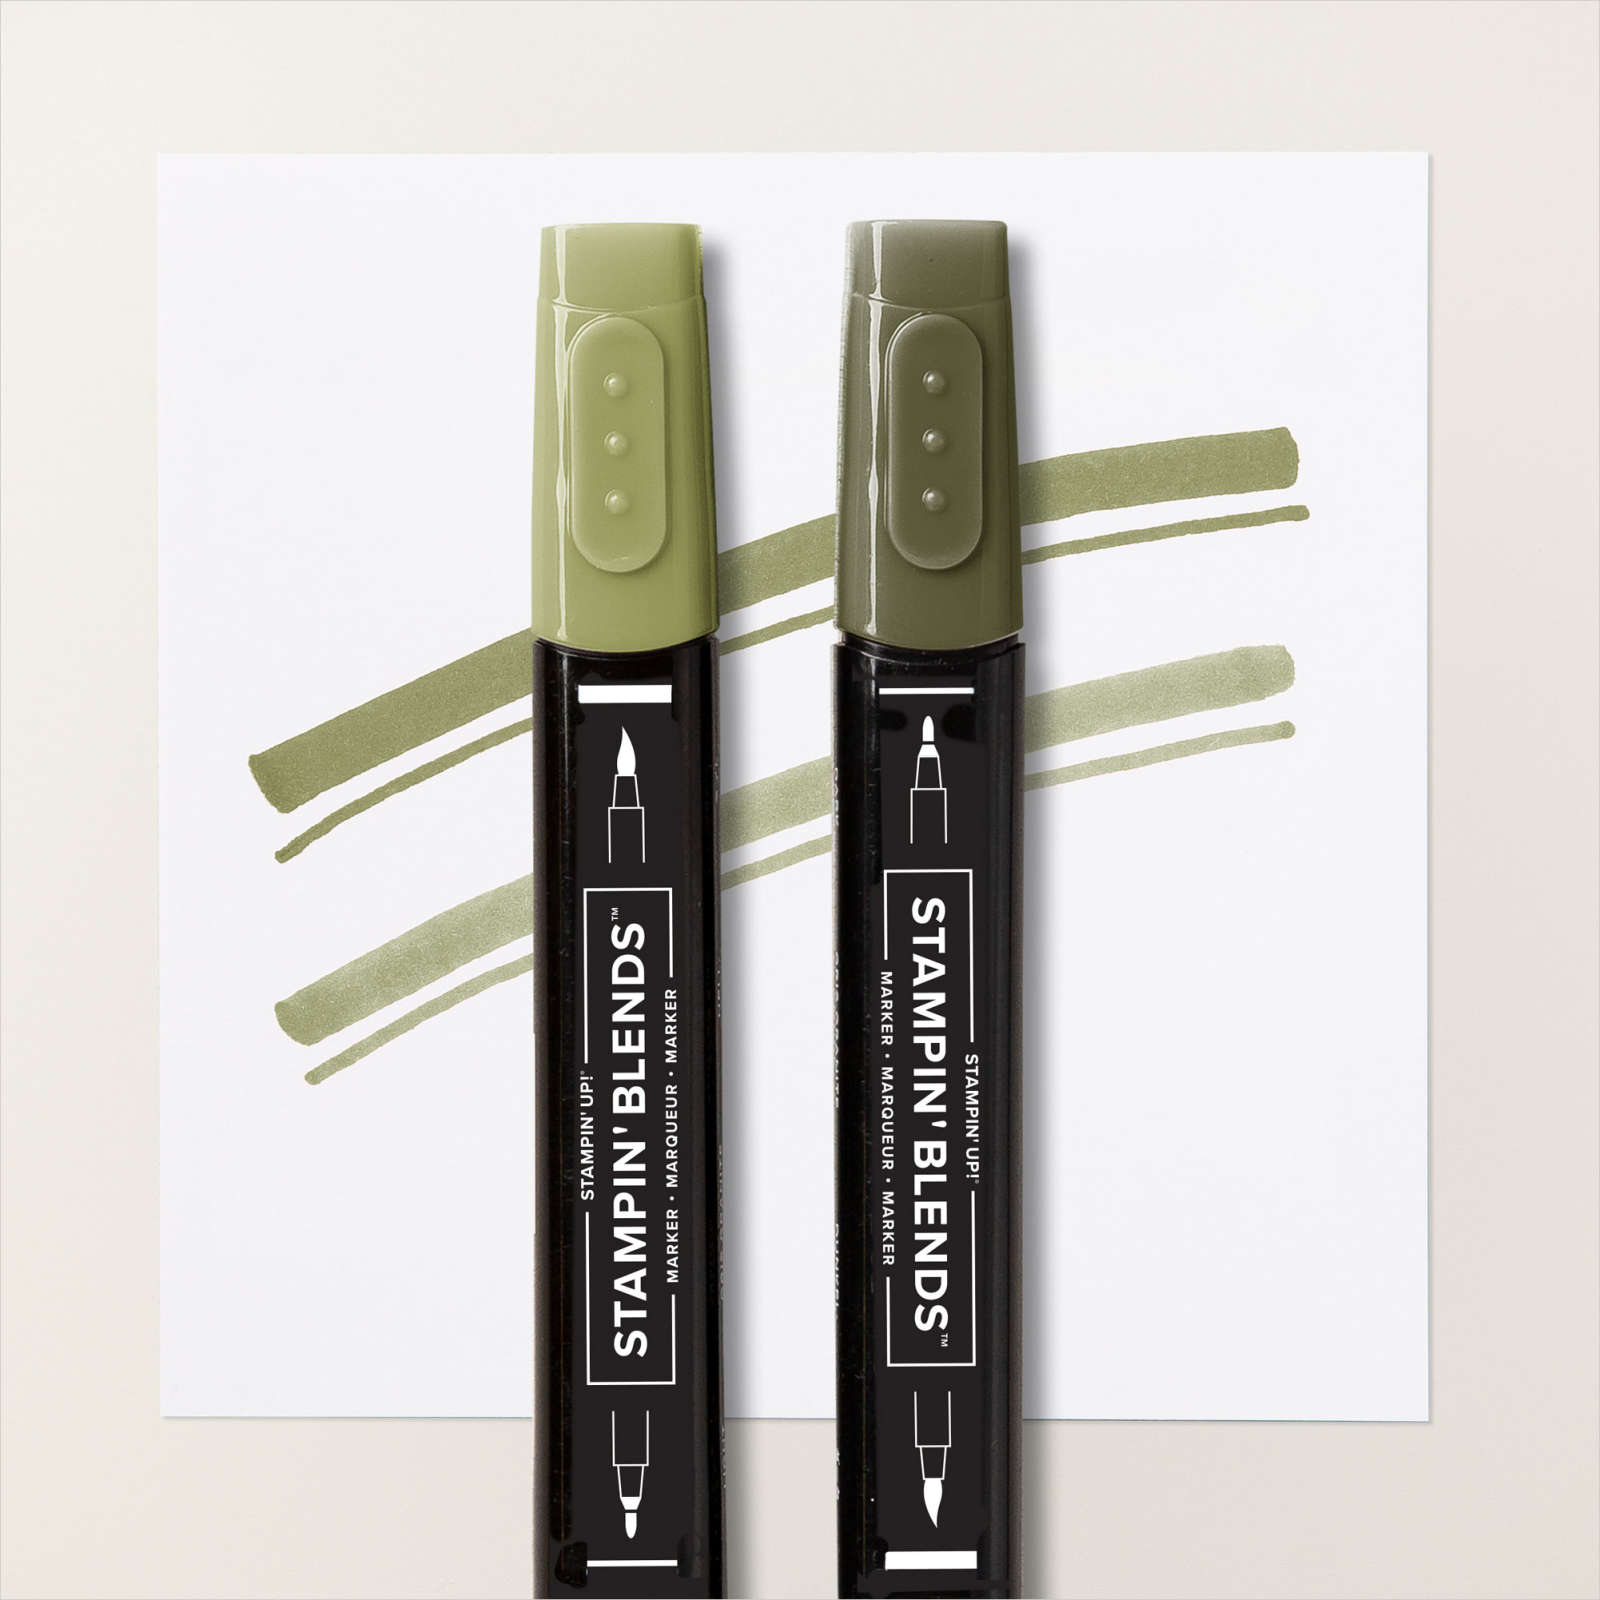
For today’s card, I embossed Crumb Cake card using the Exposed Brick 3D Embossing Folder. The embossed card is attached to scored and folded Blackberry Bliss card. I cut Basic White card using one of the Spotlight on Nature Dies which I attached to the embossed card using dimensionals. I stamped the floral image from the Charming Day stamp set onto Basic White card using Memento Tuxedo Black ink. I coloured the image using Blackberry Bliss and Mossy Meadow Stampin’ Blends. I cut out the image using the co-ordinating Charming Day Die and attached it to the Basic White circle.
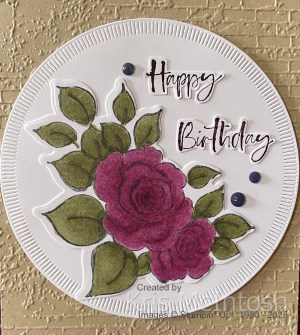
I stamped “happy birthday” from the Charming Day stamp set onto Basic White card using Memento Tuxedo Black ink.
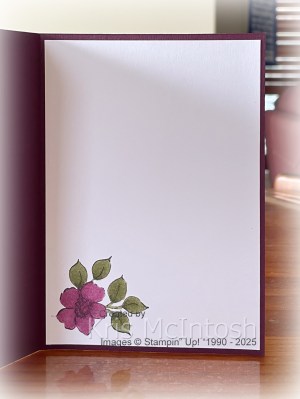
I fussy cut the greeting and attached it to the card front. To decorate the inside of the card, I stamped the smaller floral image from the Charming Day stamp set onto the lower left hand corner of Basic White card using Memento Tuxedo Black ink. I coloured the image using the Blackberry Bliss and Mossy Meadow Stampin’ Blends. The stamped and coloured panel is attached to the inside of the card base. I have had a lot of fun playing with the Charming Day Bundle and the co-ordinating products from the Floral Charm Suite Collection. This bundle is an Online Exclusive, so pop into my store and check it out.
Bye for now,
Kris
Product Used:


Celebration Time
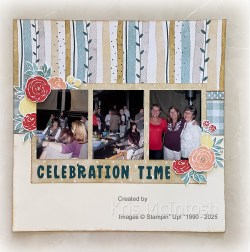
I watched a video on You Tube by Craft With Julie which inspired me to create this page using the same layout but different papers. I cut my Everyday Happiness 12″ x 12″ Designer Series Paper using Julie’s instructions. I sponged the edges of my pieces using Pecan Pie ink before attaching them to the Very Vanilla Two-Tone 12″ x 12″ paper
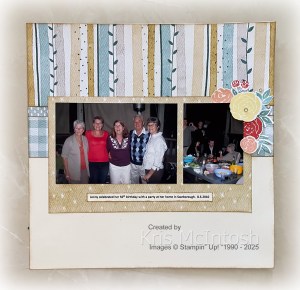
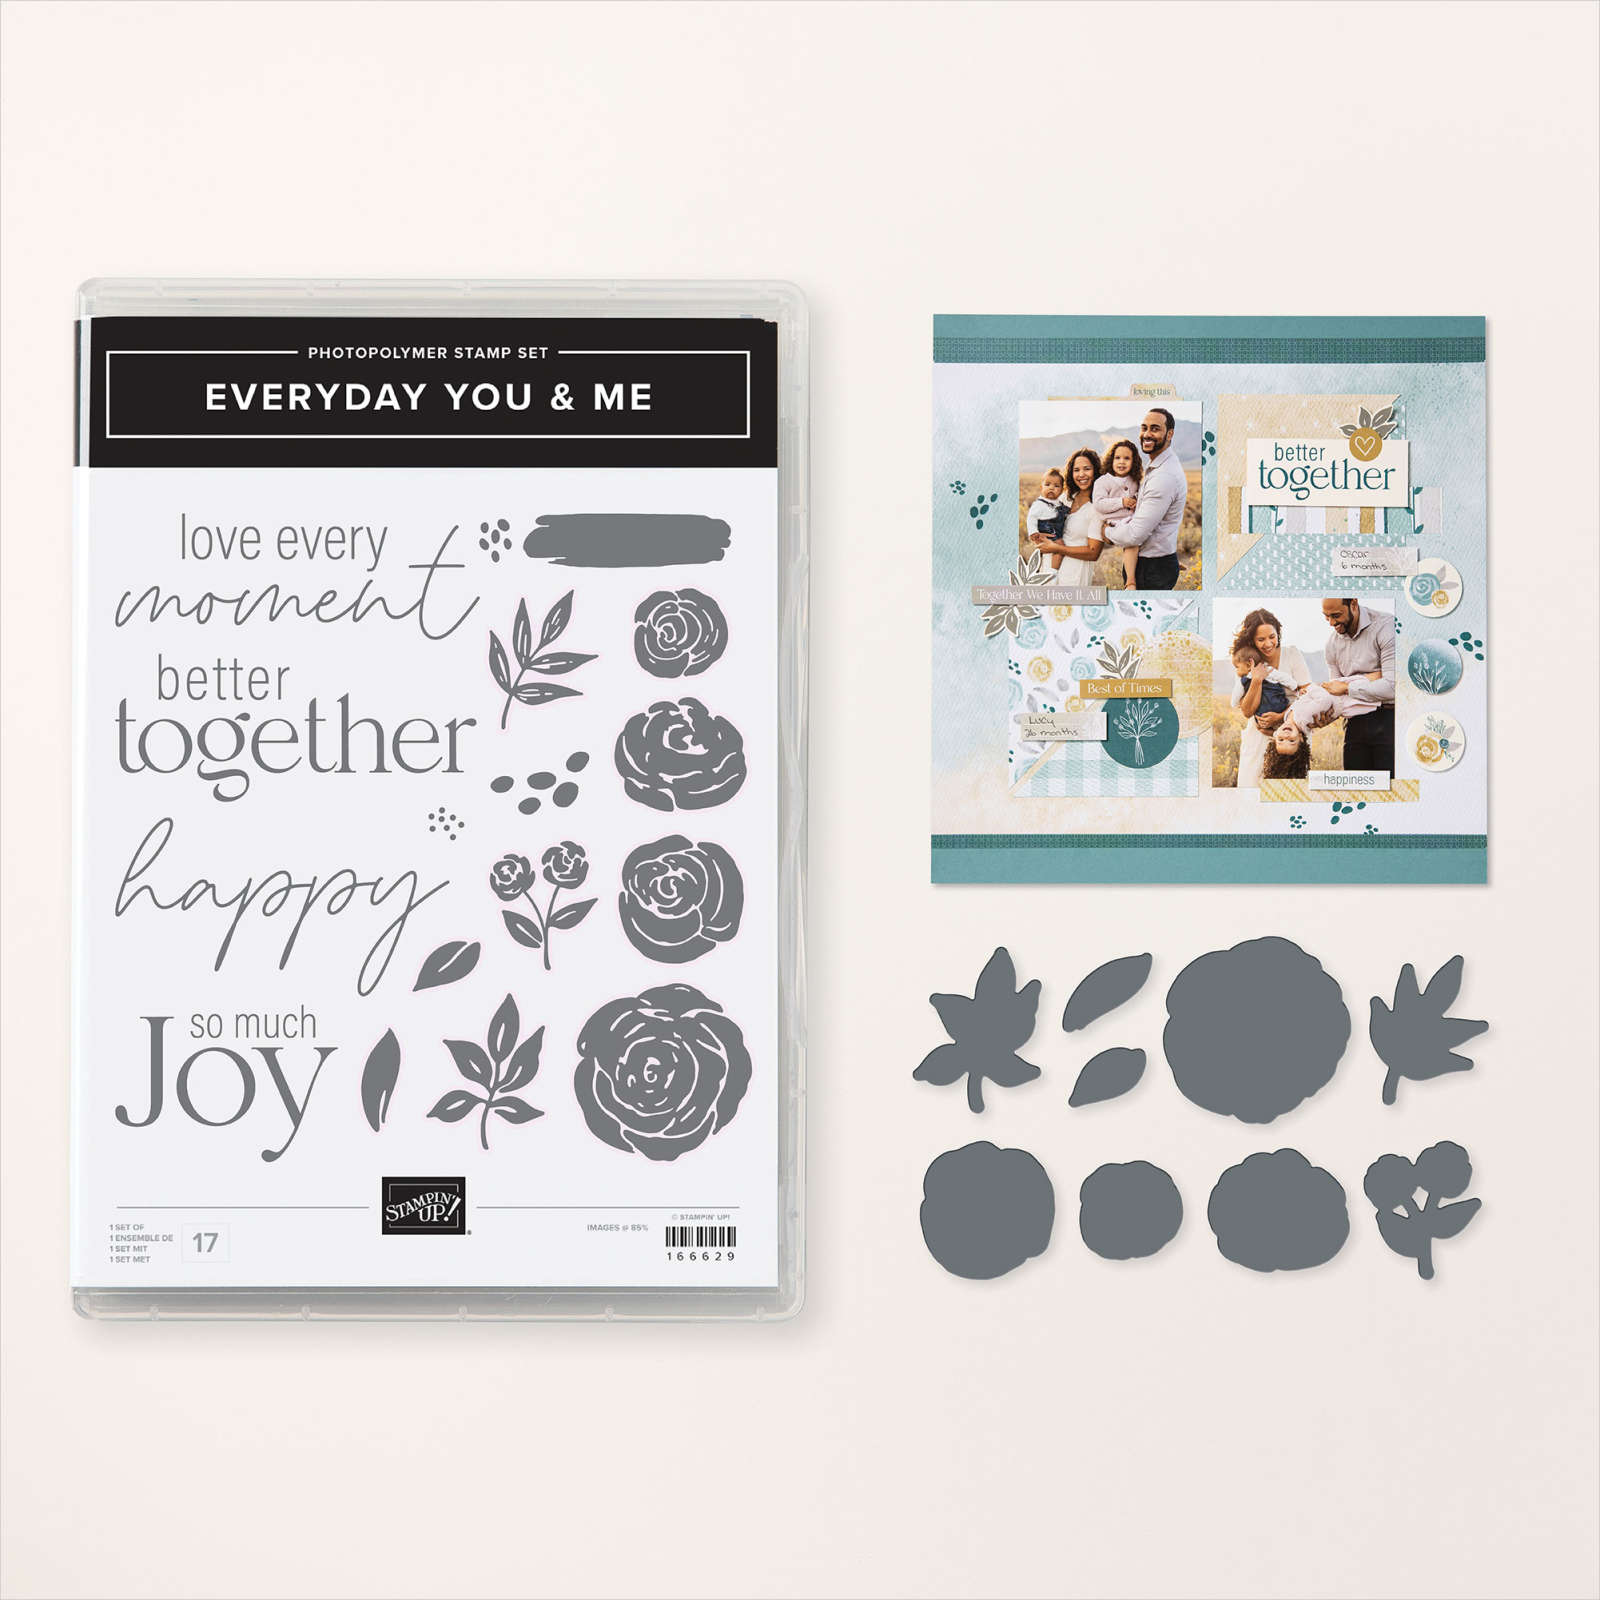
I stamped various flowers and leaves from the Everyday You & Me stamp set (last chance) using Poppy Parade, Flirty Flamingo and Lemon Lolly. I also stamped lots of the leaves from the Everyday You and Me stamp set using Lost Lagoon ink. The flowers and leaves are cut out using the co-ordinating Everyday You & Me Dies (last chance). I attached my photos to the page and arranged the flowers and leaves so that they sit partially behind the photos.
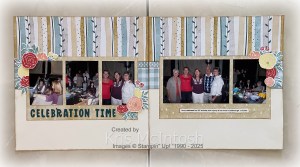
I did use dimensionals underneath the flower that sits over the photos. I cut the title from Pretty Peacock card using the Mini Alphabet Dies. I printed my journaling onto Very Vanilla card, trimmed it and sponged the edges using Pecan Pie ink before attaching it to the right hand page. I also added some Basic Rhinestones around my flower clusters. I am really happy with the way this turned out and love that I was able to use some more of this beautiful paper, which, by the way, is still a current product. So thank you Julie for the inspiration.
Bye for now,
Kris
Product Used:


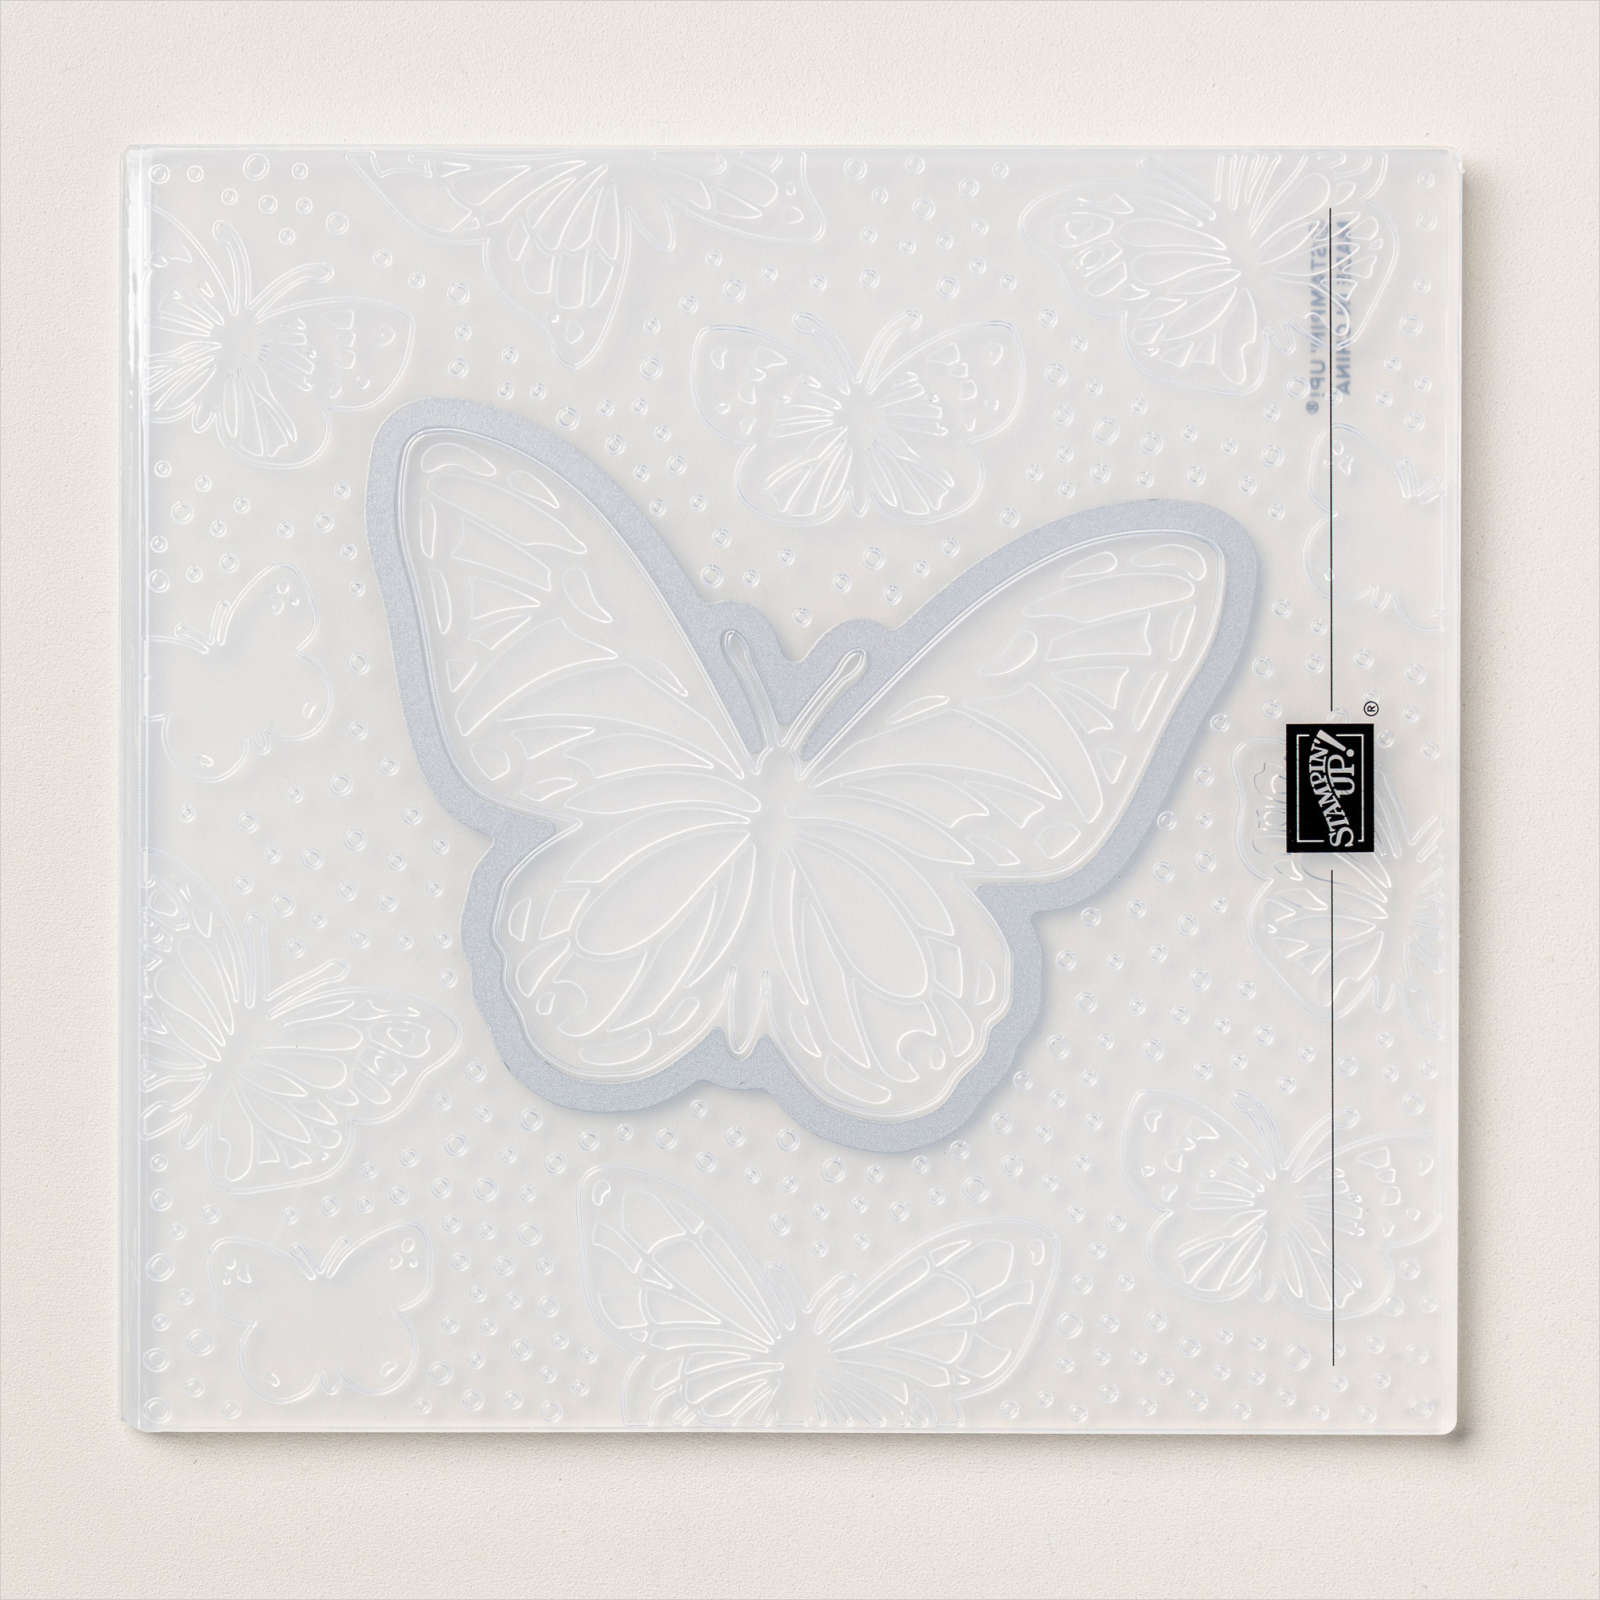
Butterfly Birthday
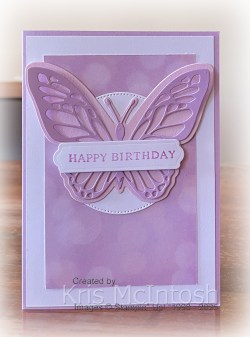
The Beautiful Butterflies Bundle has been moved to the Last Chance list so I thought I have a little play with it before it is gone forever. I attached a piece of Beautiful Boho 6″ x 6″ Designer Series Paper to Basic White card. The whole panel is attached to scored and folded Fresh Freesia card. I die cut Basic White card using one of the circles from the Stylish Shapes Dies and attached it to the card front. I used the Beautiful Butterfly Dies to cut the solid butterfly from Bubble Bath card and the intricate butterfly from Fresh Freesia card.
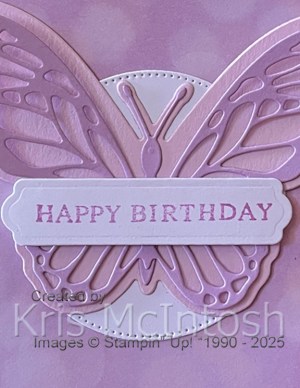
I also die cut the butterfly body from Fresh Freesia card using the same dies. I attached the butterfly body to the solid butterfly and attached the intricate butterfly over the top. I only added glue behind the body sections of the butterfly pieces so that the wings were loose.
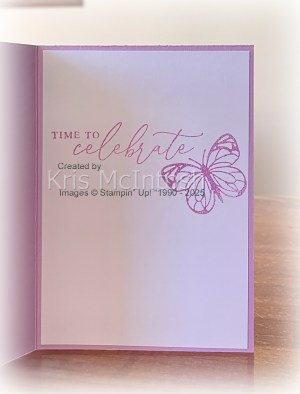
stamped the greeting from the Beautiful Butterflies stamp set onto Basic White card using Fresh Freesia ink. I used one of the banners from the Beautiful Butterfly Dies to cut it out. The greeting is attached across the butterfly using dimensionals. To decorate the inside of the card, I stamped another greeting from the Beautiful Butterflies stamp set using Fresh Freesia ink. I also stamped the smaller butterfly from the Beautiful Butterflies stamp set next to the greeting using Fresh Freesia ink. Simple but pretty. I’d love to know what you think.
Bye for now,
Kris
Product Used: