Tuesday Morning Sketches
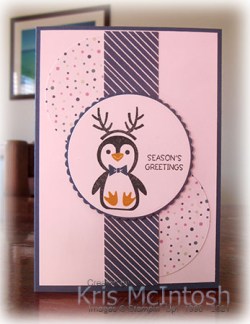
Today’s card was inspired by the sketch challenge at Tuesday Morning Sketches. Unfortunately I missed the deadline but loved the sketch. I cut a circle from the Penguin Playmates Designer Series Paper and then cut it in half. I attached one half to the bottom right and one half to the top left hand edges of Basic White card. I cut a strip from another pattern of the Penguin Playmates Designer Series Paper and attached it down the centre of the Basic White card covering the edges of the half circles. The Basic White panel is attached to scored and folded Misty Moonlight card. I cut a circle the same size as the designer series paper circles from Basic White card.
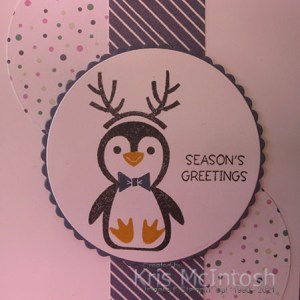
I stamped the penguin from the Penguin Place stamp set onto the Basic White circle using Memento Tuxedo Black ink. I stamped the antler image from the Penguin Place onto the penguin image using Memento Tuxedo Black ink. I added the nose and feet images from the stamp set using Crushed Curry ink.
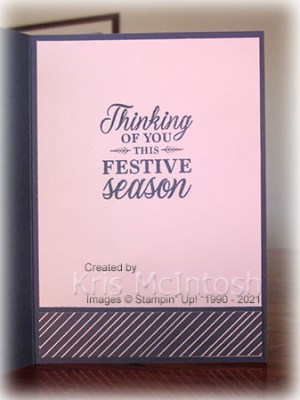
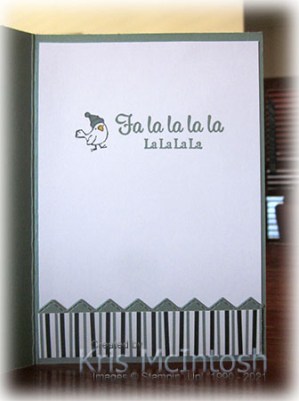
I added the bow tie image from the Penguin Place stamp set using Misty Moonlight ink. The greeting from the same stamp set is stamped in Memento Tuxedo Black ink. I cut a scalloped circle from Misty Moonlight card using the Layering Circle Dies and attached the stamped Basic White circle. The image panel is attached to the card front using dimensionals. To decorate the inside of the card, I stamped the greeting from the Merriest Moments stamp set using Misty Moonlight ink. I attached a narrow strip of Misty Moonlight card behind one long edge of a piece of Penguin Playmates Designer Series Paper before attaching it to the bottom of the stamped Basic White card. I really love this gorgeous little stamp set and when you add the Penguin Playmates Designer Series Paper the options become even more fun. Of course the added benefit is that you can earn the Designer Series Paper for FREE during Sale-a-bration with a qualifying order. I love that some of the freebies in the Sale-a-Bration catalogue co-ordinate with product from either the current Annual or Mini Catalogue.
Bye for now,
Kris
Product Used:


Papercraft Crew Sketch 432

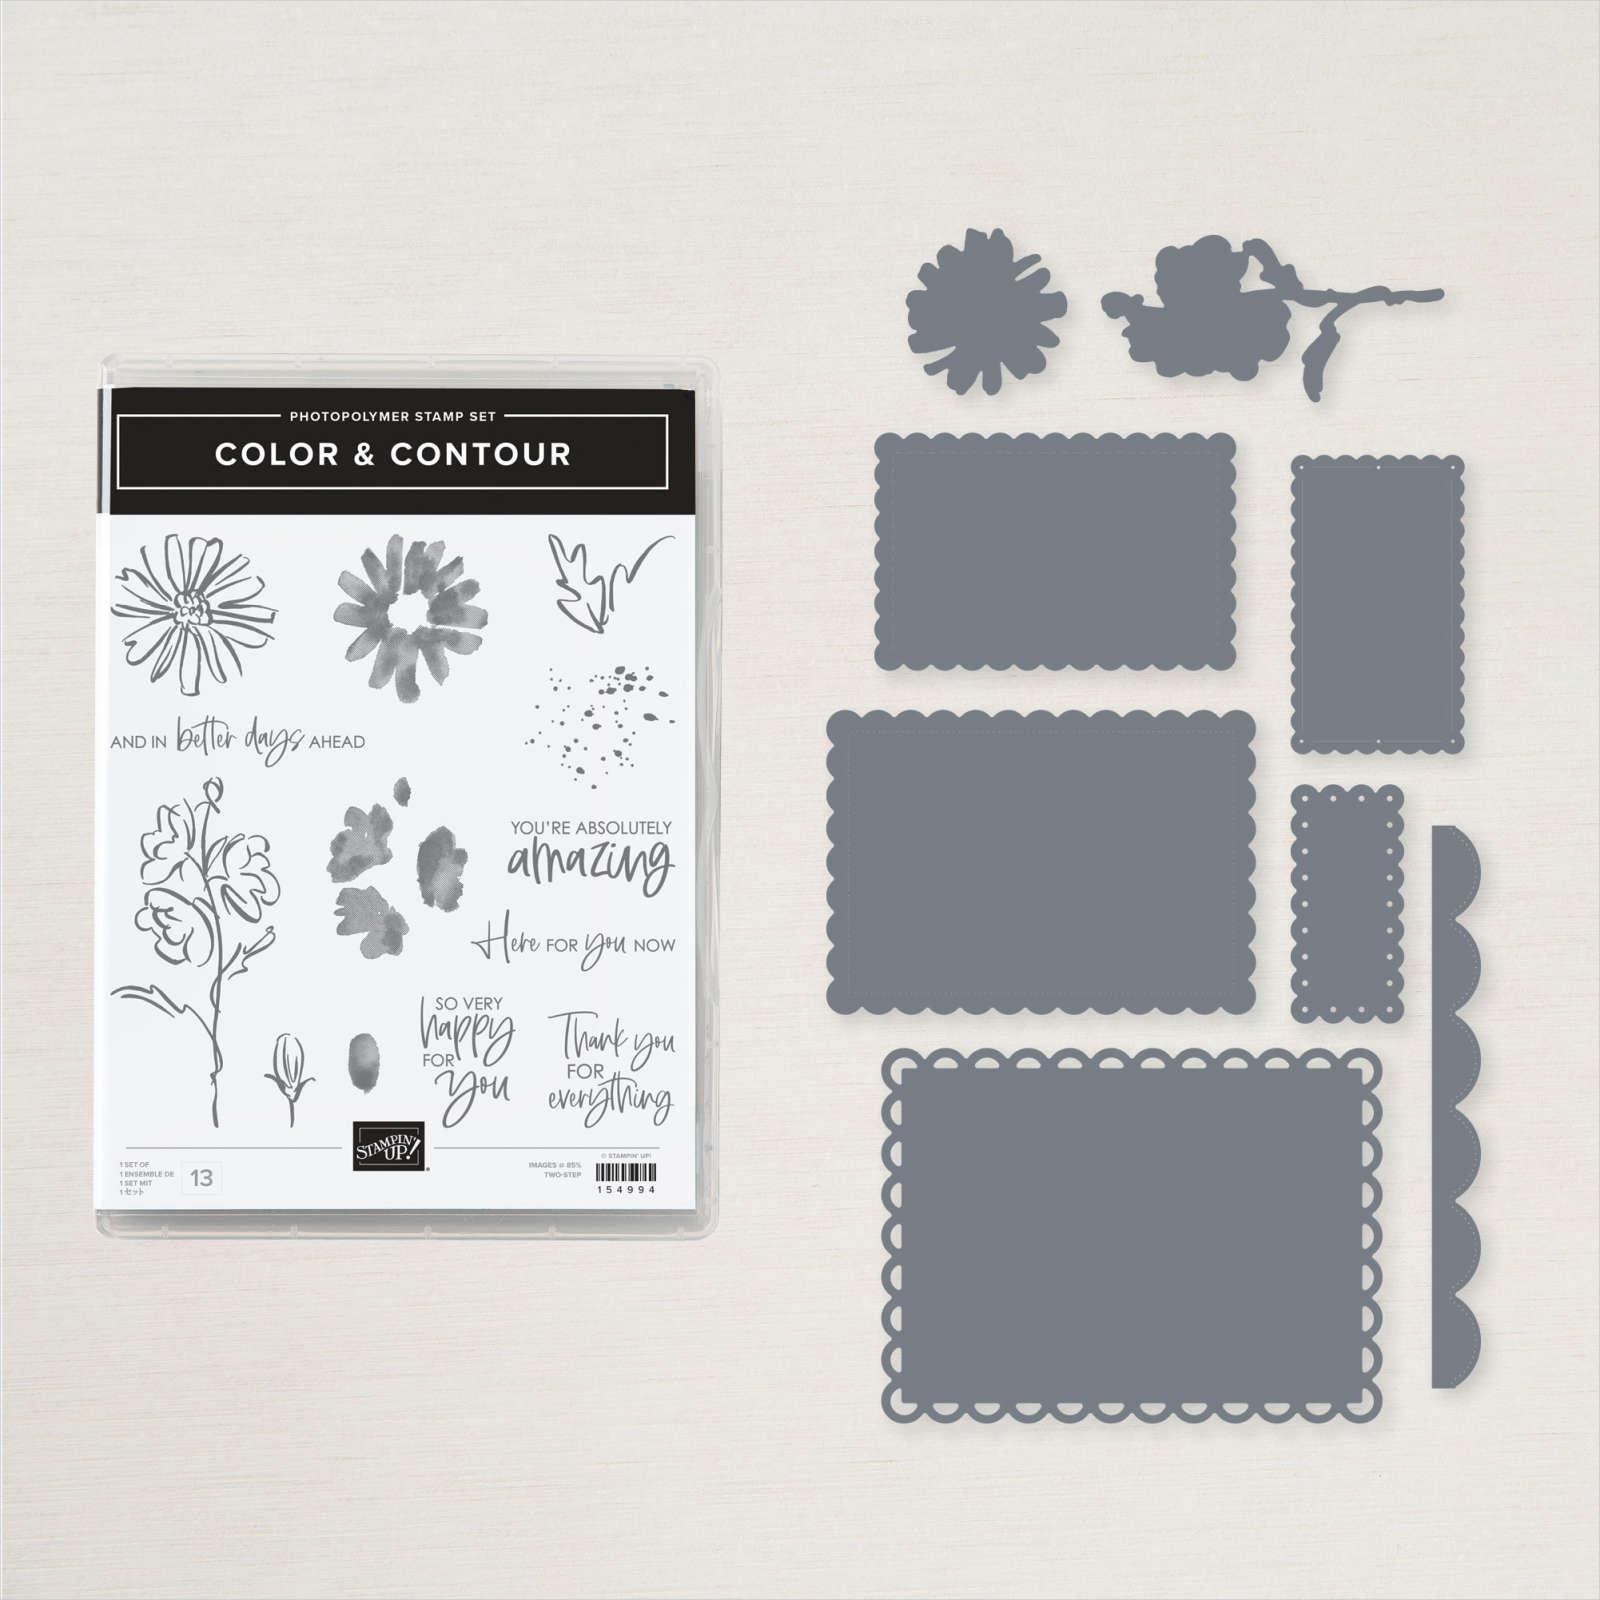
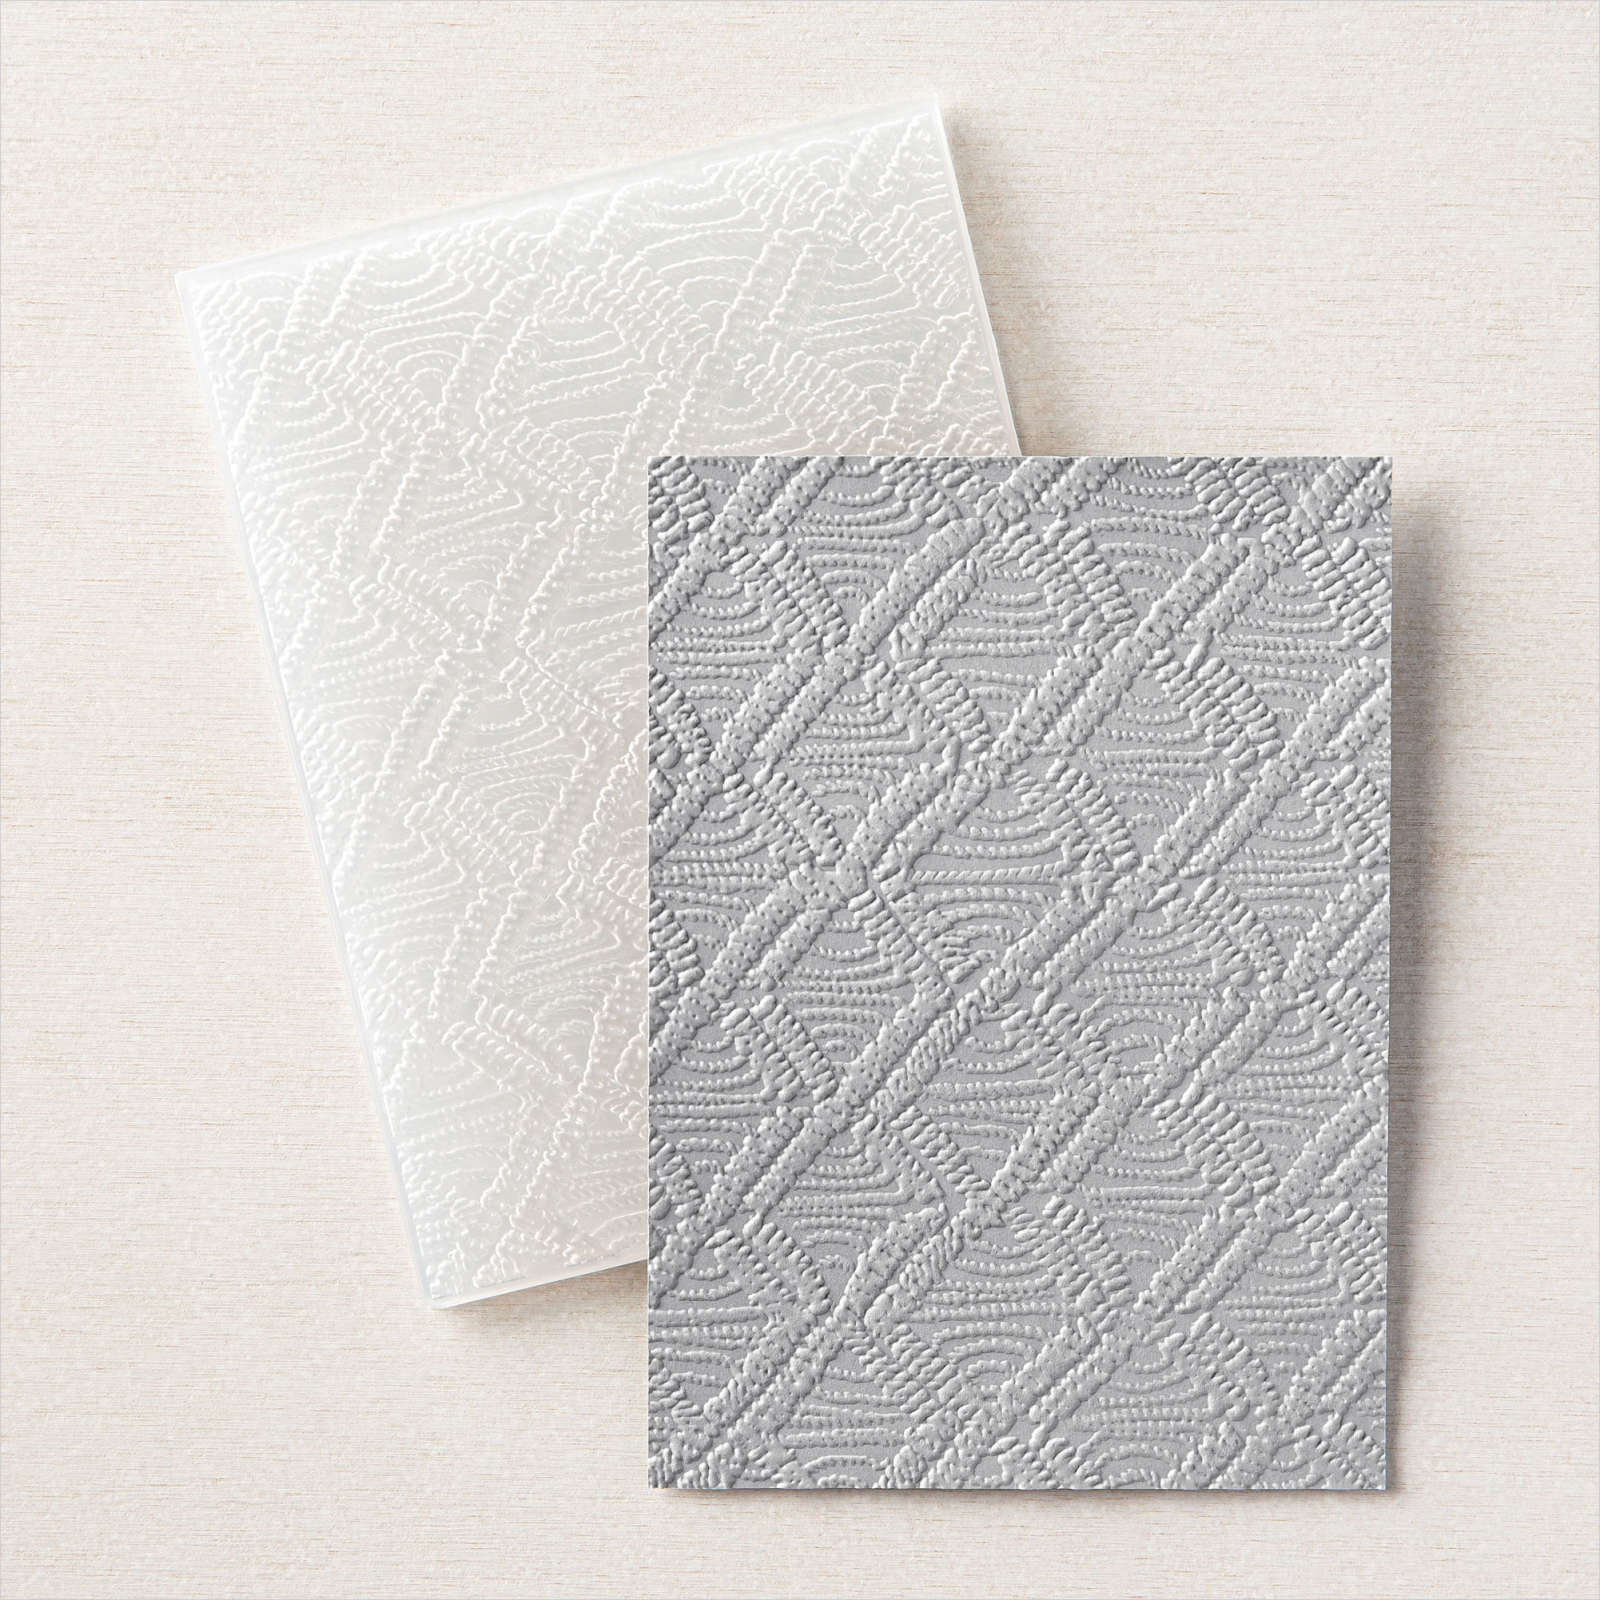
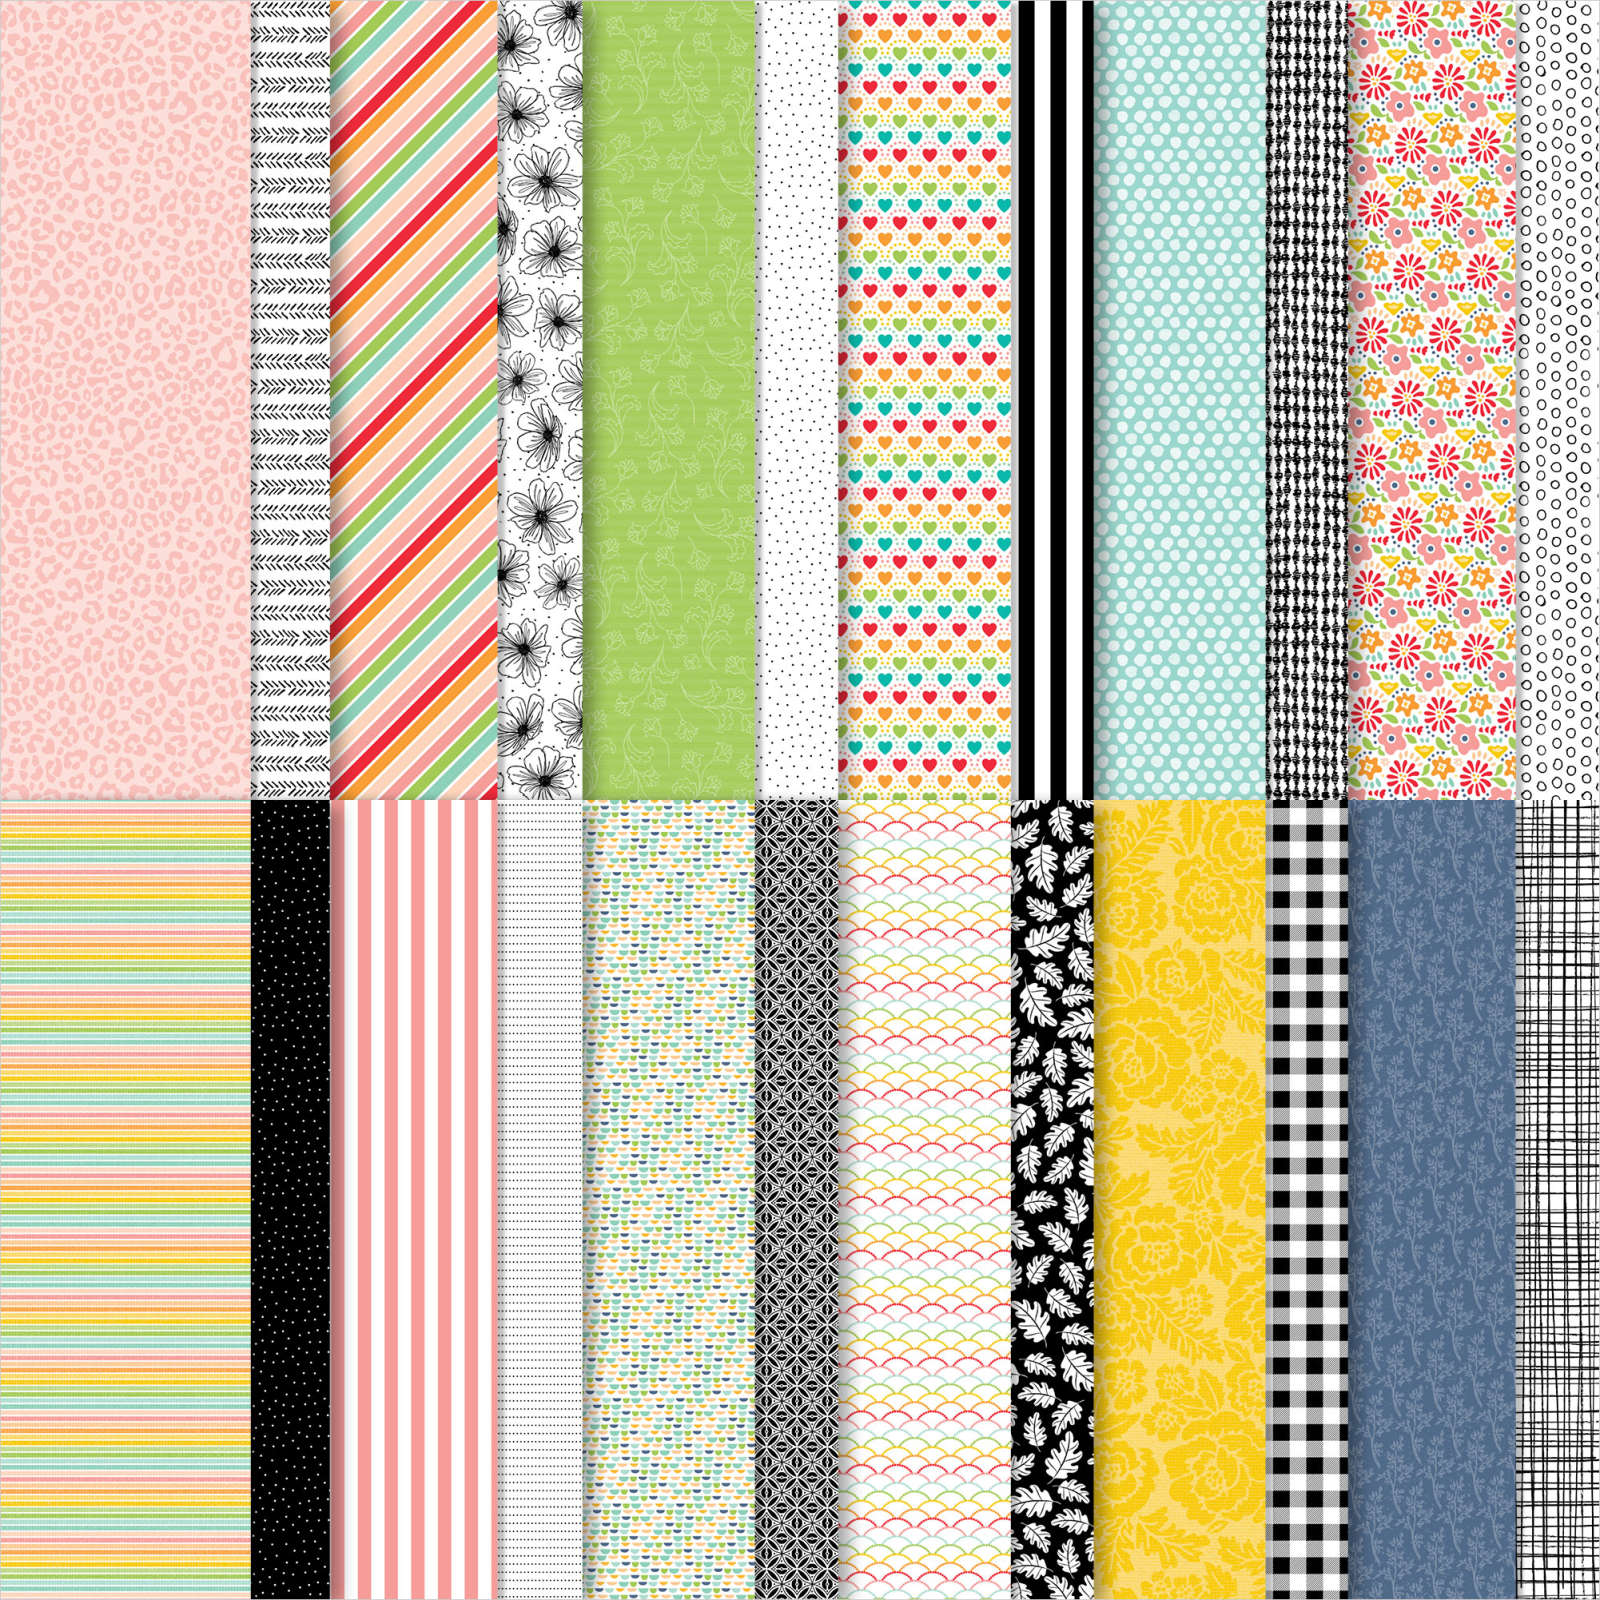
Today’s card was inspired by a recent sketch challenge at Papercraft Crew. Unfortunately, I didn’t meet the deadline for this card but thought I would share it with you anyway. I embossed Basic White card using the Macrame 3D Embossing Folder and attached it to scored and folded Highland Heather card. I cut a narrow strip of Pattern Party Designer Series Paper and attached it across the embossed Basic White card. I cut the same pattern of Pattern Party Designer Series Paper twice using one of the Stitched Rectangle Dies. I attached one die cut above and to the left of the Designer Series Paper strip.
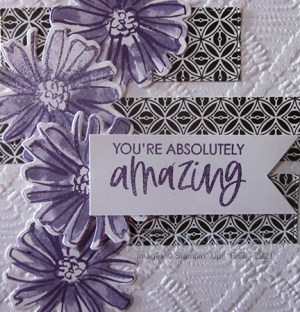
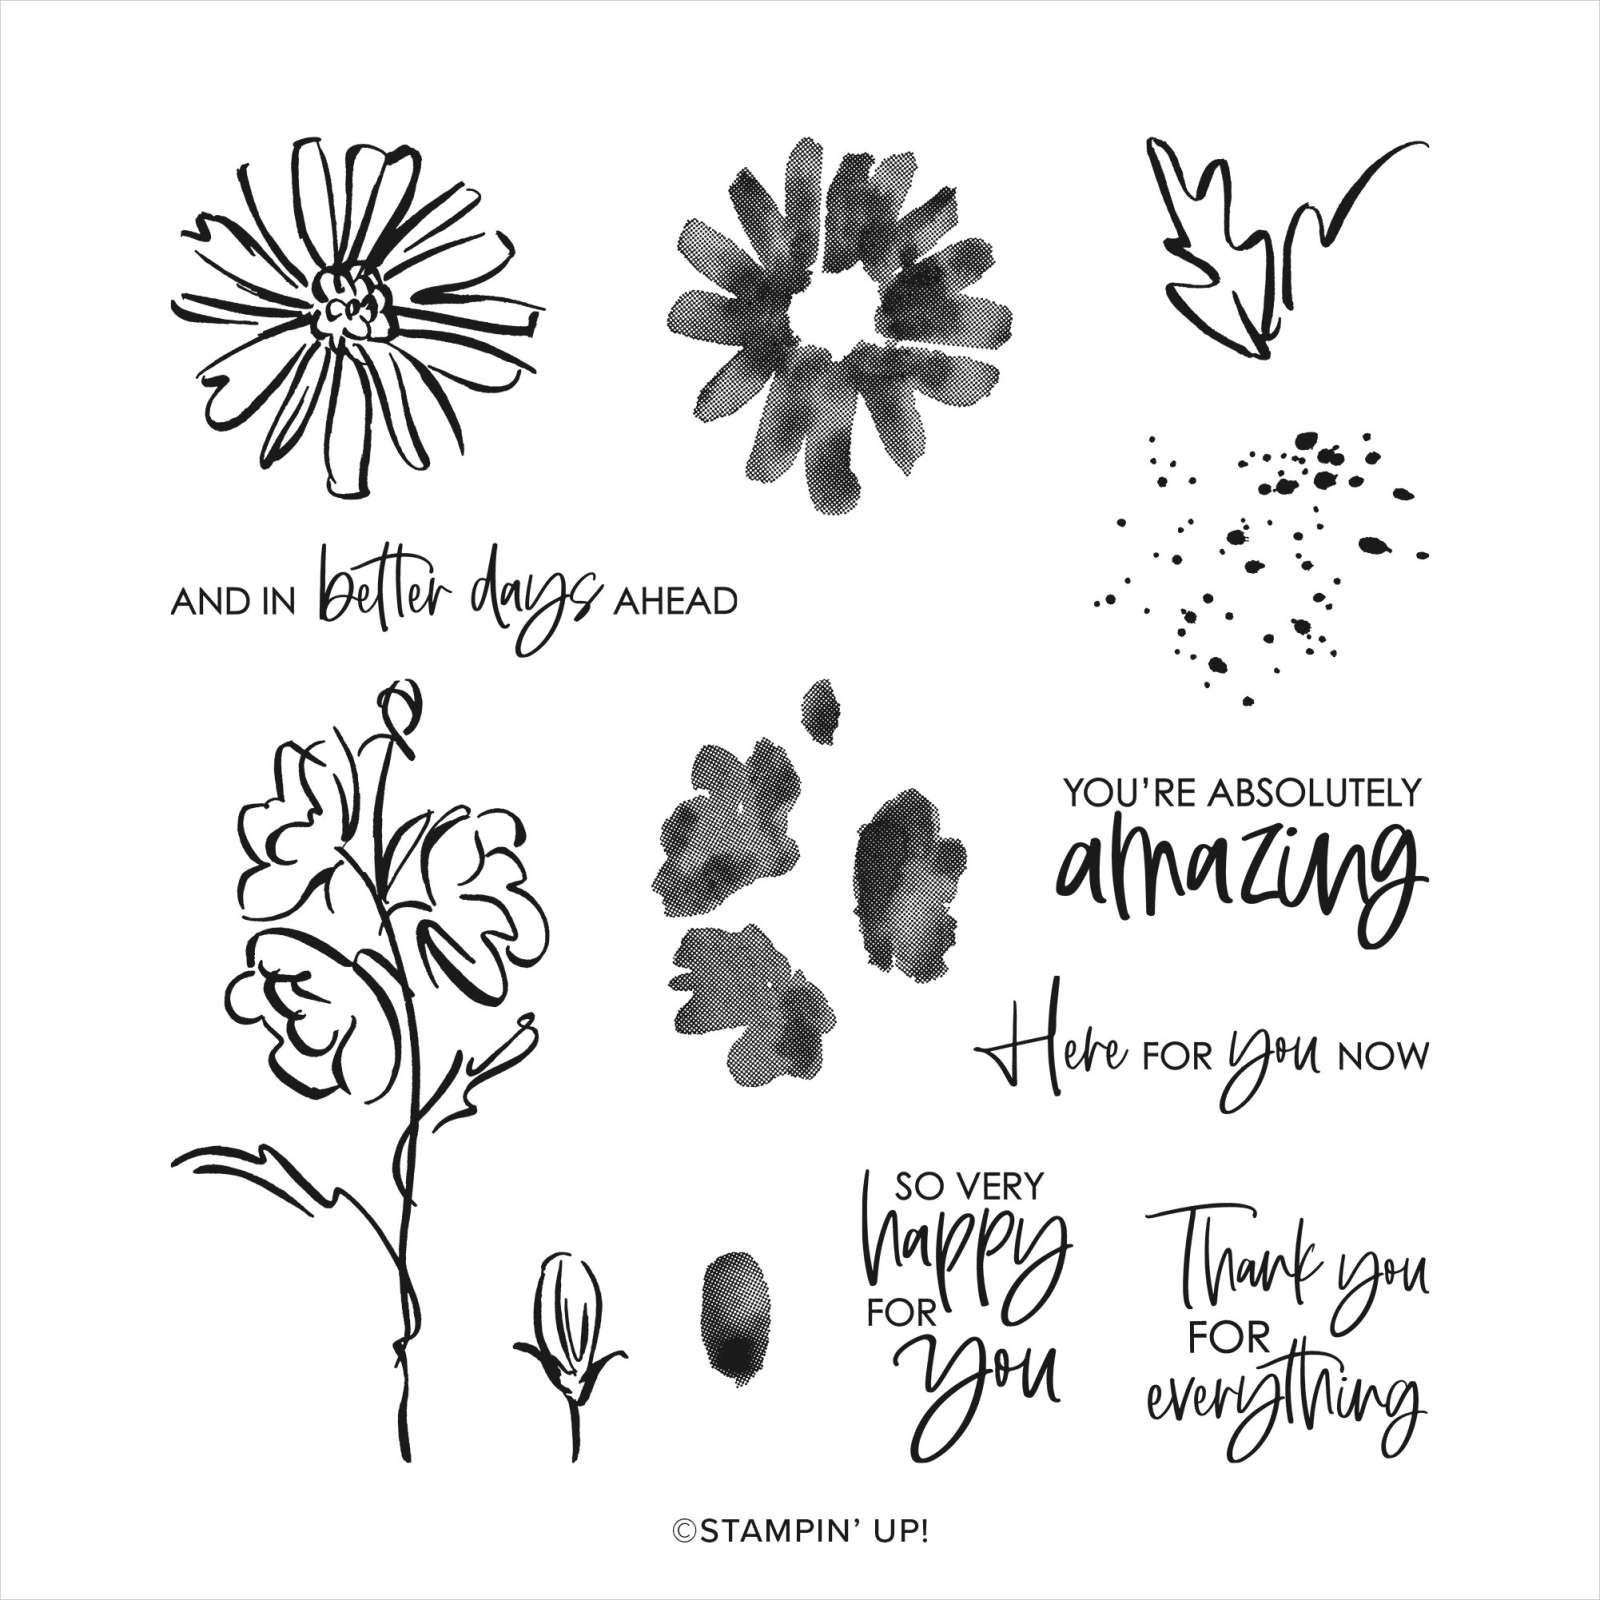
I attached the other one to the right and below the Designer Series Paper strip. I stamped the outline single flower image from the Colour & Contour stamp set onto Basic White card four times using Gorgeous Grape ink. I stamped the solid single flower over the outline image using Highland Heather ink.
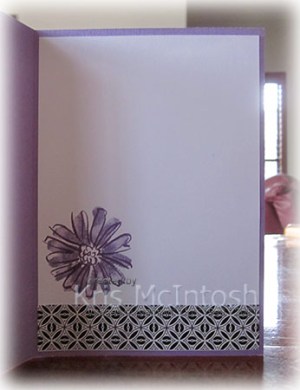
I cut out the images using the co-ordinating Scalloped Contour Die. I attached all of the flowers to the left hand side of the card front, using dimensionals for the third flower. I stamped the greeting from the Colour & Contour stamp set onto Basic White card using Gorgeous Grape ink. I cut a “v” in the right hand edge before attaching the greeting to the card front using dimensionals. To decorate the inside of the card, I stamped the outline single flower image from the Colour & Contour stamp set onto the lower left hand corner of Basic White card using Gorgeous Grape. I stamped the fill image over the top using Highland Heather ink. I attached a narrow strip of the same pattern of Pattern Party Designer Series paper across the bottom of the card.
Such a bright happy card, don’t you think? Best of all I used up most of the pieces from some left over class kits! Yay!
Bye for now,
Kris
Product Used:


Stanthorpe
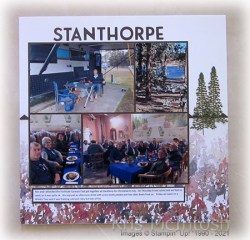
Today’s pages show some photos from our recent visit to Stanthorpe for Christmas in July with the Fortitude Caravan Club. This Club is sponsored by Brisbane RV’s who sell the Fortitude Caravan and let me say they did an amazing job of feeding us all on Saturday night! It was pretty cold which would have been ok but it was wet and rainy too.
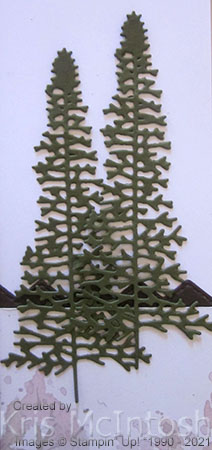
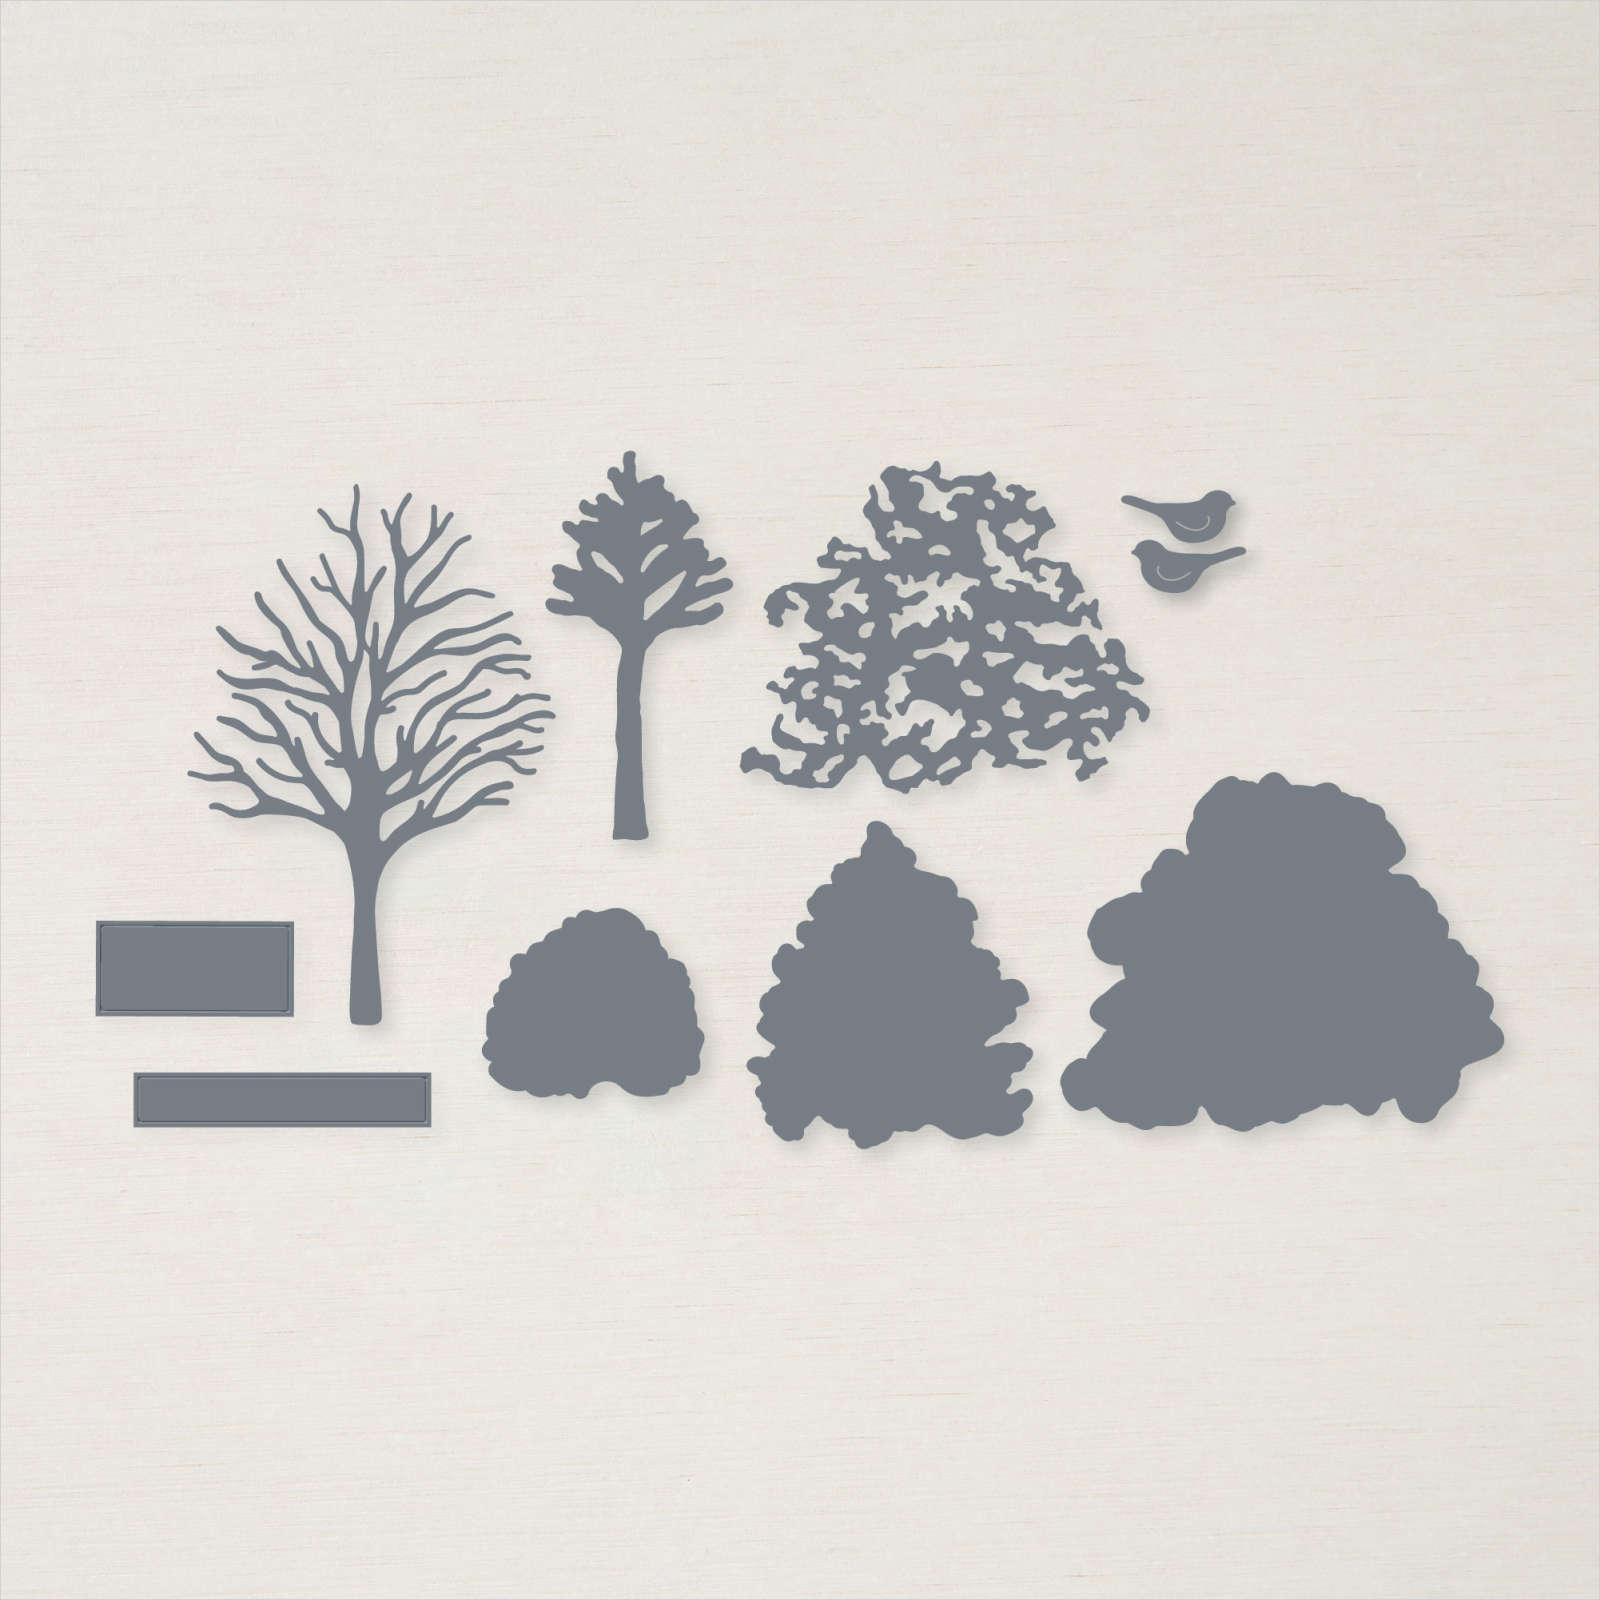
Can’t complain too much though, because this town has had to truck in water for 3 years and now has a full dam! I cut lengths of Early Espresso card using one of the Basic Border Dies which I attached behind one long edge of a piece of Beauty of the Earth Designer Series Paper. The panels are attached across the bottom of two Basic White 12″ x 12″ pages. I attached four photos for each page to Early Espresso card before attaching them to the pages. I printed the journaling onto Basic White card, attached the journalling to Early Espresso card and then to each page. I cut four trees from Mossy Meadow card using the Majestic Mountain Dies and attached two to each page. The title is cut from Early Espresso card using the Playful Alphabet Dies.
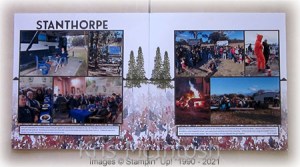
Simple pages but a great reminder of the fun we had on our first trip with this Club.
Bye for now,
Kris
Product Used:


Another Merriest Moment

Today I am sharing another card I made using the Merriest Moment Bundle which I showcased on my Facebook Live this week. This time, I embossed and cut (at the same time) Basic White card using the Merriest Frames Hybrid Embossing Folder (and die). I attached the die cut to scored and folded Crumb Cake card. I cut the rectangle from Crumb Cake card using the die in the Hybrid Embossing Folder Bundle and attached it to the card front using dimensionals.

I stamped the two large flowers from the Merriest Moments stamp set onto Basic White card using Real Red ink and cut them out using the co-ordinating die. I stamped the different leaves from the Merriest Moments stamp set twice each onto Basic White card using Old Olive ink. I cut out the leaves using the co-ordinating dies. I layered the flowers and leaves together and attached them to the left hand side of the Crumb Cake rectangle.

I stamped the greeting from the Merriest Moments stamp set onto Basic White card using Old Olive ink and cut it out with Paper Snips. I attached the greeting to the right hand side of the Crumb Cake rectangle using dimensionals. To decorate the inside of the card, I stamped the flowers and leaves used on the card front onto Basic White card using Real Red and Old Olive ink. I cut out the flowers and the leaves using the co-ordinating dies. I stamped the dotted image from the Merriest Moments stamp set onto the centre of the smaller flower using Real Red ink. I layered the flowers and leaves together and attached them to the lower left hand corner of Basic White card.
I certainly hope you take a look at this bundle, it is so much fun!
Bye for now,
Kris
Product Used:
You can see the Merriest Moments Bundle here at my online store.


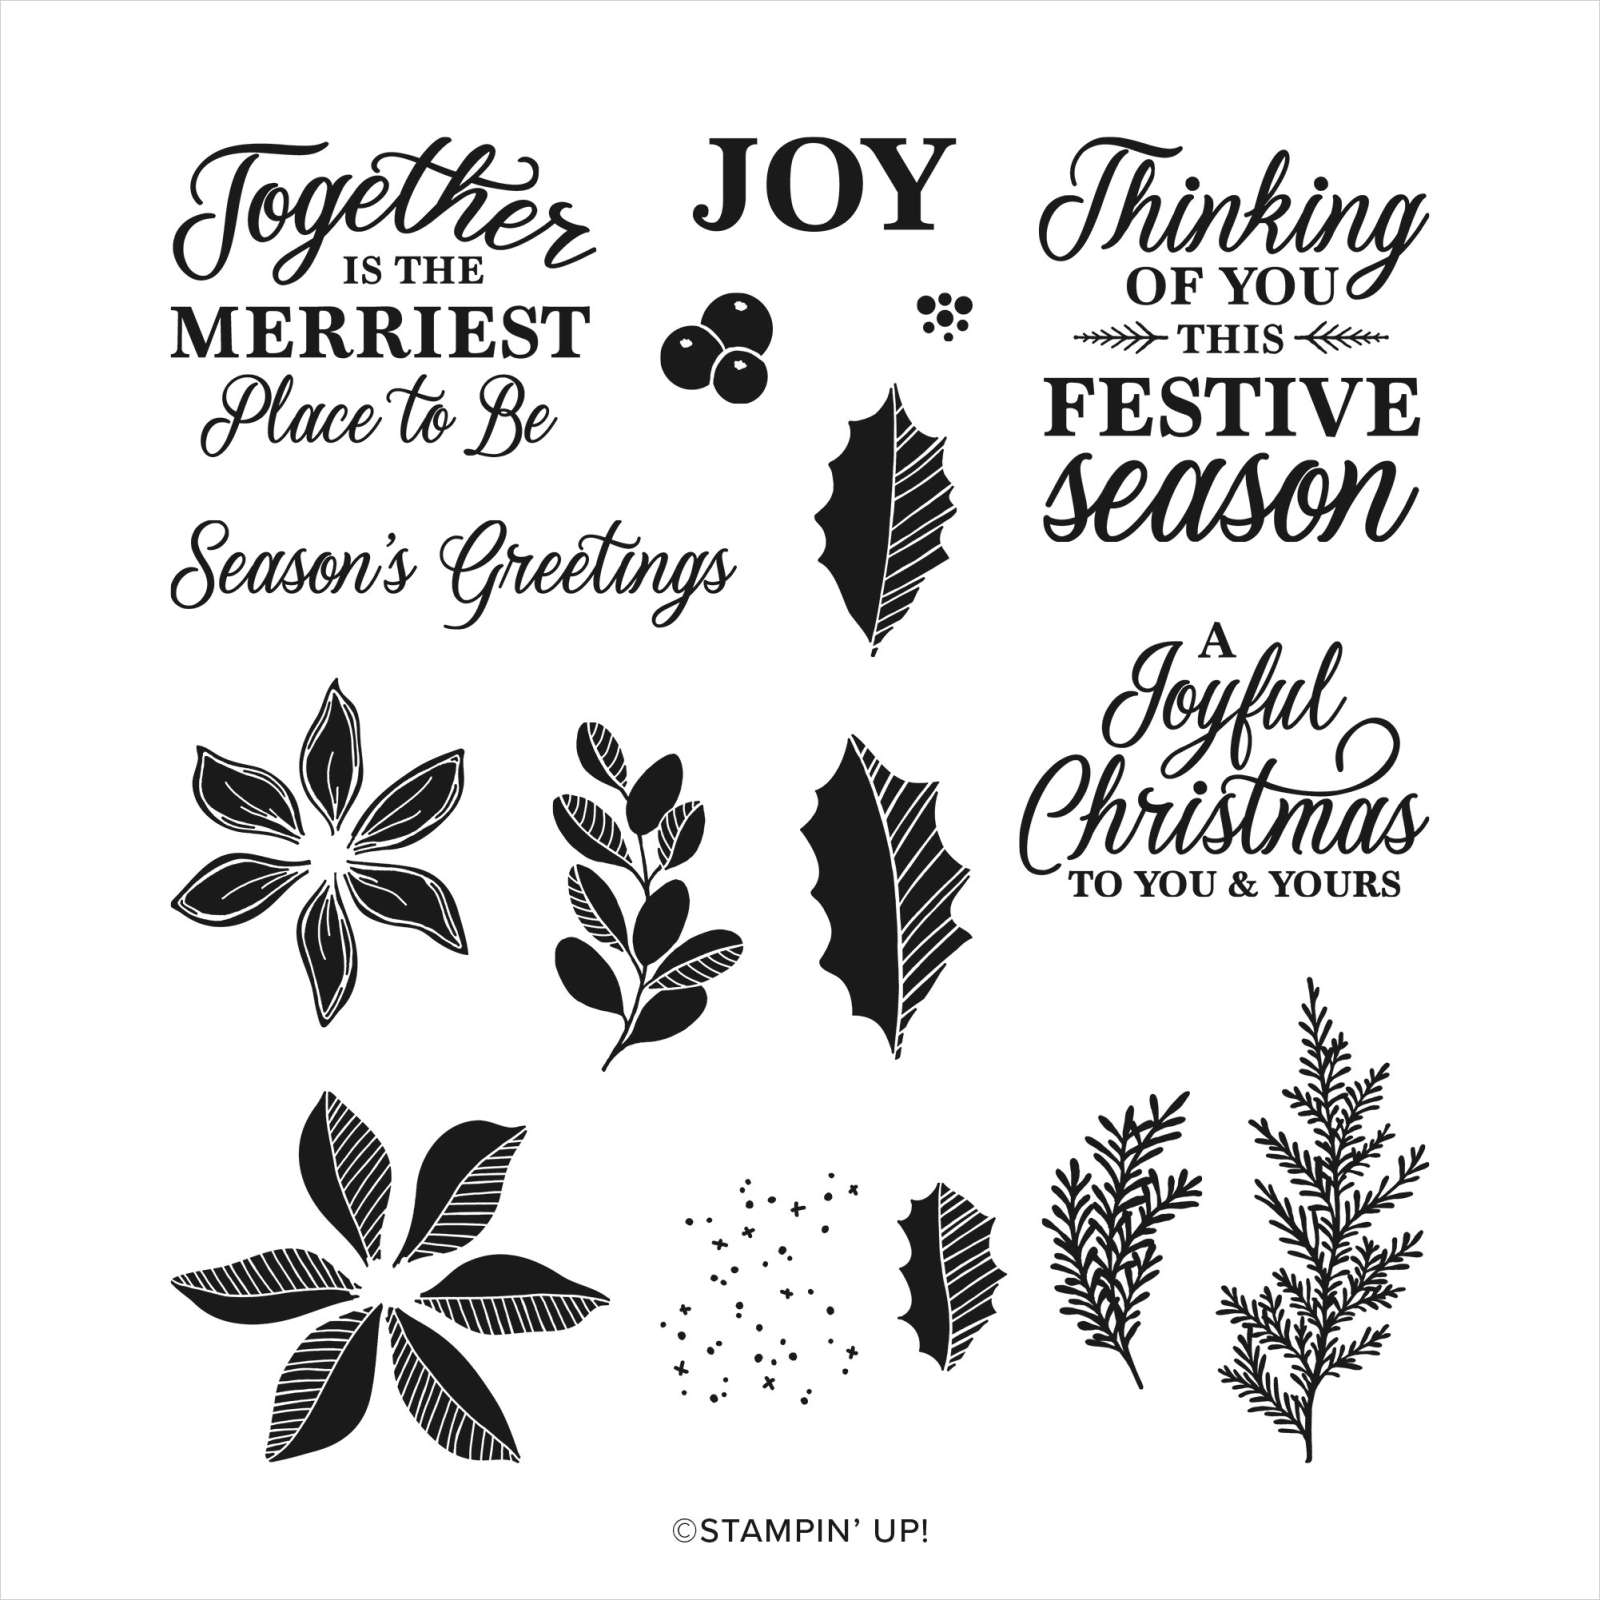
Merriest Moments

Yesterday on my Facebook Live, I shared some tips on using the Merriest Moments Bundle. This bundle comes with the Merriest Moments stamp set and the Merriest Frames Hybrid Embossing Folder. I was curious to see how this bundle worked together and really curious about the Hybrid Embossing Folder. So it turns our that you can use this as a normal 3D embossing folder or your can add one of the two dies to the folder and cut and emboss at the same time. Amazing! For today’s card I simply embossed Old Olive card using the Merriest Frames Hybrid Embossing Folder and attached it to scored and folded Thick Basic White card.

I used the die to cut the rectangle from Basic White card to go on the front panel (I hope you can see the beautiful stitched edge) . I stamped the greeting from the Merriest Moments stamp set across the rectangle using Real Red ink before attaching the rectangle to the centre of the card front using dimensionals. I stamped the two flowers from the Merriest Moments stamp set onto Basic White card using Real Red ink and used the co-ordinating dies to cut them out. I also stamped two of the mediums sized leaves onto Basic White card using Old Olive ink and cut them out using the co-ordinating die. I layered the two flowers and attached the leaves to the back of the flowers before attaching them to the Basic White rectangle.
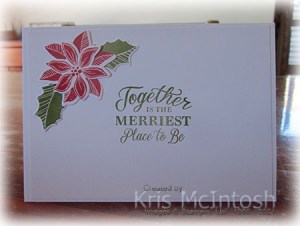
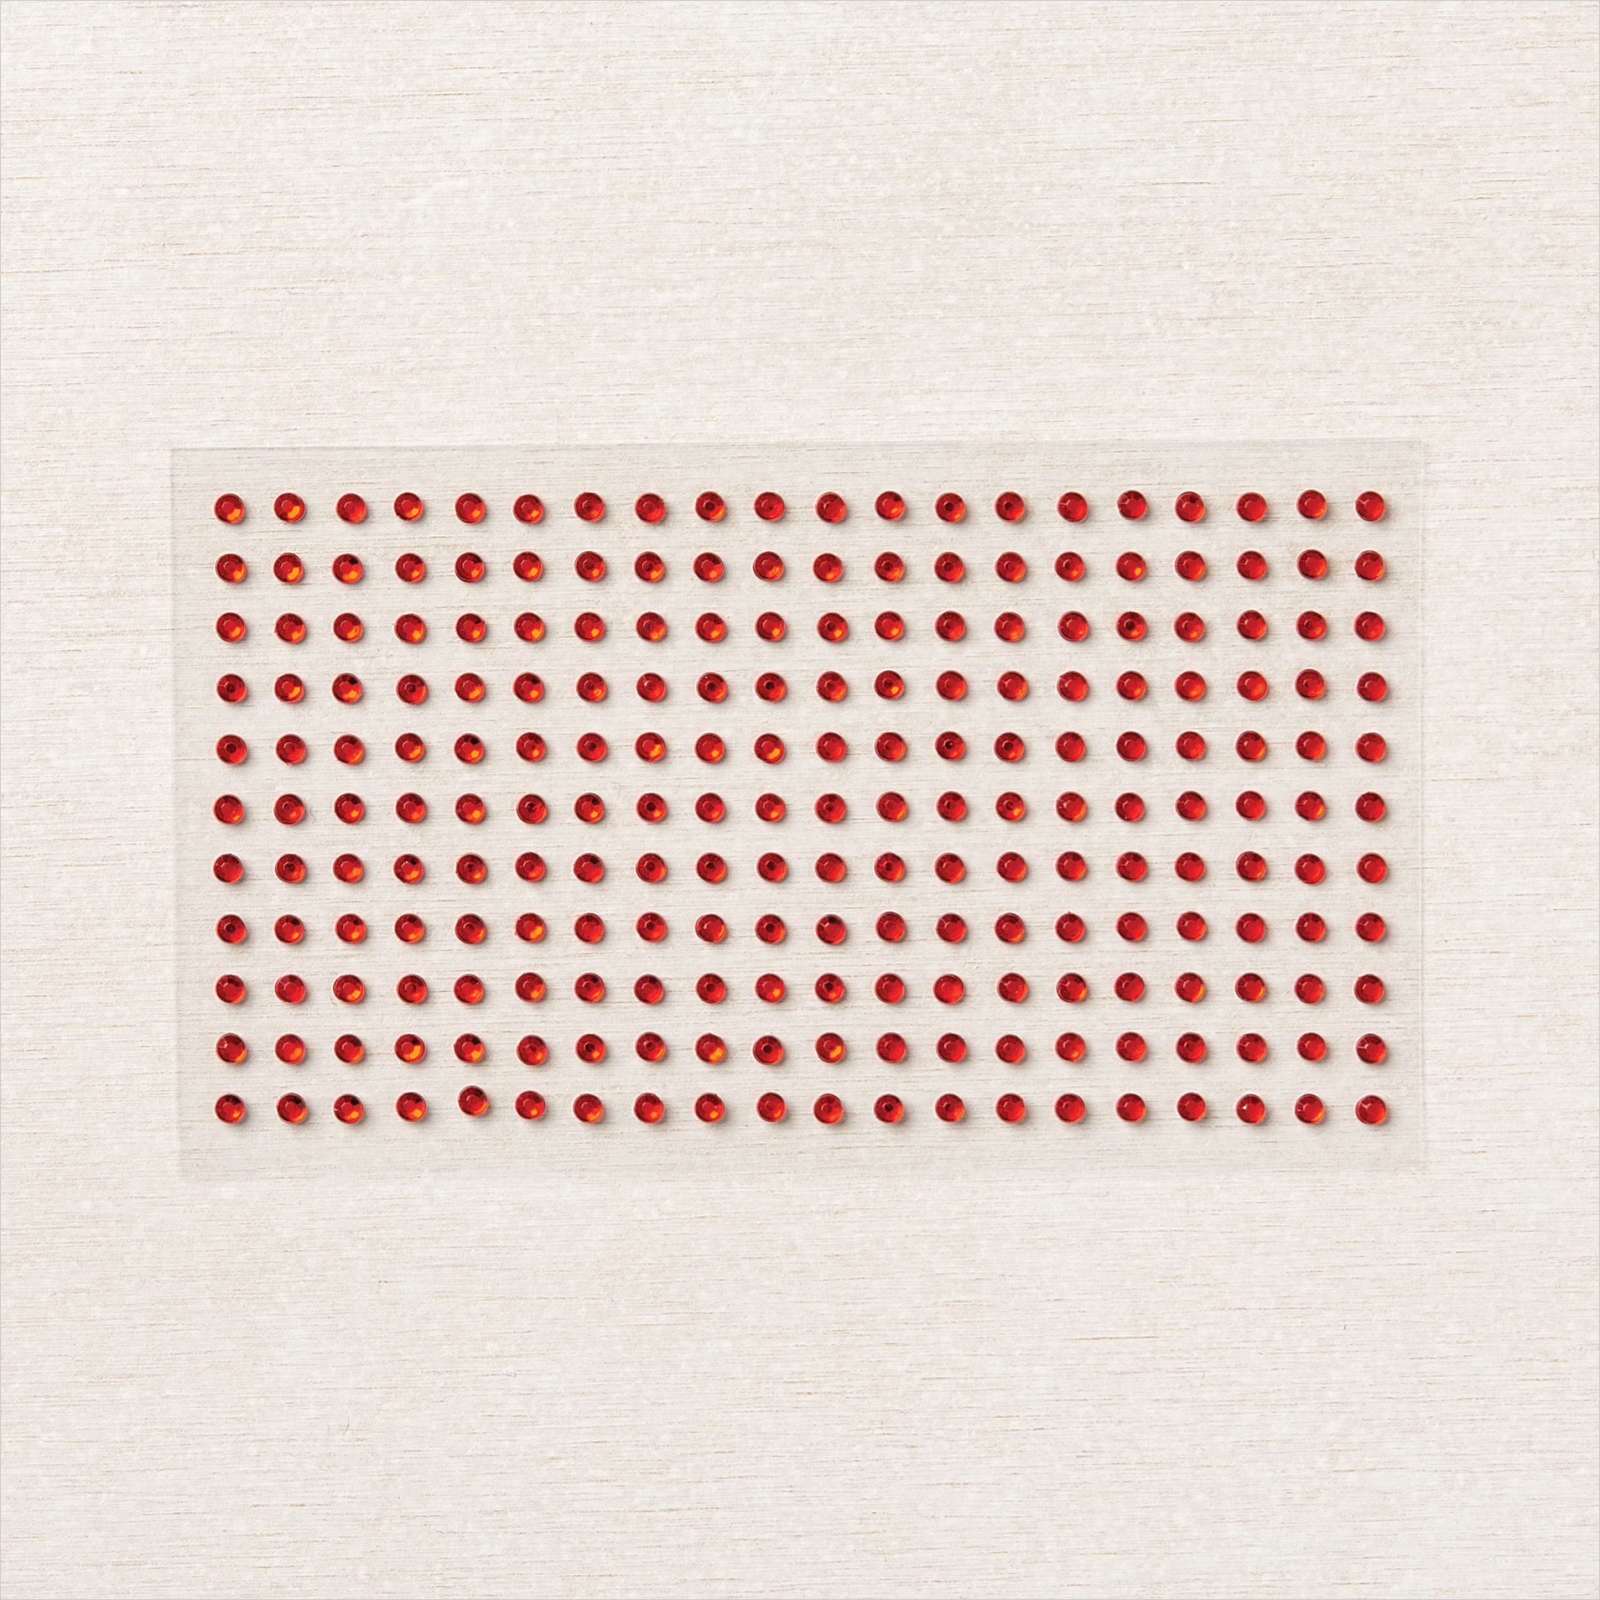
I added three Red Rhinestones to the centre of the flower – you really need to have some bling! To decorate the inside of the card, I stamped the greeting from the Merriest Moments stamp set onto Basic White card using Old Olive ink. I stamped the flowers and two leaves as before and cut them out using the co-ordinating dies. I layered the flowers and leaves onto the top left hand corner of the stamped Basic White card. Lastly I stamped the small dotted image onto the centre of the flower using Real Red ink before attaching the panel to the inside of the card.
I am just amazed at how gorgeous this Merriest Moments Bundle really is. I love the stamps and co-ordinating dies and who couldn’t love the Hybrid 3D Embossing Folder.
Bye for now,
Kris
Product Used:
I don’t have an icon for the Merriest Moments Bundle yet but you can view it here in my online store.


Jolly Christmas

Today’s card is one that I created using the Be Jolly and Holly Jolly Wishes stamp set from the July to December Mini Catalogue. I began by cutting a length of Soft Succulent card in half using one of the Basic Border Dies. I love that these dies give you a finished edge on both pieces, saving time when you are creating cards! I attached one half of the die cut behind one long edge of a piece of Tidings of Christmas Designer Series Paper. The Designer Series Paper panel is attached to the left hand side of Basic White card. The greeting from the Holly Jolly stamp set is stamped onto the lower right hand corner of the Basic White card using Soft Succulent ink.

I stamped the tree image from the Be Jolly stamp set onto Basic White card using Memento Tuxedo Black ink and cut it out using one of the Layering Circle Dies. I coloured the image using the Dark Soft Succulent, Cherry Cobbler, Dark Daffodil Delight and Light Soft Suede Stampin’ Blends.
I attached the image to a Soft Succulent scalloped circle cut using the Layering Circle Dies. The image panel is attached to the card front using dimensionals. To decorate the inside of the card, I stamped the greeting from the Holly Jolly Wishes stamp set onto Basic White card using Soft Succulent ink. I also stamped the bird image from the Be Jolly stamp set next to the greeting using Memento Tuxedo Black ink. I coloured the bird hat using the Dark Soft Succulent Stampin’ Blend and its beak using the Dark Daffodil Delight Stampin’ Blend. I attached the second piece of the Soft Succulent die cut behind one long edge of a strip of the same pattern Tidings of Christmas Designer Series Paper before attaching it to the bottom of the stamped Basic White card.
I think these stamp sets are going to be very popular and today is the first day that you can order them.
Bye for now,
Kris
Product Used:


Seashell CASE

I was inspired to create this card after seeing this one on Pinterest by Janet Ribet. Janet’s card was created a while ago and used different images and embossing folders. I began by cutting a circle from a piece of Very Vanilla card using the Layering Circle Dies. I embossed the die cut panel using the Seashells 3D Embossing Folder and used dimensionals to attach it to the front of scored and folded Thick Very Vanilla card. I stamped the large seashell from the Friends Are Like Seashells stamp set onto Very Vanilla card using So Saffron ink. I stamped the smaller seashell from the same stamp set onto Very Vanilla card using Flirty Flamingo ink. I also stamped the sand dollar image from the Friends Are Like Seashells stamp set onto Very Vanilla card using Sahara Sand ink.

I cut out each of the seashells using the co-ordinating Seaside Seashells Dies. I also cut a piece of Mossy Meadow card using the large background die and trimmed off a small section. I attached the sand dollar image to the card front inside the circle cut out. I attached the die cut seaweed to the back of the large seashell and attached it to the embossed panel on the card front. I attached the smaller seashell across the bottom of the larger seashell. I used dimensionals on the back of the seashells where necessary. I stamped “happy” from the A Wish For Everything stamp set onto Very Vanilla card using Mossy Meadow ink and cut it out.
I stamped “birthday” from the same stamp set onto Very Vanilla card using Mossy Meadow ink and also cut it out. I attached the “happy” inside the circle. I attached the “birthday” onto the card front using a mini dimensional under the left hand edge.
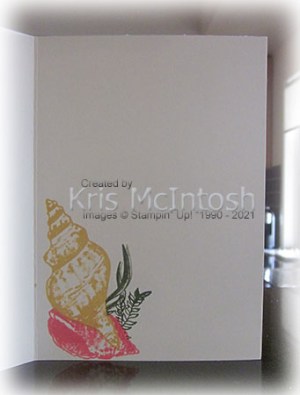
To decorate the inside of the card, I stamped the large seashell from the Friends are Like Seashells stamp set onto the lower left hand corner using So Saffron ink. I masked the image and stamped the smaller seashell from the same stamp set over the bottom of the large seashell using Flirty Flamingo ink. I masked the smaller seashell and stamped the two seaweed images from the Friends are Like Seashells stamp set using Mossy Meadow ink.
I really love how this card turned out, thank you Janet for the inspiration.
Bye for now,
Kris
Product Used:


Birthday Fun
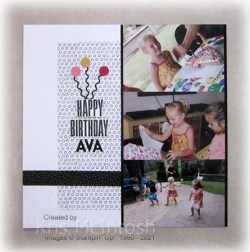
Today’s pages shows off some photos from Ava’s 3rd birthday way back in 2013. I cut down two pieces of the Pattern Party 12″ x 12″ Designer Series Paper and attached them to Basic White 12″ x 12″ pages. I attached narrow strips of another pattern from the Pattern Party Designer Series Paper across the bottom of the pages.
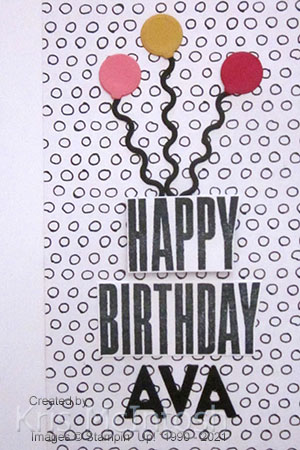
I attached three photos to a panel of Basic Black card before attaching the panel to the right hand side of the first page. I attached the last two photos to Basic Black card before attaching them to the second page. I stamped “happy” and “birthday” from the Biggest Wish stamp set onto Basic White card using Memento Tuxedo Black ink and hand cut around the greetings.

I attached the “happy” to the left hand side of the first page using dimensionals. The “birthday” is attached flat to the page. I cut “Ava” from Basic Black card using the Playful Alphabet Dies and attached her name below “birthday”. I cut basic black card using the balloon string die from the Hippo and Friends Dies. I used the same dies to cut three balloons from Real Red, Crushed Curry and Flirty Flamingo card. I attached the balloon strings so that the ends would sit below the “happy” before attaching the balloons. I printed my journaling onto a strip of Basic White card, which I attached to Basic Black card and then the second page.
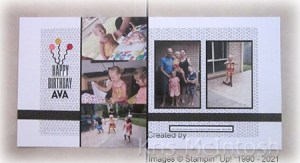
I am really happy with these pages. Ava is such a happy child always smiling as you can see from the photos.
Bye for now,
Kris
Product Used:


Watercolour Hugs

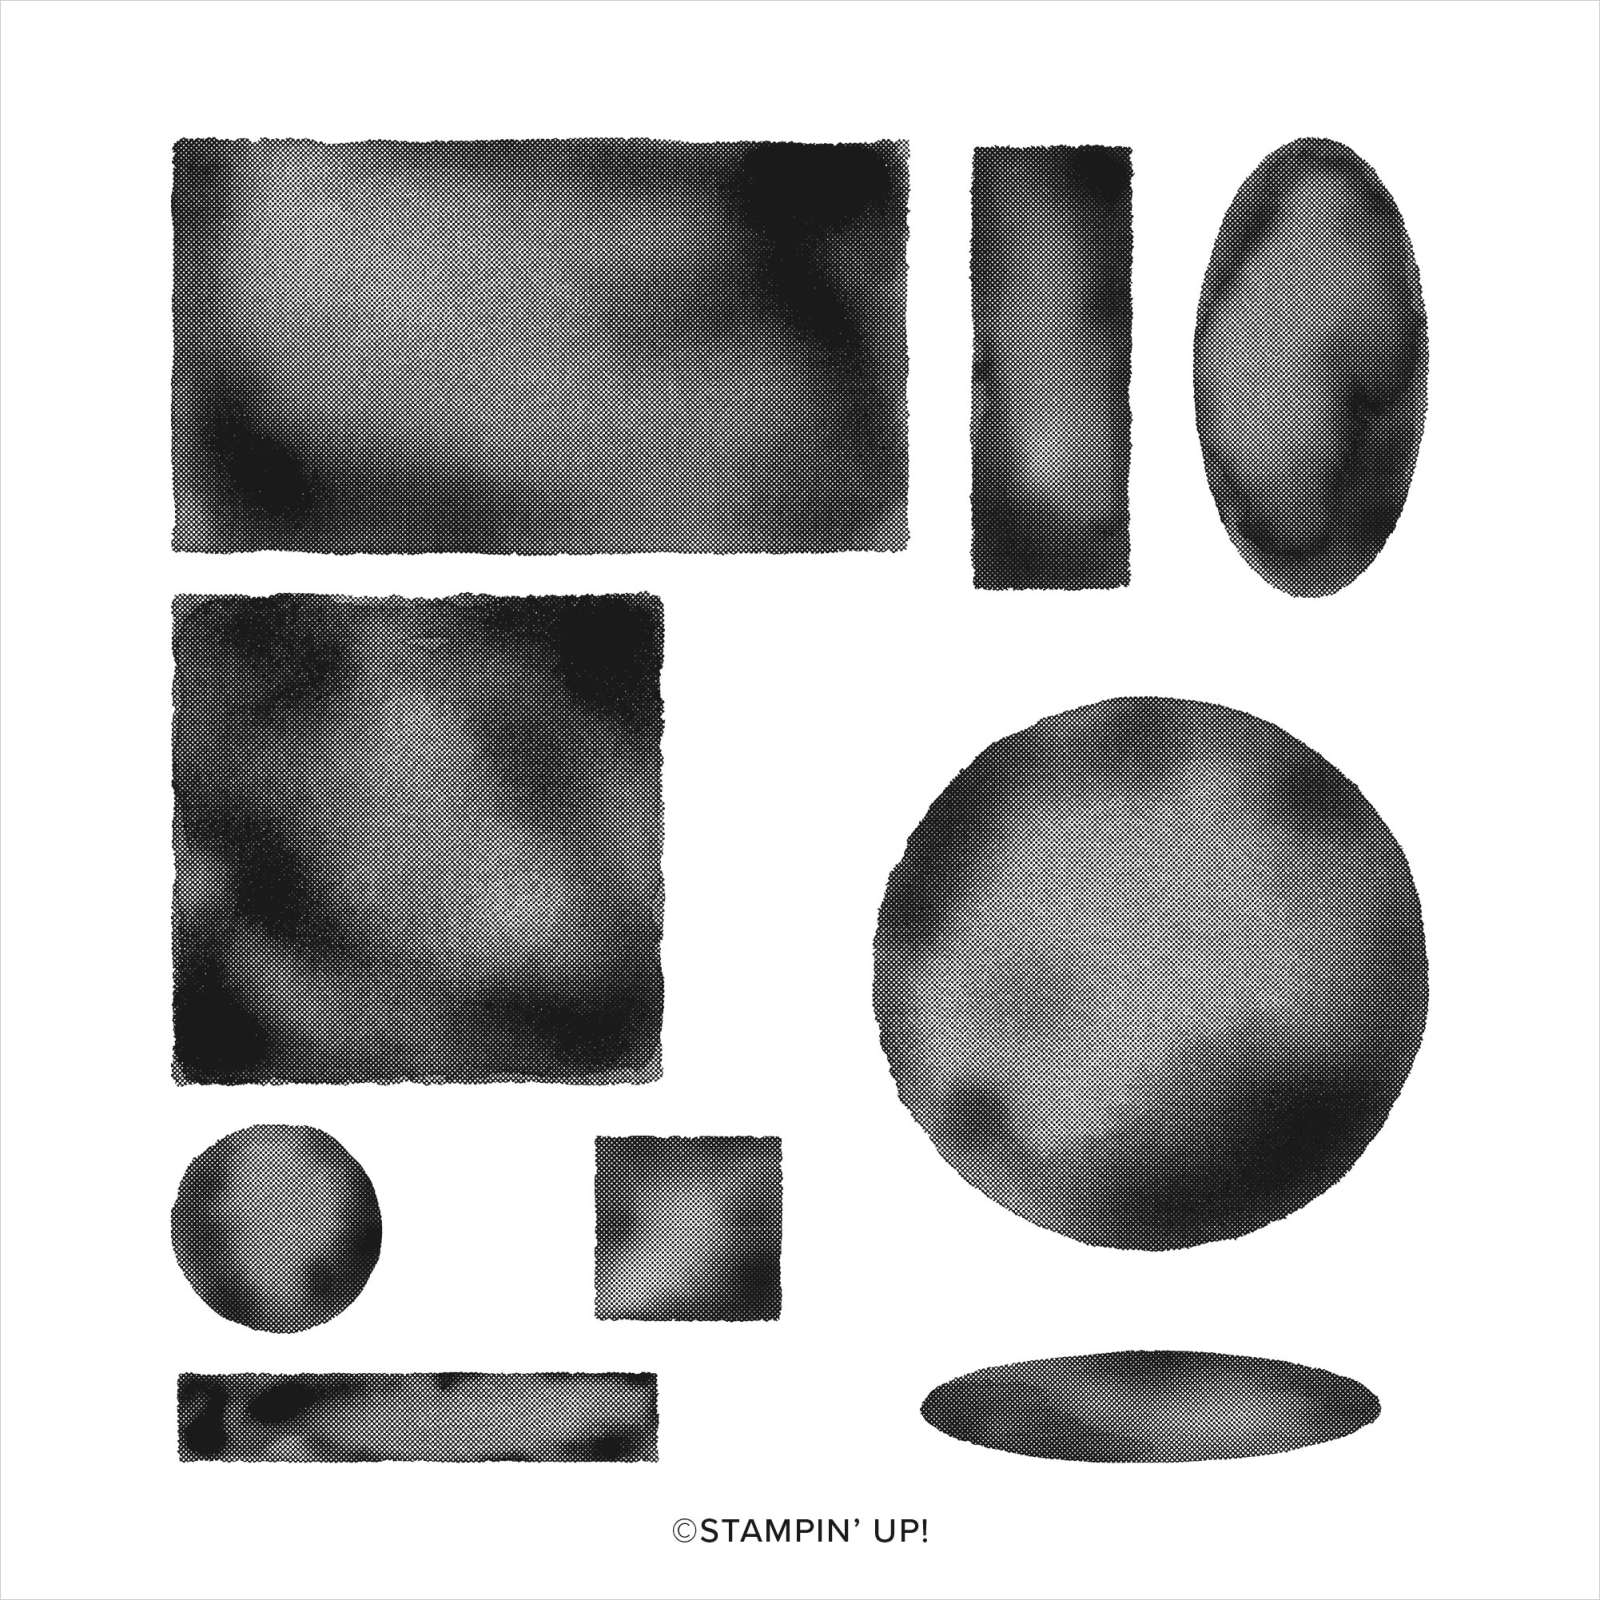
I created the card I am sharing with you a while ago but forgot to add it to my blog. It’s a simple card using the Watercolour Shapes stamp set which is new to this Annual Catalogue. I began by stamping the rectangle shape from the Watercolour Shapes stamp set onto Very Vanilla card using Soft Sea Foam ink.
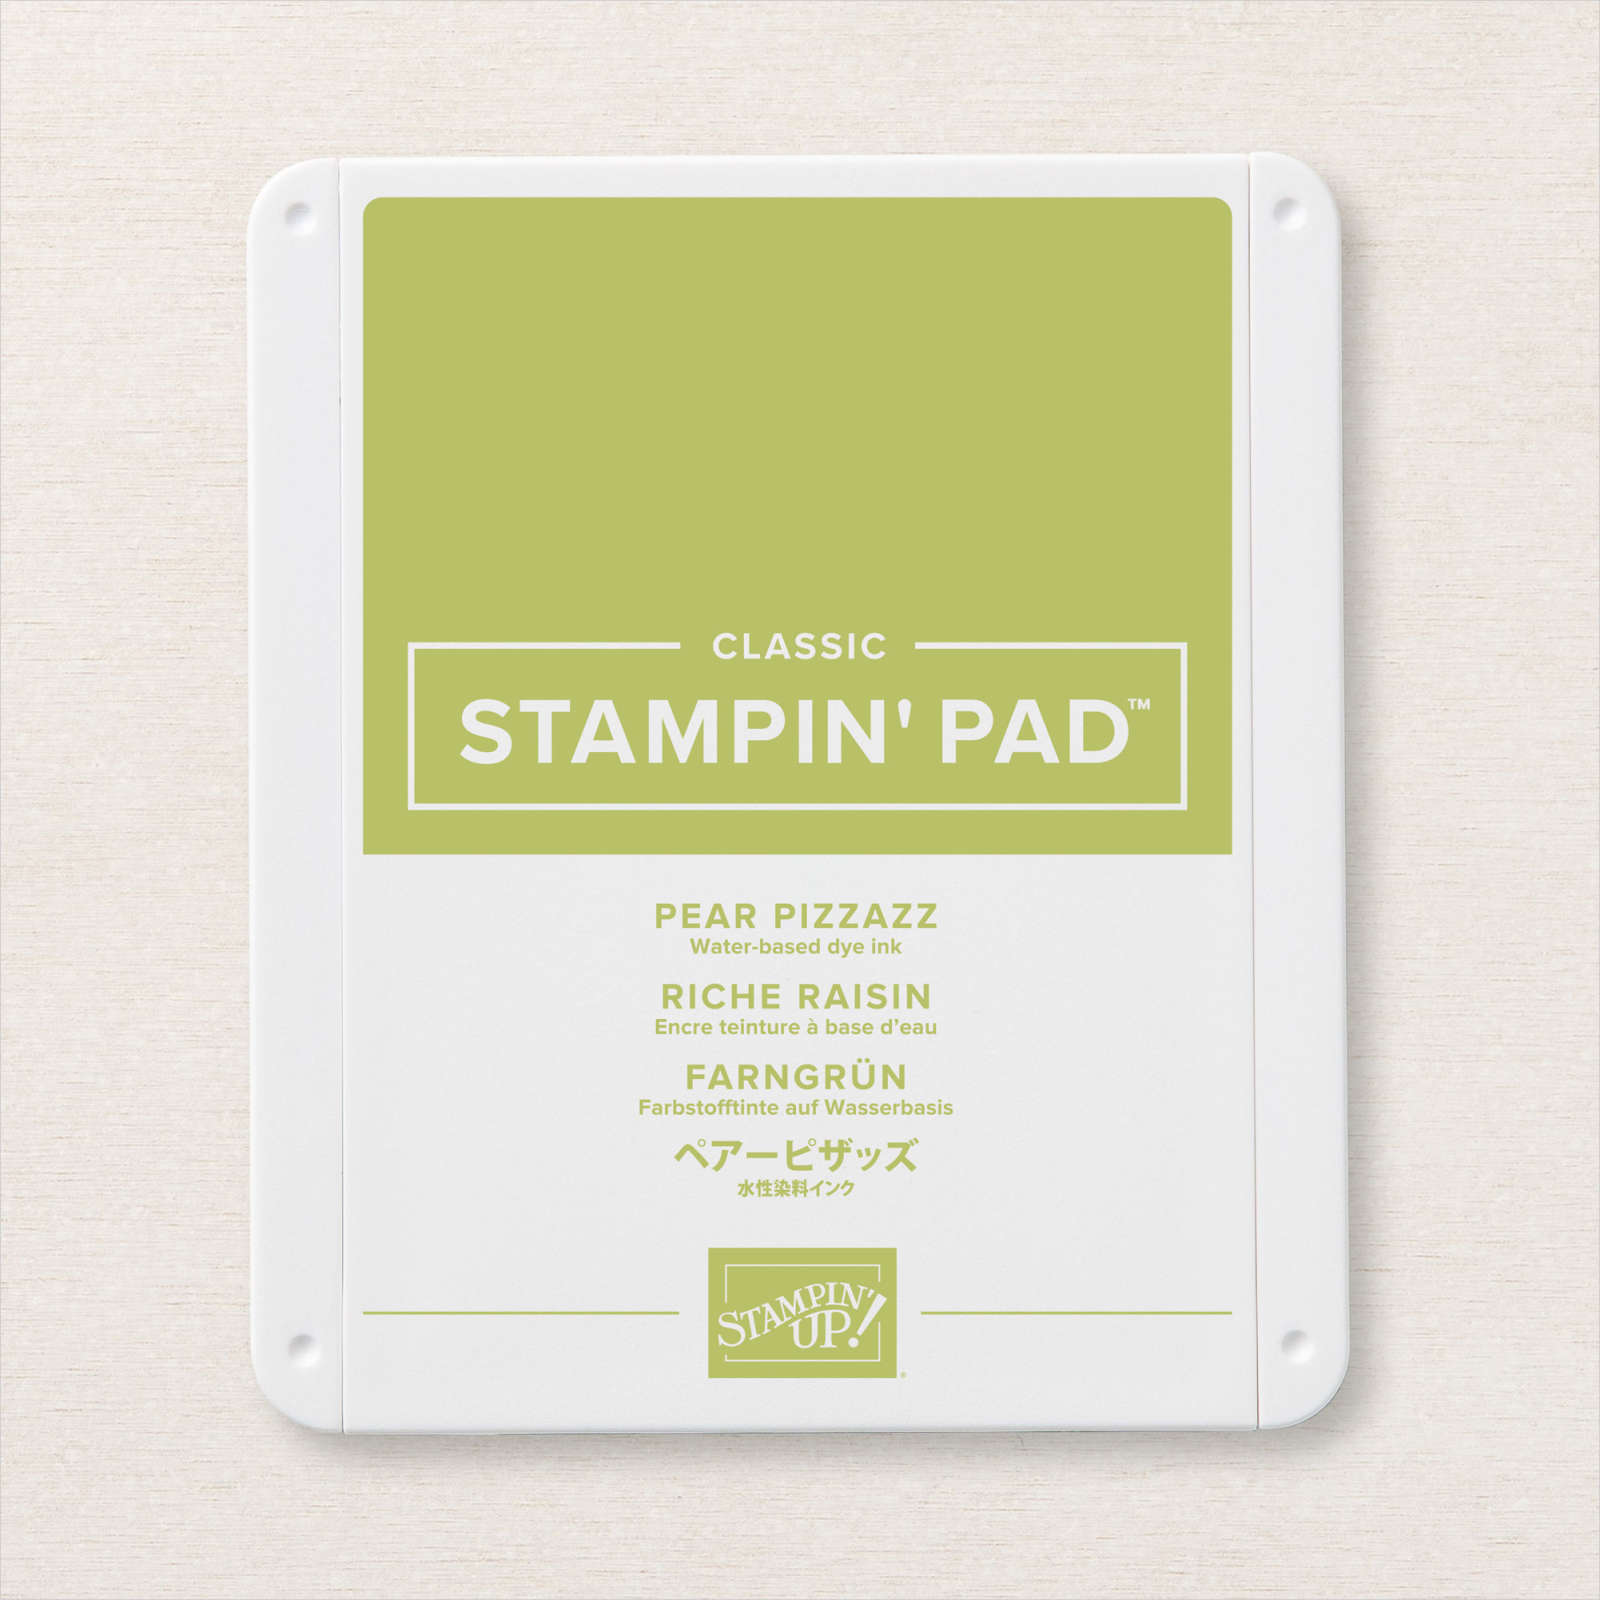
I stamped the leaf image from the Positive Thoughts stamp set over the rectangle using Pear Pizzazz ink. I stamped the greeting from the Positive Thoughts stamp set also using Pear Pizzazz ink. The stamped panel is attached to Pear Pizzazz card and then scored and folded Thick Very Vanilla card. To decorate the inside of the card, I stamped the same leaf image from the Positive Thoughts stamp set using Pear Pizzazz ink. A really simple card but I think quite pretty, what about you?
Bye for now,
Kris
Product Used:


Cupcake Birthday
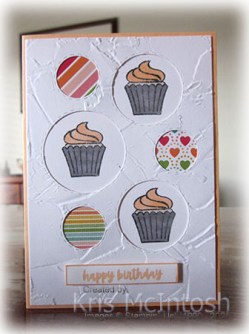
Today’s card features a stamp set from the July to December 2021 Mini Catalogue. This stamp set is really lovely and co-ordinates with several other products in the Mini Catalogue and the best part is that it will cover birthdays and Christmas. I actually created two versions of this card, one in Balmy Blue and one in Pale Papaya. I began by cutting Basic White card using the circle die from the Picture This Dies and embossing the panel using the Painted Texture 3D Embossing Folder.
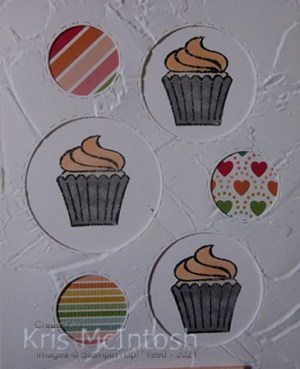
I attached 3cm squares of three different patterns from the Pattern Party 12″ x 12″ Designer Series Paper behind each of the small circles before attaching the whole panel to another piece of Basic White card. I stamped the cupcake image from the Sweets & Treats stamp set into the three remaining circles in the die cut panel.

I used two different combinations of Stampin’ Blends to colour the cupcakes – Dark Smoky Slate, Light Crumb Cake & Dark Pale Papaya – or – Dark Smoky Slate, Light Crumb Cake and Light Balmy Blue. I attached each of the panels to the co-ordinating card base, either Balmy Blue or Pale Papaya. I stamped the greetings using either Pale Papaya or Balmy Blue ink onto Basic White card and cut them out using the banner die from the Beautiful Trees Dies. I inked the edges of each of the greetings using the co-ordinating ink before attaching them to the card front using dimensionals. To decorate the inside of the card, I stamped another greeting from the Sweets & Treats stamp set onto Basic White card using Memento Tuxedo Black ink. I stamped the cupcake image from the same stamp set beside the greeting using the same ink. I coloured the cupcake images to co-ordinate with the card front before attaching the panel to the inside of the respective card base.

I am loving these stand alone Picture This Dies from the Annual Catalogue. They lend themselves to just about any stamp set you can think of.
Bye for now,
Kris
Product Used: