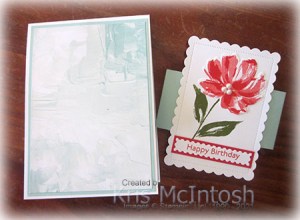
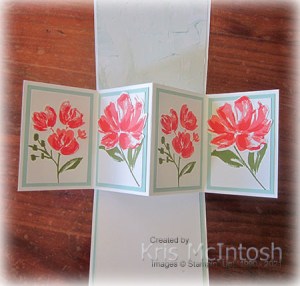
Memorable Bridge Fold
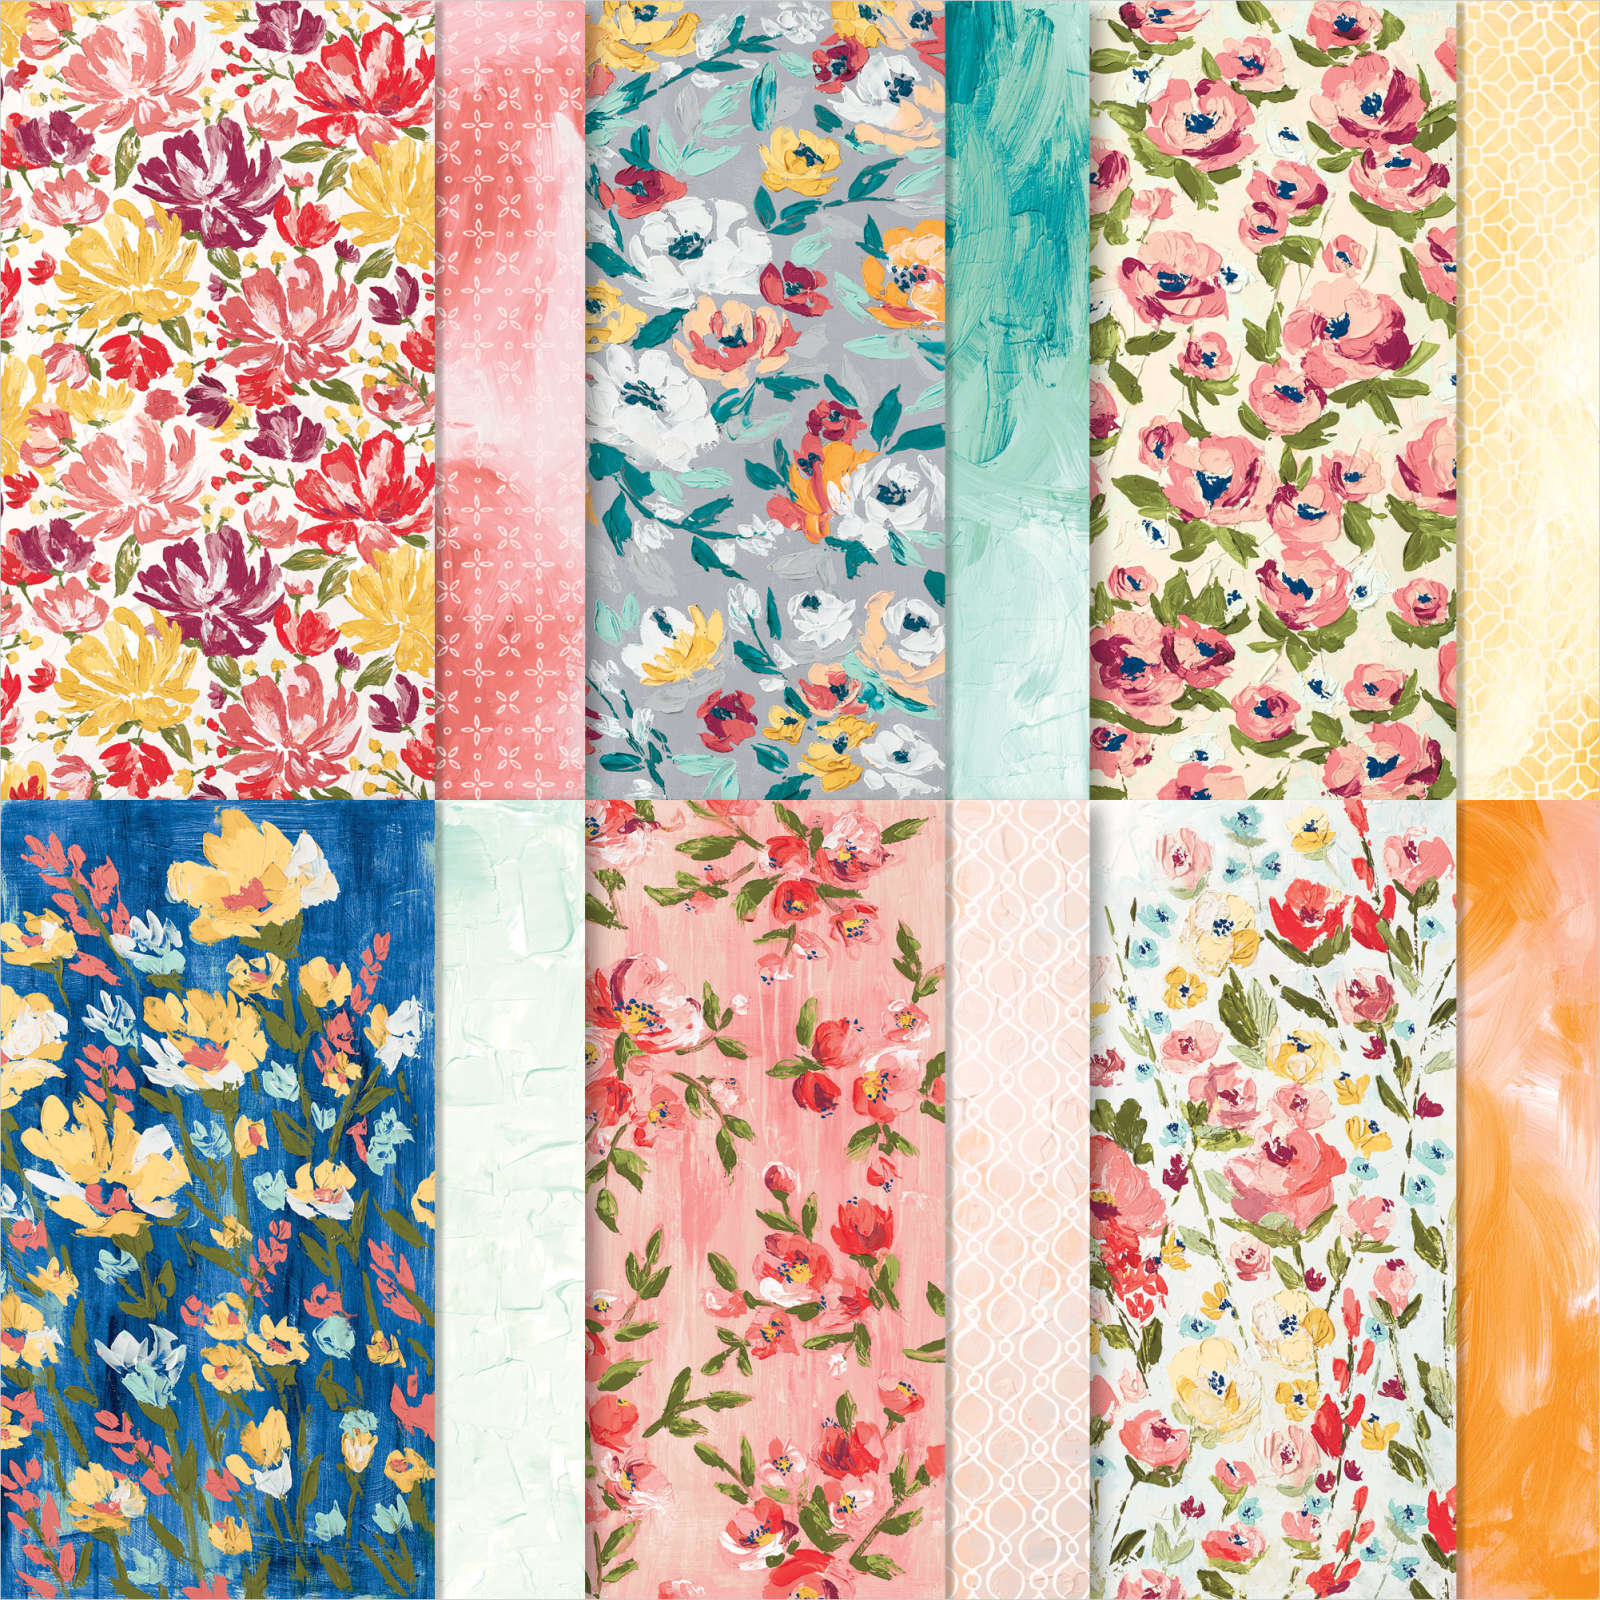
Yesterday in my Facebook Live, I shared my method for creating a Bridge Fold card. You will find all the instructions on the video with photos of my templates and examples. For today’s card, I used Thick Basic White to create the card base and added pieces of the Expressions in Ink Designer Series Paper across all the panels, including the bridge.

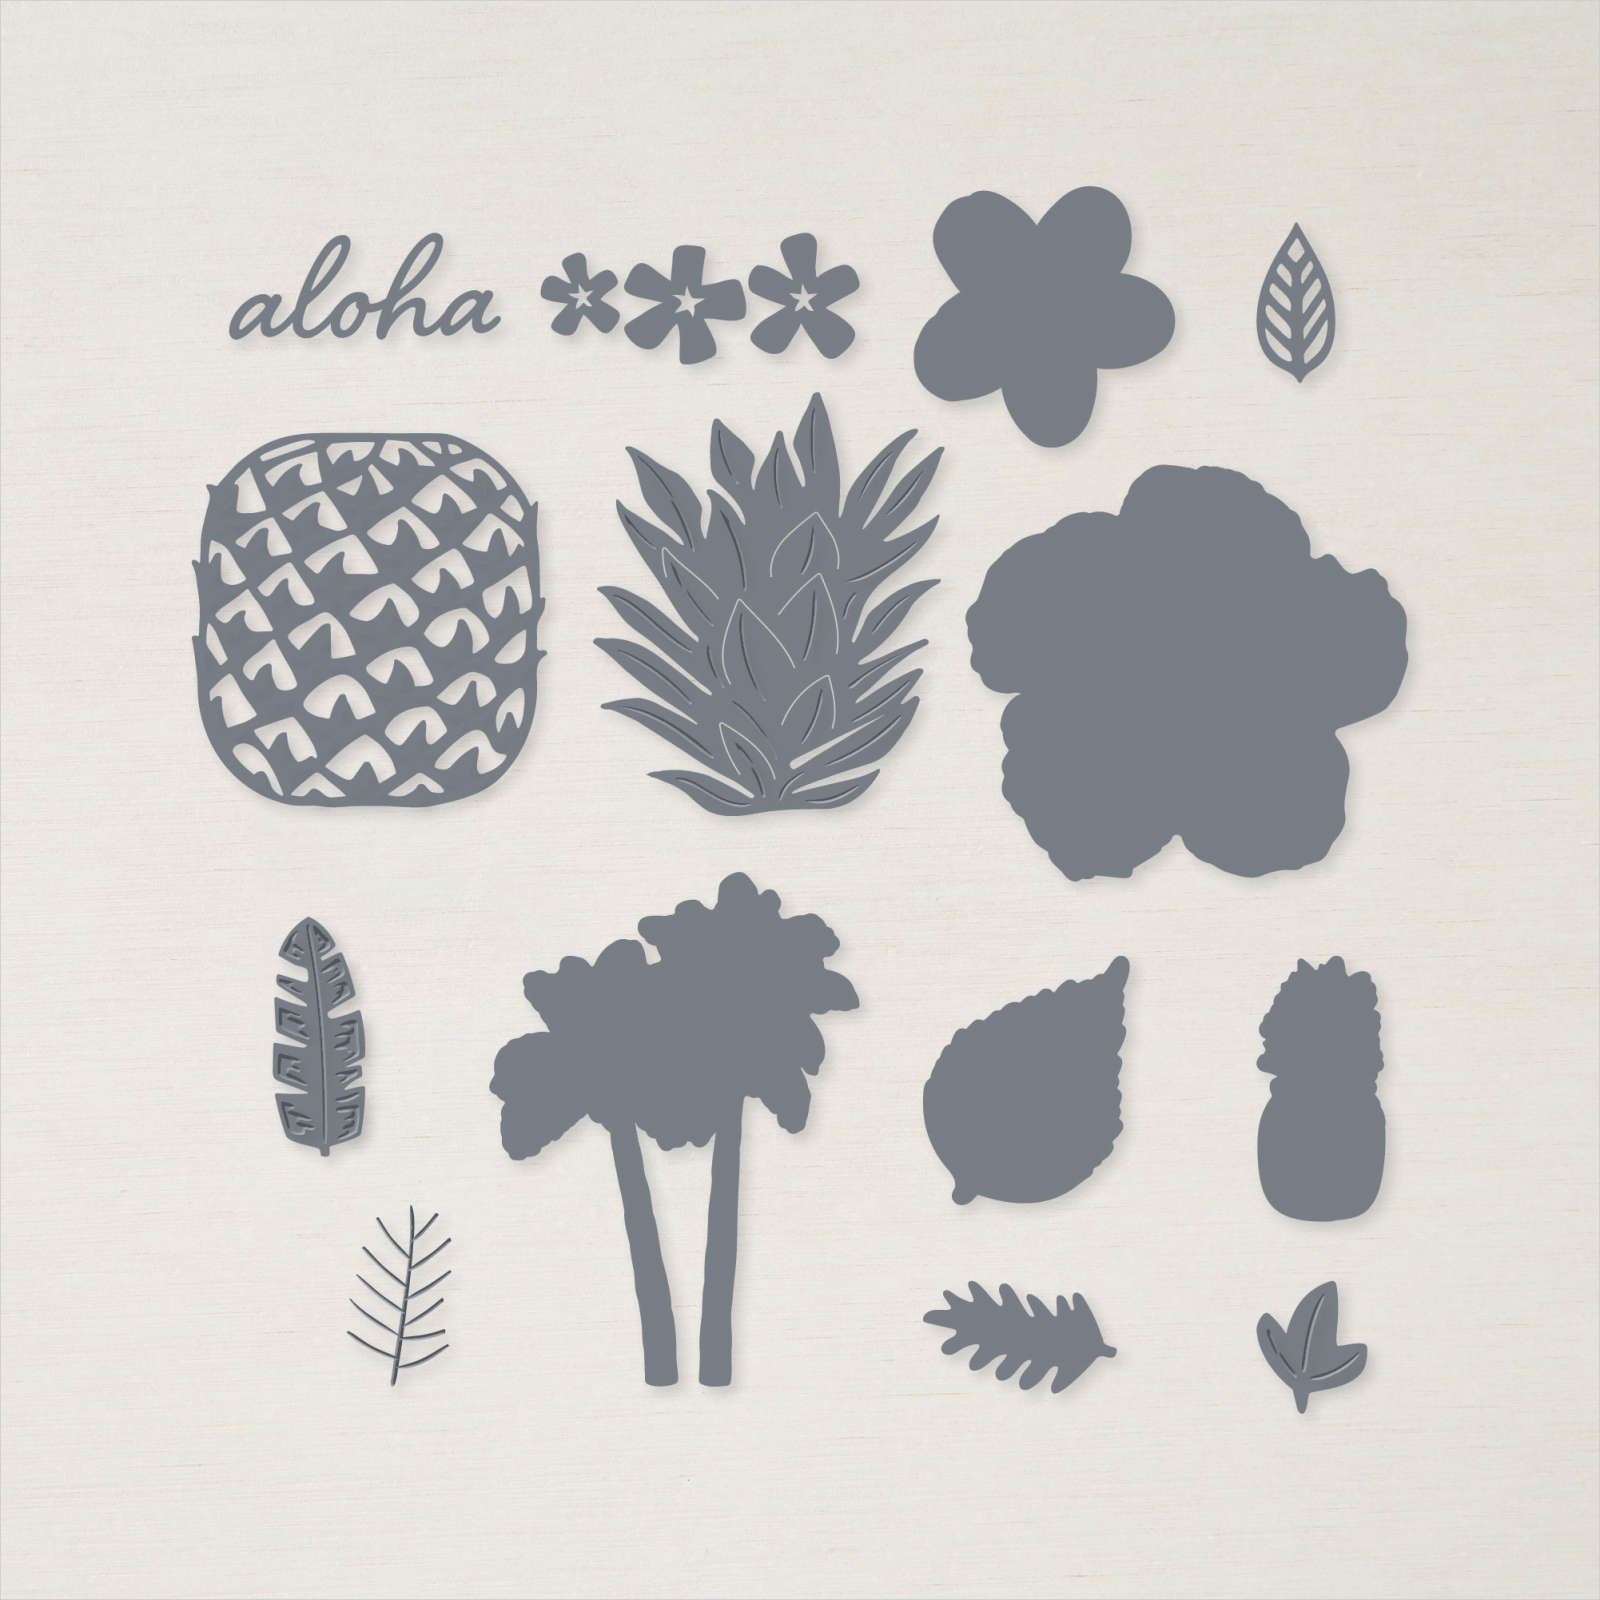
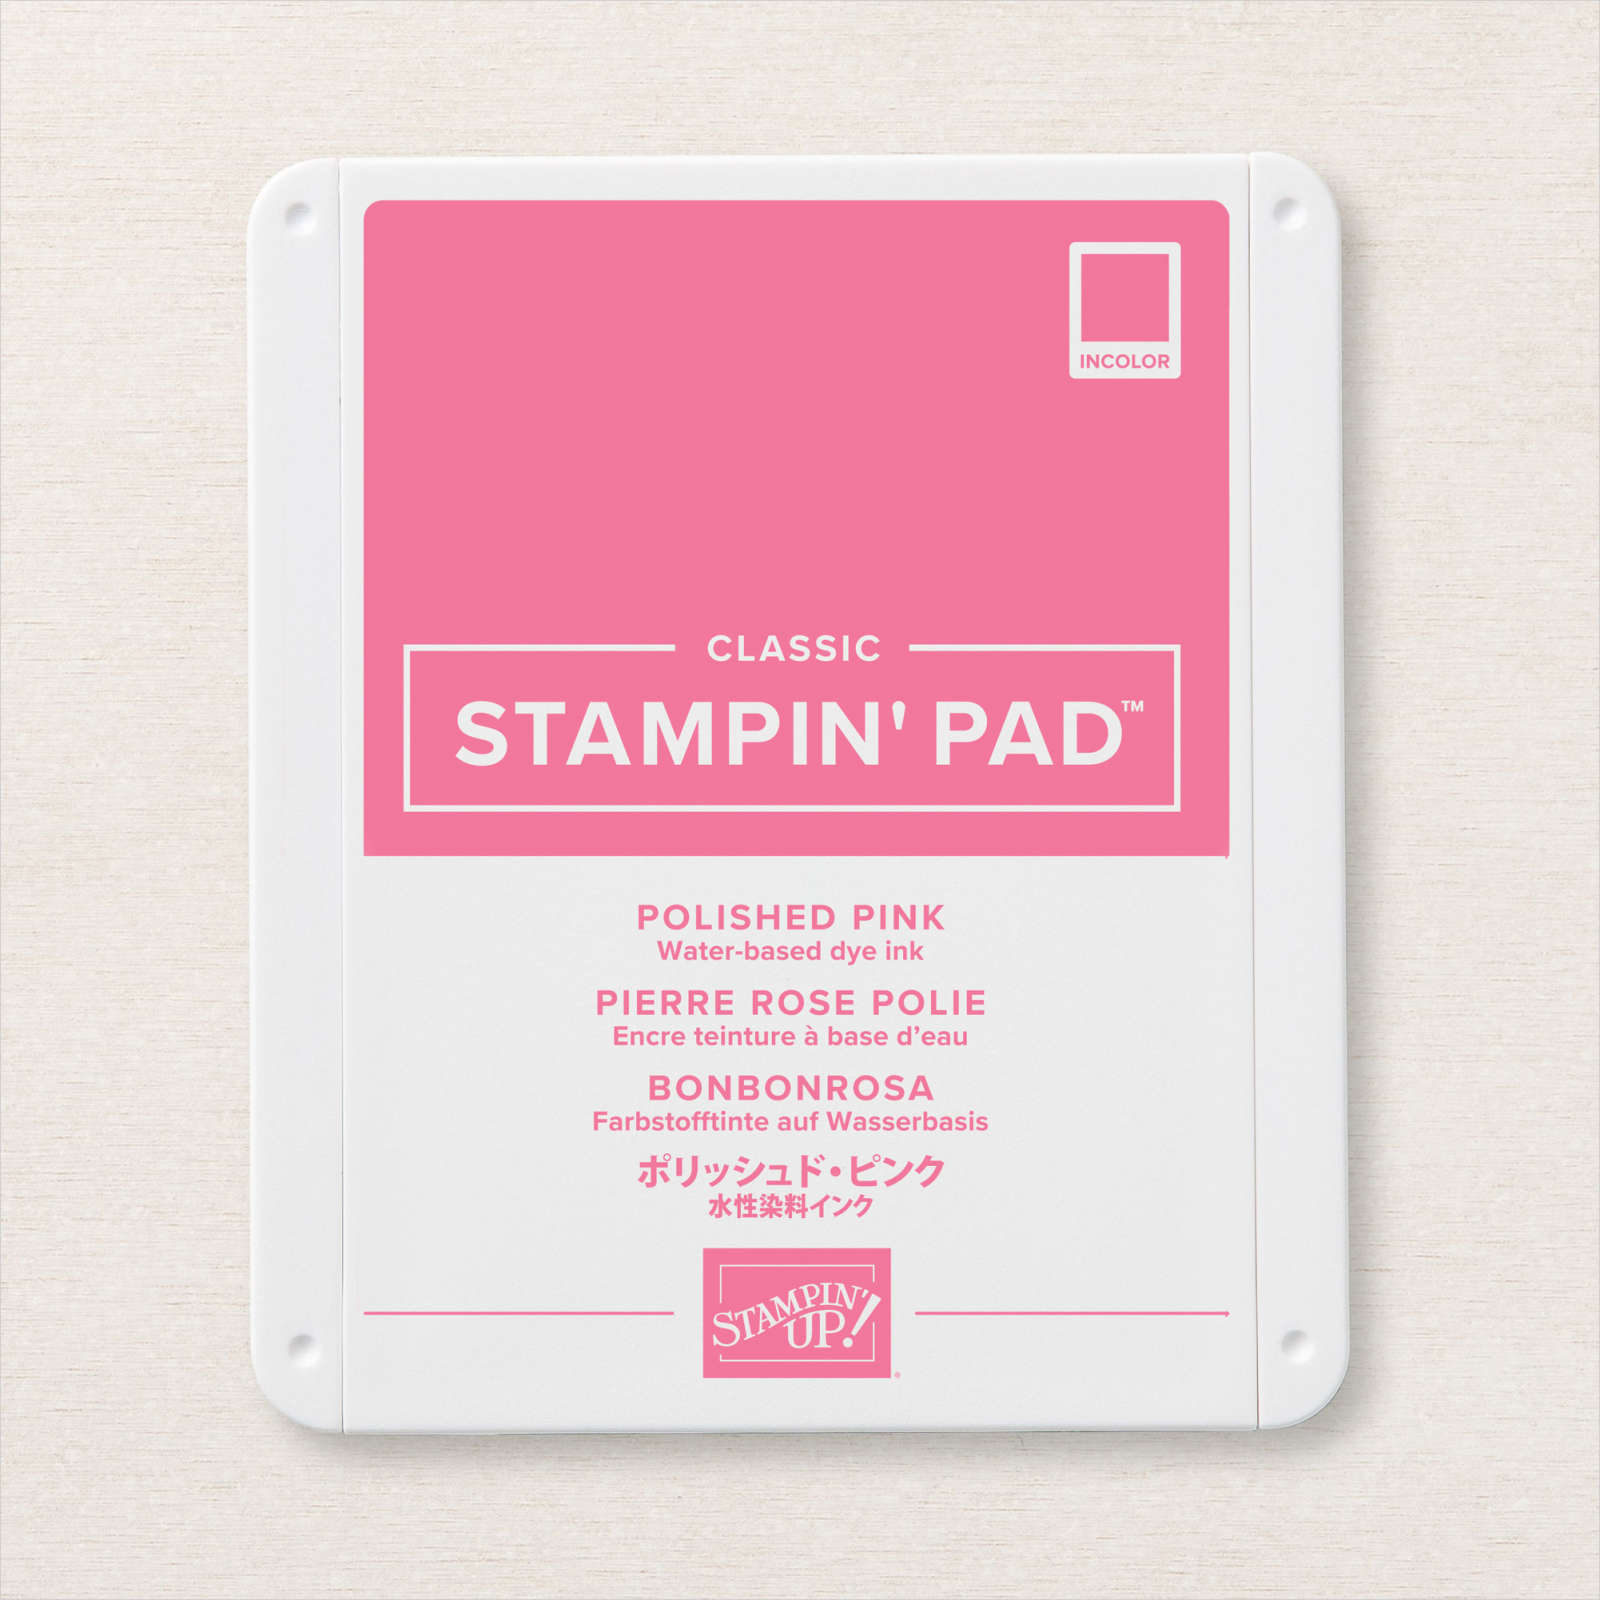
I inked the palm tree image from the Timeless Tropical stamp set using Early Espresso and Just Jade Stampin’ Write Markers and stamped onto Basic White card. I stamped the hibiscus flower from the same stamp set onto Basic White card using Polished Pink ink. I stamped the frangipani flower from the Timeless Tropical stamp set three times onto Basic White card using Pale Papaya ink.

I cut out all of the images using the co-ordinating In The Tropics Die. I attached the palm trees to the card first and then layered on the hibiscus and two frangipani flowers. I stamped the greeting from the Timeless Tropical stamp set onto Basic White card using Polished Pink ink and punched it out using the Double Oval Punch. The greeting is attached to the right hand side of the card so that the left portion floats. I attached the last frangipani to Basic White card which I attached to the back of the card to give me somewhere to write a message. Since this card folds flat, it will fit into a standard envelope.
I haven’t made one of these cards in a while but I have been having a lot of fun creating them. I have one more to share with you tomorrow.
Bye for now,
Kris
Product Used:


Happy Anniversary
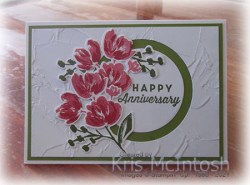
Today I thought I would share the card I made for my Mum and Dad who celebrated their 67th Wedding Anniversary recently I began by cutting a piece of Basic White card using one of the Layering Circle Dies. I embossed the piece of card with the circle cut out using the Painted Texture 3D Embossing Folder. I attached the panel to Old Olive card and then scored and folded Thick Basic White card. I cut a slightly smaller circle from Basic White card and stamped the greeting from the stamp set included in the For The Guys Card Kit using Old Olive ink.

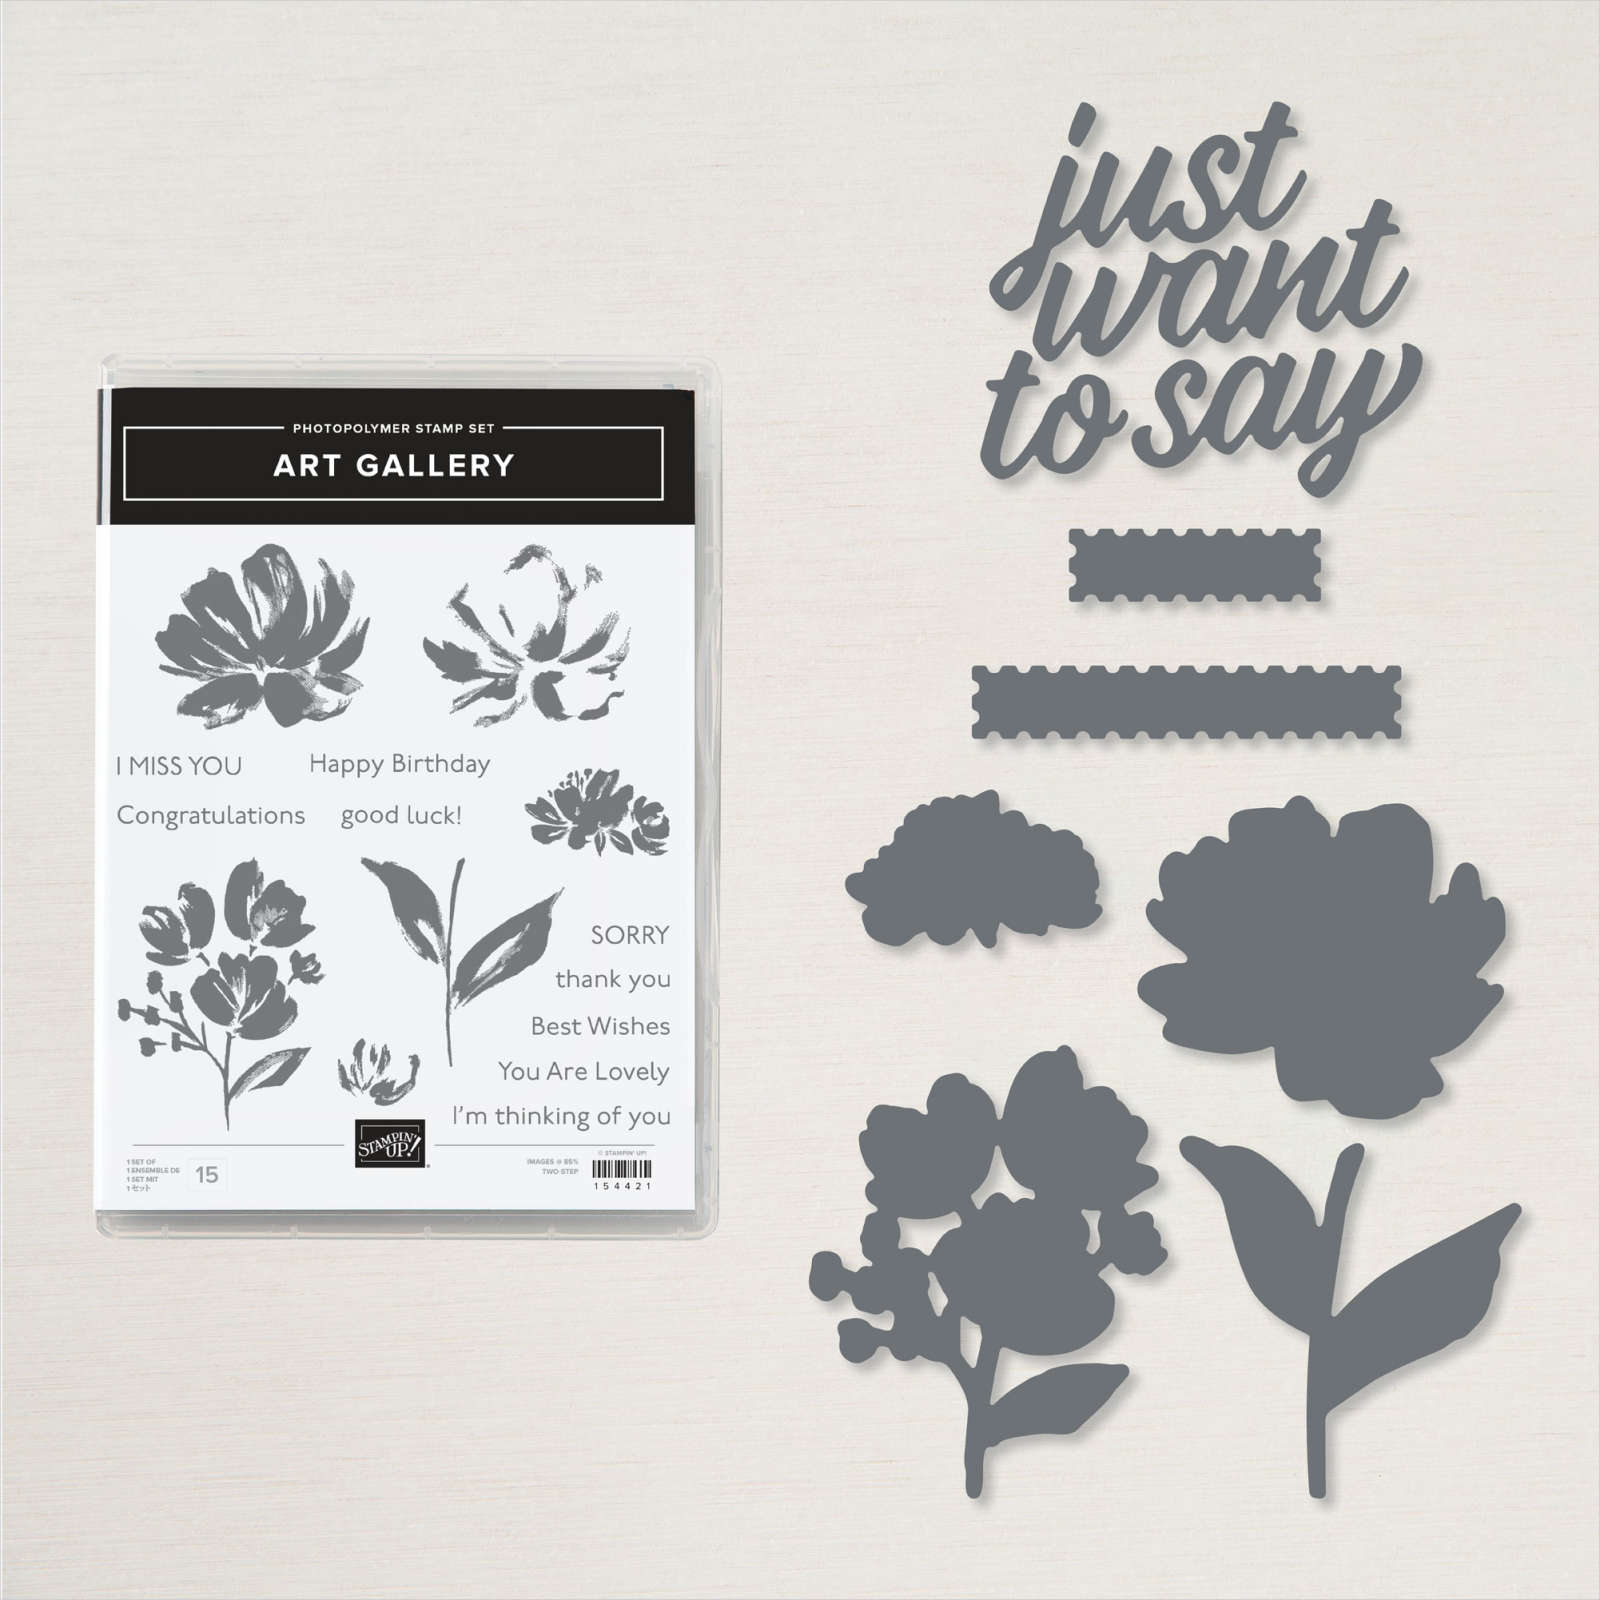
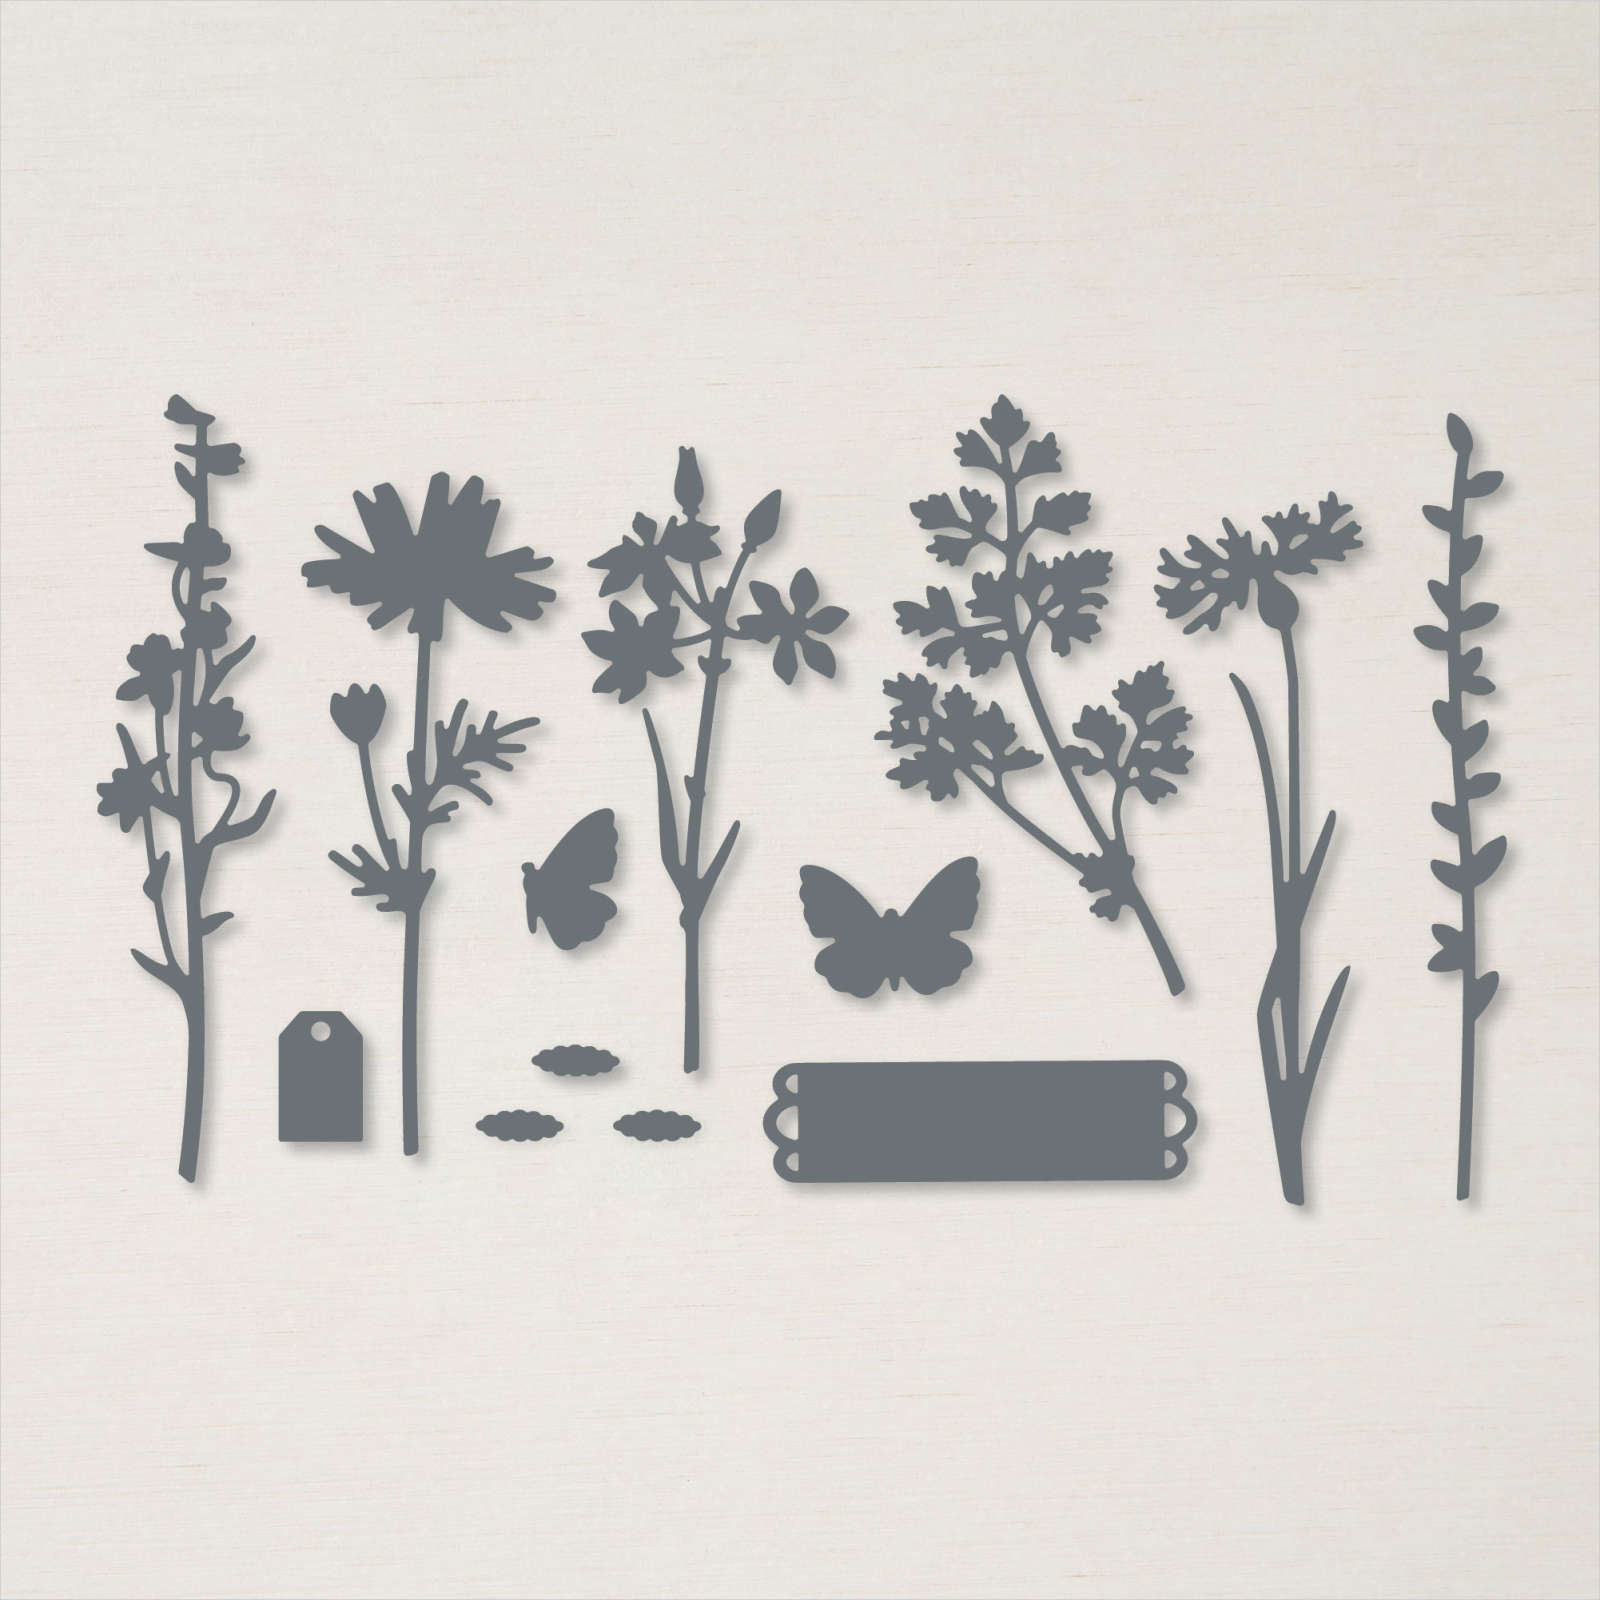
he greeting is attached inside the space in the Basic White card. I stamped the smaller floral image from the Art Gallery stamp set onto three times Basic White card using Real Red ink which I stamped onto scrap paper first. I stamped the small single flower over the flower images using Real Red ink. I also stamped the same image onto Basic White card three times using Old Olive ink. I cut out the images using the Floral Gallery Dies. I trimmed the stems from each of the Real Red images. I attached a couple of leaves I trimmed from the Old Olive images behind one of the Real Red flower images and attached it to the card front.
I attached another of the Real Red floral images to an Old Olive image and attached it to the card front. To decorate the inside of the card, I trimmed two leaf images from the Old Olive floral images and attached them behind the last Real Red floral image. The floral image is attached to the lower left hand corner of the inside of the card.
I was inspired to create this card after seeing one on Pinterest by Teah Woodward. Of course, I had to make mine a landscape card but I thank you for the inspiration Teah.
Bye for now,
Kris
Product Used:


Happy 40th

My youngest daughter turned 40 recently, which makes you kind of wonder where has all that time gone! So today I though I would share with you the card I made for her. I began by stamping the word image from the Very Versailles stamp set onto Basic White card using Crumb Cake ink. I stamped the leaf image from the same stamp set several times also using Crumb Cake ink. Lastly I stamped the floral image from the Quiet Meadow stamp set several times using Crumb Cake ink. I used a blending brush to add Crumb Cake ink around the edges of the card as well. Lastly I stamped the floral image from the Quiet Meadow stamp set using Memento Tuxedo Black ink.

I coloured the Memento image using the dark Polished Pink and Dark Soft Succulent Stampin’ Blends. I attached the stamped image to Crumb Cake card and then scored and folded Thick Basic White card. I tied a bow in a length of the Polished Pink 3/8″ Open Weave Ribbon and attached it to the flower stem using a glue dot. I stamped the greeting from the Best Year stamp set onto Basic White card using Polished Pink ink.

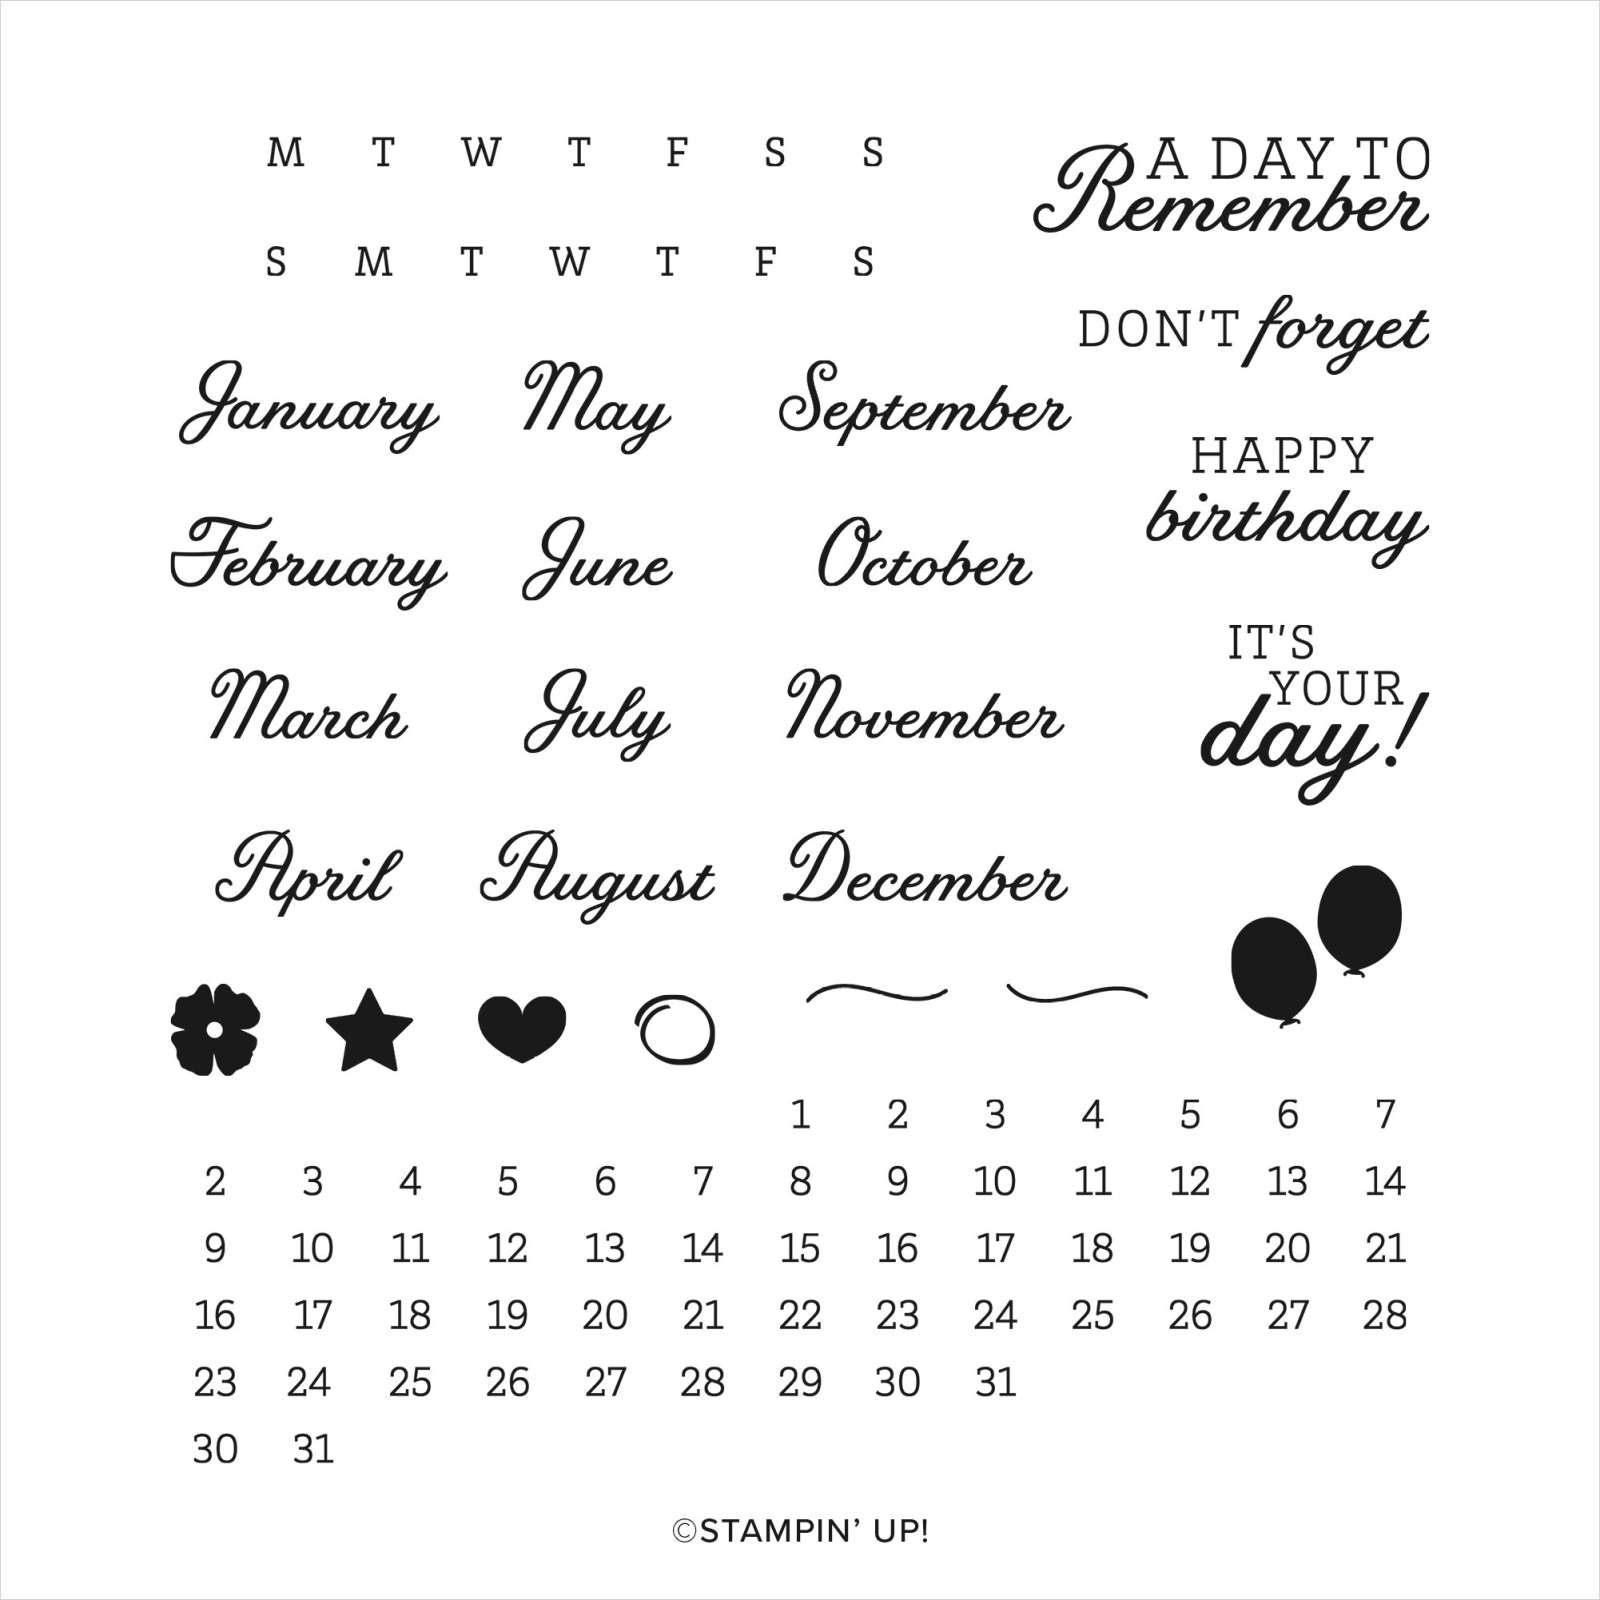
I cut out the greeting using the label die from the Meadow Dies, added some Crumb Cake ink using the Blending Brush before attaching it to the card front using dimensionals. I coloured five medium Basic Pearls using the dark Polished Pink Stampin’ Blend and added them to the flower centres as well as one to the greeting label. To decorate the inside of the card, I used the calendar image from the Days to Remember stamp set to add a “4” and then an “0” to Basic White card using the Polished Pink Stampin’ Write Marker. I stamped the greeting from the Best Year stamp set below the “40” using Polished Pink ink. I stamped part of the floral image from the Quiet Meadow stamp set onto the lower left hand corner of the card using Memento Tuxedo Black ink. I coloured the image using the Dark Polished Pink and Dark Soft Succulent Stampin’ Blends.
Not my usual style of card, but I do love the finished look, don’t you? I hope that Emma loved it as much as I do.
Bye for now,
Kris
Product Used:


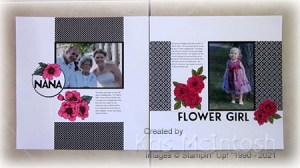
Flower Girl

Last week I shared a page using a photo of my grandmother at my daughter’s wedding. Well after I had created that page, I found this photo of my granddaughter Abigail who was a flower girl at her Aunty’s wedding. I wanted to make this page co-ordinate with the page last week and since I have loved and used the True Love Designer Series Paper so much I had to use a different paper for this page. I attached the strip of True Love Designer Series Paper across the Basic White 12″ x 12″ page.
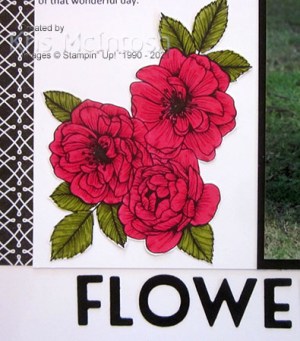
I attached the photo to Basic Black card and attached it to the Designer Series Paper panel. I created the journaling on my computer, printed it onto Basic White card and attached it beside the photo. I coloured the flower from the True Love Designer Series paper using Melon Mambo and Old Olive Stampin’ Blends. I cut out the floral bouquet and attached it below the journaling. I cut the title from Basic Black card using the Playful Alphabet Dies. I attached the title below the Designer Series paper. I coloured another flower from the True Love Designer Series Paper using Melon Mambo and Old Olive Stampin’ Blends, cut it out and attached it to the lower right hand edge of the Designer Series Paper panel.
Even though I didn’t create them together, I think they co-ordinate very well, don’t you?
Bye for now,
Kris
Product Used:


It’s Your Day
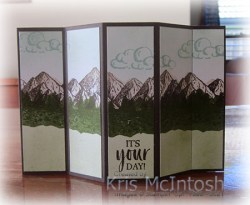
Today I am sharing another version of my take on the Bay Window card. This time, I stamped across a Basic White panel using the images from the Mountain Air stamp set. I stamped the solid mountain image using Crumb Cake ink and added the detailed mountain image over the top using Early Espresso ink. I stamped the solid tree image across the bottom of the mountain images using Old Olive ink and added the detailed tree image using Mossy Meadow ink.
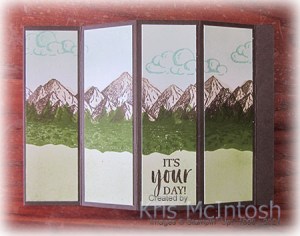
I used a blending brush to add Pool Party ink across the top of the mountain images and Old Olive ink below the tree images. I stamped the cloud image from the Mountain Air stamp set across the sky using Pool Party ink. I used Early Espresso card to create my card base and folded and scored all the panels. I cut up the Basic White card into panels to cover the four main panels on the front of the card.
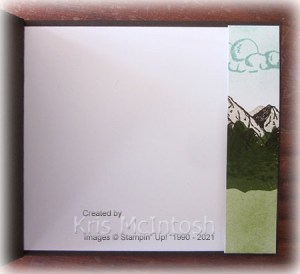
I didn’t add an image panel to the small locking panel because it will be hidden most of the time. I stamped the greeting from the A Good Man stamp set onto the middle panel of the bay window using Early Espresso ink. To decorate the inside of the card, I attached a Basic White panel and then used Foam Adhesive Strips to attached the stamped panel to the right hand side of the Basic White card. You only add adhesive behind the right hand side of the image panel, so that you can slide the small panel on the front underneath to lock the bay window into position.
I really love the look of this card. Let me know what you think.
Bye for now,
Kris
Product Used:


Sand & Sea

Yesterday on my Facebook Live I shared a fun fold which I had never made before, it’s called a Bay Window Card! Sounds complicated but they are surprisingly easy. For today’s card, I used Thick Basic White card for the card base and after scoring and folding added Sea & Sand Designer Series Paper to each of the panels on the card front. I cut Basic White card using one of the Stitched So Sweetly Dies and stamped the greeting from the Friends are Like Seashells stamp set onto the top right hand corner using Sahara Sand ink. I stamped the seashell from the Friends are Like Seashells stamp set onto the bottom of the Basic White panel using Flirty Flamingo ink and covered it with a post-it-note mask.

I stamped the star fish image and the sand dollar image from the same stamp set using Sahara Sand ink. I added a post-it-note mask over the sand dollar image and stamped the seaweed image twice using Mossy Meadow ink. I attached the stamped panel to the centre of the bay window. To decorate the inside of the card, I stamped the seashell image from the Friends are Like Seashells stamp set onto the lower left hand corner using Flirty Flamingo ink. I covered the seashell with a post-it-note mask and stamped the seaweed image twice using Mossy Meadow ink.

I attached the Sea & Sand Designer Series Paper panel to the right hand side of the inside of the card using Foam Adhesive Strips. You have to make sure that you only add the adhesive strips to the back of the right hand side of the Designer Series Paper so you can tuck the front panel underneath to create your “bay window”. I also added panels of the same Sea & Sand Designer Series Paper to the panels on the back of the card front. Not because you need to but because I managed to get ink where I shouldn’t and this covered it beautifully.
I think this is a fun way to play with your stamps and perhaps I haven’t created my card in quite the way it was meant to be done but I love the end result, don’t you.
Bye for now,
Kris
Product Used:


Purple Birthday

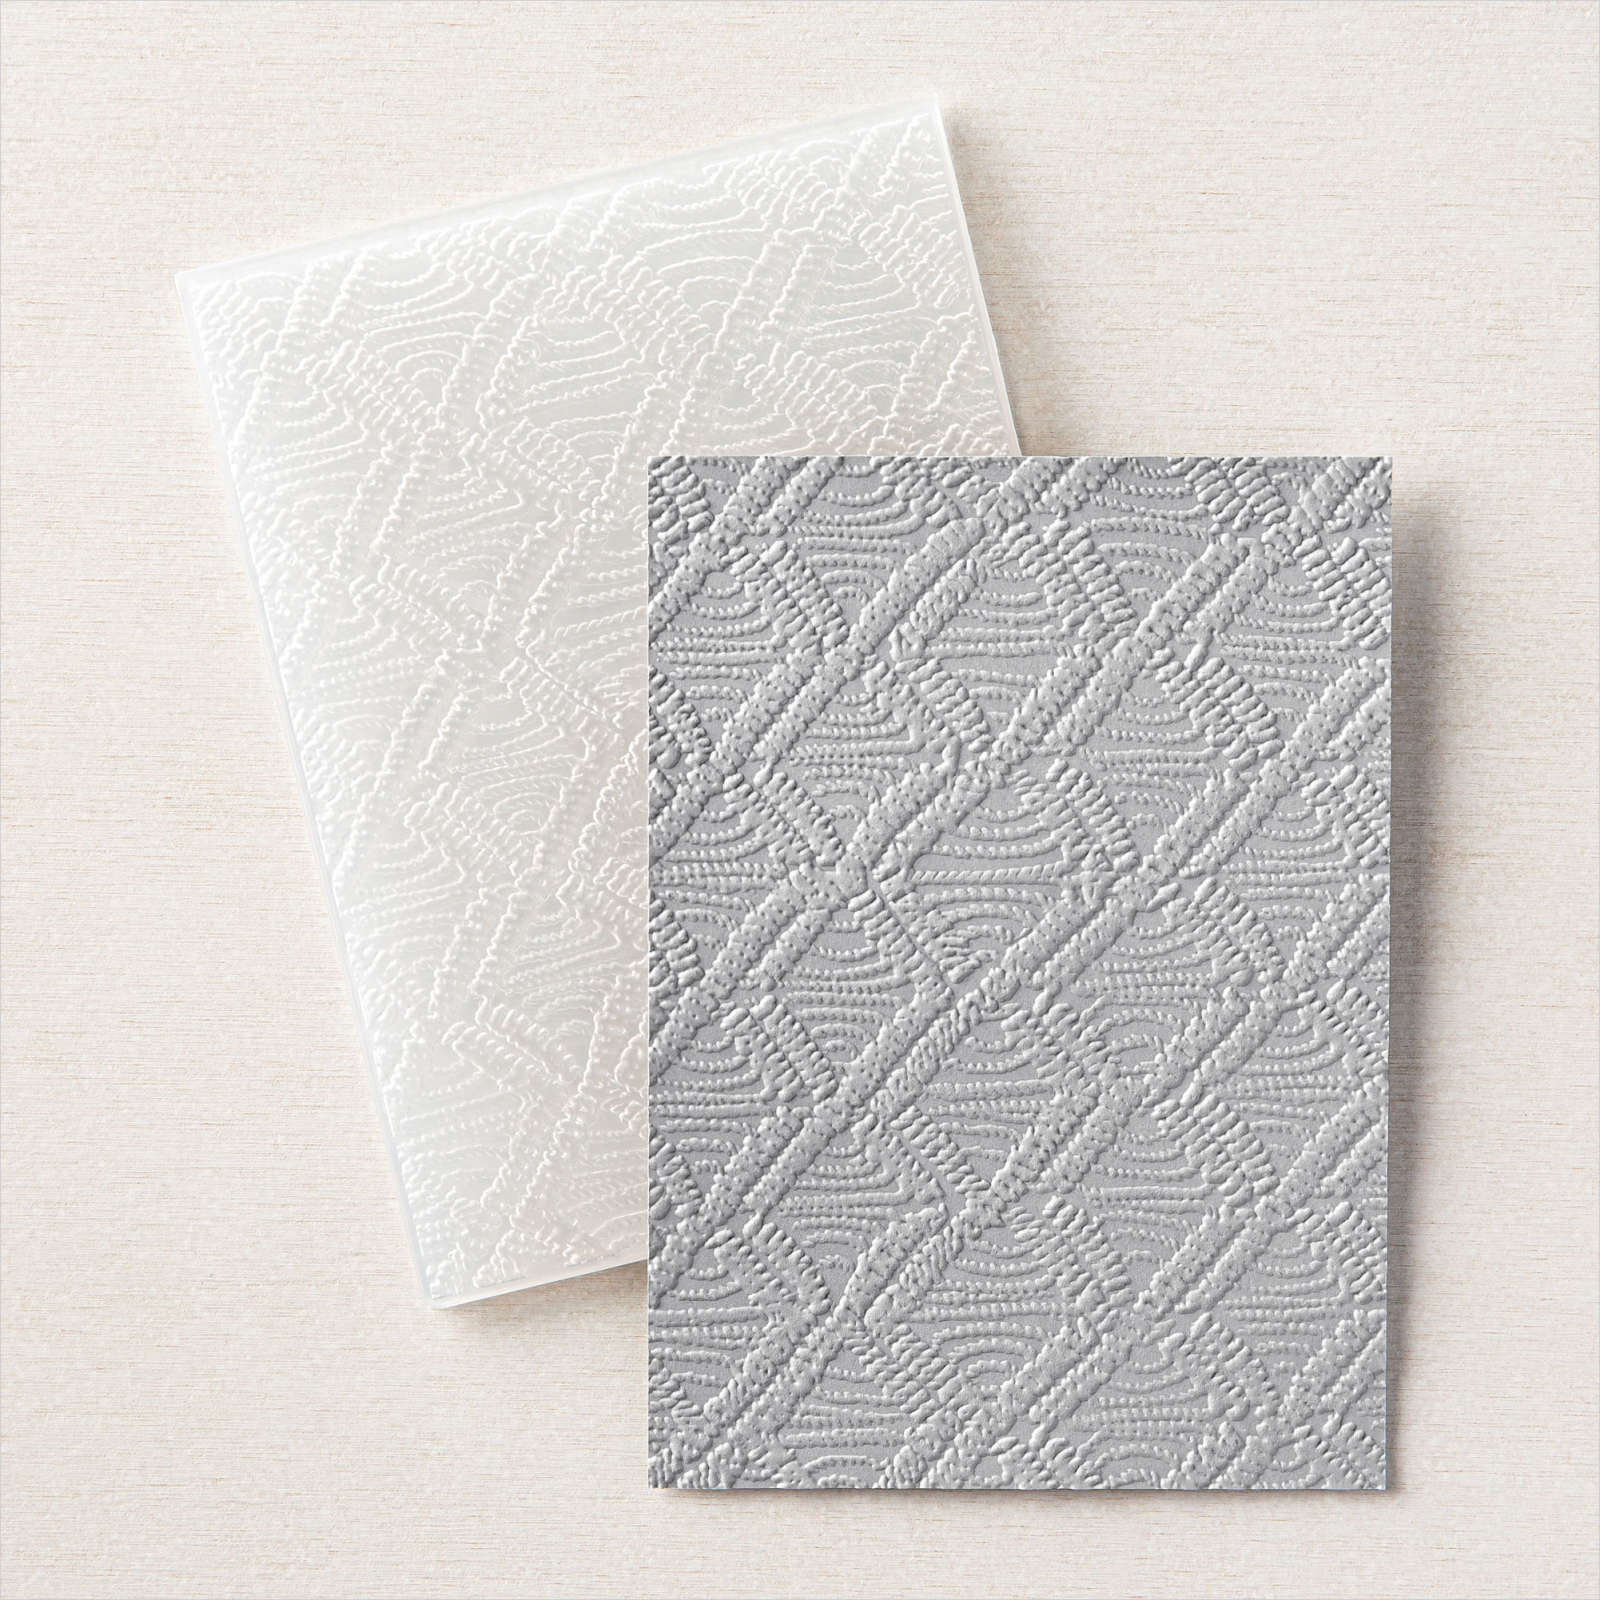
Toay’s card once more uses the FREE United in Creativity PDF download. I am also casing a layout used by the very talented Jacqui Williams, a New Zealand Demonstrator. For this card, I embossed Basic White card using the Macrame 3D Embossing Folder and attached it to scored and folded Highland Heather card. I used one of the Stitched Rectangle Dies to cut out one of the black and white papers from the Pattern Party 12″ x 12″ Designer Series Paper. I attached the die cuts to the card front using dimensionals.

I stamped “happy birthday” from the Artisitically Inked stamp set onto Basic White card. I used the Stitched Rectangle Dies to cut out the greeting. I cut a larger rectangle from Highland Heather card and attached the greeting. The greeting panel is attached to the card front using dimensionals.

I printed the floral image from the United in Creativity PDF download onto Basic White card. I coloured the image using Highland Heather, Granny Apple Green and Dark Daffodil Delight Stampin’ Blends and cut it out. I attached the flower to the card front using dimensionals where necessary. To decorate the inside of the card, I stamped the greeting from the Peaceful Moments stamp set onto Basic White card using Highland Heather ink. I attached a piece of the same Pattern Party Designer Series Paper across the bottom of the stamped panel.
Another card, I just love using this gorgeous Designer Series Paper and the United in Creativity PDF download.
Bye for now,
Kris
Product Used:
You can download the United in Creativity PDF here.


The Happiest of Birthdays
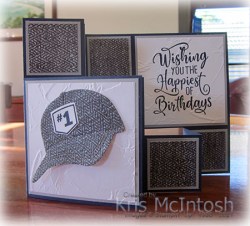
Today I thought I would share with you the card I made for my eldest grandson’s 15th birthday. I used the template that Julie Burt shared on a demonstrator only facebook page quite a while ago. If you go to this post you can download a PDF to get the basic instructions for creating the card. I began by cutting Night of Navy card to create the base card and the small folded card on the front. I cut pieces of Smoky Slate card and attached them to the card base. I used one of the patterns from the In Good Taste Designer Series Paper to attached to all of the small squares except the one in the middle of the card. For this panel I embossed Basic White card using the Painted Texture 3D Embossing Folder.
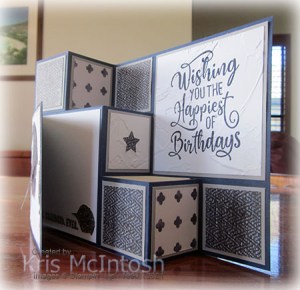
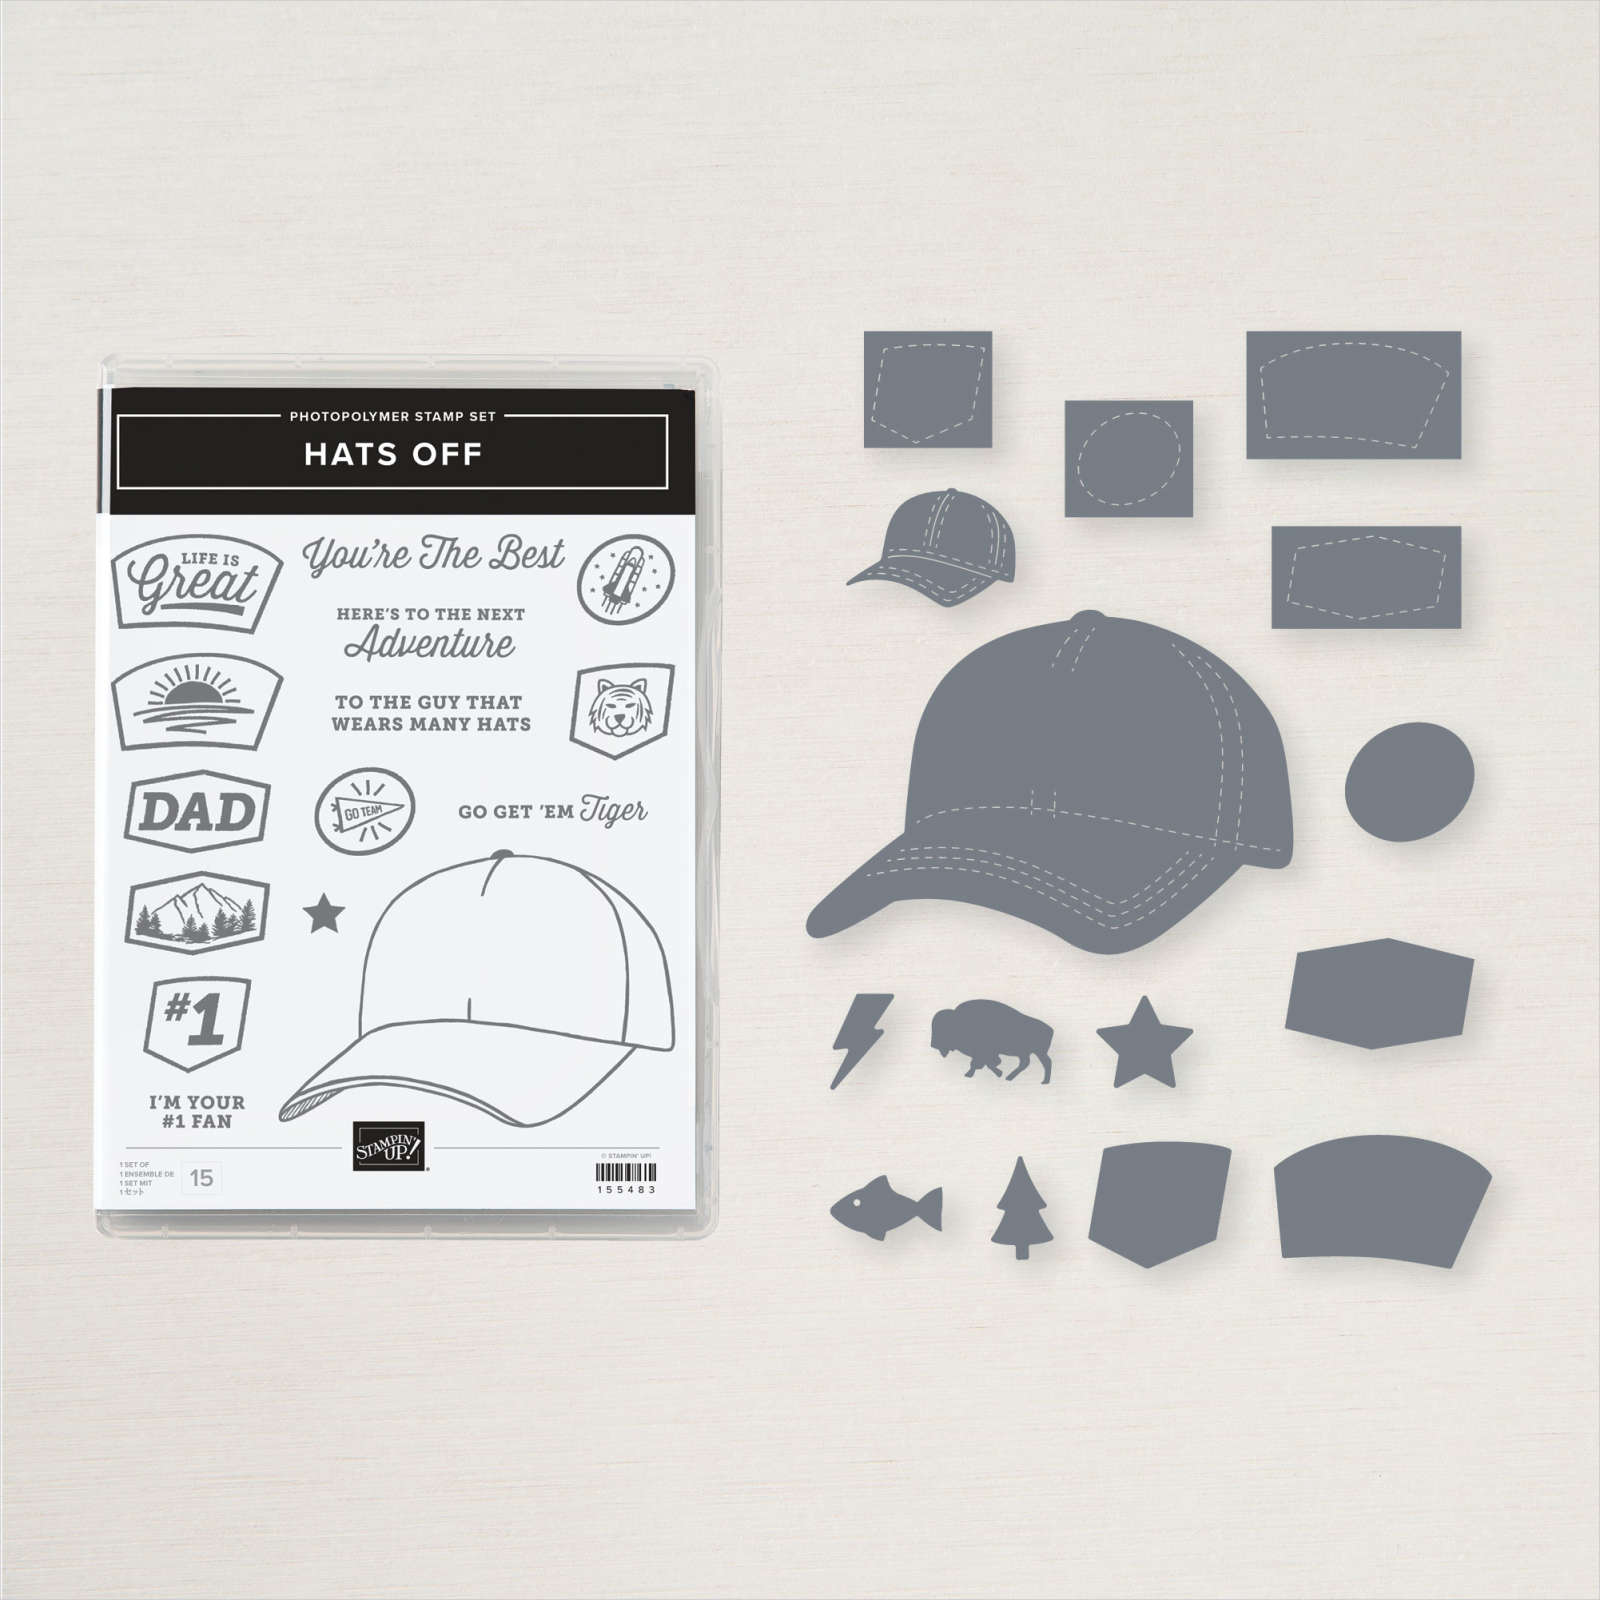
I stamped the greeting from the Happiest of Birthday’s stamp set onto Basic White card using Night of Navy ink before embossing the panel with the Painted Texture 3D Embossing Folder. This panel is attached to the large space on the right hand corner of the card. I embossed another piece of Basic White card using the Painted Texture 3D Embossing Folder to attach to the front of the small folded card. I cut the large hat from the same pattern In Good Taste Designer Series Paper using the Hat Builder Dies and attached it to the card front. I did not add adhesive under the brim of the cap to give it a little more dimension. I stamped “#1” from the Hats off stamp set onto Basic White card using Night of Navy ink.
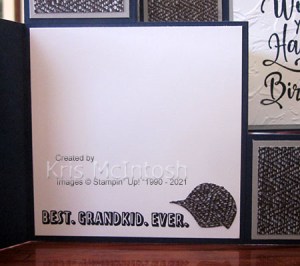
I cut out the “#1” using the co-ordinating Hat Builder Die and attached it to the large cap. I cut the same pattern In Good Taste Designer Series Paper using the star die from the Hat Builder Dies and attached it to the small centre panel. To decorate the inside of the small card, I stamped the greeting from the A Grand Kid stamp set across the bottom of Basic White card using Night of Navy ink. I cut the small cap from the same pattern In Good Taste Designer Series Paper using the Hat Builder Dies.
I love how fun this card is but still gives lots of room to write your message. I cannot thank Julie enough for sharing her template with us all. Once again Happy Birthday Ethan!
Bye for now,
Kris
Product Used:


Nana
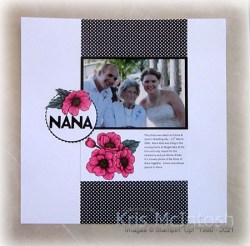
Today’s page shows off a photo of my grandmother with my daughter Emma and her husband Jason on their wedding day. My Nana was 92 in this photo and still going strong. I attached the photo to Basic Black card. I found a strip of True Love Designer Series Paper and trimmed it to be the same width as my photo which I attached down the length of the Basic White 12″ x 12″ page. I printed my journaling onto Basic White card and attached it below the photo.

I coloured a trio of flowers from the True Love Designer Series Paper using Polished Pink and Soft Succulent Stampin’ Blends. I cut out the floral bouquet and attached it beside the journaling. I cut Basic white card using the largest circle from the Layering Circle Dies and Basic Black card using the largest scalloped circle from the same dies. I attached the Basic White circle to the Basic Black scalloped circle before adding the title which is cut from Basic Black card using the Playful Alphabet Dies. The panel is attached to the left side of the page. I coloured a single flower from the True Love Designer Series Paper using the Polished Pink and Soft Succulent Stampin’ Blends, cut it out and attached it to the title panel.
I love this page, a special photo taken on a special day!
Bye for now,
More Pop & Twist
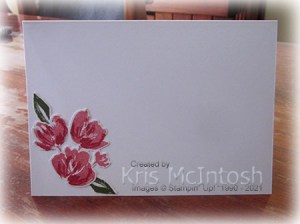
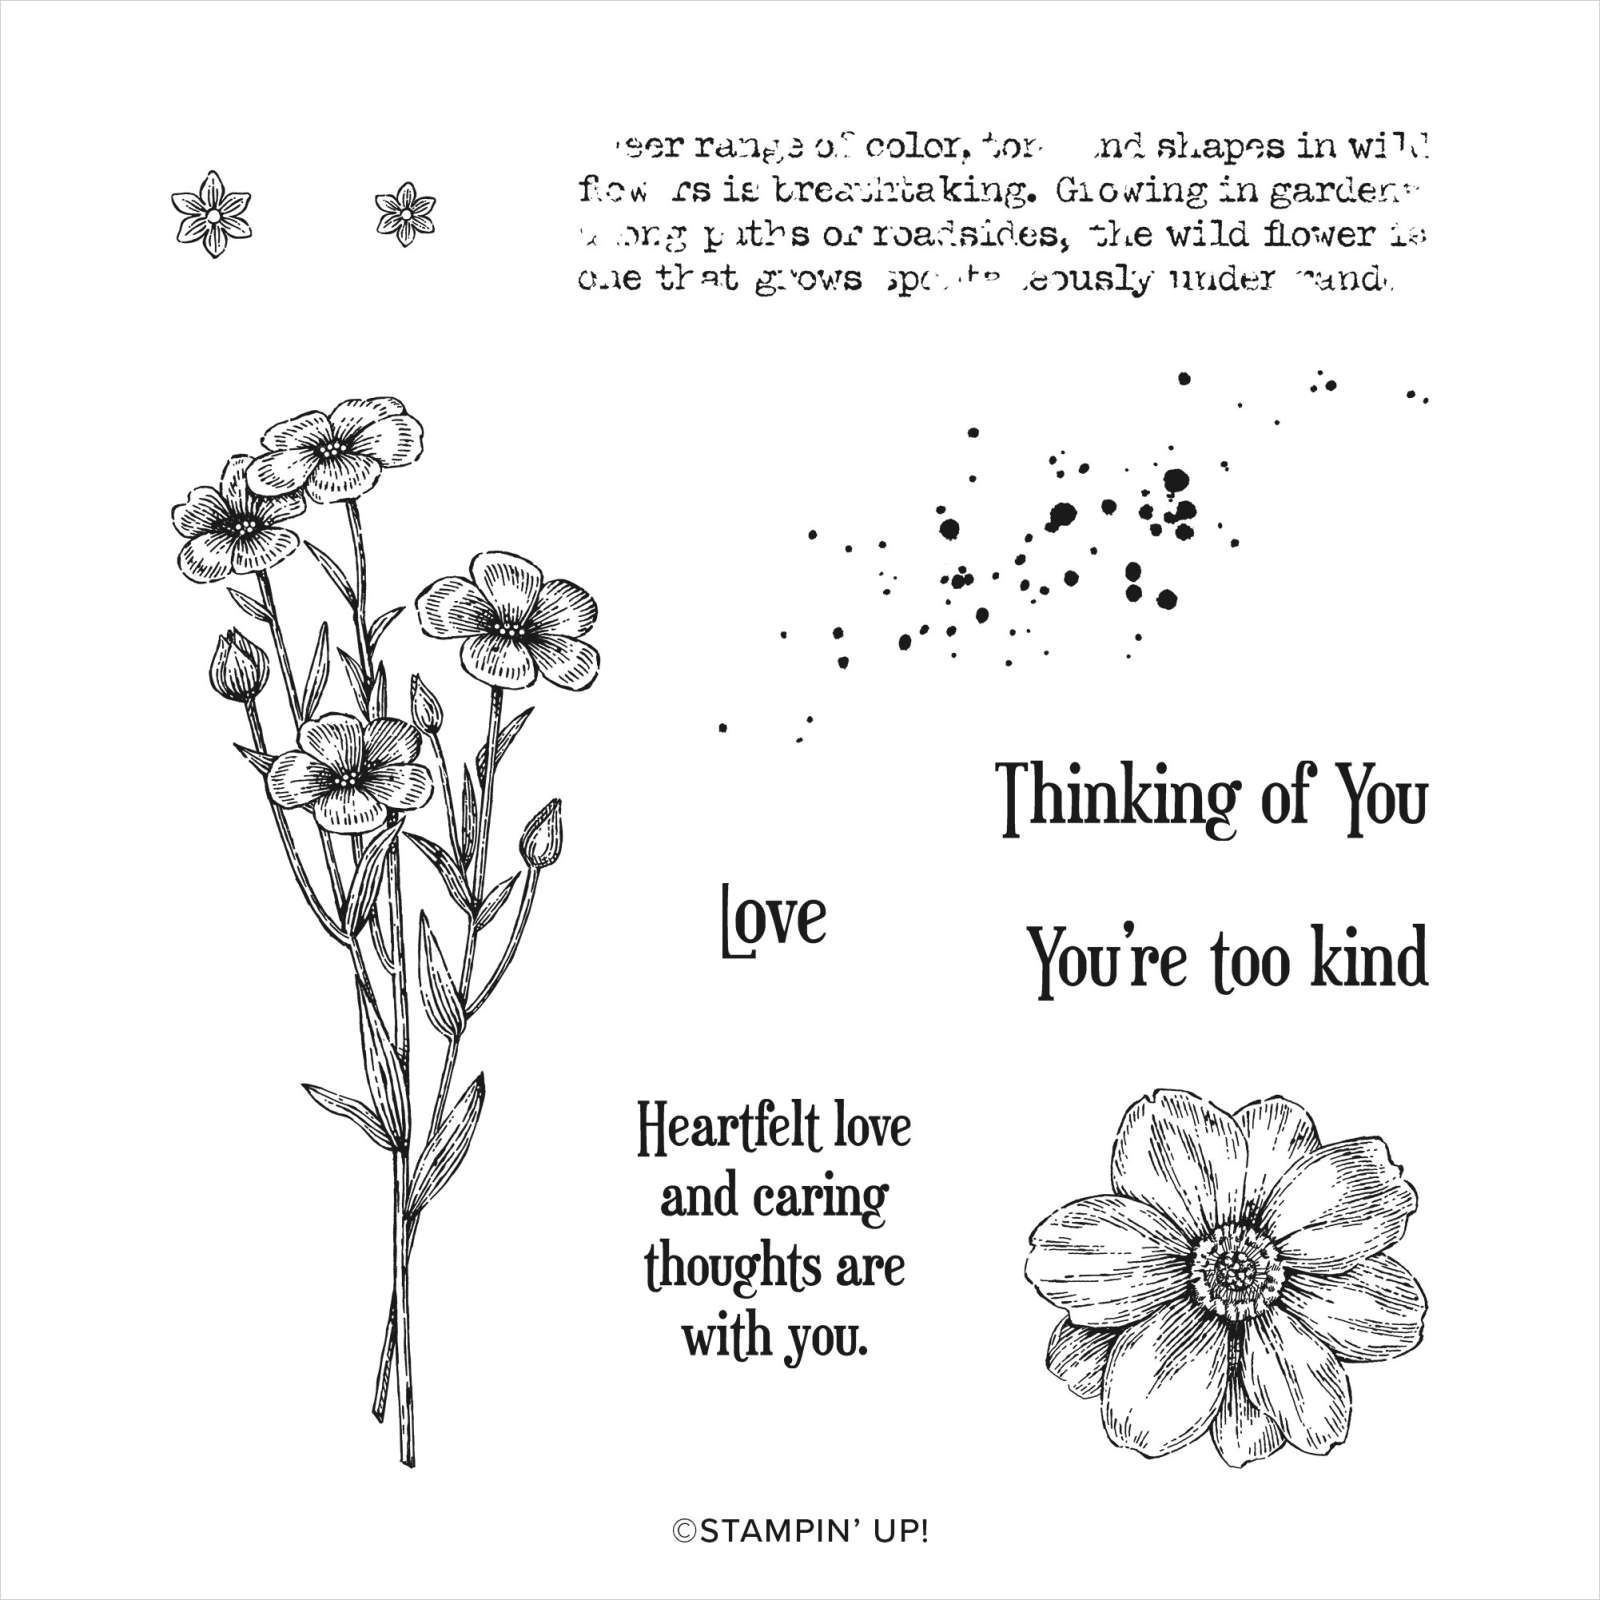
Today I am sharing another Pop and Twist card I made, this time using the Art Gallery stamp set. I attached a piece of the Fine Art Floral Designer Series Paper to Pool Party card and then the Thick Basic White card front. On the inside of the card I attached another piece of the same Fine Art Floral Designer Series Paper to the card base above the pop and twist mechanism. I attached Basic White card to Pool Party card and attached it to the card base below the pop and twist mechanism. I decorated two Basic White panels using the small floral bouquet from the Art Gallery stamp set.
I stamped the image using Old Olive ink straight onto the Basic White card. I stamped the same image onto scrap Basic White card using Poppy Parade ink which I stamped onto scrap paper first.
I stamped the small single flower from the Art Gallery stamp set onto the flowers in the image using Poppy Parade ink. I cut out the Poppy Parade image using the co-ordinating Floral Gallery Die, trimmed away the leaves and attached it to the stamped Old Olive image. The Basic White panels are attached to Pool Party card and then the first and third panels of the pop and twist panel. I stamped two Basic White panels using the stem and leaf image from the Art Gallery stamp set and Old Olive ink. I stamped the large solid flower from the Art Gallery stamp set onto Basic White card using Poppy Parade ink which I stamped onto scrap paper first. I stamped the large detailed floral image over the top using Poppy Parade ink. I used the co-ordinating Floral Gallery Die to cut out the flowers before attaching them to the stamped stem and leaf image.
The panels are attached Pool Party card and then the second and fourth panels of the pop and twist panel. I decided to create the front panel of the card as a slide off closure for the card. I cut Basic White card using one of the Scalloped Contour Dies. I stamped the flower stem image from the Art Gallery stamp set onto the die cut using Old Olive ink. I stamped the large solid floral image from the Art Gallery stamp set onto scrap Basic White paper using Poppy Parade ink which I stamped onto scrap paper first.
I stamped the detailed floral image over the top using Poppy Parade ink. I cut out the image using the co-ordinating Floral Gallery Die and attached it over the stamped stem. I added three large Basic Pearls to the centre of the flower. I stamped “happy birthday” from the Art Gallery stamp set onto Basic White card using Poppy Parade ink. I cut out the greeting using the largest label die from the Floral Gallery Dies. I attached the greeting label to Poppy Parade card and then the die cut. I wrapped the card using a strip of Pool Party card and attached the decorated die cut onto the front of the Pool Party wrap. Using this kind of closure stops the card from popping open.
If you want more information on how to make this kind of card, please pop over to my Facebook Page and watch the video.
Bye for now,
Kris
Product Used: