Poetic Artistry Sketches
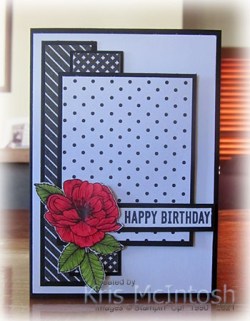
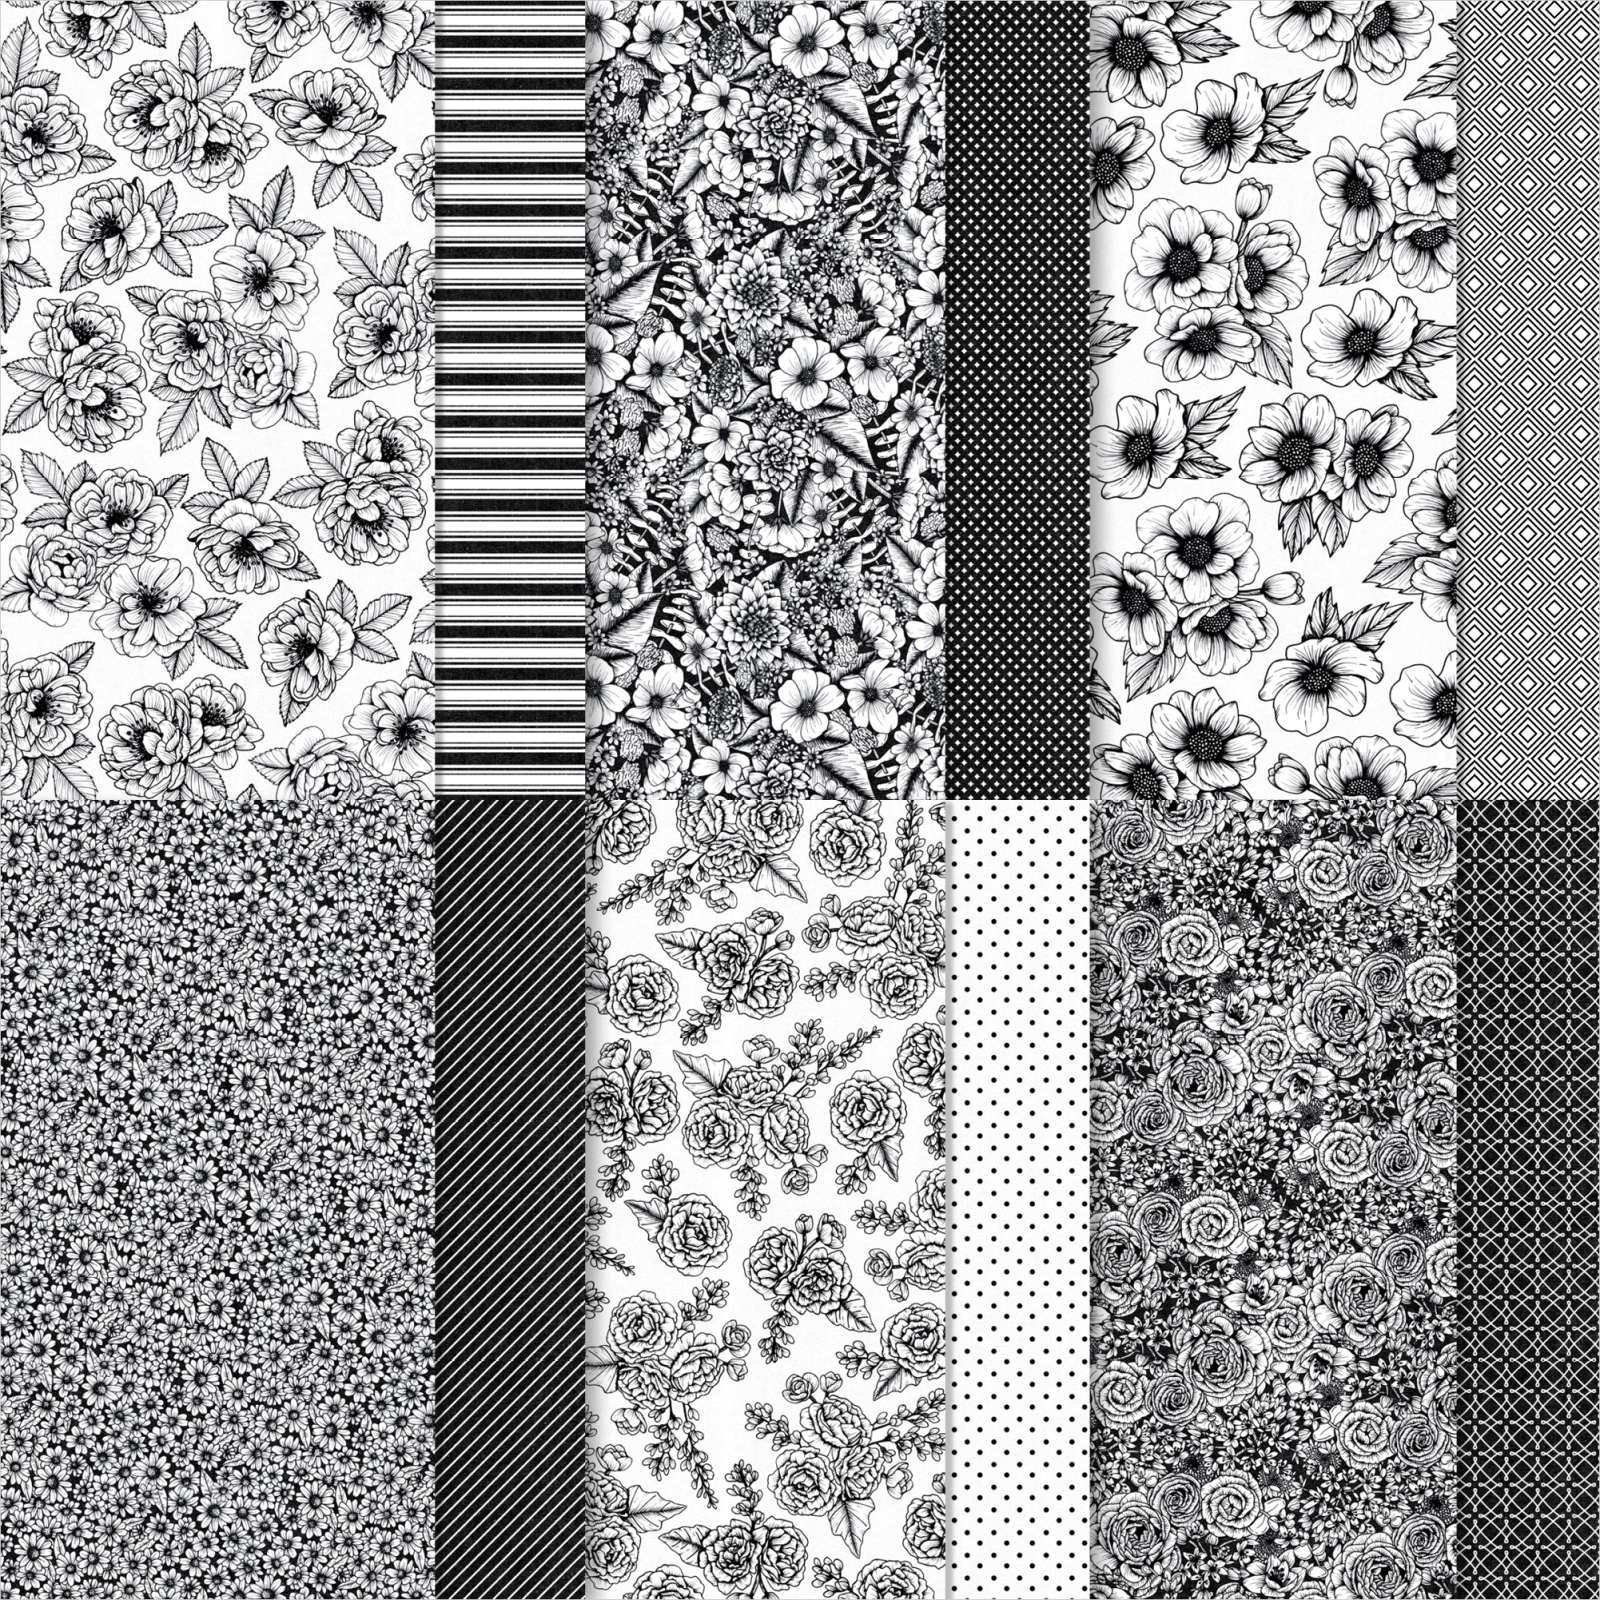
I saw a sketch challenge on the Poetic Artistry blog recently and although I didn’t get my card created in time for the challenge, I thought I would share the card I made. I began by attaching two strips of different patterns from the True Love Designer Series Paper to Basic Black card. The panels are attached to the left hand side of Basic White card. I attached a larger rectangle piece of another pattern from the True Love Designer Series paper to Basic Black card and then the card front using dimensionals where necessary. I attached the Basic White panel to scored and folded Basic Black card.

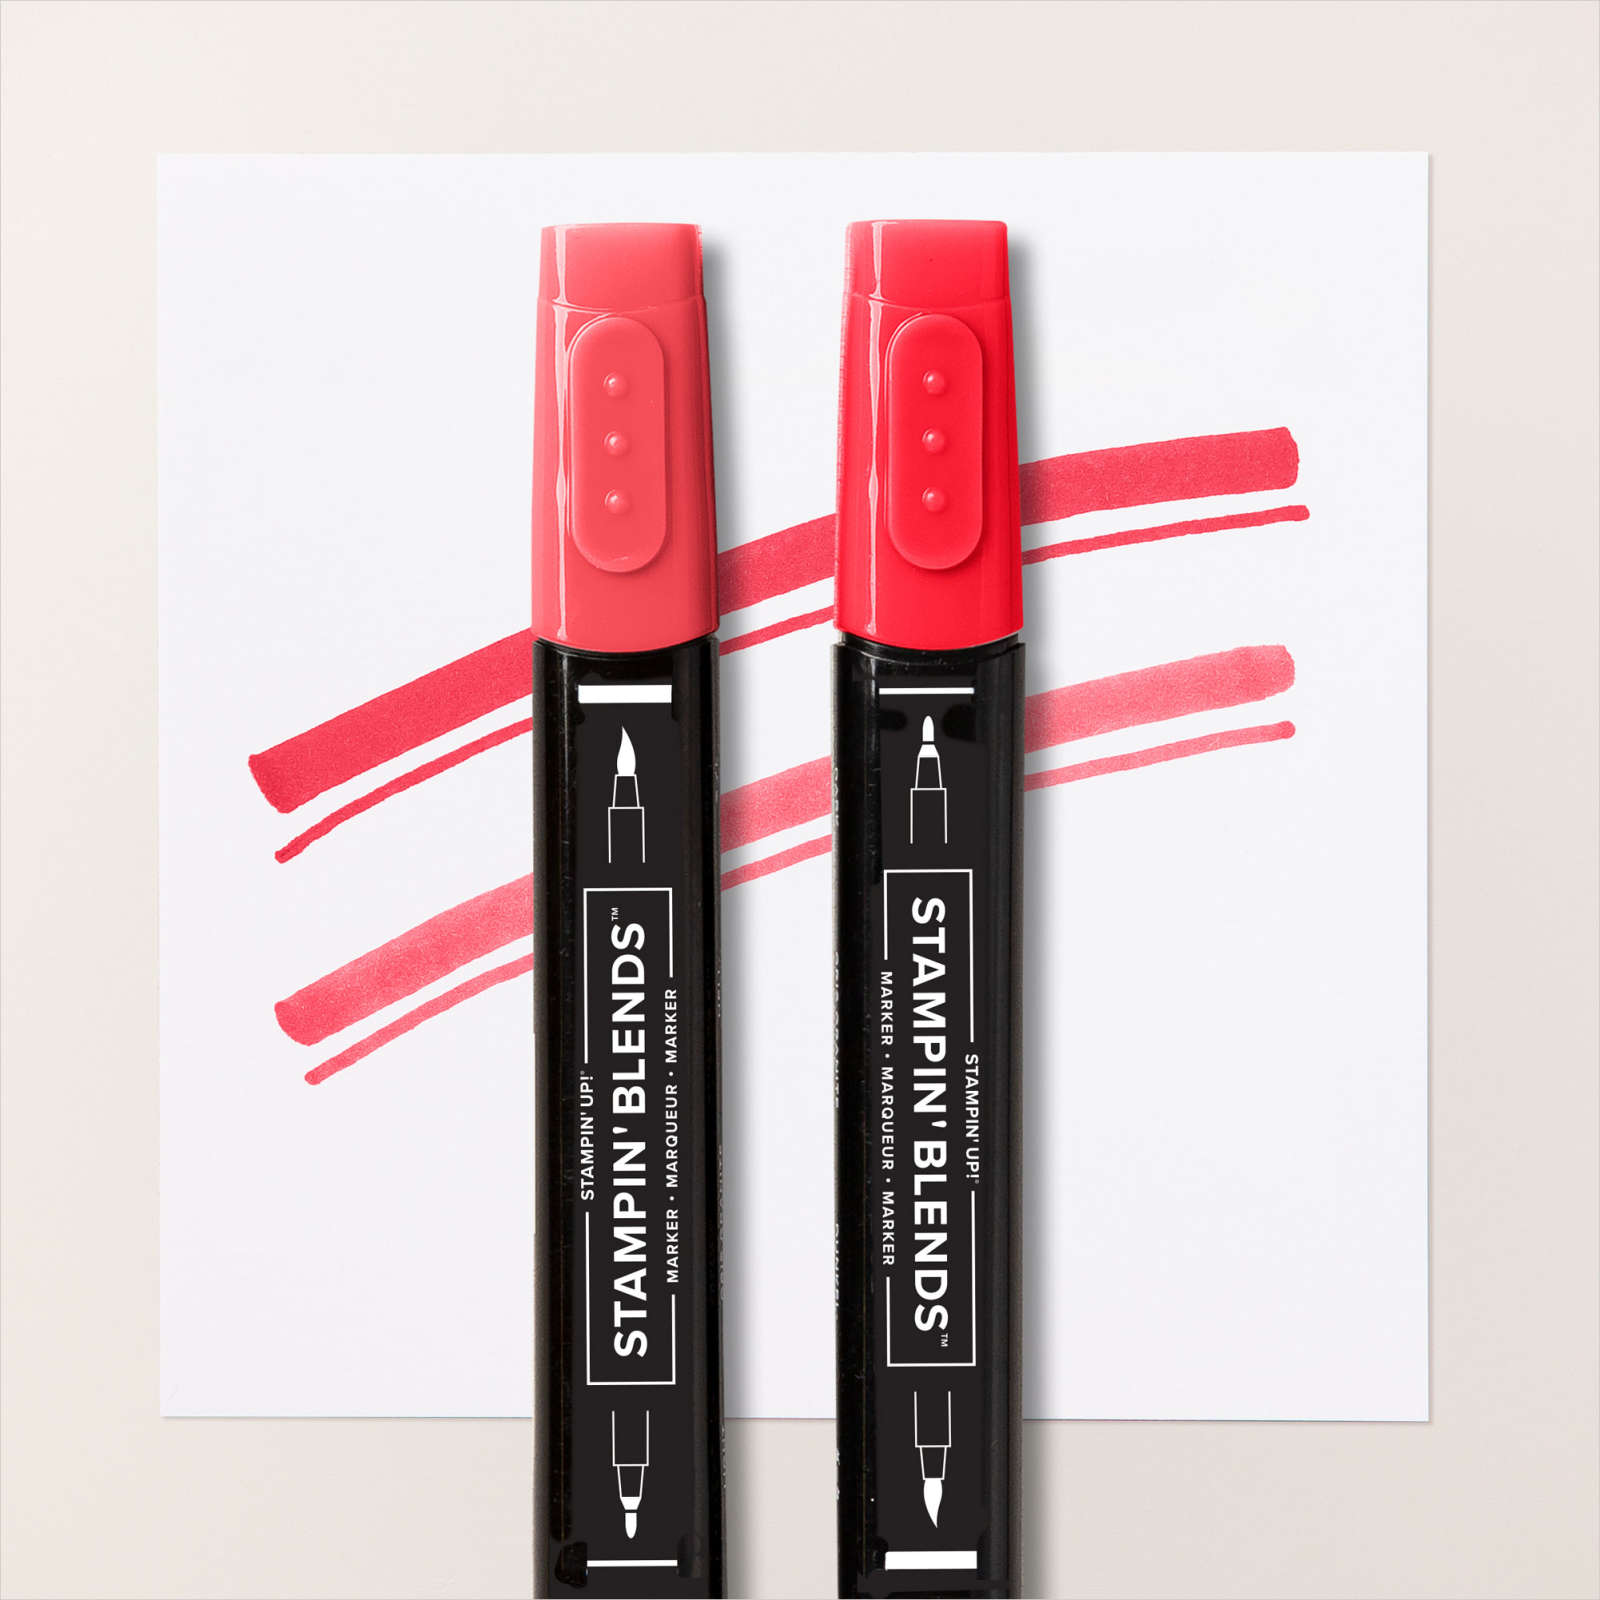
I stamped “happy birthday” from the Itty Bitty Birthday stamp set onto Basic White card using Memento Tuxedo Black ink. I attached the greeting to Basic Black card before attaching the greeting to the card front. I coloured the flower from another of the patterns from the True Love Designer Series Paper using Poppy Parade and Granny Apple Green Stampin’ Blends.
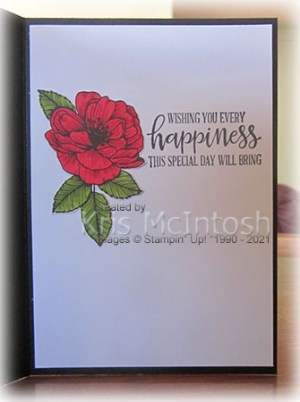
I cut out the flower and attached it to the card front covering the end of the greeting panel. To decorate the inside of the card, I stamped a greeting from the Peaceful Moments stamp set onto Basic White card using Memento Tuxedo Black ink. I coloured another flower from the True Love Designer Series Paper using Poppy Parade and Granny Apple Green Stampin’ Blends. I attached the flower beside the greeting before attaching the panel to the inside of the Basic Black card base.
I loved the sketch from Poetic Artistry, thank you for the inspiration, and love the finished card. What about you, what do you think?
Bye for now,
Kris
Product Used:


Pretty in Pink
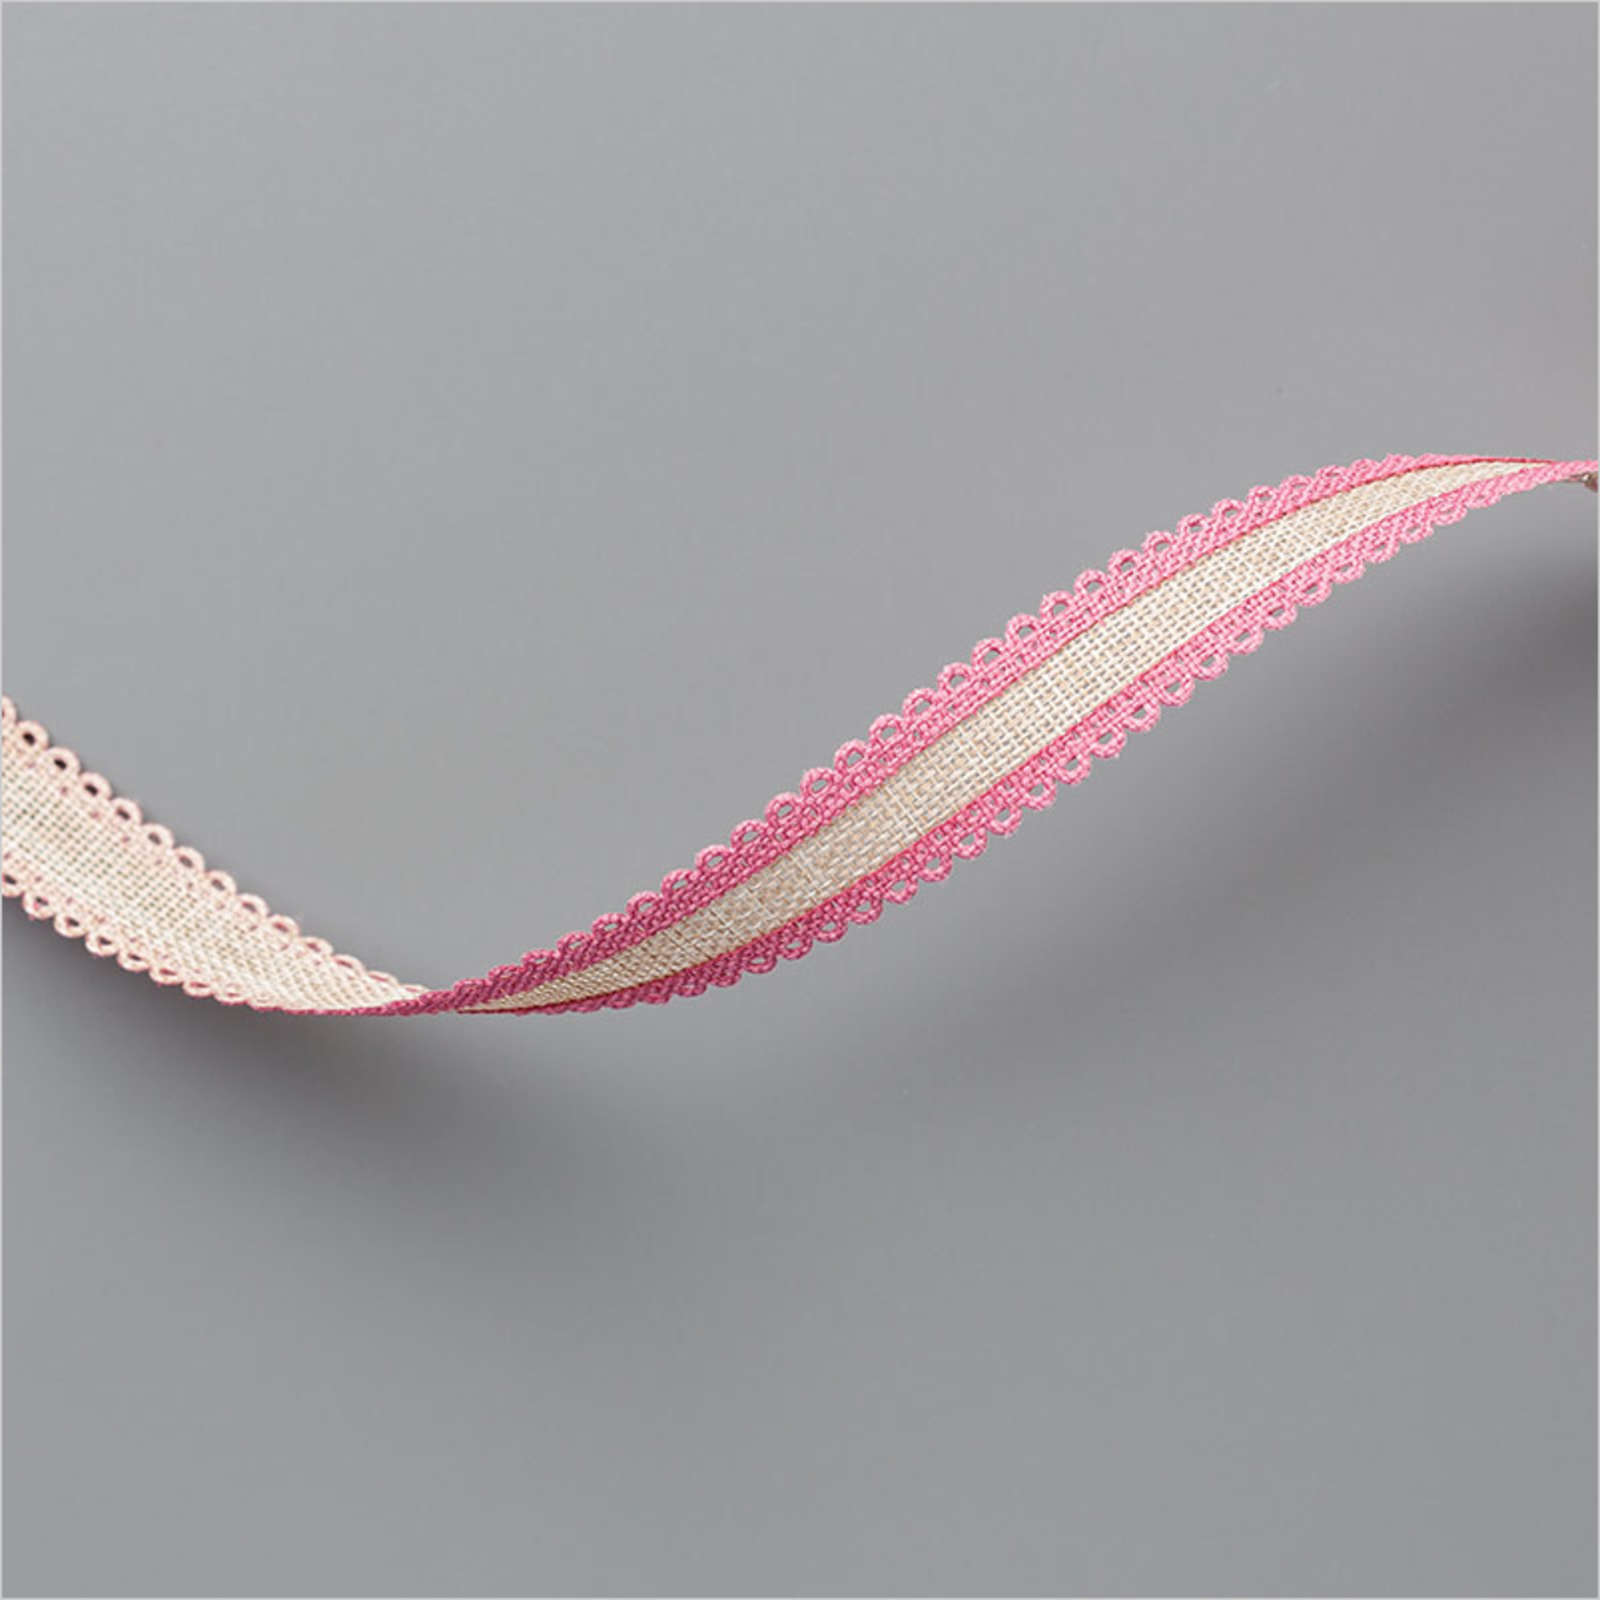
Today’s card was inspired by a layout I saw on Pinterest. I think maybe I spend too much time, looking! I cut a length of Rococo Rose Scalloped Linen Ribbon in half to give two pieces each with a scalloped edge. I attached one half behind one long edge on a piece of Paper Blooms Designer Series Paper. I attached the Designer Series Paper to the bottom of Basic White card and wrapped the ends of the ribbon around the back. The Basic White card is attached to scored and folded Rococo Rose card. I stamped the floral image from the A Touch of Ink stamp set twice onto Basic White card using Memento Tuxedo Black ink.

I added the fill image using Rococo Rose ink before stamping the greeting from the A Touch of Ink stamp set across the bottom of the panel using Memento Tuxedo Black ink. I cut a scalloped rectangle from Rococo Rose card using the Stitched So Sweetly Dies and attached the image panel. The whole piece is attached to the card front using dimensionals.

To decorate the inside of the card I stamped the floral outline image from the A Touch of Ink stamp set onto the lower left hand corner of Basic White card. The floral fill image is stamped using Rococo Rose ink. I attached the second half of the Rococo Rose Scalloped Linen Trim behind one long edge of a strip of the same pattern Paper Blooms Designer Series Paper. The panel is attached across the bottom of the stamped Basic White card. Again I attached the ends of the ribbon to the back of the Basic White card before attaching it inside the card base.
I must admit that I haven’t used Rococo Rose in any form very much and now it’s almost ready to retire, I wish I had. I’d love to hear what you think of my creation.
Bye for now,
Kris
Product Used:


USA Bound

My Dad was stationed in the United States for a period of about 18 months when I was only 8 years old. These pictures show us saying goodbye to our grandmother and also a photo taken on a refuelling stop at Honolulu airport. I cut down a Basic White 12″ x 12″ page and attached it to a Basic Black 12″ x 12″ page (retired). I embossed a strip of Basic White card with one of the Greenery Embossing Folders and attached it to Basic Black card. I attached the embossed panel across the Whisper White card, only using adhesive on the sides and across the bottom edge.
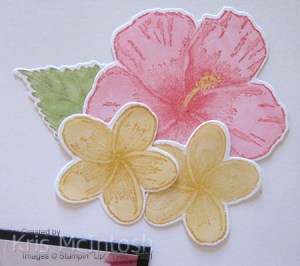
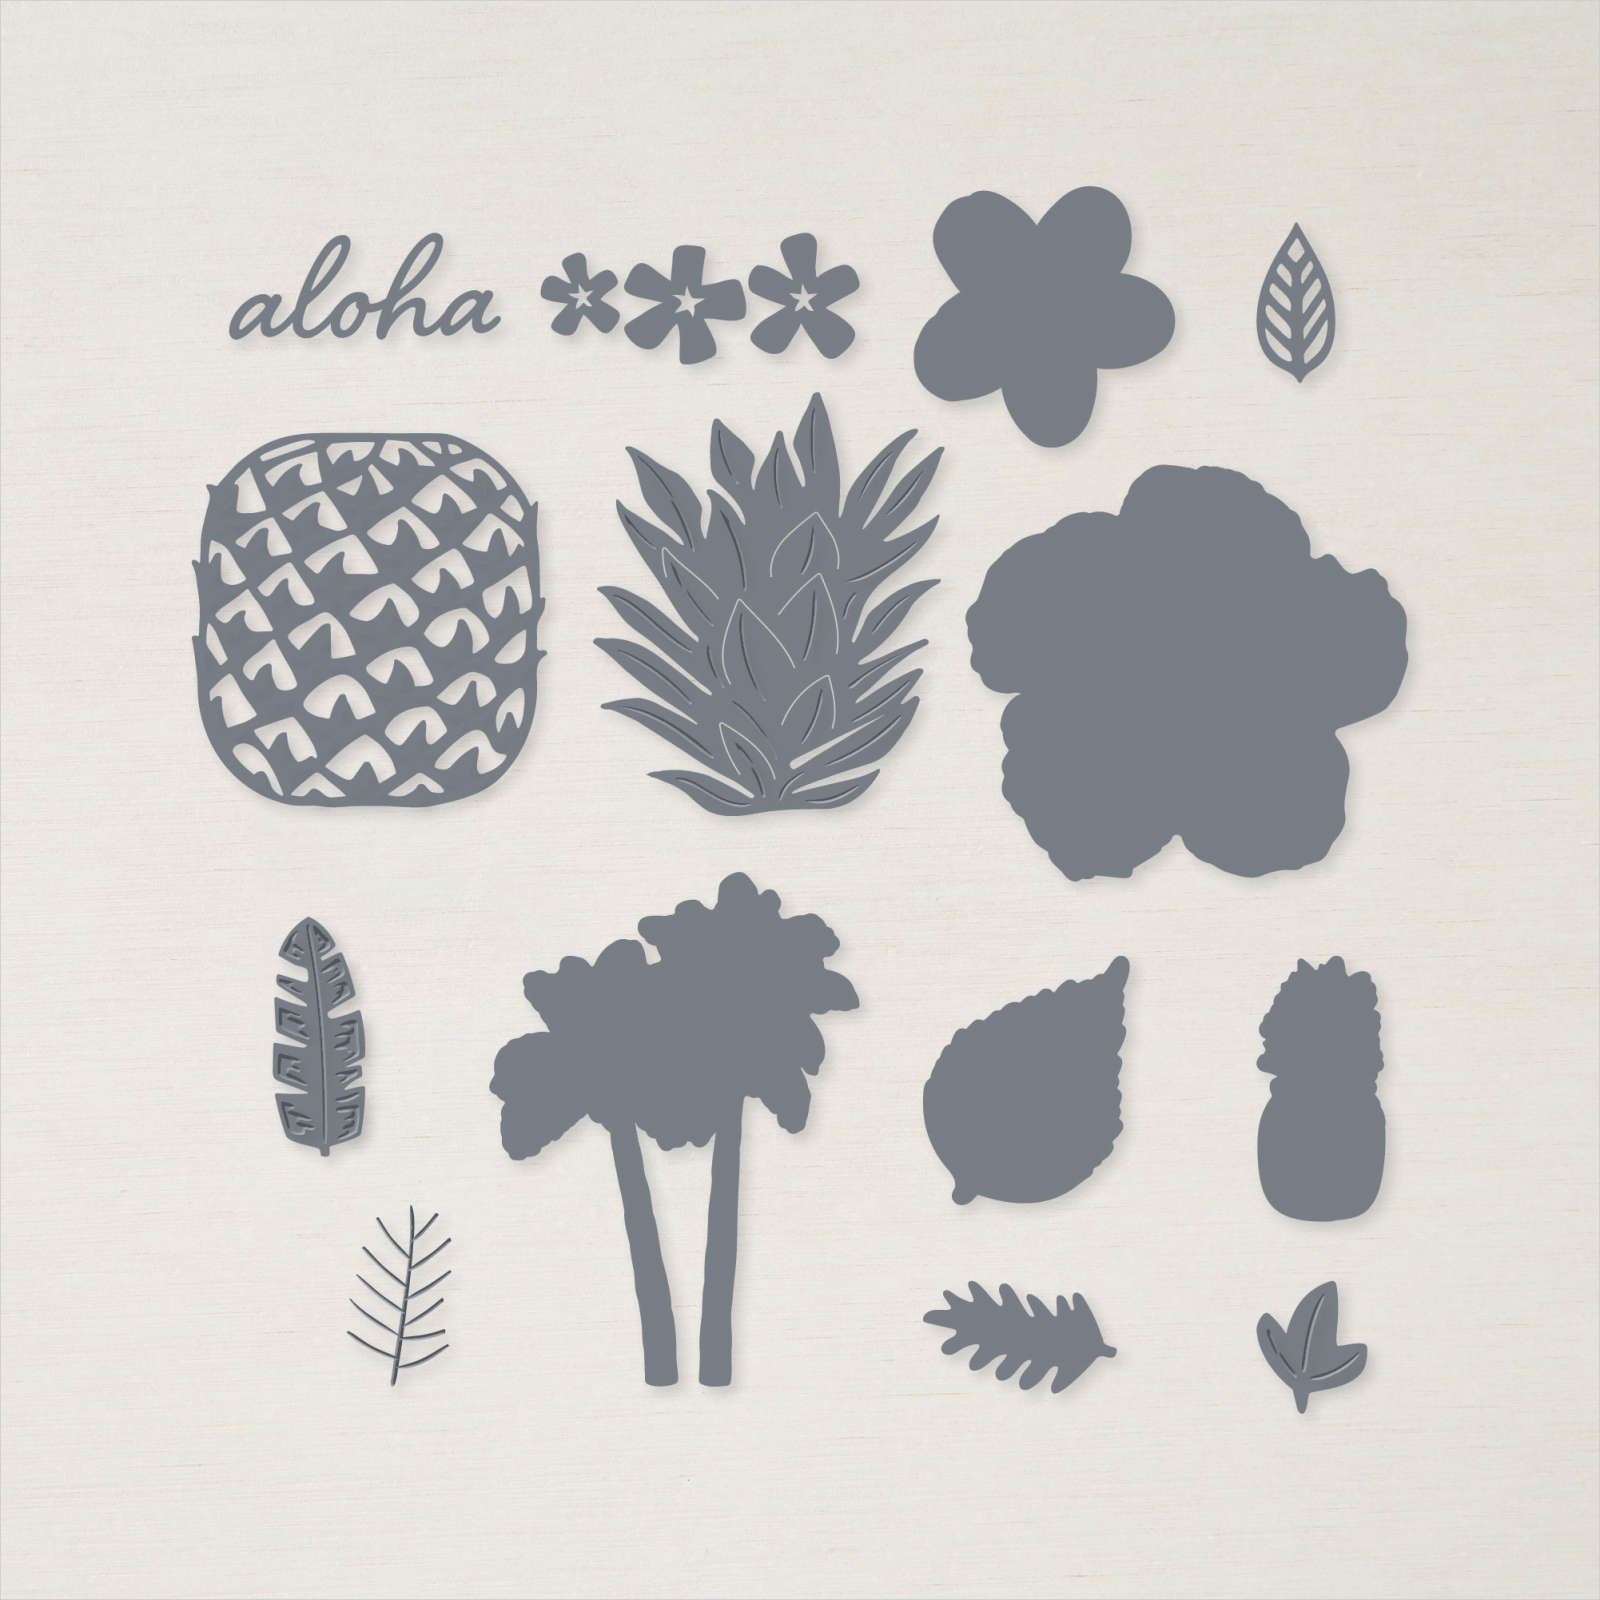
I attached my photos to Basic Black card and positioned them underneath the embossed panel. I cut the title from Basic Black card using the Playful Alphabet Dies and attached them on the left hand side of the page below the embossed panel. I stamped two hibiscus flowers from the Timeless Tropical stamp set onto Basic White card using Flirty Flamingo ink. I stamped three frangipani flowers from the Timeless Tropical stamp set onto Basic White card using So Saffron ink. I coloured the hibiscus flowers using the Light Flirty Flamingo Stampin’ Blend and the frangipani flowers using the Dark So Saffron Stampin’ Blend.

I also stamped four leaves from the Timeless Tropical stamp set onto Basic White card using Smoky Slate ink. I coloured the leaves using the Light Granny Apple Green Stampin’ Blend. I cut all of the flowers and leaves out using the co-ordinating In The Tropics Dies. I attached some flowers to the top right hand corner of the page and some beside the title. I printed my journaling onto Basic White card and attached it to Basic Black card before attaching to the lower right hand corner of the page. I made the journaling panel a lift up one, so that I could add some more details when I get them from my Dad. I am reminded of so many memories when I look at these photos, which is why I love getting onto pages so that they can be enjoyed by myself and also my family.
Bye for now,
Kris
Product Used:


Brilliance Birthday
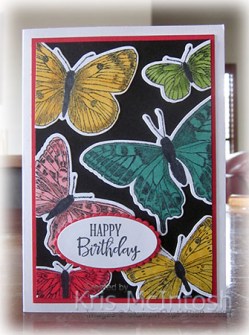
Yesterday I shared a card with you made using the Butterfly Brilliance Products and today I have another version of that card to share with you. This time, I stamped the Butterfly Brilliance stamp onto Basic White card using Memento Tuxedo Black ink. I coloured the images using Dark Basic Black, Mango Melody, Daffodil Delight, Flirty Flamingo, Bermuda Bay, Poppy Parade and Granny Apple Green Stampin’ Blends.

I used the co-ordinating Brilliant Wings Die to cut out the butterflies before attaching them to Basic Black card. I trimmed away any overhanging parts of the butterflies before attaching the panel to Poppy Parade card.

The whole panel is attached to scored and folded Thick Basic White card. I stamped “happy birthday” from the Perfect Moments stamp set onto Basic White card using Memento Tuxedo Black ink and cut it out using the Layering Ovals Dies. I attached the greeting to a Poppy Parade scalloped oval cut using the same dies. The greeting is attached to the lower left hand corner of the card front using dimensionals. To decorate the inside of the card, I stamped another greeting from the Peaceful Moments stamp set using Memento Tuxedo Black ink. I stamped an additional butterfly onto Basic White card using Memento Tuxedo Black ink and coloured the image using Dark Basic Black and Melon Mambo Stampin’ Blends. I cut out the butterfly using the co-ordinating Brilliant Wings Die and attached it next to the stamped greeting.

I am not sure which version of this card I like the best, the embossed one or the stamped one, they are both lovely. Which one do you prefer?
Bye for now,
Kris
Product Used:


Butterfly Brilliance

Yesterday on my Facebook Live, I showed a new product bundle which will be available for customers on the 2nd March until the 3rd May. The bundle includes the Butterfly Brilliance stamp set and co-ordinating Brilliant Wings Dies, Natural Touch Specialty Paper and Butterfly Bijou 6″ x 6″ Designer Series Paper. The stamp set and the co-ordinating dies will still be available when the next annual catalogue is released, however, the designer series papers are only available during the pre-catalogue promotion while stocks last. I am sure that you will love this product bundle as much as I do. So today, I want to share another card I made using this bundle. I began by stamping the Butterfly Brilliance stamp onto Basic Black card using Versamark ink. I sprinkled the ink with White Embossing Powder and heat set it.

I coloured the White Embossing using the Dark blend in the these Stampin’ Blend combos Mango Melody, Daffodil Delight, Bermuda Bay, Granny Apple Green, Flirty Flamingo, Poppy Parade and Smoky Slate. I attached the Basic Black card to Melon Mambo card and then scored and folded Thick Whisper White card. I stamped “happy birthday” from the A Grand Kid stamp set onto Basic Black card using Versamark ink, sprinkled the ink with White Embossing powder and heat set it. I coloured the greeting using the Dark Melon Mambo Stampin’ Blend. I cut out the greeting using the Layering Ovals Dies and attached it to a Melon Mambo scalloped oval cut using the same dies.

The greeting is attached to the lower left hand side of the card front. To decorate the inside of the card, I stamped another greeting from the A Grand Kid stamp set using Memento Tuxedo Black ink. I stamped one of the butterflies from the Butterfly Brilliance stamp set onto Basic Black card using Versamark ink, coloured it using Dark Melon Mambo and Dark Smoky Slate Stampin’ Blends and cut out the butterfly using the co-ordinating Brilliant Wings Die. The butterfly is attached next to the greeting.
I just love how the butterflies pop off the Basic Black card. I love colouring White embossing using the Blends and the good thing is, it is so easy. The only thing you need to remember is not to press too hard or you will transfer the embossing to the blend – not a good thing!
I have another card using this product bundle to share with you tomorrow. In fact, I have so many ideas floating around in my head that you will probably see me use this bundle quite a bit!
Bye for now,
Kris
Product Used:


Always & Forever Gold

Today’s card uses one of the card front pieces from the Forever Gold Laser Cut Specialty Paper. I still have a lot of these to use because they are so beautiful I want to make sure that I create something special with them! I attached the Forever Gold Laser Cut Specialty Paper to the centre of Basic White card.

The whole panel is attached to scored and folded Poppy Parade card. I coloured some of the flowers from the True Love Designer Series Paper which were situated on the edges of the 12″ x 12″ page using Poppy Parade, Granny Apple Green and Dark Daffodil Delight Stampin’ Blends before cutting out the flowers.

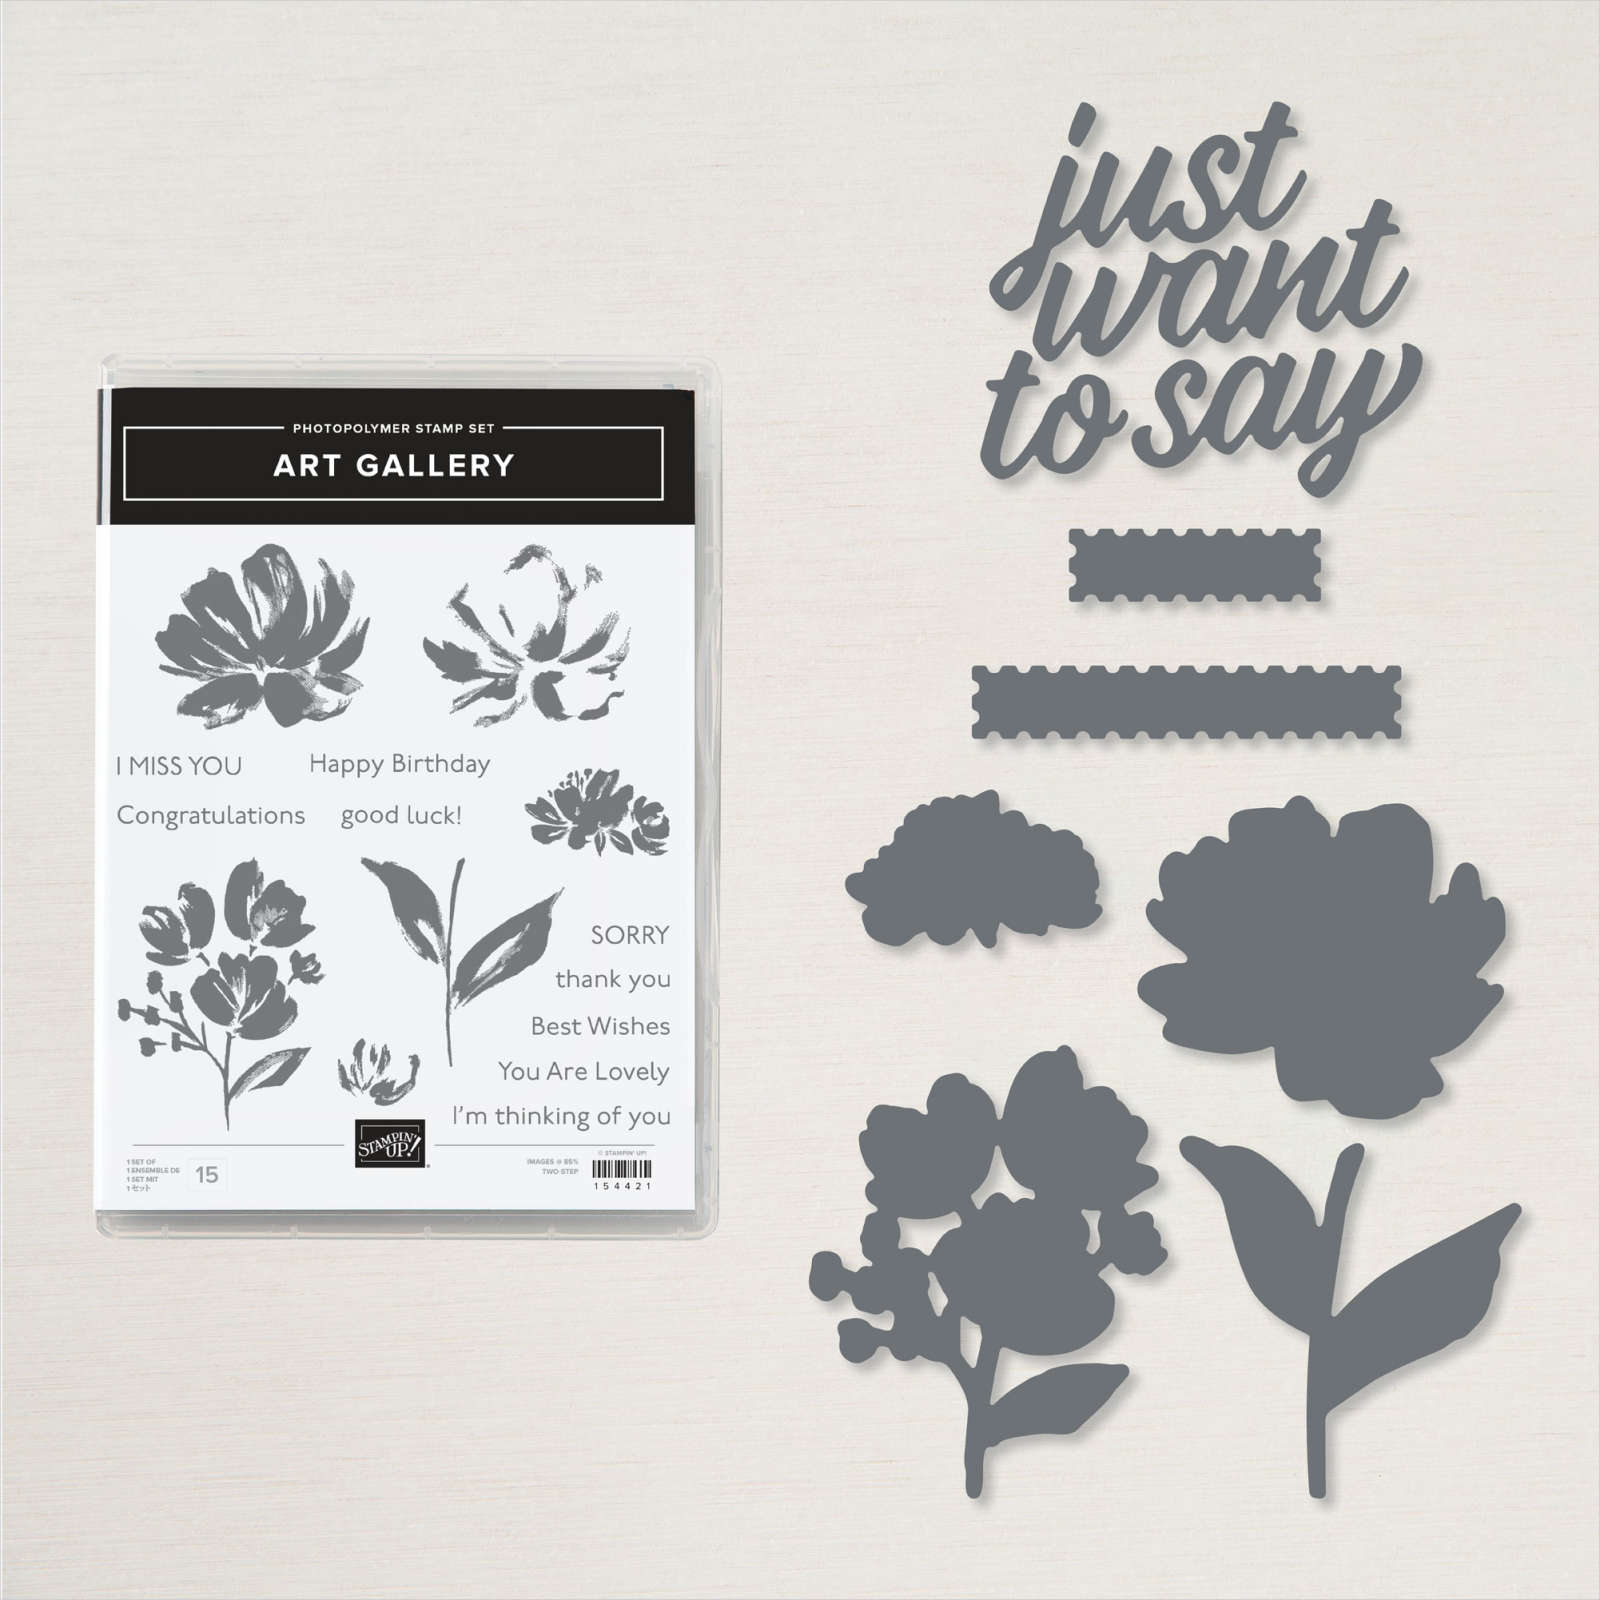
I attached the flowers so that they sit on the edge of the Laser Cut panel. I stamped “happy birthday” from the Art Gallery stamp set onto Basic White card using Poppy Parade ink. I used the largest banner from the Floral Gallery Dies to cut out the greeting. I attached the greeting to the centre of the card front using dimensionals. To decorate the inside of the card, I coloured another of the flowers from the edge of the True Love Designer Series Paper using Poppy Parade, Granny Apple Green and Dark Daffodil Delight Stampin’ Blends. I attached the image to the left hand side of Basic White card. I’m not sure if you can see just how pretty this card is with that beautiful golden background, but I simply love it.
Bye for now,
Kris
Product Used:


Hey Girlfriend

I love stamp sets with girlie images, they are such fun to use for your friends but I love using them for my daughters and granddaughters. Today I thought I would share three cards, I made using the images from the Hey Girlfriend stamp set and the Paper Blooms Designer Series Paper which is Free with a qualifying order during Sale-a-Bration. I attached a piece of the same pattern Paper Blooms Designer Series Paper to Whisper White card. I wrapped the edge of the Designer Series Paper using three different ribbons – Rococo Rose Scalloped Linen Ribbon, Seaside Spray Scalloped Linen Ribbon and Denim 3/8″ Ribbon. I attached each piece to a card base cut from Rococo Rose Seaside Spray or Night of Navy card.

I stamped each of the girl images from the Hey Girlfriend stamp sets onto Whisper White card using Memento Tuxedo Black ink. The images are coloured using Stampin’ Blends with combinations of Rococo Rose, Seaside Spray, Night of Navy, Ivory, Light Soft Suede with a little Soft Sea Foam thrown in. The images are cut out using the Layering Ovals Dies and attached to a scalloped circle cut with the same dies from Rococo Rose, Seaside Spray and Night of Navy card.

I attached the images to the card fronts using dimensionals. I stamped the greeting from the Hey Girlfriend stamp set onto Whisper White card using Rococo Rose, Seaside Spray and Night of Navy ink. The images are punched out using the Double Oval Punch and attached to the larger layer cut from co-ordinating card. The greetings are attached to the card front using dimensionals where necessary. It’s a bit hard to see but each of the bows has a small Basic Rhinestone added to the centre. To decorate the inside of the cards, I attached the same pattern Paper Blooms Designer Series Paper across one short edge of Basic White card. I wrapped the top edge of the Designer Series Paper using the co-ordinating ribbon. I stamped another greeting from the Hey Girlfriend stamp set onto each Basic White panel using the co-ordinating ink.

I love this set of cards and the best thing is if you buy the stamp set, punch, one ribbon and one packet of cardstock you can earn the Designer Series Paper for free. You have to love that! If you need any more information on how to stock up with freebies during Sale-A-Bration contact me so we can work it out for you.
Bye for now,
Kris
Product Used:


Phoenix
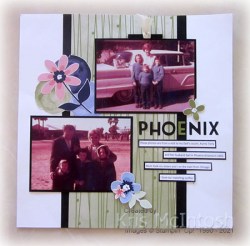
Today’s page shows off a couple of photos from our time in Phoenix Arizona when my Mum, my sister’s and I visited Dad’s cousin. We went by train from Chicago. I am quite amused by the fact that my sisters and myself are wearing the same outfits in each photo! I attached a piece of the Paper Blooms Designer Series Paper to a strip retired Basic Black 12″ x 12″ before attaching the panel to a Basic White 12″ x 12″ page. I cut some circles from one of the papers in the Paper Blooms Designer Series Paper and attached them to the top left hand corner of the page.

I attached my photos to Basic Black card before attaching them to the page. The top photo is only attached around the two sides and across the bottom. I cut some flowers from the Paper Blooms Designer Series Paper and attached them to the page. I cut my title from Basic Black card using the Playful Alphabet Dies. The journaling was created on my computer and printed onto Basic White card.

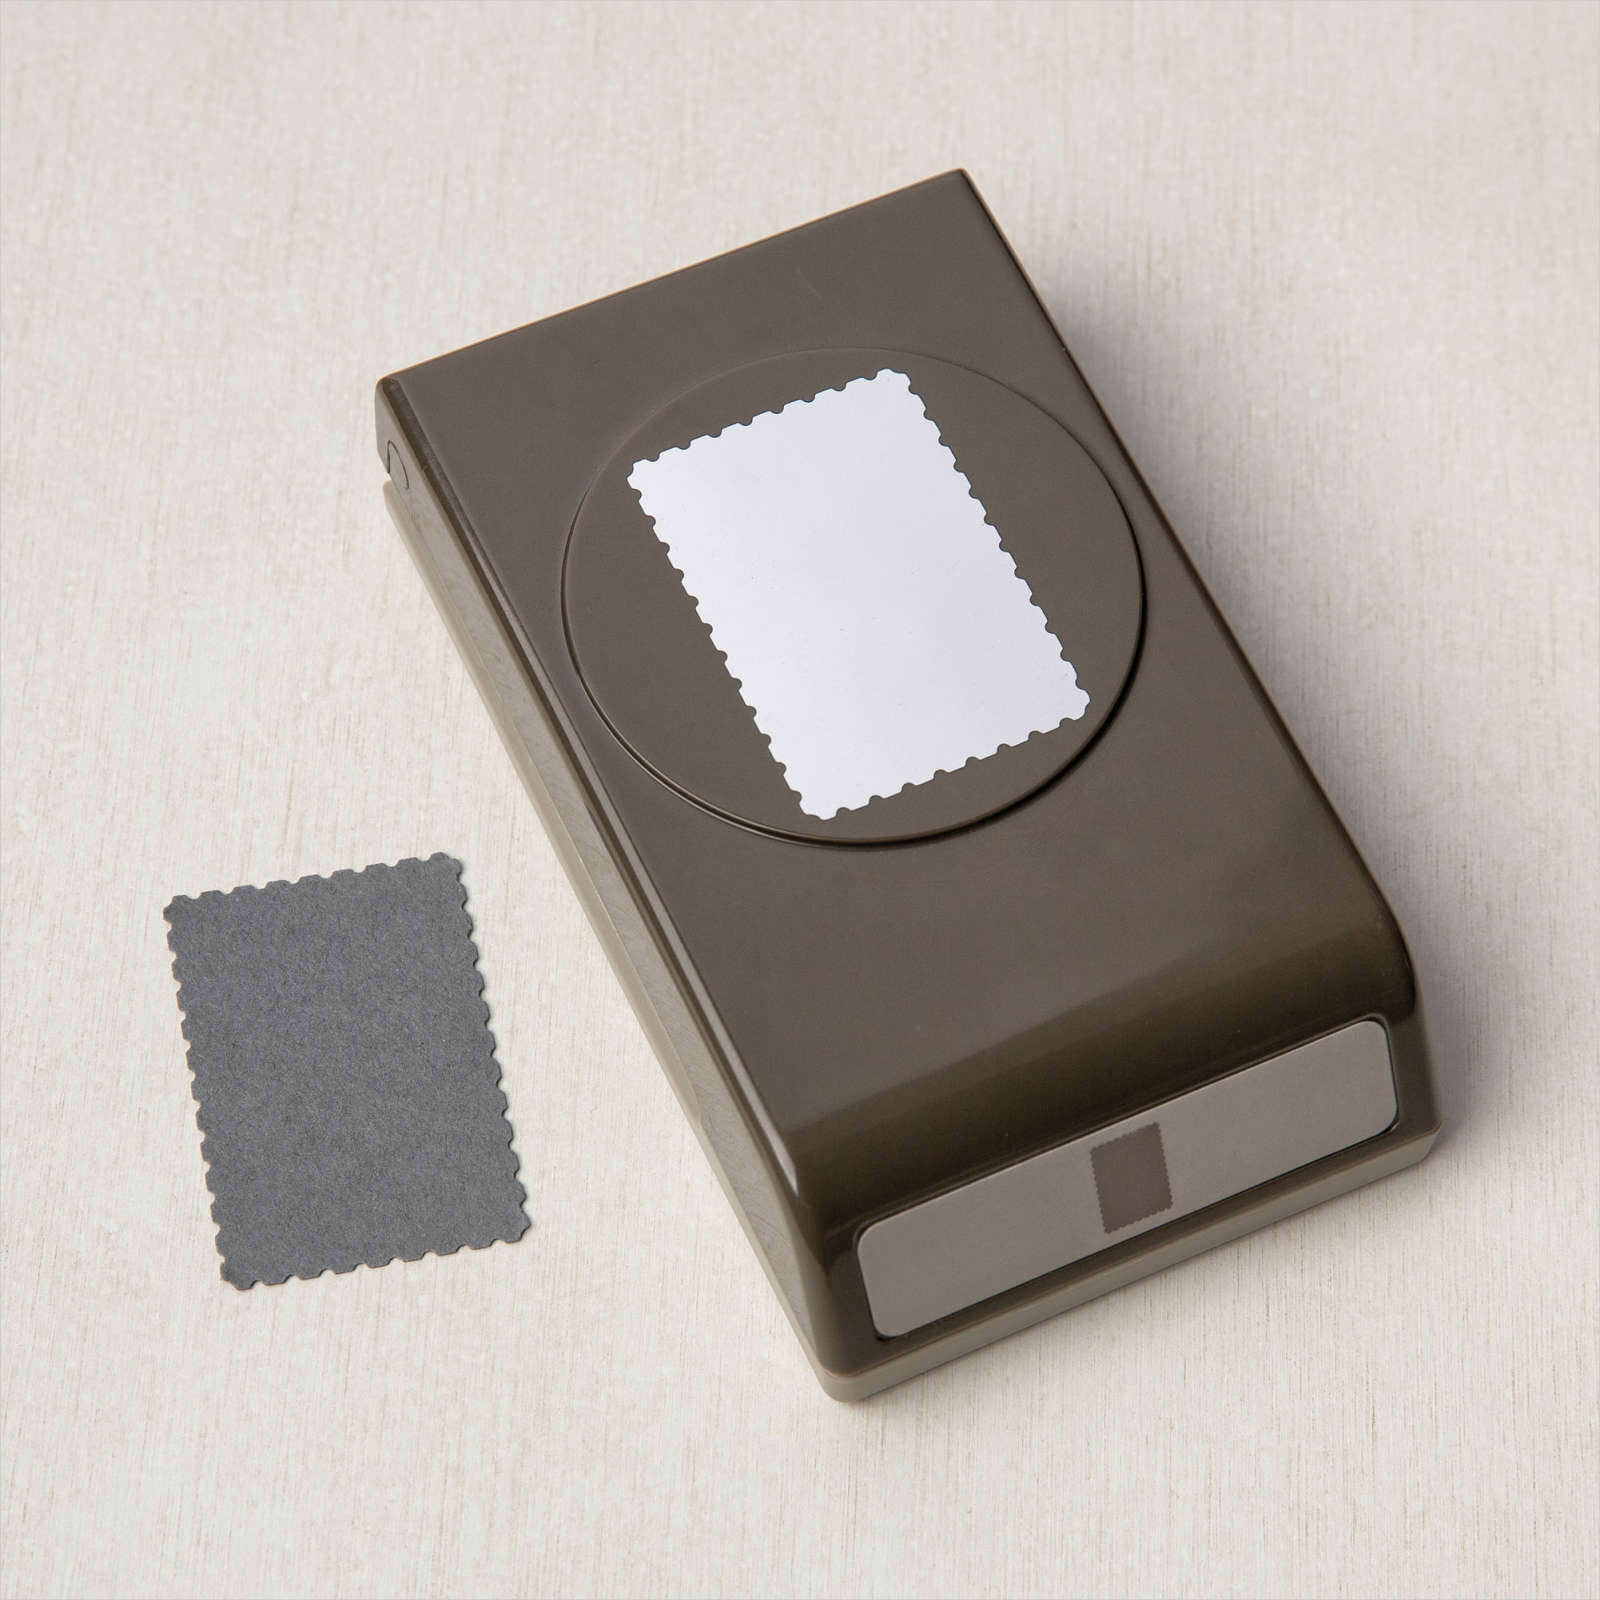
I attached the journaling strips to Basic Black card before attaching them to the page. I printed more information about Dad’s cousin and how they are related and printed it onto Basic White card. I punched Basic Black card using the Rectangle Postage Stamp Punch. I attached the journaling to Basic Black card and attached the punched piece which I folded in half. I punched a hole through the piece and attached the Vanilla Open Weave Ribbon from the Forever Greenery Trim Combo Pack. This journaling panel slides behind the top photo.
This brings back so many memories of our time in the USA.
Bye for now,
Kris
Product Used:
Global Birthday
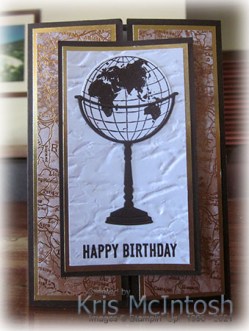
This week on my Facebook Live I shared a gatefold card with a twist and yesterday I shared a card made using the instructions on Lisa Curcio’s blog. Lisa’s instructions create a landscape style card which was such a fun card to make but I wanted to make a portrait style card. So I did a little playing and came up with my version. I cut a standard A4 card base and scored on each end at 5.1cm. This gave me just enough gap to let the card front slide on. I attached a piece of the beautiful World of Good Specialty Designer Series Paper to Gold foil card and then each piece is attached to the front flaps on an Early Espresso card base.
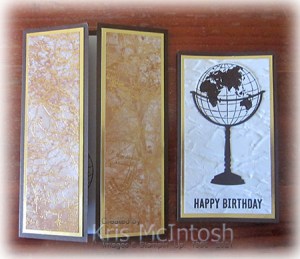
I used Early Espresso card to create the slide on front and added a layer of Gold Foil. I stamped “happy birthday” from the Itty Bitty Birthday stamp set onto Basic White card using Early Espresso ink. I embossed the stamped Basic White card using the Old World Paper 3D Embossing Folder and attached it to the Gold Foil card. I cut the globe base from Early Espresso card using the World Map Dies. I stamped one of the globe images onto Basic White card using Early Espresso ink and used the co-ordinating World Map Die to cut it out. The globe and stand are attached to the card front.

To decorate the inside of the card, I stamped the globe image once more onto Basic White card using Early Espresso ink and cut it out using the World Map Dies. I also cut the small globe stand from Early Espresso card using the World Map Die. I attached the stand and globe to the lower left hand corner of Basic White card before attaching the panel inside the Early Espresso card base.
I loved making the landscape cards using Lisa’s instructions but I am also excited to be able to create a portrait version. If you love this as much as I do, here are the measurements.
CARD BASE – 21cm x 14.8cm, scored along the 21cm length at 5.1cm from each end.
SLIDING CARD FRONT – four pieces of card 7cm x 12cm. Score two pieces along the 7cm length at 3.5cm. Create the mechanism following Lisa’s instructions.
I’d love to know what you think and just to give you a comparison, here are the two cards together.

Bye for now,
Kris
Product Used:


A Beautiful Journey
Yesterday on my Facebook Live, I shared with you a gatefold card with a twist. I followed the instructions shared by Lisa Curcio on her blog to create the cards. Today I have another version for you. I cut my card base from Early Espresso card. I attached a piece of World of Good Specialty Designer Series Paper to Gold Foil card and attached the panels to the front flaps. I cut the sliding card front from Early Espresso card and attached a layer of Gold Foil.
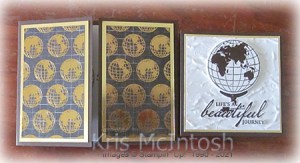
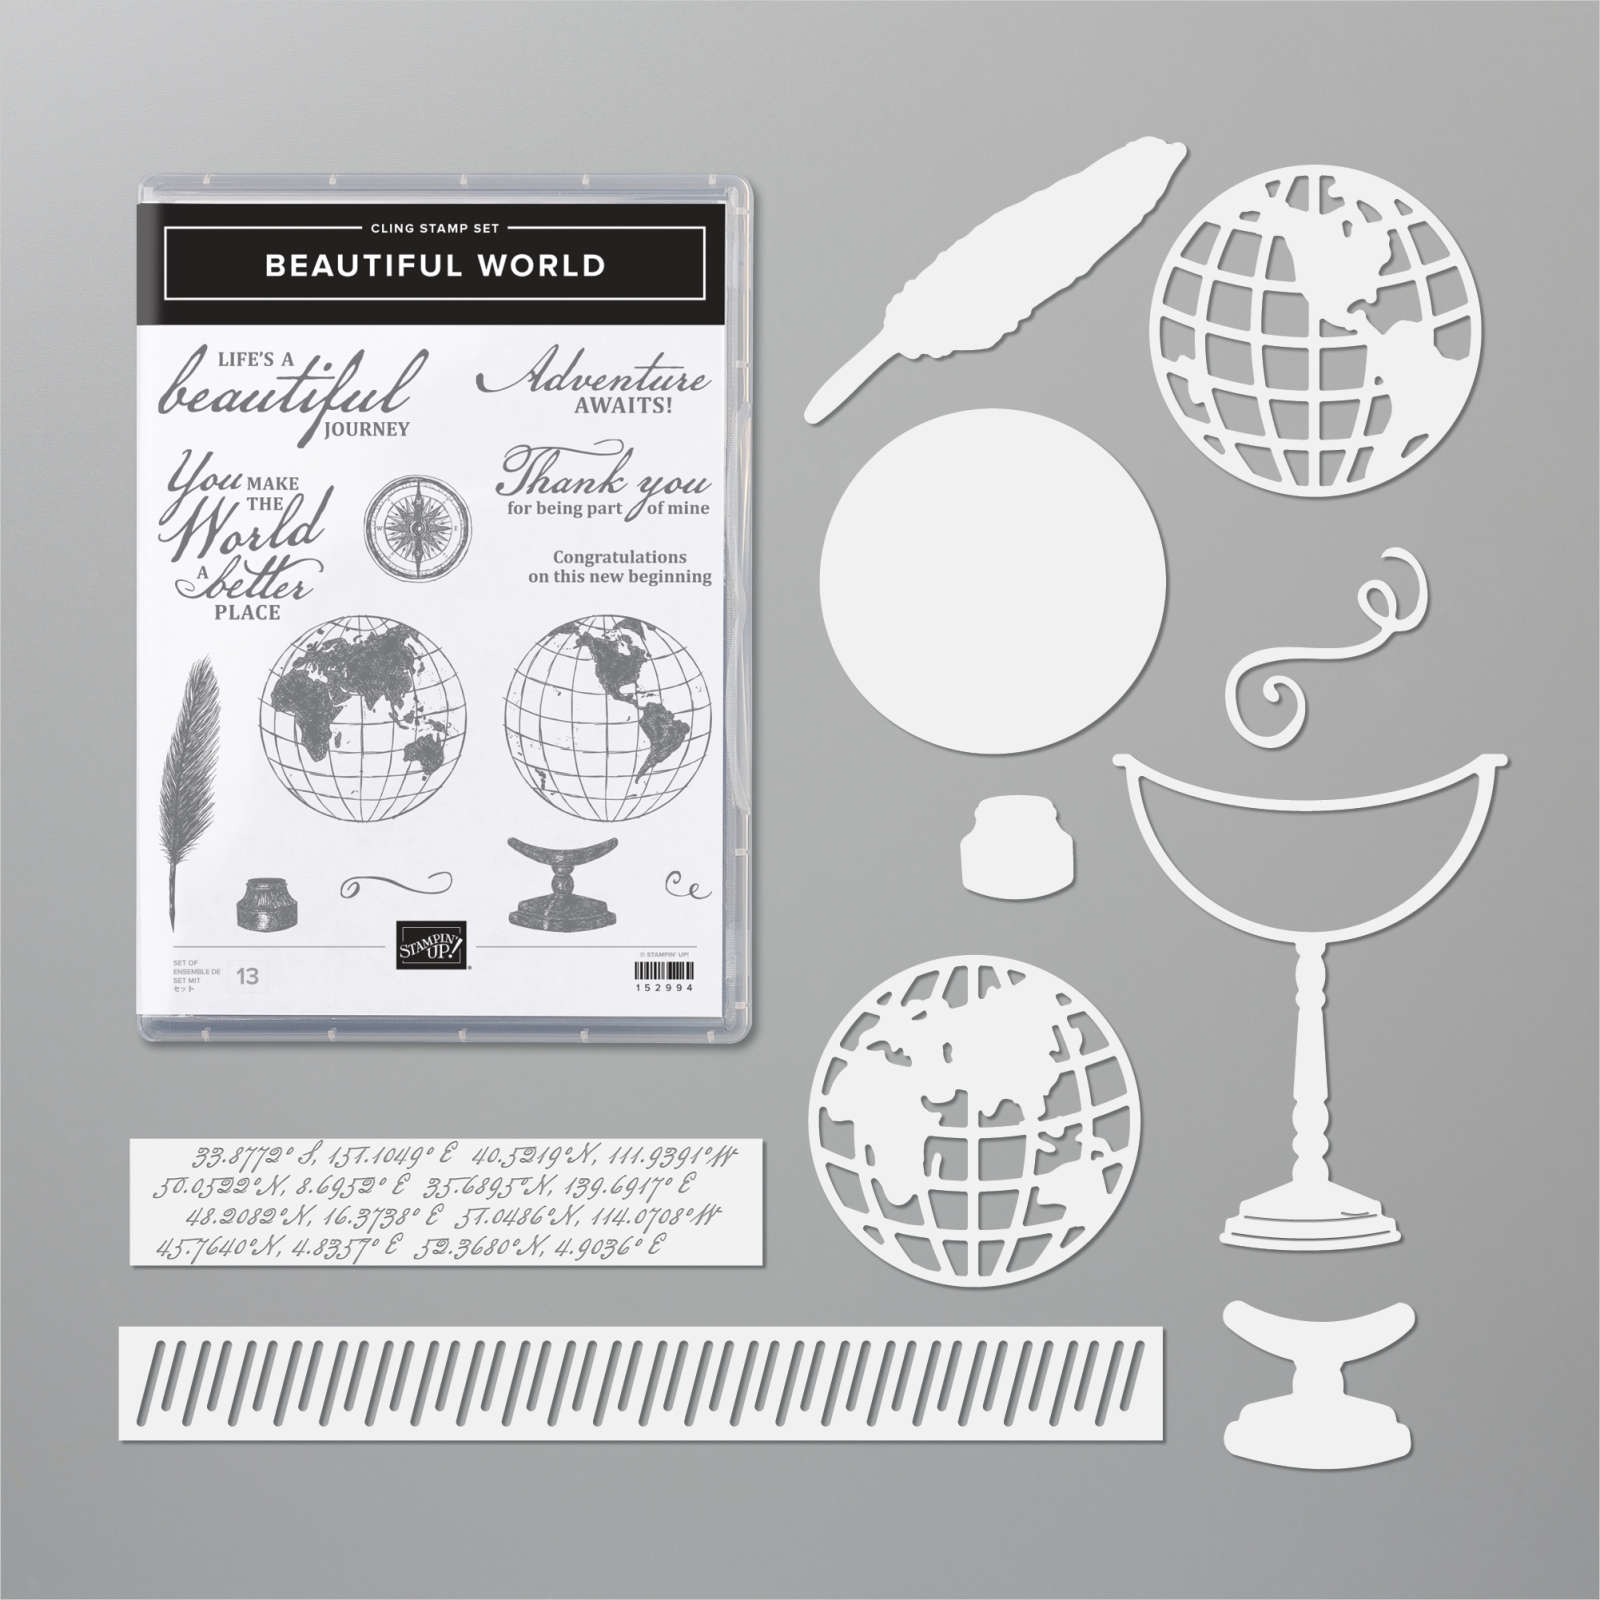
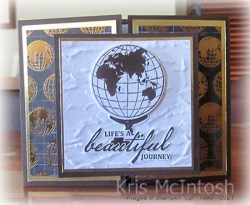
I embossed Basic White card using the Old World Paper 3D Embossing Folder and attached it to the Gold Foil card. I stamped the globe base and the globe from the Beautiful World stamp set onto Basic White card using Early Espresso ink. I used the co-ordinating World Map Dies to cut out the images. I attached the images to the embossed Whisper White card using dimensionals underneath the globe.
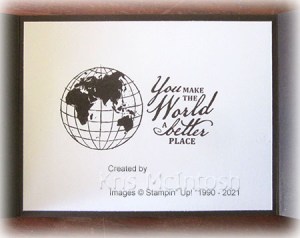
I stamped “Life’s a beautiful journey” from the Beautiful World stamp set onto Basic White card using Early Espresso ink. I used my Paper Snips to cut around the greeting and attached it over the globe base. To decorate the inside of the card, I stamped another greeting from the Beautiful World stamp set onto Basic White card using Early Espresso ink. I stamped the globe image from the same stamp set next to the greeting using Early Espresso ink.
I have never made a lot of Gatefold cards as I found it difficult to create the slide off band with more than a greeting. However with Lisa’s instructions of adding the sliding panel I feel you have a better opportunity to add a proper card front.
I would love to know what you think.
Bye for now,
Kris
Product Used:


