Seashells Z Fold

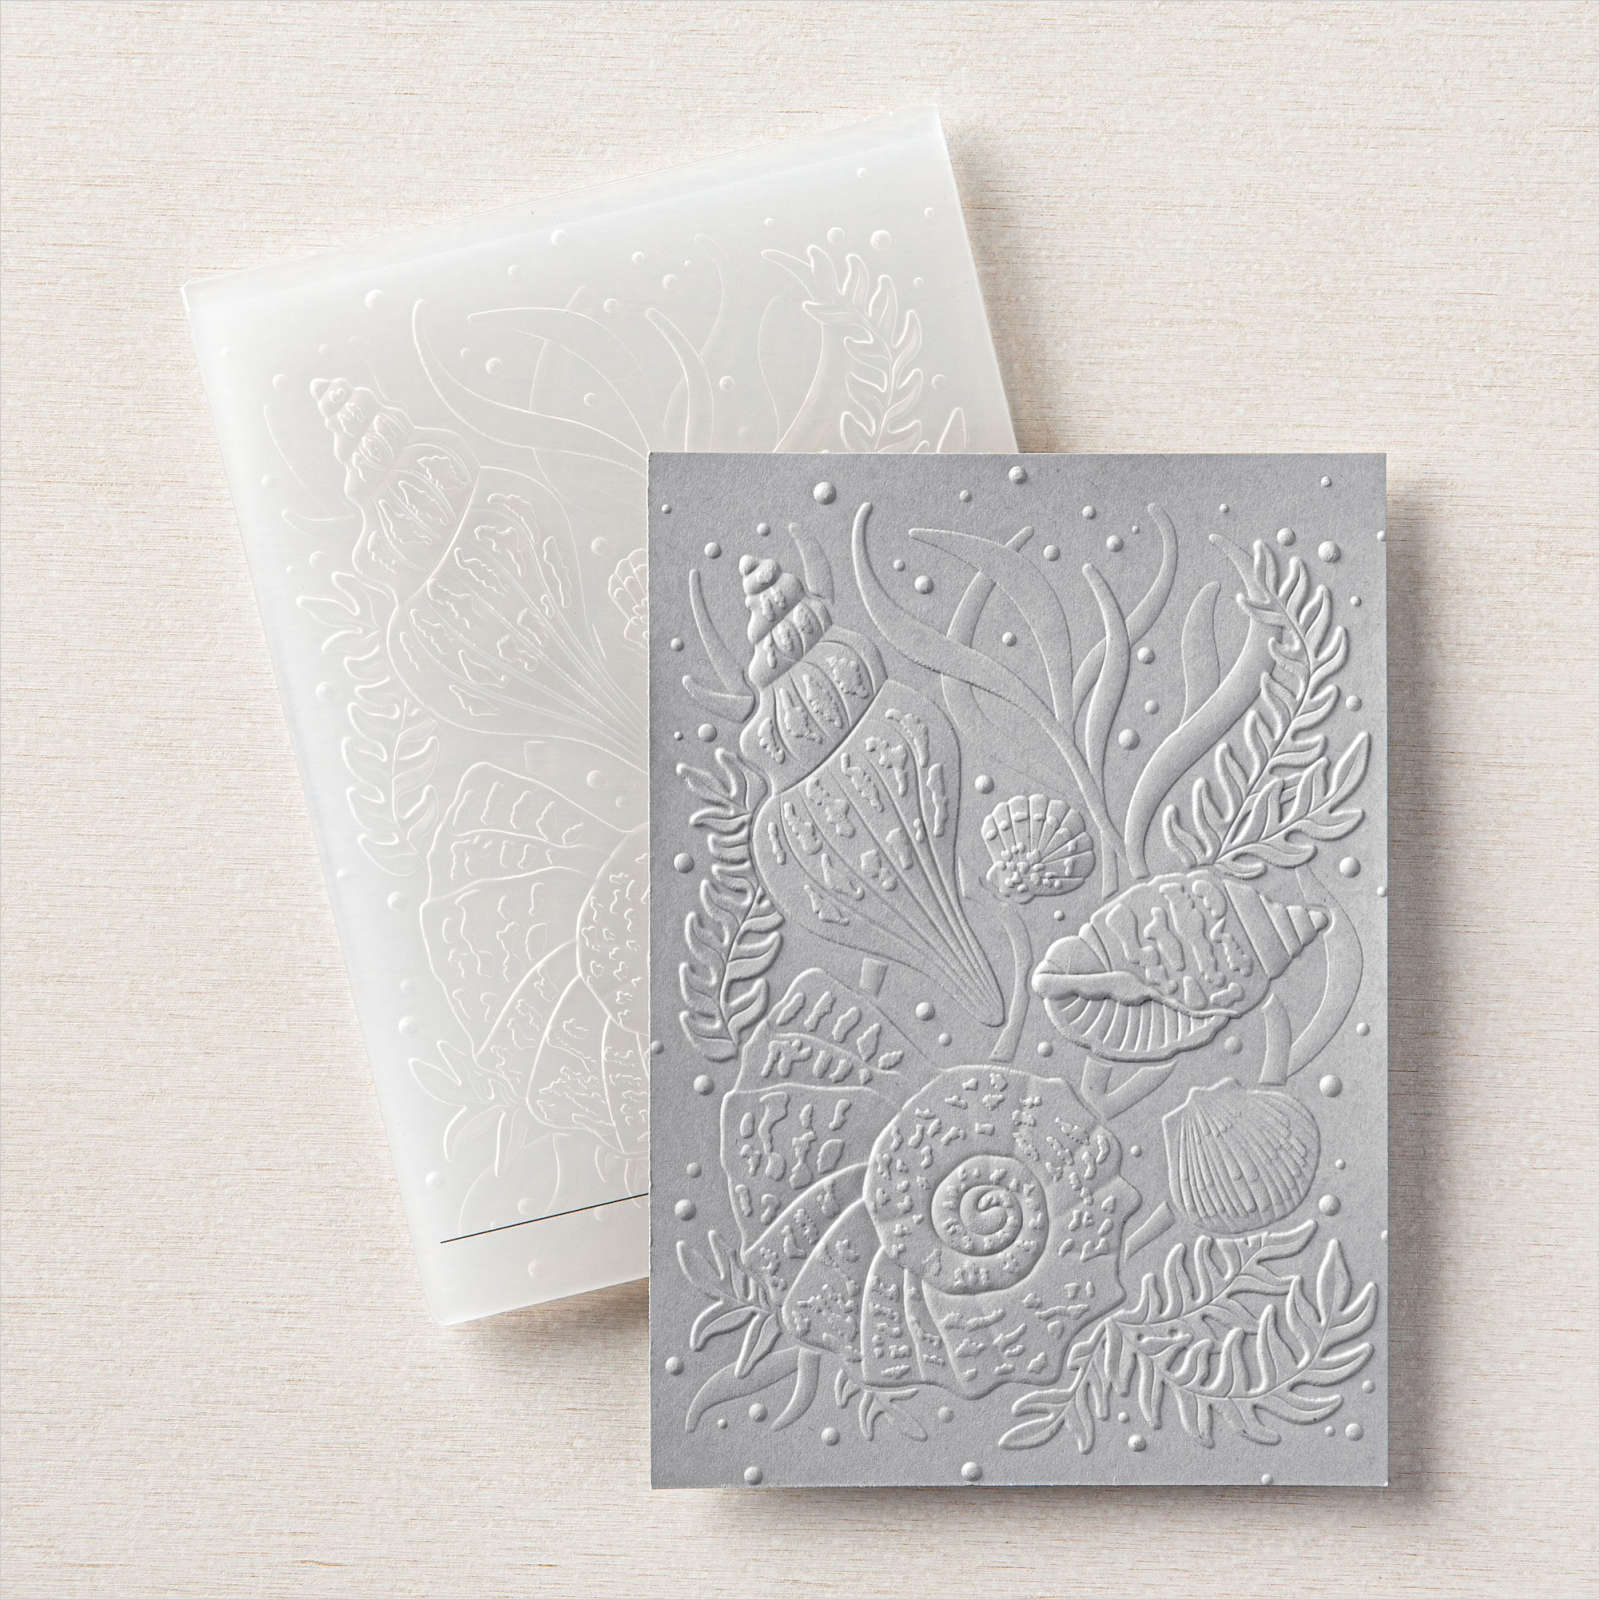
Yesterday in my Facebook Live I showed how to make a Z fold card following Lisa Curcio’s instructions. I did however convert the dimensions to fit our A4 card. I cut the base of the card and the Z fold from Gray Granite card and used my bone folder to make sure that the folds were all straight and neat. I cut the layering pieces for the card base from Basic White card and embossed the panels using the Seashells 3D Embossing Folder. After attaching the embossed panels, I attached the Z fold piece using Tear and Tape because I wanted to make sure that the cards were attached to each other well.

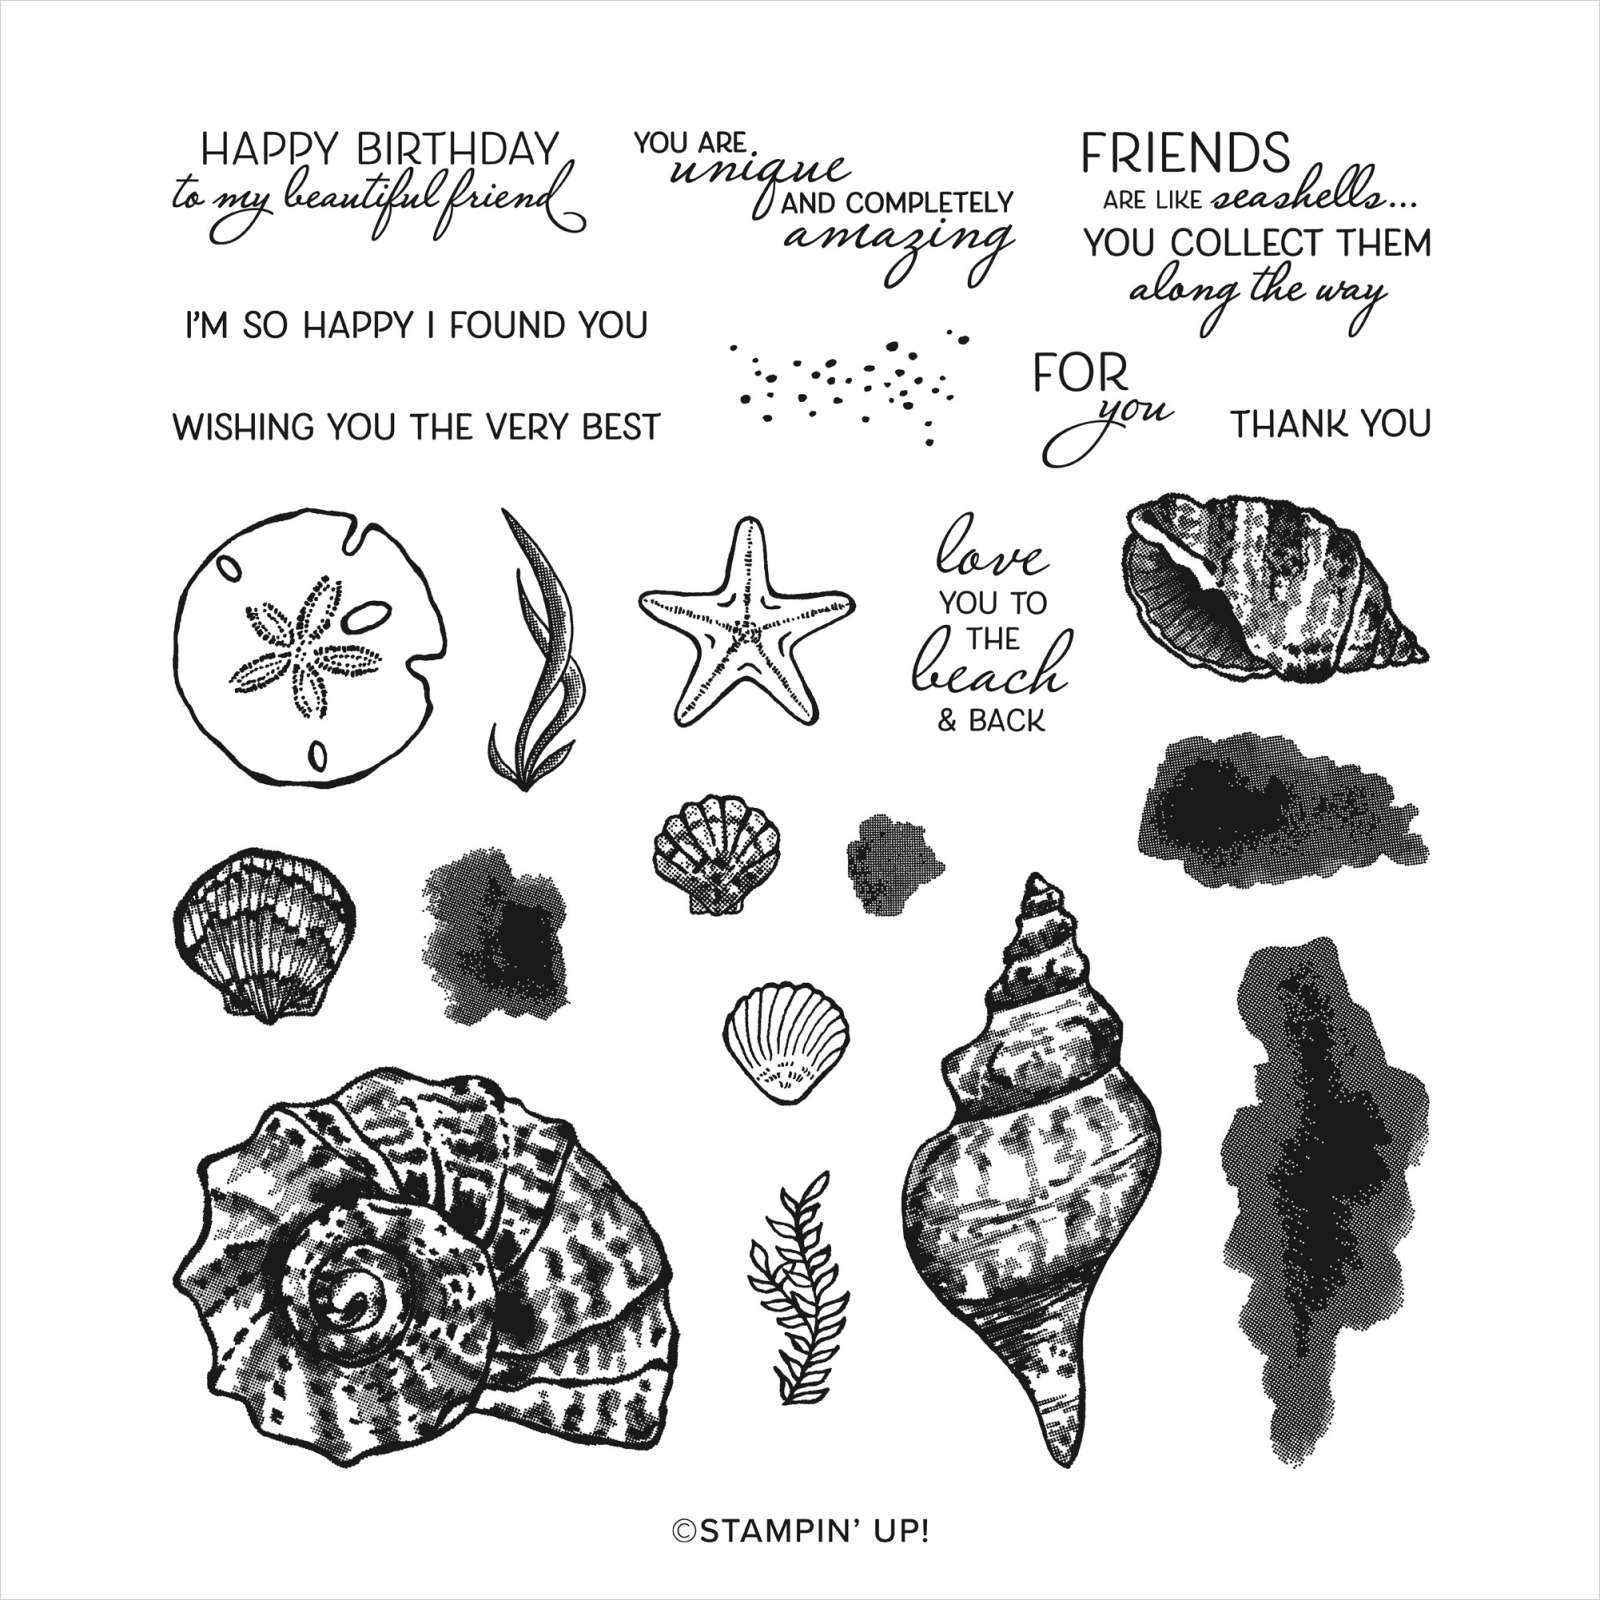
I cut Basic White card and Mossy Meadow card using the Seaside Seashells Dies. I stamped the seashell images from the Friends are Like Seashells stamp set onto the Basic White die cut using Gray Granite ink. I embossed both the Basic White panel and the Mossy Meadow panel using the Seashells 3D Embossing Folder. I cut both panels and attached the stamped Basic White panel to the Mossy Meadow panel so that the seaweed is green.

I also stamped the sand dollar and the starfish images onto Basic White card using Gray Granite ink and cut them out using the co-ordinating Seaside Seashells Dies. I layered most of the images onto Basic White card to decorate the front panel. I added the large seashell image and the starfish image to Basic White card to decorate the last panel on the inside of the card. I attached Basic White card to the centre panel and left it bare so that I could write a message. I stamped “friends are like seashells…” from the Friends are like Seashells stamp set onto Basic White card using Mossy Meadow ink. I punched out the greeting using the Story Label Punch and attached it to the card front using dimensionals.
I think I could become addicted to this fancy fold card. What about you? Have you made one of these yet? If not I can highly recommend you try it.
Bye for now
Kris
Product Used: