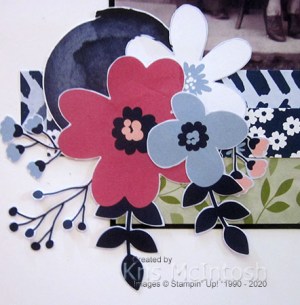
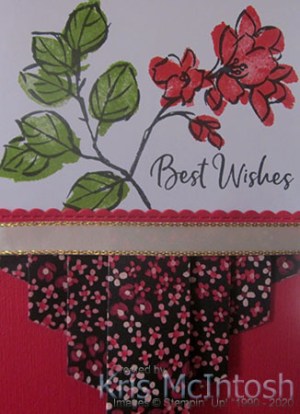
Best Wishes

Today’s card features two items you can obtain for Free with a qualifying order during Sale-A-Bration but only until the end of the month when Sale-A-Bration finishes. I decided to cut Poppy Parade card and cut the front so that it is only a 7cm flap. I decorated the small flap by attaching a piece of the Flower and Field Designer Series Paper.

I stamped the leaf outline image from the A Touch of Ink stamp set onto Basic White card using Memento Tuxedo Black ink. I also stamped the flower outline image from the A Touch of Ink stamp set using the same ink. I added the fill image to the leaf using Granny Apple Green ink and the fill image to the flower using Poppy Parade ink.
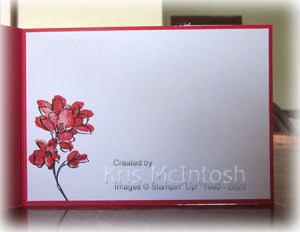
I also stamped the greeting from the A Touch of Ink stamp set using Memento Tuxedo Black ink. The image panel is attached to Poppy Parade card and then the card front. To decorate the inside of the card, I stamped the flower outline image from the A Touch of Ink stamp set using Memento Tuxedo Black ink onto the lower left hand corner of Basic White card. I stamped the flower fill image from the same stamp set using Poppy Parade ink. Such a simple card, but one that is quite pretty, don’t you think?
Bye for now,
Kris
Product Used:


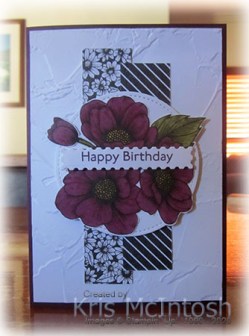
Another True Love Birthday

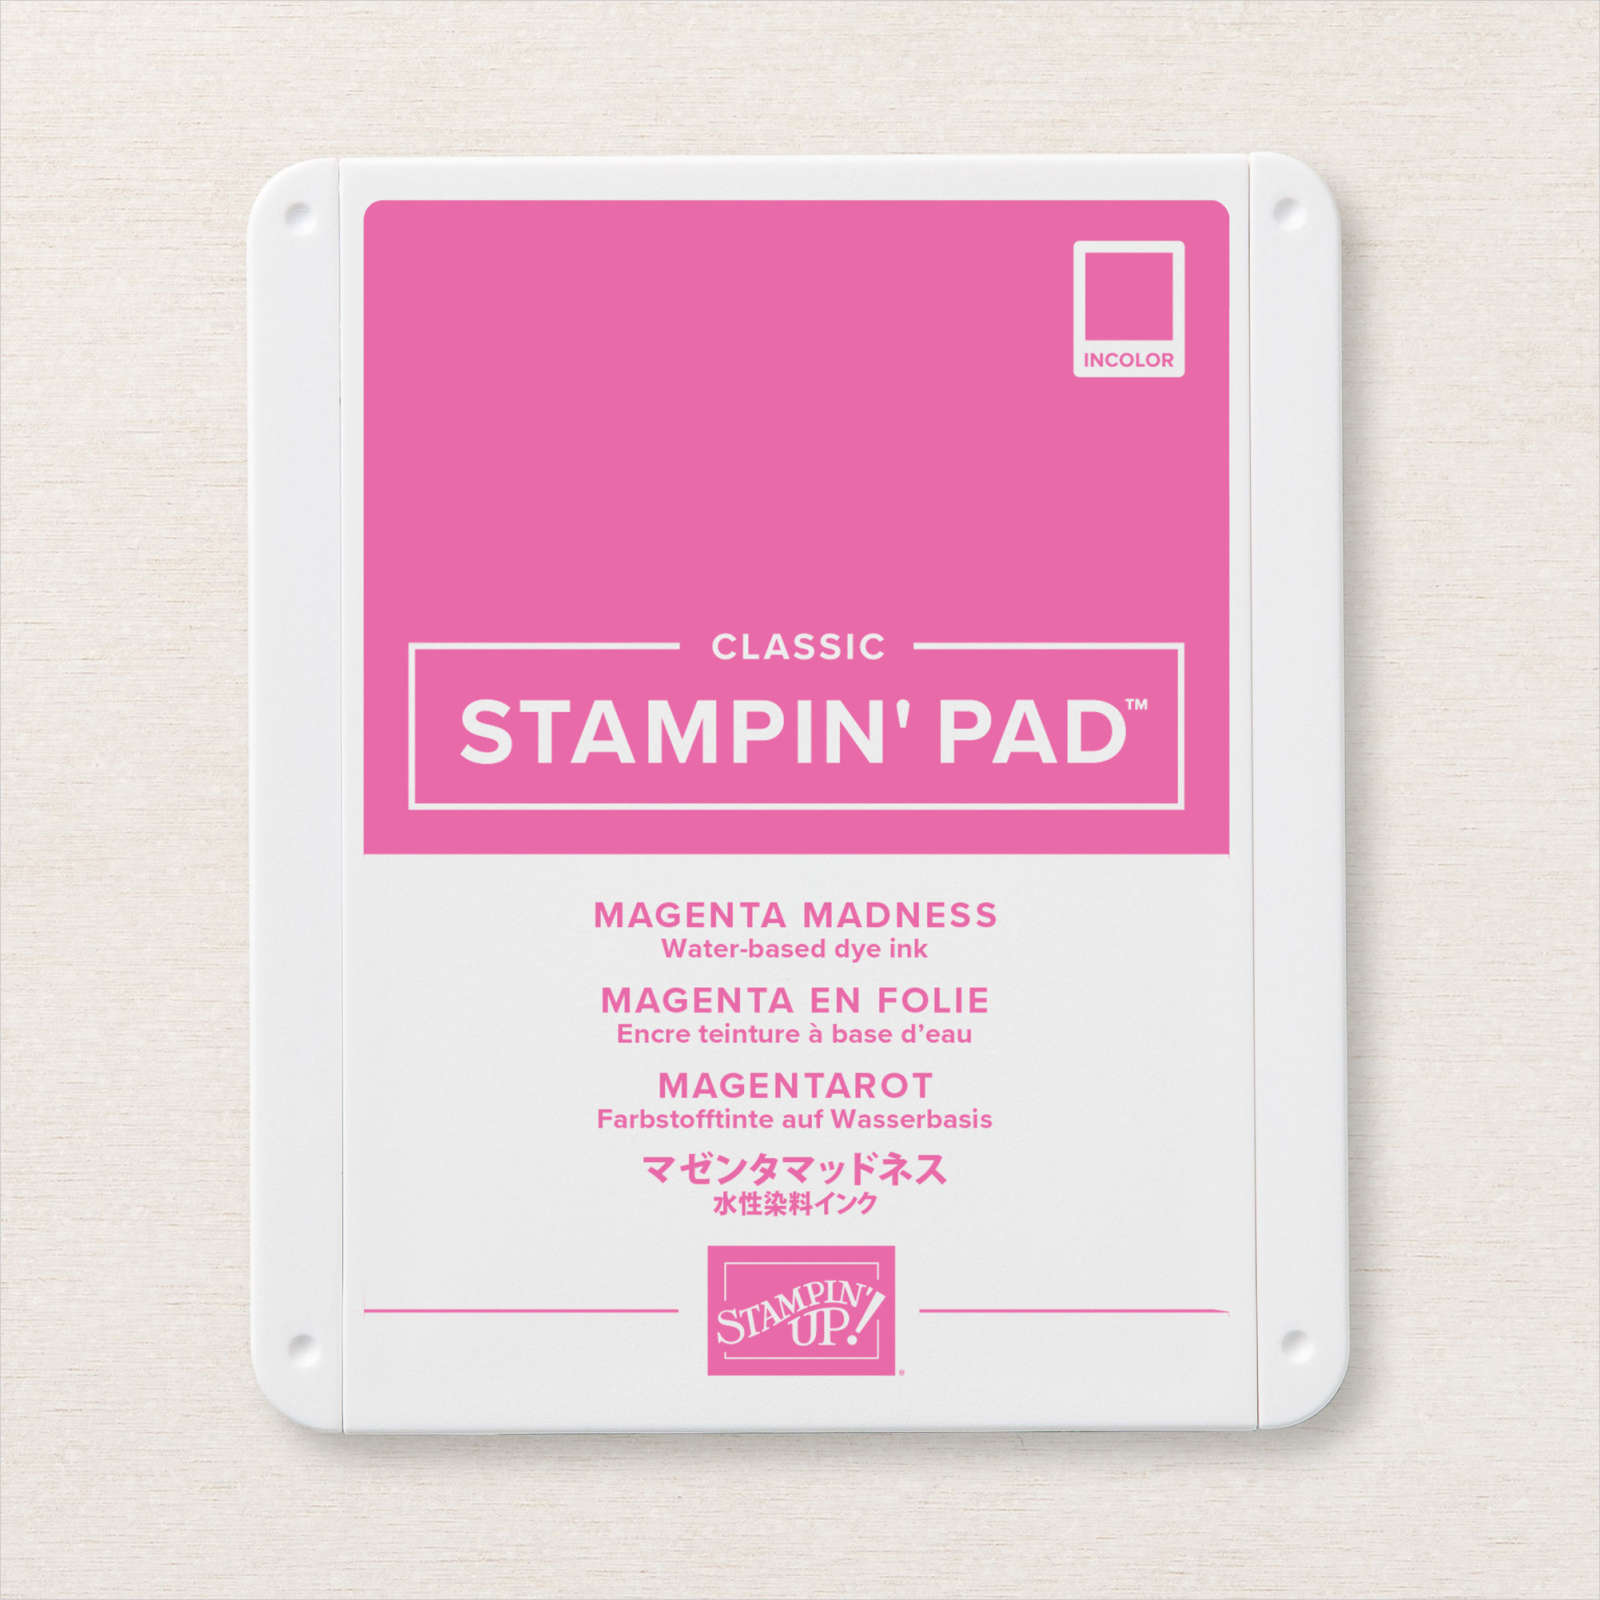
Today’s card was created using another sketch layout I had saved to Pinterest (you will notice that I turned the sketch for this card). This time I embossed Basic White card using the Painted Texture 3D Embossing Folder before attaching the striped pattern of the True Love Designer Series Paper down the left hand side. I wrapped the edge of the Designer Series Paper using the Just Jade 1/4″ 2020-2022 In Colour Ribbon. The panel is attached to scored and folded Magenta Madness A4 card.

I cut Basic White card using the largest circle from the Stitched Shapes Dies and attached it to the card front using dimensionals. I coloured the flower on the True Love Designer Series Paper using Magenta Madness, Dark Daffodil Delight and Just Jade Stampin’ Blends.

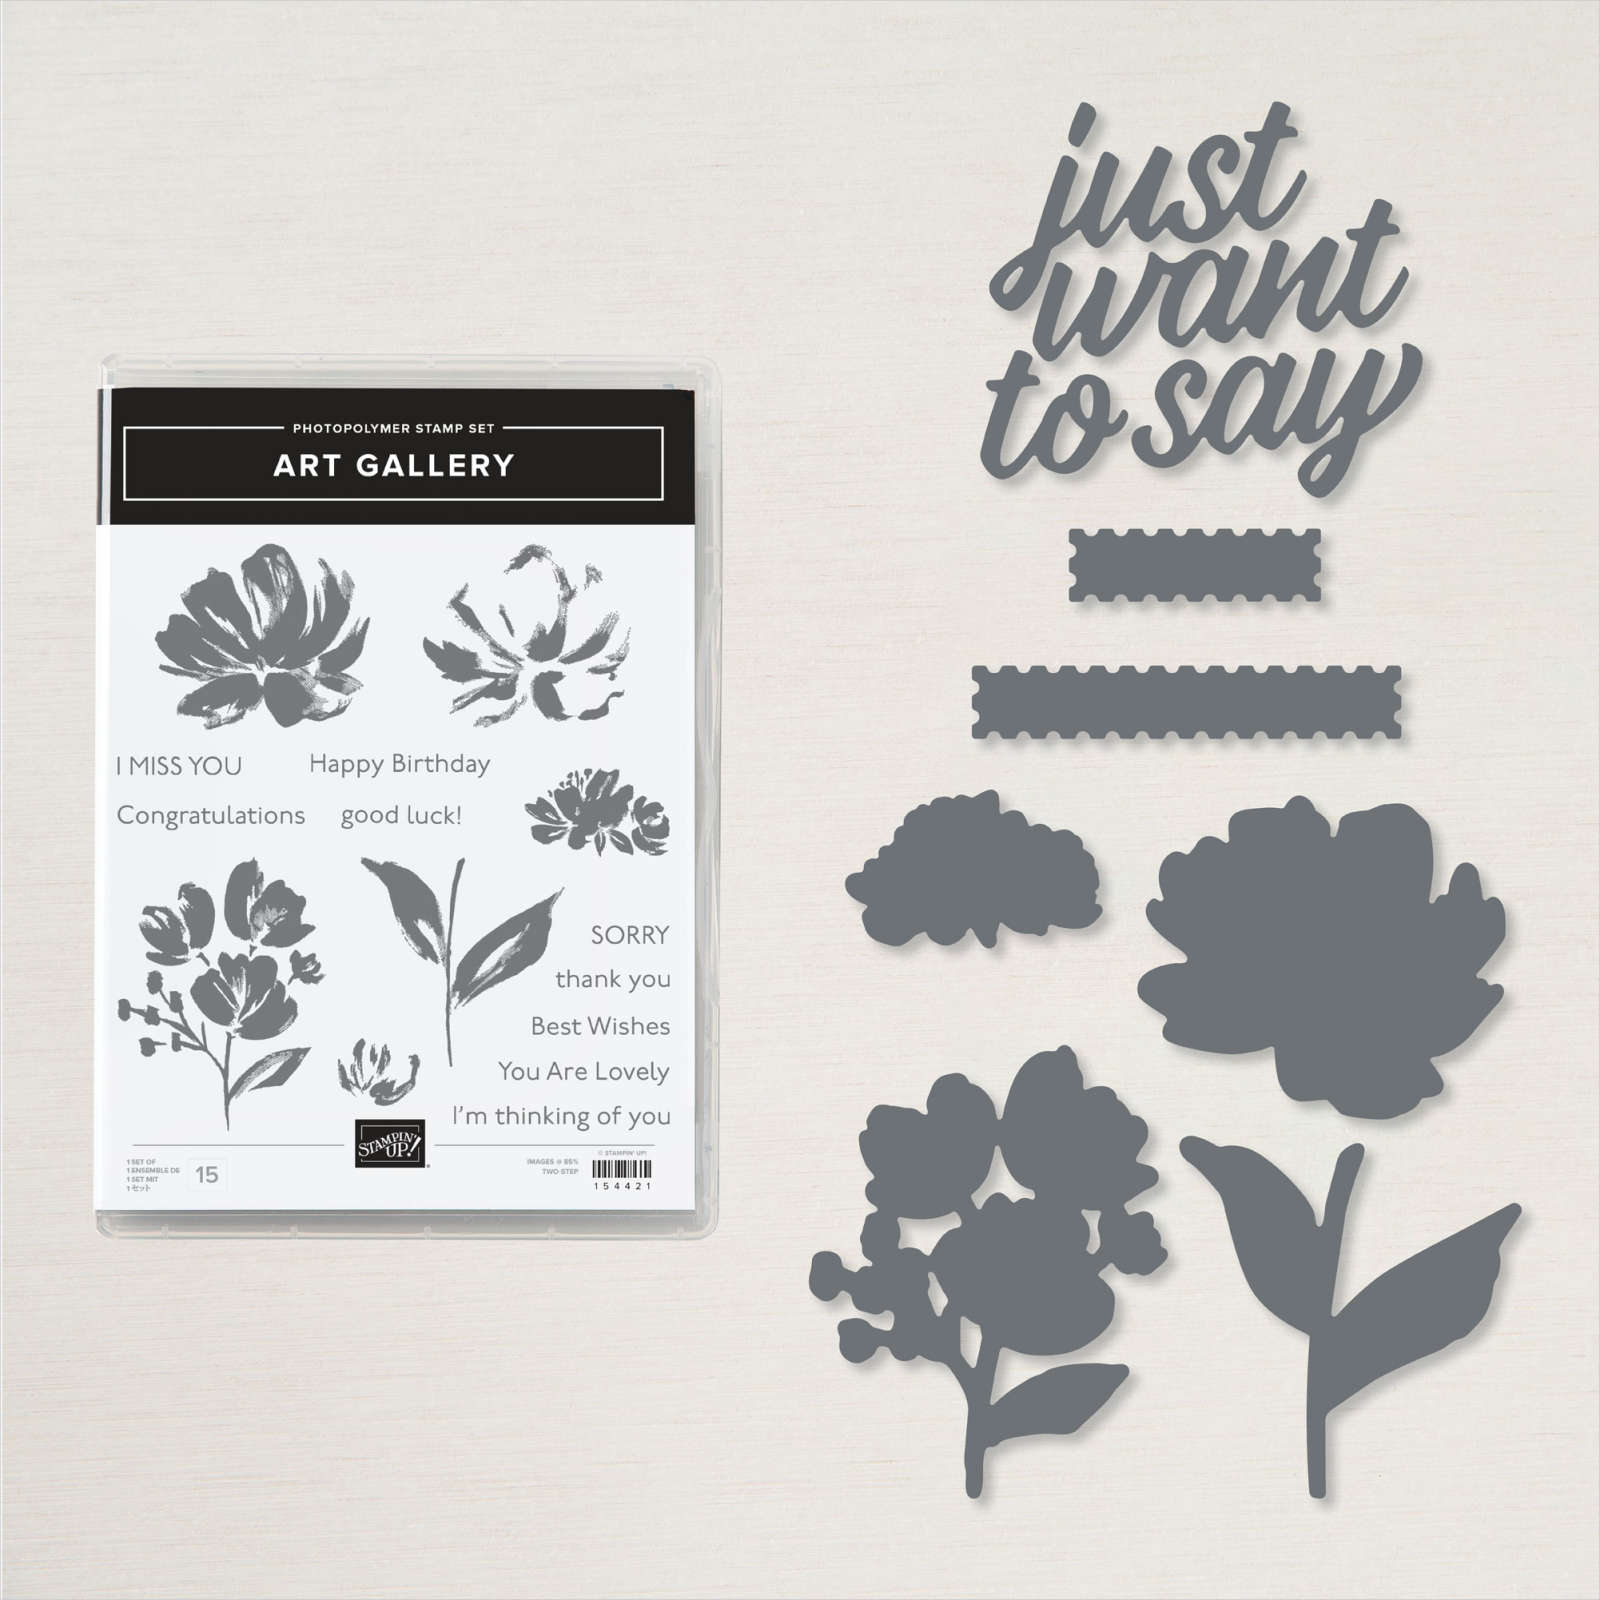
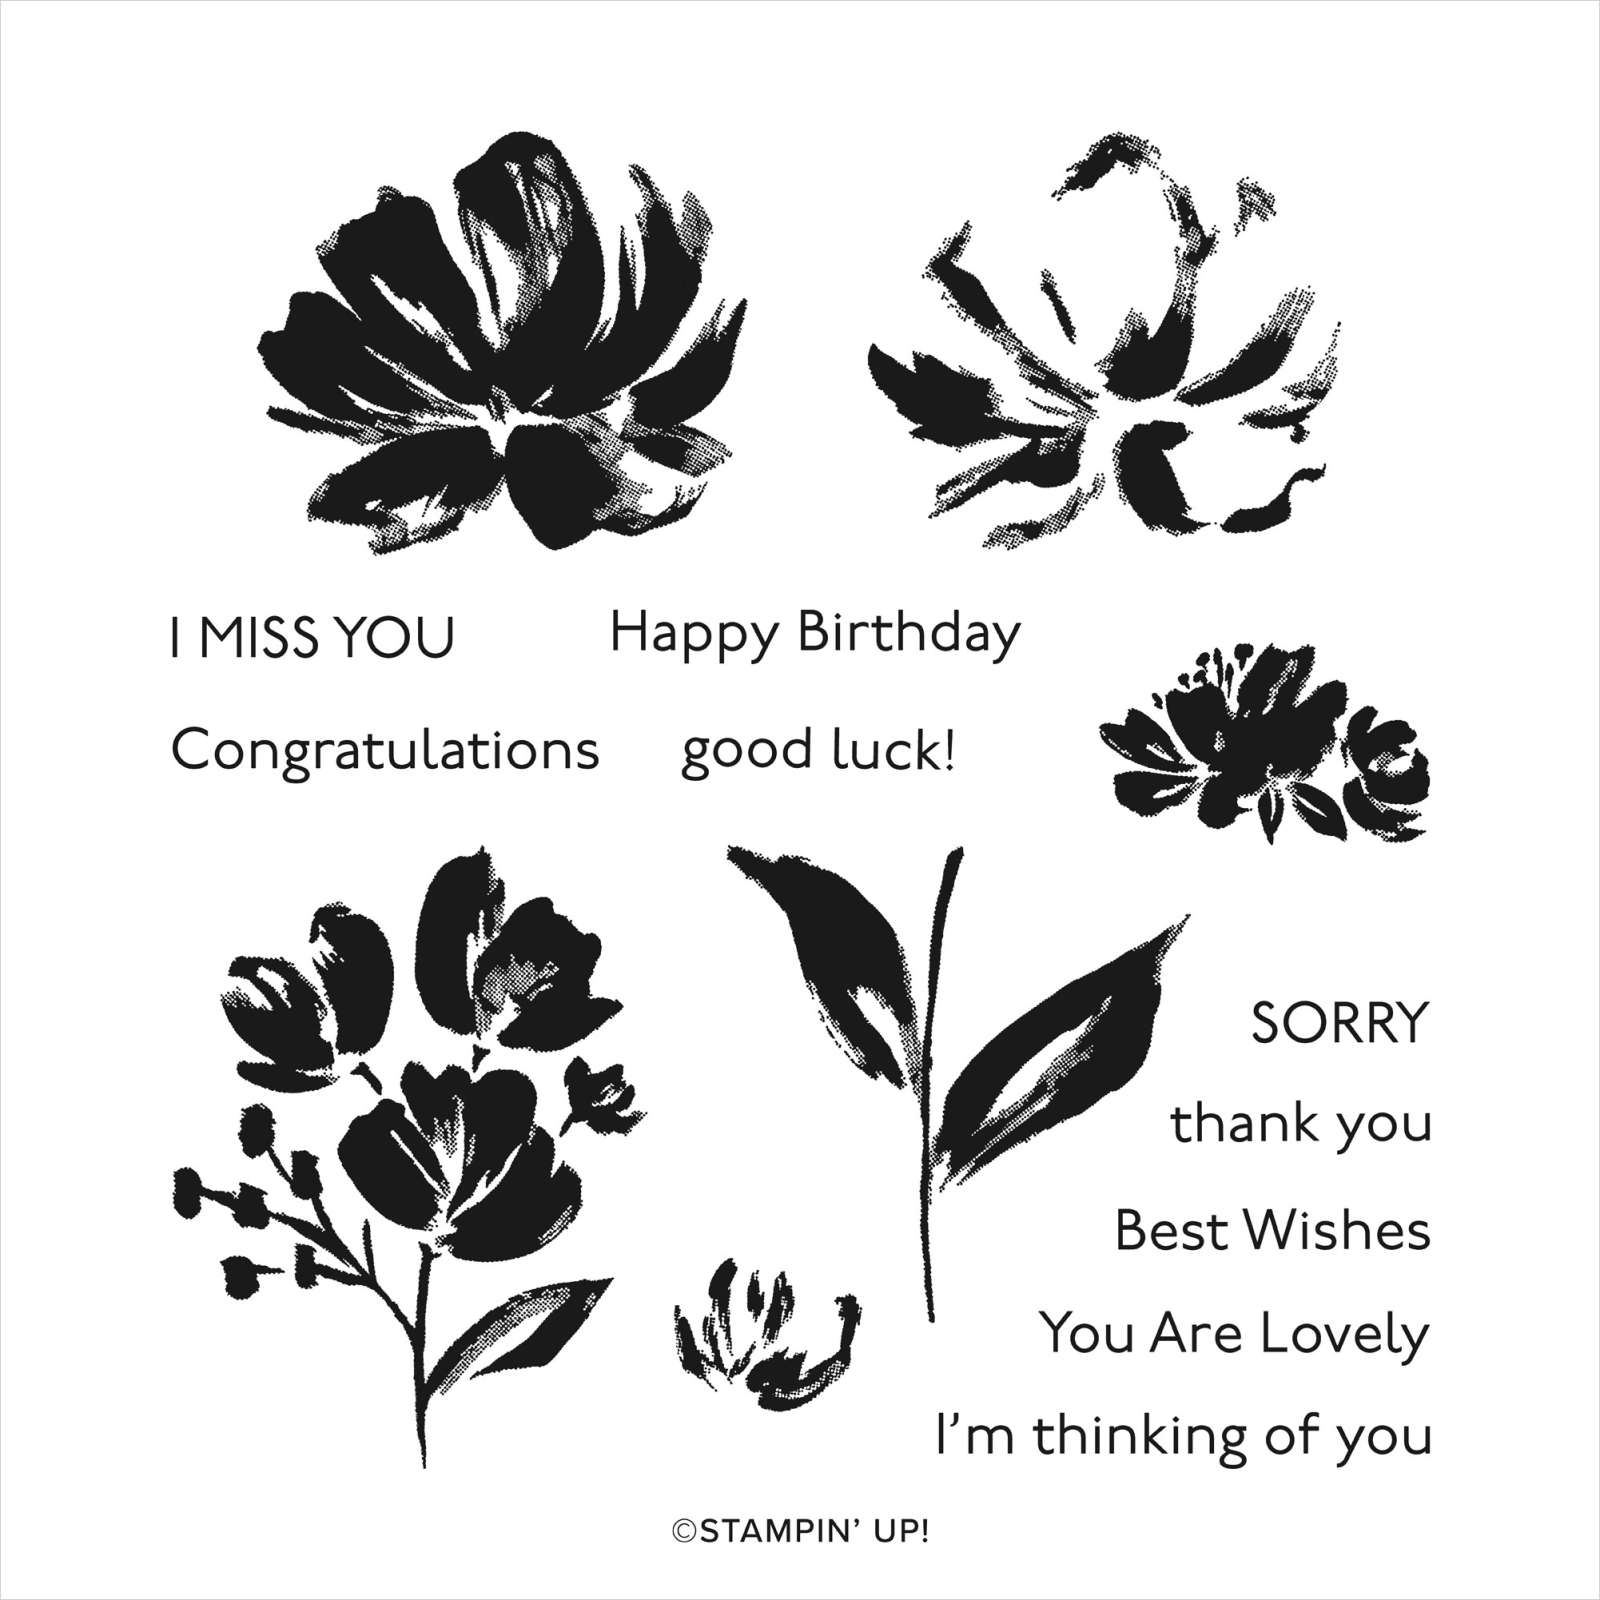
I cut out the flower and attached it to the stitched circle die using dimensionals where necessary. I stamped “happy birthday” from the Art Gallery stamp set onto Basic White card using Magenta Madness ink. I cut out the greeting using the largest banner die from the Art Gallery Dies. The greeting is attached to the card front using dimensionals. To decorate the inside of the card, I embossed Basic White card using the Painted Texture 3D Embossing Folder and attached it to the bottom of Basic White card. I wrapped the top of the embossed card using the Just Jade 1/4″ 2020-2022 In Colour Ribbon. I coloured one of the flowers on the edge of the True Love Designer Series Paper using the same Stampin’ Blends, cut it out and attached it just underneath the edge of the ribbon.
Another pretty card, don’t you think.
Bye for now,
Kris
Product Used:


Four Generations

Today’s page shows off a photo of myself as a baby with my Mum, Grandfather and his Mum, my Great Grandmother. I decided to attach a strip of Paper Blooms Designer Series Paper across the bottom of a square of Basic Black card. I attached the photo above the Designer Series Paper on the left hand side of the Basic Black card.
I created the journaling on the computer, printed it onto Basic White card before attaching to the upper right hand side of the Basic Black card. I attached the photo panel to a Basic White 12″ x 12″ page.

I attached two strips of the Paper Blooms Designer Series paper across the page just covering the bottom of the photo and journaling block. I cut all of the flowers and circles from the Paper Blooms Designer Series Paper and attached them to the lower left and upper right of the photo block. I really love how this bright and cheery paper has given my photo a bit of a lift. What do you think?
Bye for now,
Kris
Product Used:


With Love

Today’s card features another drapery fold. When I started researching drapery folds, I couldn’t believe how many there are! I have shown a few on my blog and shared a few more on my Facebook Live but believe me there are lots! For today’s card I used the Paper Blooms Designer Series Paper which you can have for Free with a qualifying order but only until the end of the month. I cut a piece of Designer Series Paper 8-1/2″ x 2″ and scored at 1″, 1-1/4″, 2-1/4″, 2-1/2″ and so on all the way across. I folded the Designer Series Paper and attached a strip of scrap card along the back to make sure the folds stayed in place and that the edges were straight. I attached the panel to Basic White card and wrapped the top of the Designer Series Paper using the Rococo Rose 1/2″ Scalloped Linen Ribbon.

I stamped “with” and “Love” from the Forever & Always stamp set onto the right and side of the Basic White card using Rococo Rose ink before attaching the panel to scored and folded Rococo Rose card. I stamped the large and the small flower from the Forever & Always stamp set onto Basic White card using Rococo Rose ink. I coloured the flowers using the Light Rococo Rose and the Dark Daffodil Delight Stampin’ Blends. The flowers are cut out by hand because I didn’t want too much white showing around the edges.

I also stamped two leaves from the Forever & Always stamp set onto Basic White card using Pretty Peacock ink. I coloured the leaves using the light Pretty Peacock Stampin’ Blend before cutting them out. I attached the flowers together and attached the leaves to the back of the flowers before using Mini Dimensionals to attach the whole piece to the left hand side of the card front. To decorate the inside of the card, I stamped the large flower using Rococo Rose ink and masked it with a Post-it-Note before stamping the smaller flower. The flower images are coloured using the Light Rococo Rose and Dark Daffodil Delight Stamin’ Blends.
This is such a pretty card, don’t you think and it makes me especially happy when I can use new product with some that I have had for a while.
Bye for now,
Kris
Product Used:


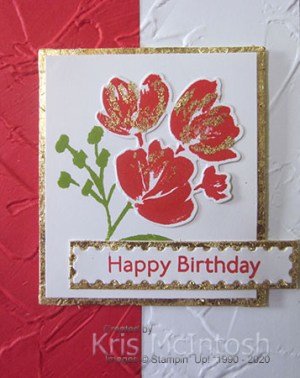
Flower & Field

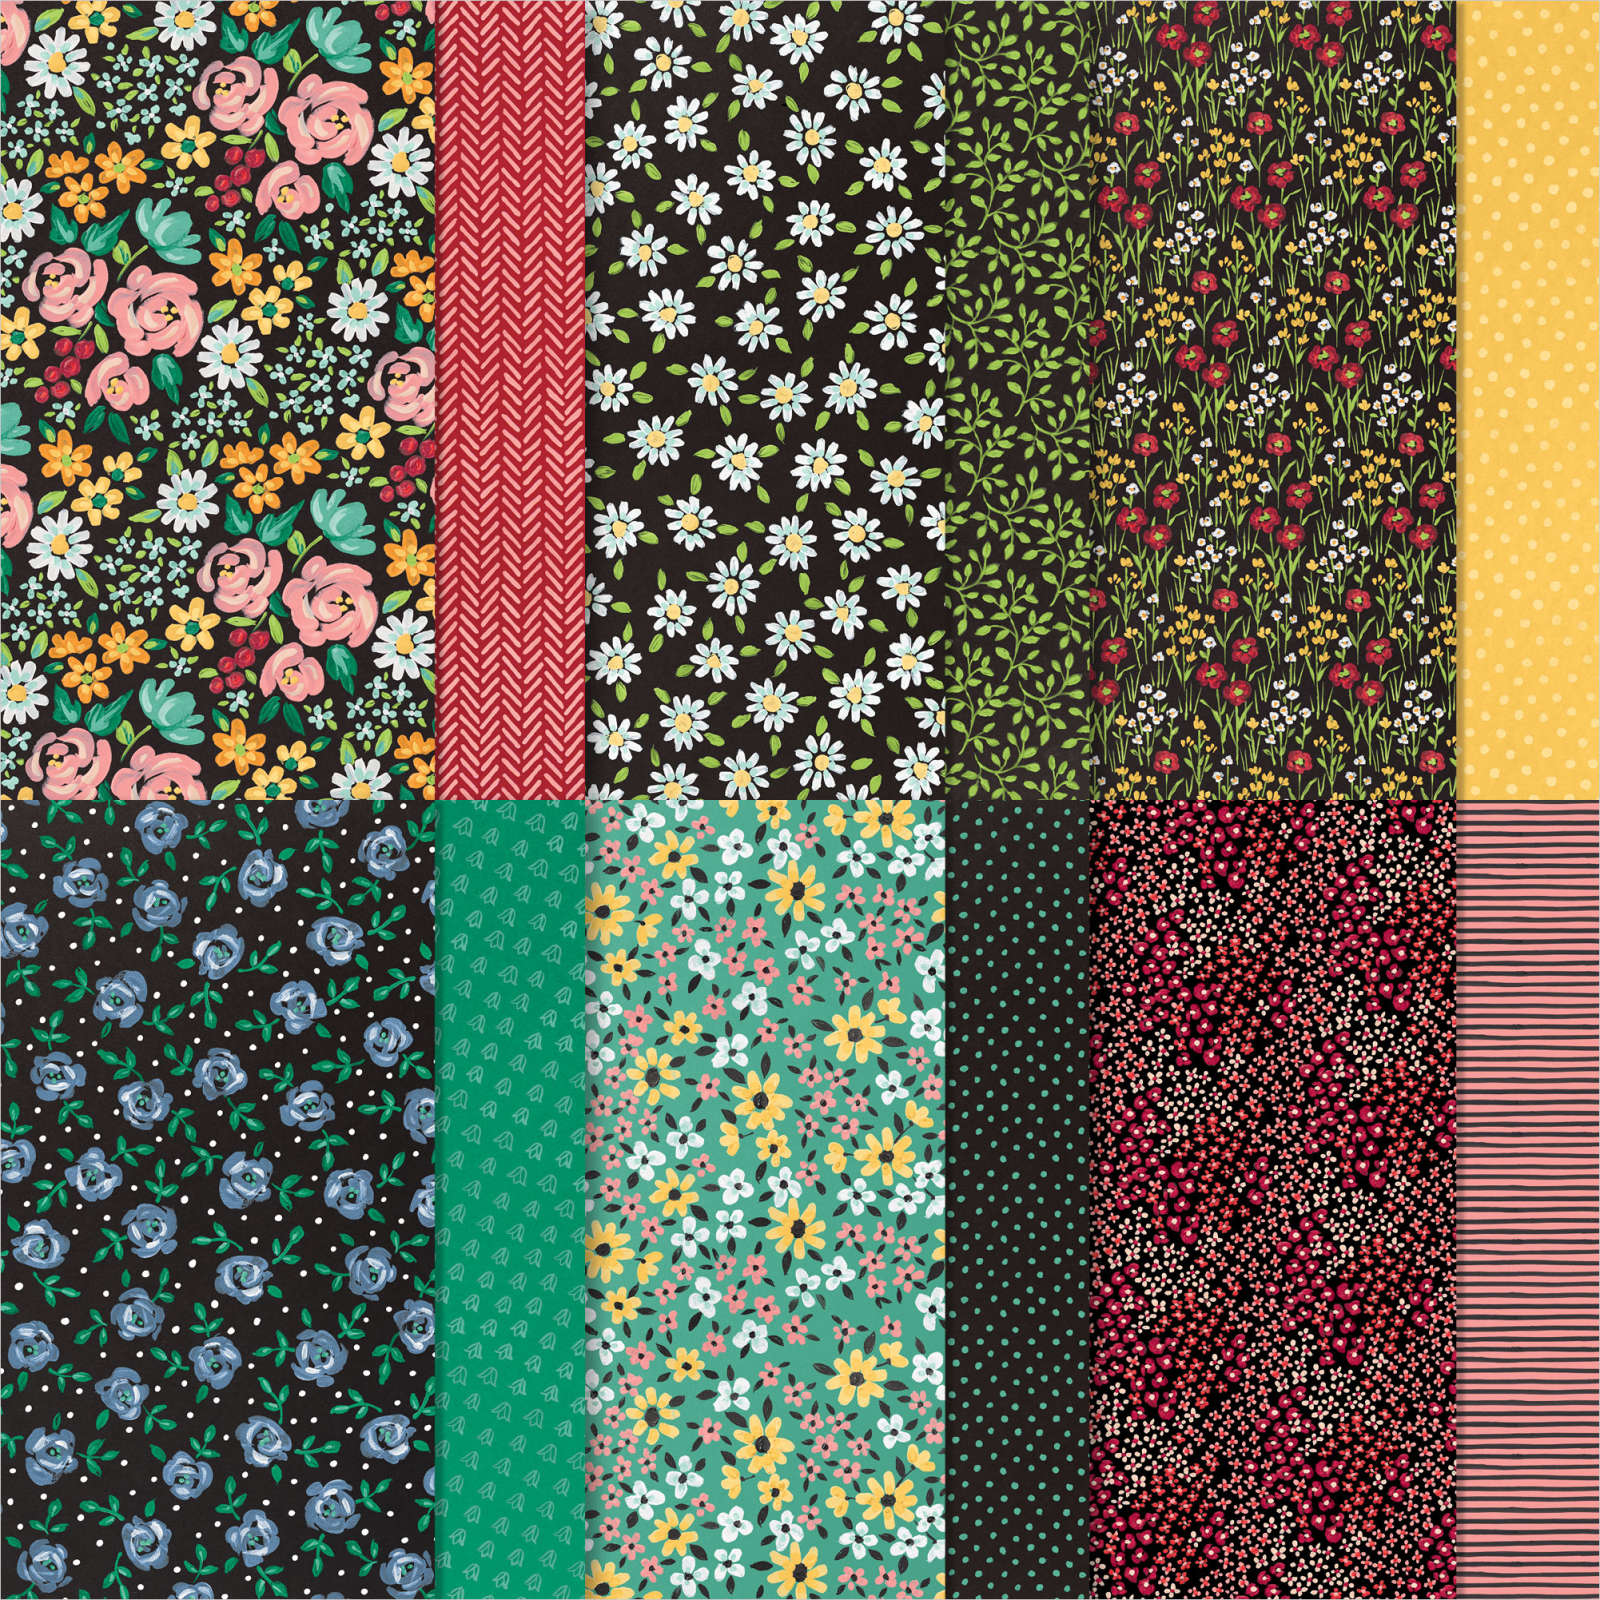
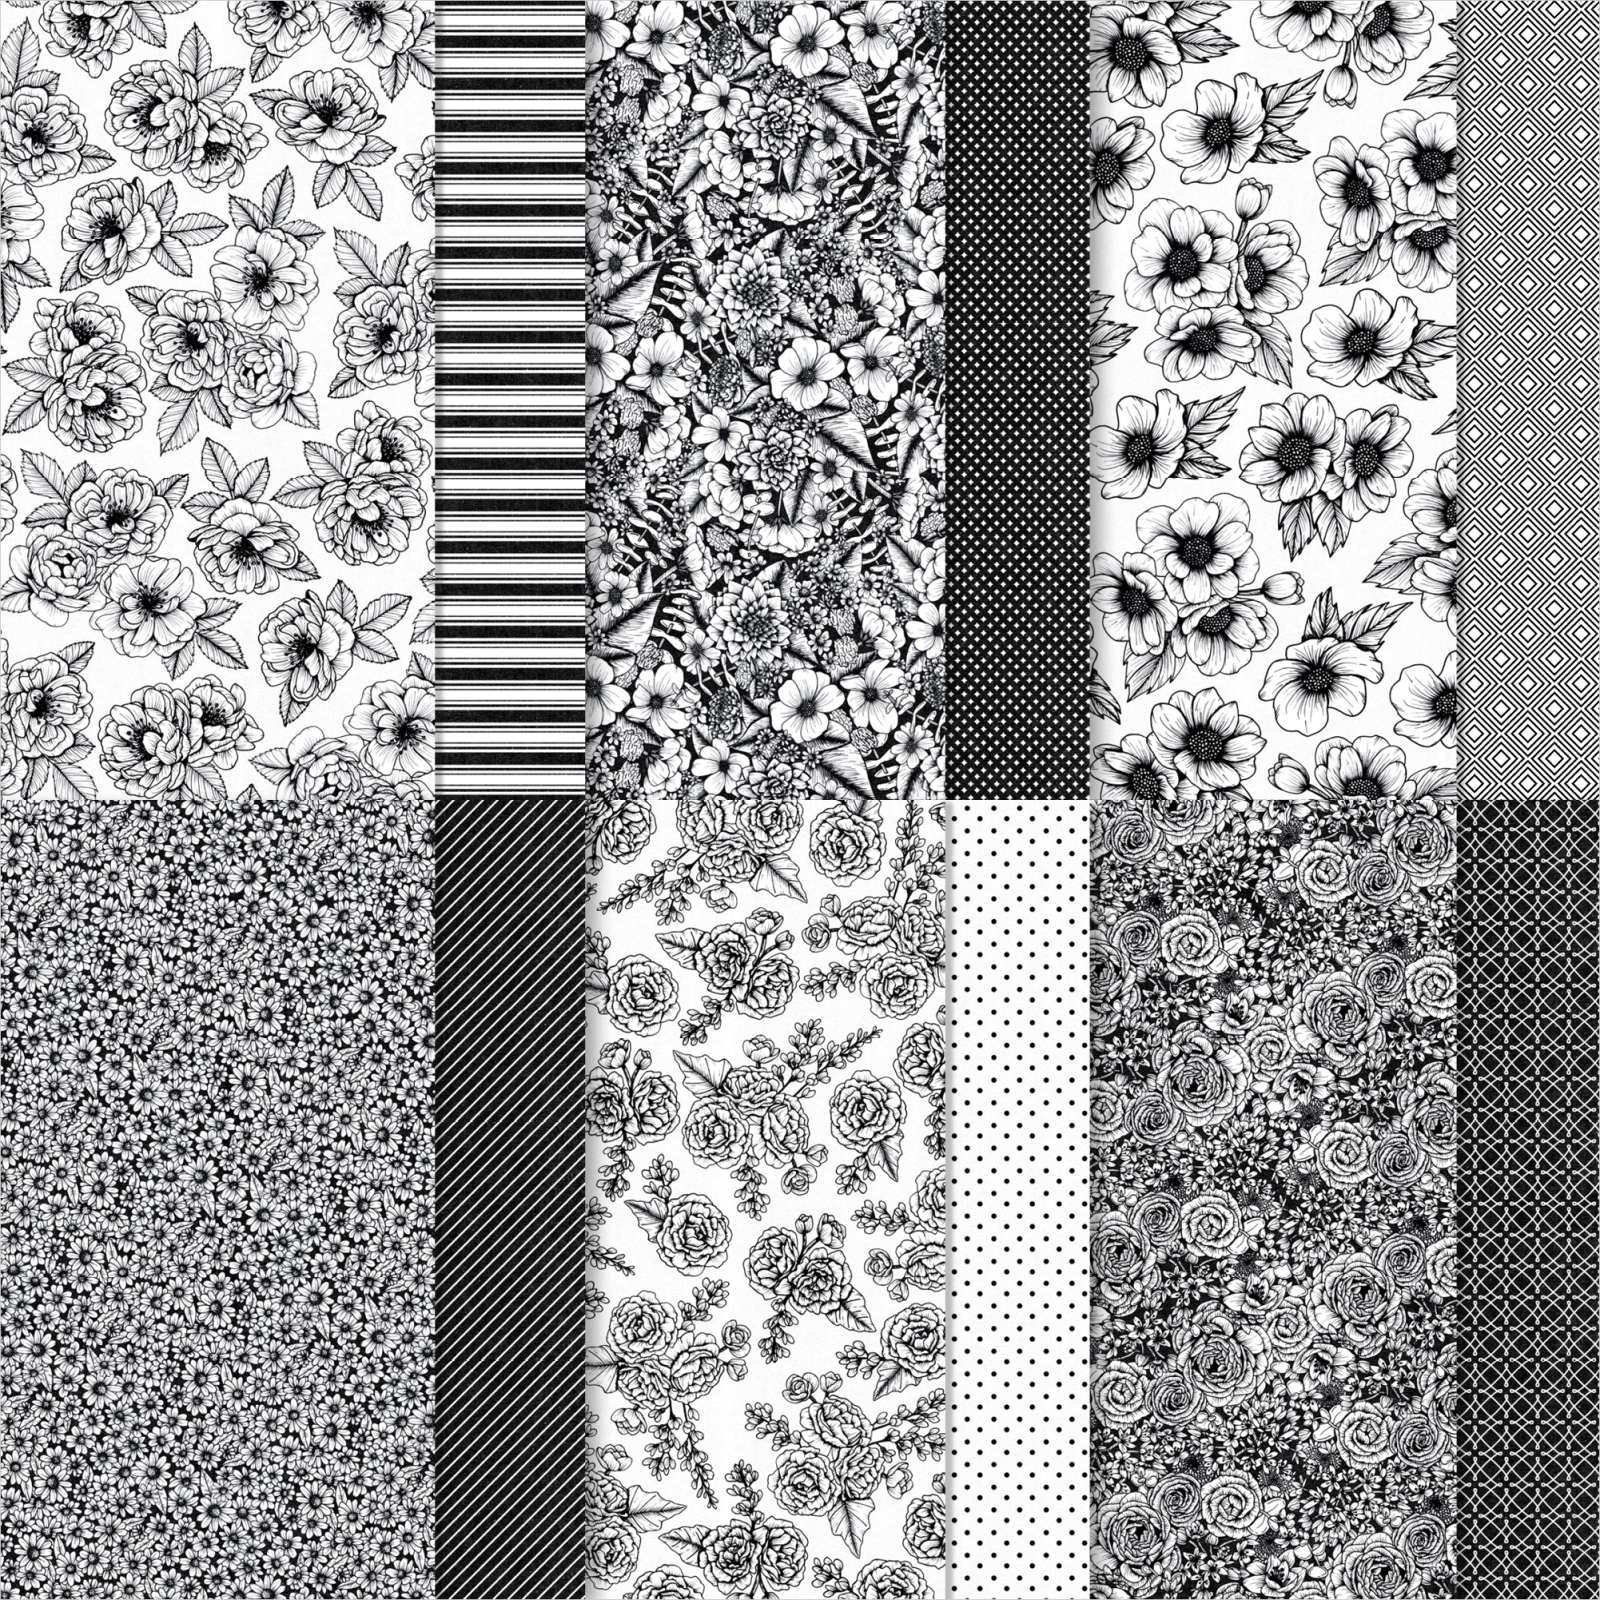
The Flower & Field Designer Series Paper which is available free with a qualifying order during Sale-A-Bration is really beautiful. There are some great patterns on both sides of the paper and although I am not a fan of “busy” patterns, all of these patterns have great appeal. I used this Designer Series Paper yesterday on my Facebook Live to show off some drapery fold cards and I thought I would share a couple more today. These cards begin by cutting Designer Series Paper 10″ x 5″. You score the 10″ length at 1″ and 1-1/2″ intervals all the way across. You cut diagonally across the paper one each corner and then cut the whole piece in half.
This gives two pieces of beautifully folded designer series paper which allowed me to create two same but different cards. To create the cards, I also used the A Touch of Ink stamp set which is also Free with a qualifying order during Sale-A-Bration. I stamped the leafy image from the A Touch of Ink stamp set onto the top of Basic White card using Memento Tuxedo Black ink. I also stamped the floral image from the same stamp set using Memento Tuxedo Black ink.
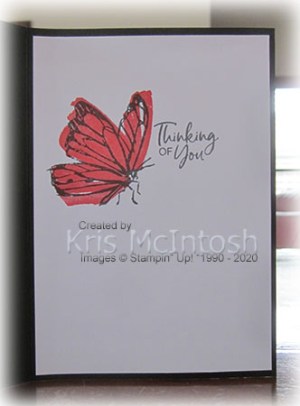
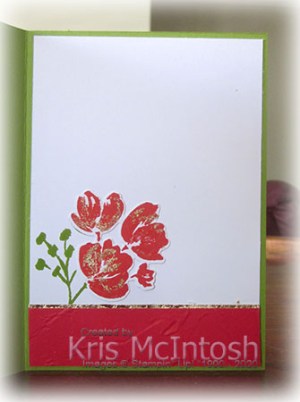
I stamped the fill image for the leaves using Granny Apple Green ink and the flower using Poppy Parade ink. I stamped the greeting from the A Touch of Ink stamp set using Memento Tuxedo Black ink. I embossed a piece of Poppy Parade card using the Subtle 3D Embossing Folder and then cut one 10cm edge using the border from the Be Mine Stitched Dies. I attached the Designer Series Paper to the embossed Poppy Parade card and wrapped the top of the paper using Gold Metallic Edge Ribbon. The whole panel is attached to the bottom of the stamped Basic White card. To decorate the inside of the card, I stamped the butterfly image from the A Touch of Ink stamp set using Memento Tuxedo Black ink onto Basic White card. I added the fill image using Poppy Parade ink. I also stamped another greeting from the A Touch of Ink stamp set using Memento Tuxedo Black ink. Because I had two pieces, I used the reverse side of the Flower & Field Designer Series Paper to create another card. This card is exactly the same except I have used Flirty Flamingo ink and card instead of Poppy Parade. You will notice that the folds look slightly different on each card.
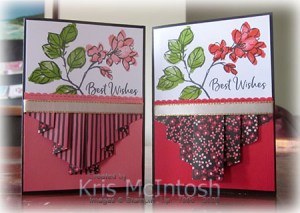
I think they both turned out great and I know that I am going to make more of these drapery fold cards. In fact I don’t know why I haven’t done so before.
Bye for now,
Kris
Product Used:


True Love Flowers
Today I thought I would share a card I made using the True Love Designer Series Paper and an old sketch by Freshly Made I had saved on Pinterest. I think it worked well. I embossed Basic White card using the Painted Texture 3D Embossing Folder and attached it to scored and folded Blackberry Bliss card. I attached two narrow strips of the True Love Designer Series Paper to the embossed Basic White card. I cut a circle from Basic White card using the largest circle from the Stitched Shapes Dies. The circle is attached to the card front using dimensionals. I coloured the flower from the True Love Designer Series Paper using Blackberry Bliss, Old Olive and Dark Daffodil Delight Stampin’ Blends.
I cut out the flower and attached it to the die cut circle using dimensionals where necessary. I stamped “happy birthday” from the Art Gallery stamp set onto Basic White card using Blackberry Bliss ink and cut it out using one of the banner dies from the Floral Gallery Dies.

The greeting is attached to the card front using dimensionals. To decorate the inside of the card, I attached a narrow strip of Basic Black to one long edge of Basic White card embossed using the Painted Texture 3D Embossing Folder. I coloured one of the flowers on the edge of the paper using the same Stampin’ Blends. The flowers are attached to the Basic White card just above the embossed panel. I love that I was able to use one of the flowers on the edge of the Designer Series Paper which I would otherwise have thrown away. I am taking a closer look at the all images on the edges of the Designer Series Paper to make sure I don’t throw away an embellishment opportunity!
Bye for now,
Kris
Product Used:


Forever Gold Birthday

Today’s card is inspired by a card sketch that I saved to Pinterest. I began by attaching one of the card front pieces from the Forever Gold Laser Cut Specialty Papers to Basic White card before a piece of True Love Designer Series Paper across the centre of the panel. The whole piece is attached to scored and folded Poppy Parade A4 card. I cut Basic White card using the largest circle from the Stitched Shapes Dies and attached it to the card front using dimensionals.

I coloured the flower from the True Love Designer Series Paper using Poppy Parade, Dark Daffodil Delight and Granny Apple Green Stampin’ Blends. I cut out the flower and attached it to the circle die using dimensionals where necessary.

I stamped “happy birthday” from the Floral Art stamp set onto Basic White card using Poppy Parade ink and cut it out using the largest banner from the Art Gallery Dies. The greeting is attached to the card front using dimensionals. To decorate the inside of the card, I attached a piece of the same pattern True Love Designer Series Paper across the bottom of Whisper White card. I coloured the flower from the edge of the paper using the same Stampin’ Blends, cut it out and attached it slightly covering the Designer Series Paper.
This card is for a friend celebrating a special birthday which I am glad to say she really loved. I really am on a bit of a roll using the beautiful True Love Designer Series Paper and will have more examples to show you soon. I am just loving how gorgeous the flowers from the Designer Series Paper look when coloured.
Bye for now,
Kris
Product Used:


True Love Wedding
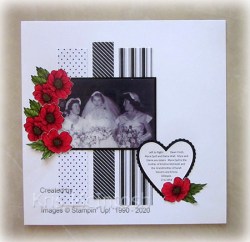
Today’s page shows off a photo of my Mum with her bridesmaids. The bridesmaid on the right is my Mum’s sister. I attached strips of the True Love Designer Series Paper to a Basic White 12″ x 12″ page. I attached the photo to Basic Black card and then to the page. I printed my journaling onto Basic White card and cut it out using the Be Mine Stitched Dies.

I cut the heart frame from Basic Black card using the same dies. I attached the hearts to the lower right hand side of the photo. I coloured the flowers from the True Love Designer Series Paper using Poppy Parade, Dark Daffodil Delight and Granny Apple Green Stampin’ Blends. I cut out the flowers and attached three of them to the left of the photo and one to the journaling. A simple page but I love the bright Poppy Parade colour on the black and white background.
This photo is one of the photos that my Mum and Dad gave to me and which I am glad to be using to create some family history for my grandchildren.
Bye for now,
Kris
Product Used:
More Gilded Leafing
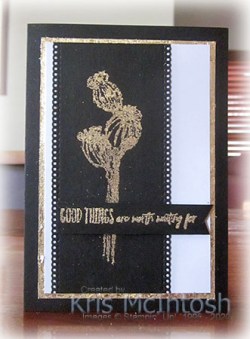
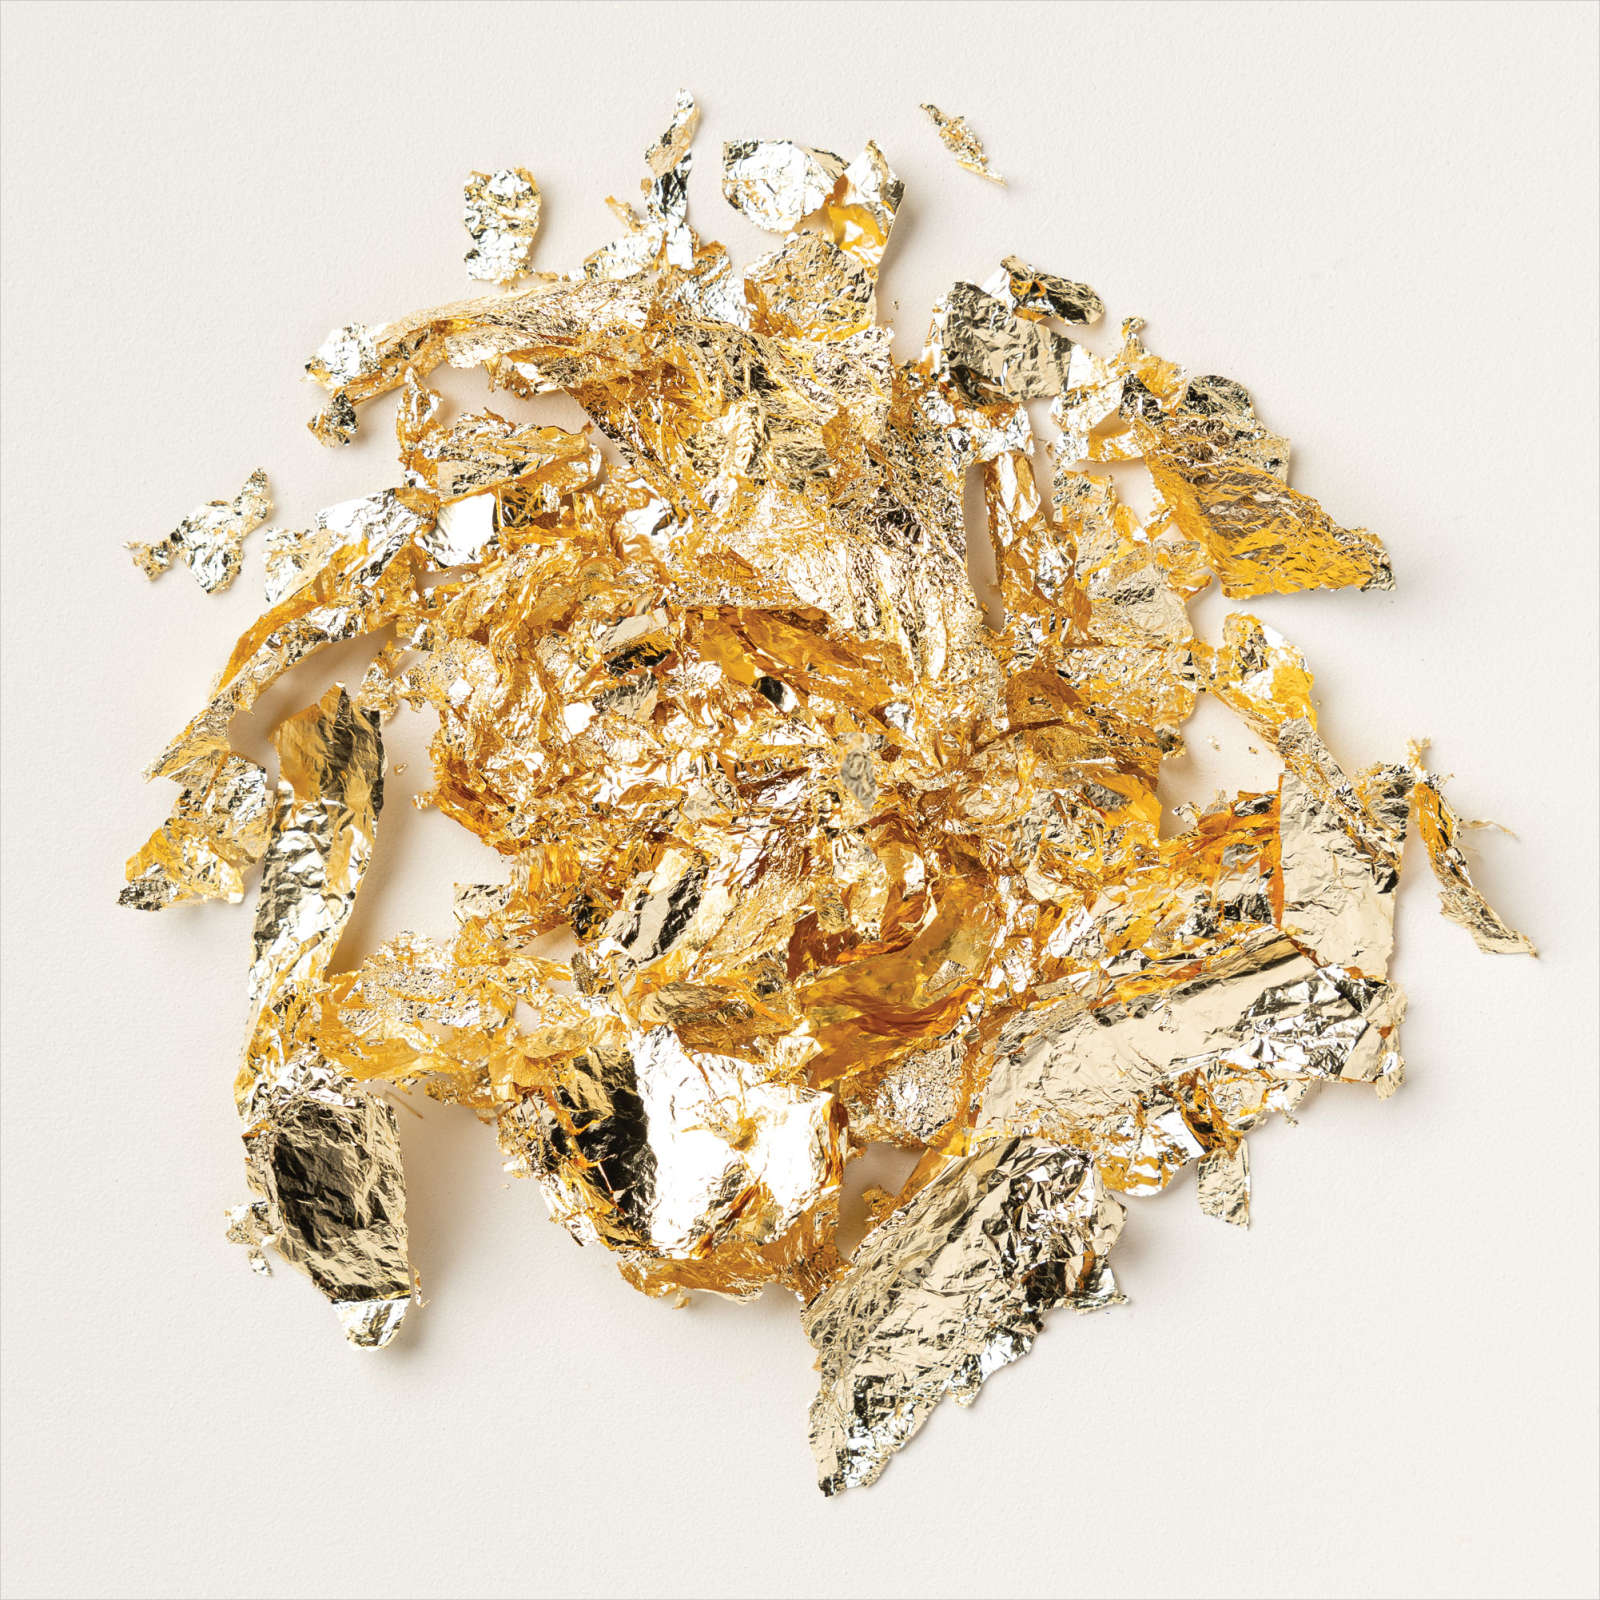
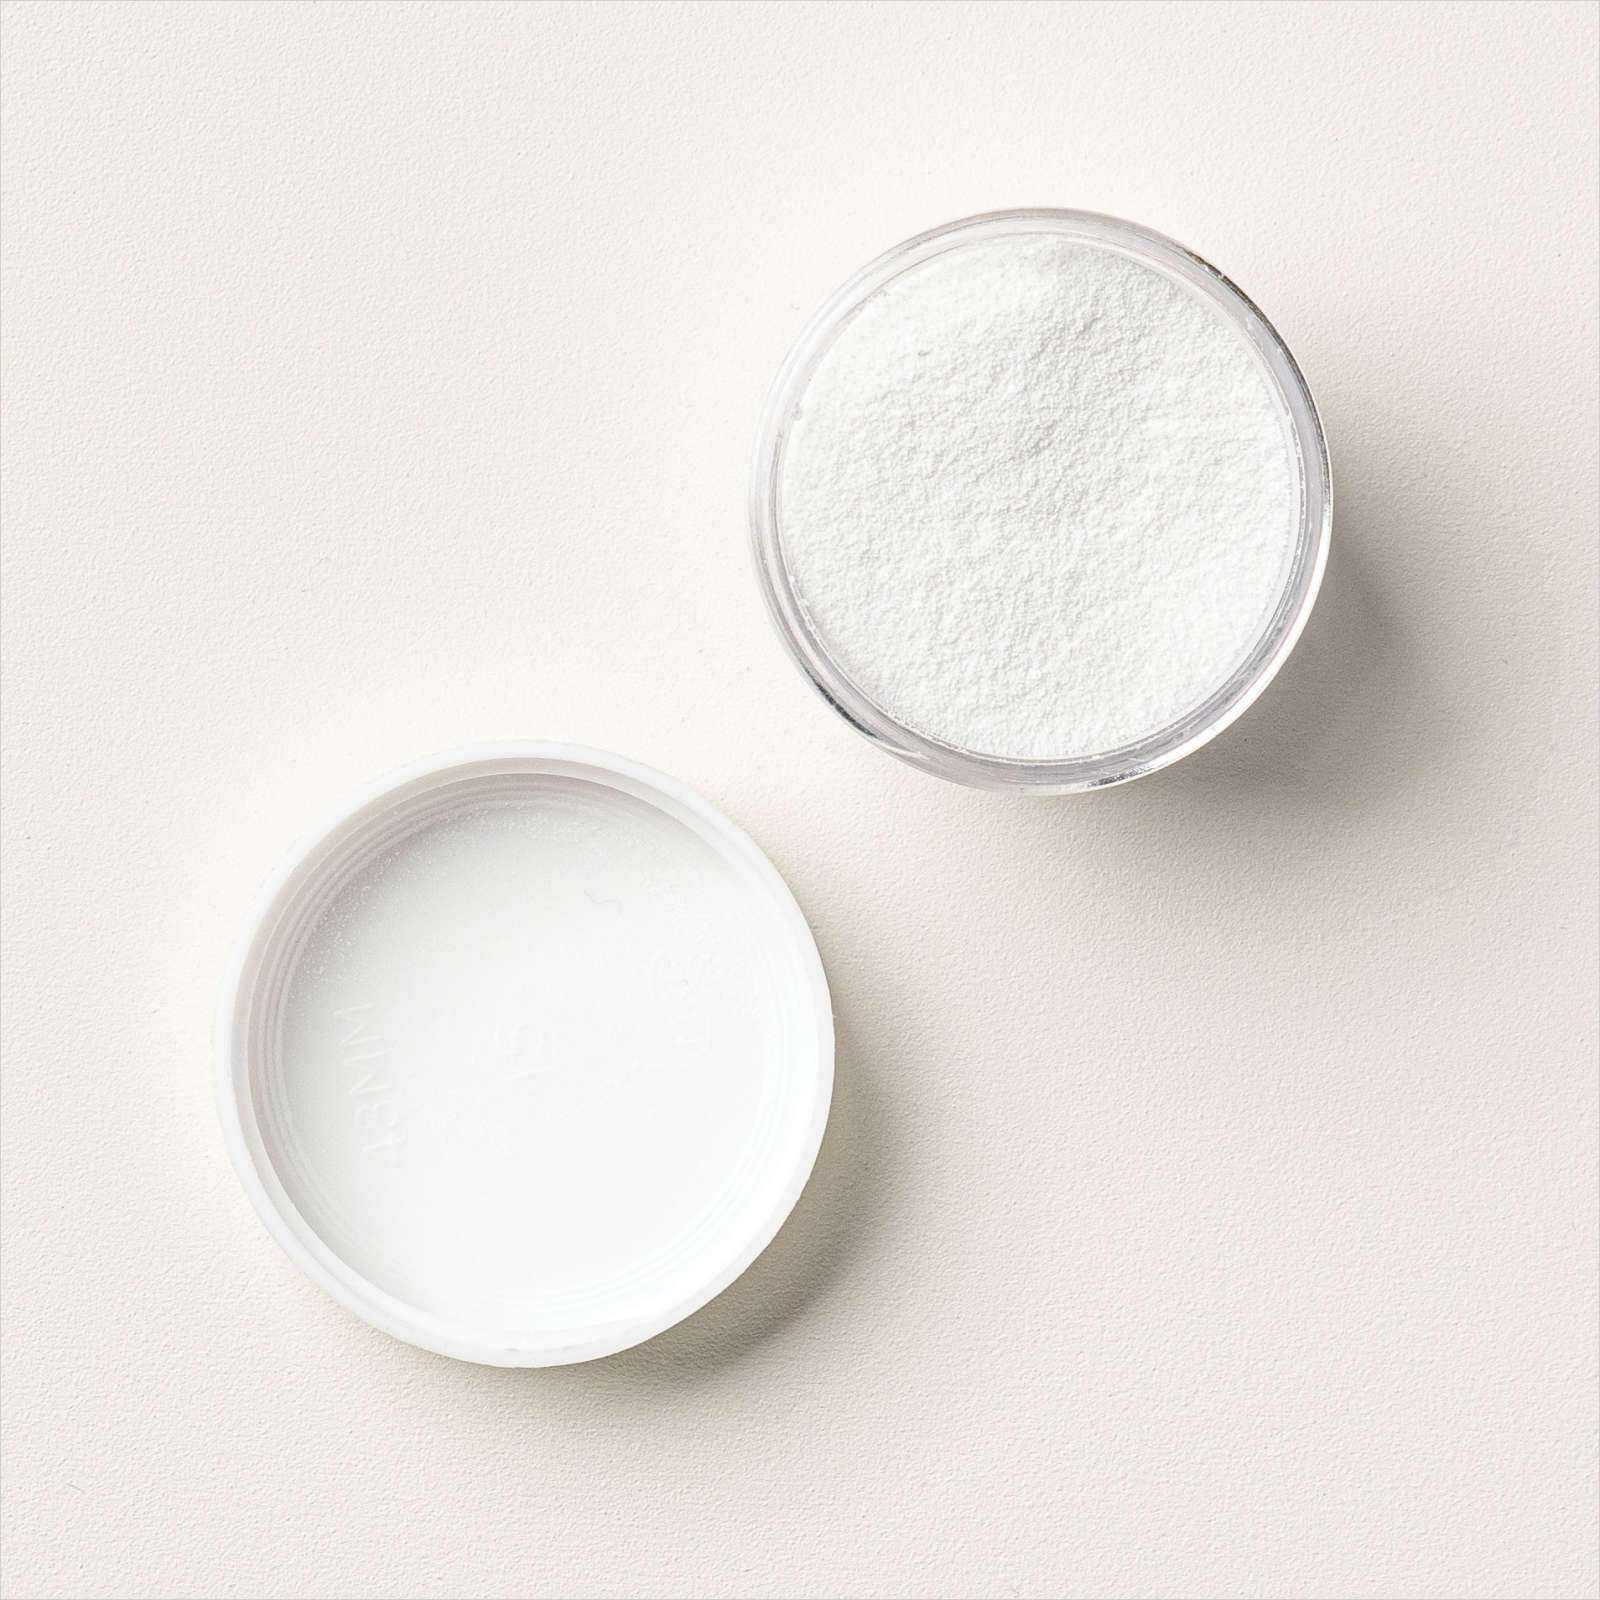
This card gave me an opportunity to try an idea that I have had in my head for a while. I wanted to show the Gilded Leafing on Black card. Not sure if it really works or not but thought I would share anyway. I cut a panel from Basic Black card using one of the Ornate Layers Dies. I stamped the image from the Enjoy The Moment stamp set onto the Black card using Versamark ink. I sprinkled the image with Heat & Stick powder and used the heat gun to activate the glue. I added Gilded Leafing using a Blending Brush and attached the panel to Whisper White card.

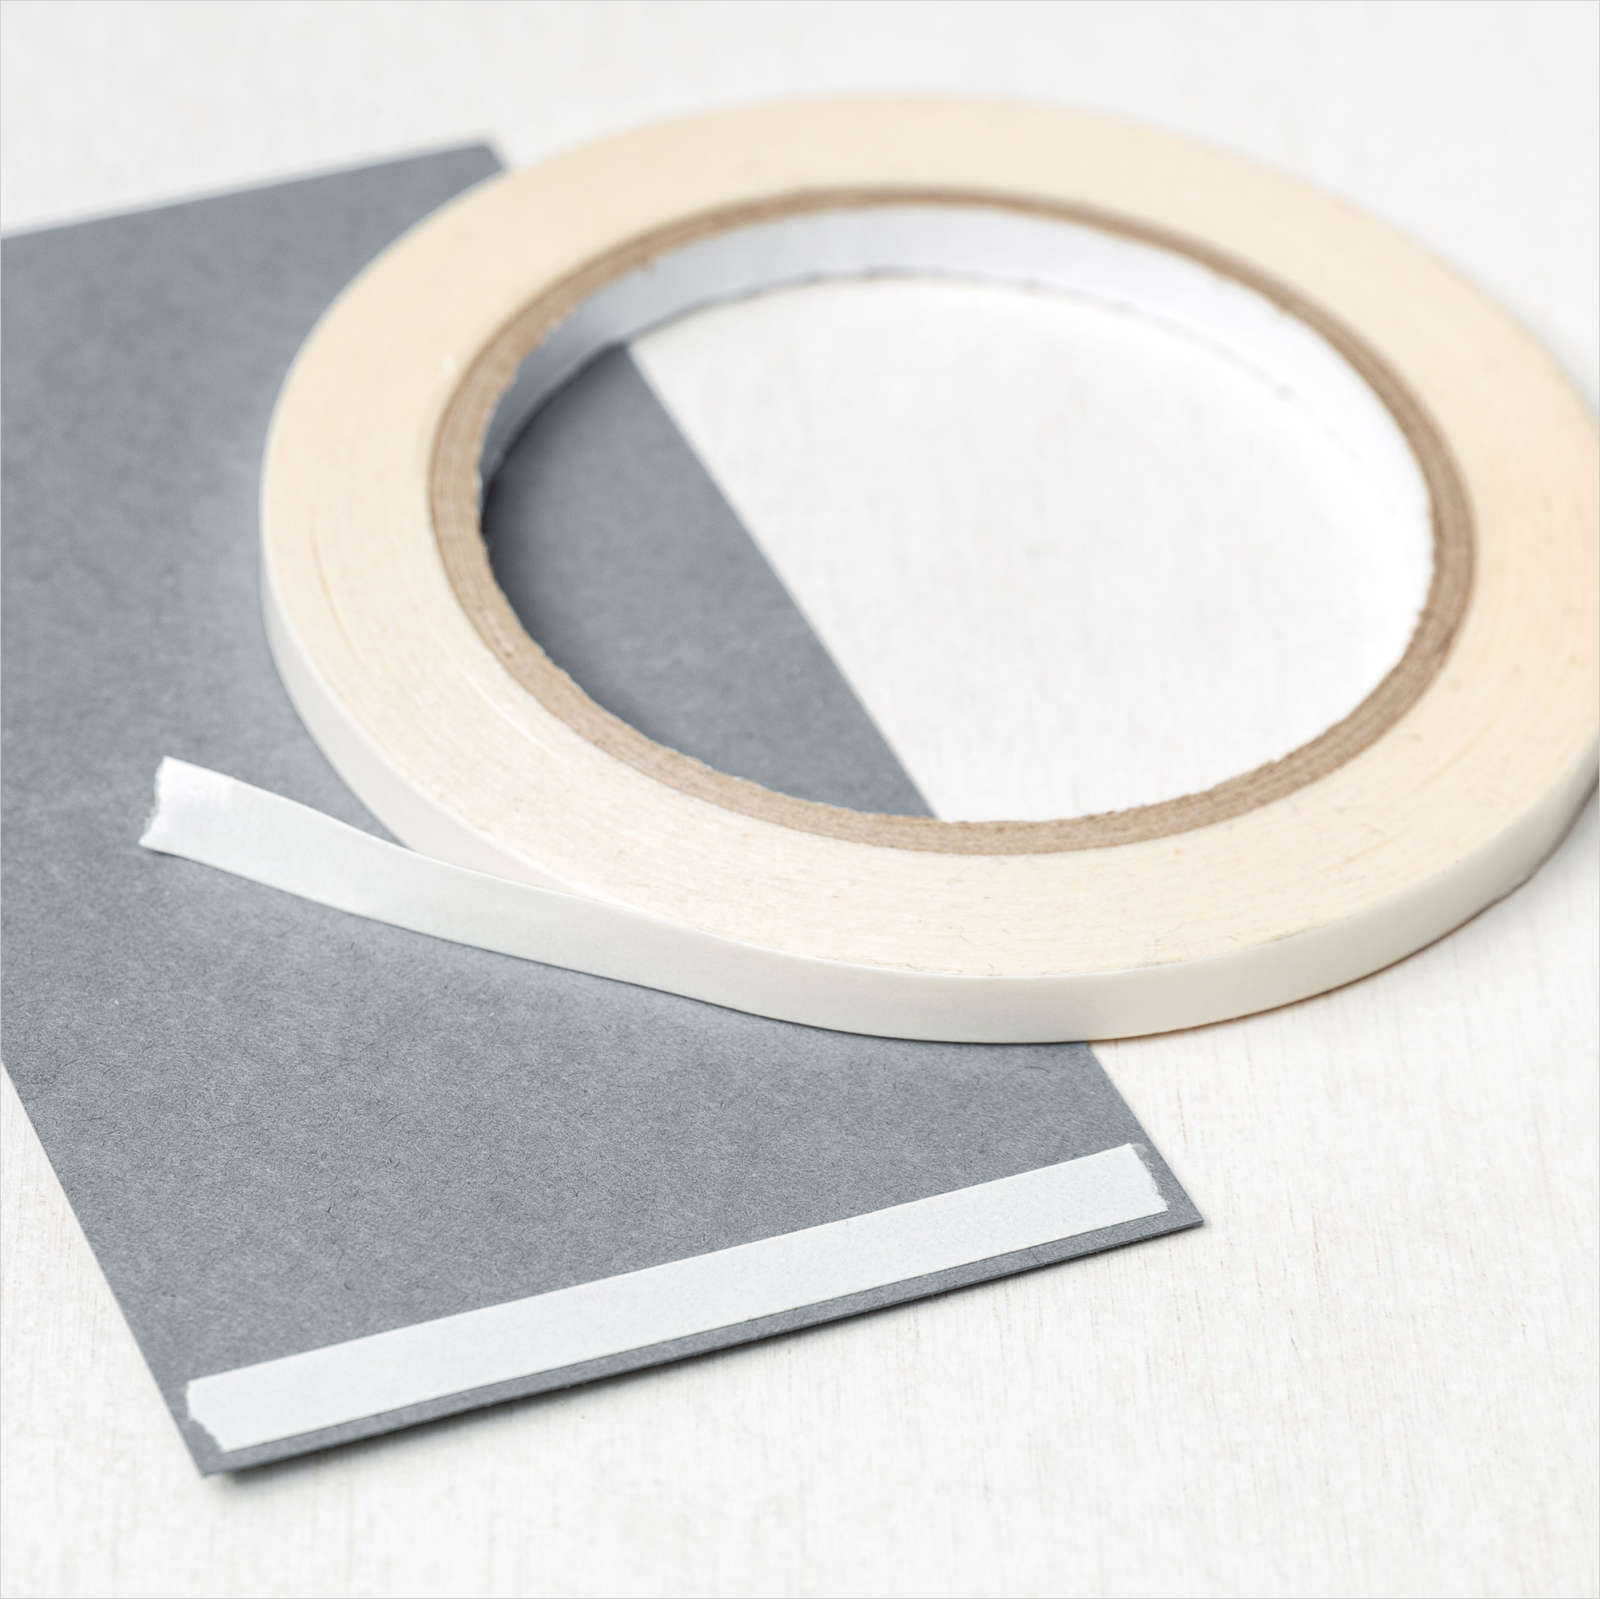
I attached Tear & Tape around the edges of another piece of Basic White card, removed the cover and added Gilded Leafing. I attached the image panel to the Gilded panel and then scored and folded Basic Black card.

I stamped the greeting from the Enjoy The Moment stamp set onto Basic Black card using Versamark ink. I sprinkled the greeting with Heat & Stick powder and used the heat gun to activate the glue before adding Gilded Leafing. I cut a “v” in one end of the greeting banner and attached it to the card front using dimensionals. To decorate the inside of the card, I stamped another image from the Enjoy The Moment stamp set onto Basic White card using Versamark ink. I followed the same procedure as before to add the Gilded Leafing.
I do like the finished card but I don’t think I would use the Gilded Leafing on such a fine sentiment again. Otherwise, I must admit I do love it.
Bye for now,
Kris
Product Used:


Gilded Leafing
I have had the jar of Gilded Leafing sitting on my desk for some time, but yesterday I got to play and share with everyone on my Facebook Live. Today I am sharing another card I created whilst I was “playing”. I attached a piece of Poppy Parade card to Basic White card and then embossed using the Painted Texture 3D Embossing Folder. I attached the embossed card to scored and folded Granny Apple Green card. I attached Tear and Tape around the edge of a piece of Basic White card, removed the cover and then added some Gilded Leafing. I did this in a largish plastic container using a Blending Brush to make sure that the Gilded Leafing was securely attached. I stamped the flower from the Art Gallery stamp set onto Whisper White card using Granny Apple Green ink and attached it to the panel with the Gilded edges using dimensionals.
The whole piece is attached to the card front also using dimensionals. I stamped the flower from the Art Gallery stamp set onto Whisper White card using Poppy Parade ink. I stamped the detailed image over the top using Versamark ink, sprinkled on Heat and Stick Powder and used the Heat Tool to melt the adhesive before adding Gilded Leafing. I love how you get the extra dimension on the flower. I used the Floral Gallery Dies to cut out the image before trimming away the flowers and attaching them over the stamped flowers. I stamped “happy birthday” from the Art Gallery stamp set onto Basic White card using Poppy Parade ink. I used the co-ordinating Floral Gallery Dies to cut out the greeting.
I cut a slightly larger piece of Basic White card and attached Tear and Tape to cover the piece. I removed the backing, attached the greeting and then added Gilded Foil to the edges of the panel. The greeting is attached to the card front using a double dimensional where necessary. To decorate the inside of the card, I stamped the flower image from the Art Gallery stamp set onto the lower left hand corner of Whisper White card. I stamped the flower onto scrap Basic White card using Poppy Parade ink and then stamped the detailed image using Versamark ink. I sprinkled the image with Heat and Stick powder, heat set it and added Gilded Leafing. I die cut the image, trimmed off the flowers and attached them over the stamped image. I added Tear and Tape to long edge of a narrow strip of Whisper White card. I embossed Poppy Parade card using the Painted Texture 3D Embossing Folder and attached it so that a little of the sticky part of the Basic White card was showing. I added Gilded Leafing before attaching the panel to the bottom of the stamped Basic White card.
I think I might just be a little “in love” with the Gilded Leafing. It has so much more dimension than just Gold Embossing with the embossing powder. I’d love to hear what you think.
Bye for now,
Kris
Product Used: