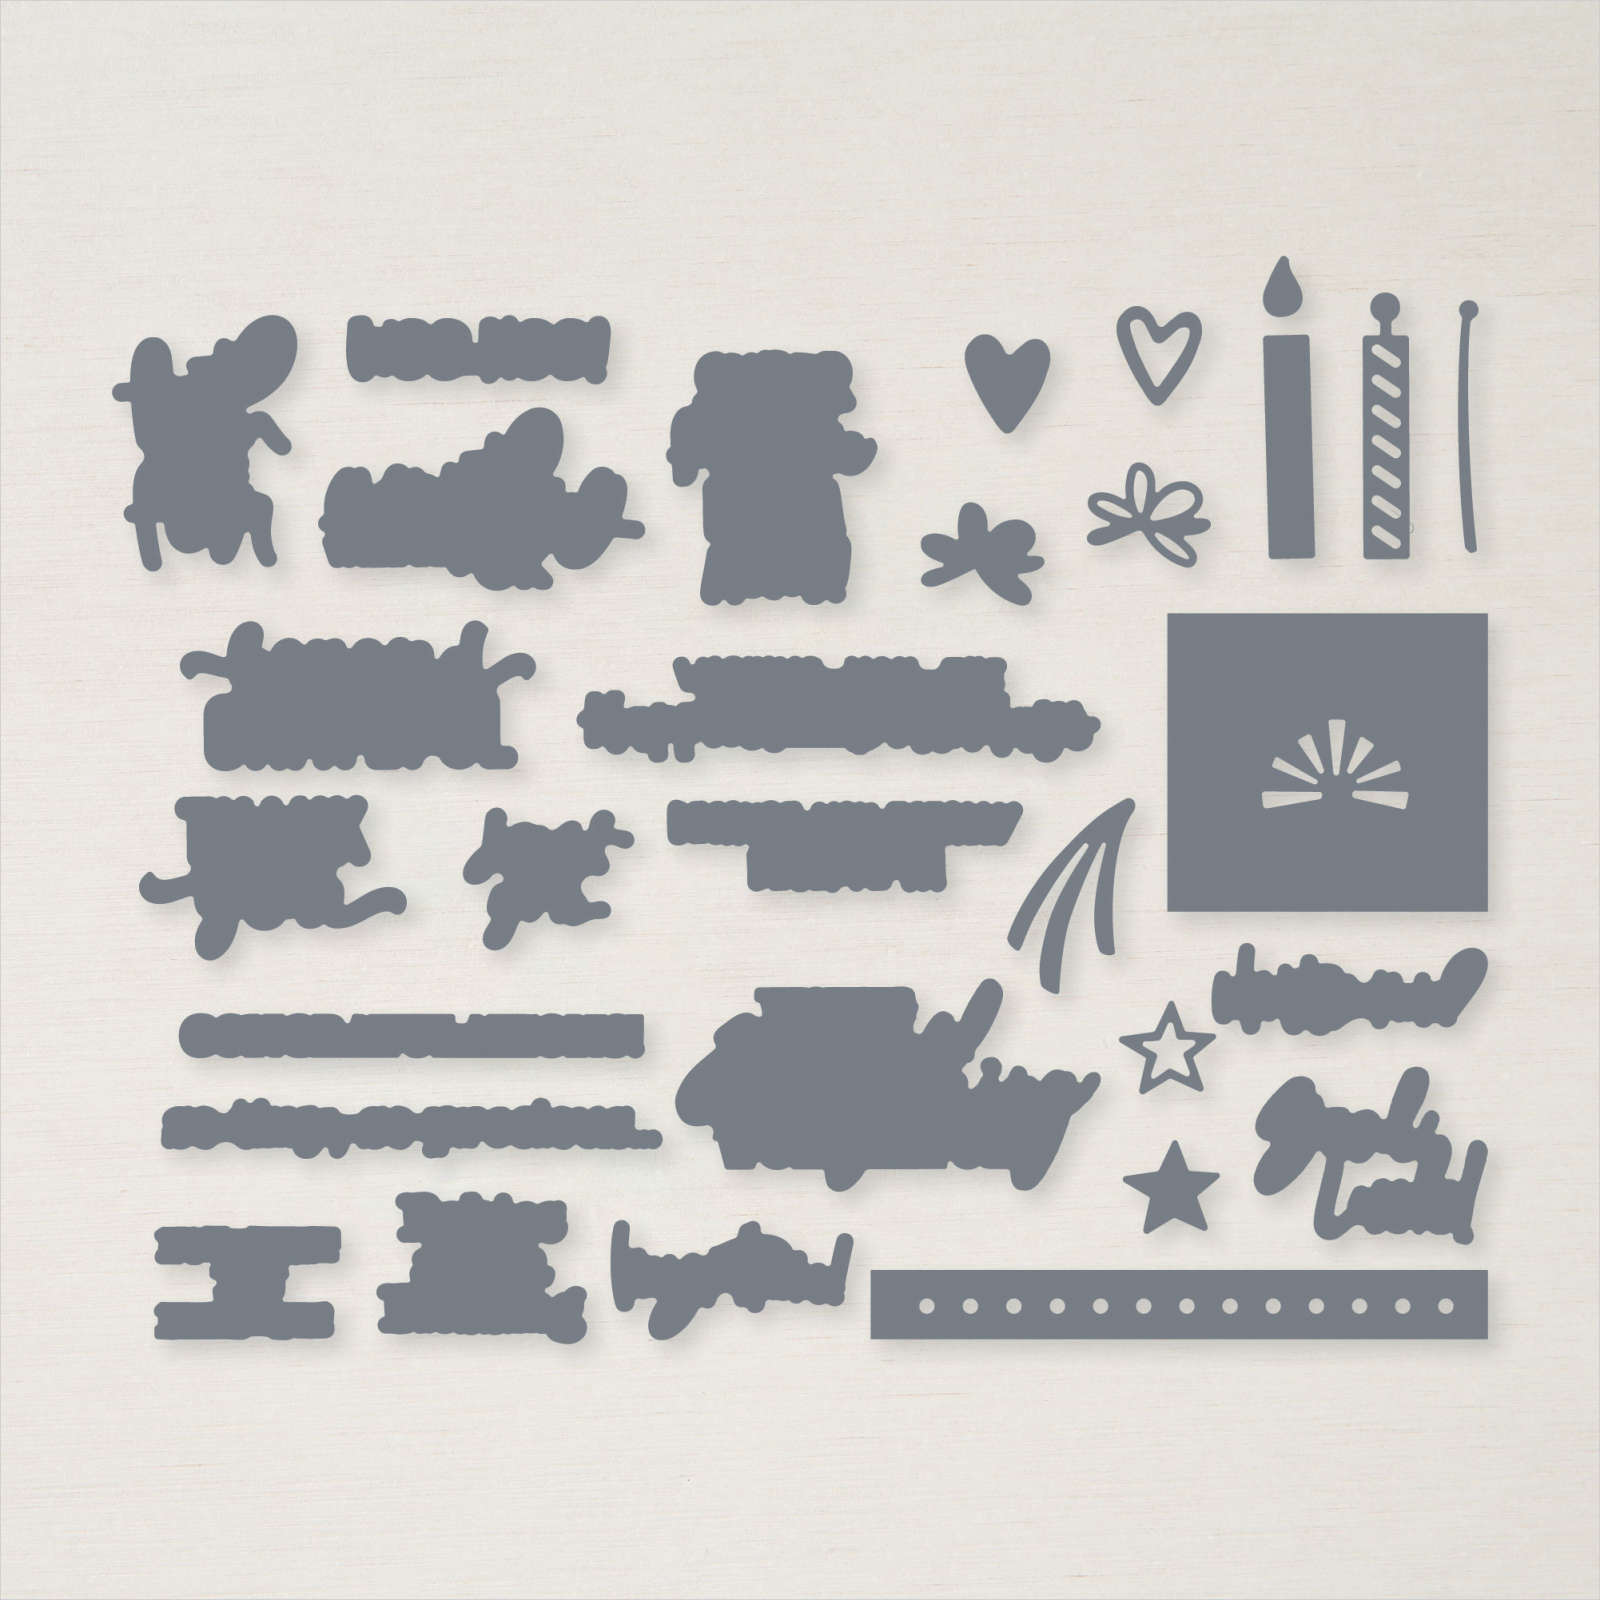
Congrats

This week in my Facebook Live, I shared some cards I made using the Year to Celebrate stamp set from the September to December Mini Catalogue. Today I have another card to share with you. I cut a piece of Thick Basic White card in half lengthwise and scored it in half. I folded the front panel in half again to give a different shape to the card. I added Delightfully Eclectic Designer Series Paper to the two small panels and Night of Navy card to the large panel on the inside of the card.

The Night of Navy card is embossed using one of the Cheery Patterns Embossing Folders which are also new to the September to December Mini Catalogue. I cut Basic White card twice using one of the Deckled Rectangle Dies. I stamped “let’s party” onto the centre of one die cut using Night of Navy ink. I stamped the confetti image from the Year to Celebrate stamp set over the top of the greeting using Bubble Bath ink. I attached this panel to the embossed Night of Navy card. I stamped “congrats” from the Year to Celebrate stamp set onto the second panel using Night of Navy ink.

I attached this stamped die cut to the card front, making sure to align it over the top of the previous Basic White die cut. I stamped the whistle image from the Year to Celebrate stamp set twice onto Basic White card using Night of Navy and Bubble Bath ink. I cut out out the images using my Paper Snips and attached them to the die cut on the card front using dimensionals.
I am sure you are going to see me using this set a lot over the coming months. You can find this stamp set on page 62 of the September to December Mini catalogue which goes live to customers on the 6th September. If you do not have a copy of this catalogue, you live in Australia and don’t have a current Stampin’ Up! demonstrator, please contact me so that we can organise to get one to you.
Bye for now,
Kris
Product Used:


Sending Birthday Wishes

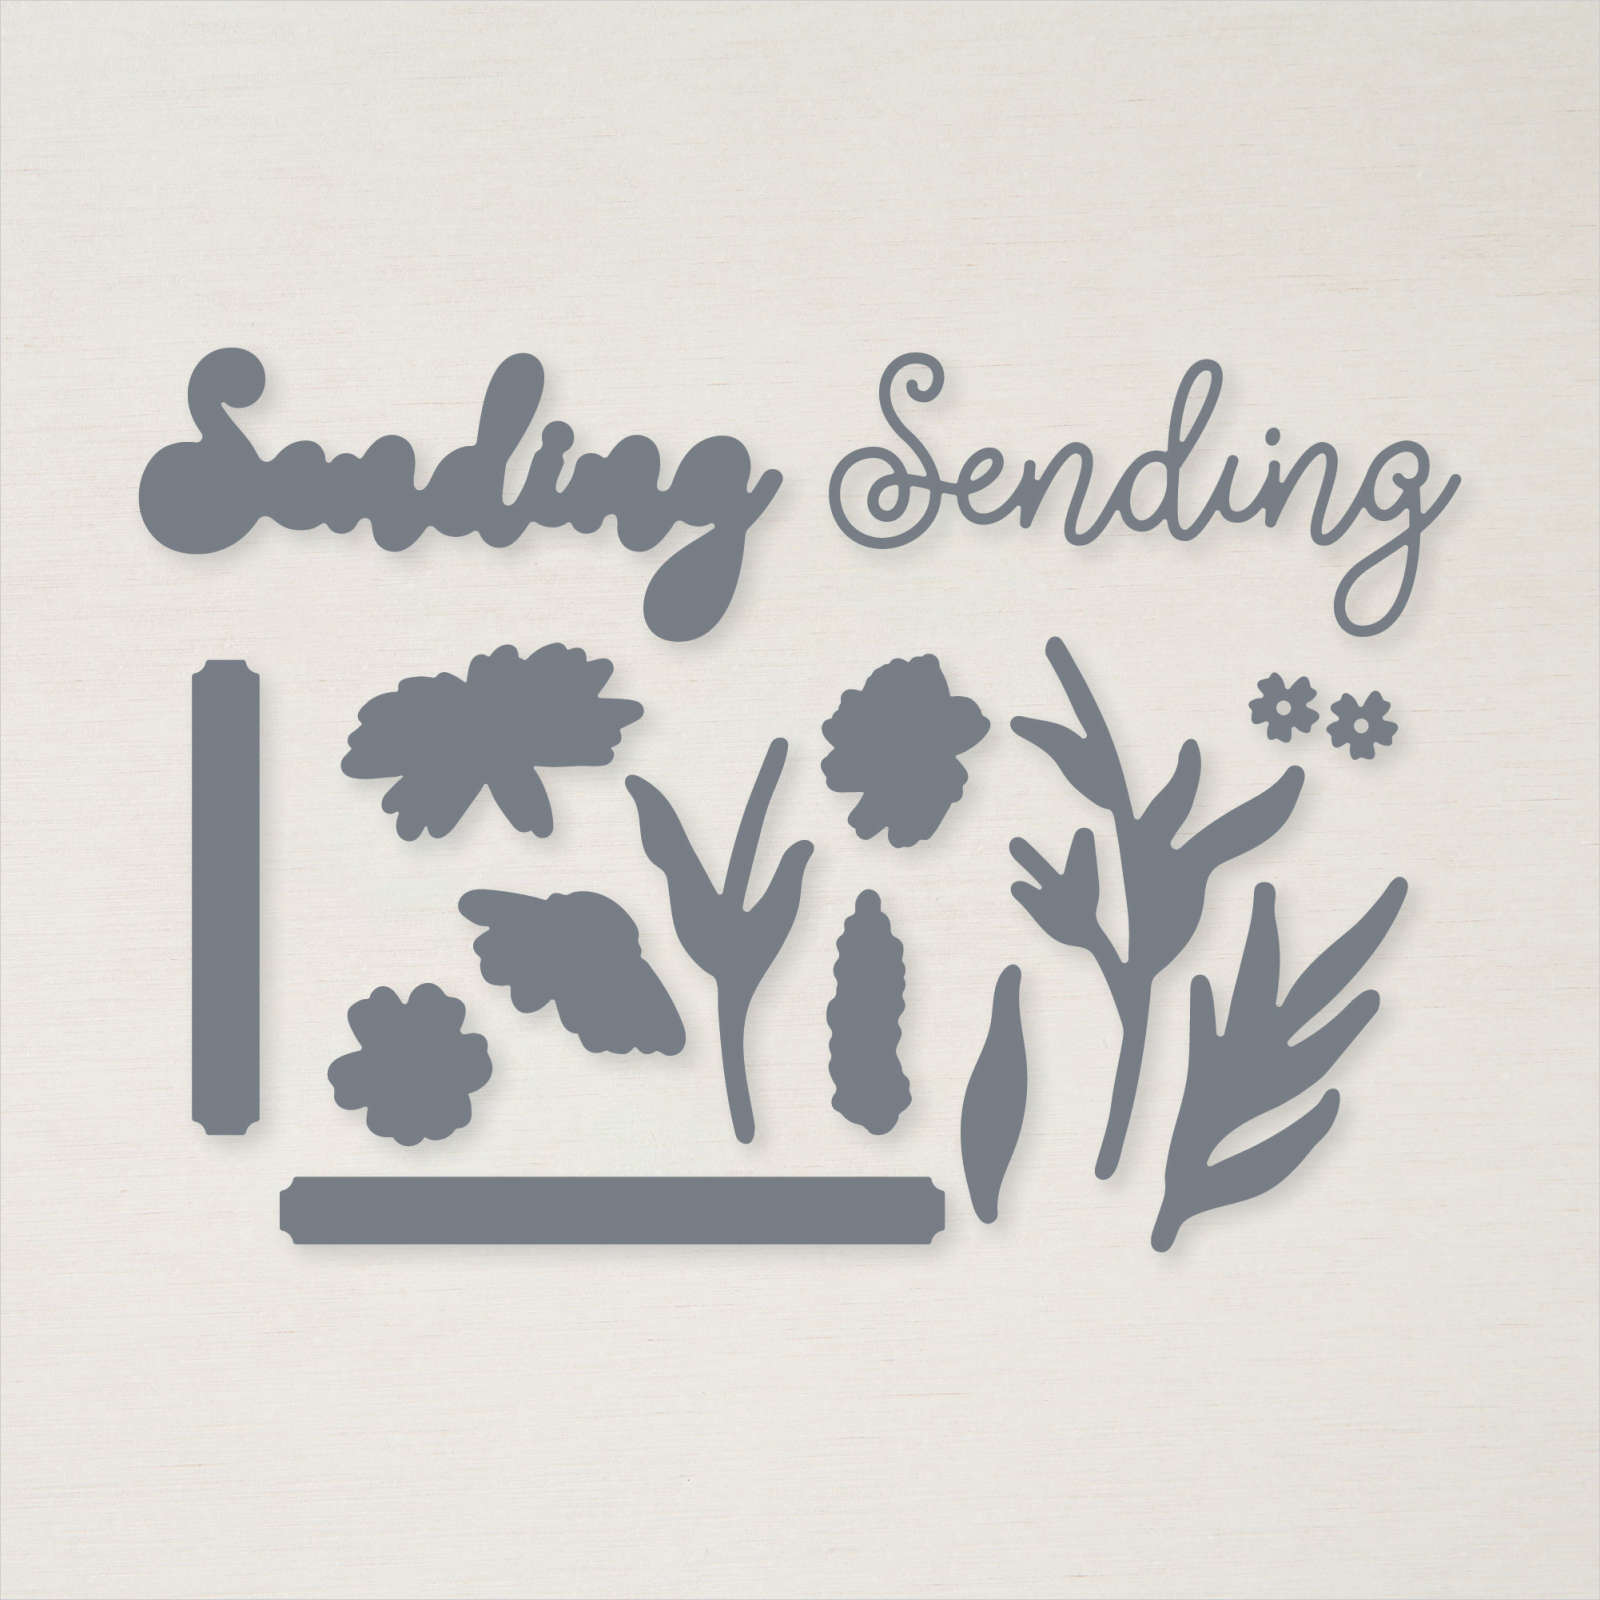
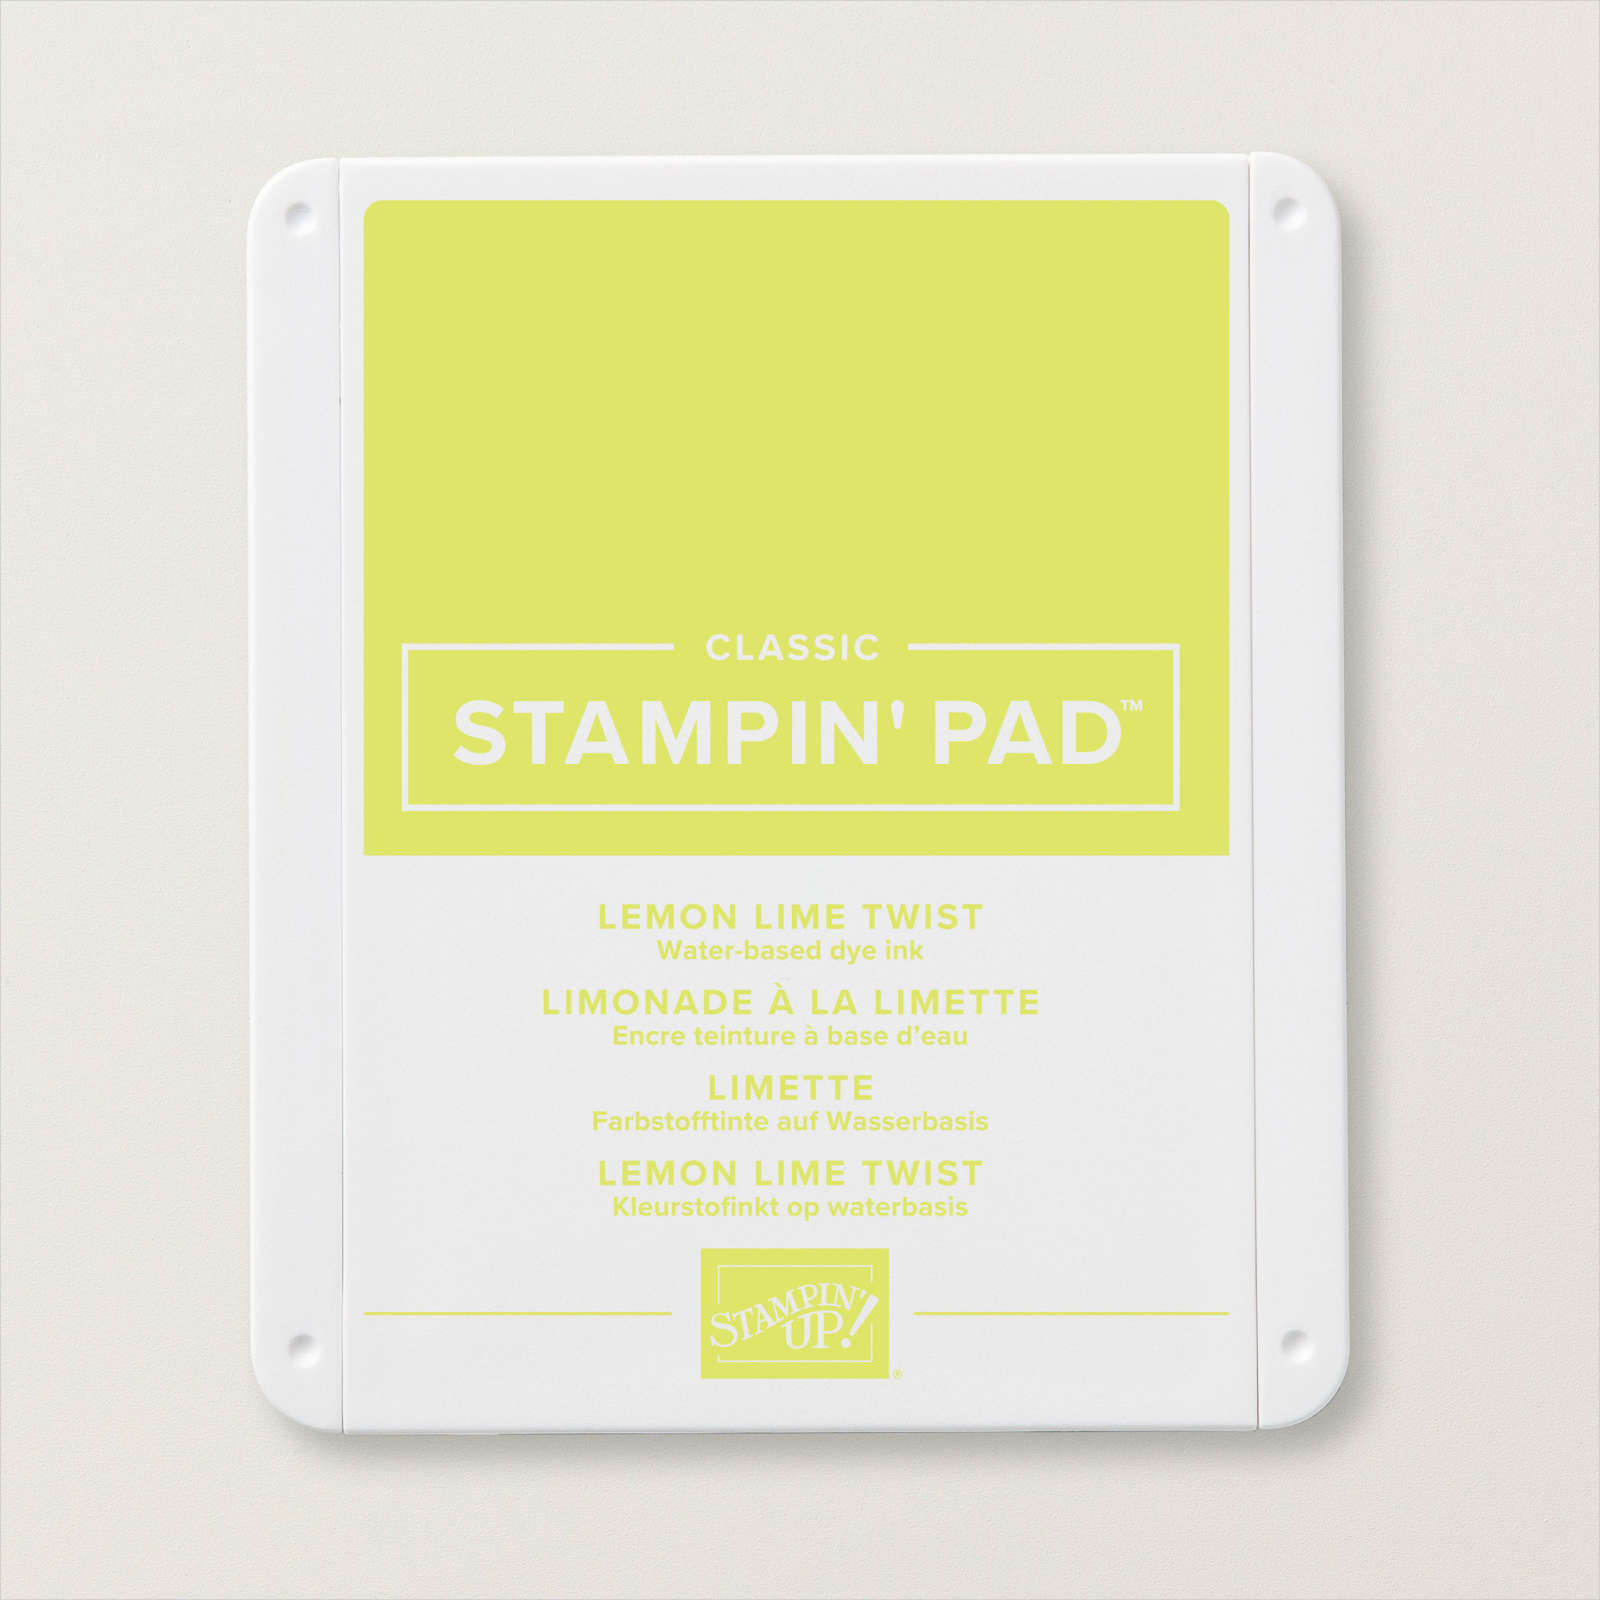
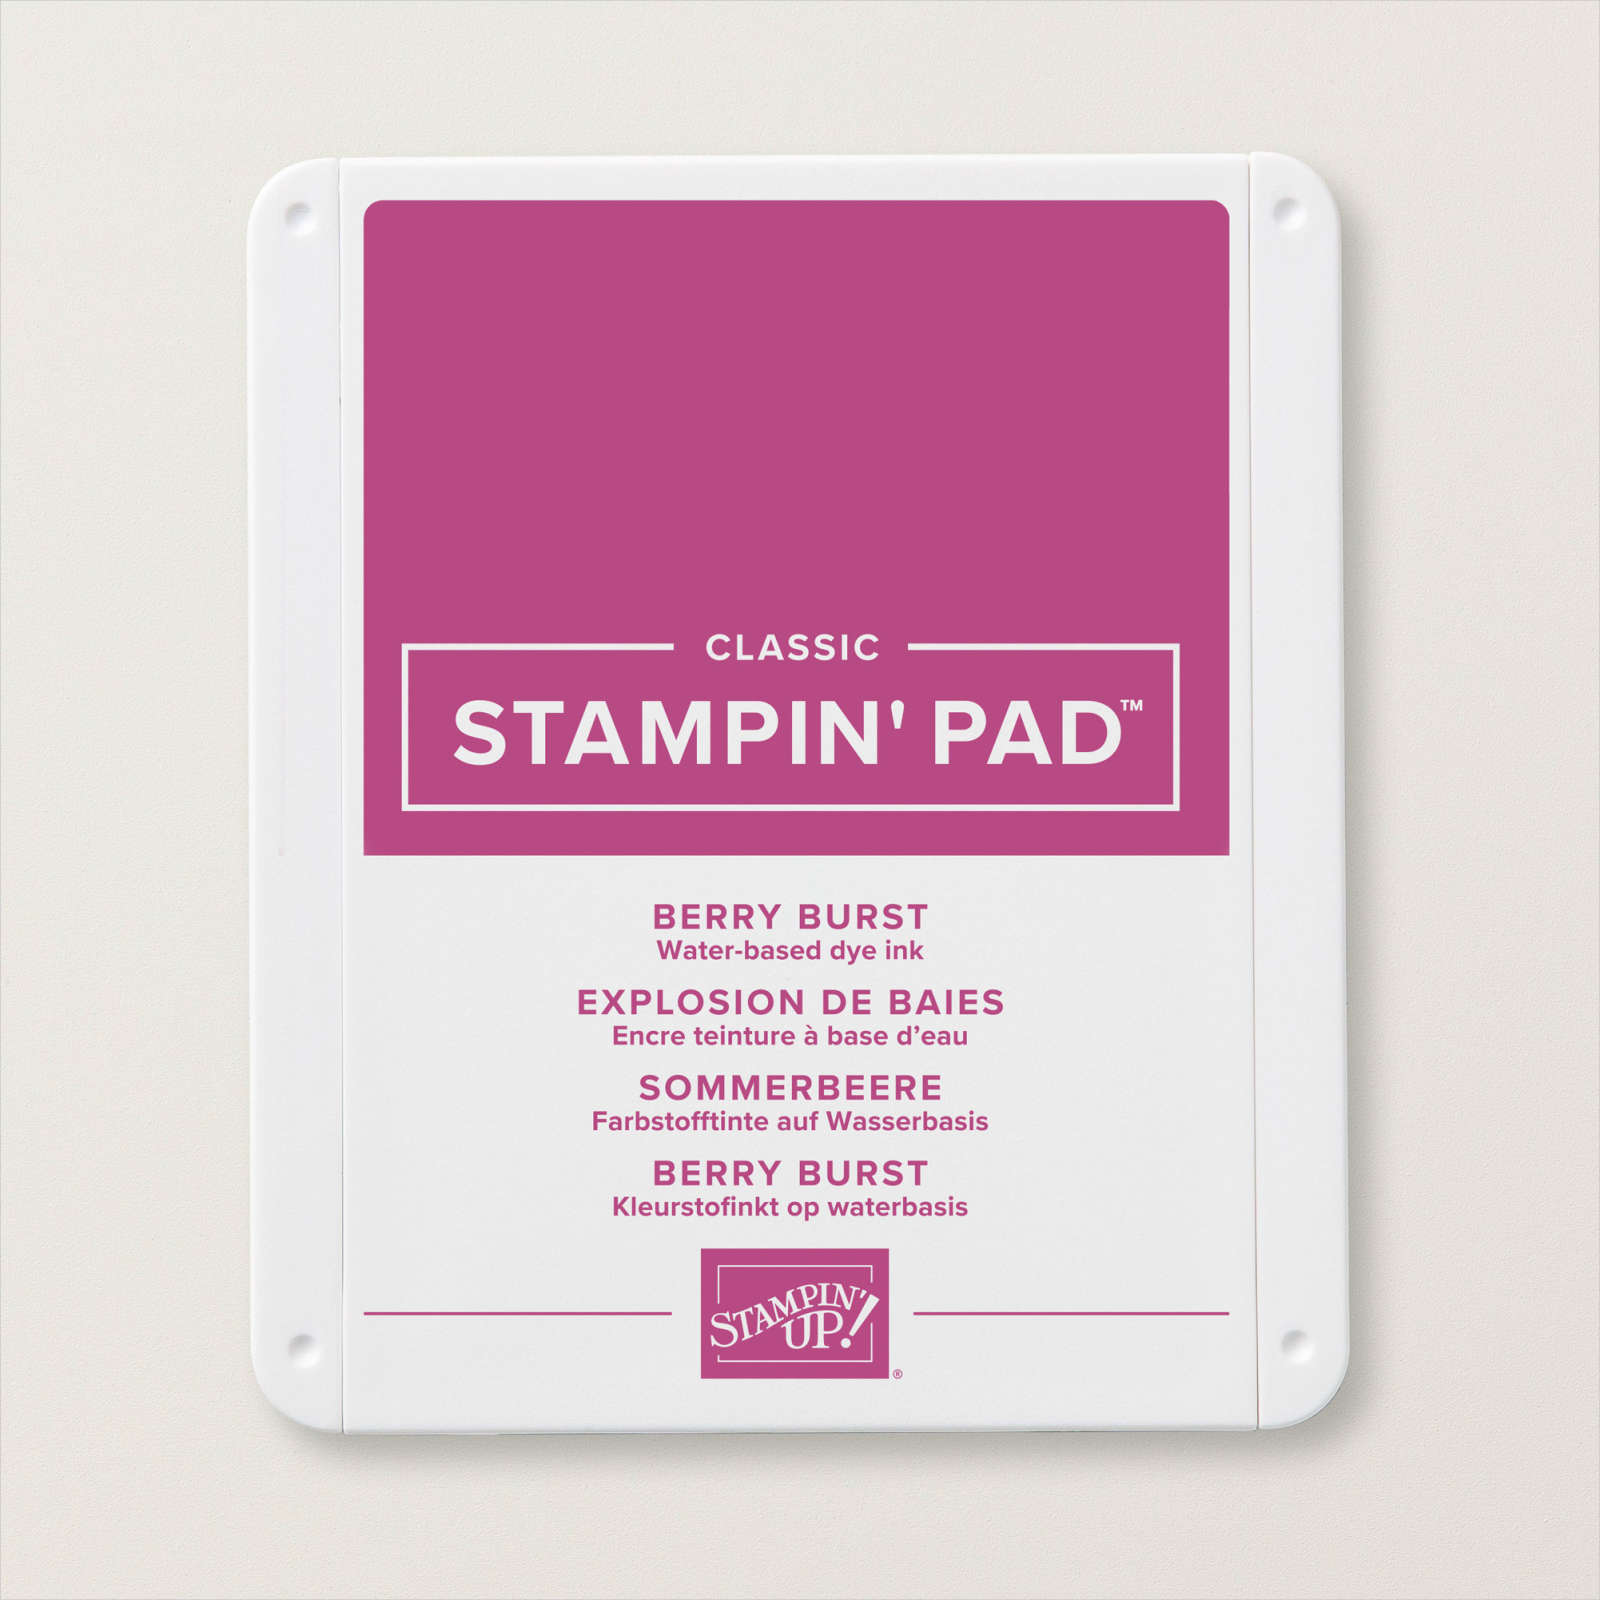
Today’s card uses the Sending Smiles stamp set and Sending Dies which carried over to this current catalogue. Yay! I embossed a panel of Blackberry Bliss card using the Quatrefoile Tile Embossing Folder. I stamped “birthday wishes” from the Sending Smiles stamp set onto the bottom of Basic White card using Berry Burst ink. The stamped Basic White panel is attached to the centre of the embossed card and then scored and folded Blackberry Bliss card. I stamped the two sets of leaf stems onto Basic White card using Lemon Lime Twist ink and cut them out using the co-ordinating Sending Dies.
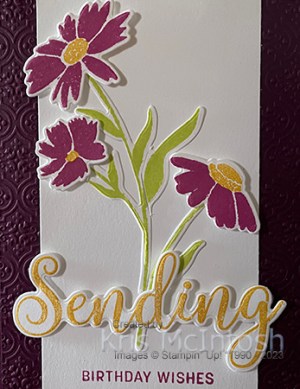
I stamped three of the flowers from the Sending Smiles stamp set onto Basic White card using Berry Burst ink. I added the flower centres using Daffodil Delight before cutting out the flowers using the co-ordinating Sending Dies. I stamped “sending” from the Sending Smiles stamp set onto Basic White card using Daffodil Delight ink and cut it out using the co-ordinating Sending Die.
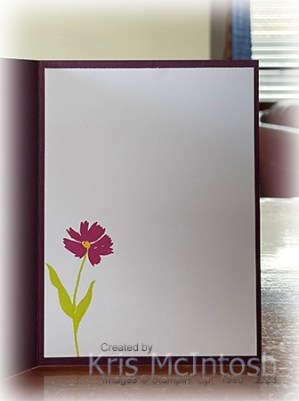
I trimmed the smaller leaf stem of one leaf before attaching both sets of flower stems to the stamped Basic White card. I attached the flowers to the leaf stems using dimensionals. I attached “Sending” across the bottom of the leaf stems also using dimensionals. To decorate the inside of the card, I stamped the small leaf stem image from the Sending Smiles stamp set onto the lower left hand corner using Lemon Lime Twist ink. I stamped one of the flowers from the same stamp set onto the leaf stem using Berry Burst ink. I also added the flower centre using Daffodil Delight ink.
Another stamp set that I am happy to see carrying over to the new Annual Catalogue. Such a versatile stamp set with lots of different greetings to suit many occasions.
Bye for now,
Kris
Product Used:


Dad
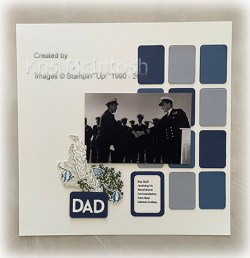
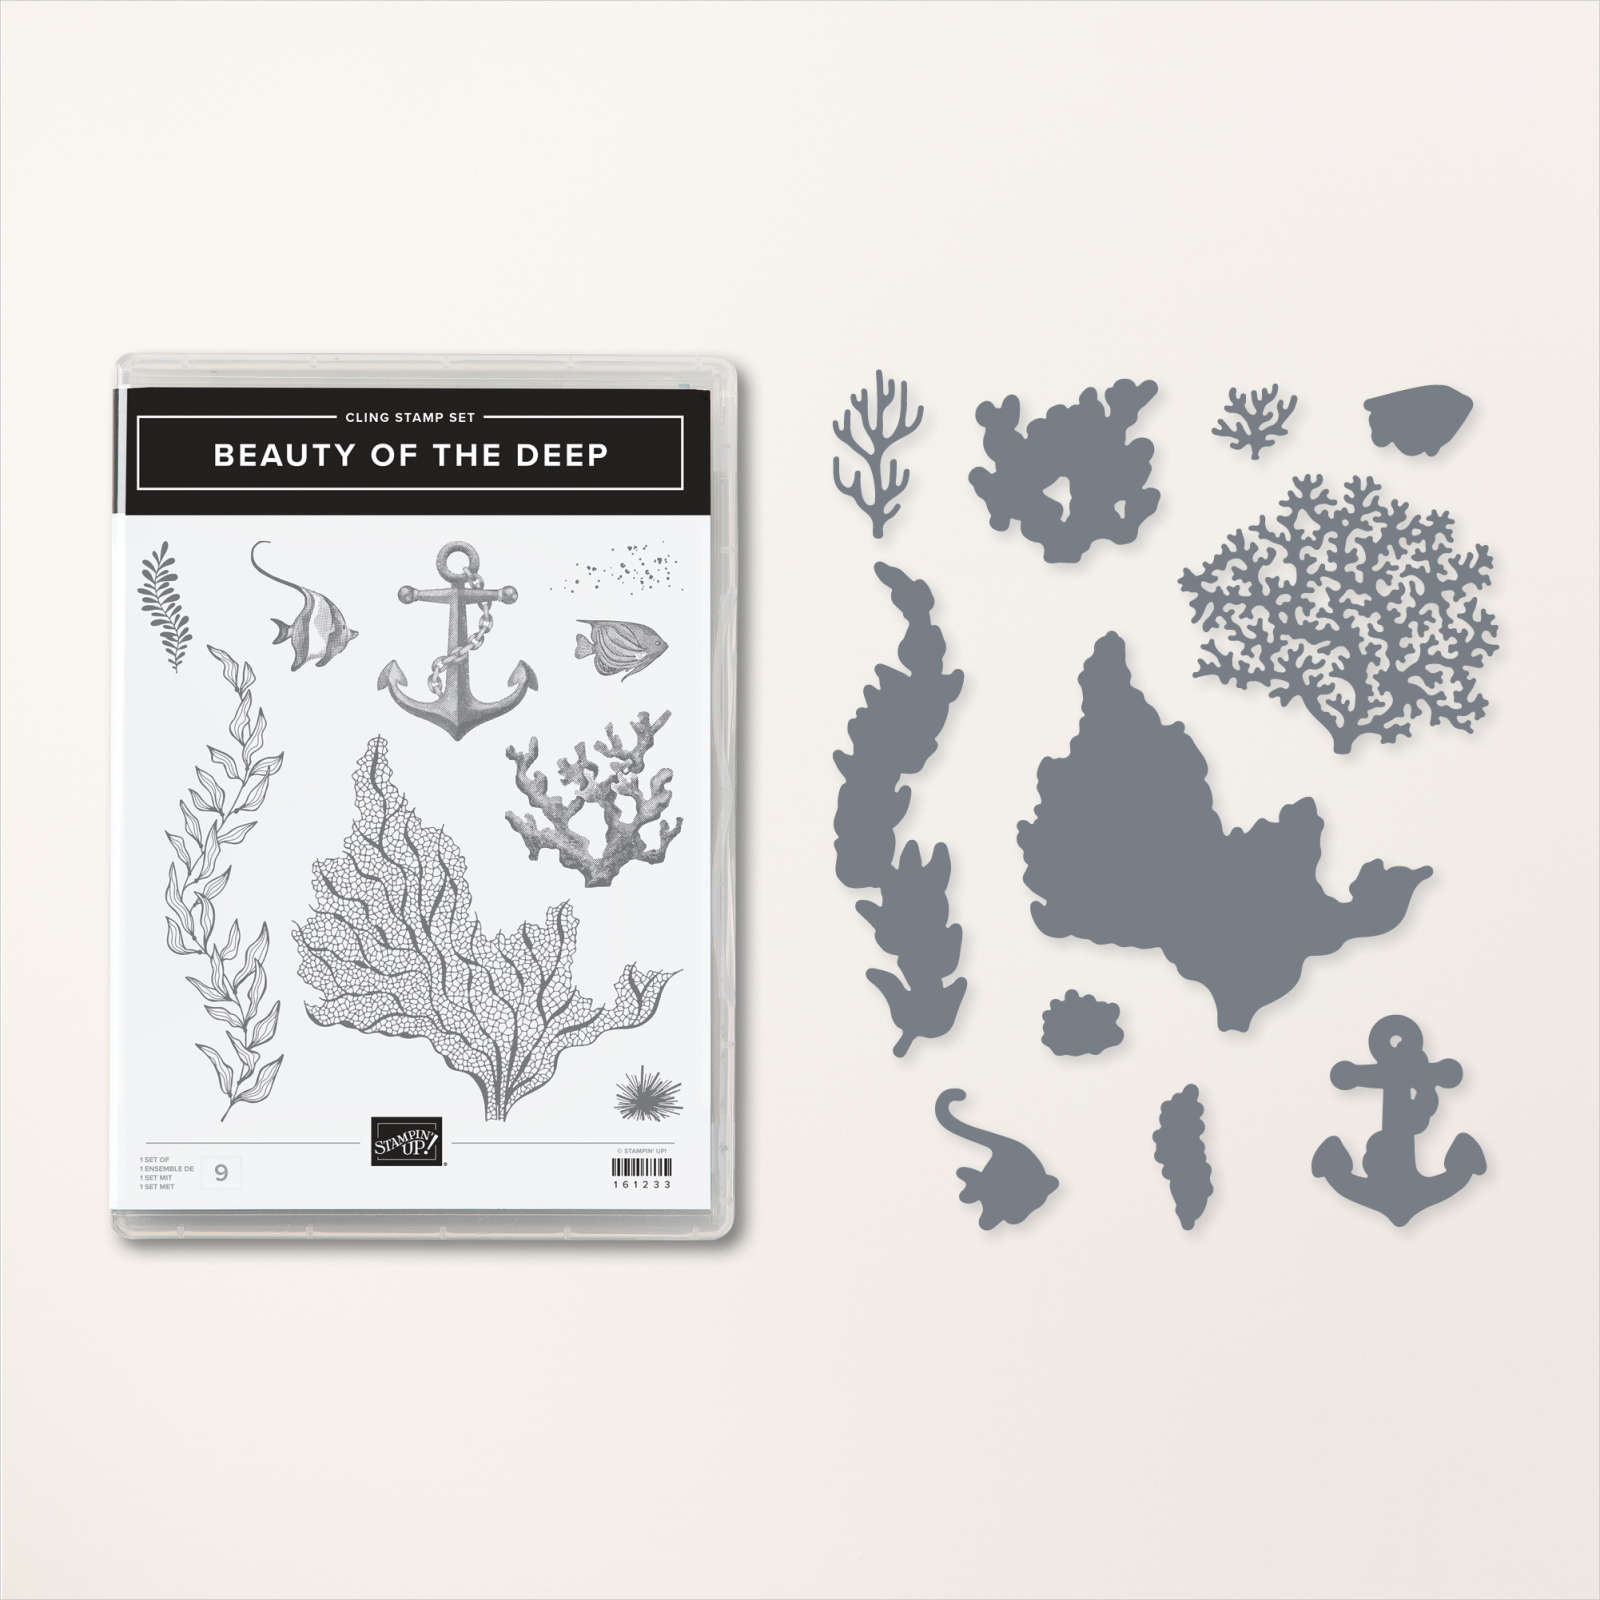
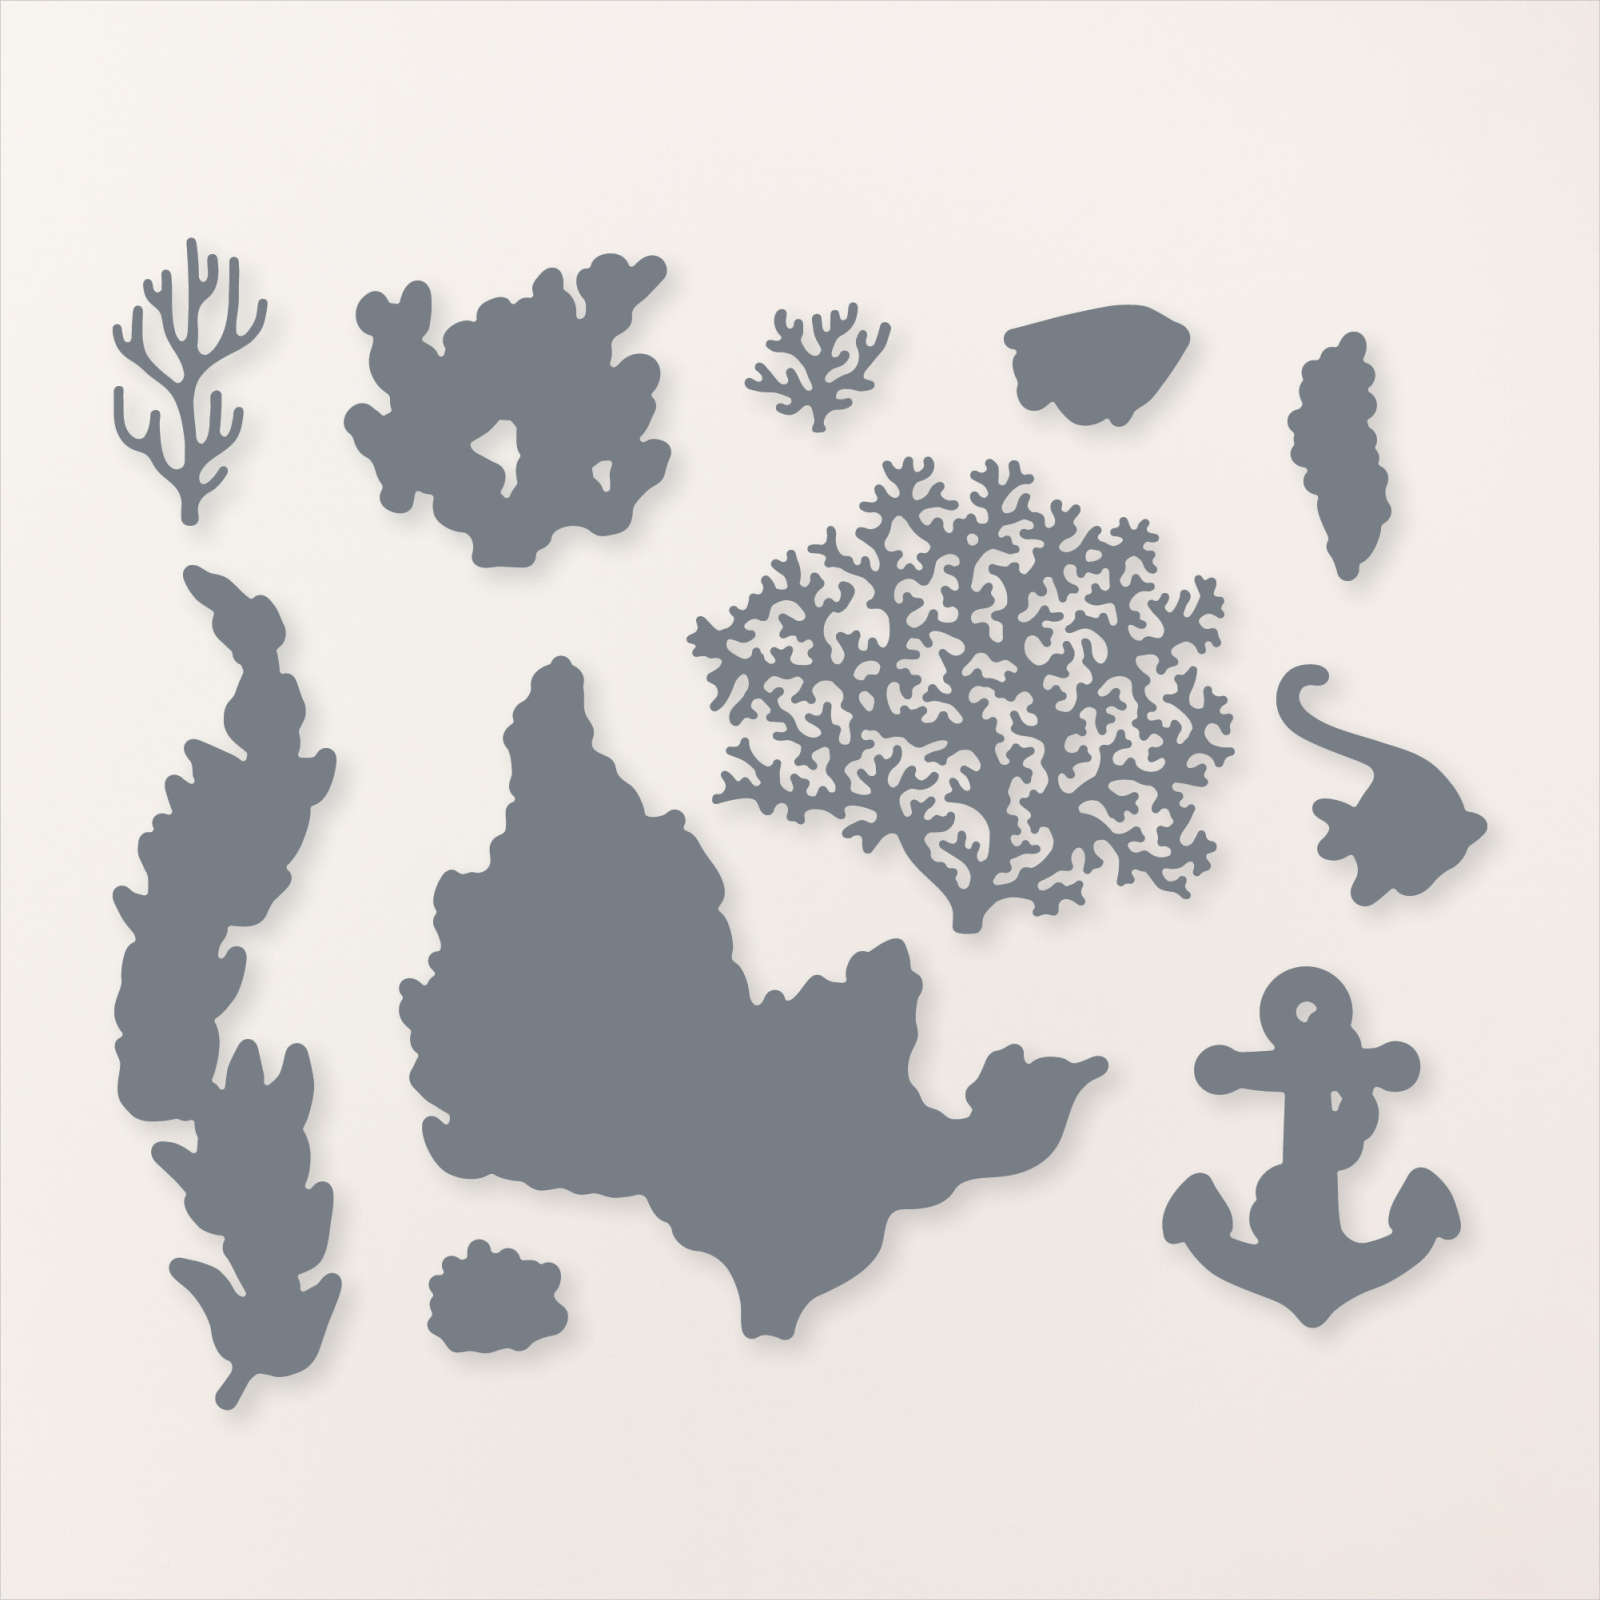
I was going through a bag of photos that my Dad gave to my daughter and found this photo of my Dad receiving a Naval Board Commendation. I am not sure of the year so will have to check with Dad. I began by cutting Misty Moonlight, Night of Navy and Smoky Slate card using the second smallest rectangle from the Nested Essential Dies. I attached the rectangles to the right hand side of a Very Vanilla page. I did cut one rectangle larger so that I could add a smaller rectangle with my journaling which I printed onto Very Vanilla card. I attached my photo using mini dimensionals. I stamped two of the seaweed images from the Beauty of the Deep stamp set onto Very Vanilla card using Mossy Meadow ink and cut them out using the co-ordinating Beauty of the Deep Dies.

I also stamped three fish images onto Very Vanilla card using Misty Moonlight ink using the stamps from the Beautify of the Deep stamp set. The fish were cut out using the co-ordinating Beauty of the Deep Dies. I also cut Mossy Meadow card using one of the seaweed dies from the Beauty of the Deep Dies. I layered the seaweed and fish images below the photo, using dimensionals where necessary. I cut the title from Very Vanilla card using the retired Playful Alphabet Dies and attached them to a Night of Navy rectangle cut using the Nested Essential Dies. I attached the title below the seaweed and fish. I am very happy with the way this turned out.
Bye for now,
Kris
Product Used:


Trucking Along

Yesterday on my Facebook Live, I shared some cards I made using the Trucking Along stamp set and Trucking Along Builder Punch. This bundle is an Online Exclusive which means you can only find it online and it has no specific end date. Although if you want the bundle, I wouldn’t wait too long to purchase it because we never know when they are going to end. For today’s card, I embossed a piece of Blueberry Bushell card using the Timeworn Type 3D Embossing Folder and attached it to scored and folded Thick Basic White A4. I cut Basic White card using one of the rectangles from the Scalloped Contour Dies and stamped the ground image from the Trucking Along stamp set across the bottom using Memento ink.

I also stamped the grass image from the Trucking Along stamp set across the panel using Shaded Spruce ink. I stamped the outline tree image across the panel using Memento Tuxedo ink and masking the images where necessary. I stamped the greenery image from the Trucking Along stamp set onto the tree images using Shaded Spruce ink. I coloured the tree trunks using the Dark Pecan Pie Stampin’ Blend before attaching the image to the card front. I stamped the solid car image from the Trucking Along stamp set onto Basic White card using Blueberry Bushell ink. I stamped the outline car image over the top using Memento Tuxedo Black ink.

(I found it easier to line up the images if I stamped the solid image first – but that is my choice.) I stamped the tyre fill image using Memento Tuxedo Black ink and added the floral image to the back of the truck using the same ink. I added the flower fill image from the Trucking Along stamp set using Crushed Curry ink. I added a little colour to the leaves and stems using a Light Old Olive Stampin’ Blend. Instead of punch out the truck, I fussy cut the image so that the flowers and car were one panel. I added the car to the stamped scalloped contour die using dimensionals. To decorate the inside of the card, I stamped the grass image onto the lower left hand corner of Basic White card using Shaded Spruce ink. I stamped the outline tree image using Memento ink and added the fill image using Shaded Spruce ink. I used the Dark Pecan Pie Stampin’ Blend to colour the tree trunk. I also stamped one of the greetings from the Trucking Along stamp set using Blueberry Bushell ink.
This is such a fun set to play with and I know you are just going to love it.
Bye for now,
Kris
Product Used:


You’re Absolutely Amazing

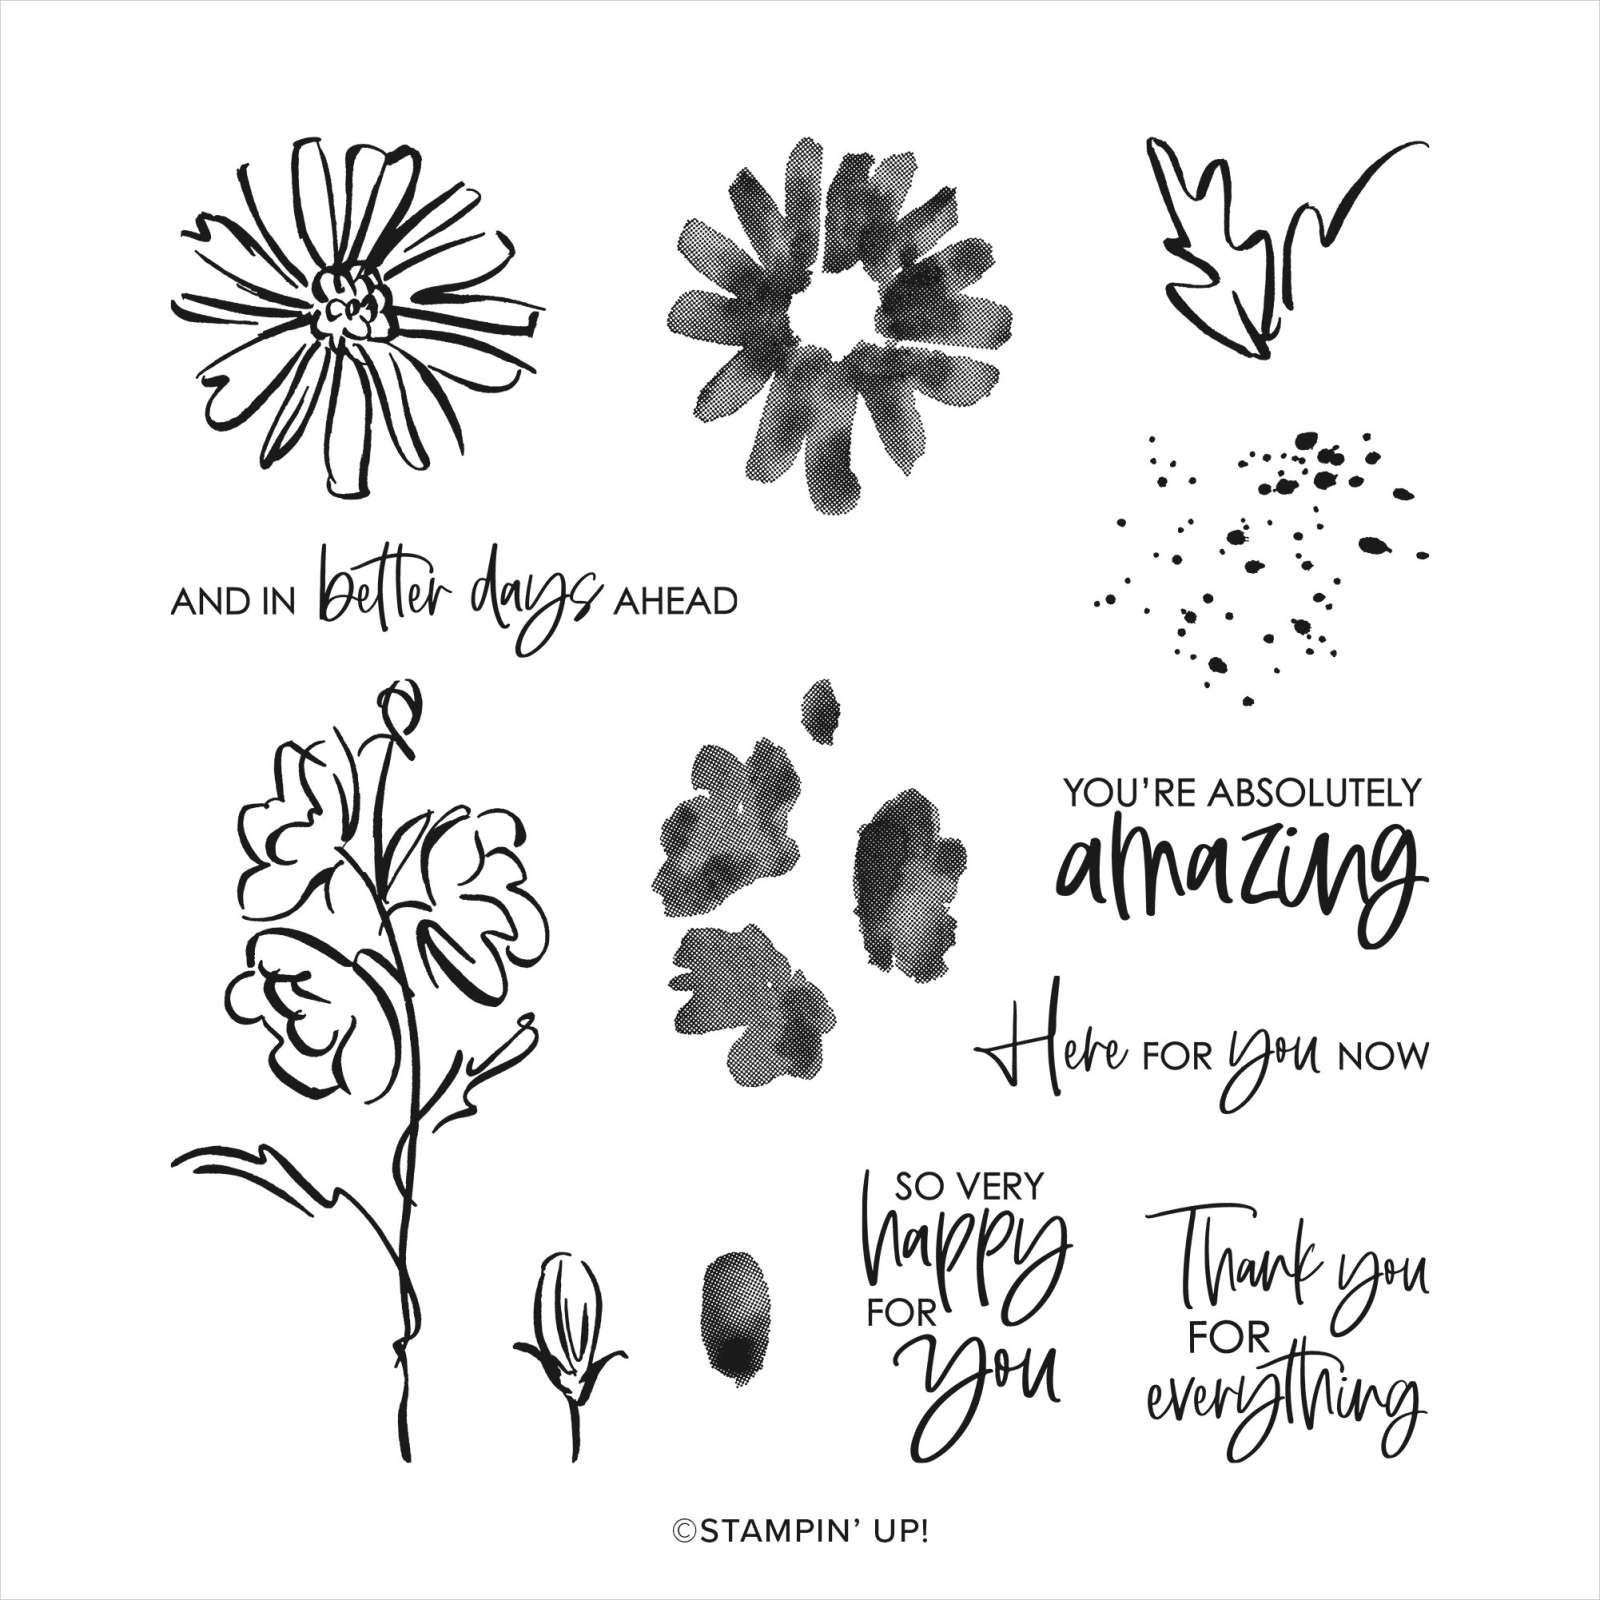
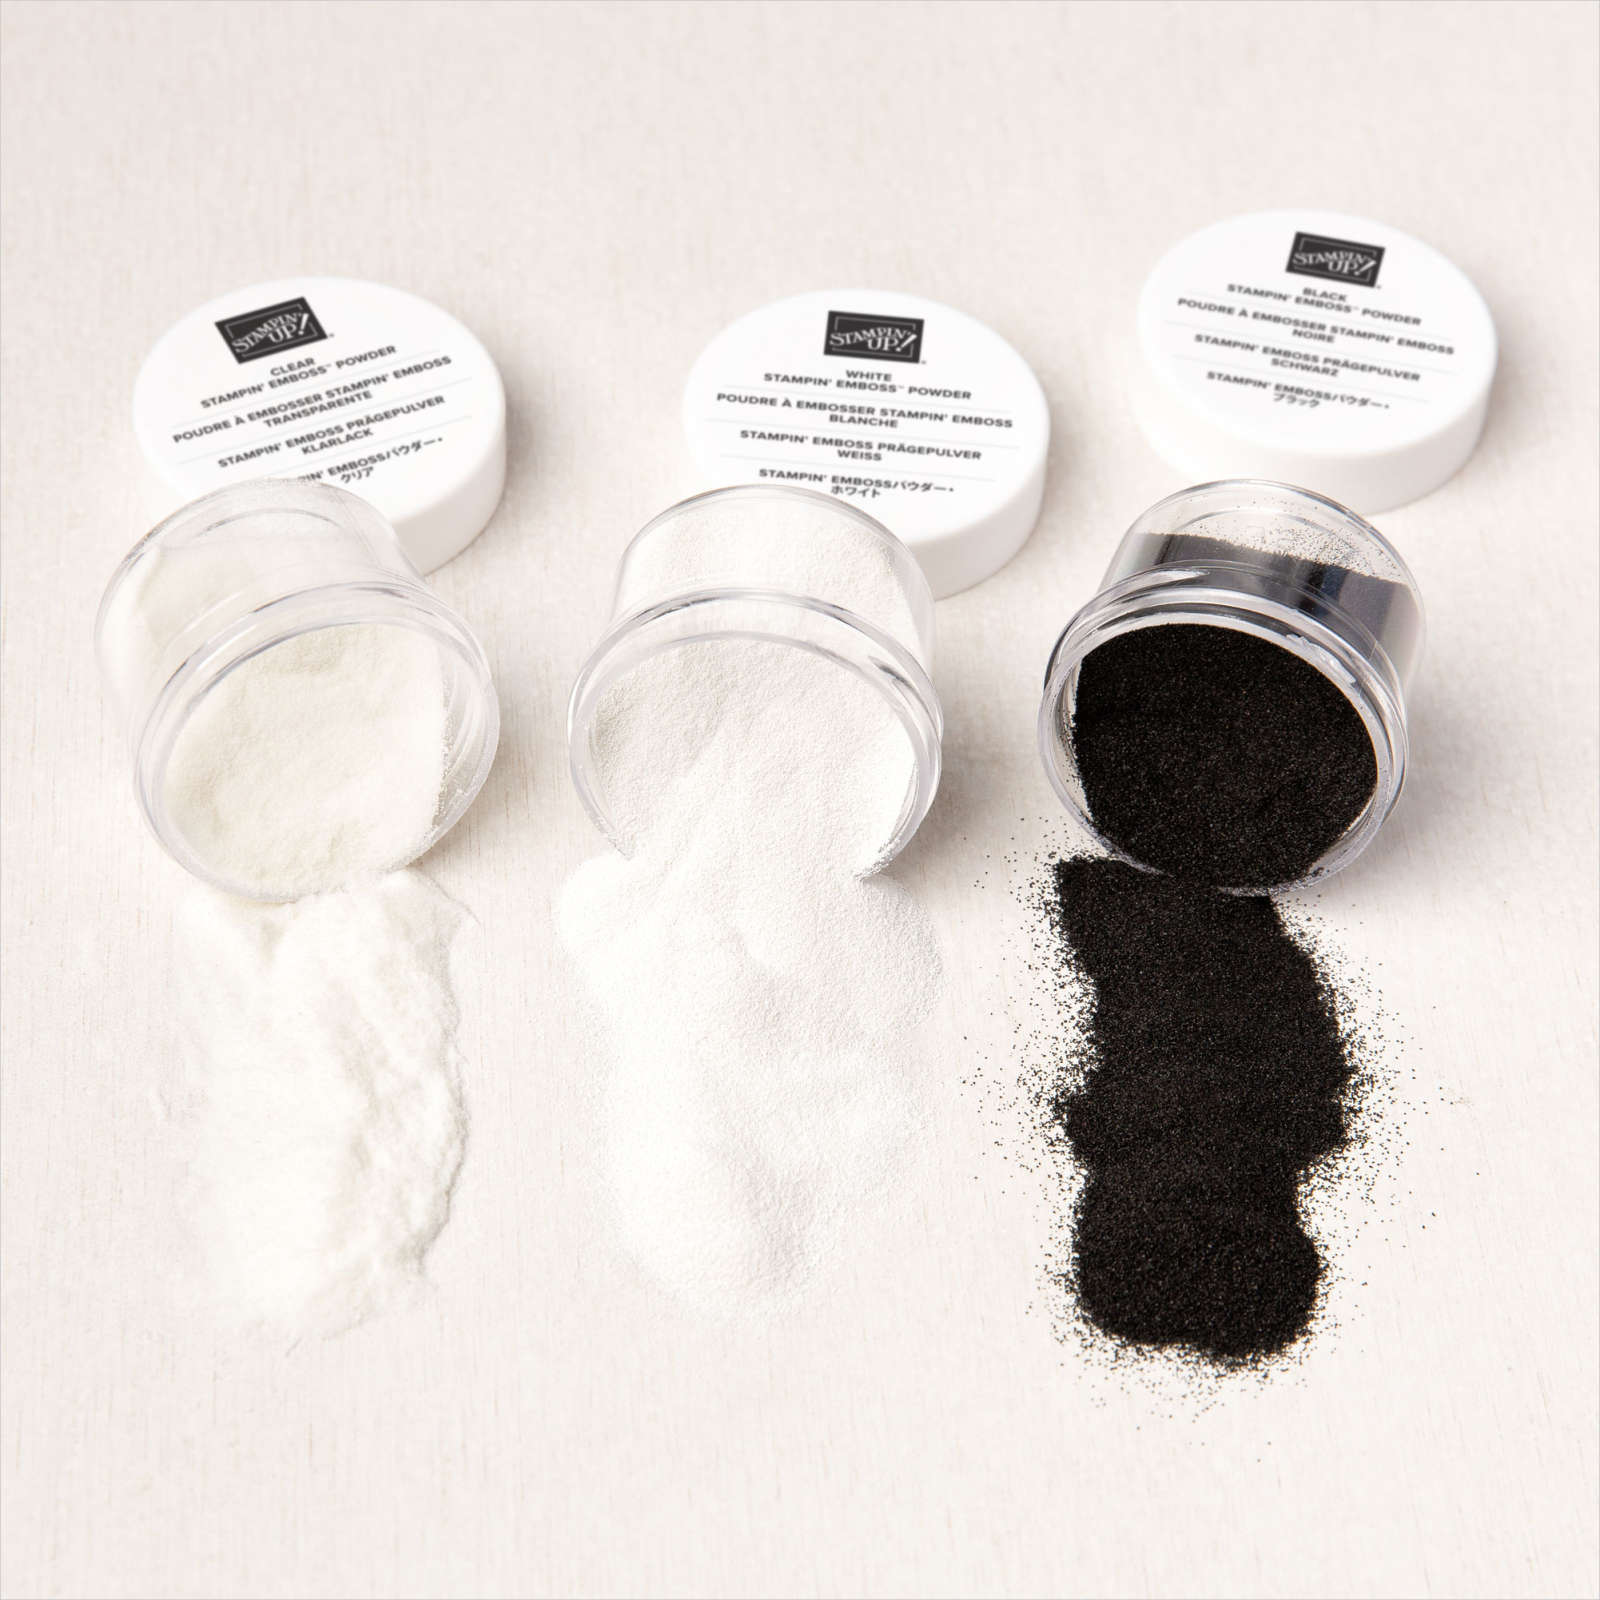
Today’s card is a CASE from the current Annual Catalogue. There are so many beautiful samples in this catalogue, I thought I should try and recreate some of them. I cut one long edge of a piece of Bright & Beautiful 6″ x 6″ Designer Series Paper using the scalloped edge die from the Scalloped Contours Dies. I attached the Designer Series Paper to scored and folded Bubble Bath card. I stamped the single outline flower from the Color & Contour stamp set twice onto Bubble Bath card using Versamark ink. I sprinkled the images with White Embossing Powder and heat set them.
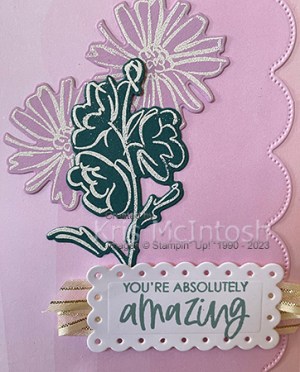
I stamped the flower stem image from the Color & Contour stamp set onto Pretty Peacock card using Versamark ink, sprinkled it with White Embossing Powder and heat set it. All three images were cut out using the co-ordinating dies from the Scalloped Contour Dies. I attached the single flowers to the Designer Series Paper with the flower stem over the top.

I stamped the greeting from the Color & Contour stamp set onto Basic White card using Lost Lagoon ink. The image is cut out using the smallest rectangle die from the Scalloped Contour Dies. I attached piece of Gold & Vanilla Satin Edged Ribbon to the back of the greeting panel before attaching it to the card front using dimensionals. To decorate the inside of the card, I cut one long edge of Basic White card using the scalloped border die from the Scalloped Contour Dies. I stamped another greeting from the Color & Contour stamp set onto the Basic White panel using Lost Lagoon ink. Such a soft and pretty card, don’t you think? Thank you Stampin’ Up! for the inspiration.
Bye for now,
Kris
Product Used:


Inverell

Last March, Ron and I did a small road trip with our friends and our first stop was Inverell. We have driven through this town many times so it was nice to spend some time there and look around. For my page I cut a piece of Early Espresso card in half using one of the Basic Border Dies. I attached the die cuts to one long edge of two pieces of retired In Good Taste Designer Series Paper. The panels are attached to the outside edges of two Basic White 12″ x 12″ pages.
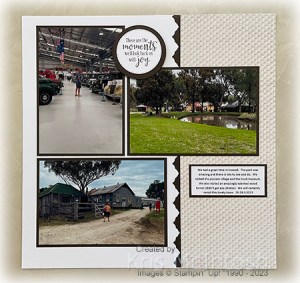
I attached each of my photos to Early Espresso card before attaching them to the pages. I printed the journaling onto Basic White card and attached it to Early Espresso card before attaching it to the right hand page. I printed the title onto Basic White card, cut it out and attached it to the left hand page. I stamped “adventure awaits” from the retired Let’s Set Sail stamp set , cut it out using one of the circles from the Stylish Shapes Dies. The greeting is attached to an Early Espresso circle cut using the same dies and attached to the left hand page. I stamped a second greeting onto Basic White card using Early Espresso ink, this time using the retired Peaceful Moments stamp set. This greeting is also cut out using the Stylish Shapes Dies. Again this is attached to Early Espresso card and then the right hand page.

So simple, but so many memories.
Bye for now,
Kris
Product Used:


Paper Florals

This week on my Facebook Live, I shared some ideas on how to create and use the Paper Florist Dies. Today I have another card to share with you. For this card I cut Basic White card using the largest rectangle from the Radiating Stitches Dies and stamped the greeting from the Wonderful Thoughts stamp set onto the upper right hand corner. I attached the stamped panel to scored and folded Fresh Freesia card. I wanted to create a soft colour scheme for my flowers, so I used four pieces of Fluid 100 Watercolour paper.

To one piece, I added Bubble Bath and Fresh Freesia ink. To another I added Highland Heather ink. To the third piece I added Lemon Lolly ink and to the last piece I added Soft Sea Foam ink. I used a watercolour brush to move the colour around a little and then used my Heat Gun to dry the paper. I cut the largest flower pieces and the tulip flowers from the Highland Heather panel.
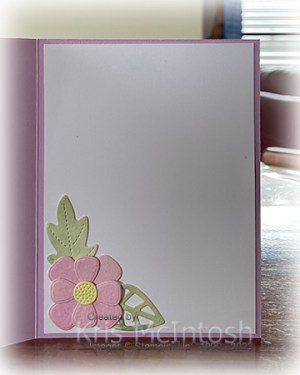
The two smaller flowers were cut from the Bubble Bath/Fresh Freesia panel. All of the leaves were cut from the Soft Sea Foam panel and the flower centres from the Lemon Lolly panel. The flowers and leaves are all layered onto the lower left hand corner of the Basic White rectangle frame. To decorate the inside of the card, I added another flower and two leaves to the lower left hand corner of Basic White card. I love how soft and pretty this card is, don’t you. I am sure that with time, I will create more lovely flowers using the fabulous Paper Florist Dies.
I’d love to know what you think.
Bye for now,
Kris
Product Used:


Celebrate with a Milkshake

Today’s card was inspired by one that Amy Richel shared on a Demonstrator only Facebook Page. I changed up the colours and the Designer Series Paper but the layout is all hers. I attached a panel of Bright & Beautiful 6″ x 6″ Designer Series Paper down the left hand side of Basic White card. I added a very narrow strip of Misty Moonlight card before attaching to Lemon Lime Twist card. The whole panel is attached to scored and folded Misty Moonlight card. I stamped the solid glass image from the Share A Milkshake stamp set onto Basic White card using Lemon Lime Twist ink which I stamped onto scrap paper first. I added the detailed glass image over the top using Lemon Lime Twist ink.

I stamped the ice cream image from the Share A Milkshake stamp set onto Basic White card using Berry Burst ink. I also stamped the decorative straw panel onto Basic White card using Berry Burst ink. I cut out all the images using the co-ordinating Share A Milkshake Die. I also cut Misty Moonlight card using the background die from the Share A Milkshake Dies.

I attached the background image to the Basic White part of the card front. I attached the ice cream to the top of the glass and added the straw. The whole glass/ice cream image is attached to the card front using dimensionals. I stamped “celebrate” from the Share A Milkshake stamp set onto Misty Moonlight card using Misty Moonlight ink. I cut out the greeting using one of the banners from the Stylish Shapes Dies. The greeting is attached to the card front using dimensionals. To decorate the inside of the card, I attached a narrow strip of the same pattern Bright & Beautiful Designer Series Paper across the bottom of Basic White card. I attached a very narrow strip of Misty Moonlight card next to the Designer Series Paper. I also stamped the greeting from the Charming Sentiments stamp set on the Basic White card using Misty Moonlight ink.
Thanks again to Amy for the inspiration.
Bye for now,
Kris
Product Used:


H.M.A.S. Latrobe
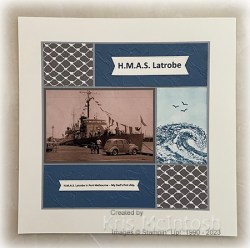
I found this photo amongst some that my Dad gave to my daughter Sarah. It is a photo of the H.M.A.S. Latrobe which was the first ship he ever served on. I embossed two panels of Misty Moonlight card using the Painted Texture 3 D Embossing Folder. I also cut two pieces of the Let’s Go Fishing 12″ x 12″ Designer Series Paper. I stamped the wave image from the Waves of Inspiration stamp set onto Very Vanilla card using Misty Moonlight ink.

I used a sponge to add Misty Moonlight ink to the rest of the panel before stamping three birds using the stamp from the Waves of Inspiration stamp set and Misty Moonlight ink. I attached my photo to Pebbled Path card before attaching all of the panels to Smoky Slate card. I printed the title and journaling onto Very Vanilla card and used the banners from the Stylish Shapes Dies to cut them out. The title and the journaling are attached to the embossed Misty Moonlight card. The whole panel is attached to Very Vanilla 12″ x 12″ card. I love being able to use photos from my Mum and Dad to create pages for my grandchildren to enjoy.
Bye for now,
Kris
Product Used:


Translucent Birthday
This week in my Facebook Live I shared some cards I created using the Translucent Floral Bundle. Today I have another card to share, although I created this card some time back for a friend who celebrated her birthday (sorry it was late). I attached a piece of Delightfully Eclectic 12″ x 12″ Designer Series Paper to a scored and folded Night of Navy card base. I die cut a piece of Basic White card using the Elegant Border Dies and attached it to the top half of the Designer Series paper. I die cut Basic White card using one of the Deckled Rectangle Dies.
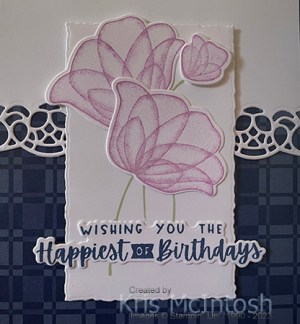
I stamped the flower stem from the Translucent Florals stamp set onto the Basic White rectangle using Soft Sea Foam ink. I stamped two large and one small flower from the Translucent Floral stamp set onto Basic White card using Fresh Freesia ink.
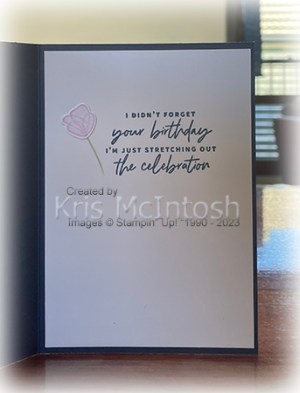
I die cut the flowers using the co-ordinating Translucent Floral Dies. I attached the flowers to the flower stems using a dimensional under the small flower. I attached the panel to the card front using dimensionals. I stamped the greeting from the Charming Sentiments stamp set onto Basic White card using Night of Navy ink. I cut out the greeting using the co-ordinating Sentiment Silhouette Die and attached it across the stamped rectangle. I stamped a greeting from the Something Fancy stamp set onto Basic White card using Night of Navy ink. I stamped the flower stem image from the Translucent Floral stamp set beside the greeting, although I only inked about half the stem. I stamped and die cut a small flower as I did for the card front and attached it to the top of the flower stem. I love how soft and pretty this card is and hope that my friend loved it too.
If you love this stamp set, you will be able to purchase it when the September to December Mini Catalogue goes live on 6th September.
Bye for now,
Kris
Product Used: