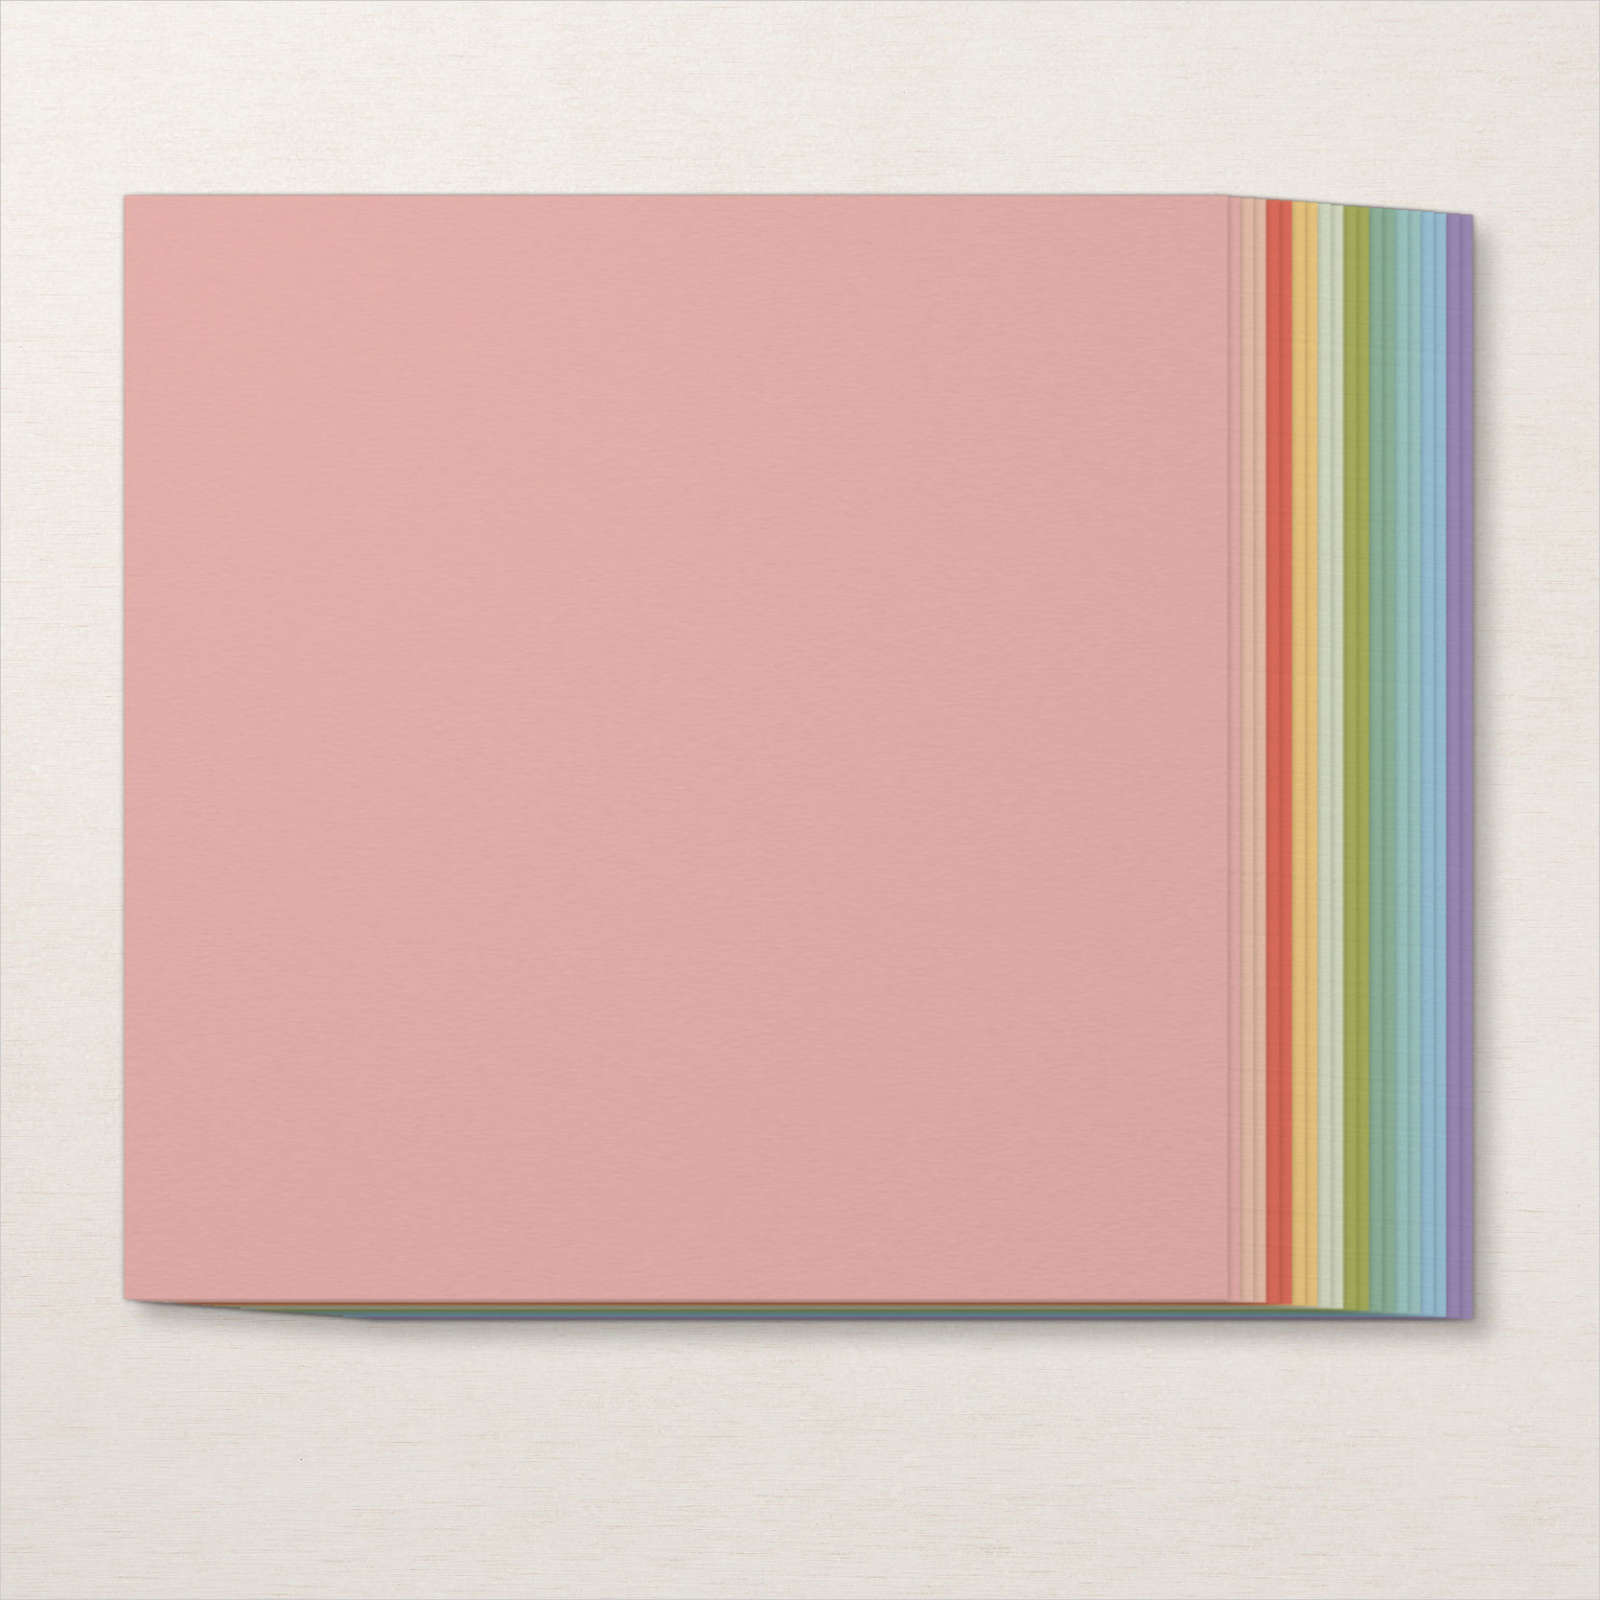
Sending Love & Light
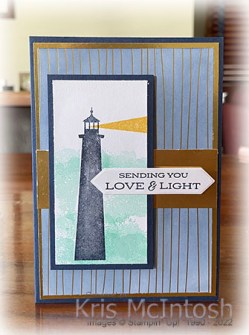
Today I am sharing the second card I made using the Lighthouse Point Bundle. Although this paper is not longer available to earn for free, I could not help including some of the gorgeous Silver & Gold 6″ x 6″ Designer Series Paper. I used a Blending Brush to add Night of Navy ink to a gold striped patterned piece of the Specialty Paper before attaching it to Gold Foil card and then scored and folded Night of Navy card. I also attached a strip of Gold Foil across the centre of the Specialty Paper.
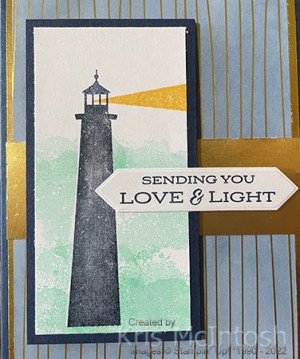
I stamped the solid lighthouse image from the Lighthouse Point stamp set onto Basic White card using Night of Navy ink. I covered the image using a Post-it-Note mask and stamped the circle like image from the Lighthouse Point stamp set over the top using Coastal Cabana ink. I removed the mask and stamped the light image from the Lighthouse Point stamp set using So Saffron ink. I attached the image panel to Night of Navy card and then the card front using dimensionals.
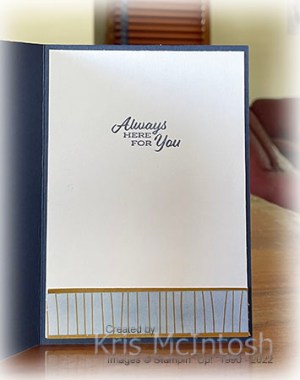
I stamped the greeting from the Lighthouse Point stamp set onto Basic White card using Night of Navy ink and cut it out using the smaller banner from the Lighthouse Dies. The greeting is attached to the card front using dimensionals where necessary. To decorate the inside of the card, I coloured a narrow strip of the same pattern Specialty Paper using a Blending Brush and Night of Navy ink. I attached the Designer Series Paper to a strip of Gold Foil and then the bottom of Basic White card. I stamped a greeting from the Lighthouse Point stamp set onto the Basic White panel using Night of Navy ink.
I really love the subtle colour you get when you add ink to this beautiful Specialty Paper, don’t you?
Bye for now,
Kris
Product Used:


Nana and Grandfather

Today’s page showcases some photos of my grandparents swimming in the pool in our backyard way back in the early 1970’s. I cut down a piece of Basic White 12″ x 12″ card and attached it to a Gray Granite 12″ x 12″ page. I attached a piece of Design a Daydream 12″ x 12″ Designer Series Paper to the left hand side of the Basic White panel. I inked the image from the Paradise Palms stamp set using an Early Espresso and a Mint Macaron Stampin’ Write Maker before stamping onto the upper right hand corner of the Basic White panel. I stamped the two large palm leaf images from the Paradise Palms stamp set onto Petal Pink card using Versamark ink. I also sponged Versamark ink around the edges of the panel before attaching it across the page.

I attached a narrow strip of Early Espresso card across the bottom of the Petal Pink panel. I rounded the corners of my photos using the now retired Detailed Trio Punch. The photos are attached to Early Espresso card which also has the corners punched using the Detailed Trio Punch and attached them across the page. I printed the journaling onto Basic White use my computer and cut it into strips. I sponged Petal Pink ink around the edges of one strip of journaling and Early Espresso ink around the other strip. I attached the journaling across the bottom of the photos. The title is also printed onto Basic White card using my computer and then cut out using my Paper Snips. I punched Mint Macaron card using the plain heart from the Heart Punch Pack. I stamped the greeting from the A Grand Kid stamp set onto the heart using Early Espresso ink. I attached the stamped heart to a scalloped heart punched using the Heart Punch Pack before attached it to the lower left hand corner of the page. This is kind of a special page for me because I do not remember my Nana swimming ever!
Bye for now,
Kris
Product Used:


Framed Occasions

For today’s card I attached a piece of Blackberry Bliss card down the right hand side of Basic White card. I embossed the panel using the Pretty Flowers Embossing Folder and attached it to scored and folded Blackberry Bliss card. I stamped the greeting from the Framed Occasions stamp set onto a strip of Old Olive card using Blackberry Bliss ink. The Old Olive panel is attached across the bottom of the card front.

I cut three different patterns of the Design A Daydream 12″ x 12″ Designer Series Paper using one of the circles from the Beautiful Shapes Dies. I attached the three circles to the card front using dimensionals underneath the striped paper. To decorate the inside of the card, I attached a strip of the striped paper from the Designer A Daydream Designer Series Paper across the bottom of Basic White card. This is not usually a style of card I would create but I do love the way the Designer Series Paper works together with the embossing folder, don’t you?
Bye for now,
Kris
Product Used:


Starter Kit +
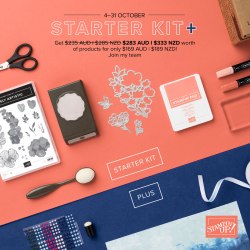
Joining Stampin’ Up! just got a whole lot better for the month of October. From now until the 31st October you can purchase $283.00 of any current Stampin’ Up! product for the crazy low price of $169.00. So if you have ever thought about becoming a Demonstrator and being part of the Stampin’ Up! family or maybe you just have a long wish list, this is the perfect time to join. You can be part of my team if you click on the join button here. Unfortunately you have to be living in Australia to join my team but if you have another favourite Demonstrator in your local area, then contact them to find out more about this amazing offer. Of course along with all your favourite stamps, inks, dies, papers you will be given all the things you need to become an active demonstrator if you wish to use them. Don’t forget once you join, all you orders going forward at subject to a 20% discount!
Have fun.
Bye for now,
Kris
Lighthouse Point Bundle

Today I thought I would share the first card I made using the Lighthouse Point Bundle which you can find in the new Annual Catalogue. I began by embossing Night of Navy card using the Into The Clouds Embossing Folder. After embossing the card, I used a Blending Brush to add some Whisper White Craft Ink. I put the card aside to dry while I created the image panel. I stamped the solid lighthouse image from the Lighthouse Point stamp set onto Basic White card.

I covered the image with a Post-it-Note mask and stamped the sea image from the Lighthouse Point stamp set over the top using Coastal neCabana ink. I also stamped the light image from the Lighthouse Point stamp set using So Saffron ink. I stamped the double rock image from the Lighthouse Point stamp set onto Basic White card using Sahara Sand ink and cut it out using the co-ordinating Lighthouse Die. I attached the double rock image over the bottom of the lighthouse image and used a Stitched Rectangle Die to cut it out. I attached the embossed Night of Navy card to scored and folded Thick Basic White card before attaching the image panel using dimensionals.

I stamped the greeting from the Lighthouse Point stamp set onto Basic White card using Night of Navy ink and cut it out using one of the banner dies from the Lighthouse Dies. The greeting is attached to the card front using dimensionals where necessary. To decorate the inside of the card, I stamped another greeting from the Lighthouse Point stamp set using Night of Navy ink.
I am very happy with my first attempt at using this lovely stamp set. What about you, have you got your eye on this bundle too?
Bye for now,
Kris
Product Used:


Free Shipping

Just a quick post to let you know that on Tuesday 4th October, all Stampin’ Up! orders of $65.00 (AUS) or more will be shipped free! Woo hoo! That means you can shop to your heart’s content and you won’t pay any shipping. Just thought you would want to know.
Bye for now,
Kris
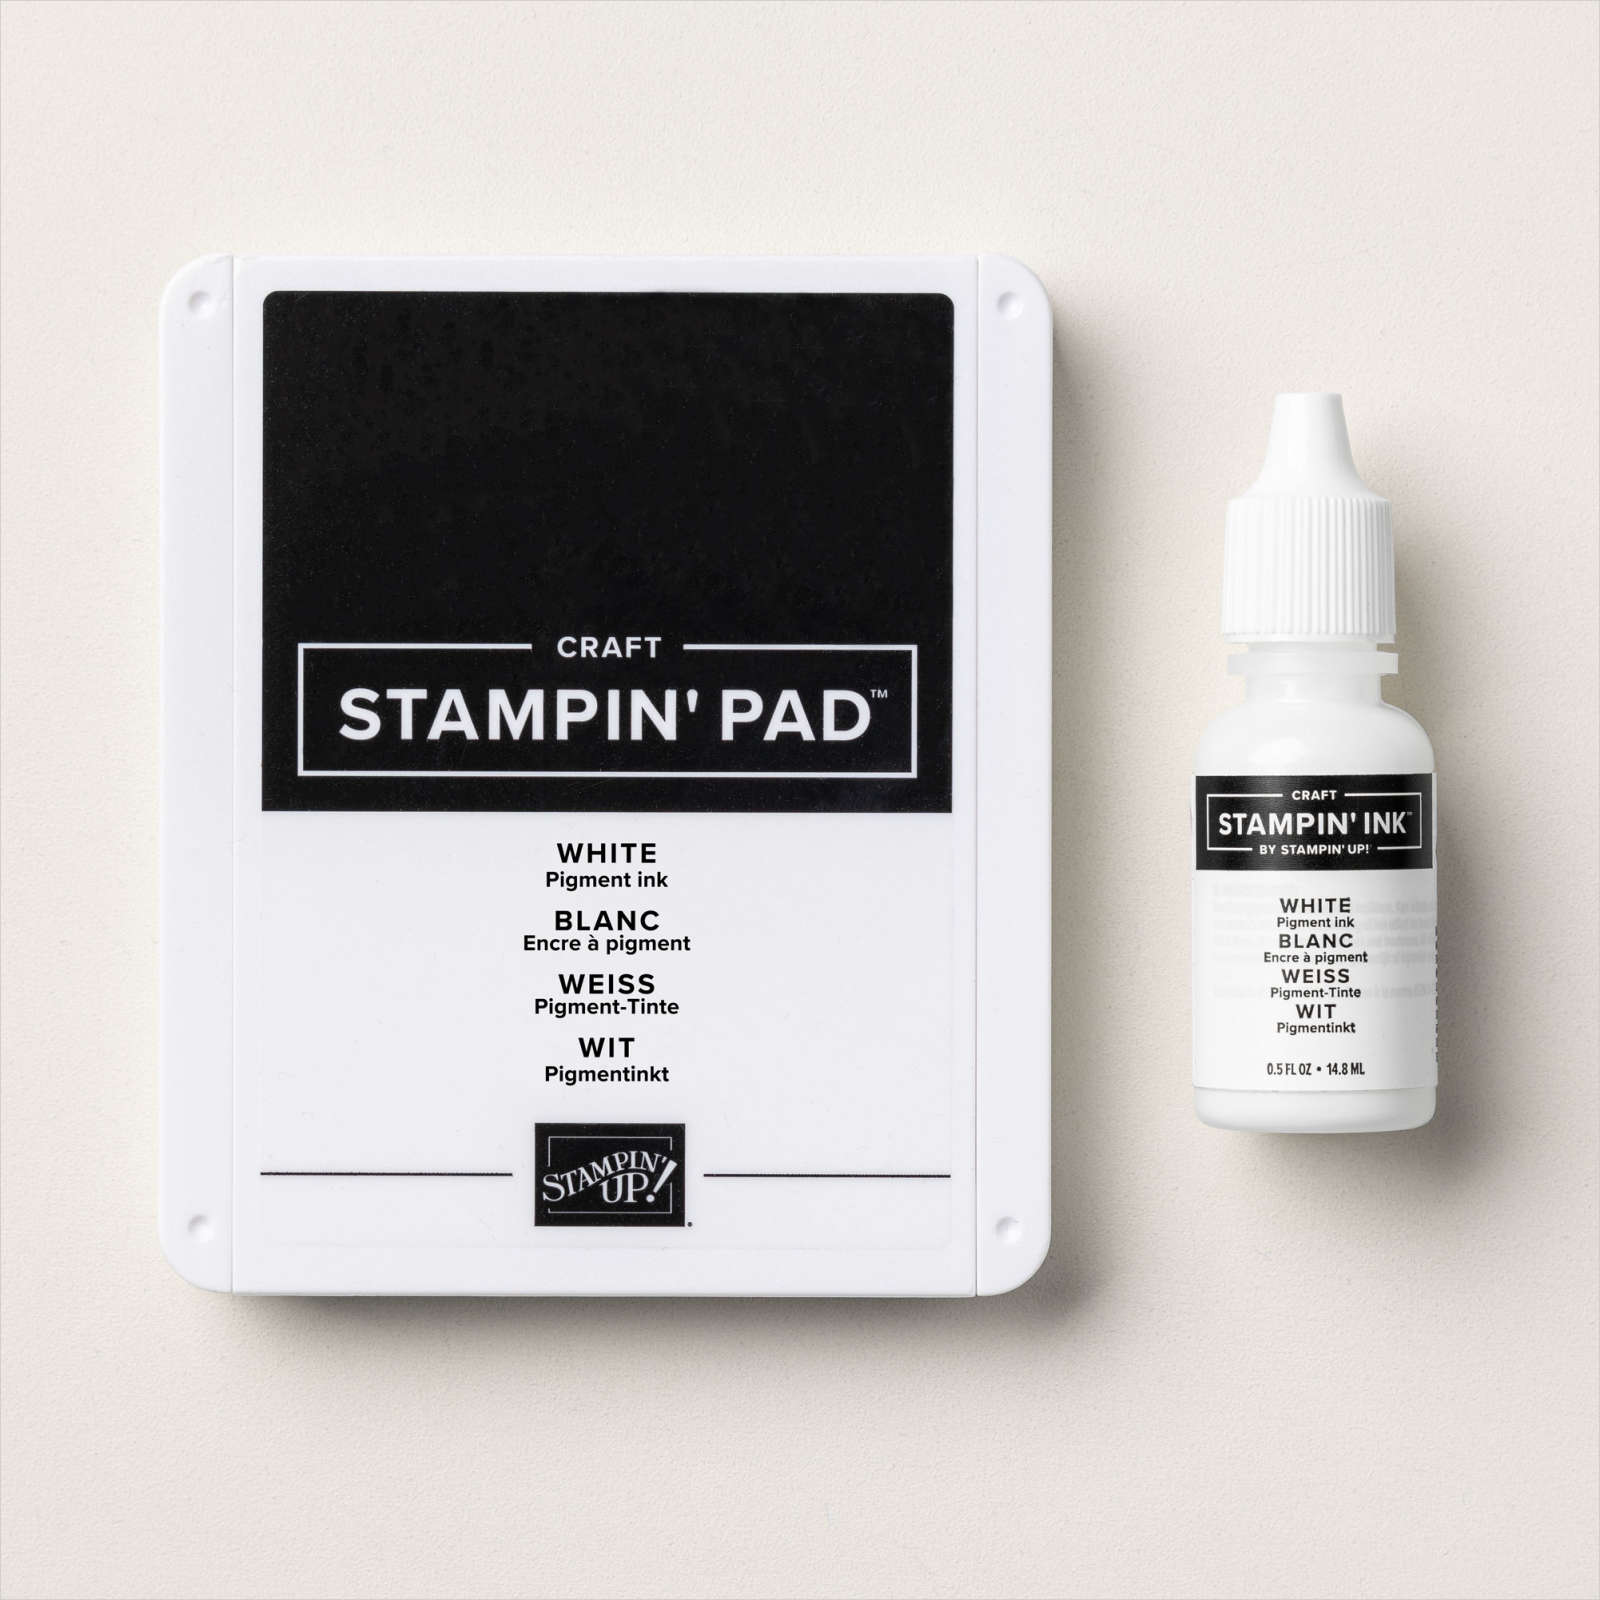
Seasons Greetings
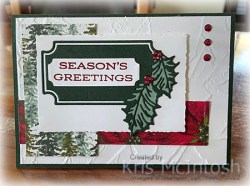
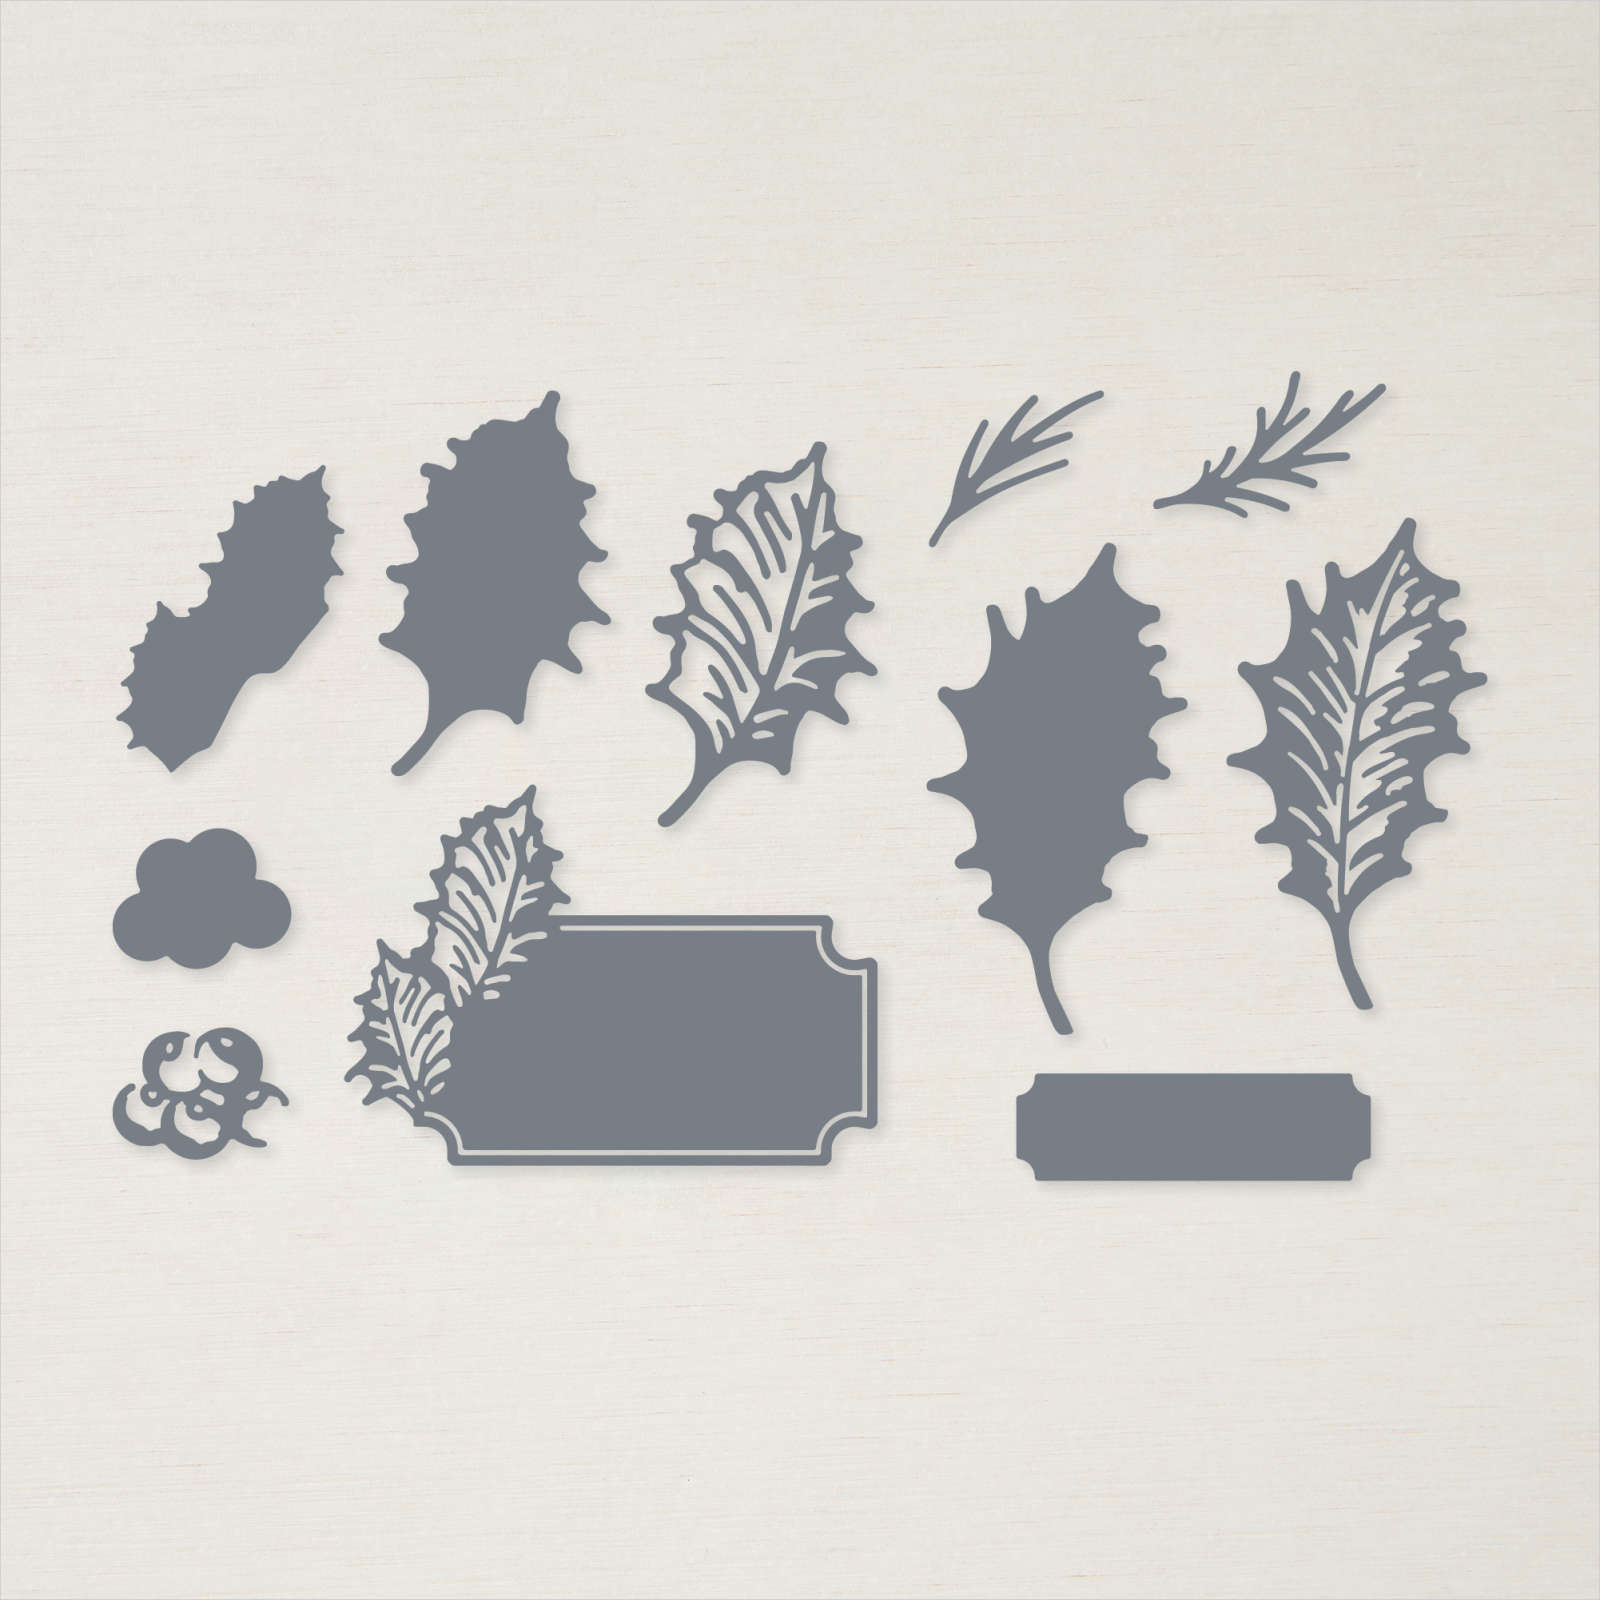
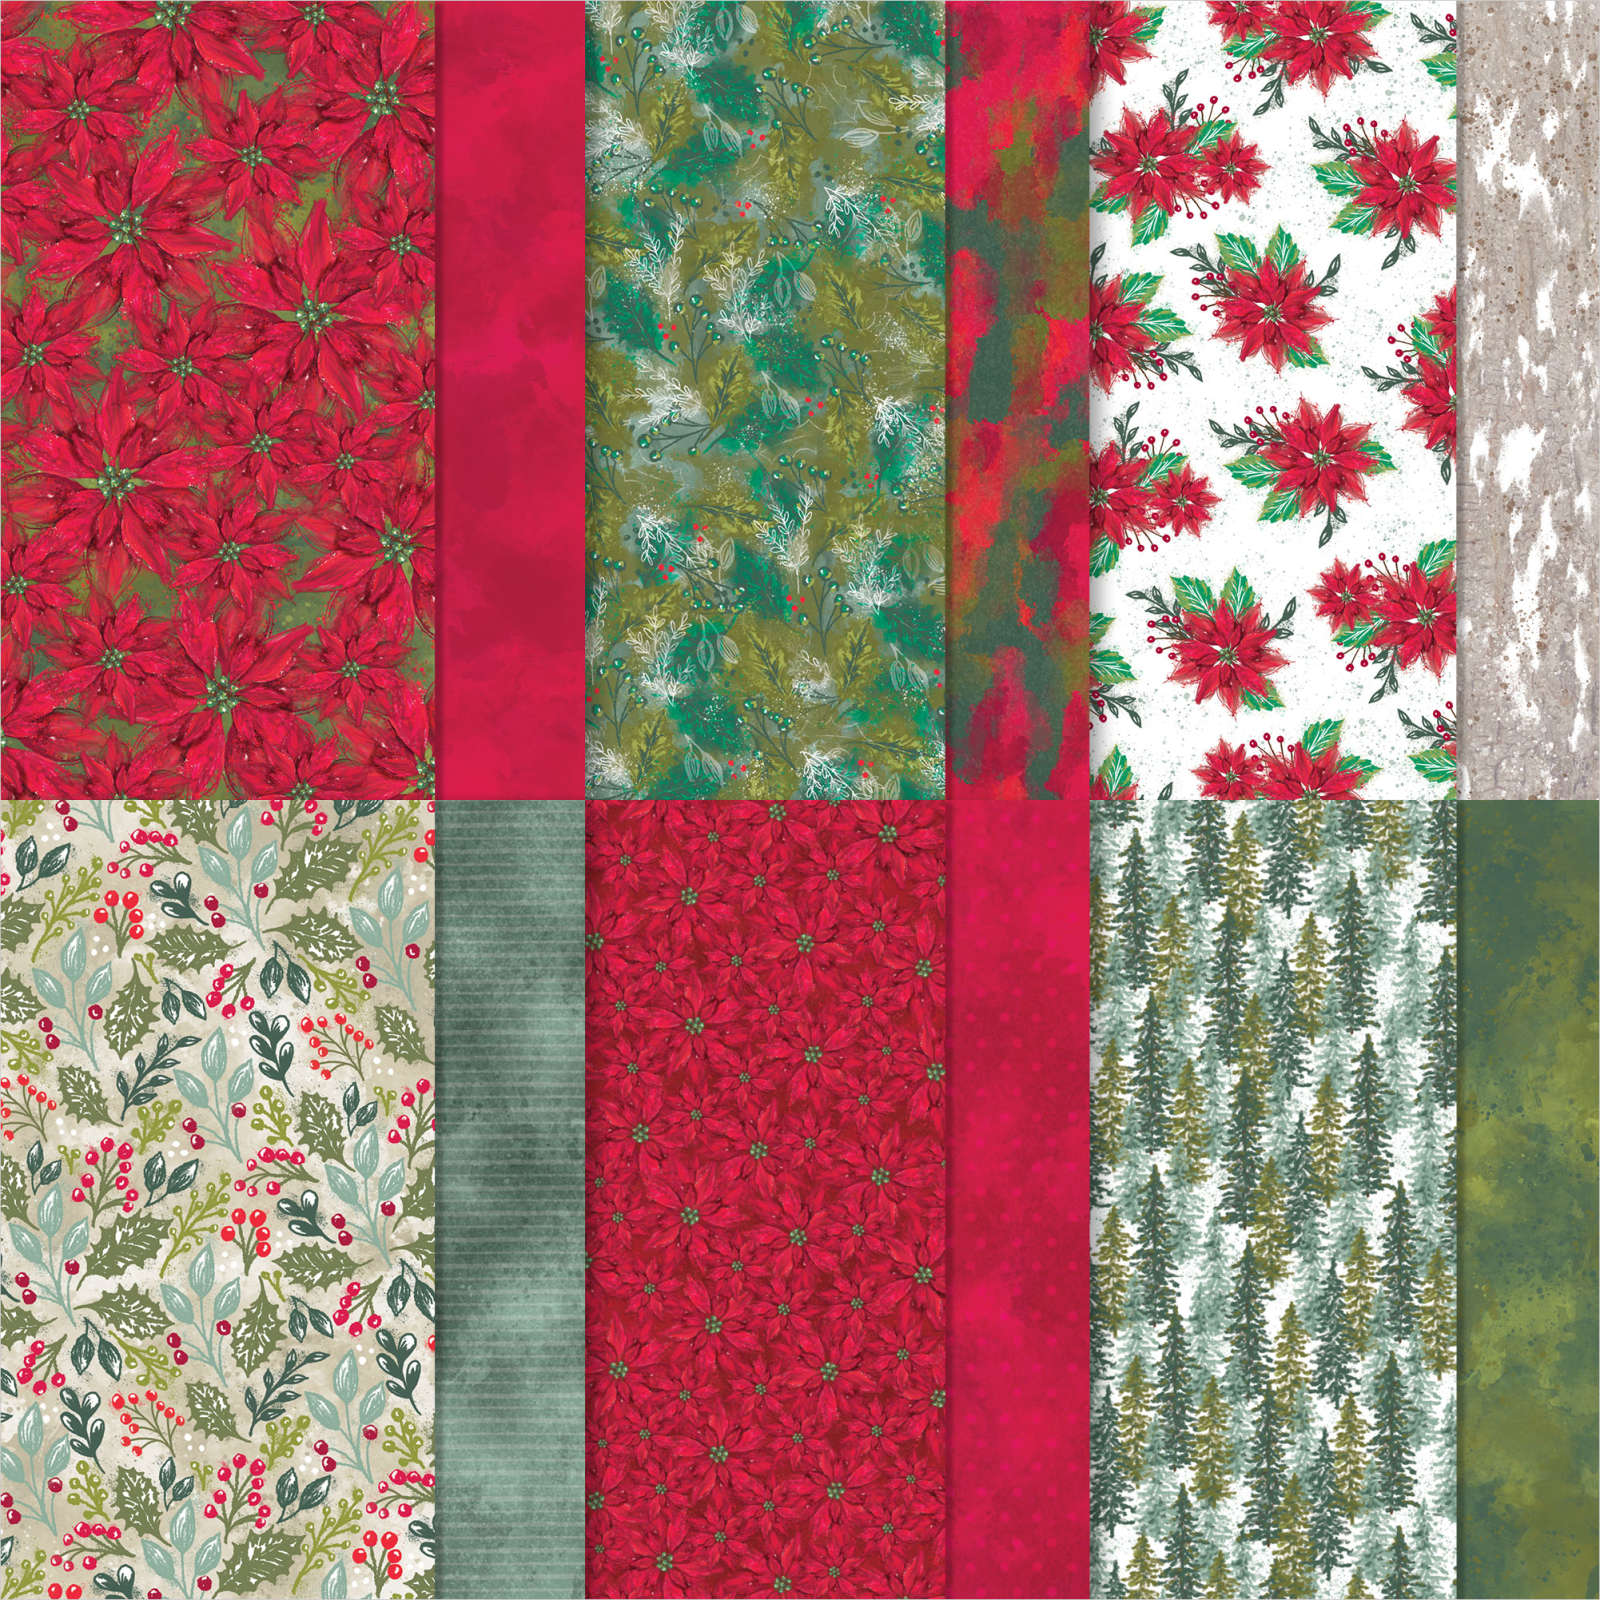
Today I am sharing a card I made using the Leaves of Holly Bundle and the co-ordinating Boughs of Holly 12″ x 12″ Designer Series Paper. I embossed Basic White card using the Painted Texture 3D Embossing Folder and attached it to scored and folded Evening Evergreen card. I cut two pieces of Boughs of Holly Designer Series Paper and attached them to the card front. I cut the label die from the Holly Berry Dies from Evening Evergreen card and the background for the leaves from Soft Succulent card. I attached the panel to a Basic White rectangle cut using the Deckled Rectangle Dies.

I stamped “Seasons Greetings” from the Leaves of Holly stamp set onto Basic White card and cut it out using the label die from the Holly Berry Dies. The greeting is attached to the centre of the Evening Evergreen label. I attached the Basic White panel to the card front using dimensionals. I coloured Basic Rhinestones using the Dark Cherry Cobbler Stampin’ Blend and attached three to each of the leaves on the card front.

I also added three large coloured Rhinestones down the upper right hand side of the card front. To decorate the inside of the card, I stamped another greeting from the Leaves of Holly stamp set onto Basic White ard using Cherry Cobbler ink. I attached a piece of Boughs of Holly Designer Series Paper across the bottom of the stamped panel.
This is an amazing suite of products from the July to December Mini Catalogue and I know that I am going to be using them often. What do you think, do you love them too?
Bye for now,
Kris
Product Used:


Hues of Happiness

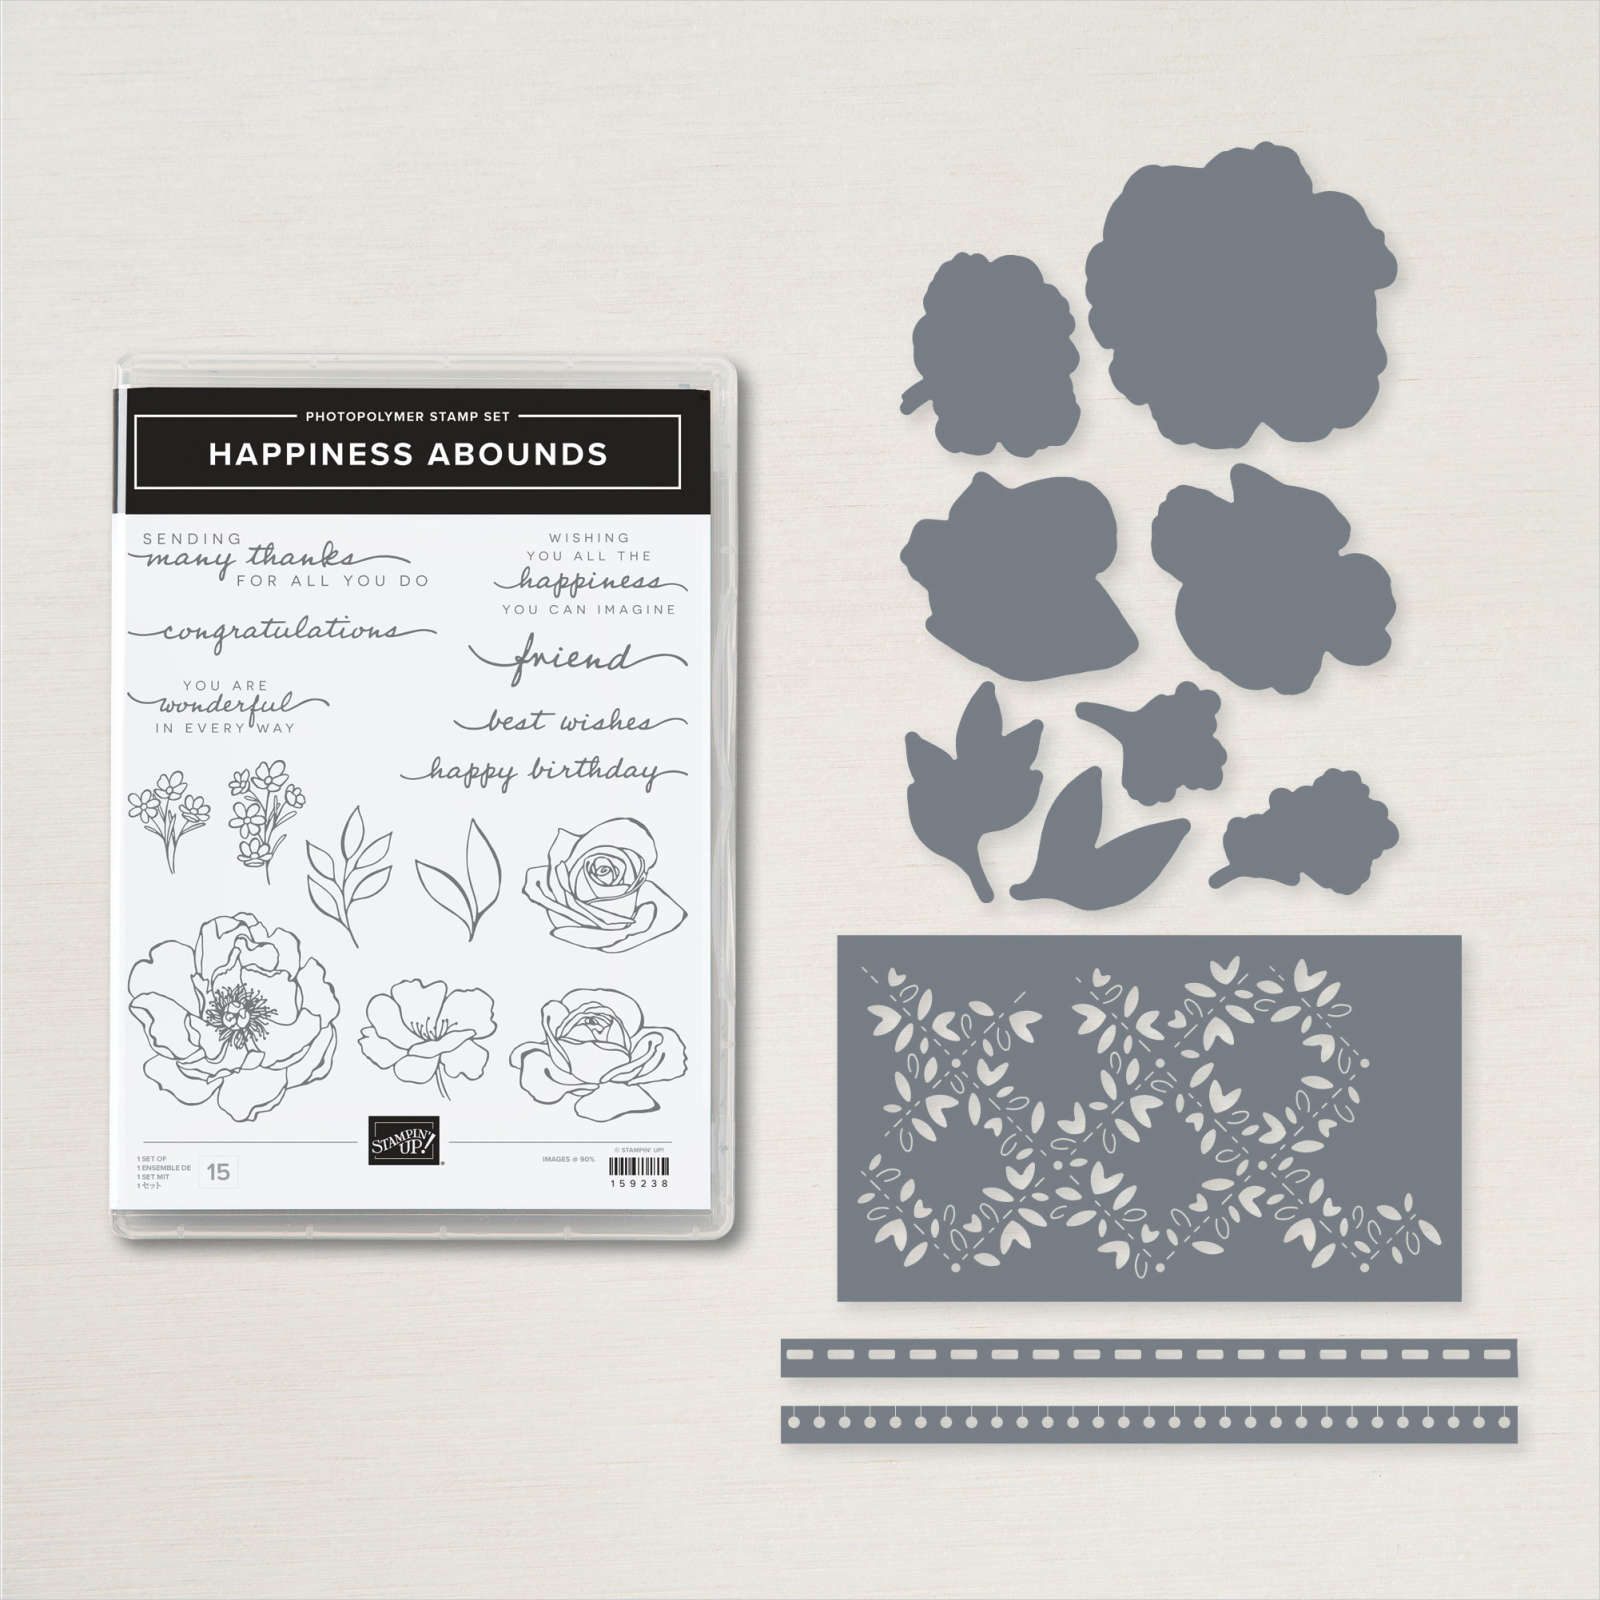
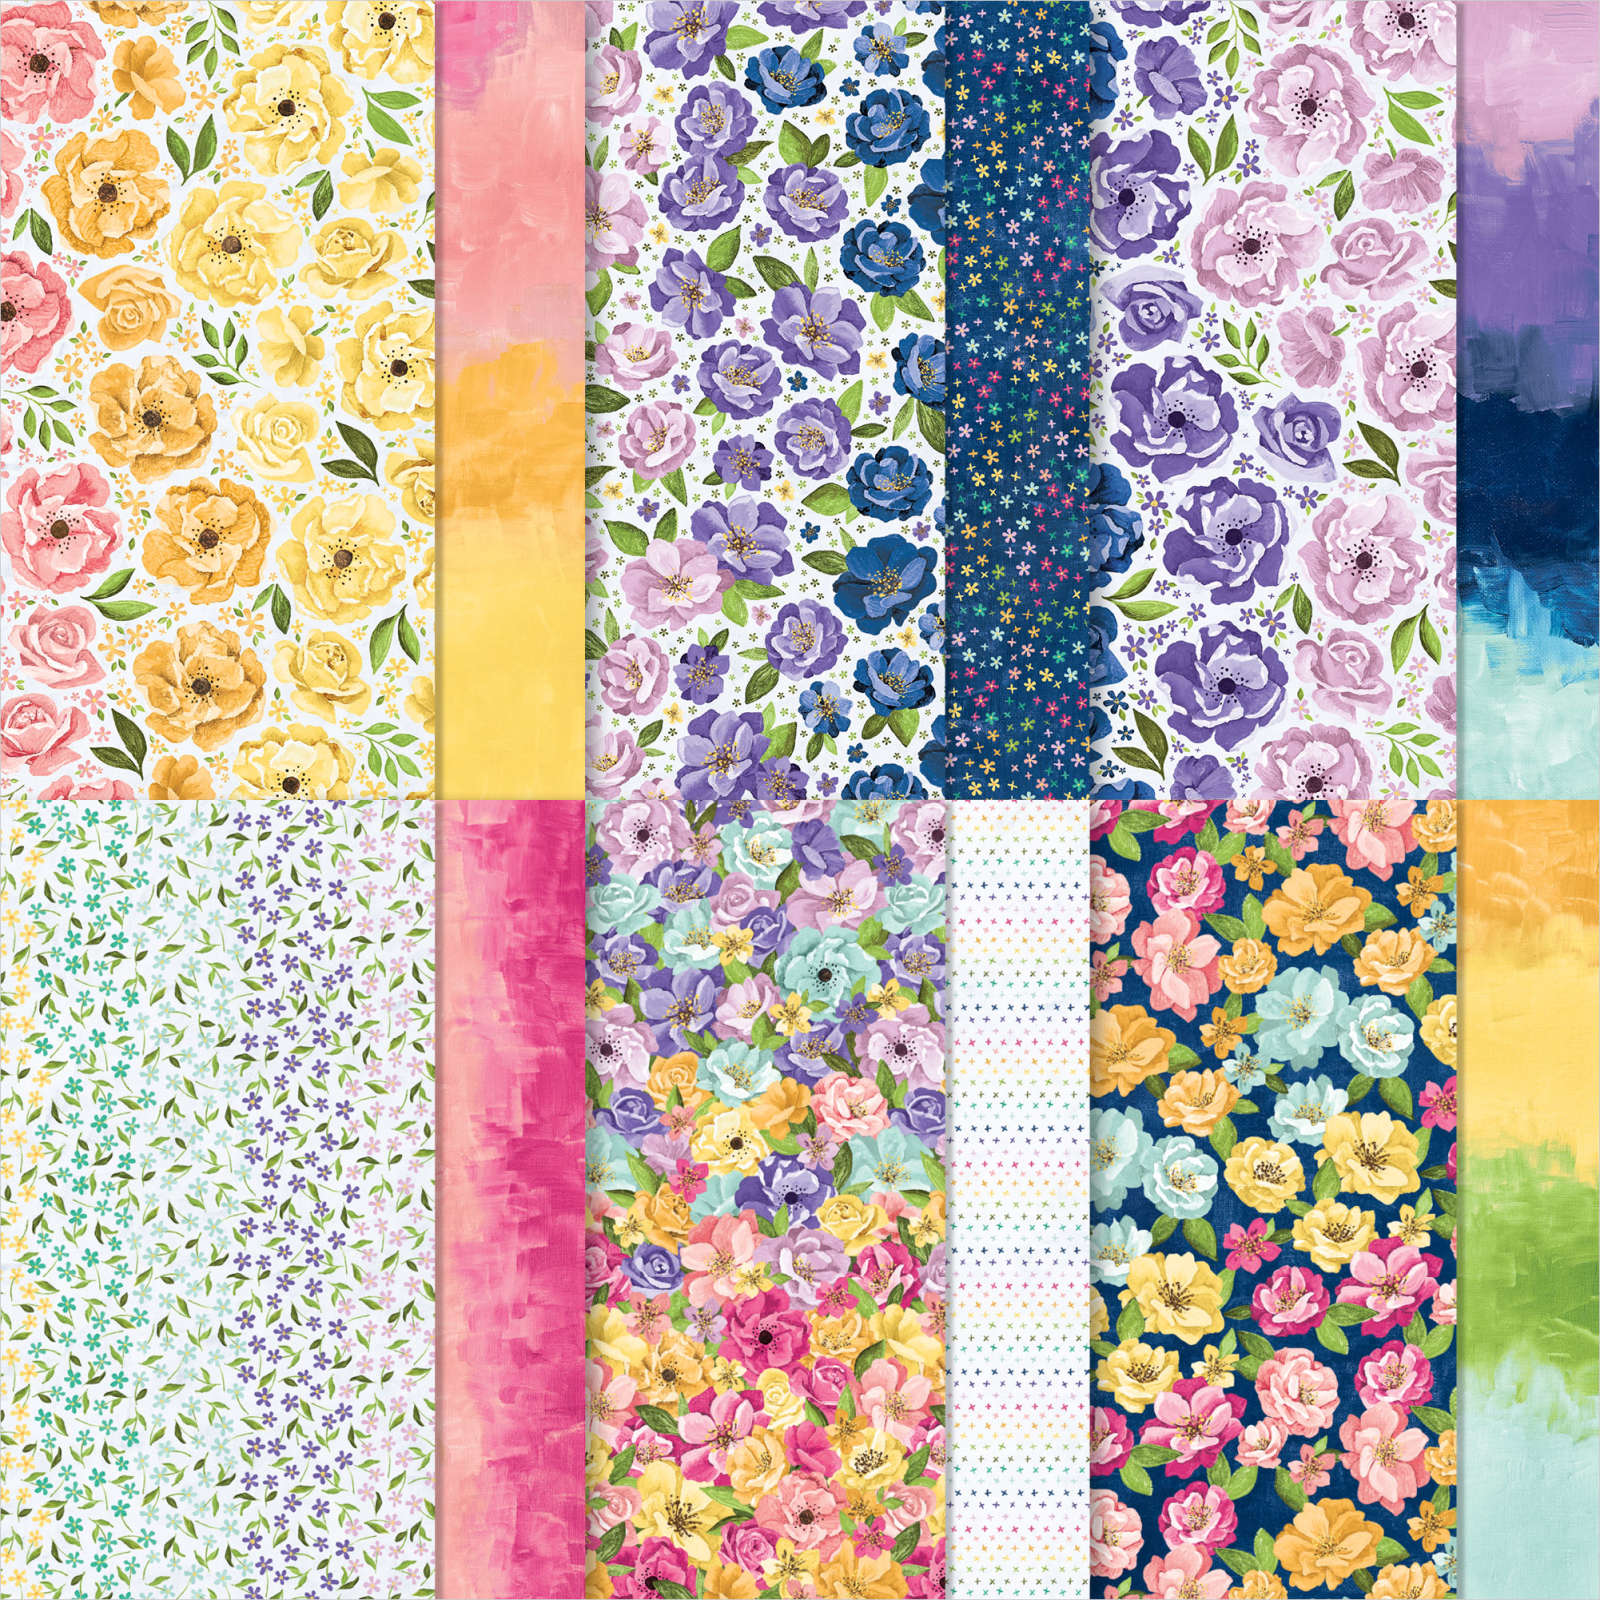
I am not sure if you know this or not but some of the papers from the Hues of Happiness 12″ x 12″ Designer Series Paper co-ordinate perfectly with the Blossoming Happiness Dies. Today’s card is created mostly using just the Designer Series Paper with only the greetings being stamped. I attached a piece of the Hues of Happiness Designer Series Paper down the left hand side of Basic White card which I attached to scored and folded Gorgeous Grape card. I cut Basic White and Gorgeous Grape card using the two largest circle dies from the Stylish Shapes Dies.

I attached the two circles to together before attaching them to the card front. I stamped the greeting from the Happiness Abounds stamp set onto Basic White card using Gorgeous Grape ink. I cut out the greeting using one of the banner dies from the Stylish Shapes Dies.
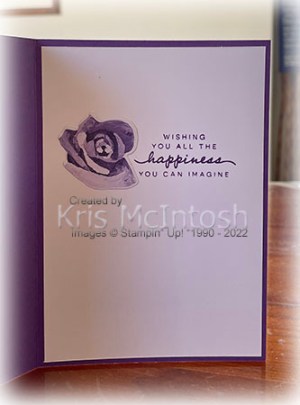
I cut the flowers and leaves from the Hues of Happiness Designer Series Paper using the Blossoming Happiness Dies. The flowers, leaves and the greeting are layered onto the Basic White circle. the banner and the Fresh Freesia flower are on dimensionals. I added three gorgeous grape dots from the Glossy Dots Assortment to the card front, just to add some bling. To decorate the inside of the card, I stamped another greeting from the Happiness Abounds stamp set onto Basic White card using Gorgeous Grape ink. I attached one of the flowers cut from the Hues of Happiness Designer Series Paper beside the greeting.
I actually cut all the flowers and leaves I could from one sheet of the Hues of Happiness Paper so that I can see what I can create.
Bye for now,
Kris
Product Used:


Abigail’s Album

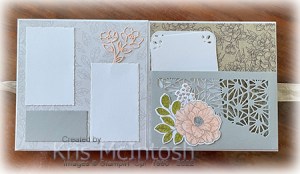
I promised Abigail that I would create an album for her to use as a keepsake for photos of her formal. I followed the instructions that Clare from Created the Ottaway shared here. I added cardboard to all of my pages and added an extra two envelopes to give Abi plenty of room for photos. Once I had assembled the envelopes, I used the gorgeous Abigail Rose 12″ x 12″ Designer Series Paper (gotta love the name) to decorate each of the pages. For the front and back covers, I did what Clare did and cut the paper into two pieces and covered the join using the Natural Finish Ribbon which will allow Abi to tie a bow to keep the album closed (I think it is going to end up kind of thick). I cut Basic White and Smoky Slate card using the Deckled Rectangle Dies and attached them to the Album cover. I die cut Petal Pink using the Cottage Flowers Dies to add to the Basic White panel. I printed the title onto Basic White card and cut it out using my Paper Snips.

For the first pages, I added Designer Series Paper and Basic White Deckled Rectangles cut using the largest one that would fit on my 6″ x 6″ pages. I also cut Smoky Slate card using the second smallest Deckled Rectangle Die. A die cut petal pink flower using the Cottage Flowers Dies decorates the left page. On the right I stamped the single flower and single leaf images from the Cottage Rose stamp set onto Basic White card using Basic Gray ink. I coloured the flower using Petal Pink and Light Smoky Slate Stampin’ Blends and the leaf using Old Olive Stampin’ Blends. The images were cut out using the co-ordinating Cottage Flowers Dies.

The next pages also have the addition of Abigail Rose Designer Series Paper. On the left page, I created a pocket based loosely on Clare’s instructions and before attaching it to the left hand page I die cut it using one of the Split Card Textures Dies. For this page I cut two pieces of Basic White card and trimmed the corners using the retired Detailed Trio Punch. I also stamped the large flower image from the Cottage Rose stamp set onto Basic White card using Basic Gray ink. The image is coloured using Petal Pink, Old Olive and Light Smoky Slate Stampin’ Blends before being cut out using the co-ordinating Cottage Flowers Die. On the right page I stamped, coloured and die cut the single leaf image from the Cottage Rose stamp set. The addition of two Basic White Deckled Rectangles gives Abigail somewhere to add photos. The smaller Smoky Slate Deckled Rectangle will allow her to add either one of the stamped sentiments I created or hand write something onto a Basic White Deckled Rectangle.
The third page has the addition of Abigail Rose Designer Series Paper to each page. I coloured the right hand piece of Designer Series Paper using Dark Petal Pink and Light Old Olive Stampin’ Blends to give it more colour. I added two Basic White Deckled Rectangles and two small Smoky Slate Deckled Rectangles. The left page also has the addition of a die cut Petal Pink flower.
Once again the fourth page has the addition of Abigail Rose Designer Series Paper, Deckled Rectangles and two Basic White pieces in the pocket which is die cut using the Split Card Texture Dies. The flower on the left page is die cut from Petal Pink card and the flower on the right is stamped, coloured and die cut as before.

The fifth page also has the addition of Abigail Rose Designer Series Paper and Basic White Deckled Rectangles. I decided to add the rectangles so that the photos could be horizontal instead of vertical. I added two smaller Deckled Rectangle Dies, one in Petal Pink (on the left) and one in Smoky Slate (on the right). I also die cut Crumb Cake card using the Cottage Flowers Dies.

The sixth page looks a bit plain. However once the photos go onto the Basic White card, I am sure it will look lovely. I have added Abigail Rose Designer Series Paper with the addition of a Basic White pocket on the left. The pocket holds two Basic White card pieces which can hold photos or journaling. On the right the Basic White flap lifts up giving the opportunity to add another photo or journaling as Abi wishes. The flower is stamped, coloured and die cut as before. I have added a Smoky Slate Deckled Rectangle to the right hand page.

The seventh and last page has Abigail Rose Designer Series Paper asw well as a Smoky Slate pocket which has been cut using the Split Card Textures Die. The right hand page has Basic White and Crumb Cake Deckled Rectangles as well as a Petal Pink die cut flower.
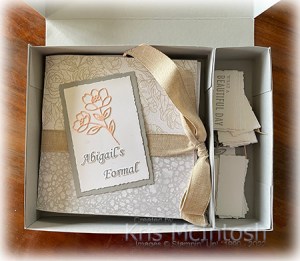
I created a pizza box from Smoky Slate card which will hold the album but also has a place for the stamped sentiments as well as some additional die cuts which Abi may want to add to some of her pages. To decorate the box, I die cut Basic White card using the largest die from the Cottage Flowers Dies. I attached the co-ordinating piece of Abigail Rose Designer Series Paper behind the die cut after using Dark Petal Pink and Light Old Olive Stampin’ Blends to colour the image. I die cut the title from Smoky Slate card using the retired Playful Alphabet Dies.

I know this is a long post but I thought you would like to see all of the pages. I am so happy with the way this has turned out and hope that Abigail will be too. I’d love to hear what you think.
Bye for now,
Kris
Product Used:


Best Wishes
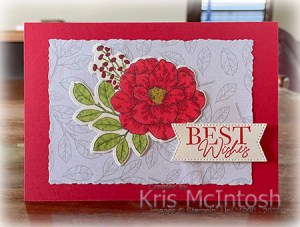
For today’s card I used the Cottage Rose Bundle which I shared on my Facebook Live this week. I cut a piece of the Abigail Rose 12″ x 12″ Designer Series Paper using one of the Deckled Rectangle Dies. I attached the Designer Series Paper to scored and folded Poppy Parade card. I stamped the large floral image from the Cottage Rose stamp set onto Very Vanilla card using Memento Tuxedo Black ink. I coloured the image using Poppy Parade, Granny Apple Green and Dark Daffodil Delight Stampin’ Blends.
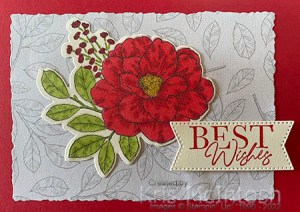
I cut out the image using the co-ordinating Cottage Flowers Die before attaching it onto the Designer Series Paper. I stamped the greeting from the Cottage Rose stamp set onto Very Vanilla card using Poppy Parade ink and cut it out using one of the banners from Stylish Shapes Dies. The greeting is attached to the card front using dimensionals.
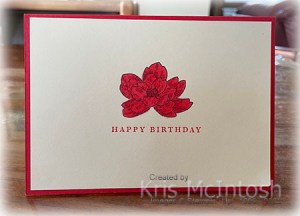
To decorate the inside of the card, I stamped the single flower image onto Very Vanilla card using Memento Tuxedo Black ink. I coloured the flower using the Poppy Parade Stampin’ Blends. I also stamped “happy birthday” from the Cottage Rose stamp set below the flower using Poppy Parade ink.
This is a gorgeous bundle and when you buy the product suite it’s called the Abigail Rose Suite and since my eldest granddaughter is Abigail, I just had to buy it!
Bye for now,
Kris
Product Used: