In the Moment

Today I am going to share with you some cards I made using the In The Moment stamp set. This stamp set will be available for purchase with the release of the January to July Mini Catalogue on the 3rd January 2022. I was lucky enough to receive this stamp set from Stampin’ Up! when I enrolled for the OnStage at Home Online event. It’s a fun set and just perfect for colouring. I created all of the cards using the same basic principals. I attached Pattern Party Designer Series Paper onto Very Vanilla card for each of my three versions.
For two of the cards, I stamped the greeting from the In The Moment stamp set onto the Very Vanilla card. For the third card, I stamped the greeting onto Very Vanilla card, firstly only inking the “sometimes the…..can do is” part of the greeting using Memento Tuxedo Black ink. I stamped the “relax” part of the greeting onto a separate piece of Very Vanilla card using the same ink and cut it out using my paper snips. I attached the “relax” beside the stamped greeting and punched each end of the banner using the Tailored Tag Punch before attaching it to the card front using dimensionals.
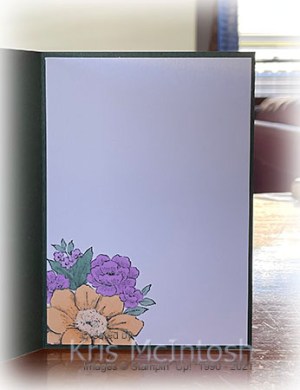
I stamped each of the images from the In The Moment stamp set onto Very Vanilla card using Memento Tuxedo Black ink. I cut each image out using the largest circle from the Layering Circle Dies. The images were coloured using varying combinations of Light Night of Navy, Light Soft Suede, Dark So Saffron, Crumb Cake, Polished Pink, Fresh Freesia, Ivory and Bronze Stampin’ Blends. Each of the images is attached to a Polished Pink scalloped circle cut using the Layering Circle Dies, before being attached to the card fronts using dimensionals. To decorate the inside of the cards, I attached a piece of the same pattern Pattern Party Designer Series Paper across the bottom of Very Vanilla card.

I had so much fun creating these cards, its such a fund set. I am sure that you will love it too.
Bye for now,
Kris
Product Used:


Windorah

Today’s page shows off some photos from our stay at Windorah in far western Queensland. This is a small, friendly community. I attached a piece of Cajun Craze 12″ x 12″ card which I cut down slightly to a Very Vanilla 12″ x 12″ page. I embossed a panel of Garden Green card using the Painted Texture 3D Embossing Folder and attached it to the left hand side of the page. I created the journaling on my computer and printed it onto Very Vanilla card which I attached to the page so that it partially covered the embossed card.

I attached each of my photos to Basic Black card before attaching them to the page. The title is cut from Very Vanilla card using the Playful Alphabet Dies. I love how the Cajun Craze echoes the colour in the sand hills.
I hope that you are being inspired by my pages to get started with your own memory keeping.
Bye for now,
Kris
Product Used:


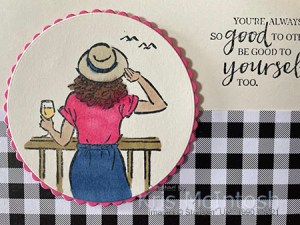
Relax

Today’s card uses the same technique which I shared in my Facebook Live this week and it uses the same stamp set that Chloe Evans used to demonstrate the technique. I stamped the greeting from the In The Moment stamp set onto the upper right hand corner of Basic White card using Night of Navy ink. I attached a piece of In Good Taste Designer Series Paper across the bottom of the stamped card.
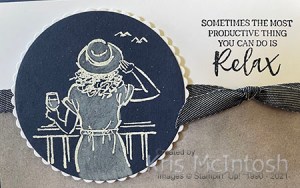
I wrapped the top edge of the Designer Series Paper using the 3/8″ Denim Ribbon and tied a knot. The panel is attached to scored and folded Night of Navy card. I stamped the image from the In The Moment stamp set onto Night of Navy card using Versamark ink, sprinkled the image with White Embossing Powder and heat set it.

I coloured the dress, hat and wine using the White Watercolour Pencil before cutting the image using one of the Layering Circles Dies. I cut a scalloped circle from Basic White card and attached the image panel. The whole piece is attached to the card front using dimensionals. To decorate the inside of the card, I stamped the image from the In The Moment stamp set onto the lower left hand corner of Basic White card using Night of Navy ink. I attached a narrow strip of Night of Navy card behind one long edge of the same pattern In Good Taste Designer Series Paper which I attached across the bottom of the stamped card.
Such a fun card to create and I love how different this technique looks depending on the card you are colouring. This stamp set, In The Moment, will be in the January to June Mini Catalogue when it is released. One of the perks of being a Demonstrator is being able to access new product before it hits the general market. Let me know what you think. Do you like this card?
Bye for now,
Kris
Product Used:


Blessings of Home

Yesterday in my Facebook Live, I shared a technique which I learned while I was participating in the Onstage Online Stampin’ Up! Demonstrator event a week or so ago. Chloe Evans a Demonstrator from Australia shared this technique and boy is it fun. For my card today, I cut Misty Moonlight card using one of the Scalloped Contour Dies and attached it to scored and folded Thick Basic White card. I cut a piece of the Heart & Home 12″ x 12″ Designer Series Paper using another of the Scalloped Contour Dies which I attached to the card front using dimensionals.
I stamped the image from the Blessings of Home stamp set onto Misty Moonlight card using Versamark. I sprinkled the image with White Embossing Powder and heat set it. I coloured parts of the image using a White Watercolour Pencil, in fact only the two large flowers. I cut out the image using the co-ordinating Flowers of Home Die and attached it to the card front.

I tied a bow in a length of 3/8″ Denim Ribbon and attached the bow to the flower stem using Glue Dot. To decorate the inside of the card, I stamped the greeting from the Blessings of Home stamp set onto Basic White card using Misty Moonlight ink. I attached a narrow strip of Misty Moonlight card behind one long edge of a piece of the same Heart & Home Designer Series Paper before attaching it across the bottom of the stamped Basic White card.
I am really loving this technique but I am also loving this fabulous product suite called Heart and Home which you will find in the January to June Mini Catalogue. I was lucky enough to be able to pre-purchase this stamp set whilst participating in the Onstage Online Event.
Bye for now,
Kris
Product Used:


Painted Seasons Greetings

I wanted to create a Christmas card to share with you and used this layout which I found on Pinterest. So versatile and easy to use. I stamped the greeting from the Christmas to Remember stamp set onto the lower right hand corner of Basic White card using Evening Evergreen ink. I cut a piece of Painted Christmas 12″ x 12″ Designer Series Paper using one of the Basic Border Dies.
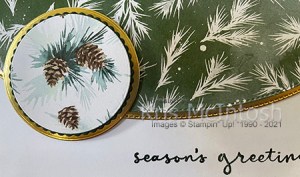
I also cut Gold Foil card using the same die and attached it behind the edge of the Designer Series Paper. The panel is attached to the top of the stamped Basic White card. I flipped over the Painted Christmas Designer Series Paper and used a Layering Circle Die to cut out a section of the Designer Series Paper. I attached the Designer Series Paper to an Evening Evergreen scalloped circle and a Gold Foil circle, also cut using the Layering Circle Dies.
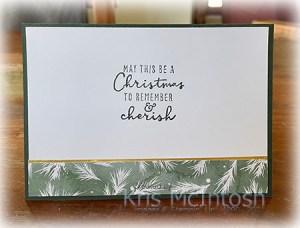
The image panel is attached to the card front using dimensionals. To decorate the inside of the card, I stamped another greeting from the Christmas to Remember stamp set onto Basic White card using Evening Evergreen ink. I attached a narrow strip of Gold Foil card behind one long edge of Painted Christmas Designer Series Paper and attached it across the bottom of the stamped Basic White card.
This is such a simple card but I think it looks amazing! What about you, do you like it? Maybe I have inspired you to take a look at some of your Designer Series Papers and see if you can use them as the focal piece on your cards.
Bye for now,
Kris
Product Used:


Onstage at Home

Since the beginning of the COVID pandemic Stampin’ Up! have been conducting our social get togethers completely differently. Since we cannot meet in person, we have been gathering online and while this is not as much fun as being together in person, Stampin’ Up! make sure that we all have a wonderful time. Last weekend was our most recent event and again so much fun. We had a Stamping Masters competition and saw lots of demonstrators present new and exciting product from the next Mini Catalogue. We got lots of tips about how to run our business, especially using Social Media which is a new thing to lots of us.

We also had a Stamp and Share experience with Shannon and this was just fantastic. We used product from the Heart & Home product suite which as demonstrators attending the event we were able to order so that we could use them with Shannon (along with other goodies which I will share soon). Of course after the event I had lots of ideas floating through my head and this is my first sample using these products. I embossed Soft Succulent card using the Tasteful Textile 3D Embossing Folder and attached a piece of the Heart & Home 12″ x 12″ Designer Series Paper to the left hand side.
The panel is attached to scored and folded Evening Evergreen card. I stamped the large floral image from the Blessings of Home stamp set onto Basic White card using Memento Tuxedo Black ink. The image is coloured using the Fresh Freesia, Pale Papaya and Soft Succulent Stampin’ Blends. I cut out the image using the co-ordinating Flowers of Home Die and attached the image to the card front using dimensionals. I stamped the greeting from the Blessings of Home stamp set onto Basic White card using Soft Succulent ink. I added a strip of the Evening Evergreen Chevron Weave Ribbon to the back of the greeting before attaching it to the card front using dimensionals where necessary. To decorate the inside of the card, I stamped a portion of the large floral image onto the lower left hand corner of Basic White card. The image is coloured using the same Stampin’ Blends as I used on the card front.
I just know that you are going to love this product suite and the new Mini Catalogue.
Bye for now,
Kris
Product Used:


Cooper’s Creek

The day that Ron & I drove from Eromanga to Windorah we crossed the Coopers Creek. Just a creek but so important to Lake Eyre. When we get enough rain this creek fills with water from the Thomson and Barcoo Rivers and floods the Channel Country and fills Lake Eyre. I was very excited to see this creek. I created the journaling on the computer and printed onto Very Vanilla card. I attached the journaling and photo to Early Espresso card and then the Very Vanilla 12″ x 12″ page. I cut two squares from Soft Suede card and two squares from Crumb Cake card. I embossed the Soft Suede squares using the Hammered Metal 3D Embossing Folder and the two Crumb Cake squares using the Painted Texture 3D Embossing Folder.

I attached the embossed squares across the page underneath the photo and journaling. I stamped the double tree image from the Mountain Air stamp set onto Very Vanilla card using Garden Green ink. I cut out the image using the co-ordinating Majestic Mountain Die. I cut Garden Green card using the single tree die from the Majestic Mountain Dies. The trees are attached over the Crumb Cake square on the left hand side of the page. I cut the letters for the title from Soft Suede card using the Playful Alphabet Dies.
I really love this page, what about you?
Bye for now,
Kris
Product Used:


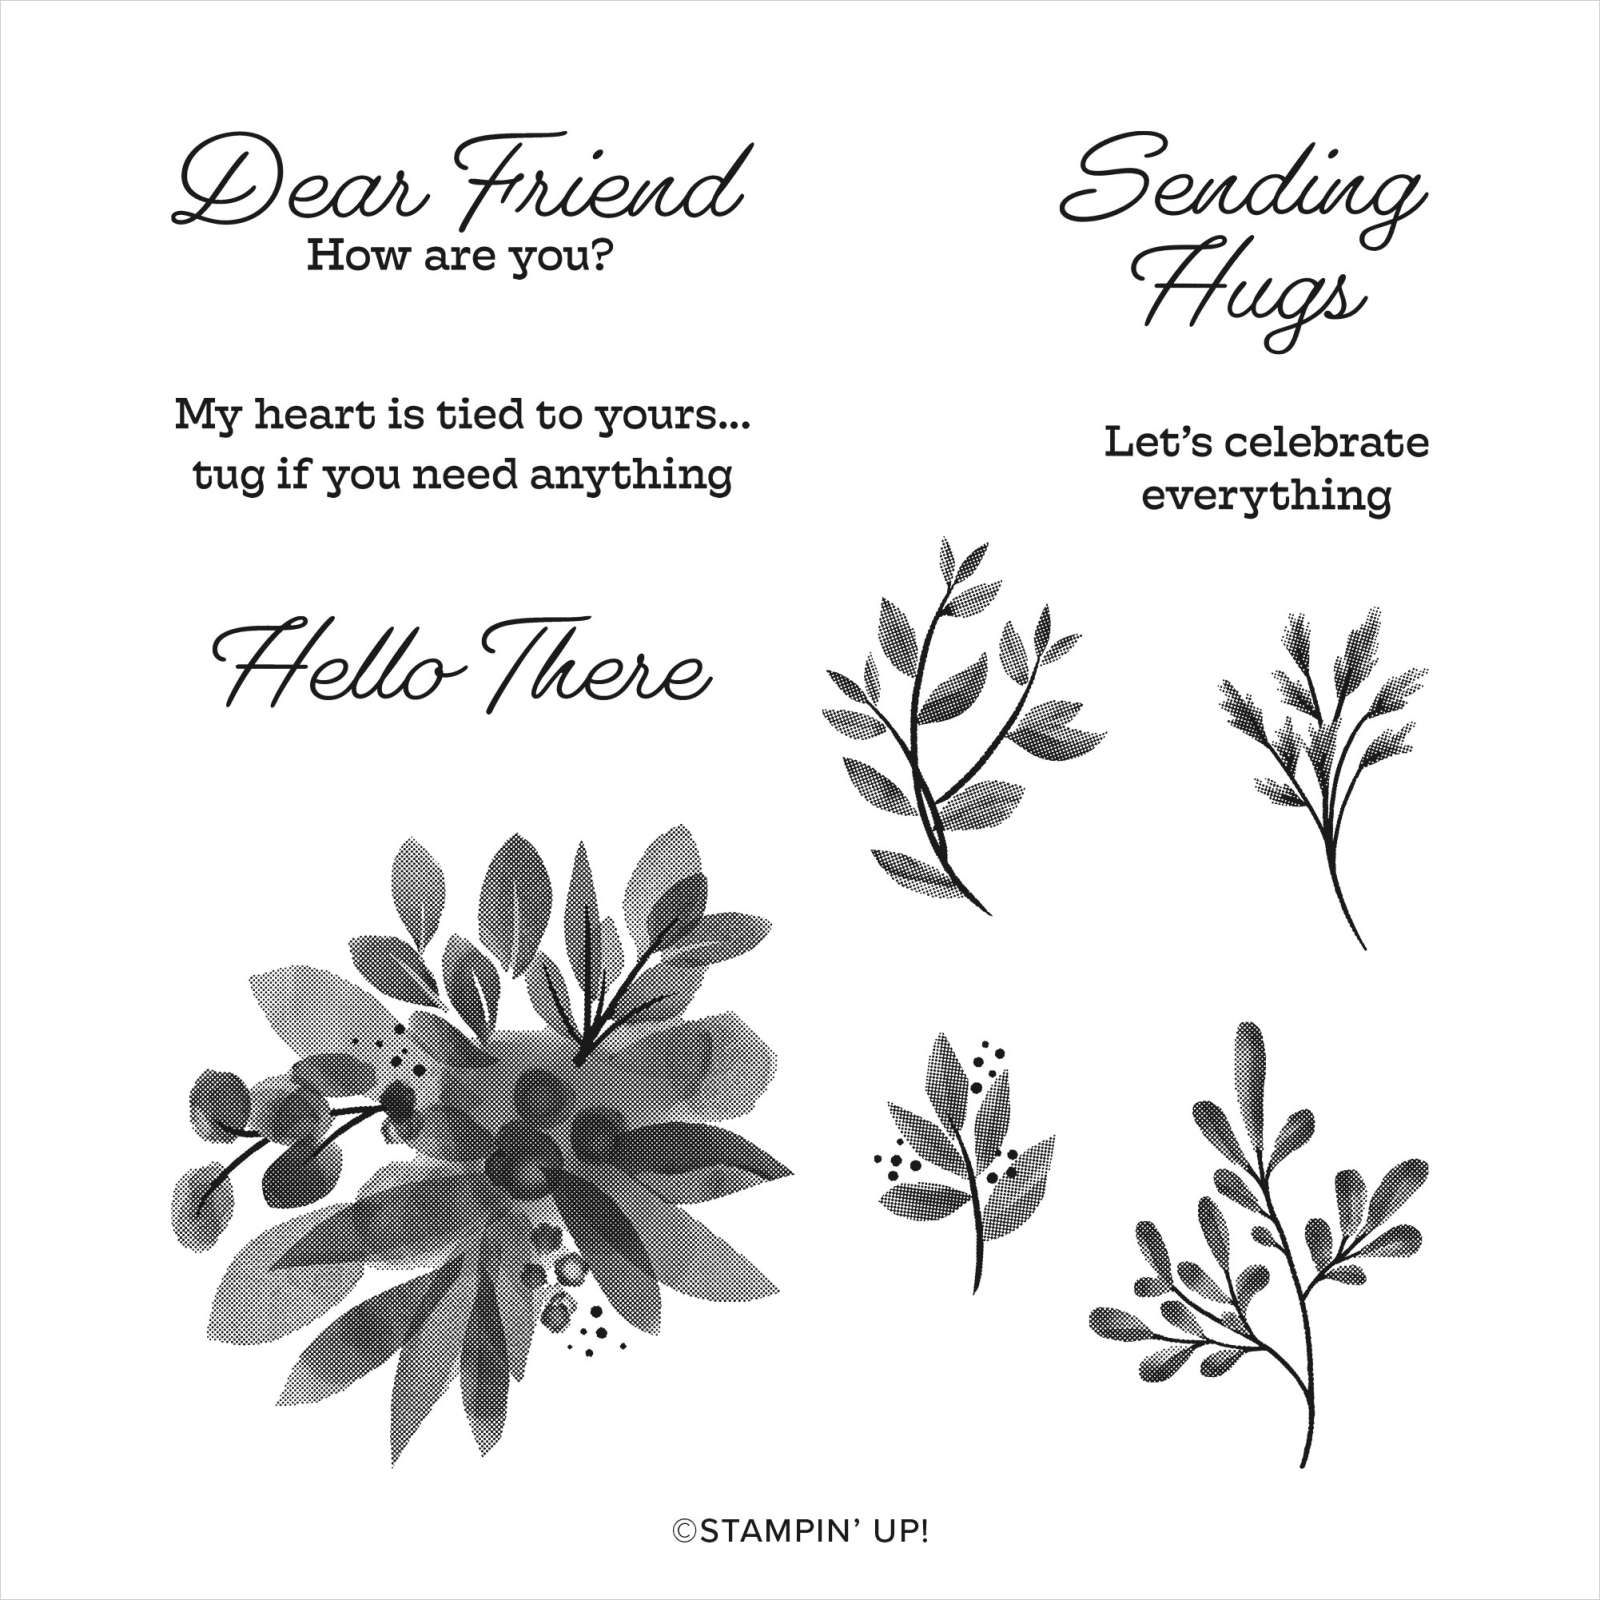
Hugs

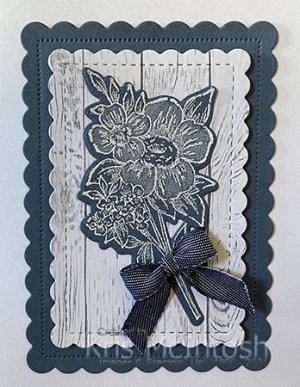
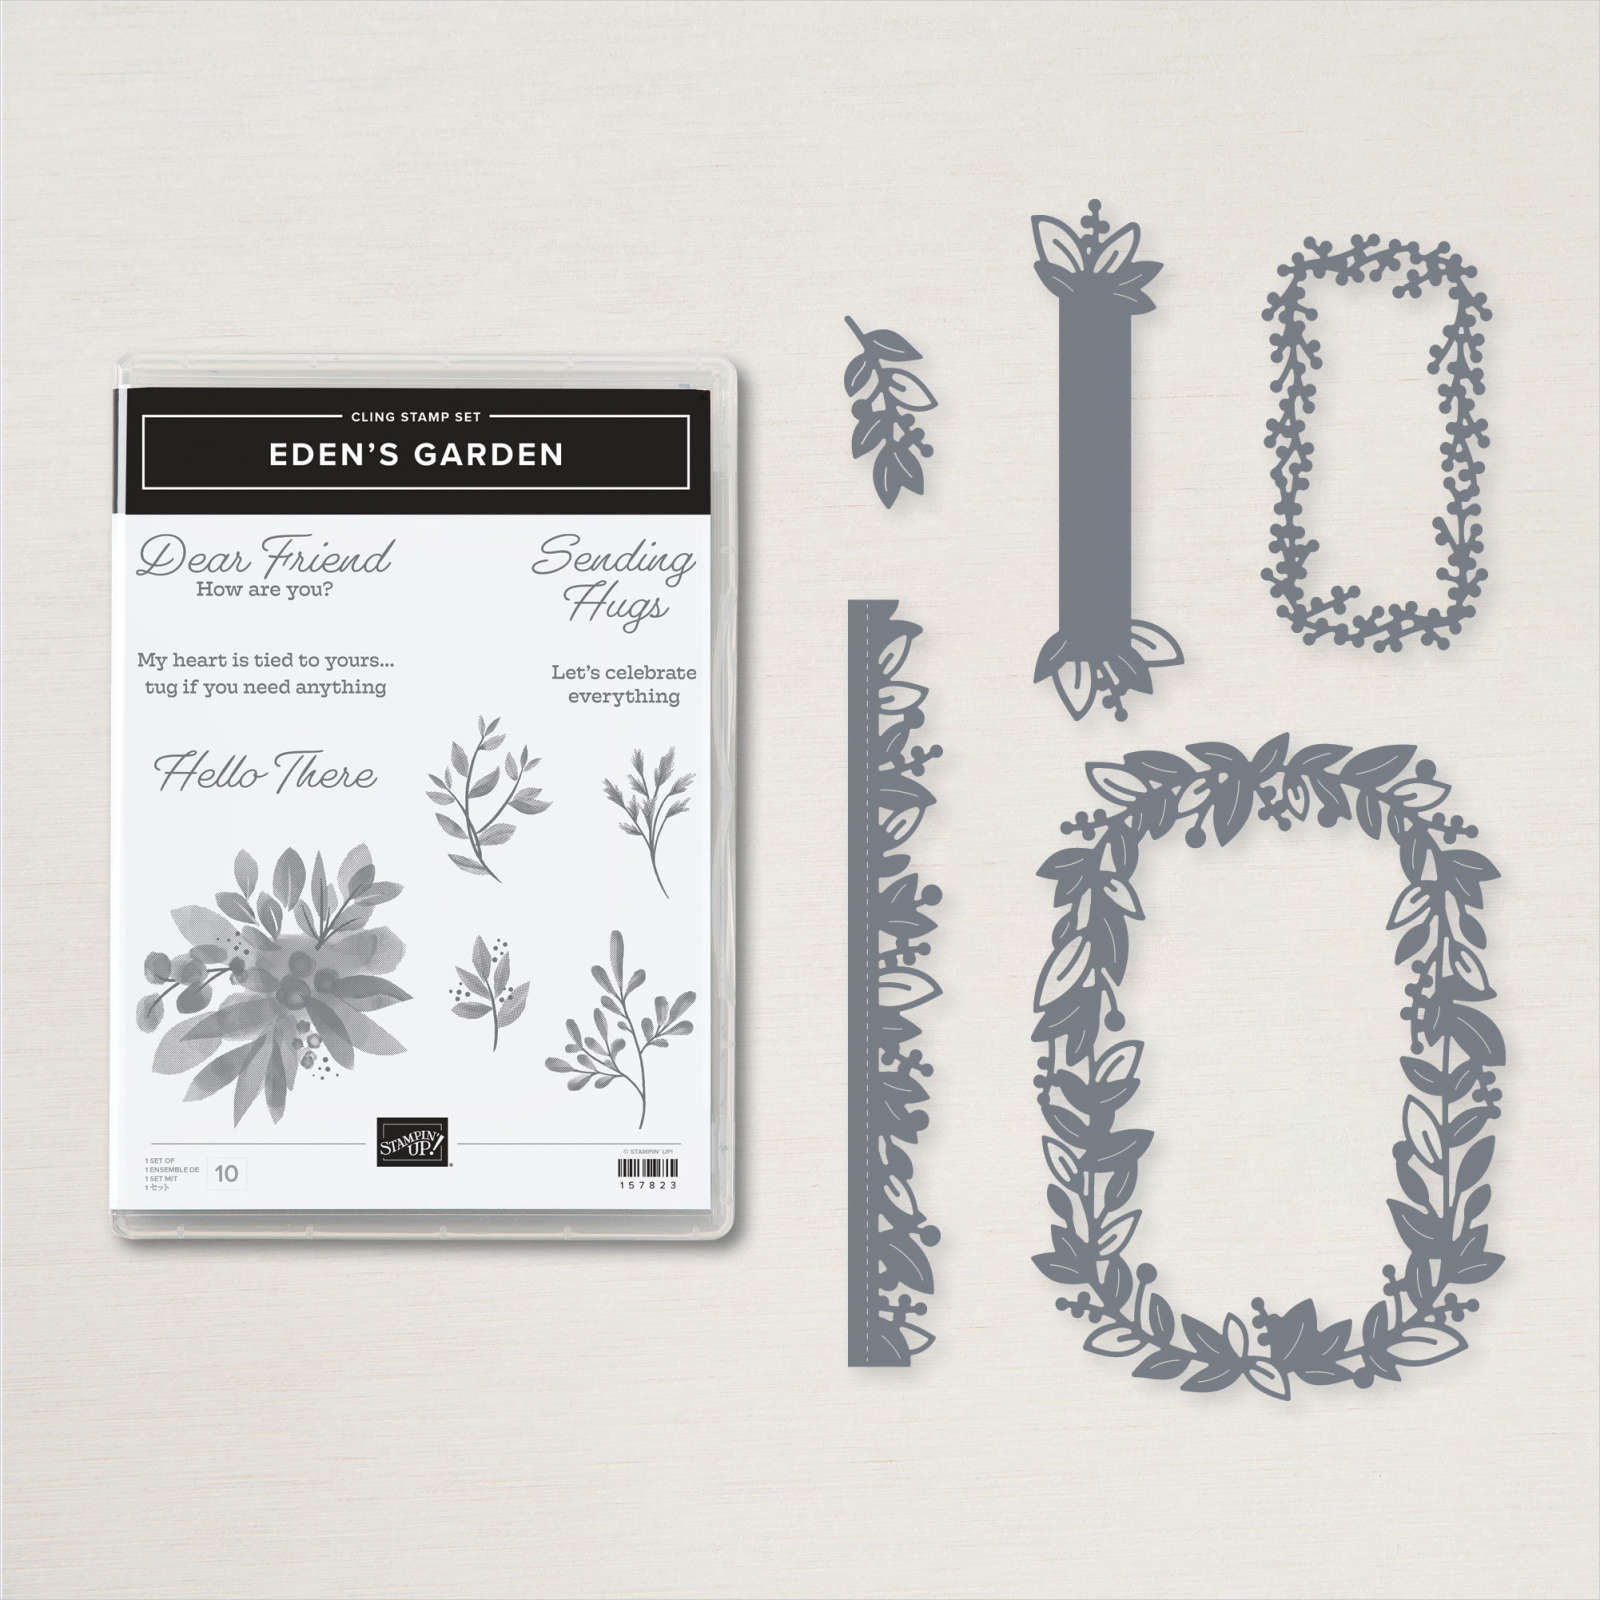
Today’s card is another I made using the fancy fold I shared on my Facebook Live this week. This time I have used the Eden’s Garden Product Suite which is an early release from the next Mini Catalogue. I attached a piece of Ever Eden Specialty Designer Series Paper to scored and folded Evening Evergreen card. I attached a strip of another design from the Ever Eden Specialty Designer Series Paper to the left hand side of the card front. I attached a narrow strip of Soft Succulent Ever Eden Cotton Paper so that it sits slightly over the right hand side of the first strip of designer series paper.
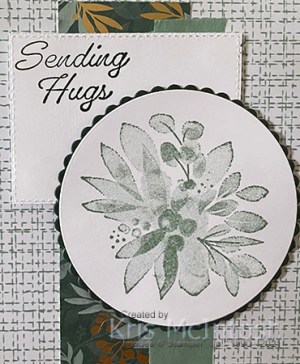
I cut Basic White card using the rectangle frame from the Merriest Frames Dies. I stamped the greeting from the Eden’s Garden stamp set onto the top left hand corner of the Basic White rectangle before attaching it to the card front using dimensionals. I stamped the large floral image from the Eden’s Garden stamp set onto Basic White card using Evening Evergreen ink and cut it out using the Layering Circle Dies.
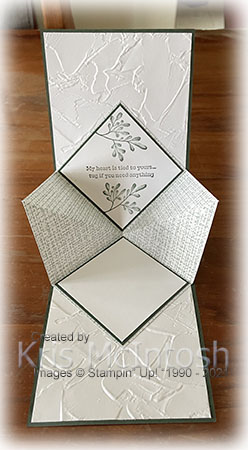
I attached the image panel to an Evening Evergreen scalloped circle cut using the same dies. The image is attached to the card front using dimensionals where necessary. To decorate the inside of the card, I embossed two panels of Basic White card using the Painted Texture 3D Embossing Folder and attached them to the inside of the Evening Evergreen card base. I scored and folded a square of the Ever Eden Specialty Designer Series Paper and attached it to the inside of the card. I stamped the greeting from the Eden’s Garden stamp set onto a small square of Basic White card using Evening Evergreen ink. I stamped one of the leafy images from the same stamp set above and below the greeting using Evening Evergreen ink. I attached the stamped panel to Evening Evergreen card and then the Designer Series Paper. I attached a piece of Basic White card to Evening Evergreen card which I also attached to the Designer Series Paper. I left this Basic White panel un-decorated so that I could write a message here.
I really like the softness of this card, do you?
Bye for now,
Kris
Product Used:
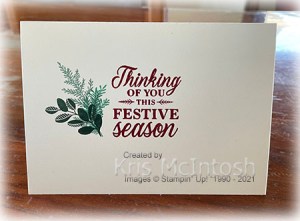
Festive Season

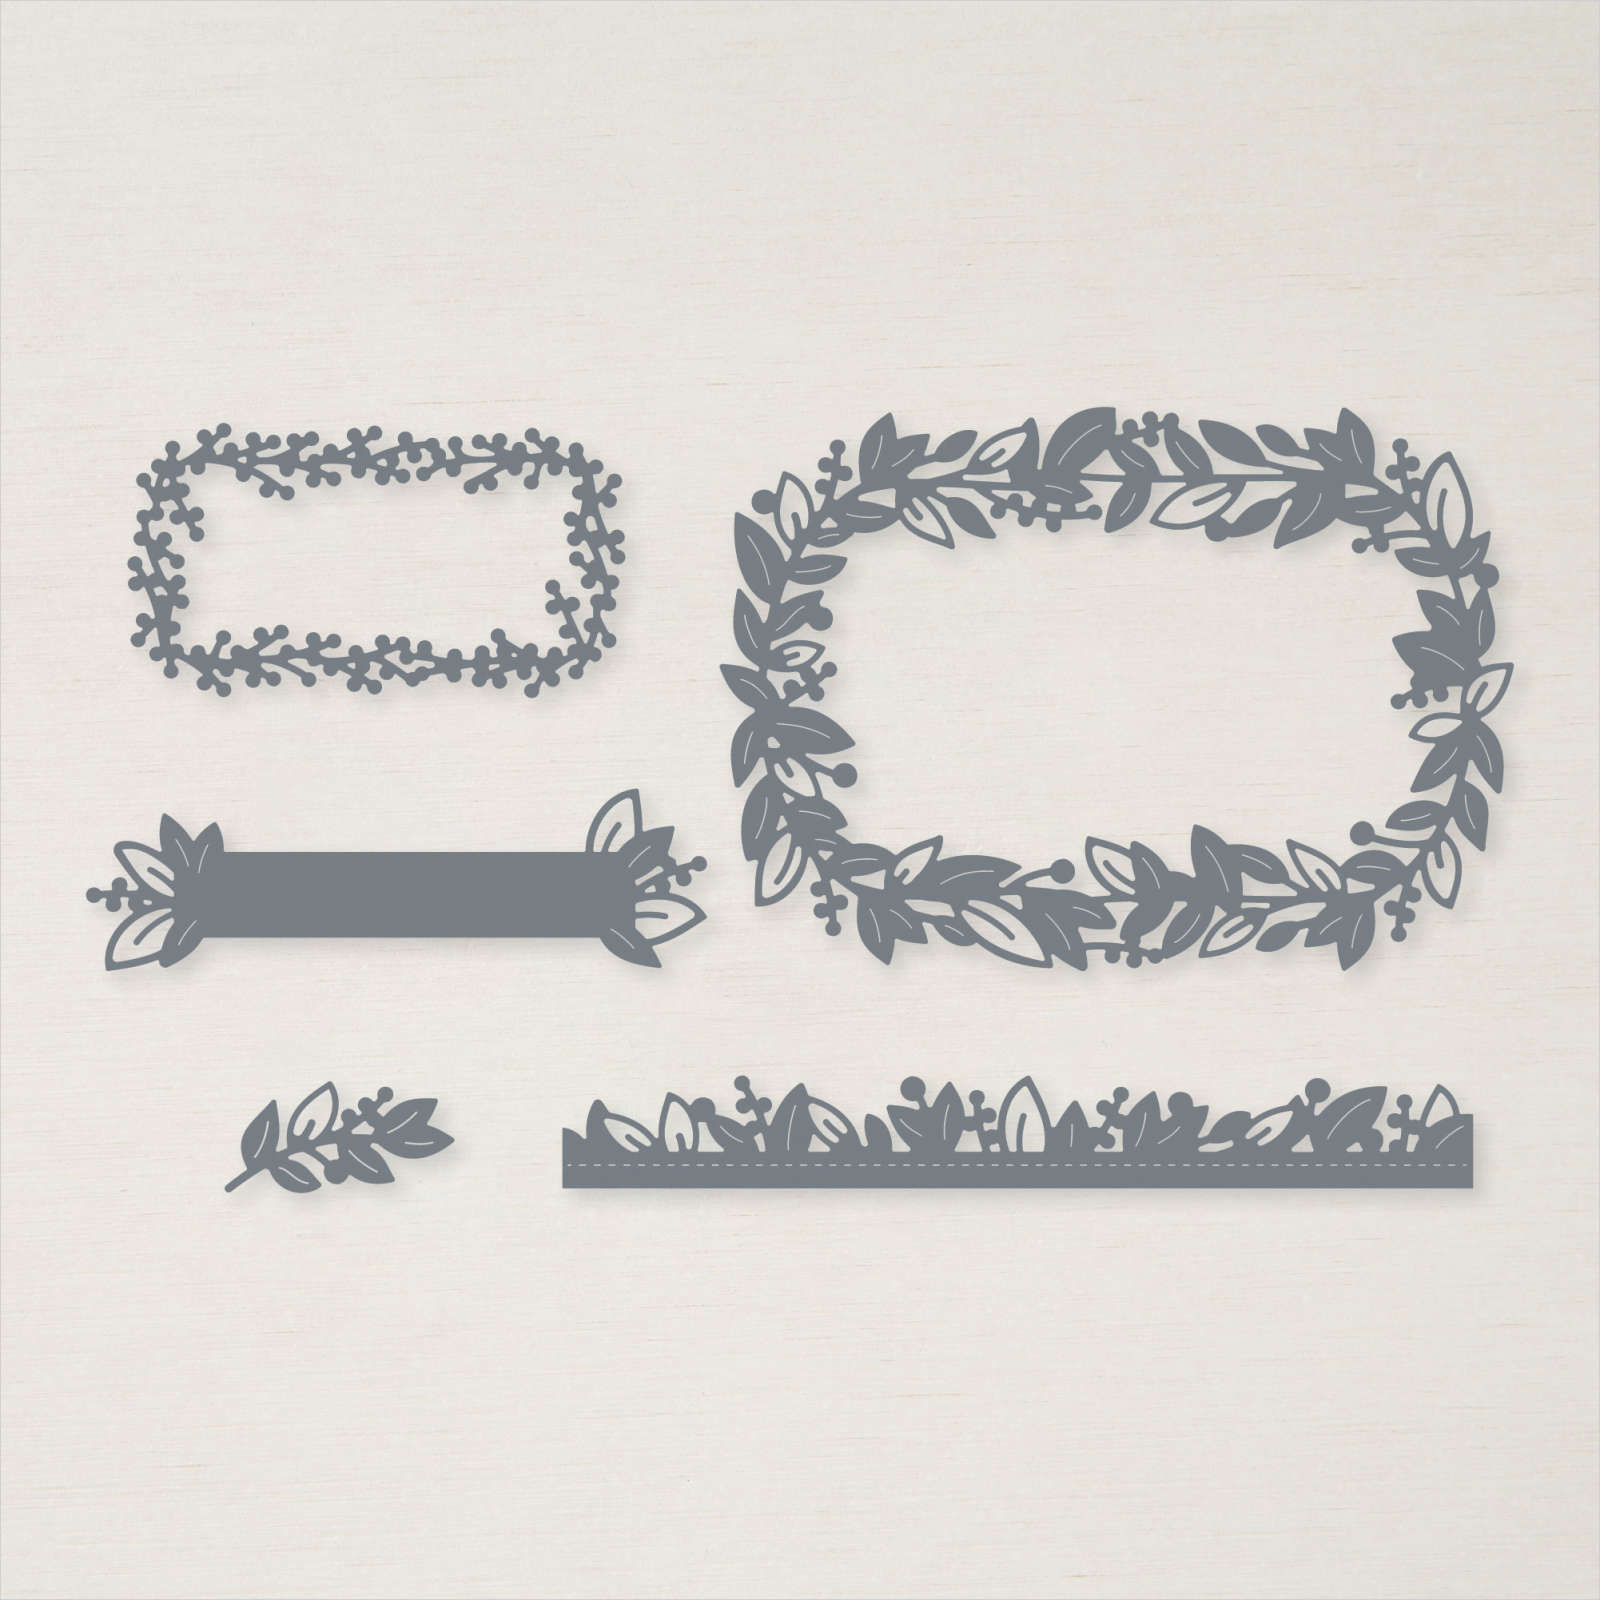
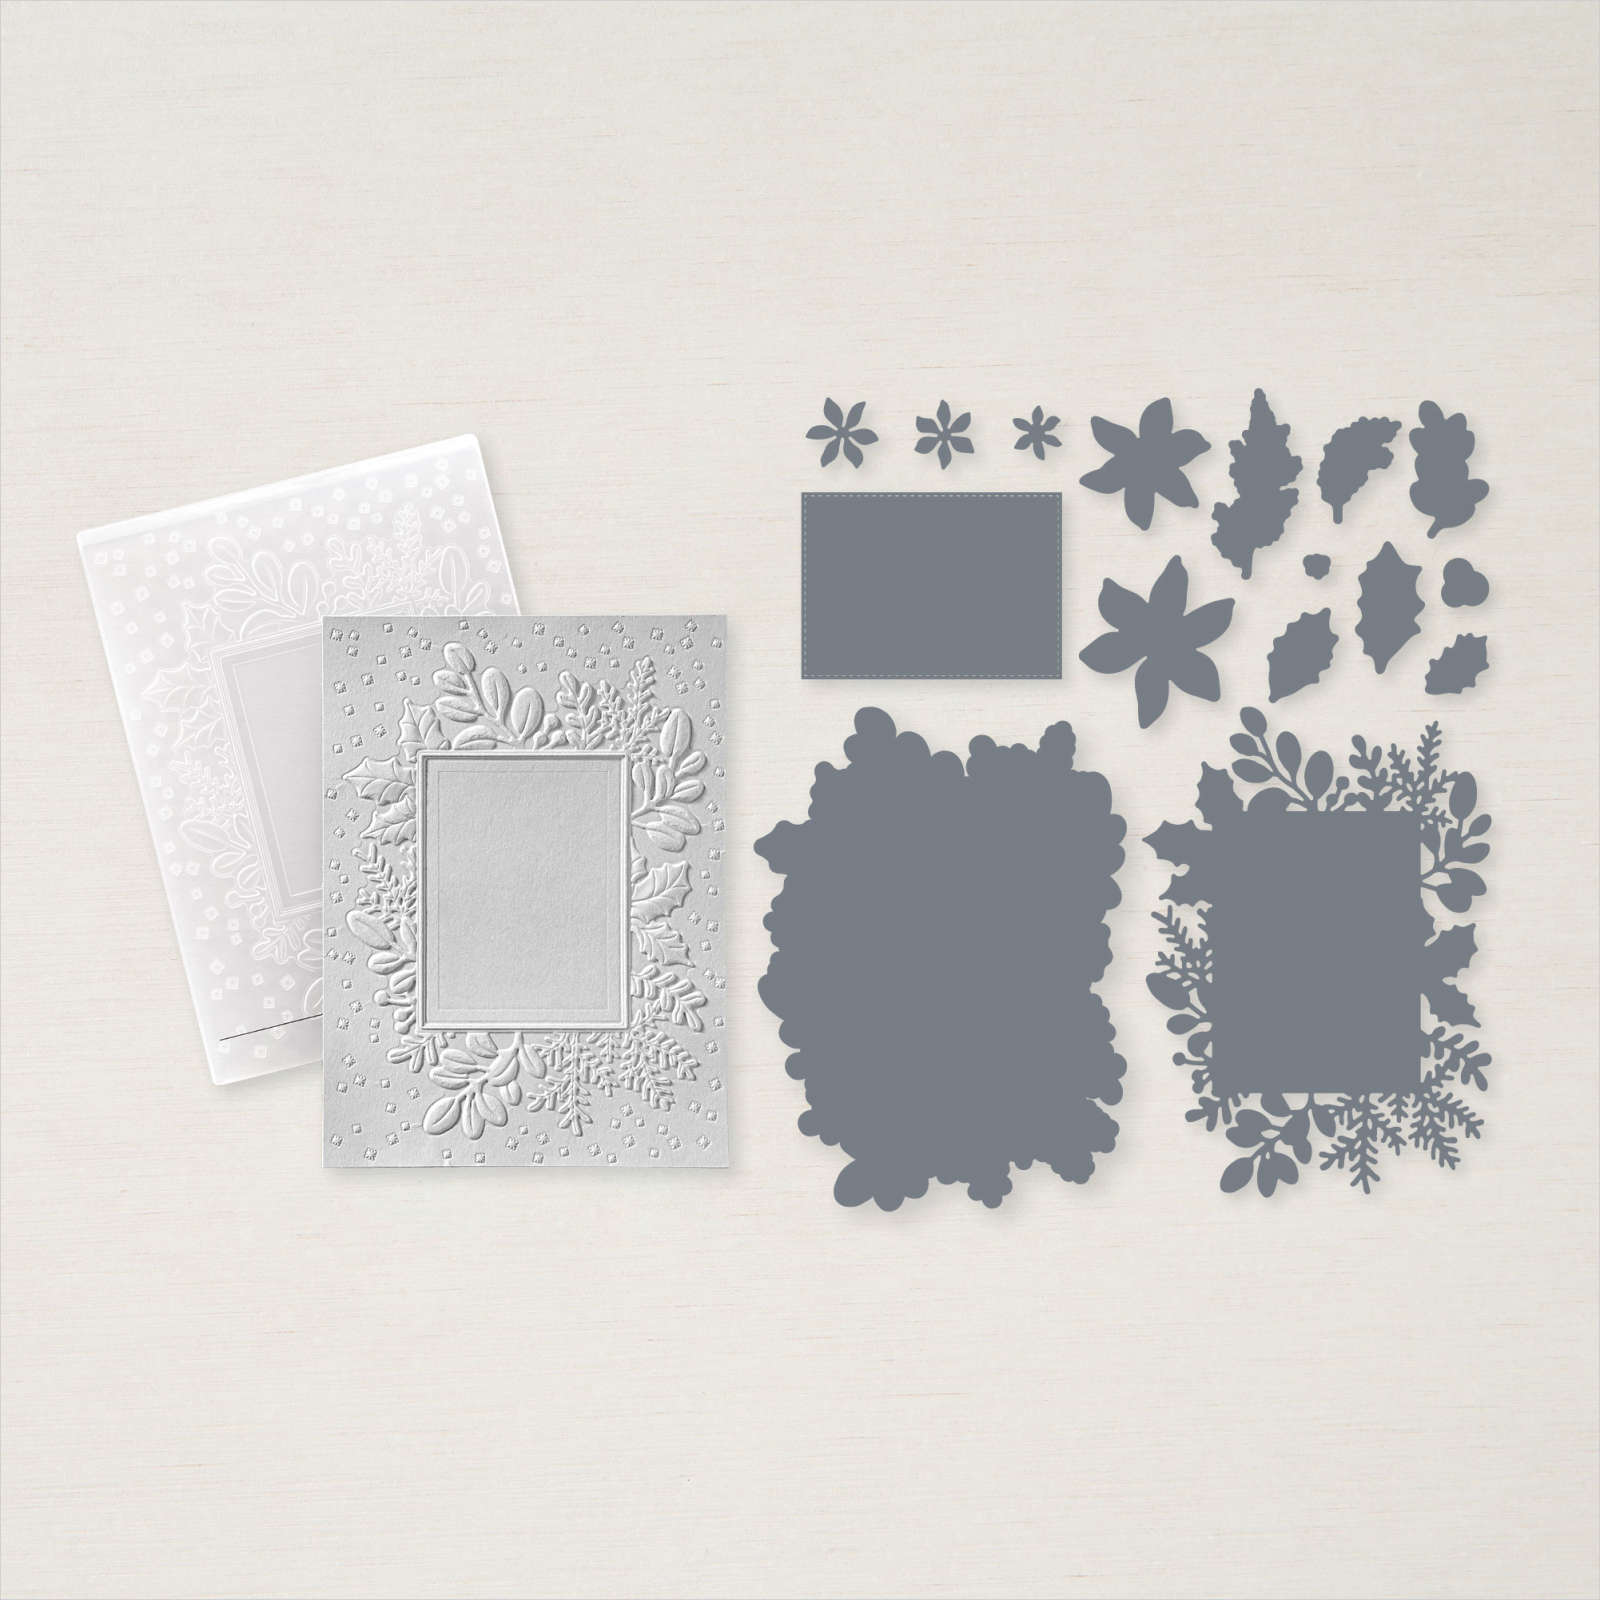
Today’s card is made using the fancy fold that I shared in my Facebook Live this week. I began by cutting Very Vanilla card using the Merriest Frames Dies. I also cut Soft Sea Foam using the detailed die from the Merriest Frames Dies. I cut the centre from the Soft Sea Foam die cut using the rectangle die and then embossed the panel using the Merriest Frames Hydrid Embossing Folder. I attached the Soft Sea Foam embossed panel to the Very Vanilla die cut and then scored and folded Blushing Bride card. I stamped the greeting from the Merriest Moments stamp set inside the die cut rectangle using Blushing Bride ink.
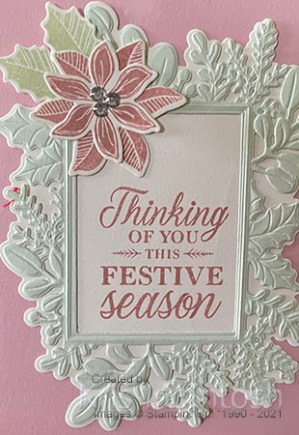
I stamped the large and small flower from the Merriest Moments stamp set onto Very Vanilla card using Blushing Bride ink and cut them out using the co-ordinating Merriest Frames Die. I stamped two medium leaves from the Merriest Moments stamp set onto Very Vanilla card and cut them out using the co-ordinating Merriest Frames Die. I attached the flowers together and attached them to the upper left hand corner of the rectangle and attached the two leaves behind them. I added three Basic Rhinestones to the centre of the flower. To decorate the inside of the card, I attached two panels of Very Vanilla card before attaching the Soft Sea Foam pop up.

I stamped the large flower from the Merriest Moments stamp set onto Very Vanilla card using Blushing Bride ink and covered it with a post-it-note mask. I stamped the medium leaf image from the Merriest Moments stamp set three times around the flower using Soft Sea Foam ink. I stamped the small flower from the Merriest Moments stamp set onto Very Vanilla card using Blushing Bride ink and it out using the co-ordinating Merriest Frames Die. I attached the small flower to the centre of the stamped large flower before attaching the Very Vanilla card to the Soft Sea Foam pop up. I stamped the greeting from the Merriest Moment stamp set onto Very Vanilla card using Blushing Bride ink before stamping the small flower from the same stamp set using the same ink. I masked the small flower and stamped the medium leaf image from the Merriest Moment stamp set three times around the flower using Soft Sea Foam ink. I stamped the small flower onto Very Vanilla card using Blushing Bride ink and cut it out using the co-ordinating Merriest Frames Die. I attached the flower over the stamped flower before attaching the panel to the Soft Sea Foam pop up. I didn’t emboss the Very Vanilla panels on the inside of this card so that I would have somewhere to write my message.
I wouldn’t normally use these colours for Christmas but I love the finished result. What about you?
Bye for now
Kris
Product Used:


Leafy Seasons Greetings

Today’s card uses the Merriest Moments stamp set. I began by using Post-It-Notes to mask off a Very Vanilla panel so that about 4cm of the card was showing. I stamped three different leaf images from the Merriest Moment stamp set across the exposed card. I used Soft Succulent ink for one image, Just Jade ink for another and Evening Evergreen ink for the last image.

I rotated the card and repeated the process on the other edge. I attached a panel of Evening Evergreen card across the centre of the stamped panel so that the edges of the leaf images were covered.
I stamped “Seasons Greetings” from the Merriest Moments stamp set onto Very Vanilla card using Cherry Cobbler ink and attached it across the centre of the Evening Evergreen card. I trimmed the panel and attached it to Cherry Cobbler card and then scored and folded Thick Very Vanilla card. To decorate the inside of the card, I stamped another greeting from the Merriest Moments stamp set using Cherry Cobbler ink. I stamped each of the leaf images beside the greeting using the same ink as I used on the card front.
Although this was a pretty quick and simple card, I think this is very pretty, don’t you?
Bye for now,
Kris
Product Used: