Pick Six Wonder

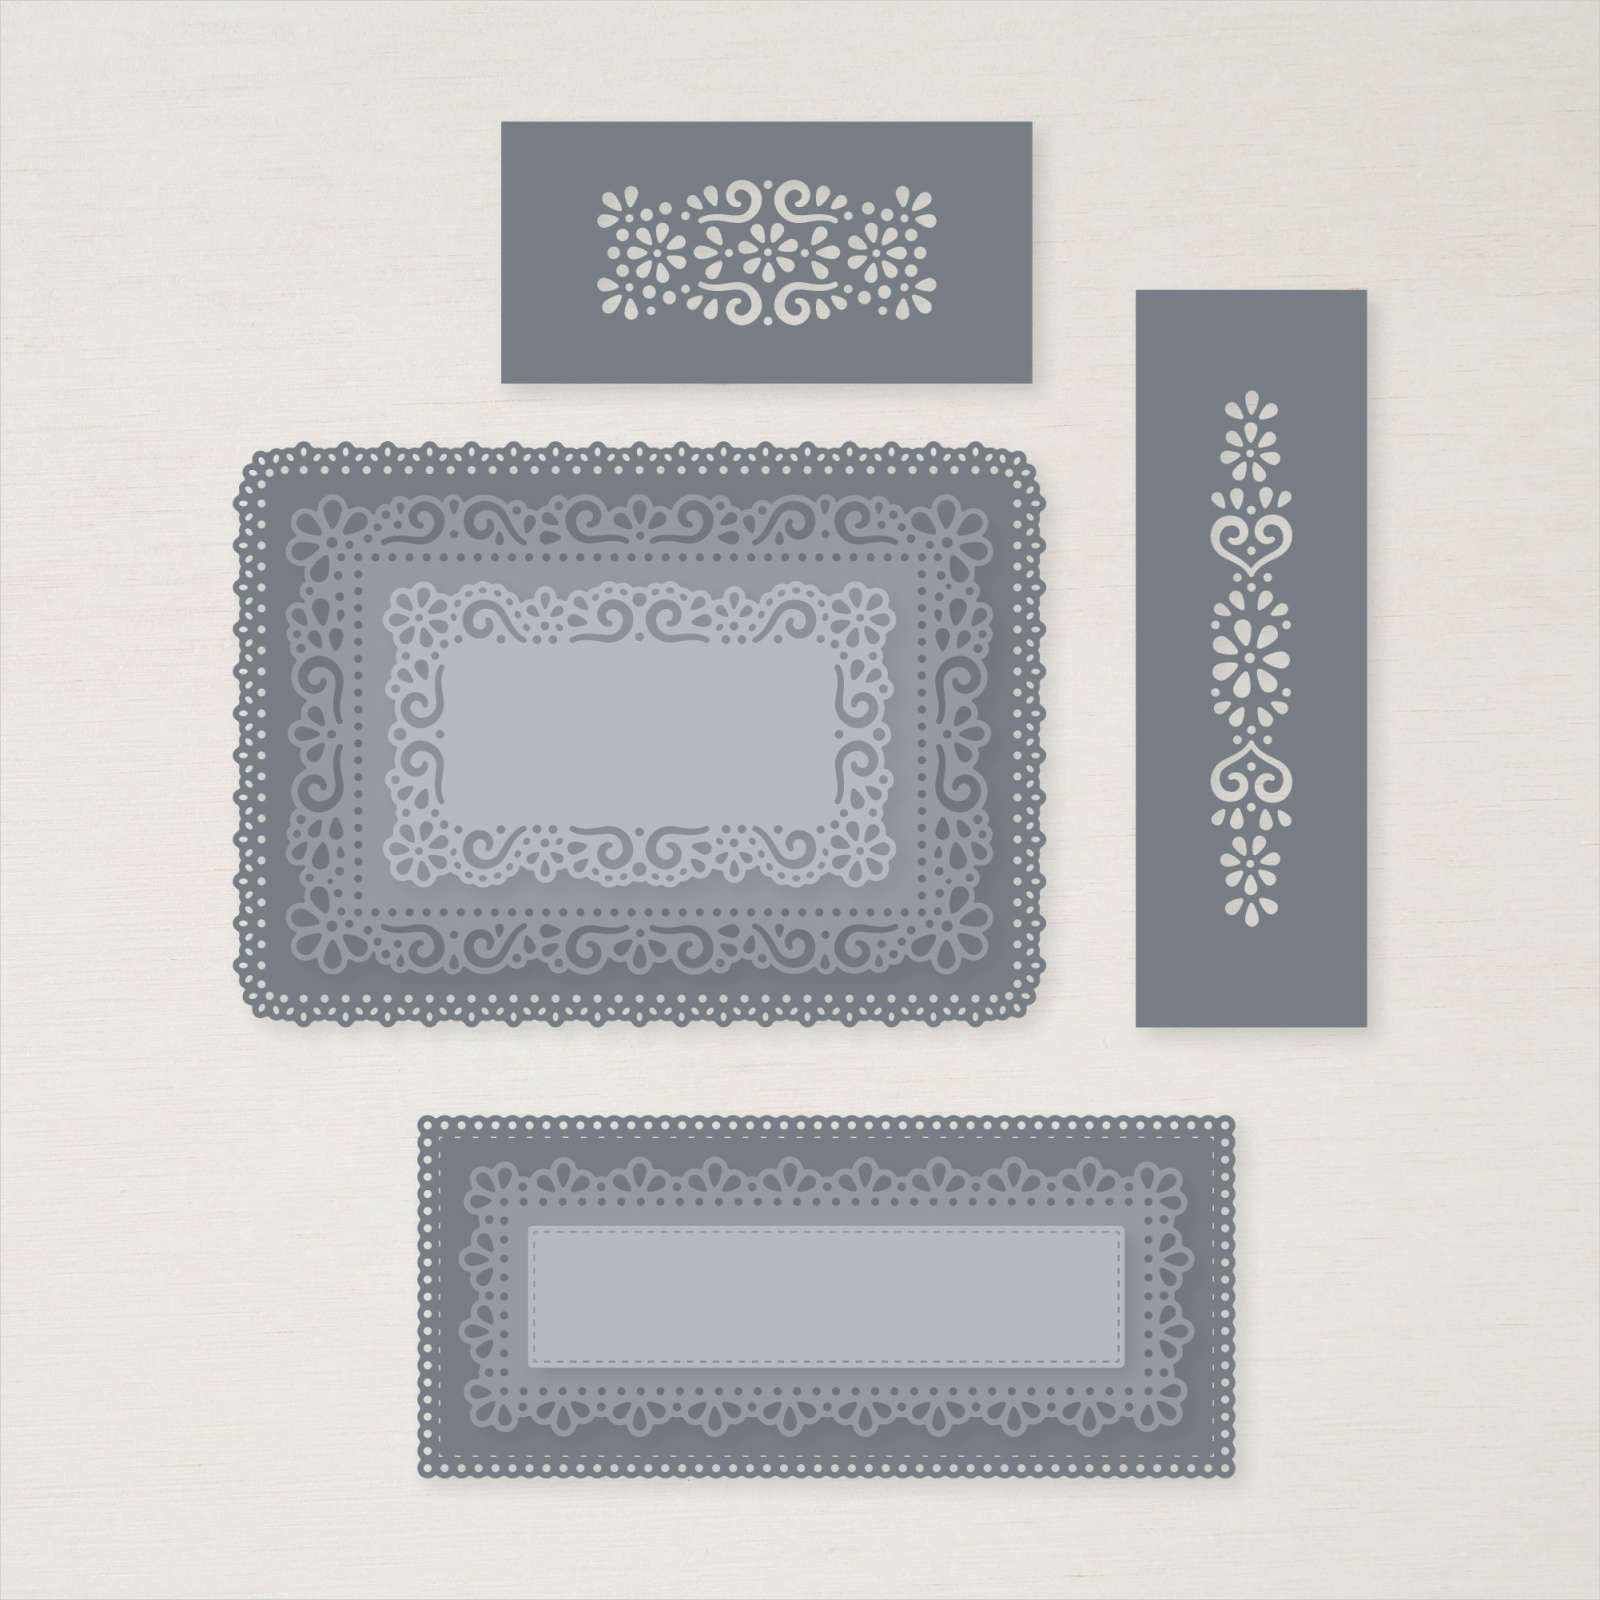
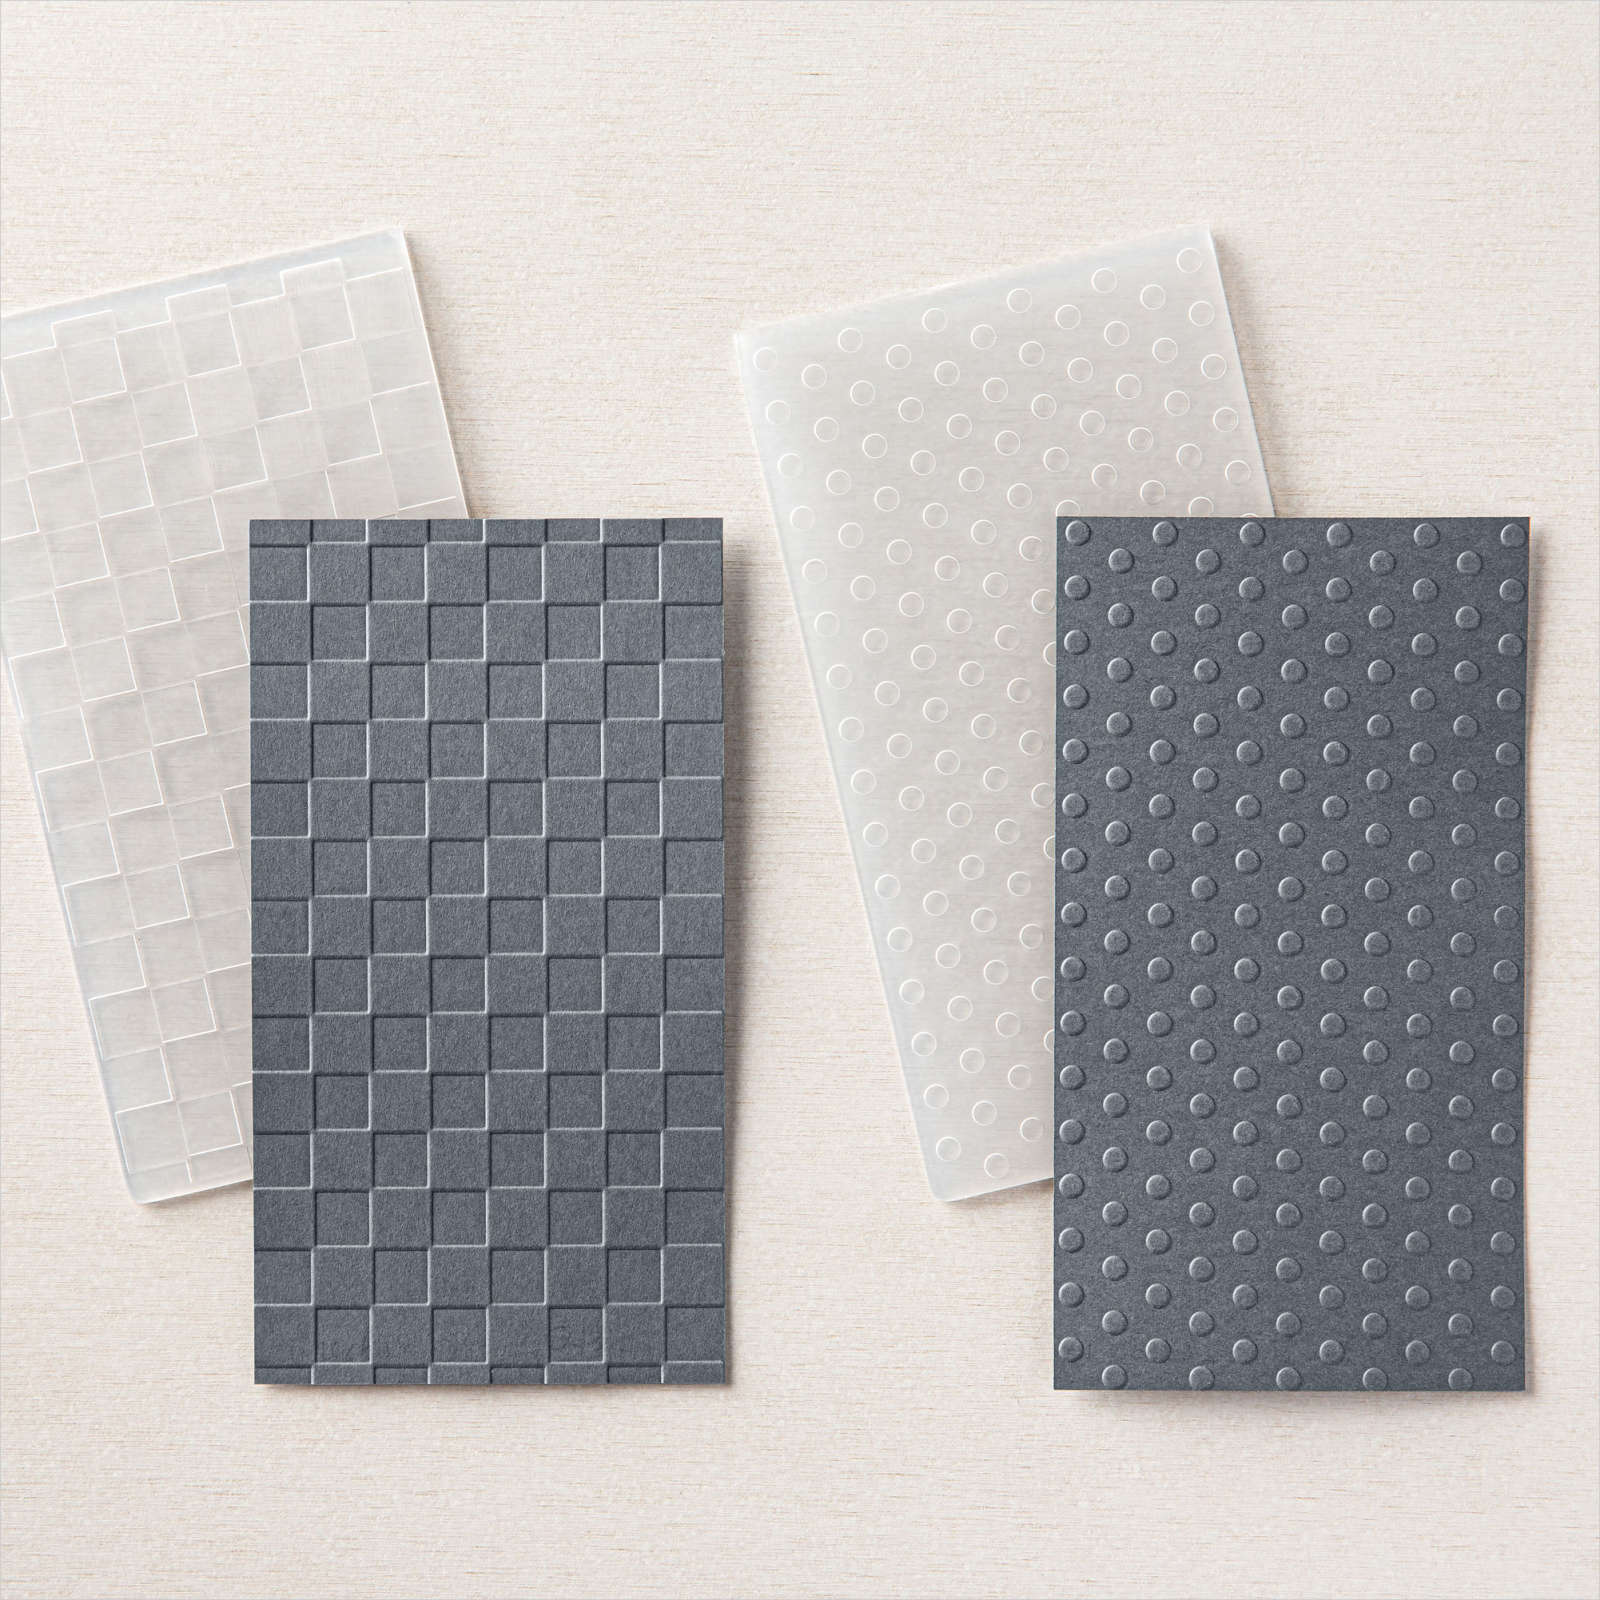
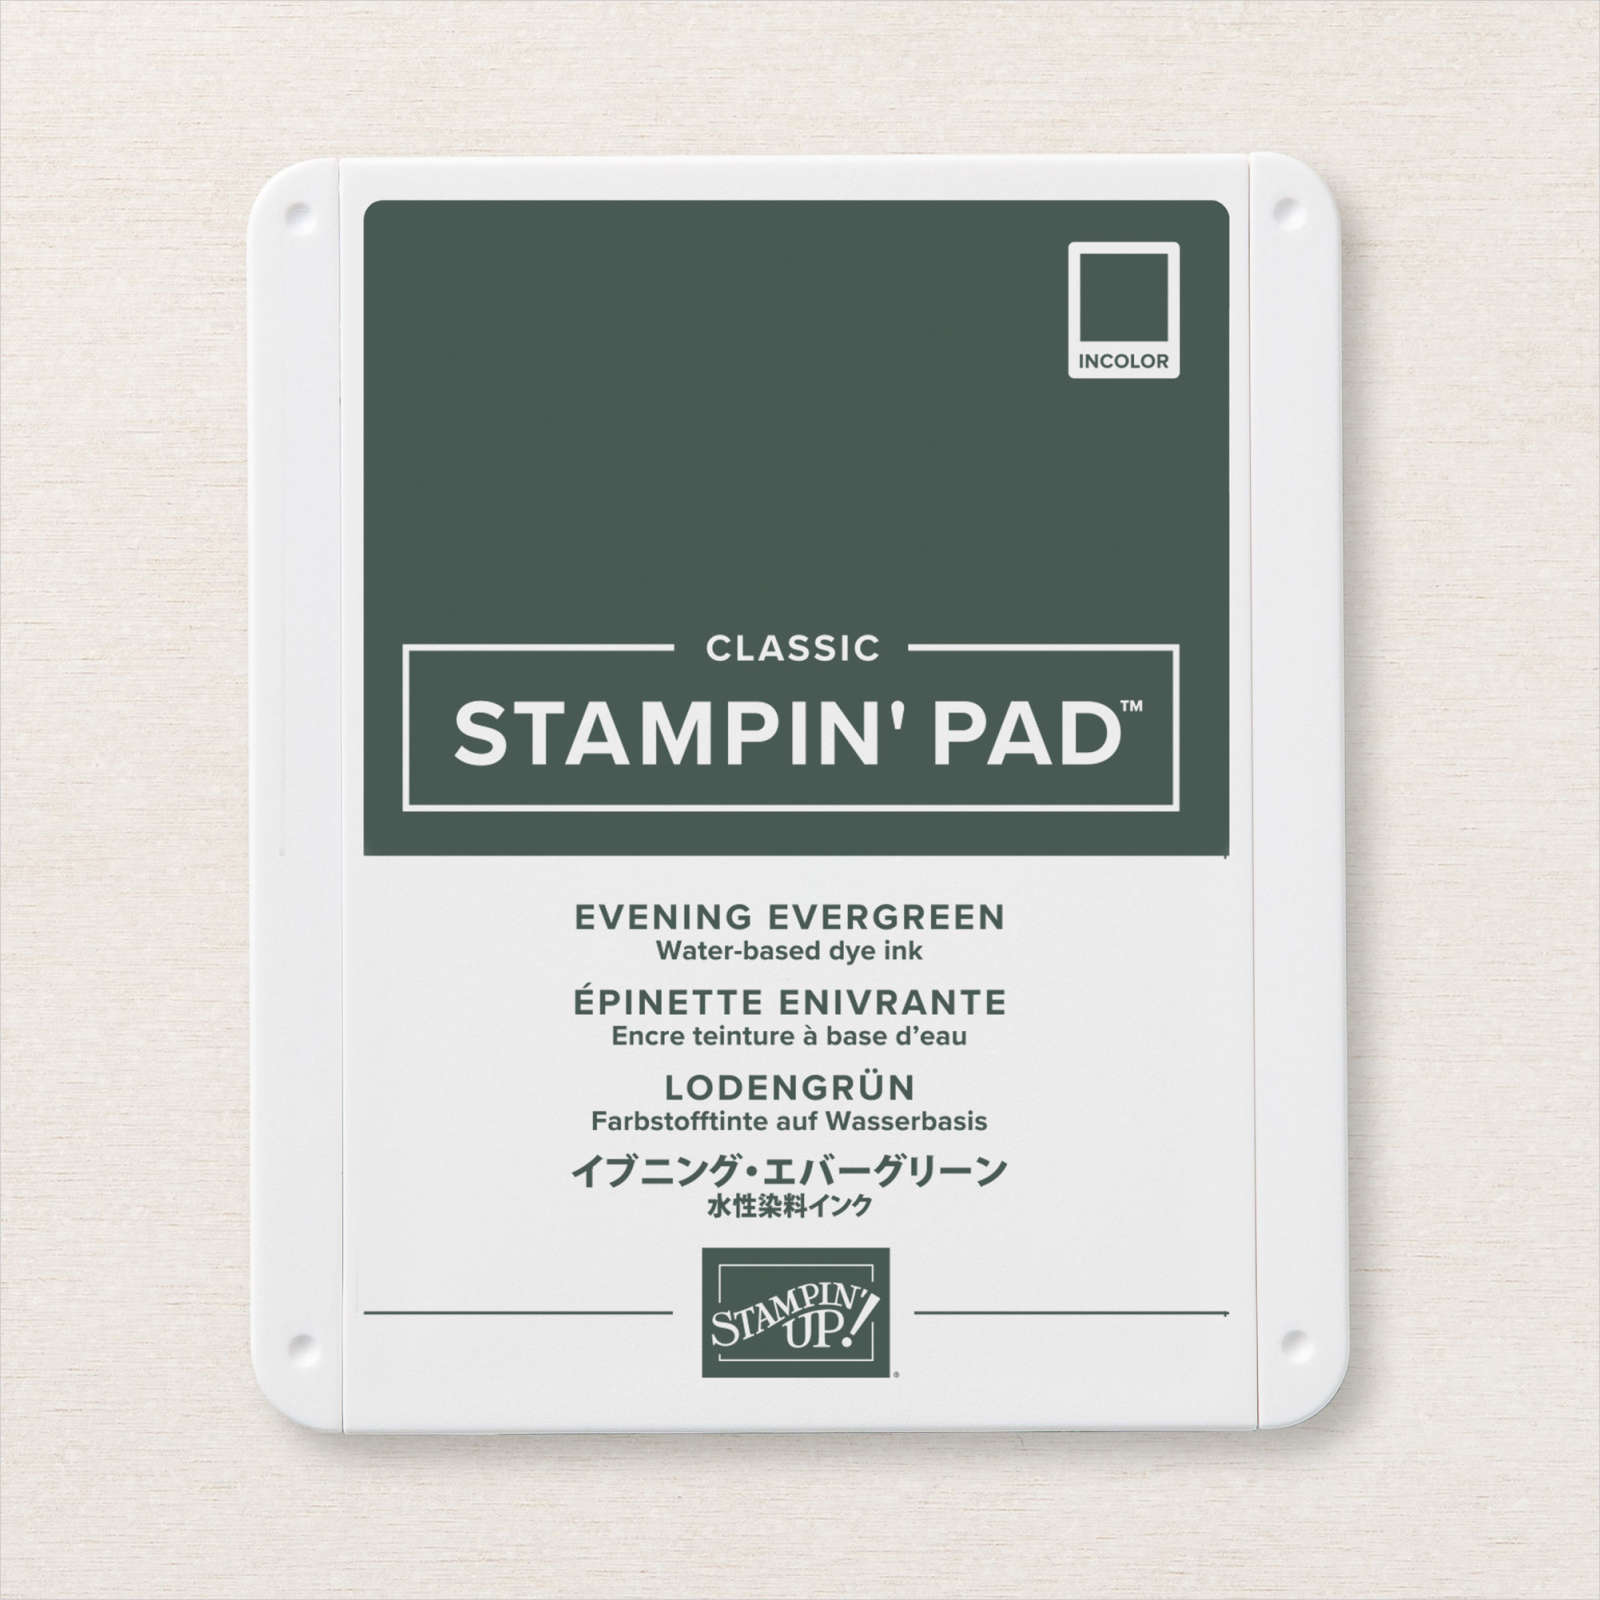
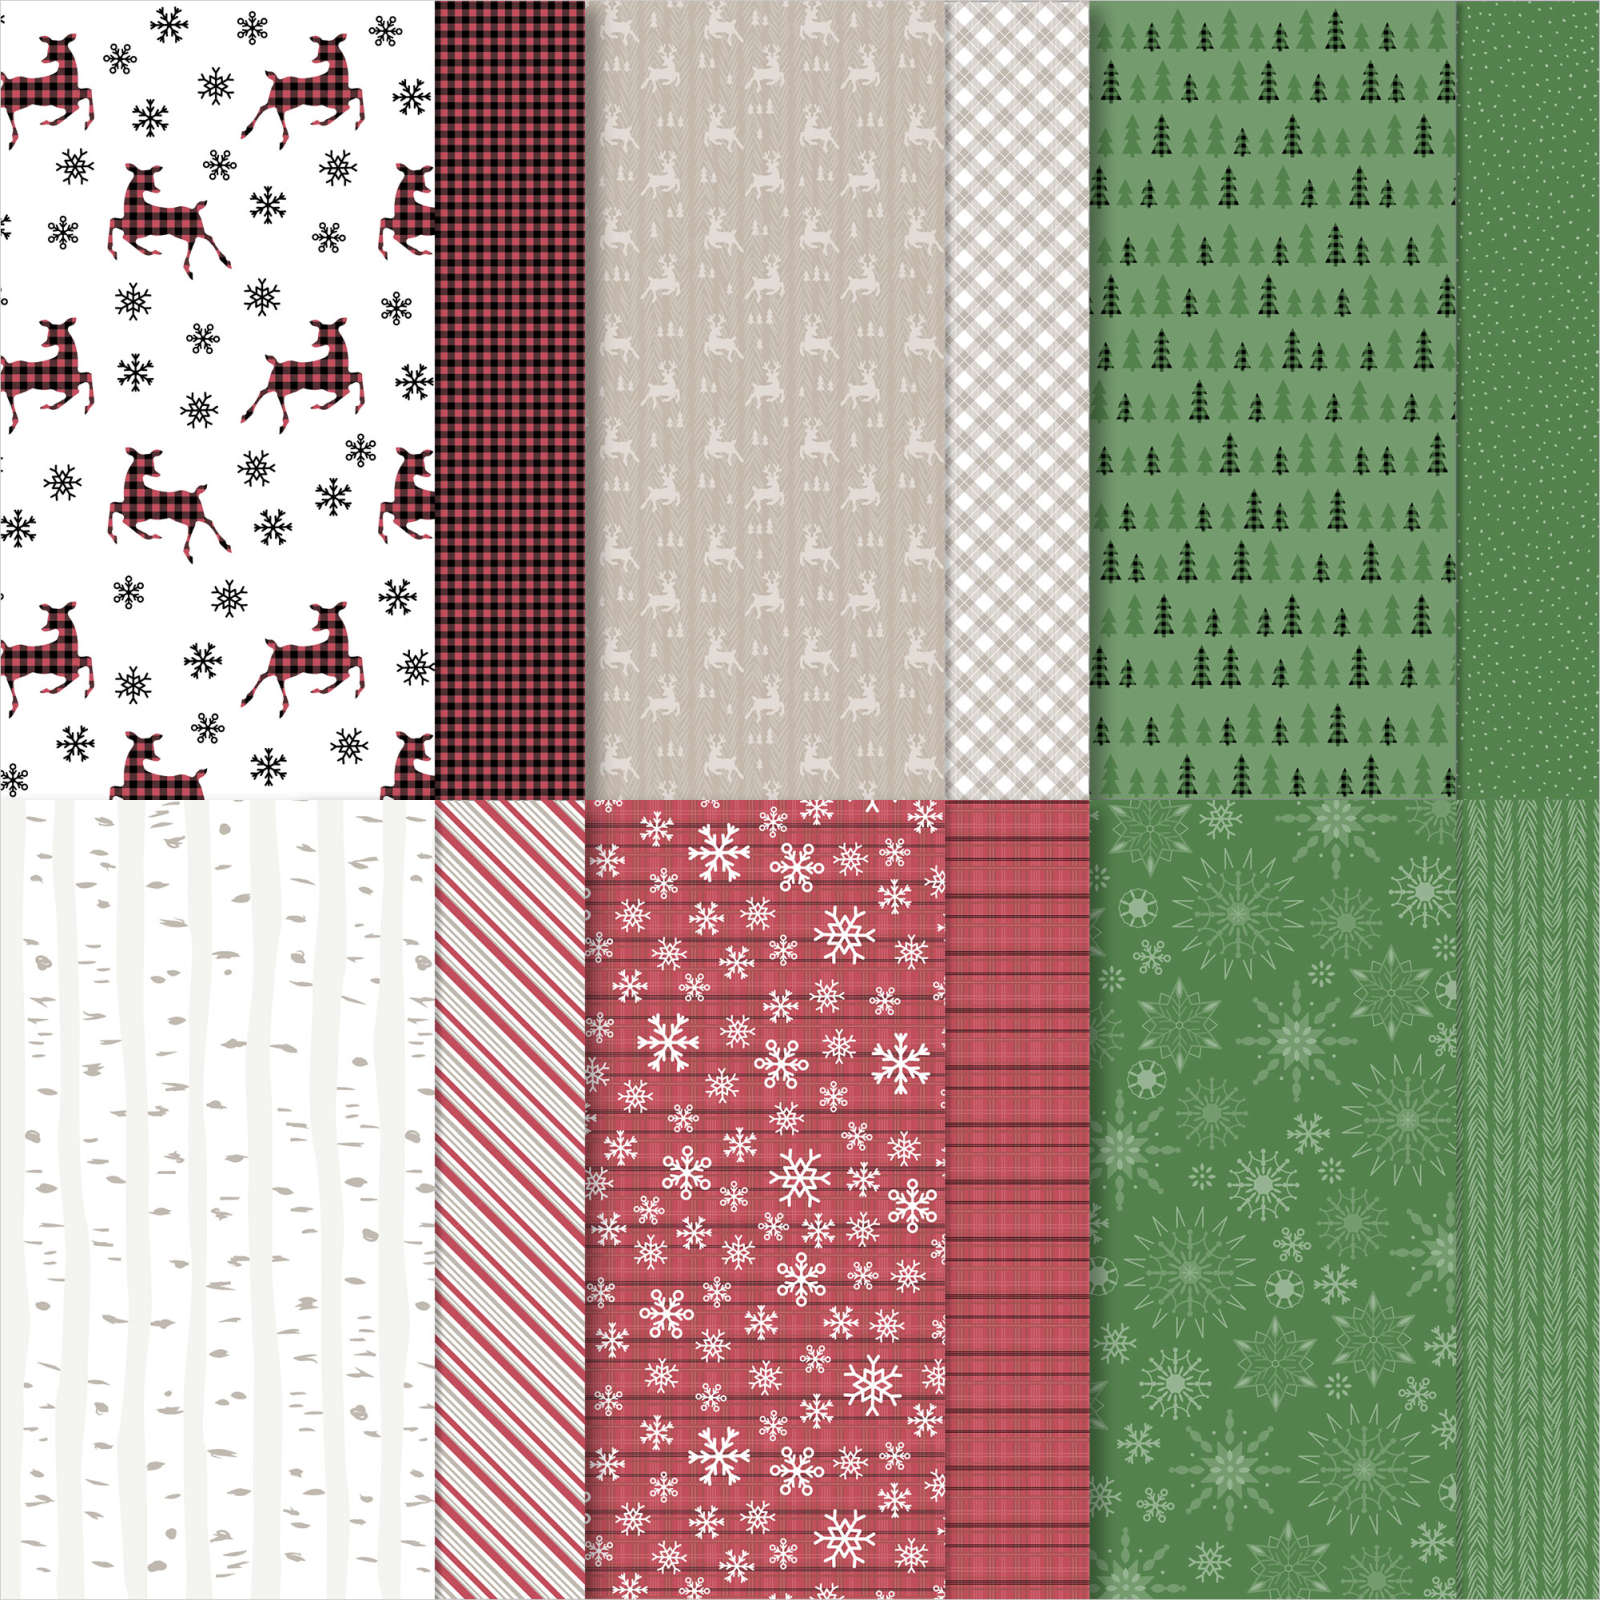
Recently I joined an online zoom experience with Clare and Emma our Australian and New Zealand Demonstrator Development Managers for Stampin’ Up! This was a fun experience where we were shown how to turn six, 6″ x 6″ pieces of Designer Series Paper into 14 cards. The first pieces from the patterned paper were used to create three cards. I followed the template that was provided to cut the six pieces of Christmas Trimmings 6″ x 6″ Designer Series Paper. I embossed Basic White card using the checked folder from the Checks & Dots Embossing Folders which I attached to either scored and folded Soft Succulent or Evening Evergreen card.

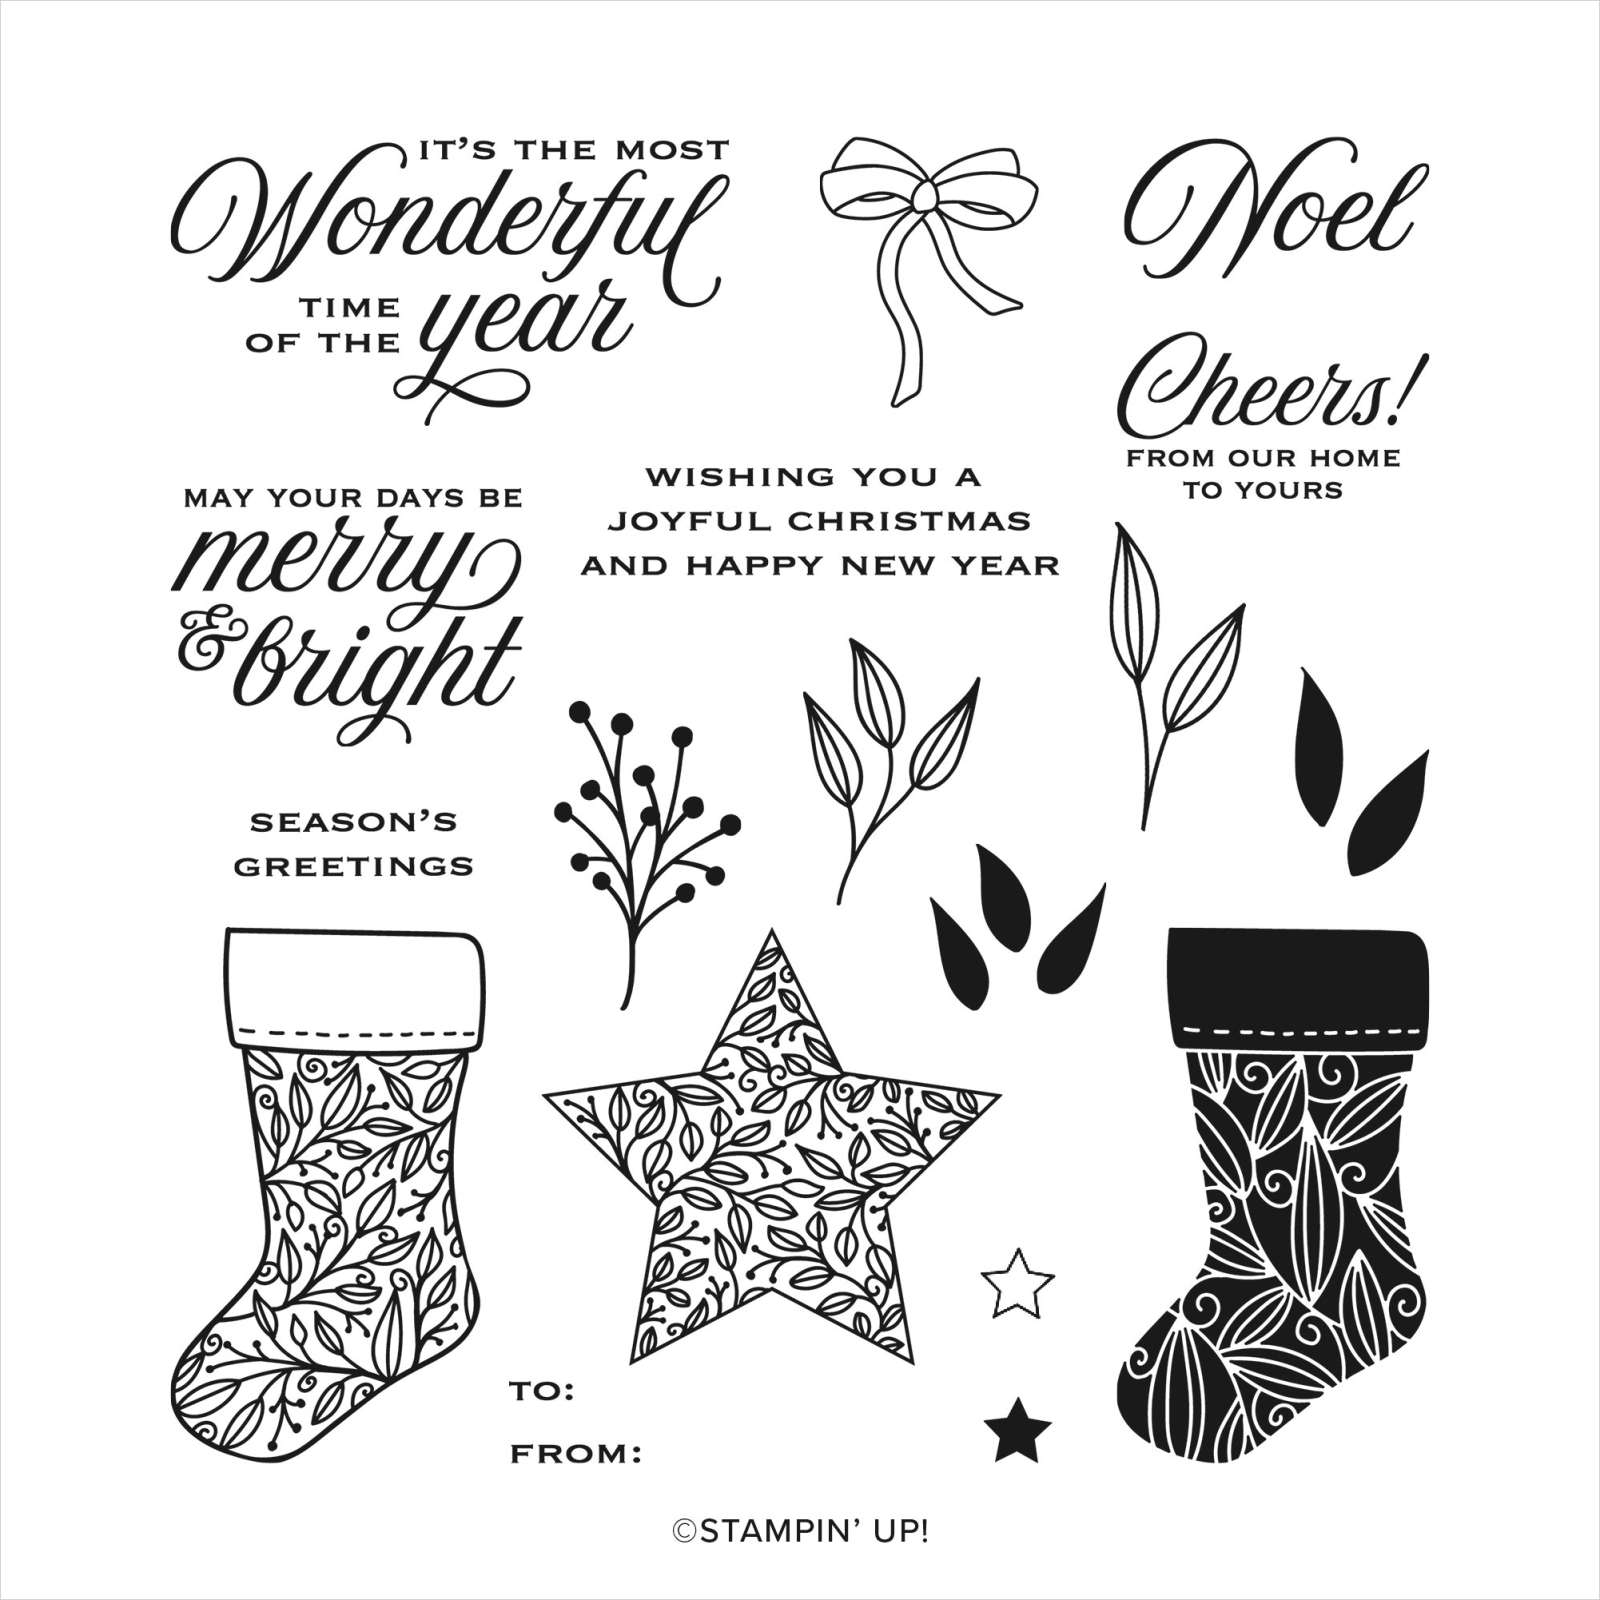
I joined and folded the Designer Series Paper pieces together and attached them to either Soft Succulent or Evening Evergreen card. The panels are attached to the card fronts, one for a portrait card and two for landscape cards. I stamped the greeting from the Tidings & Trimmings stamp set three times onto Basic White card using Evening Evergreen ink and punched them out using the Everyday Label Punch. I also punched two labels from Evening Evergreen card and one from Soft Succulent card.

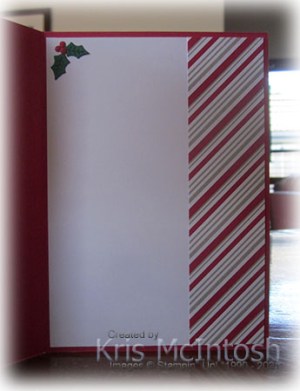
I cut the coloured labels in half and attached them behind the greetings to give a little dimension. I attached a length of Evening Evergreen Chevron Ribbon behind each greeting before attaching them to the card front using dimensionals. To decorate the inside of the card, I stamped the greeting from the Tidings & Trimmings stamp set using Evening Evergreen ink. I also stamped the leaf outline from the Tidings & Trimmings stamp set beside the greeting using Evening Evergreen ink. I stamped the leaf fill image from the same stamp set using Soft Succulent ink.

I loved the idea of this Pick Six Wonder and we have been creating these in my weekly class at Beachmere. I had a kit left over and decided to create the cards again but this time adding an image from the Tidings & Trimmings stamp set. So I created the card front up to the point where the Designer Series Paper panels are attached. To create the focal image panels, I stamped the stocking image from the Tidings & Trimmings stamp set onto Basic White card using Soft Succulent ink. I attached the stamped panel to either Soft Succulent or Evening Evergreen card and then the card fronts using dimensionals. I stamped “Noel” from the Tidings & Trimmings stamp set onto Basic White card using Cherry Cobbler ink. I trimmed around the greetings and attached them to the image panels. To decorate the inside of the cards, I stamped the greeting from the Tidings & Trimmings stamp set onto Basic White card using Evening Evergreen ink. I stamped the stocking image from the same stamp set beside the greeting using Cherry Cobbler ink.
I love both versioins of these cards. Which one do you like best?
Bye for now,
Kris
Product Used:


Deepest Sympathy

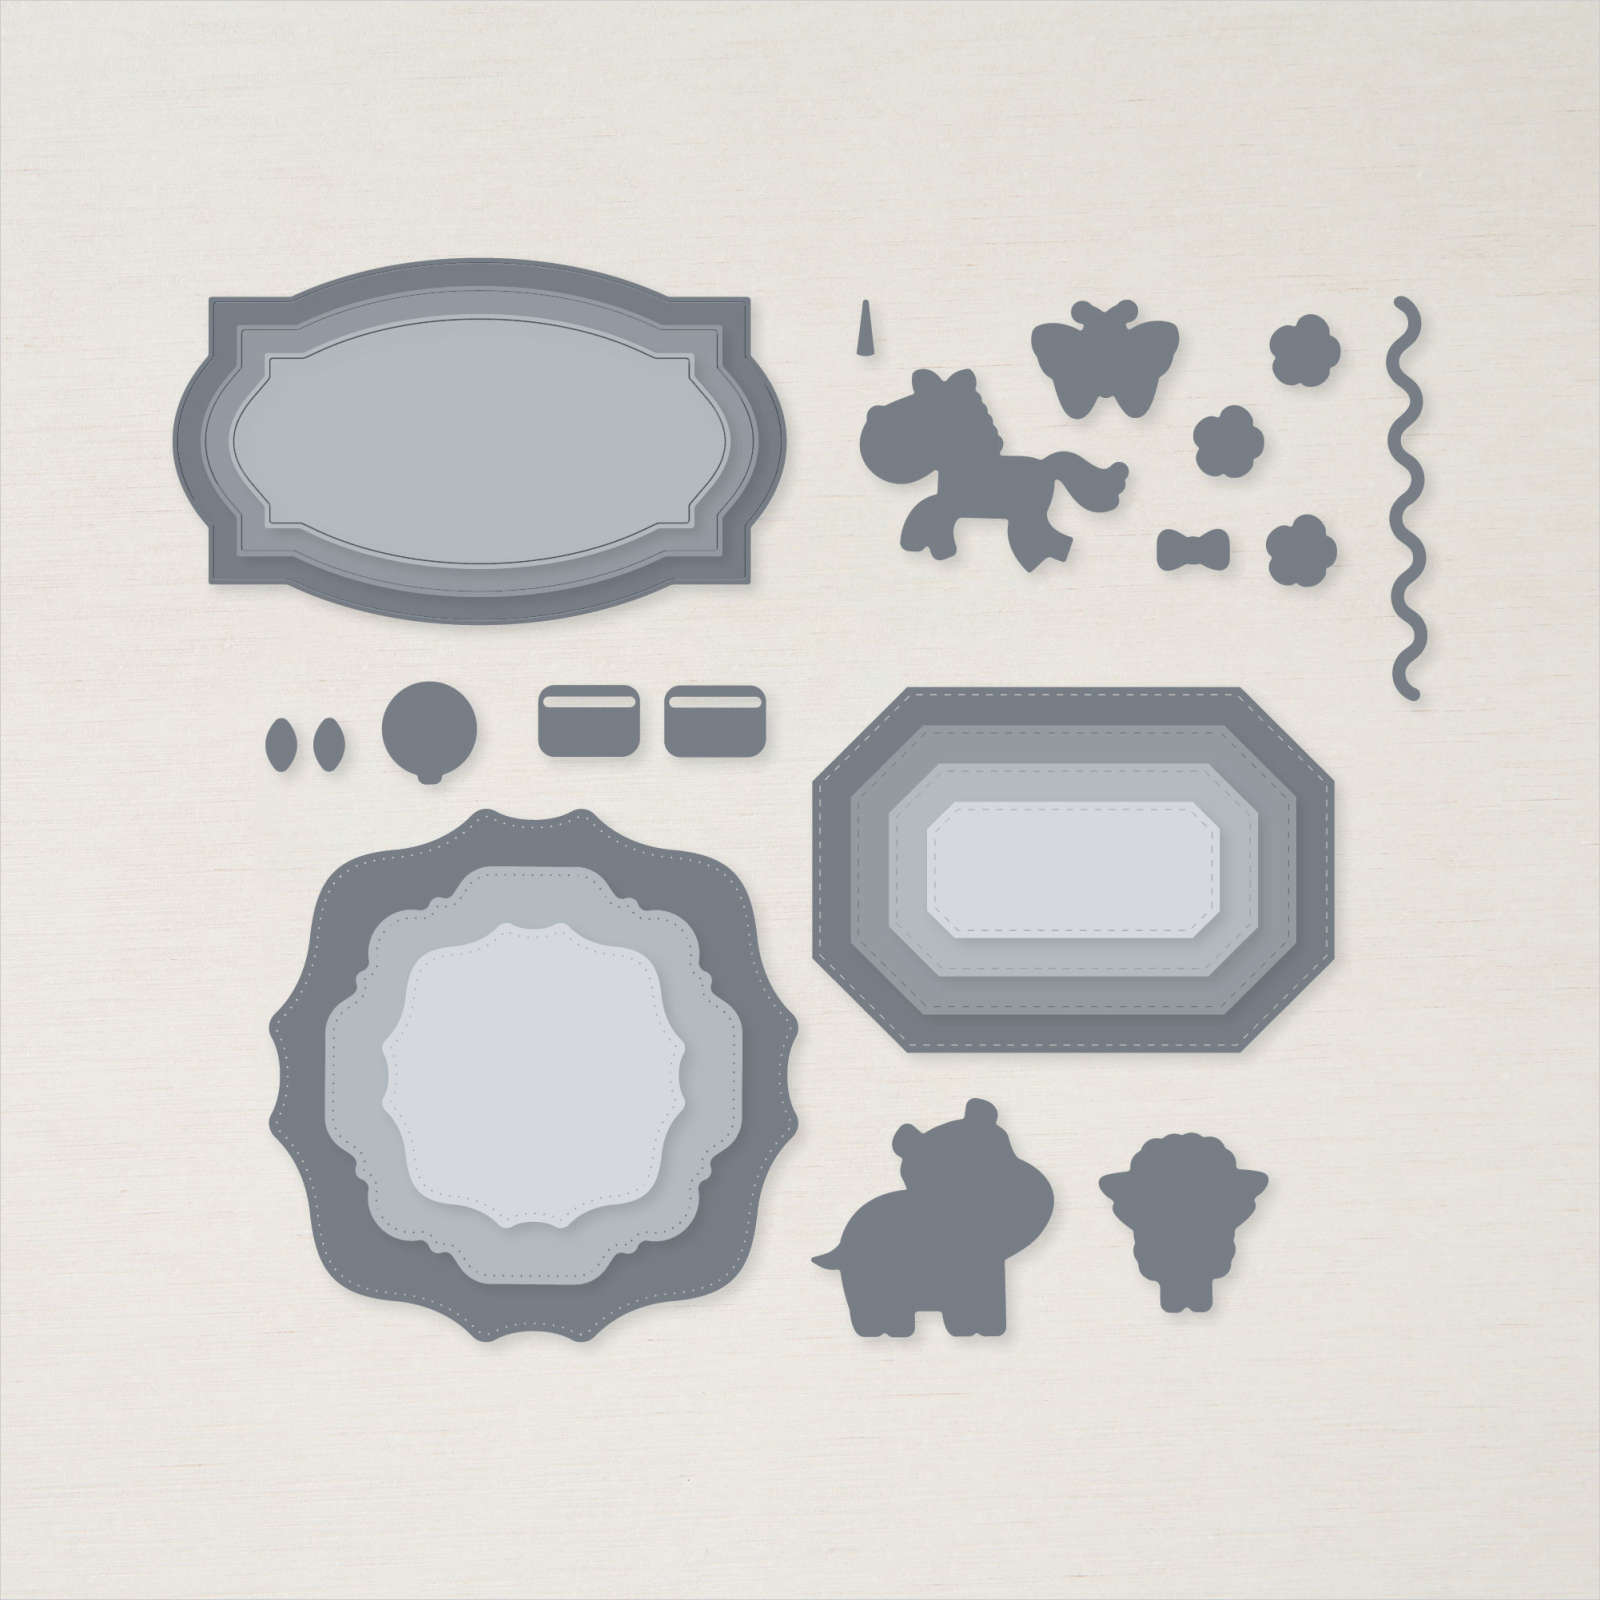
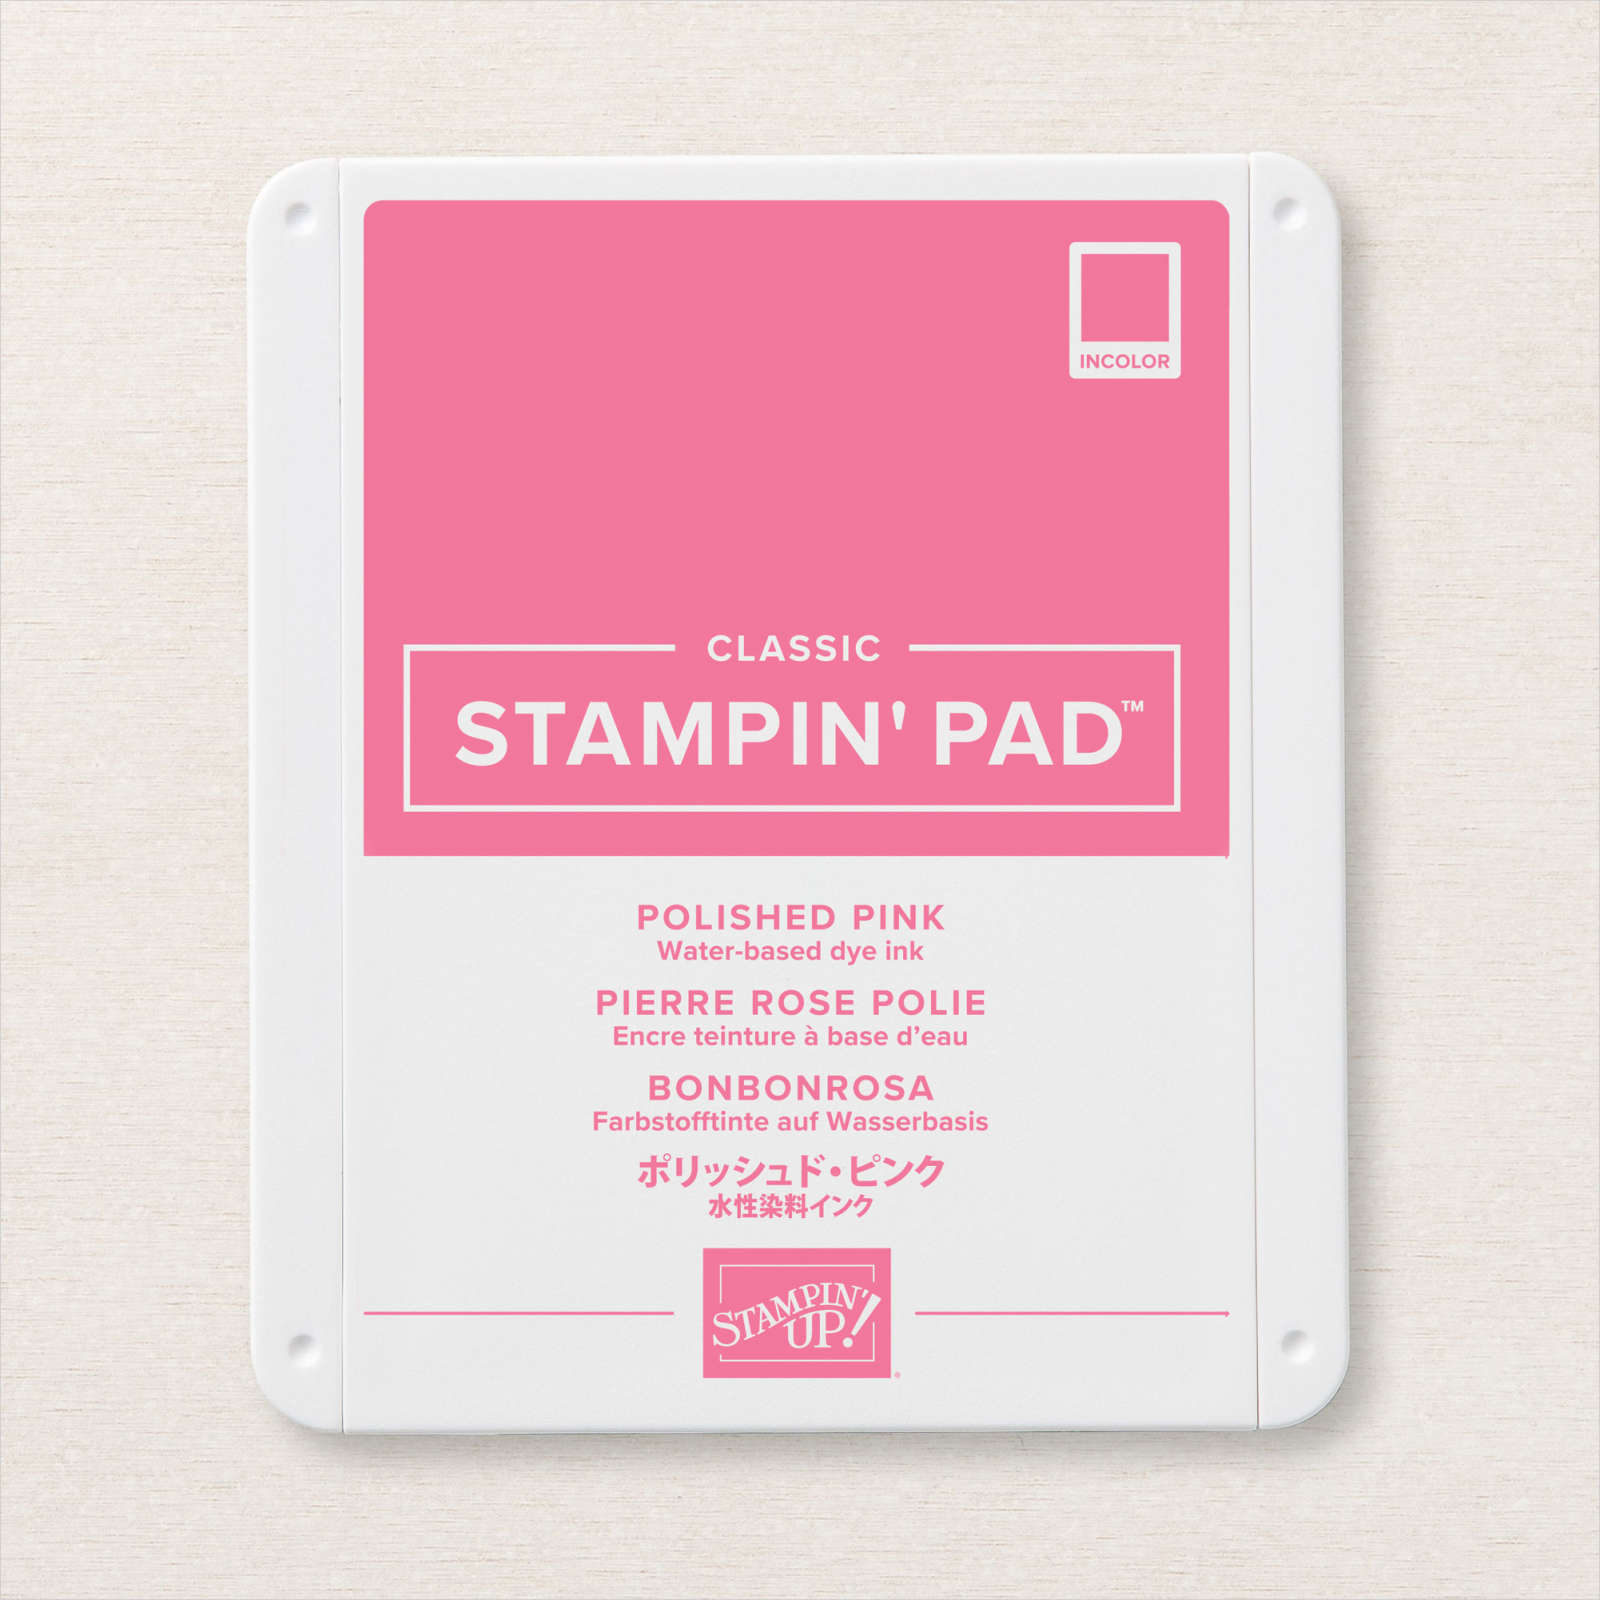
Sympathy cards are always hard to make at the time, so I decided to create one to have in my stash. I embossed Basic White card using the Tasteful Texture 3D Embossing Folder and attached it to scored and folded Soft Succulent card. I stamped the greeting from the Peaceful Moments stamp set onto Basic White card using Polished Pink ink and cut it out using one of the Hippo and Friends Dies.

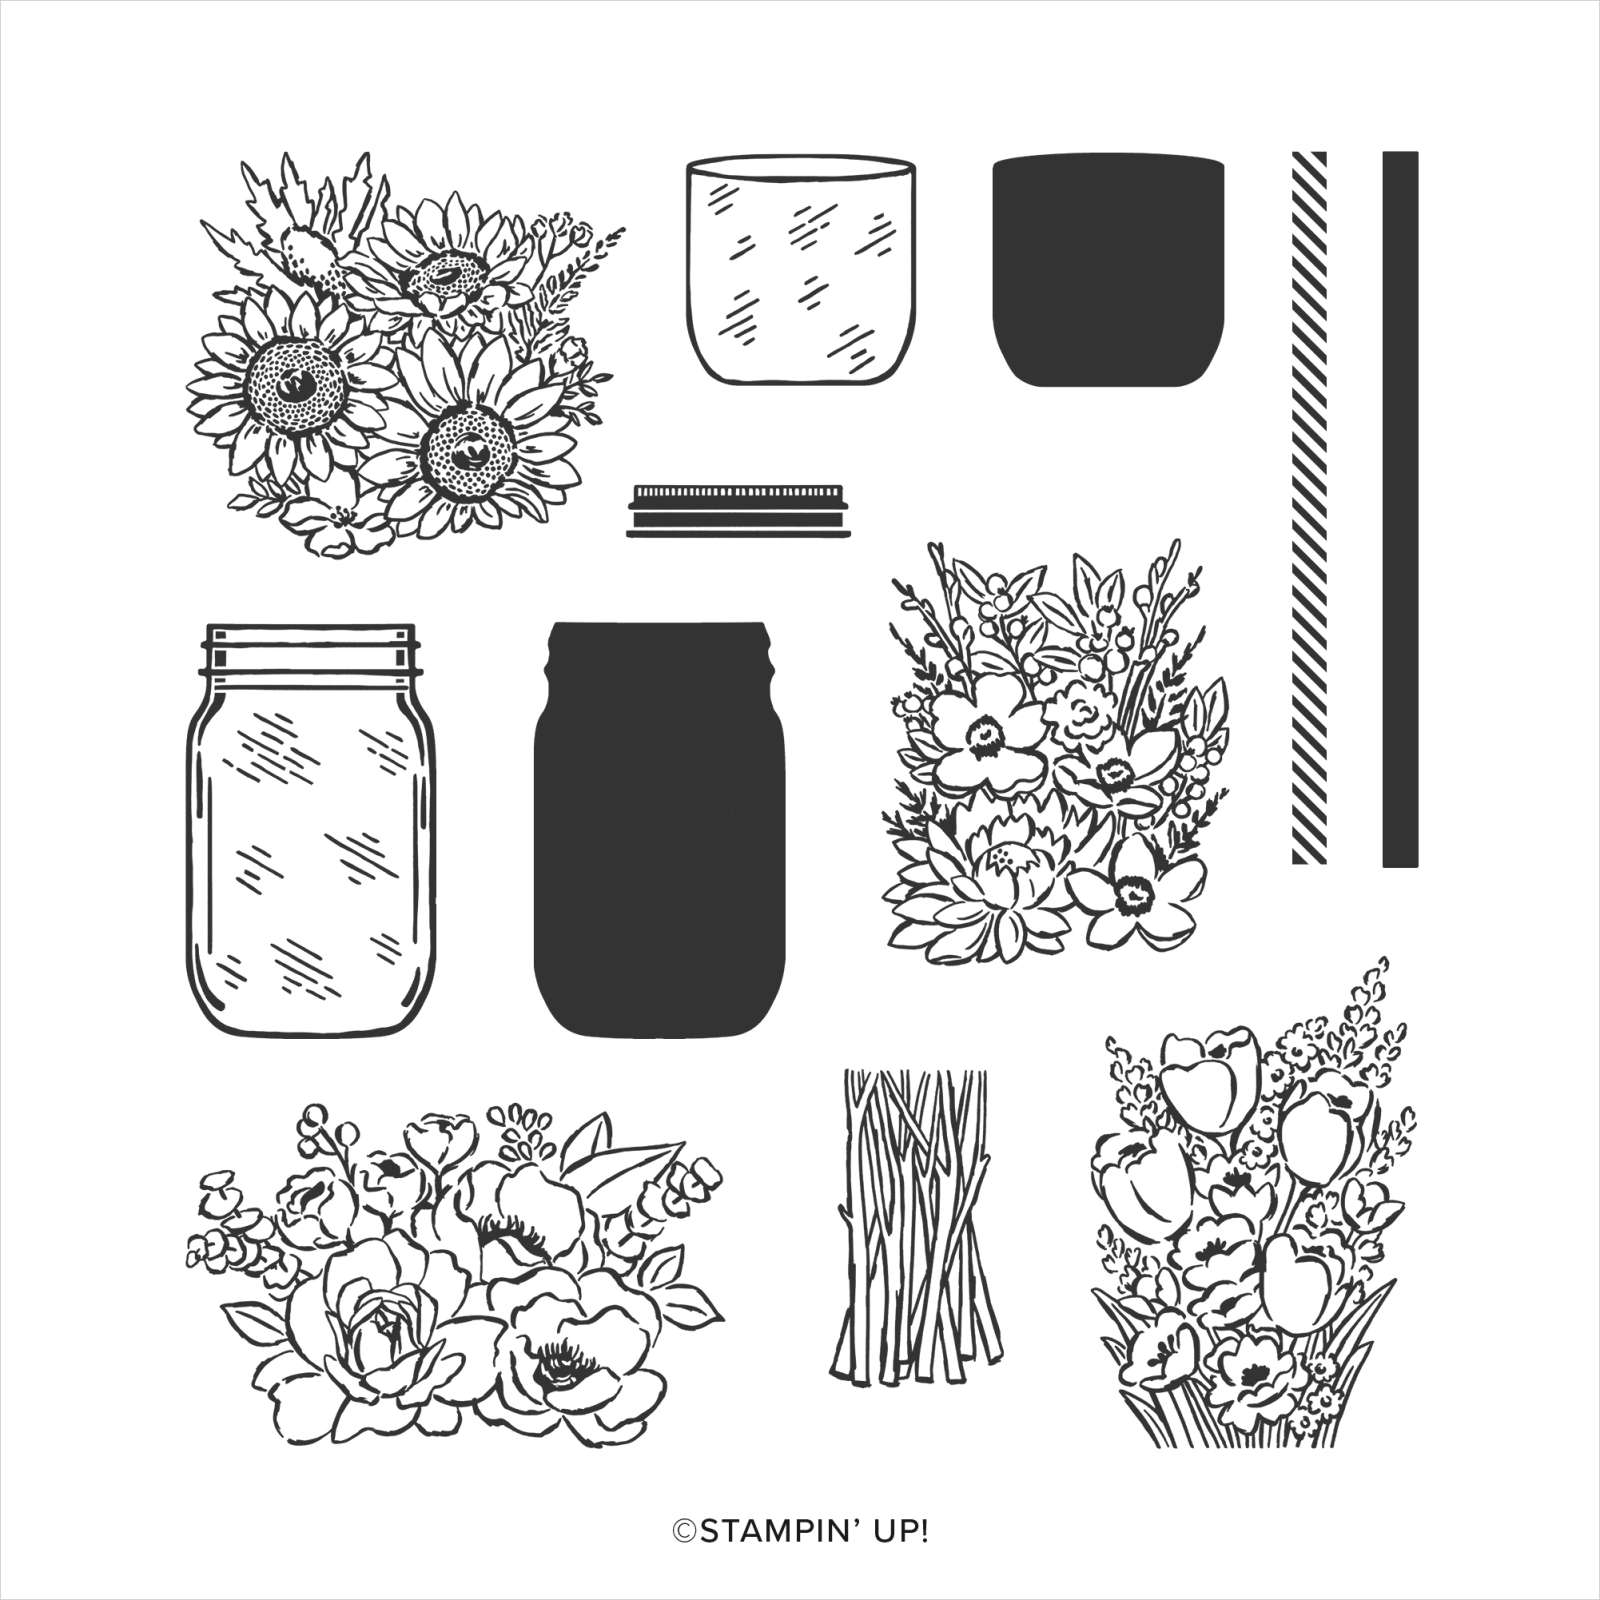
I cut Soft Succulent with a larger die from the Hippo and Friends Dies and attached the greeting to the centre. The greeting panel is attached to the centre of the embossed Basic White card using dimensionals. I stamped the floral image from the Jar of Flowers stamp set twice onto Basic White card using Memento Tuxedo Black ink.

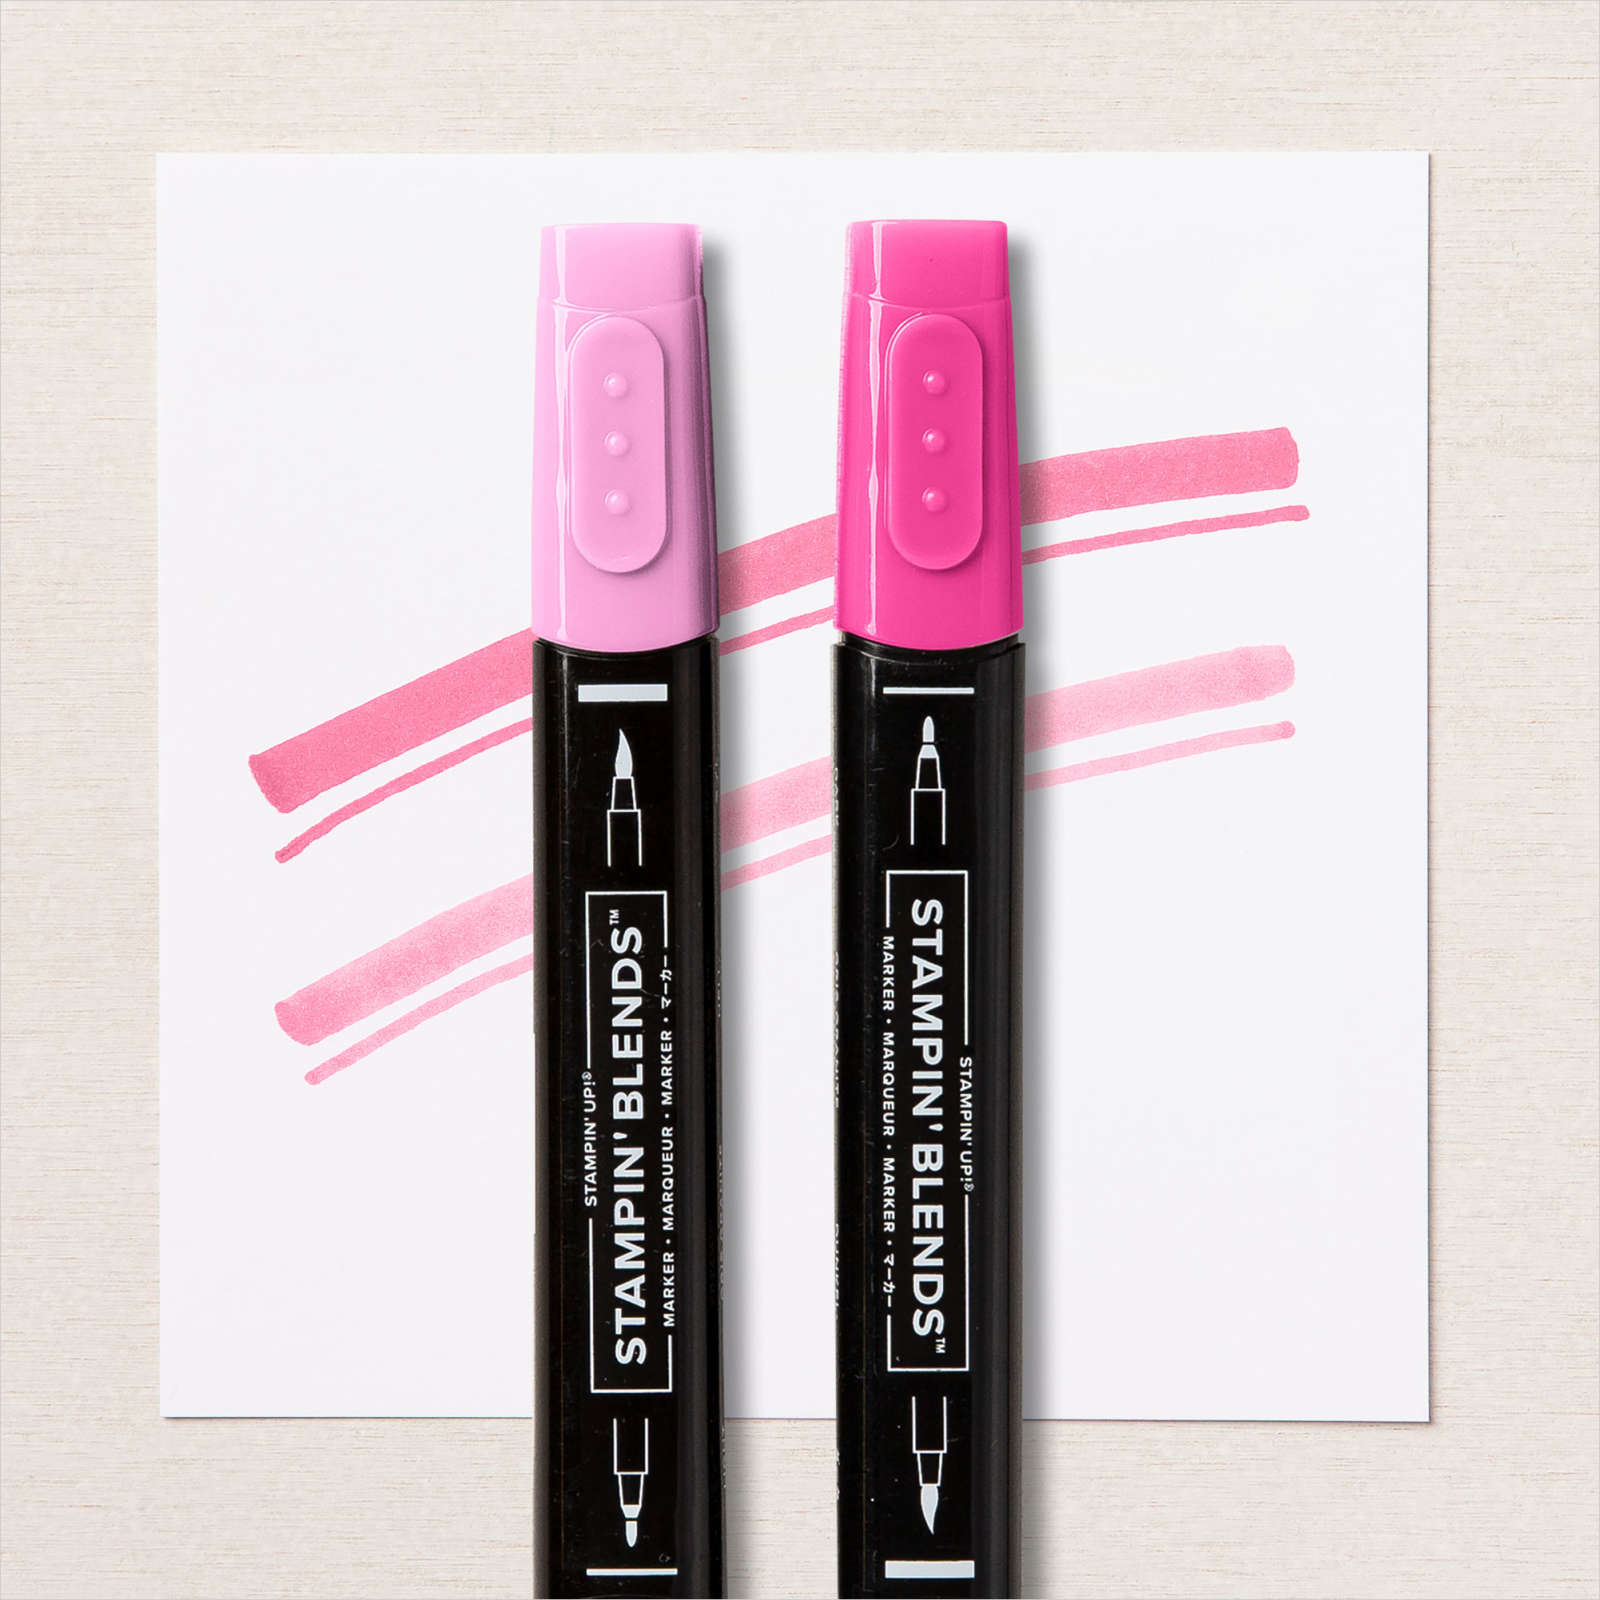
I coloured the images using the Polished Pink, Soft Succulent and Dark Fresh Freesia Stampin’ Blends. I cut out the images and attached them to the card front using dimensionals where necessary. To decorate the inside of the card, I stamped the same image from the Jar of Flowers stamp set onto the lower left hand corner using Memento Tuxedo Black ink and coloured the image using the same Stampin’ Blends.
I have neglected this stamp set for a long time and I don’t know why.
Bye for now,
Kris
Product Used:


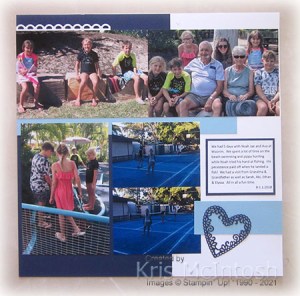
Moree

Today’s page is created around some photos taken back in 2018. Funny when you go through your albums and realised whole months of the year have gone unscrapped! Anyway, they were taken in Moree on our way to Dubbo for a week’s holiday. Ron was born in Moree and his Mum and Dad are both buried there, so when we are there we always refresh the flowers on their headstone. I attached a piece of Basic Black card across a Basic White 12″ x 12″ page. I added a square of Beautifully Penned Designer Series Paper to the centre of the page. I added a strip of the reverse side of the patterned paper down the left hand side of the page. This beautiful black and white Designer Series paper is available FREE with a qualifying order during Sale-A-Bration. I attached my photos to Basic Black card before attaching them to the page.

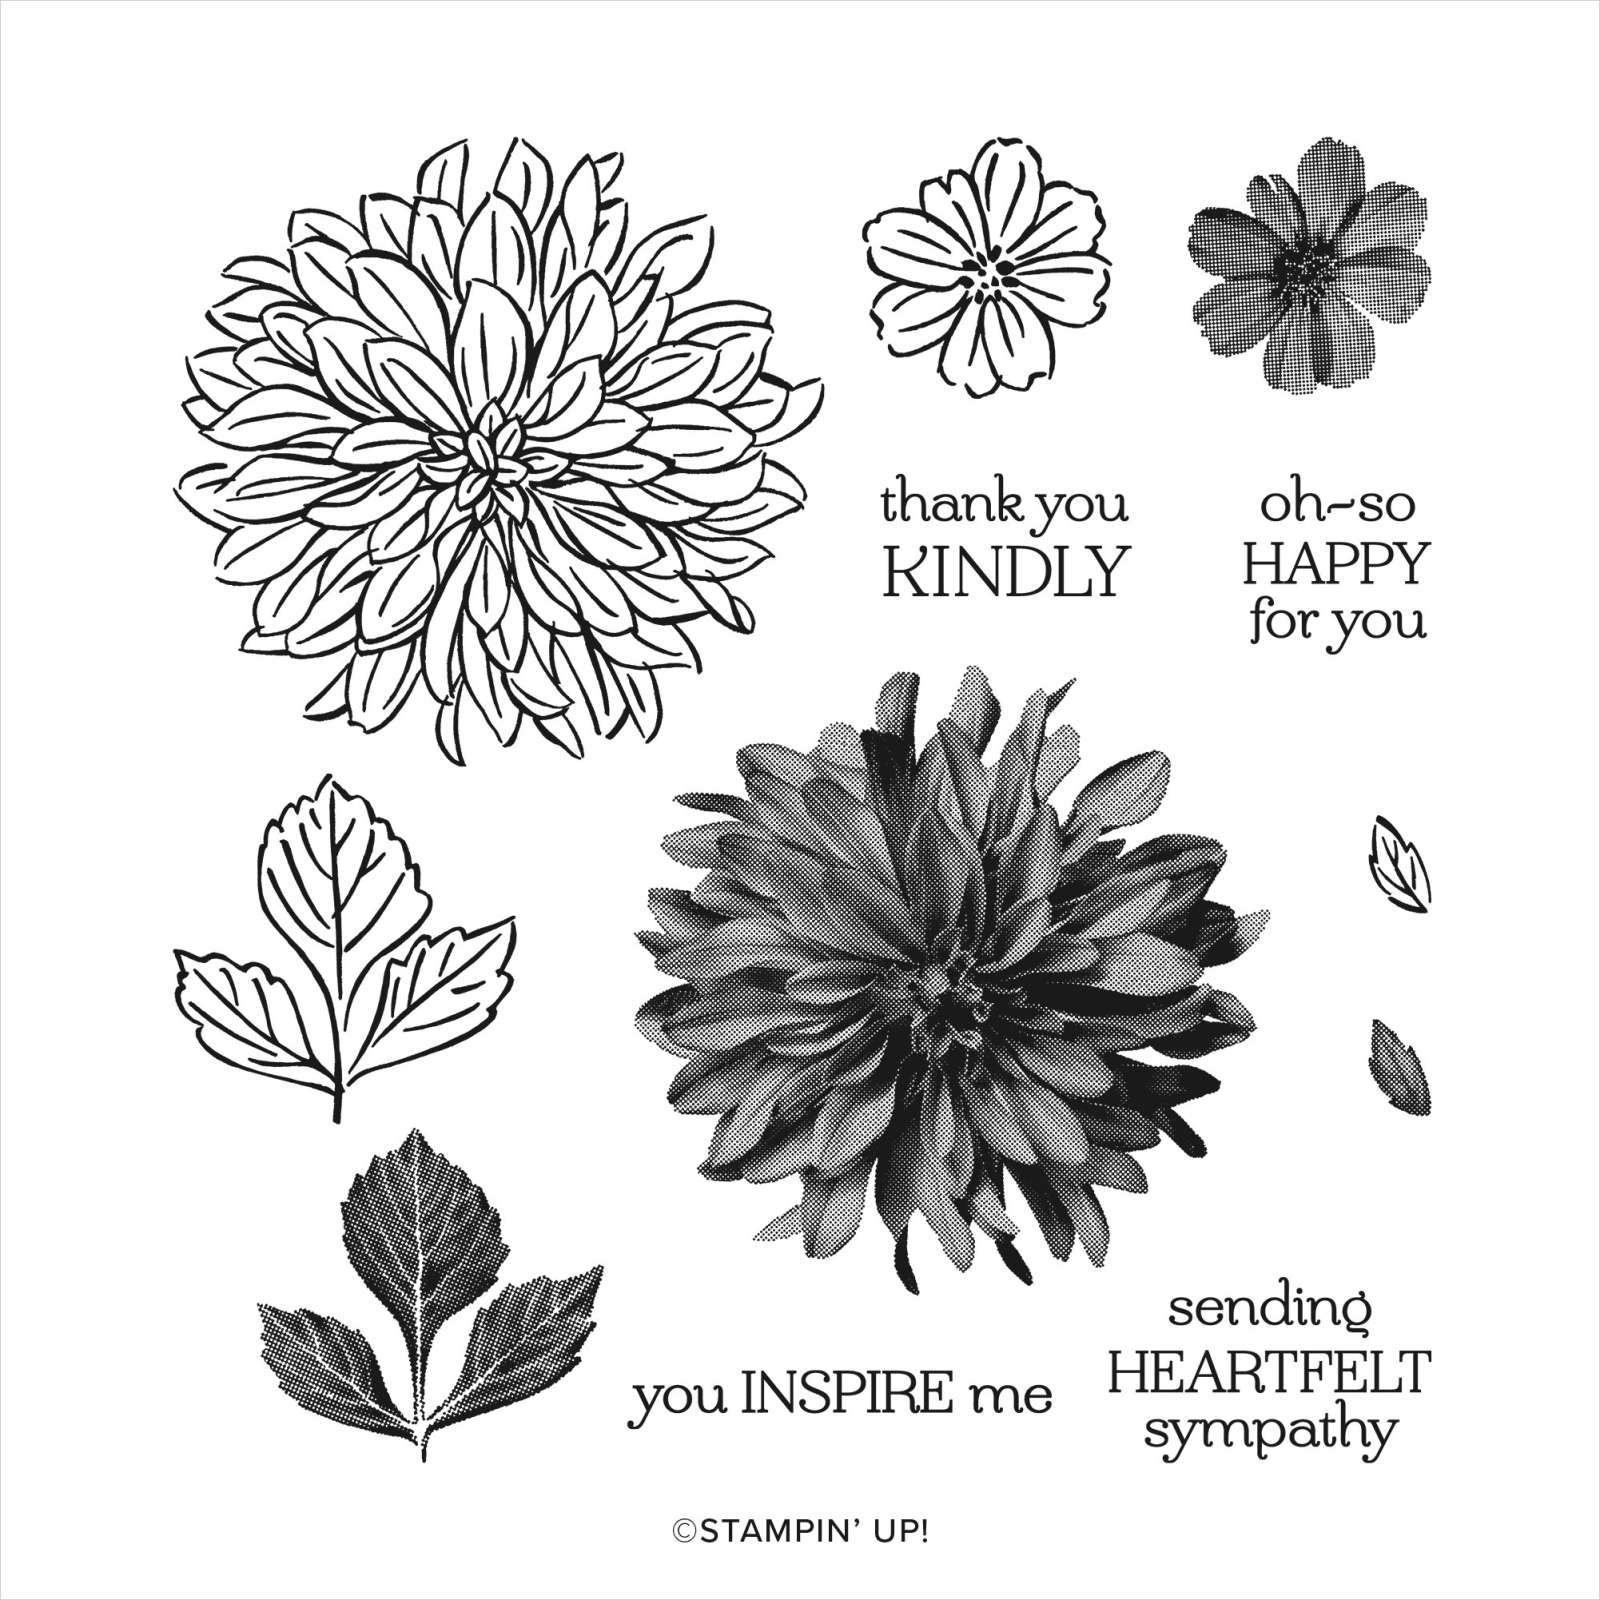
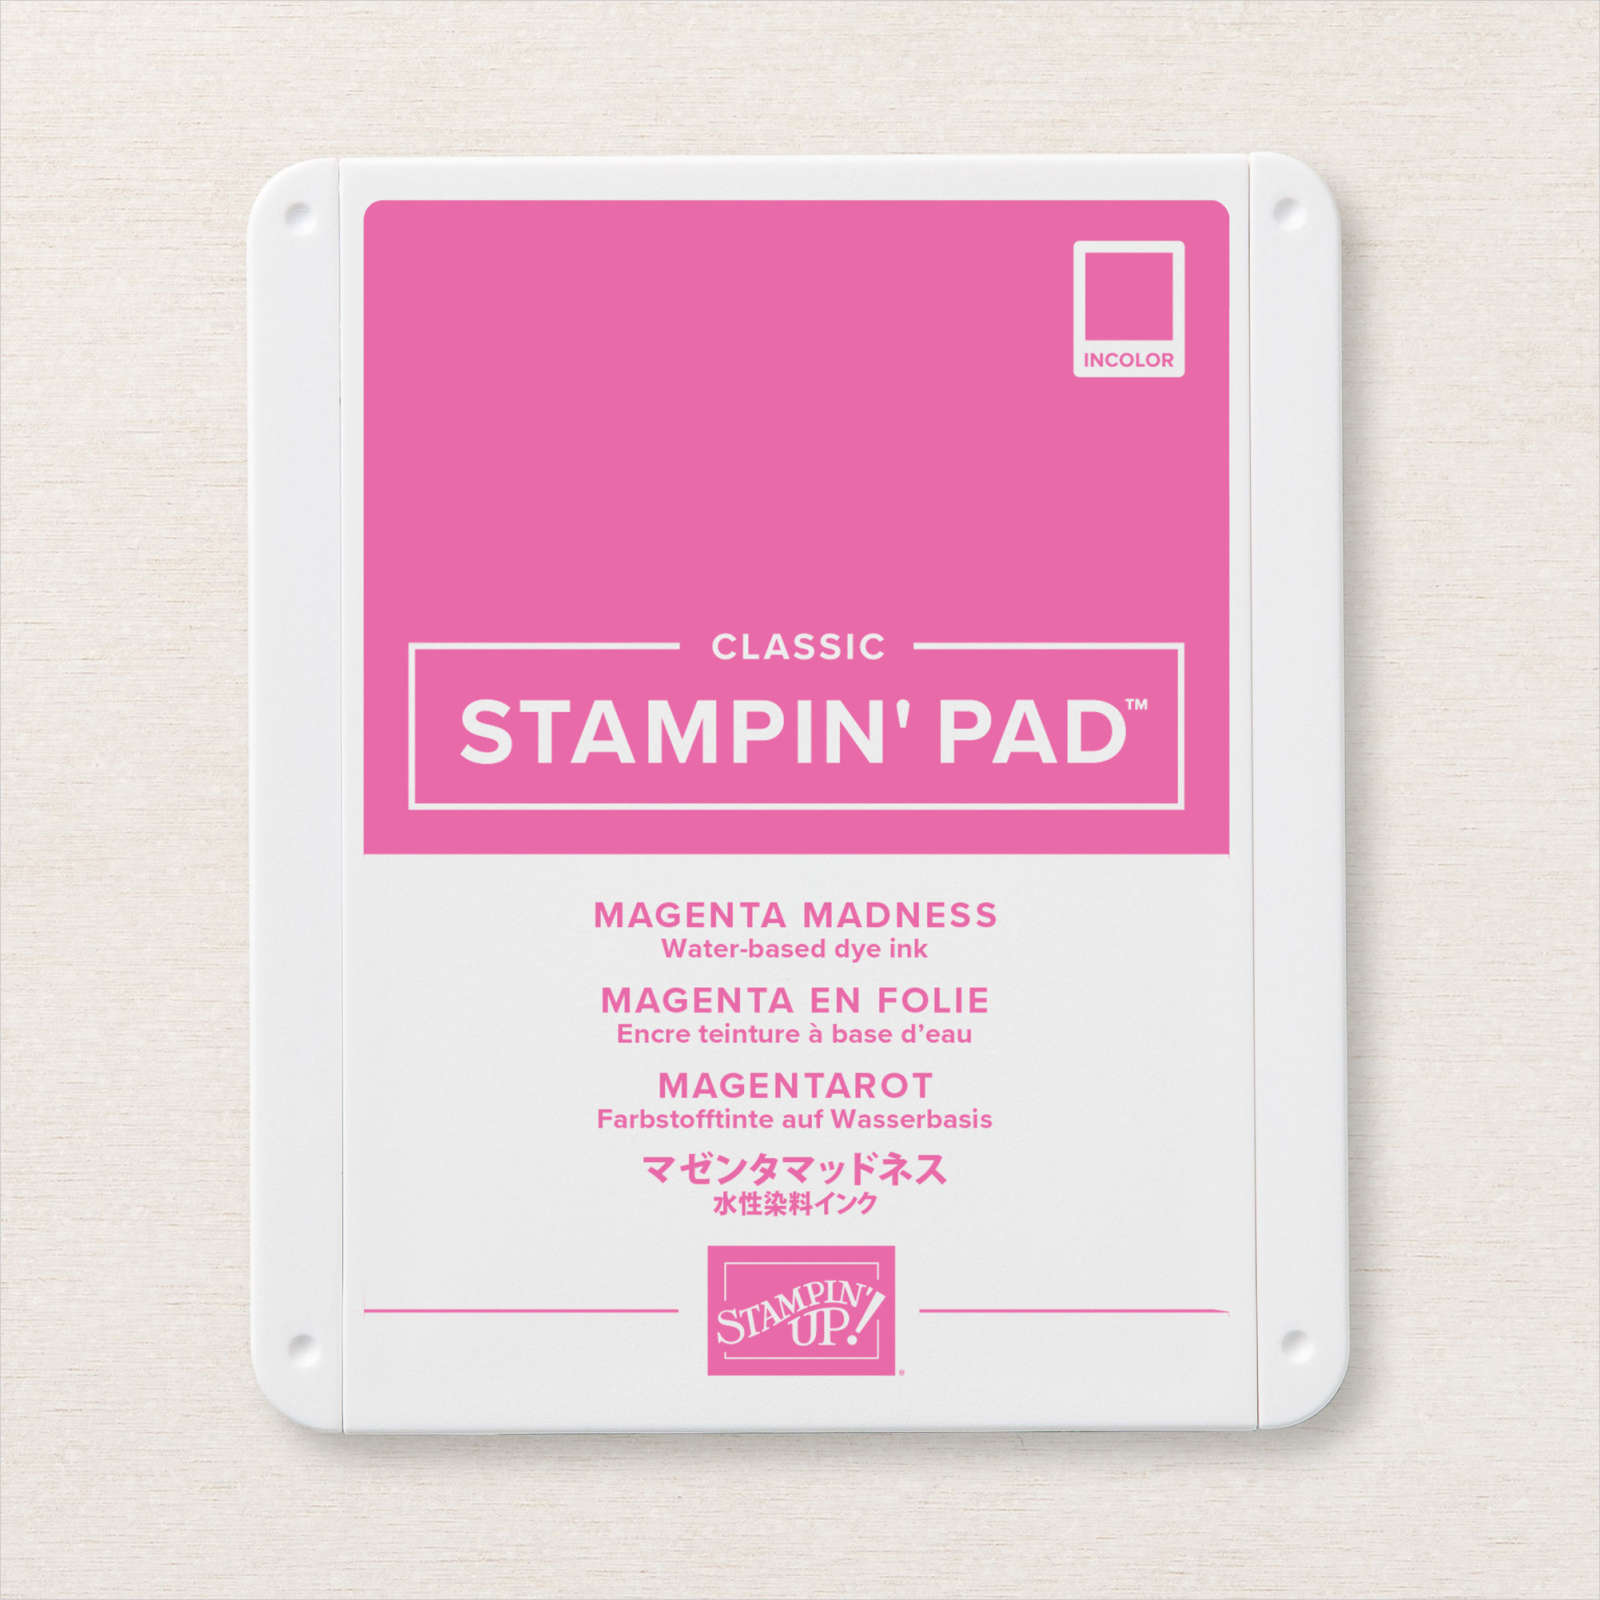
The title is cut from Basic Black card using the Playful Alphabet Dies. I printed my journaling onto Basic White card, attached it to Basic Black card and then the right hand side of the page. I stamped the large dahlia and two small dahlias from the Delicate Dahlia stamp set onto Basic White card using Magenta Madness ink. I also stamped three sets of leaves from the same stamp set onto Basic White card using Just Jade ink. I cut out the flowers and leaves and arranged them onto the page using dimensionals to attach the two smaller flowers. The Delicate Dahlia stamp set is also available FREE with a qualifying order during Sale-A-Bration. You might need to be quick as Sale-A-Bration ends in a couple of weeks.
I’d love to know what you think of my page.
Bye for now,
Kris
Product Used:


More Feels Like Home

Today I am once more sharing a card I made using the Feels Like Home stamp set which you can earn for FREE with a qualifying order during Sale-a-Bration. For this card, I stamped the image from the Feels Like Home stamp set onto Basic Black card using Versamark ink. I sprinkled the image with White Embossing Powder and heat set it. I used a technique called Black Magic to add colour to the embossed image.

I used a combination of Dark Old Olive, Light and Dark Smoky Slate, Light Soft Suede, Dark Calypso Coral, Dark Poppy Parade and Dark Pumpkin Pie Stampin’ Blends to add colour to the image. You just add colour to the embossed lines.
I love how this technique makes the image stand out so beautifully. I attached the image panel to Basic White card and then scored and folded Old Olive Card. To decorate the inside I stamped the single flower pot image from the Feels Like Home stamp set onto Basic Black card using Versamark ink. Again I sprinkled the image with White Embossing Powder and heat set it. The image is coloured using the Dark Old Olive, Dark Poppy Parade, Light Calypso Coral, Light Soft Suede and Light Smoky Slate Stampin’ Blends. I cut out the image using one of the scalloped circles from the Layering Circles Dies and attached it to the lower left hand corner of Basic White card.
I think this is my favourite of the cards I have so far made using the Feels Like Home stamp set. What about you which one do you love.
Bye for now,
Kris
Product Used:


Feels Like Home

Yesterday on my Facebook Live, I shared a couple of ways to colour the beautiful image in the Feels Like Home stamp set which is another stamp set you can earn for FREE with a qualifying order during Sale-A-Bration. For today’s card, I stamped the image from the Feels Like Home stamp set onto Vellum paper using Memento Tuxedo Black ink. I turned the image over and coloured the back of the image. I used a Dark Old Olive Stampin’ Blend to colour the leafy images. I coloured the door using the Dark Smoky Slate Stampin’ Blend. I coloured the door frame using the light Soft Suede Stampin’ Blend.
The brick work is coloured using the Light Smoky Slate Stampin’ Blend. I coloured the flower pots using Dark Calypso Coral with Light Soft Suede Stampin’ Blend over the top. The timber flooring is coloured using firstly the Dark Pumpkin Pie and then the Light Soft Suede Stampin’ Blend. I cut the image using one of the Stitched Rectangle Dies. I used the same die to cut Old Olive card and then cut the centre away using a slightly smaller Stitched Rectangle Die. I attached the Vellum image to the back of the Old Olive frame and then Basic White card. The whole panel is attached to scored and folded Old Olive card.

To decorate the inside of the card, I stamped the single flower pot image from the Feels Like Home stamp set onto Vellum paper using Memento Tuxedo Black ink. Once again I flipped the image over and coloured it using Dark Old Olive, Dark Calypso Coral, Light Soft Suede and Dark Poppy Parade Stampin’ Blends. I cut out the image using the Layering Circle Dies. The image is attached to the centre of Basic White card using Tombow Multipurpose Glue around the edges only. I cut a scalloped circle Old Olive card with a smaller circle cut in the centre using the Layering Circle Dies. I made sure that this smaller circle was one size smaller than the circle used to cut out the image. The Old Olive scalloped circle is attached over the stamped edges so that no edges are showing.
I am enjoying trying different colouring mediums with this gorgeous stamp set. Don’t forget it could be yours for FREE with a qualifying order during Sale-a-Bration.
Bye for now,
Kris
Product Used:


Seasons Greetings

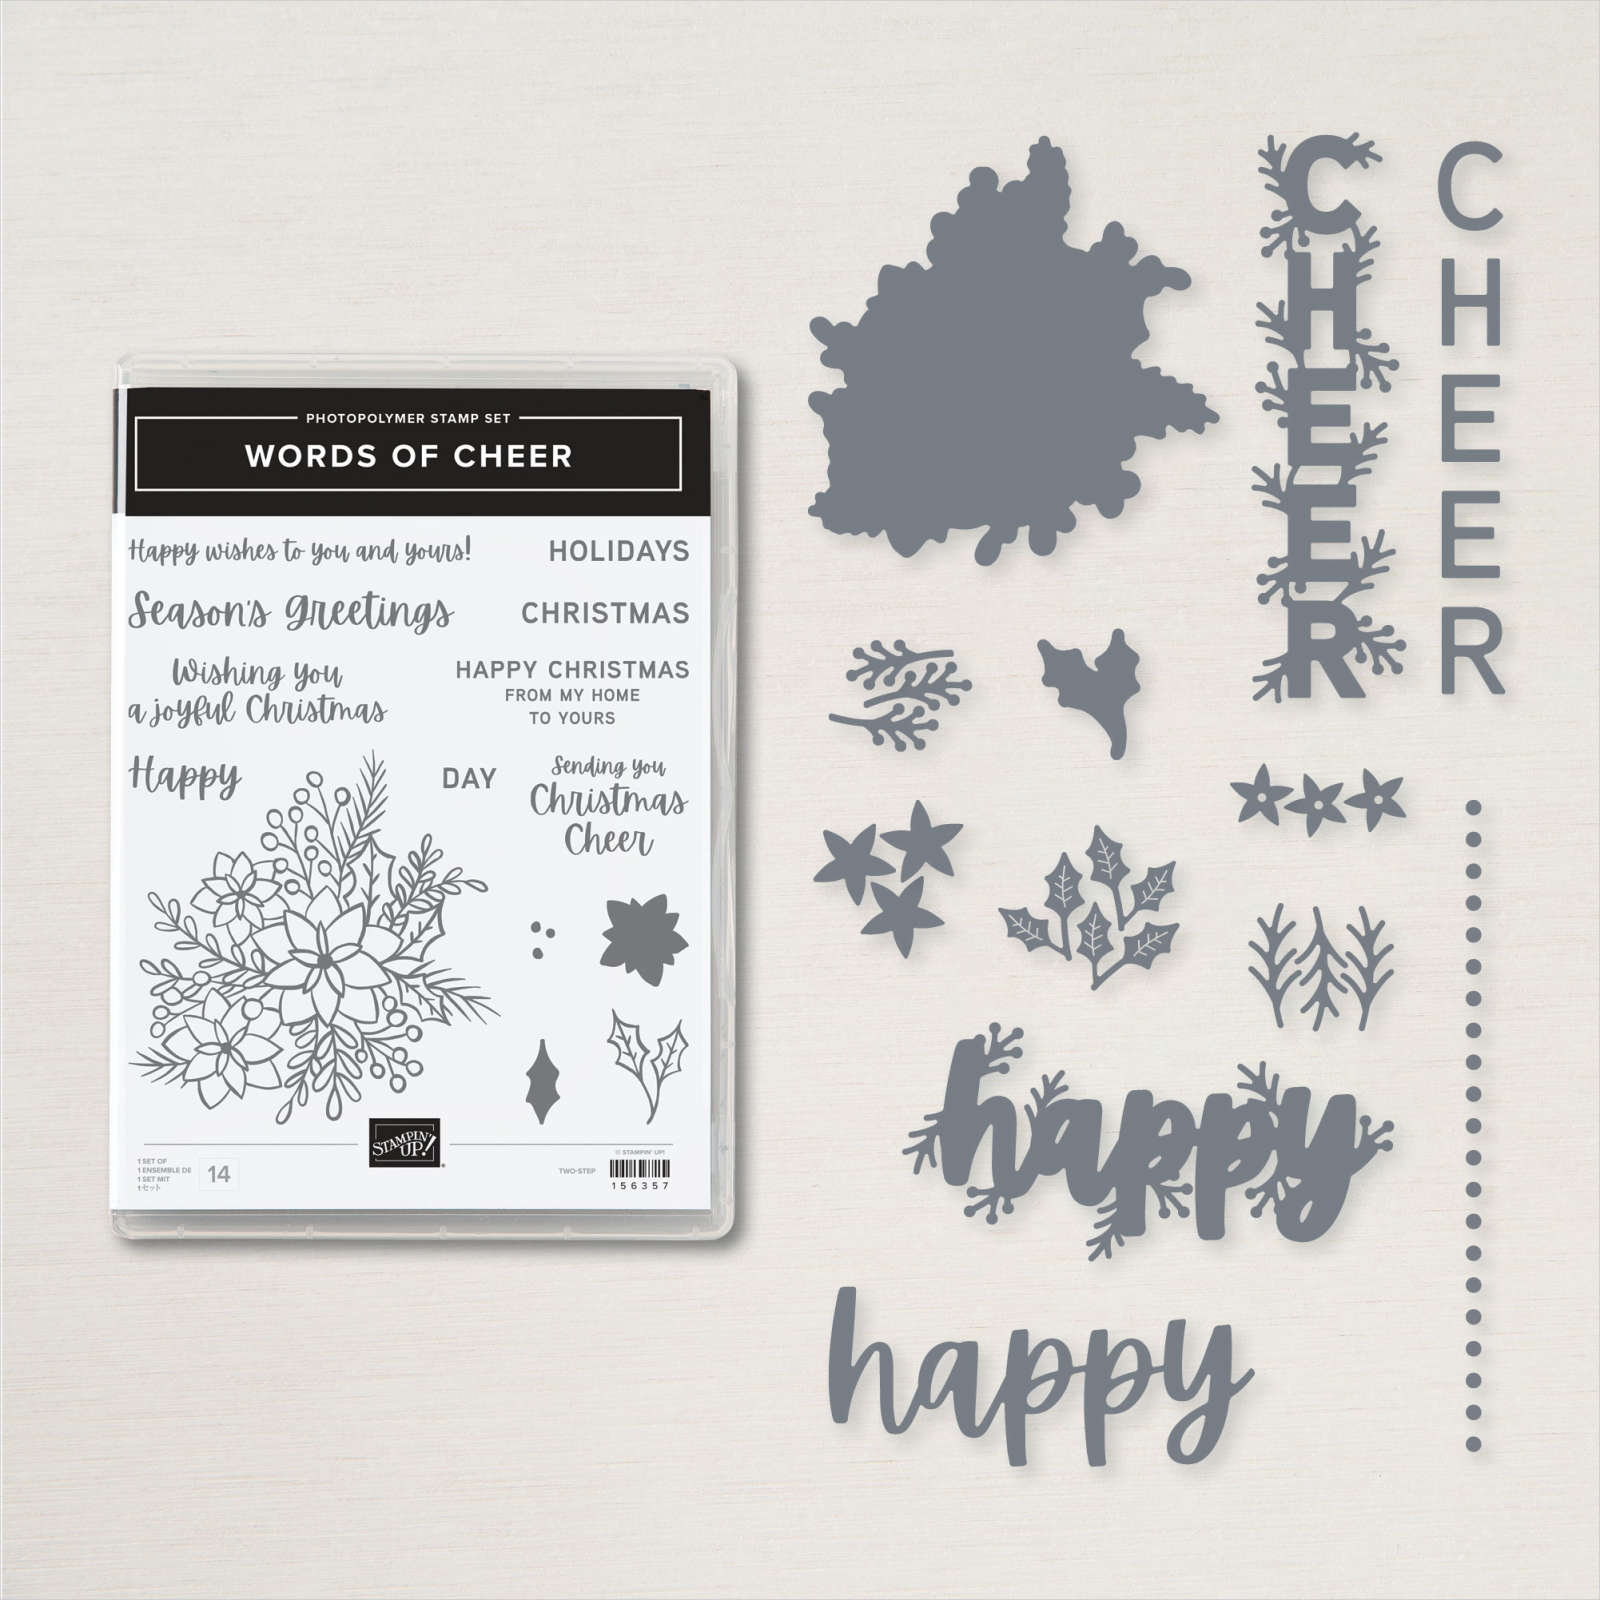
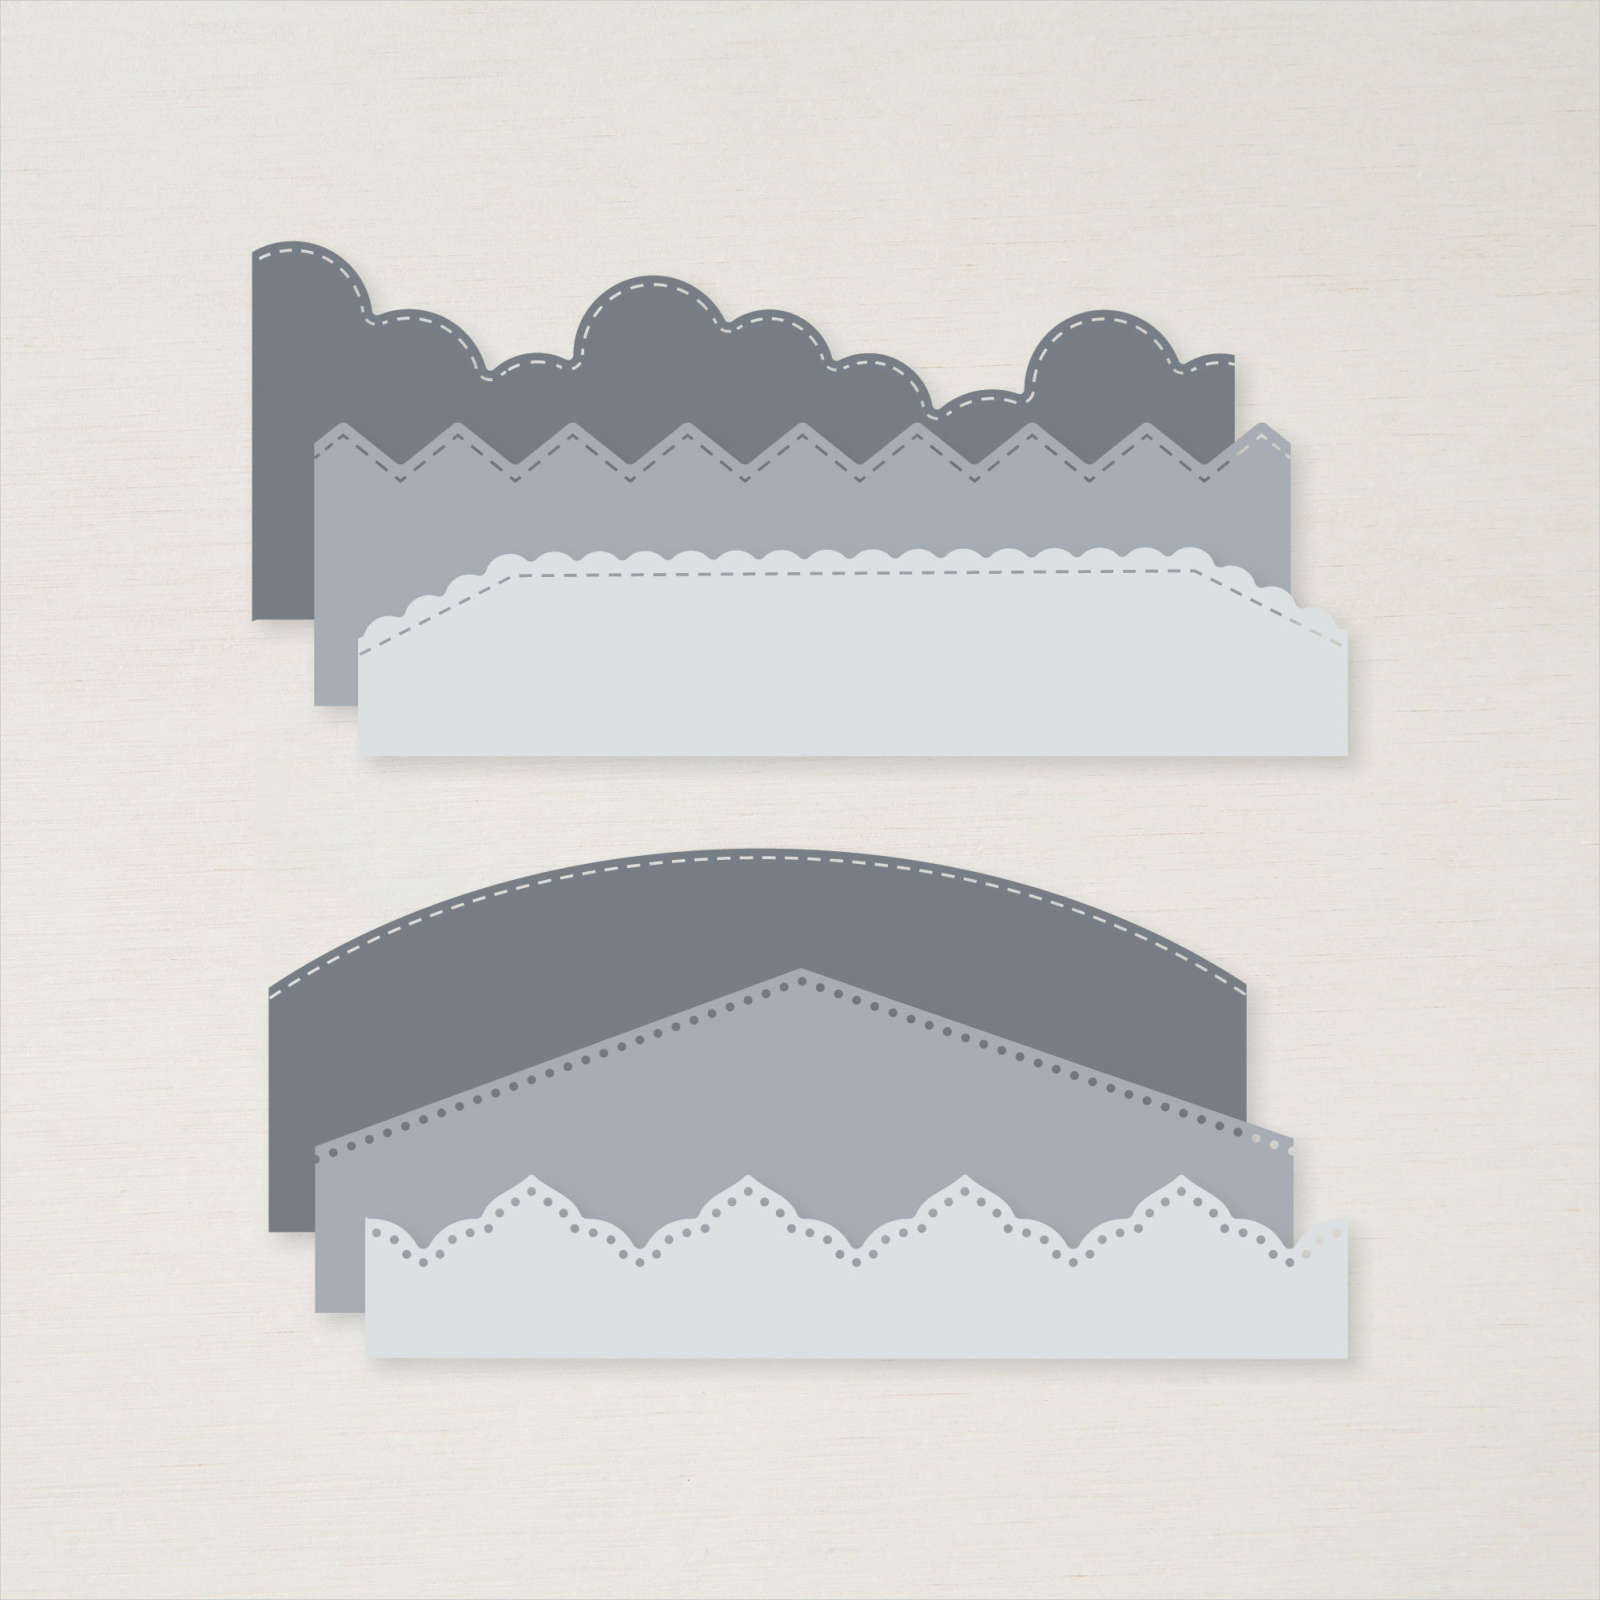
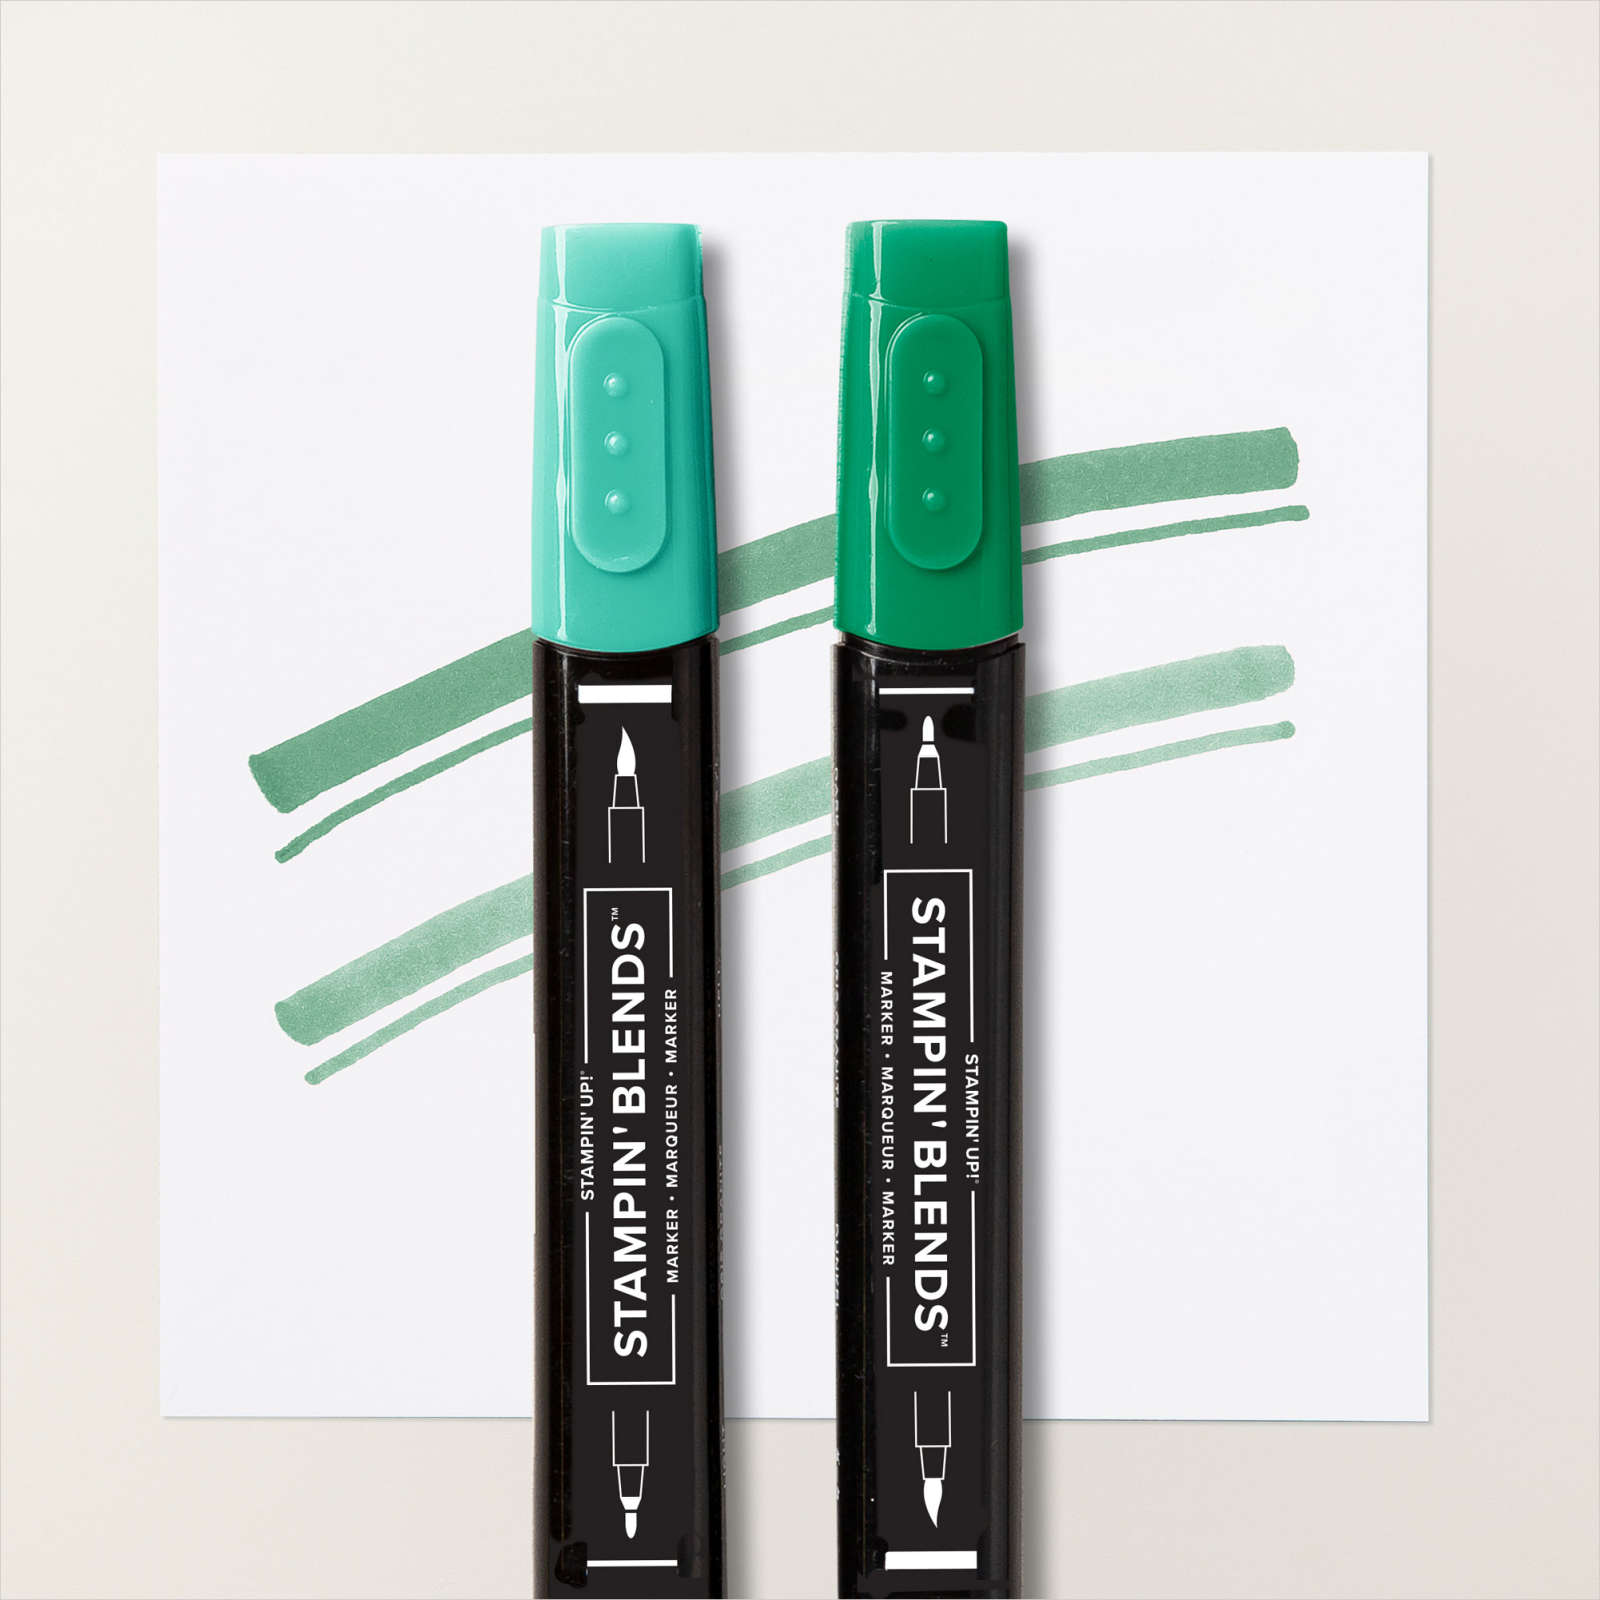
I really love the large floral image from the Words of Cheer stamp set and just had to make one more card. This time, I cut Basic White card using one of the Basic Border Dies. I attached a piece of Peaceful Prints Designer Series Paper behind the bottom edge before attaching the panel to scored and folded Cherry Cobbler card. I stamped the large floral image from the Words of Cheer stamp set onto Basic White card using Memento Tuxedo Black ink. I coloured the image using Cherry Cobbler, Shaded Spruce and Dark Real Red Stampin’ Blends.

I cut out the image using the co-ordinating Christmas Cheer Die and attached it to the card front. I stamped the image once more onto Basic White card using Memento Tuxedo Black ink. I coloured the central part of each flower using Cherry Cobbler Stampin’ Blends and cut them out.

Each flower centre is attached to the co-ordinating flower on the card front using dimensionals. Lastly I added a Basic Rhinestone to the centre of each flower. I stamped the greeting from the Words of Cheer stamp set onto Basic White card using Cherry Cobbler ink and trimmed around the the greeting before attaching it to the card front. To decorate the inside of the card, I stamped part of the floral image from the Words of Cheer stamp st onto the lower left hand corner of Basic White card. I coloured the image as before using Cherry Cobbler, Shaded Spruce and Dark Real Red Stampin’ Blends. Do you love this bundle as much as I do?
Bye for now,
Kris
Product Used:


Penguin Party

Today’s card uses the really fun Penguin Place stamp set from the latest Mini Catalogue. I love this set, because it can be used for birthdays or Christmas which makes it very versatile. It also co-ordinates with the Penguin Playmates 12″ x 12″ Designer Series Paper which you can earn for free during Sale-a-bration – Yay! For my card today, I die cut a piece of Misty Moonlight card using the Basic Border Dies and attached it behind one long edge of a piece of the Penguin Playmates Designer Series Paper. The panel is attached to the left hand side of Basic White card before stamping the greeting from the Penguin Place stamp set using Memento Tuxedo Black ink.

I also stamped the balloon string from the Penguin Place stamp set using the same ink. The balloon from the Penguin Place stamp set is stamped onto the balloon string using Misty Moonlight ink. I stamped the penguin image from the Penguin Place stamp set onto Basic White card using Memento Tuxedo Black ink. I added the feet and the nose/mouth using Bumblebee ink. I cut out the penguin image using the Layering Circle Dies and attached it to a Misty Moonlight scalloped circle cut using the same dies.

The image panel is attached to the card front using dimensionals. I stamped the present image from the Penguin Place stamp set onto scrap Basic White card three times, once using Misty Moonlight ink, once using Fresh Freesia ink and once using Just Jade ink. I cut out the images and attached them in front of the penguin image. To decorate the inside of the card, I stamped the balloon string image from the Penguin Place stamp set three times onto the lower left hand corner of Basic White card using Memento Tuxedo Black ink. I stamped a balloon image from the Penguin Place stamp set onto each balloon string using Misty Moonlight, Fresh Freesia and Just Jade ink.
This is such a bright, happy birthday card, don’t you think? If you haven’t received a copy of these catalogues, you live in Australia and don’t have a demonstrator, then please contact me so that I can get them to you.
Bye for now,
Kris
Product Used:
Woorim

Today’s page shows off some photos from a holiday we had with my youngest daughters children at Woorim way back in January 2018. Looking at the photos, I can’t believe how quickly these children have all grown up! For the first page I attached three photos down the right hand side of a Basic White 12″ x 12″ page before attaching a strip of Night of Navy card. I attached a strip of Balmy Blue card across the left hand side of the page. I cut a piece of Night of Navy card using the largest die from Scalloped Contour Dies which I attached behind the left hand edge of Pacific Point card.
I attached the photo of Noah to the panel before attaching it to the left hand side of the page. I cut the letters for the title from Basic White card using the Playful Alphabet Dies. I stamped “you are so loved” from the A Grand Kid stamp set onto Basic White card using Night of Navy ink. I cut out the greeting using one of the retired Be Mine Stitched Dies. I cut the Night of Navy frame using the same dies. I attached the Night of Navy frame to the page and attached the greeting in the centre. For the second page I attached a strip of Night of Navy card to the left hand side of a Basic White 12″ x 12″ page, with a strip of Balmy Blue card across the page. I cut Basic White card using the largest rectangle die from the Scalloped Contour Dies and attached it behind one of the photos before I attached them. I printed the journaling onto Basic White card which I attached to Night of Navy card before attaching it to the right hand side of the page. I added another strip of Balmy Blue card below the journalling. The heart on this page is cut from Night of Navy card using the retired Be Mint Stitched Die.

It’s so nice to finally get these photos onto a page and into my album and I know that the grandchildren will enjoy looking at the page and remembering the fun we had.
Bye for now,
Kris
Product Used:


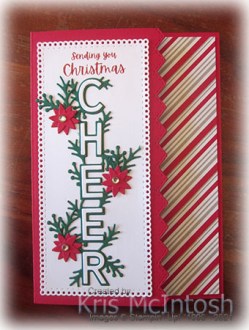
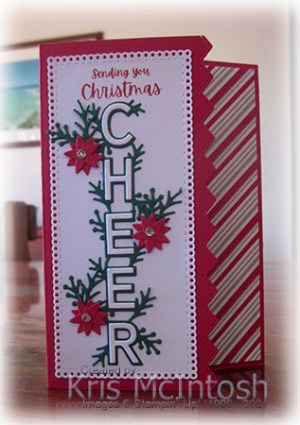
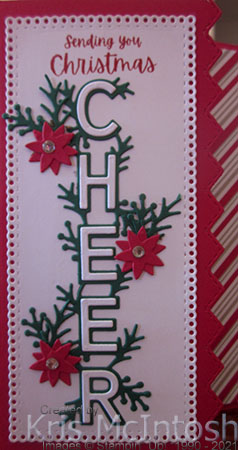
Sending Christmas Cheer

Today’s card again uses the Words of Cheer Bundle which you will find in the new Mini Catalogue. I began this card by attaching two pieces of Peaceful Prints Designer Series Paper to Basic White card. You can earn this Designer Series Paper for FREE with a qualifying order during Sale-a-Bration. I stamped the greeting from the Words of Cheer stamp set onto the upper left hand corner of the Basic White card using Real Red ink. The whole panel is attached to scored and folded Real Red card. I stamped the floral image from the Words of Cheer stamp set onto Basic White card using Memento Tuxedo Black ink.

I coloured the image using Real Red, Shaded Spruce and Dark Cherry Cobbler Stampin’ Blends. The image is cut out using the co-ordinating Christmas Cheer Die. I attached the die cut to the card front partially covering the Designer Series Paper. I stamped the floral image from the Words of Cheer stamp set onto Basic White card using Memento Tuxedo Black ink.

This time, I only coloured the inside petals of each of the flowers using Real Red Stampin’ Blends. I cut out the inside panels for the flowers and attached then using dimensionals over the co-ordinating flower on the card front. Lastly I added Basic Rhinestones to the centre of the flowers. To decorate the inside of the card, I stamped part of the floral image from the Words of Cheer stamp set onto the lower left hand corner of Basic White card using Memento Tuxedo Black ink. I coloured the image once again using the Real Red, Shaded Spruce and Dark Cherry Cobbler Stampin’ Blends.
I really love how this card turned out. I used a card sketch I found on Pinterest as the starting point for this card and I love how it turned out. What about you? What do you think?
Bye for now,
Kris
Product Used:


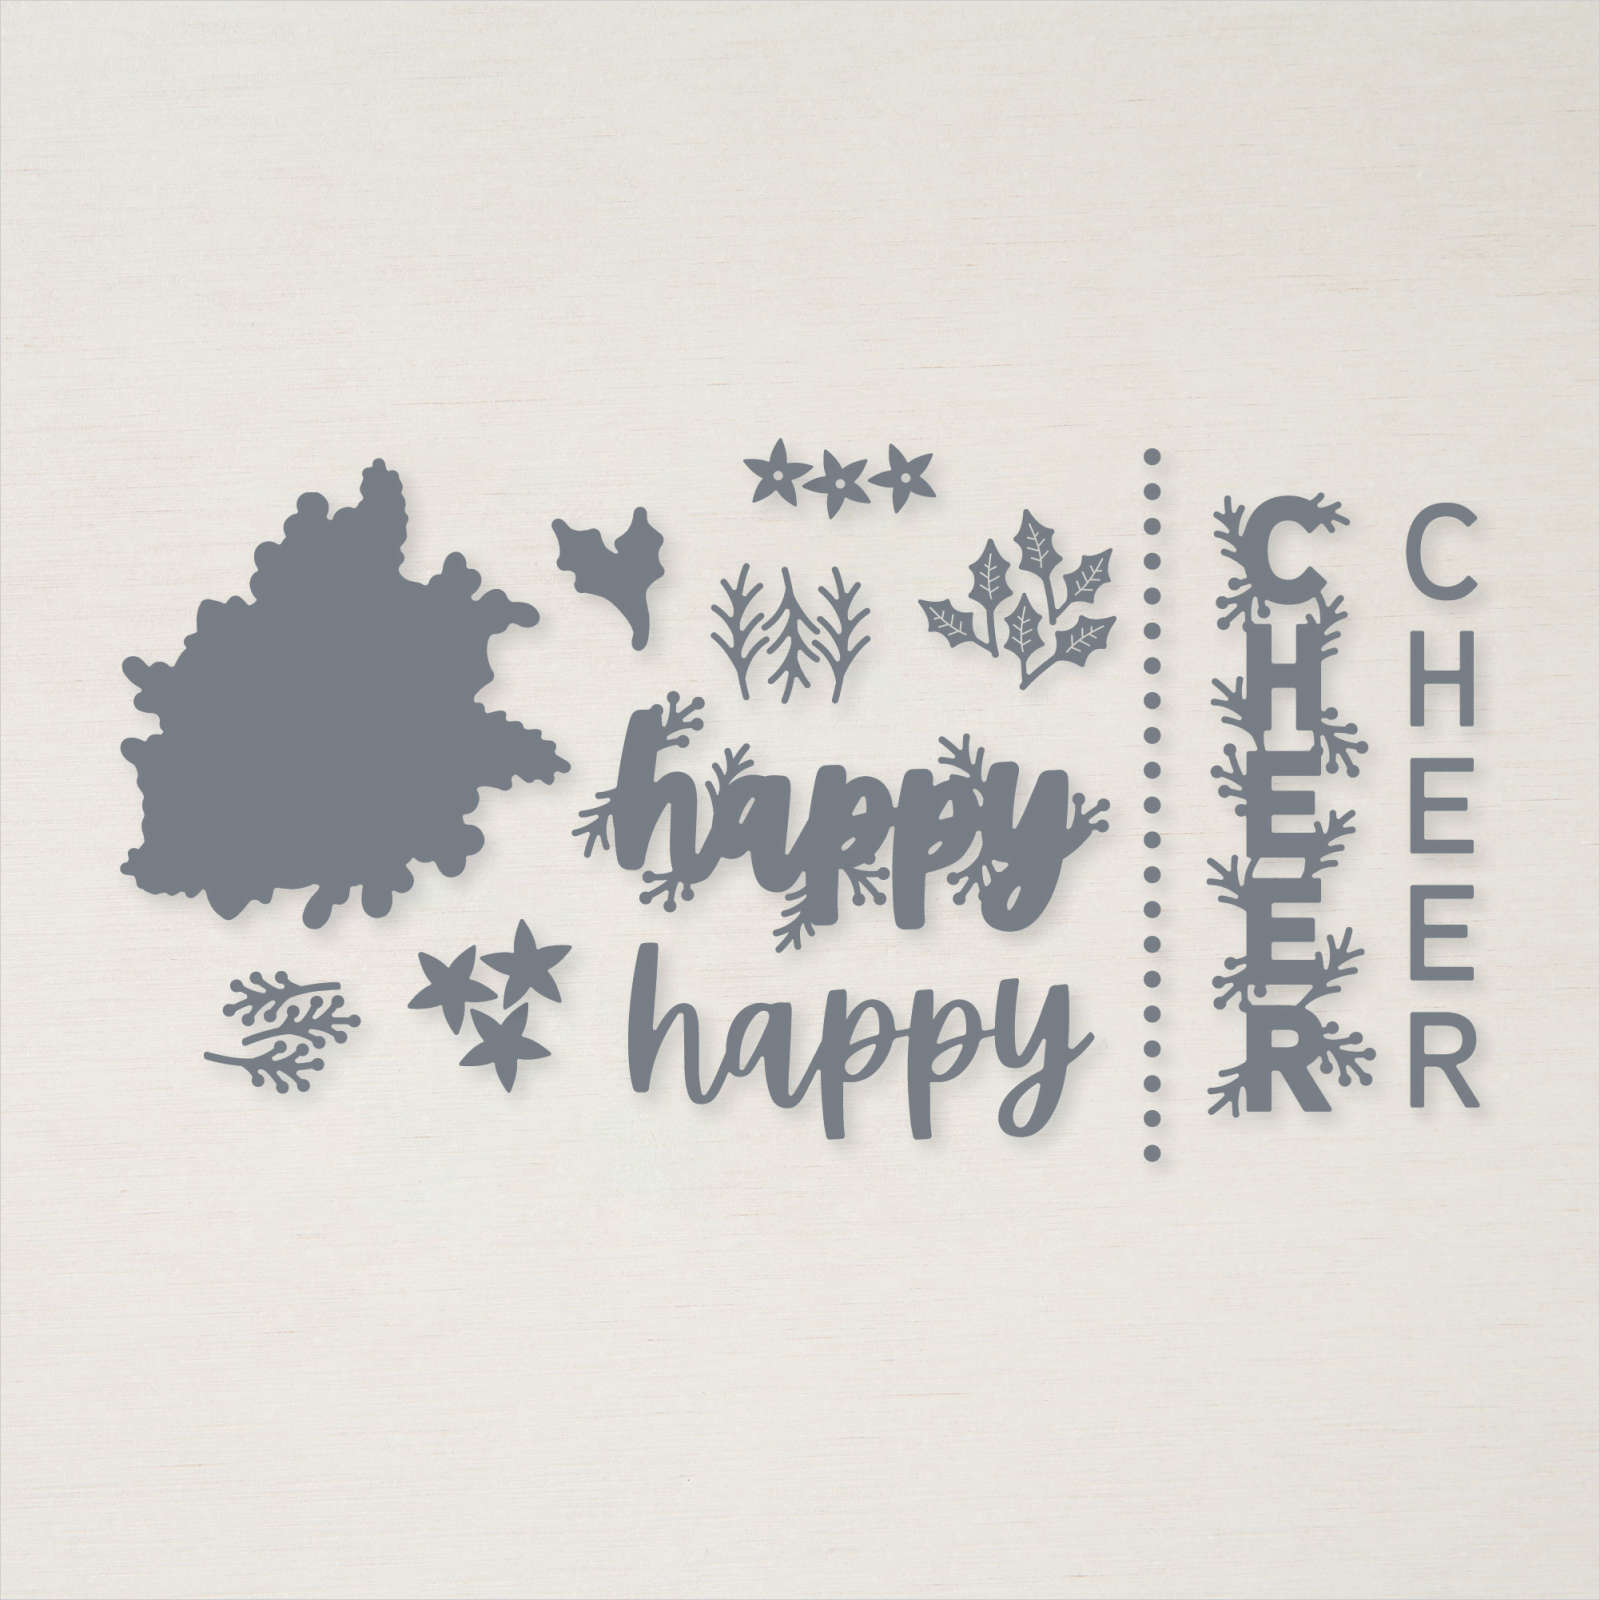
Words of Cheer
Yesterday on my Facebook Page I shared a video with some ideas for using the Words of Cheer stamp set and co-ordinating Christmas Cheer Dies. Today I am sharing another card I created using these products. I began by cutting the edge of a Real Red card base using the Basic Border Dies. I partially inked the greeting from the Words of Cheer stamp set with Real Red ink and stamped onto Basic White card cut using the Ornate Layers Dies. This panel is attached to the card front.
I cut the background die for the word “cheer” from Shaded Spruce card using the Christmas Cheer Die. The die cut is attached below the greeting onto the Basic White layer. I cut the individual letters for the word “cheer” from Basic White card and attached them to the Shaded Spruce die cut.
I cut the larger star image from the Christmas Cheer Dies twice from Real Red card. I also cut the two different leaf image dies from Shaded Spruce card. I layered the small leaf images and two of the stars together to create a “poinsettia” which I attached around the die cut “cheer”. I also added medium Basic Rhinestones to the centre of the “poinsettias”.
To decorate the inside of the card, I cut a piece of the Peaceful Prints Designer Series Paper and attached it to the right hand side of Basic White card. I die cut Shaded Spruce card using the holly die from the Christmas Cheer Dies and attached them to the top left hand corner of the Basic White card. I also die cut the holly berries from Real Red card using the Christmas Cheer Dies and attached them onto the holly leaves. The panel is attached to the inside of the card and because I cut down the card front, you can see the Designer Series Paper when the card is closed. The great thing about this Designer Series Paper is that you can earn it for FREE during Sale-a-Bration with a qualifying order.
This is such a fun bundle to create with. Have you noticed it in the Mini Catalogue?
Bye for now,
Kris
Product Used: