Most Wonderful Time
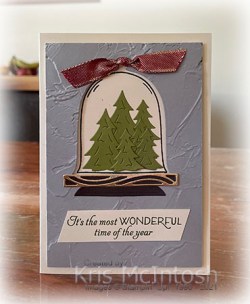
Yesterday in my Facebook Live, I shared several cards I created using the Classic Cloche Bundle. You can find this bundle in the July-December Mini Catalogue. I wasn’t immediately drawn to this stamp set but I am glad I gave in and purchased it! For this card, I cut Smoky Slate card using the cloche die form the Cloche Dies and then embossed the panel using the Painted Texture 3D Embossing Folder. I stamped the cloche image from the Classic Cloche stamp set onto Very Vanilla card using Early Espresso ink and attached it behind the window in the Smoky Slate card using dimensionals.

The whole panel is attached to scored and folded Thick Very Vanilla card. I cut the solid shelf panel from Early Espresso card using the Cloche Die and the detailed shelf panel from Gold Foil card. I attached the two images together before attaching them to the card front across the bottom of the cloche opening.
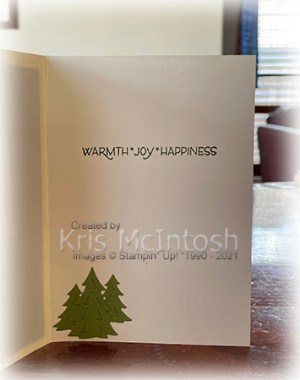
I also cut the half round image in the Cloche Dies from Early Espresso card. I trimmed the rounded edge off the die cut and attached it across the bottom of the shelf images to create the look of a “stand”. I die cut Old Olive card using the large and small tree dies from the Cloche Dies. I layered the trees inside the stamped cloche image. I tied a knot in a length of the Cherry Cobbler & Gold Metallic Ribbon and attached it to the front panel on the top of the cloche opening. I stamped the greeting from the Classic Cloche stamp set onto Very Vanilla card using Old Olive ink. I trimmed the edges on the diagonal and attached the greeting to the card front. To decorate the inside of the card I stamped the greeting from the Classic Cloche stamp set using Smoky Slate ink. I die cut the three larger trees from Old Olive card using the Cloche Die and attached them to the lower left hand corner.
Bye for now,
Kris
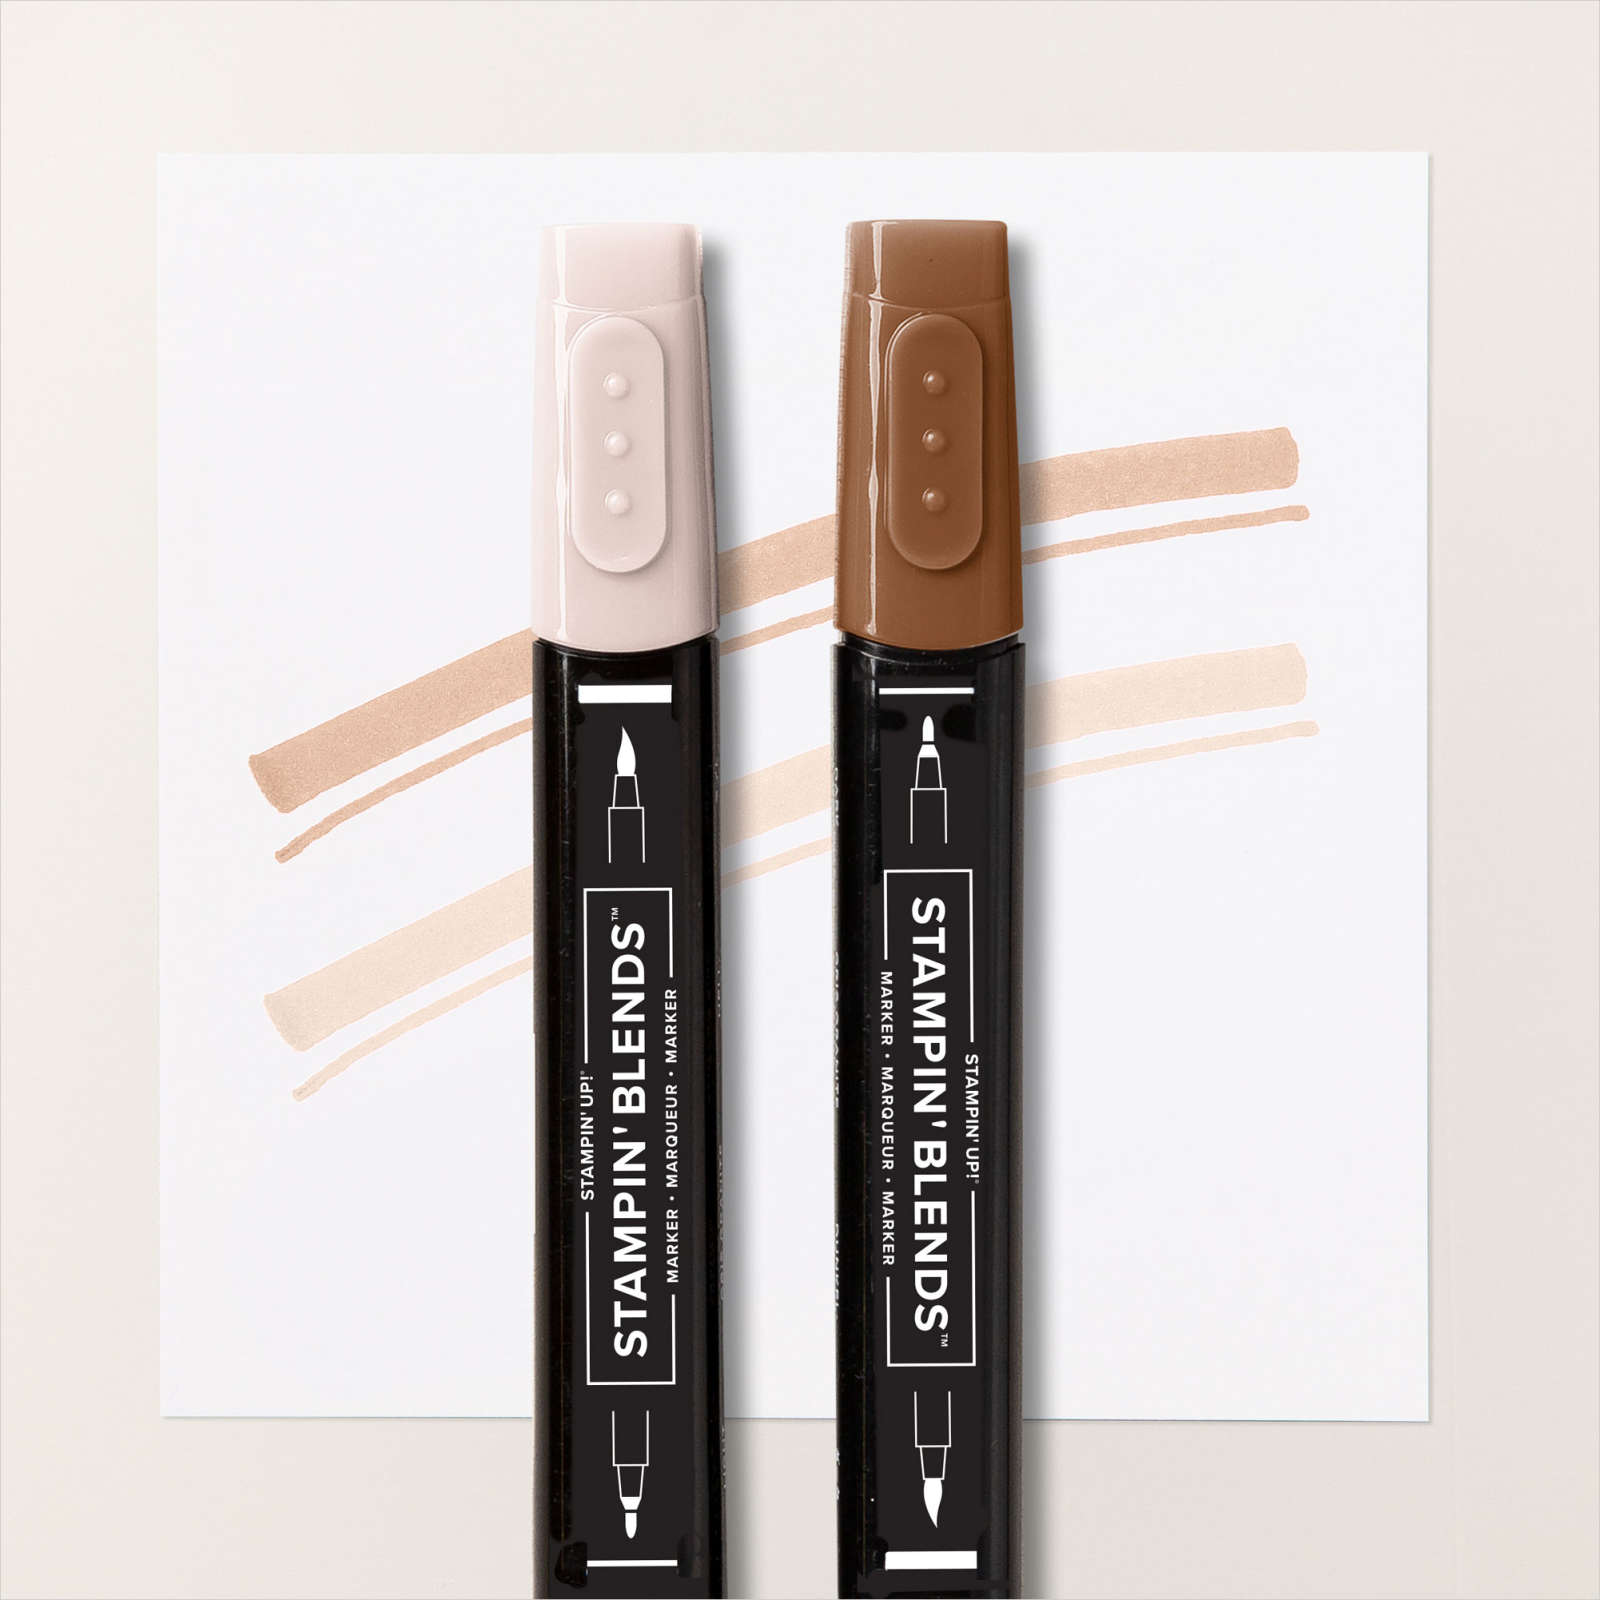
Product Used:


Jolly Santa’s

I was showing my ladies at Beachmere how to use the Stamparatus to get a mirror image and I was left with these two cute Santa images which of course I couldn’t waste. Both the Santa images from the Be Jolly stamp set were stamped in Memento Tuxedo Black ink onto Basic White card. I coloured the images using the Dark Real Red, Dark Basic Black, Dark Balmy Blue (eyes) Dark Petal Pink (tongue) and Ivory Stampin’ Blends.

I stamped the greeting from the Holly Jolly Wishes stamp set between the images using Memento Tuxedo Black ink. I trimmed the Basic White panel and attached it to Real Red card and then scored and folded Thick Basic White card.
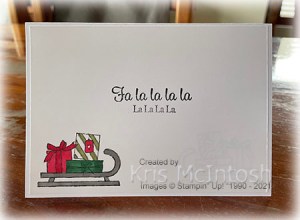
To decorate the inside of the card, I stamped the sleigh image from the Be Jolly stamp set onto the lower left hand corner of Basic White card using Memento Tuxedo Black ink. I coloured the image using the Real Red, Dark Shaded Spruce, Light Mossy Meadow and Light Smoky Slate Stampin’ Blends. I also stamped the greeting from the Holly Jolly Wishes stamp set onto the centre of the stamped Basic White card using Memento Tuxedo Black ink.
Such a fun card, especially suitable for someone younger, don’t you think?
Bye for now,
Kris
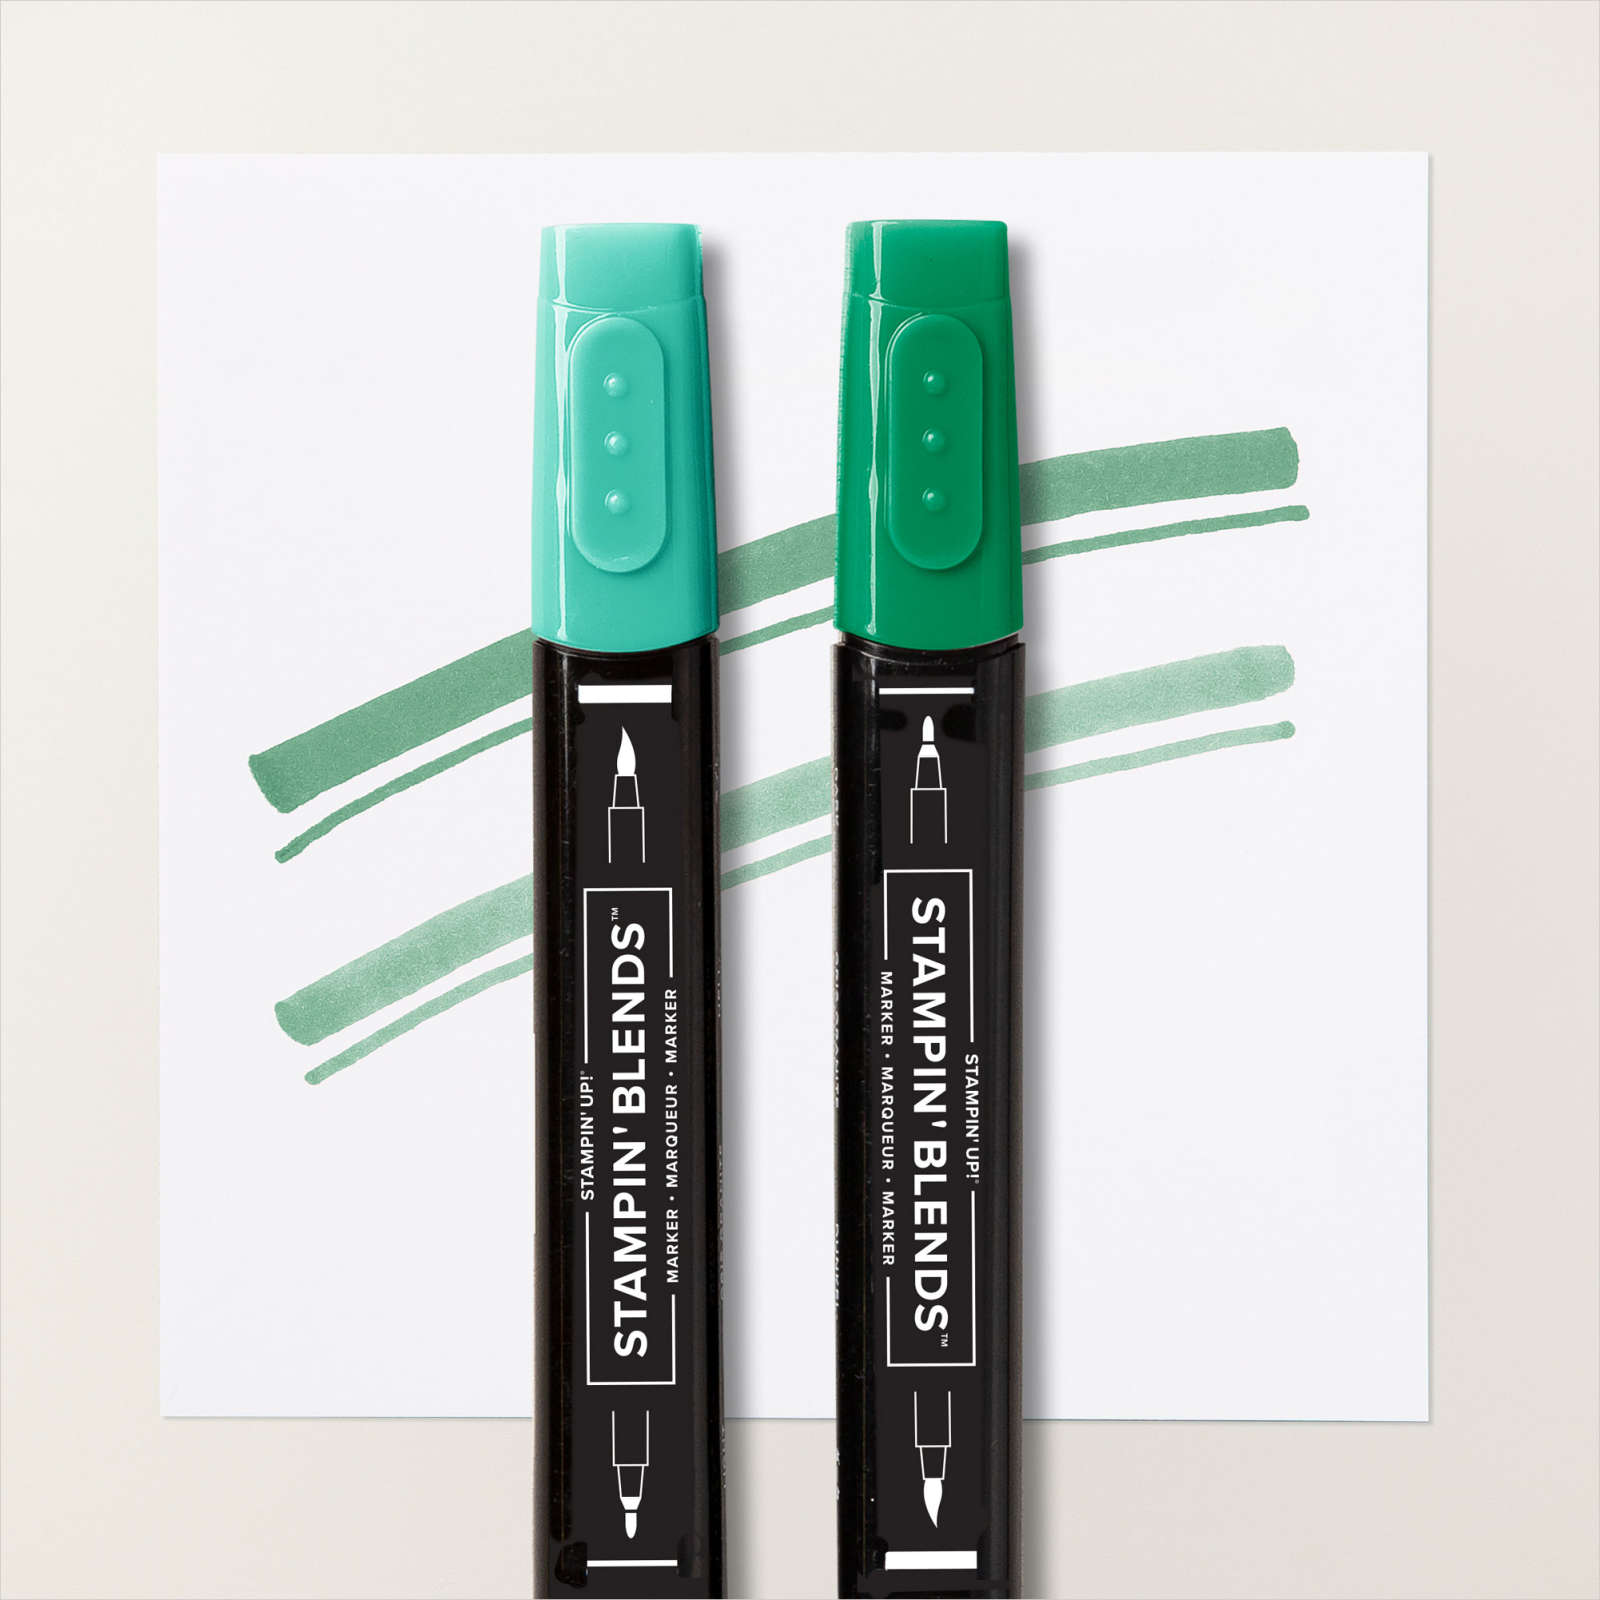
Product Used:


Eden’s Garden

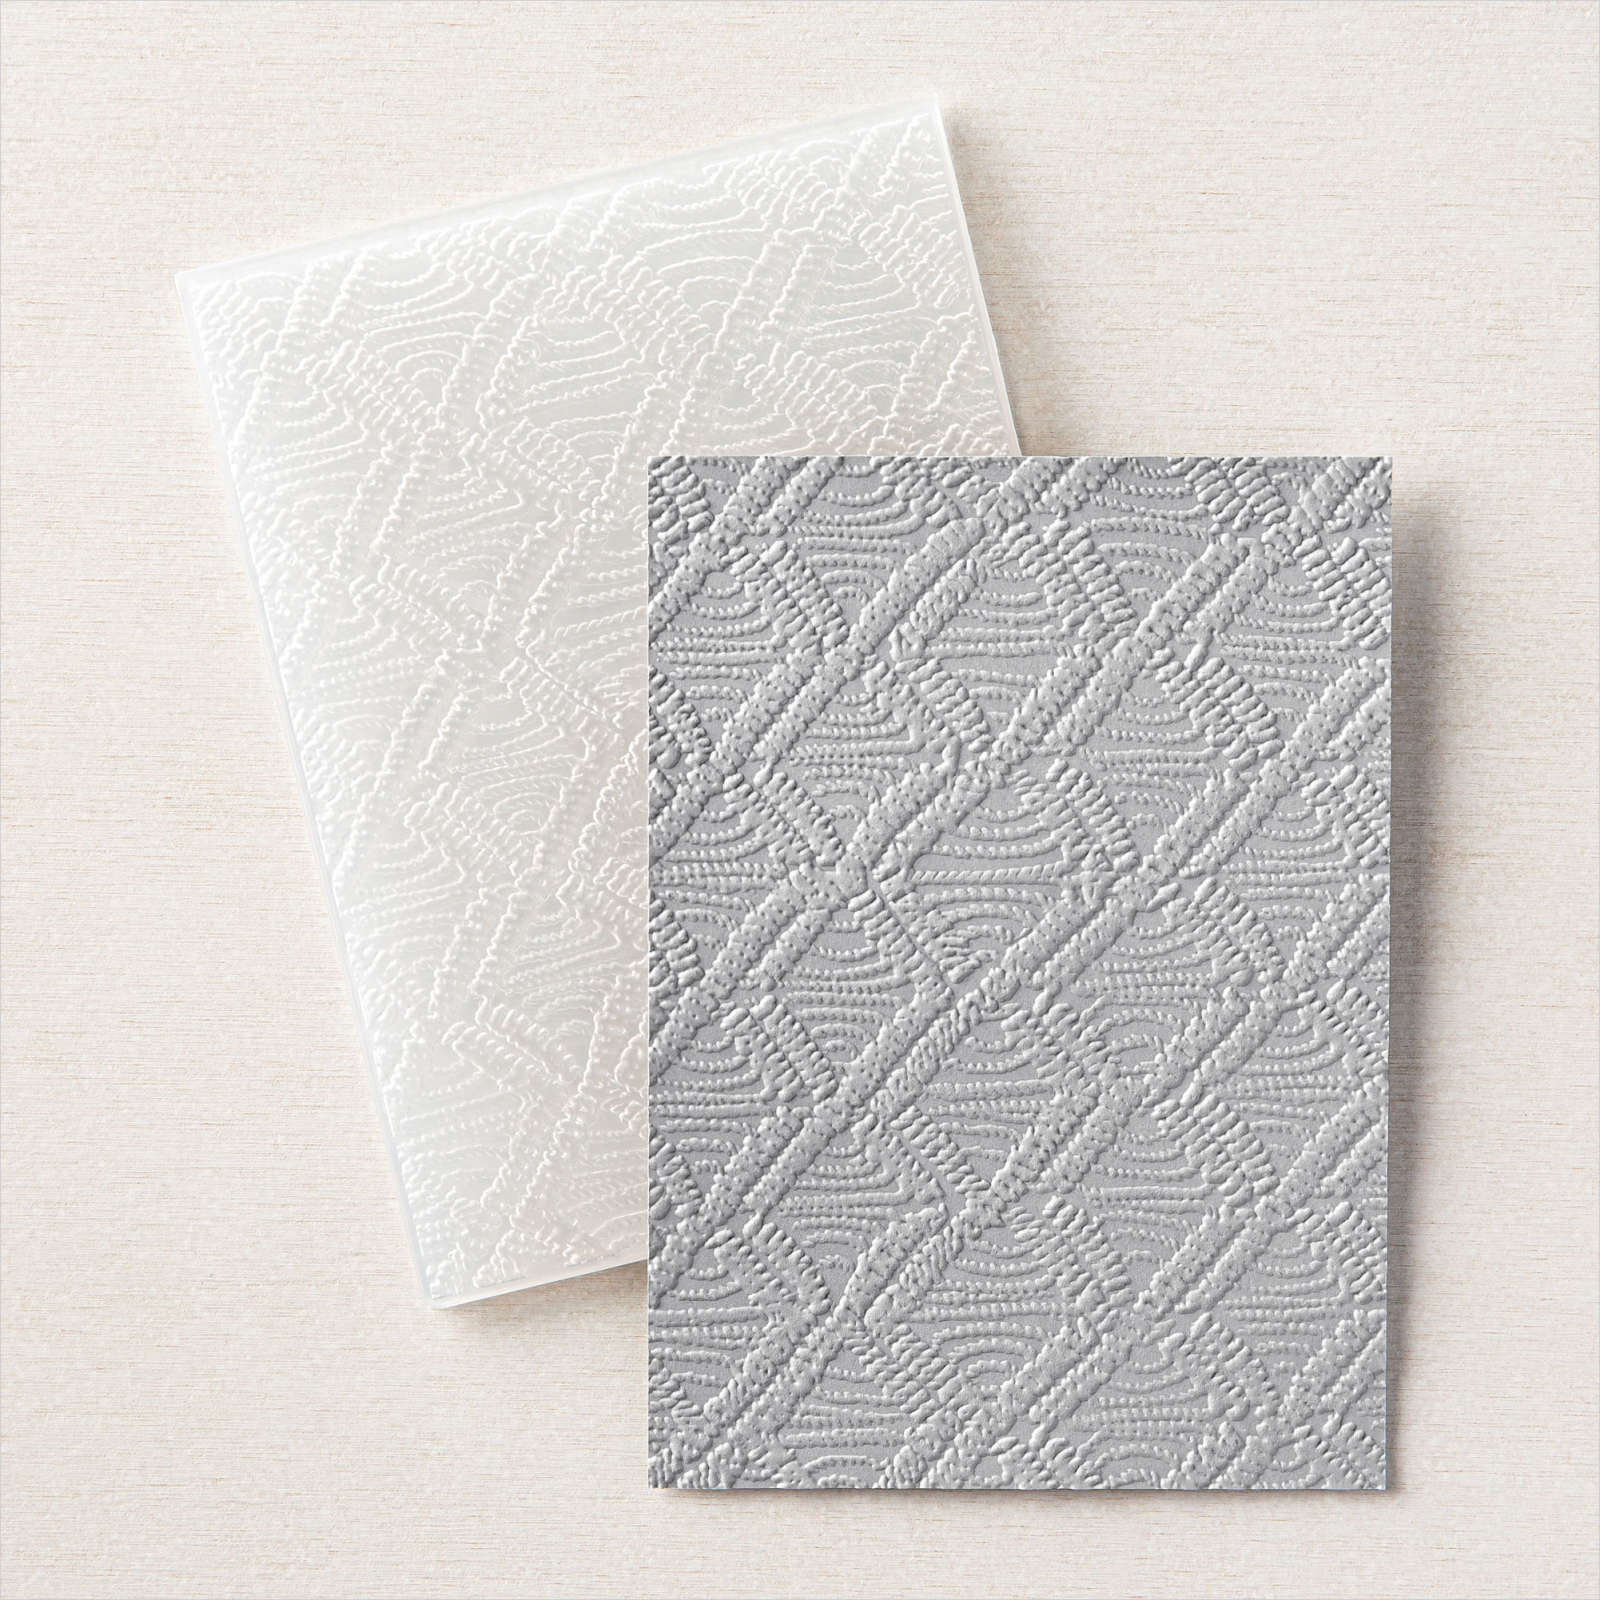
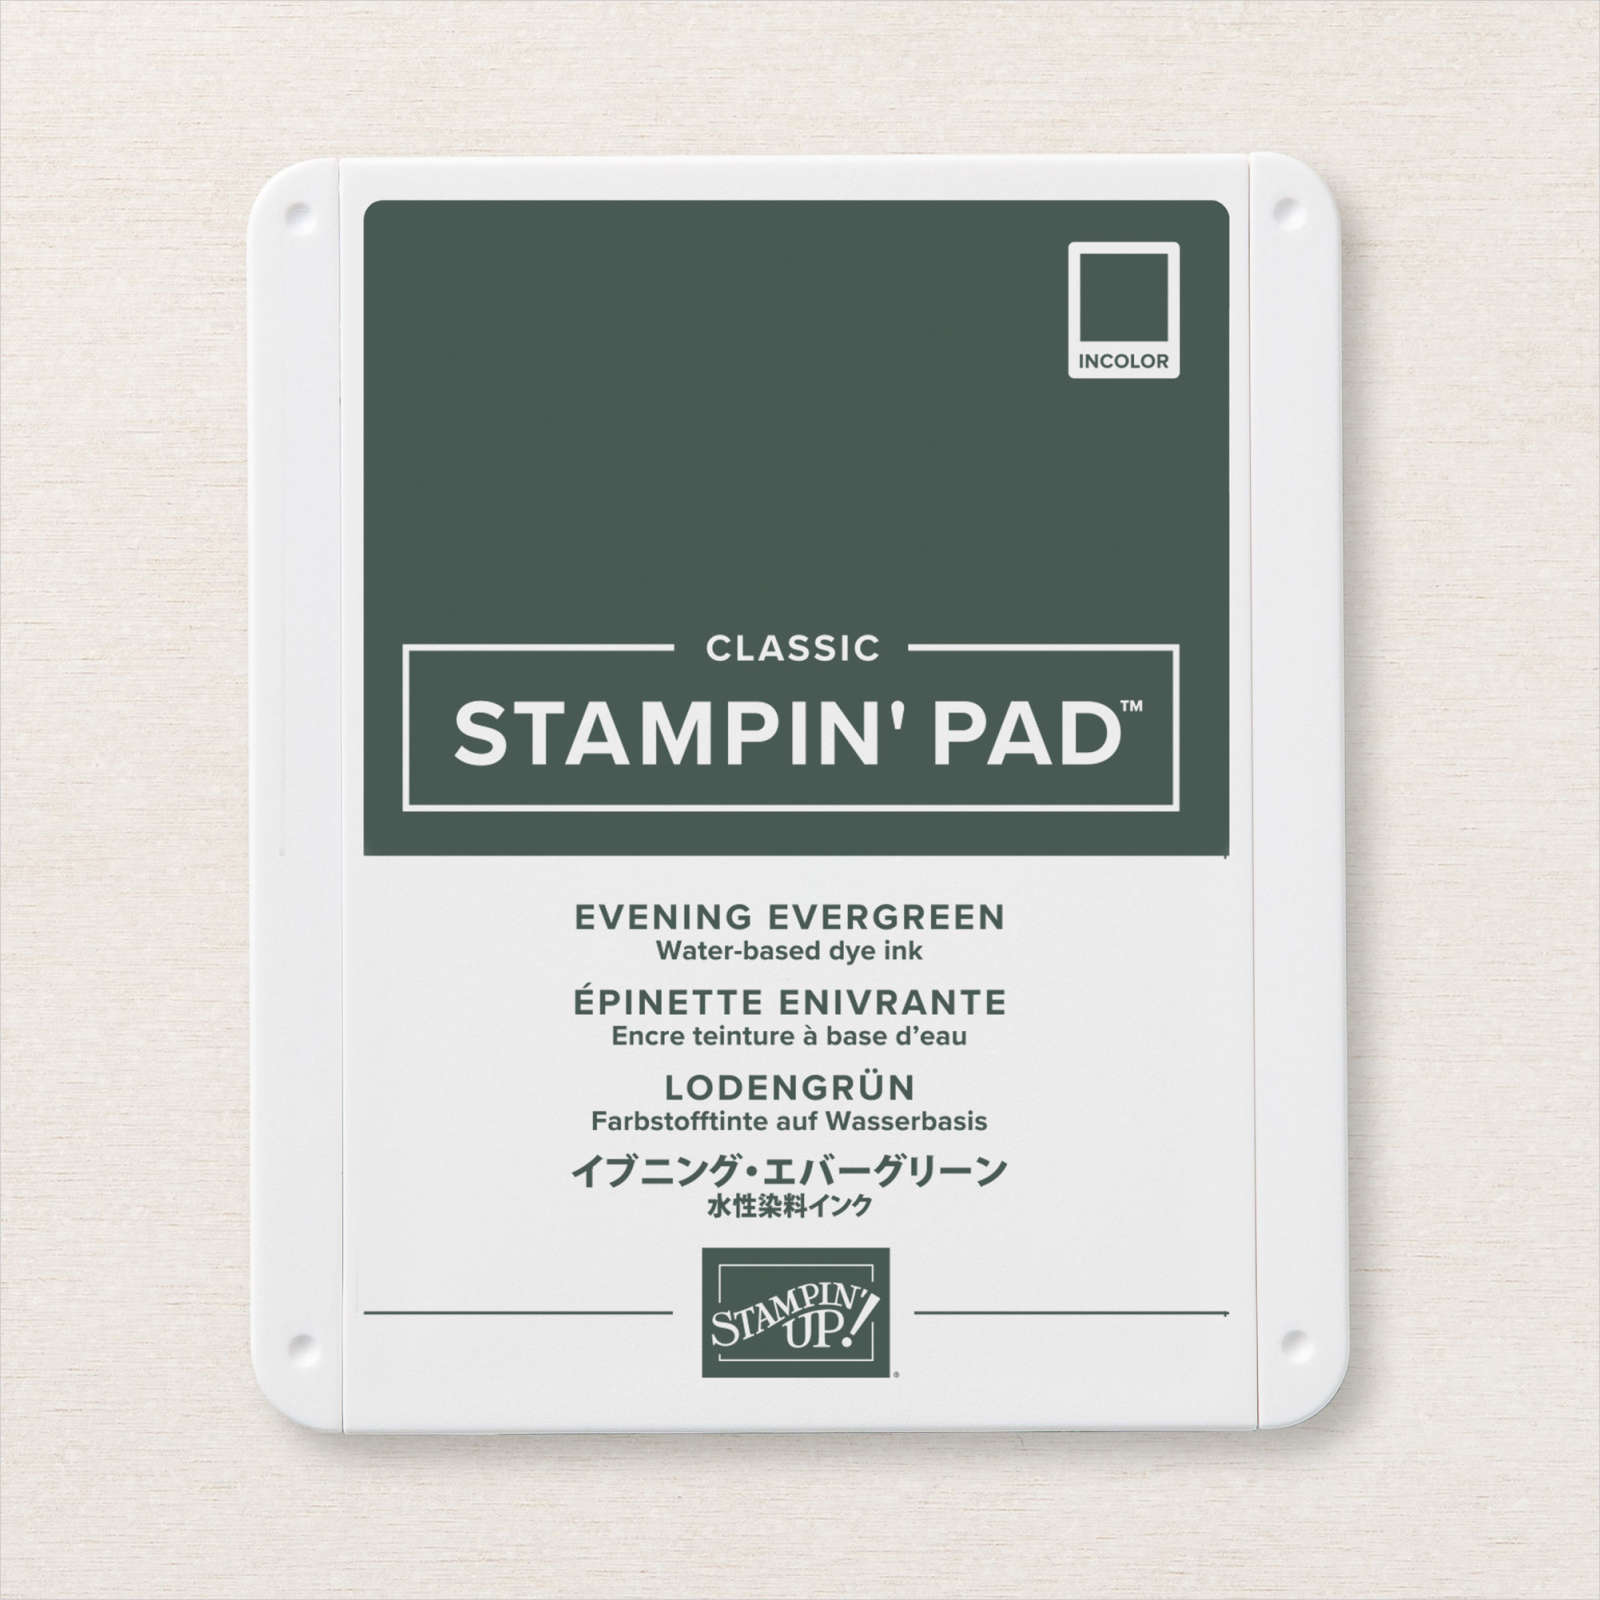
Today’s card is another using the Eden’s Garden stamp set and co-ordinating products. I began by attaching a piece of Evening Evergreen Ever Eden Cotton Paper to Basic White card. I embossed the panel using the Macrame 3D Embossing Folder before attaching the panel to scored and folded Evening Evergreen card. I stamped the large image from the Eden Garden stamp set onto Basic White card using Evening Evergreen ink and cut it out. I attached the image to a circle cut from Basic White card using the Layering Circles Dies.
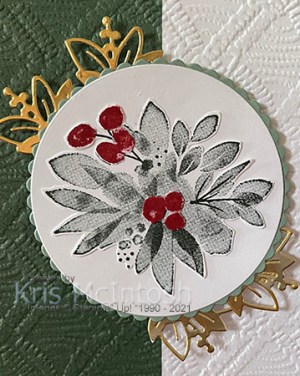
I stamped the same image from the Eden Garden stamp set onto Basic White card using Cherry Cobbler ink and cut out the berries which I attached over the stamped Evening Evergreen image.
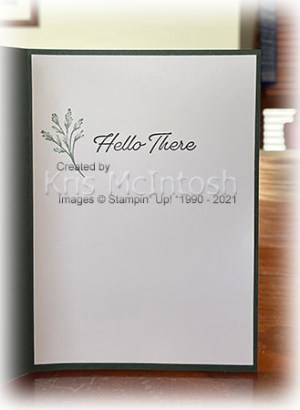
I cut a scalloped circle from Soft Succulent card using the Layering Circle Dies and attached the image panel. I cut Gold Foil card twice using the banner die from the Eden Dies and attached the die cuts to the back of the image panel. The whole piece is attached to the card front using dimensionals. To decorate the inside of the card, I stamped the greeting from the Eden’s Garden stamp set onto Basic White card using Evening Evergreen ink. I stamped one of the smaller leaf images from the Eden’s Garden stamp set beside the greeting using Evening Evergreen ink.
So far, this card is my favourite of the ones I have made using this product suite. What about you which one is your favourite?
Bye for now,
Kris
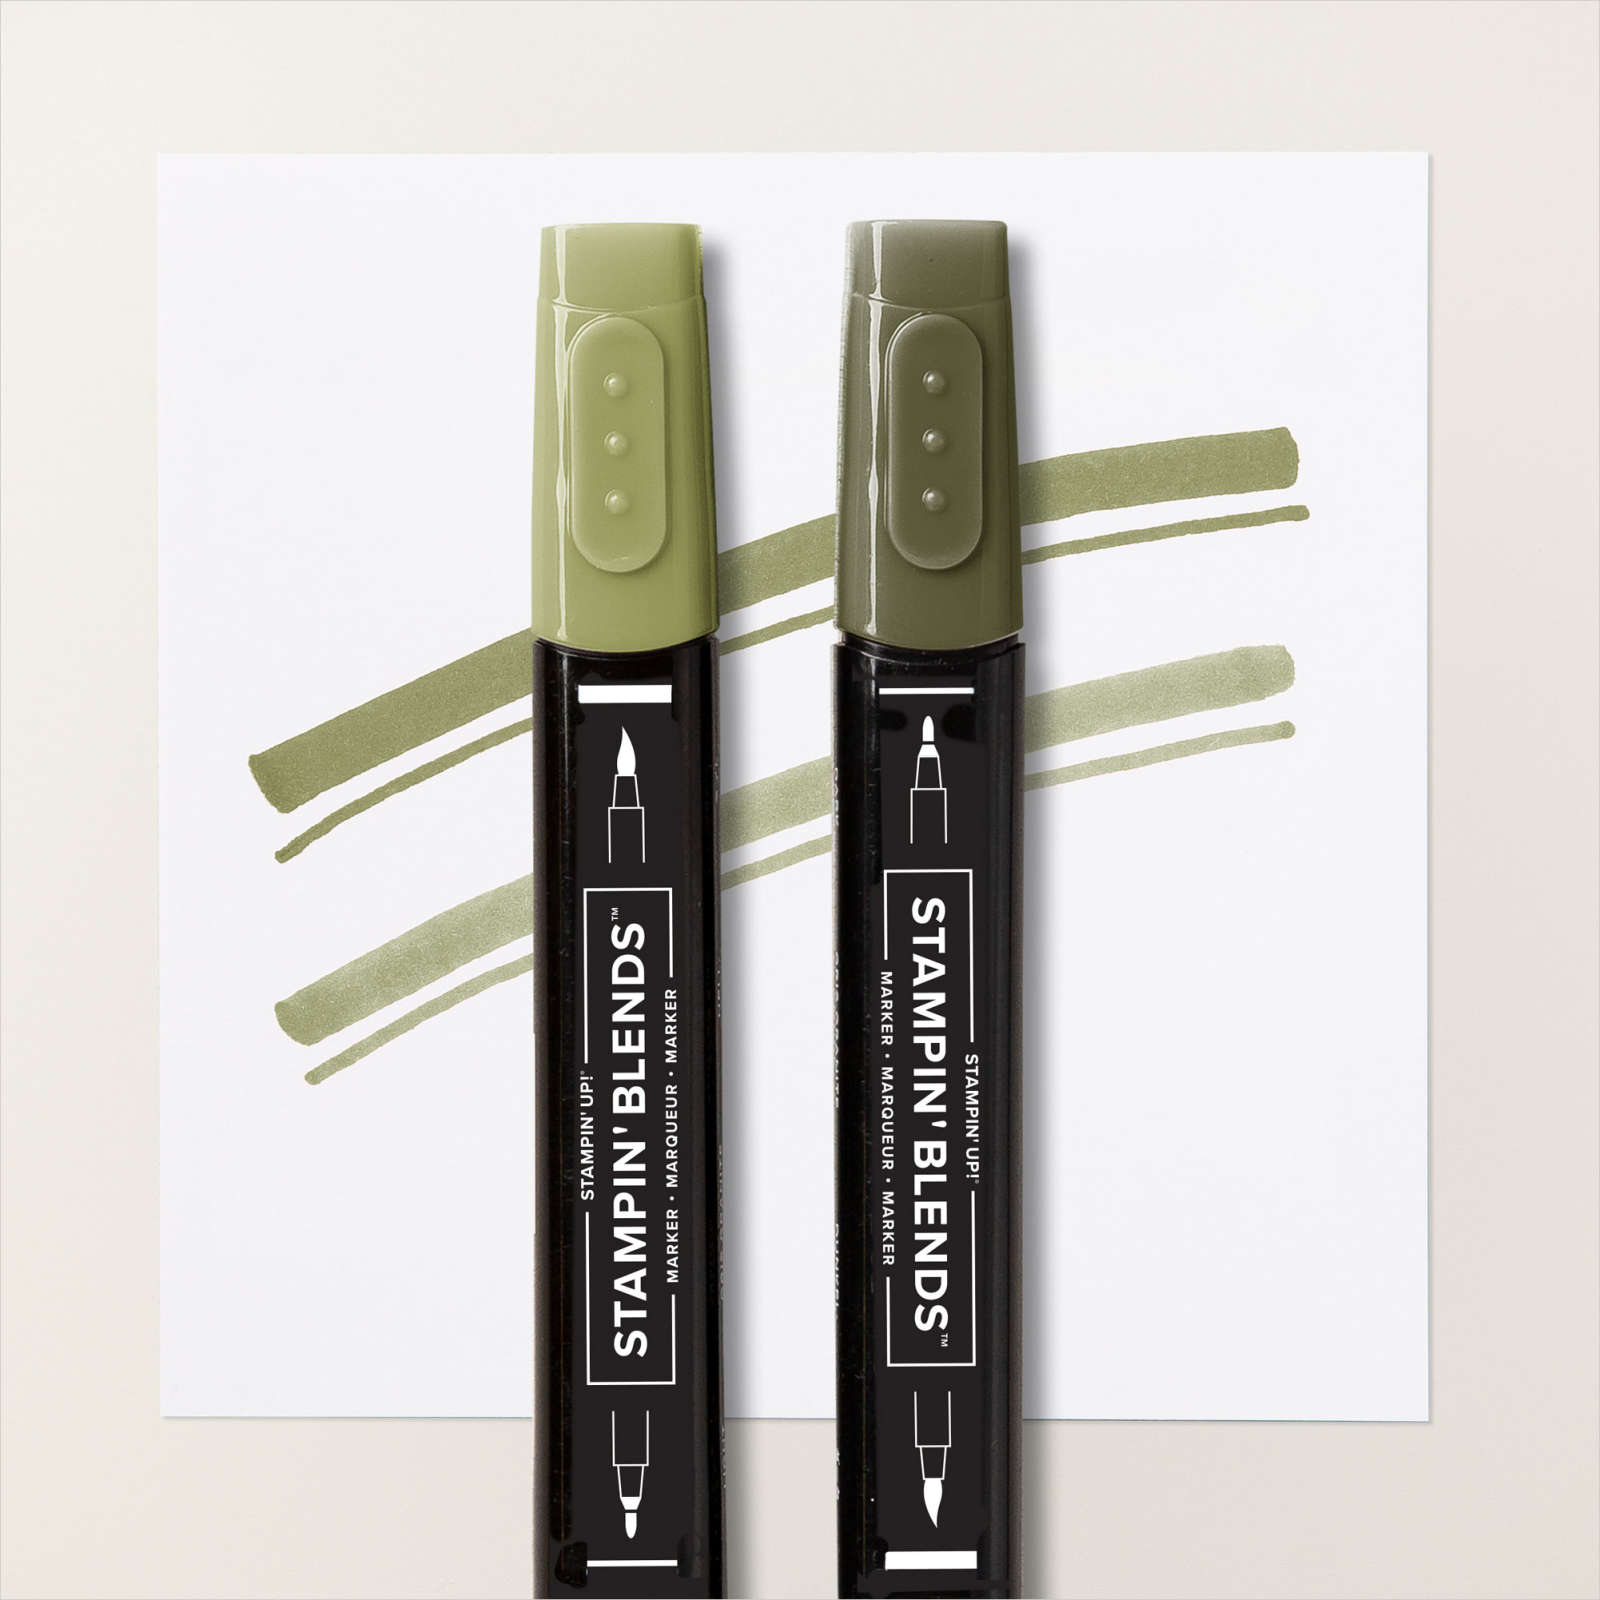
Product Used:


New Fence
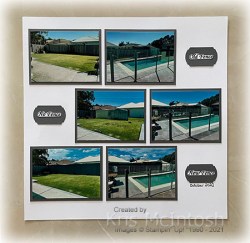
Last week we replaced our timber fence with a colourbond fence. Boy, what a difference! Unfortunately it will be a while until my bougainvillea grows back and makes a colourful display! My page couldn’t be more simple. I managed to take photos from the same spot on our back verandah at each stage of the construction. I attached the photos to Basic Gray card before attaching them to the Basic White 12″ x 12″ page.
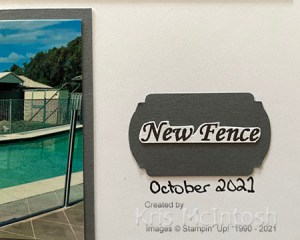
I created the titles on the computer, printed them onto Basic White card and used my paper snips to trim around the words. I punched Basic Gray card using the Label Me Fancy Punch and attached the titles to them. I hand wrote the date. Again, it can’t get much simpler but reminds me of a busy couple of days – not that I did much, but my hubby worked pretty hard. He still has to refinish our veggie garden but I love our new fence and the difference it makes to our back yard.
Bye for now,
Kris
Product Used:


Paper Pumpkin Birthdays
Today’s cards are created using the last of the card bases from the Expressions in Color Paper Pumpkin kit. You have seen previous creations using the other two card bases here and here. I needed to make a birthday card for my granddaughter who is turning 13 today. How quickly the years go! I attached the patterned card to the centre of Basic White card and then scored and folded Evening Evergreen card.

I stamped the image from the Beautiful Moments stamp set onto Basic White card using Memento Tuxedo Black ink. I coloured the image using Fresh Freesia, Ivory, Bronze, Dark Polished Pink and Light Evening Evergreen Stampin’ Blends. I attached the stamped and coloured panel to Evening Evergreen card and then the card front. I stamped “happy birthday” from the Artistically Inked stamp set onto Basic White card using Evening Evergreen ink and cut it out using one of the Stitched Rectangle Dies.

I attached the greeting to Evening Evergreen card and then the card front, just covering the bottom of the stamped and coloured image. To decorate the inside of the card, I stamped the greeting from the Peaceful Moments stamp set onto Basic White card using Evening Evergreen ink. I stamped the small floral image from the Beautiful Moments stamp set beside the greeting and coloured it using the Dark Polished Pink and Light Evening Evergreen Stampin’ Blends.

The card base in this instance is Evening Evergreen and I decided to cut up the card base and emboss the panels using the Painted Texture 3D Embossing Folder. The panels are attached to Basic White card and then scored and folded Evening Evergreen ink. The layout is the same as the first card with the stamped image from the Beautiful Moments stamp set and the greeting from the Artistically Inked stamp set. The images are coloured using a combination of Polished Pink, Pale Papaya, Dark Fresh Freesia and Light Evening Evergreen Stampin’ Blends. The insides of the cards are decorated with the same greeting from the Peaceful Moments stamp set and the small floral image from the Beautiful Moments stamp set.
I am so happy with the way these cards turned out. It’s amazing what you can do when you let your imagination run wild! You can see the variations I made using each of the other cards from the kit here and here.
Bye for now,
Kris
Product Used:


Coming Soon
Stampin’ Up has released a beautiful stamp set and co-ordinating dies from the next mini catalogue early. Demonstrators were able to purchase these products on the 2nd October and customers can purchase from the 3rd November. The release consists of the Eden’s Garden stamp set and Eden Dies which will be in the next mini catalogue released in January. However, they have also released co-ordinating Eden’s Garden Designer Series Paper, Ever Eden Cotton Paper and Garden Gems which will only be available while supplies last or until the 3rd January. Yesterday on my Facebook Live, I shared three cards using this product suite and today I have another card for you.

For this card, I cut the card base from Evening Evergreen card and trimmed 3.5cm from the front panel. I cut Gold Foil card using the border die from the Eden Dies and attached it to a piece of Eden’s Garden Designer Series Paper and then the smaller front panel of the card base. I cut the banner die from the Eden Dies from Gold Foil card and attached it to the centre of the Designer Series paper. I stamped the greeting from the Eden’s Garden stamp set onto Basic White card using Evening Evergreen ink and punched it out using the Double Oval Punch. I punched Evening Evergreen card using the same punch to create a scalloped oval. I attached the greeting to the scalloped oval and then the card front using dimensionals.

To decorate the inside of the card, I attached a strip of the Soft Succulent Ever Eden Cotton Paper across the bottom of the inside of the card. I stamped the leaf image from the Eden’s Garden stamp set onto a piece of Basic White card using Evening Evergreen ink and attached the stamped panel across the top of the Cotton Paper.
I think you are going to love this suite. The stamp set is a distinctive stamp set, so you get lots of depth in your stamped images using just one colour. The Eden’s Garden Designer Series has one side of each pattern paper with gold foil accents and the Cotton Paper is so soft and fine but strong. So don’t delay, place your order on the 3rd November so you can get this amazing product suite.
Bye for now,
Kris
Product Used:

Christmas Wonder
Today’s cards are created using a 6″ x 6″ One Sheet Wonder which was shared with Demonstrators by Clare and Emma our South Pacific Stampin’ Up! leaders. I cut a piece of the Christmas Trimmings 6″ x 6″ Designer Series Paper using the template that they provided. I also cut Evening Evergreen card to create layers for the Designer Series paper.

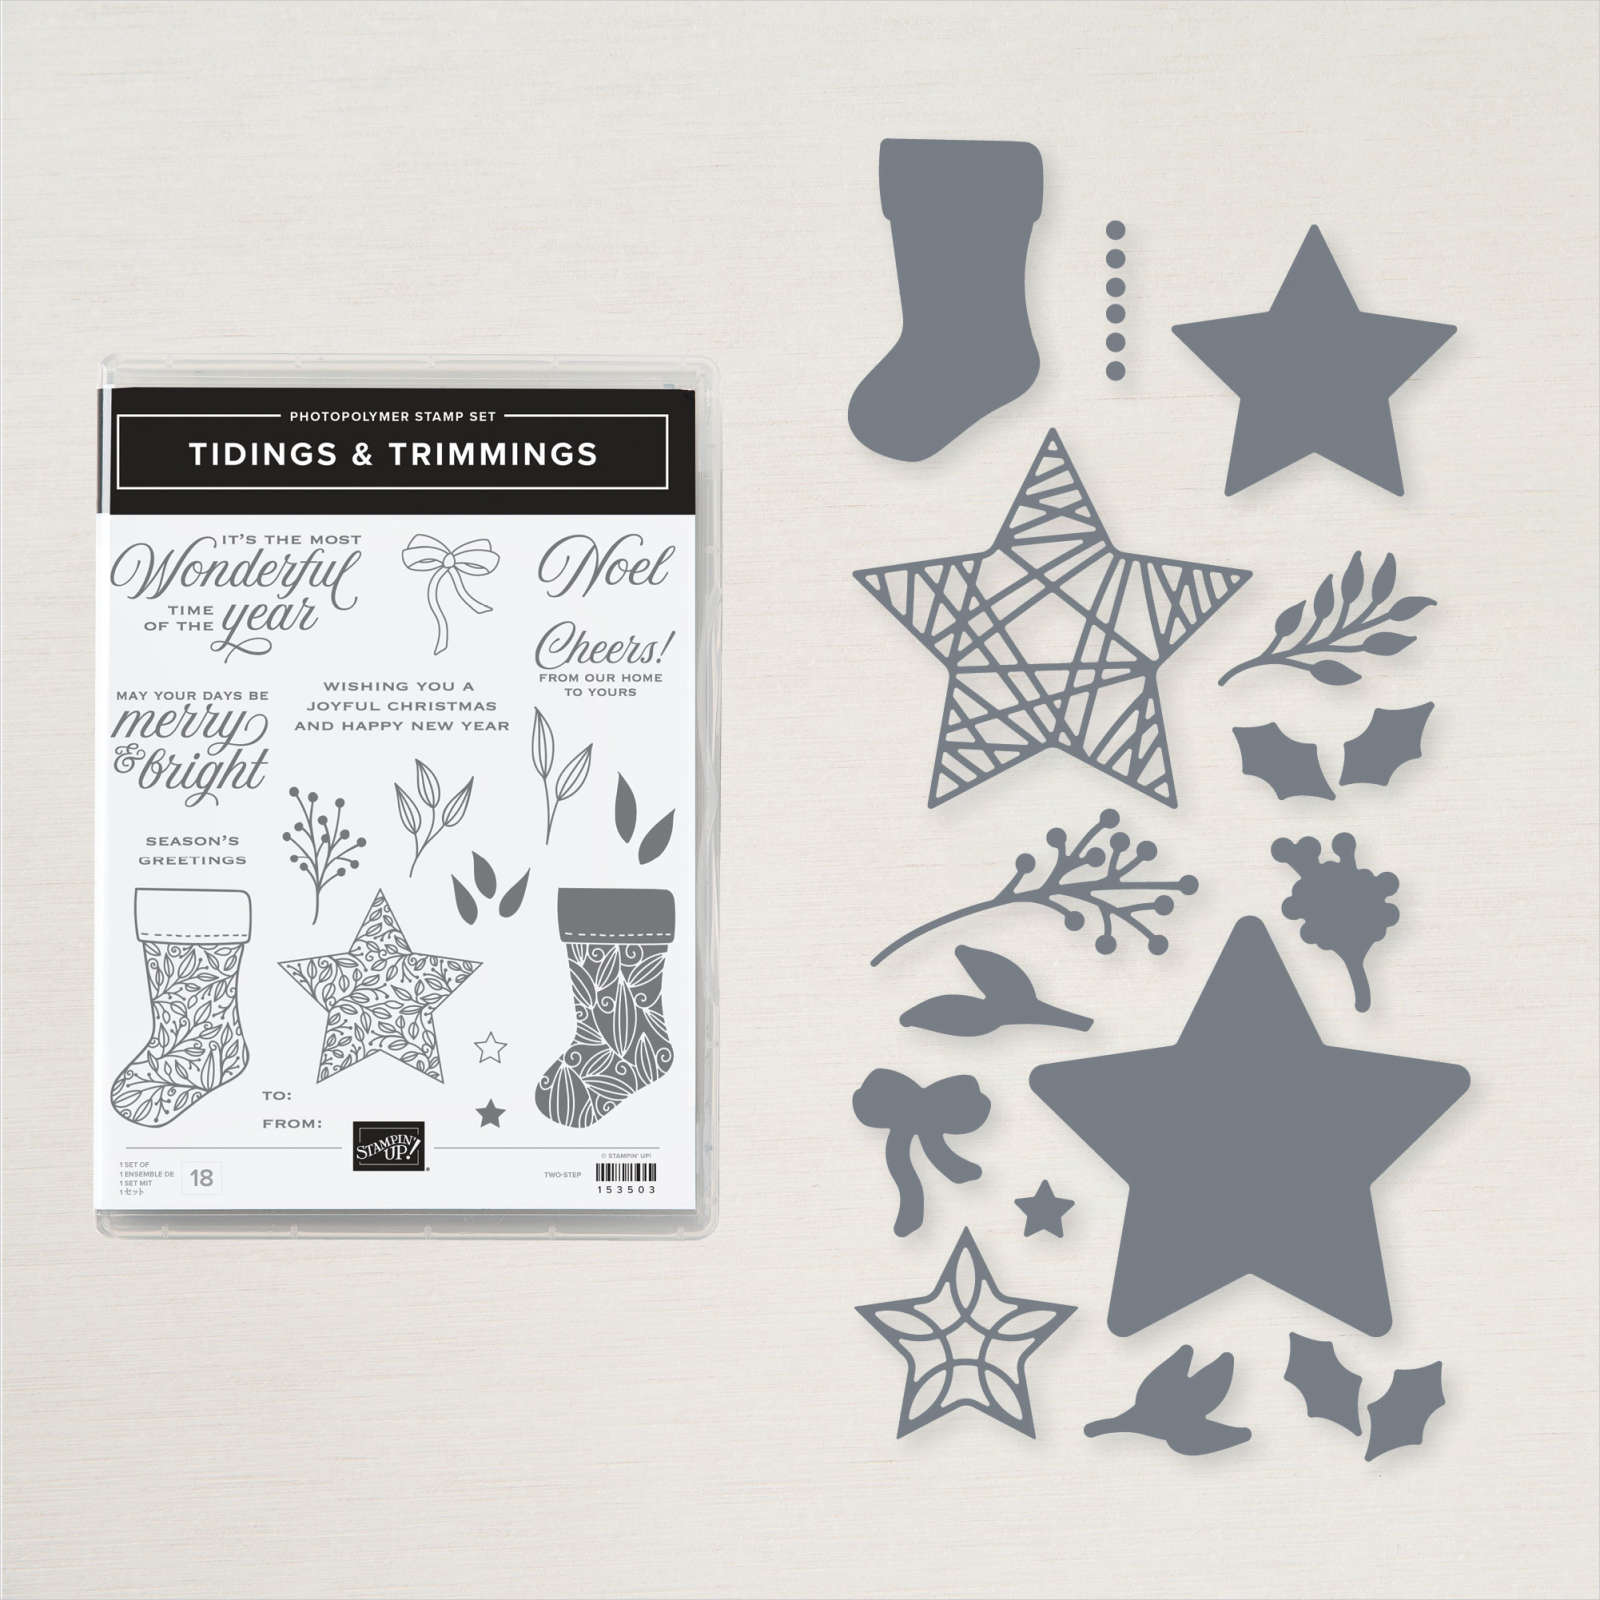
For each card I embossed a piece of Basic White card using the Painted Texture 3D Embossing Folder and attached it to scored and folded Evening Evergreen card. I attached all of the pieces of Designer Series Paper to the co-ordinating piece of Evening Evergreen card before attaching them to the card fronts. I die cut four of the largest star from the Christmas Trimmings Dies from Evening Evergreen card. I also die cut Gold Foil card using the largest detailed star from the Christmas Trimmings Dies. I attached the detailed stars to the Evening Evergreen stars and then to each card front using dimensionals. For two of the cards, I stamped “seasons greetings” from the Tidings and Trimmings stamp set onto Basic White card using Cherry Cobbler ink.
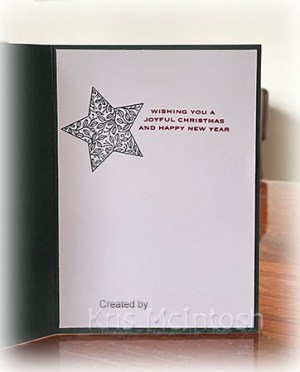
I cut out the greetings using my paper snips and attached the greetings to the centre of two of the stars. For two more cards, I stamped “Noel” from the Tidings and Trimmings stamp set onto basic White card using Cherry Cobbler ink and punched them out using the Double Oval Punch. I cut a scalloped oval from Evening Evergreen card using the same punch. I attached the greeting to the centre of the scalloped Evening Evergreen oval and then the card front using dimensionals. For the last card, I punched Gold Foil card using the scalloped oval from the Double Oval Punch. I attached the last greeting to the centre of the Gold Foil scalloped oval and then the card front using dimensionals. To decorate the inside of the cards, I stamped the star image from the Tidings and Trimmings stamp set onto Basic White card using Evening Evergreen ink. I stamped the greeting from the Tidings and Trimmings stamp set beside the greeting using Cherry Cobbler ink.

I love how these cards turned out. It is amazing how different the same cutting layout can look using different Designer Series Paper and embellishments.
I’d love to hear what you think.
Bye for now,
Kris
Product Used:


Case The Catalogue
I joined a group on Facebook because one of the admins is my friend Vicky Wright, a very talented Stampin’ Up! Demonstrator now located at Toogoom new Hervey Bay. The aim of the group (at the moment) was to celebrate World Card Making Day which was 2nd October. One of the challenges in the lead up to World Card Making Day was to case one of the samples on page 67 of the July-December Mini Catalogue. Today I thought I would share my creation with you all. I embossed Evening Evergreen card using the Painted Texture 3D Embossing Folder and attached it to scored and folded Thick Basic White Card.

I stamped the image from the Beautiful Moments stamp set onto Basic White card using Memento Tuxedo Black ink and cut it out using one of the Stitched Rectangle Dies. I coloured the image using Polished Pink, Dark Evening Evergreen, Dark Fresh Freesia, Ivory and Bronze Stampin’ Blends before attaching it to the embossed card front.
I cut a piece of Pattern Party Designer Series Paper using one of the Stitched Rectangle Dies and attached it below the stamped image. I stamped “happy birthday” from the Artistically Inked stamp set onto Basic White card and cut it out using the Stitched Rectangle Dies. I attached the greeting to the card front using dimensionals. To decorate the inside of the card, I stamped the greeting from the Peaceful Moments stamp set onto Basic White card using Polished Pink ink. I stamped the small flower image from the Beautiful Moments stamp set beside the greeting using Memento Tuxedo Black ink. I coloured the image using the Dark Fresh Freesia and Dark Evening Evergreen Stampin’ Blends. I attached the image panel to Evening Evergreen card before attaching it inside the Thick Basic White card base.
I love how my card turned out, so a big thank you to the Work Card Making Day 2021 Facebook Group.
Bye for now,
Kris
Product Used:


New Bike
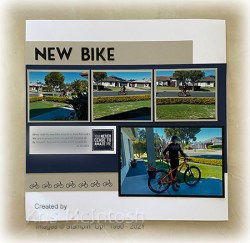
My eldest grandson rode around to our place last week to show off his new bike. We are very proud of the fact that he paid off this bike himself! I attached Gray Granite card to a Basic White 12″ x 12″ page and attached Night of Navy card over the top. I attached each of the three small photos to Gray Granite card before attaching them to the page. The large photo is attached to Basic Black card. I created the journaling on my computer and printed it onto Basic White card. I stamped the greeting from the long retired En Route stamp set beside the journaling use Night of Navy ink. I stamped the push bike image from the same stamp set across the bottom of the Night of Navy card.

The title is cut from Basic Black card using the Playful Alphabet Dies. You know I am going to say it but it is a simple page. The object for me is to get as many photos as I can onto a Memory Keeping page that can be shared now and into the future. I just recently had a portable hard drive fail and although it does contain lots of photos, I know that most memories are also preserved as pages, so I am not as devastated as I would be if that was not the case!
Bye for now,
Kris
Product Used:


More Expressions in Color
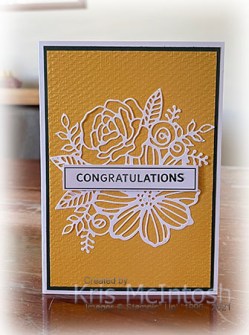
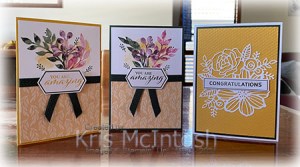
This week has all been about the Expressions in Color Paper Pumpkin Kit which is available for purchase now. These Paper Pumpkin Kits are amazing and I wish we were able to get them every month but I’ll take them whenever I can! Today I have another three cards for you which I made using just one card base from the kit. I cut the card from the kit in half and cut one half down to fit my card front and embossed it using the Tasteful Textile 3D Embossing Folder. I attached the embossed panel to Evening Evergreen card and then scored and folded Thick Basic White card.

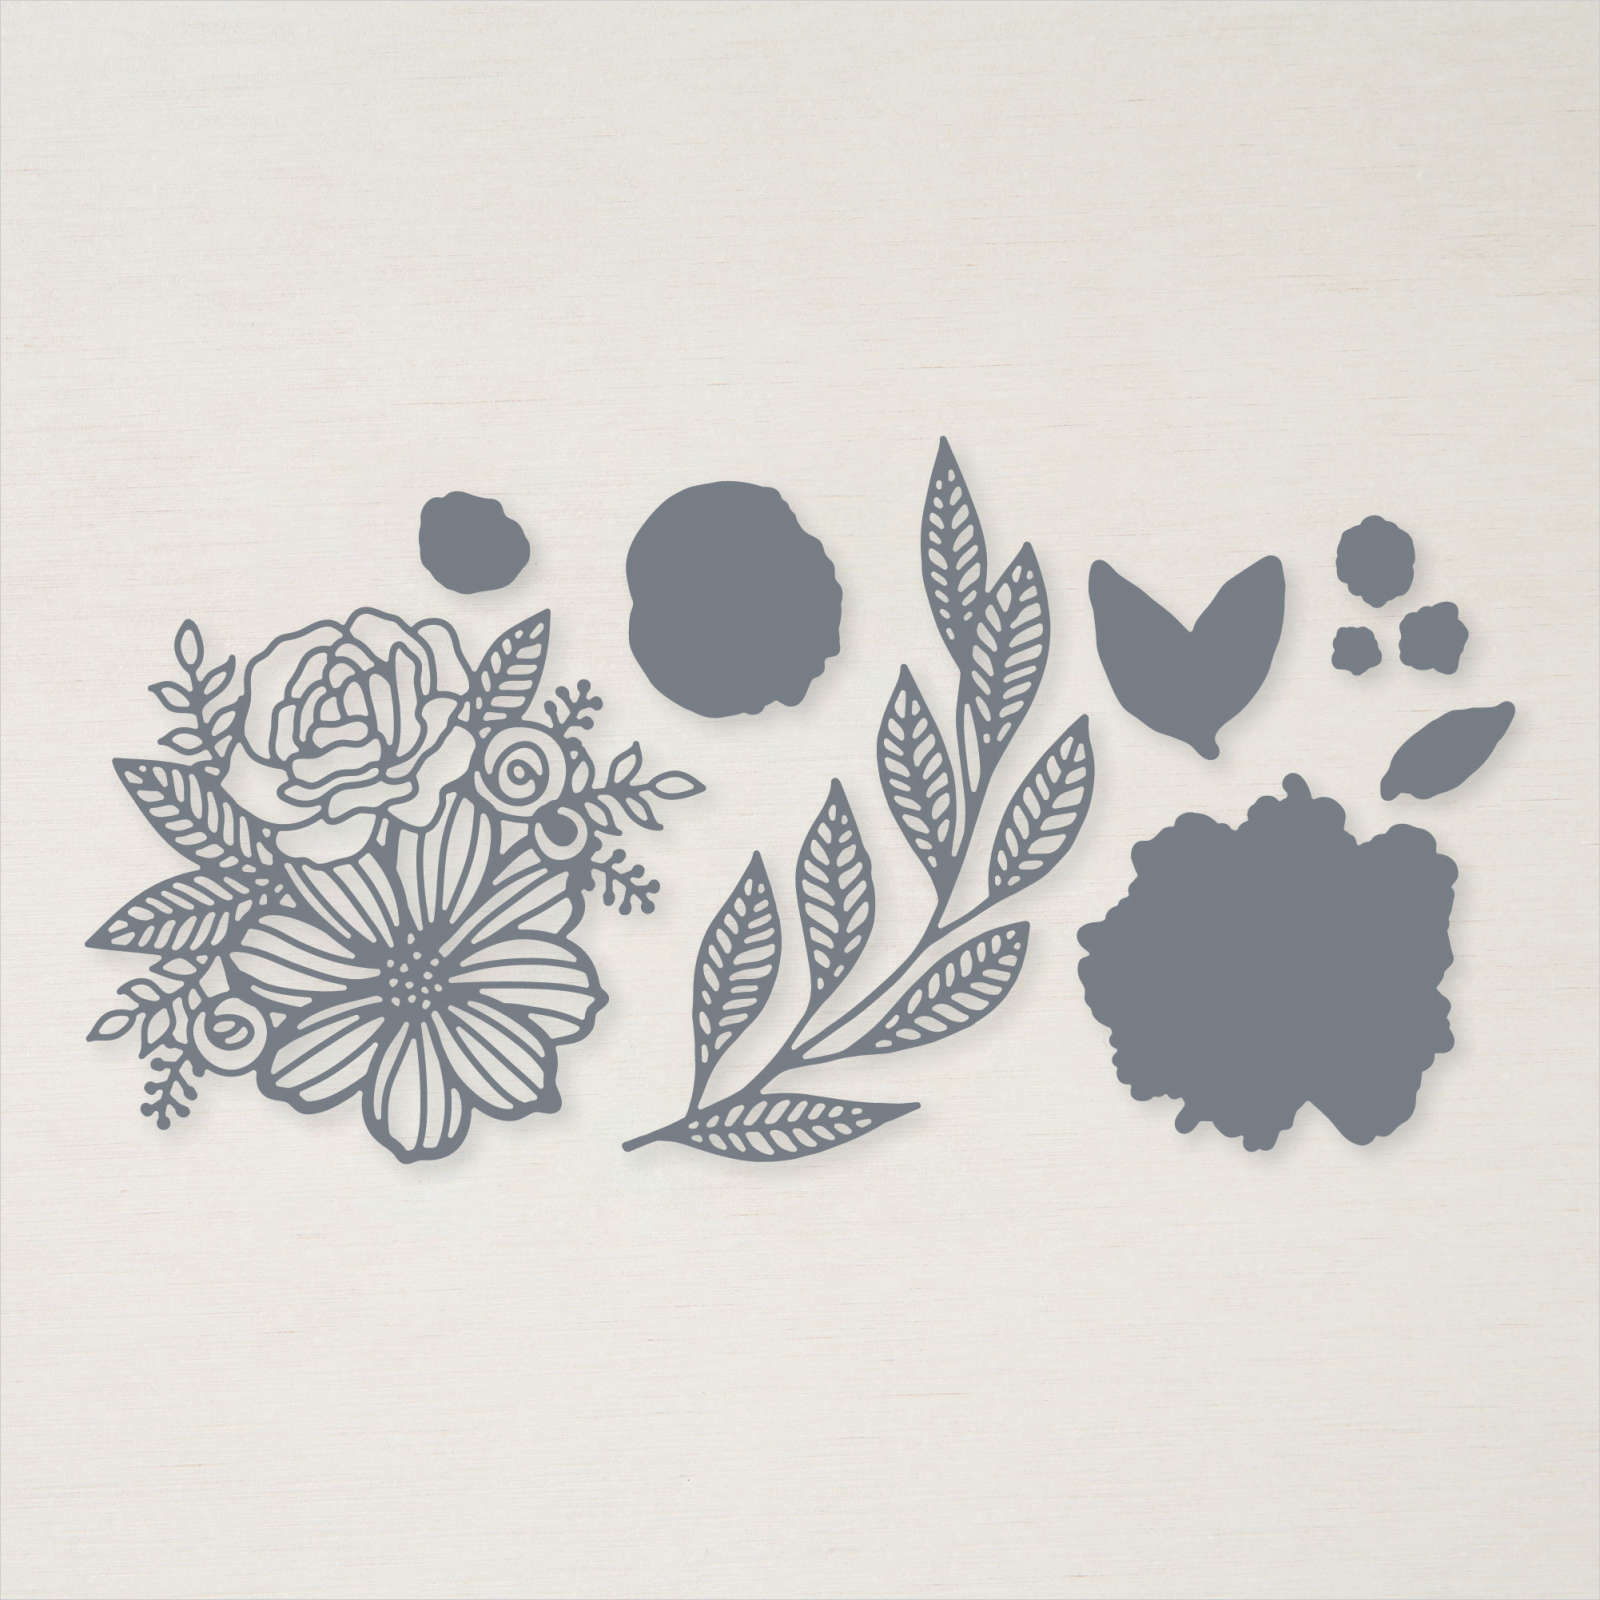
I cut Basic White card using the beautiful floral die from the Artistic Dies and attached it to the embossed card. I stamped “congratulations” from the stamp set included in the kit onto one of the labels using the Evening Evergreen Stampin’ Spot also included in the kit.
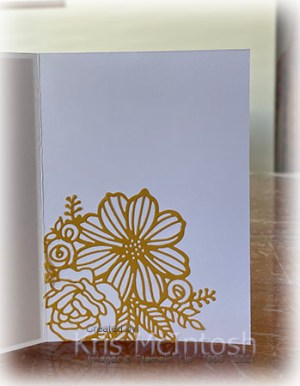
The label is the one the instructions for the kit use for this card. The greeting is attached to the card front using dimensionals. To decorate the inside of the card, I cut Bumblebee card using the same die from the and attached it to the bottom left hand corner of the inside of the card. This particular card comes with a vellum over lay and I attached it to the remaining piece of the card base and then cut it in half.

I attached the vellum pieces to Basic White card. I stamped the background image from the included stamp set twice onto the Basic White part of the card front using the included Bumblebee Stampin’ Spot. I did stamp the images onto scrap paper first, so that it was lighter. I stamped the small leaf from the included stamp set several times over the background image using the included Evening Evergreen Stampin’ Spot.

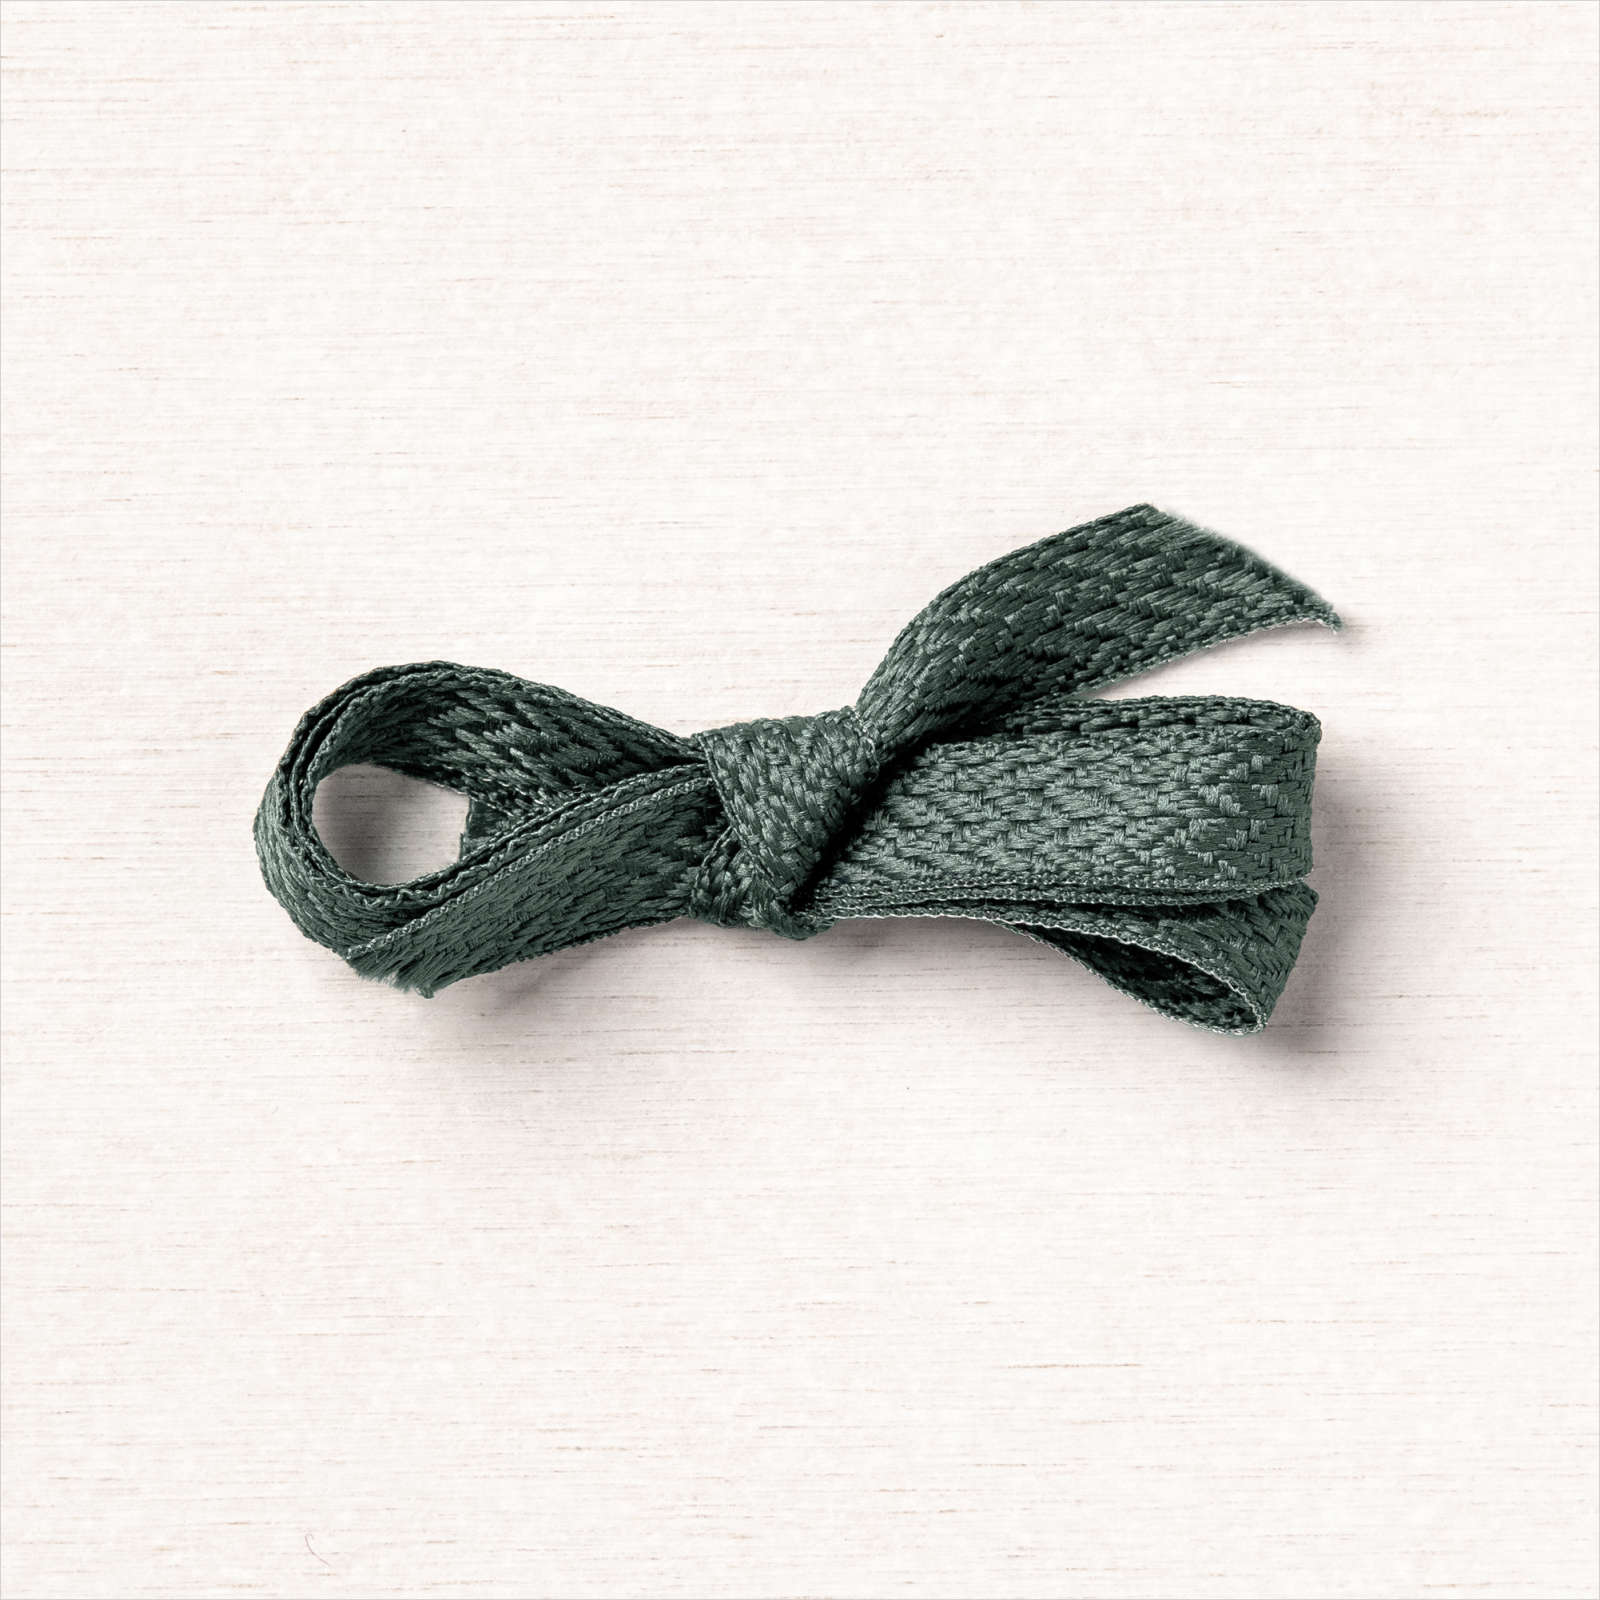
I wrapped the top of the vellum piece using Evening Evergreen Chevron Weave Ribbon and attached the panels to either scored and folded Bumblebee card or Evening Evergreen card. I cut the leaf die cuts included in the kit for this particular card into pieces. I layered one piece from each die cut onto the card front. I stamped the greeting from the included stamp set onto labels from the kit once using the Bumblebee Stampin’ Spot and once using the Evening Evergreen Stampin’ Spot. I threaded a length of the Evening Evergreen Chevron Weave Ribbon to create “tails” and attached the greetings using dimensionals. To decorate the inside of the card, I stamped the background image onto Basic White card, for one card I used Bumblebee ink and for the other Evening Evergreen ink which was stamped onto scrap paper first. I attached the remaining pieces of the die cuts over the stamped background.
Again I am so happy with how these variations turned out. The amazing thing about these kits is that they are fantastic for beginners but can also be used by Avid stampers (like myself) to upscale the basic components. I’d love to know what you think.
Bye for now,
Kris
Product Used: