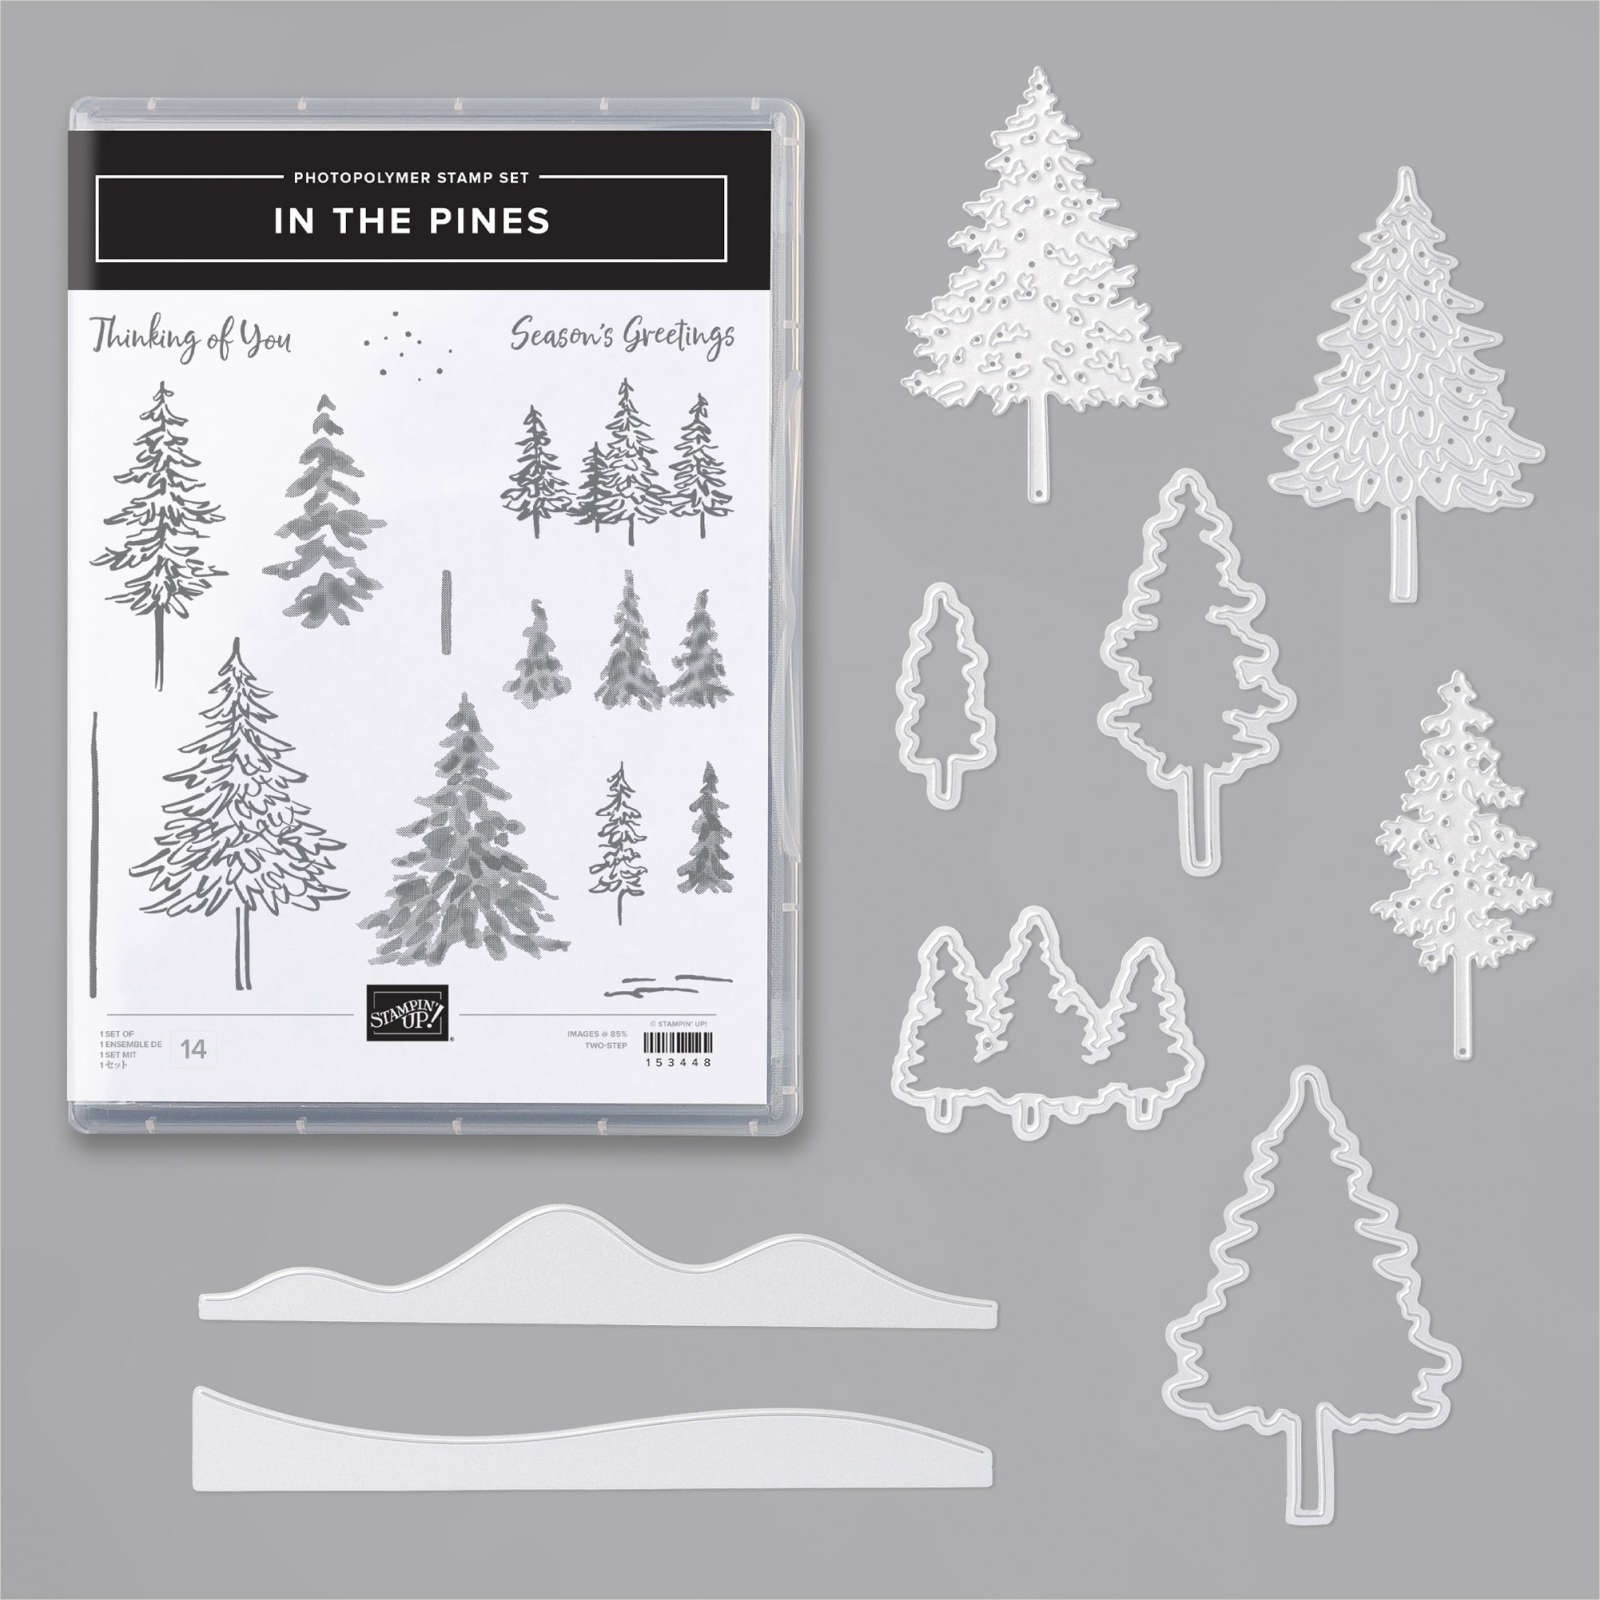
In The Pines
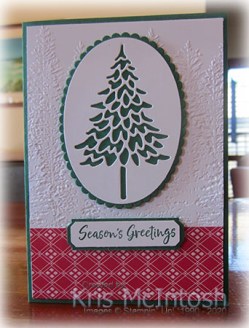
Yesterday on my Facebook Live I shared some cards using the In The Pines stamp set and co-ordinating Pine Woods Dies. Today I have another card to share using this Product Bundle. I began by embossing Whisper White card using the Evergreen Forest 3D Embossing Folder. I moved the Whisper White card down inside the embossing folder so that the embossing went to the top of the Whisper White card. I attached a piece of ‘Tis The Season 6″ x 6″ Designer Series Paper across the bottom of the embossed card. This also covered the line where the embossing folder ended. I attached the embossed panel to scored and folded Shaded Spruce card.
  I stamped the greeting from the In The Pines stamp set onto Whisper White card using Shaded Spruce ink and punched the ends using the Lovely Labels Pick a Punch. I attached the greeting to Shaded Spruce card which also has the ends punched to co-ordinate. The greeting is attached to the card front using dimensionals. I used the Layering Ovals Dies to cut a Whisper White oval before using the Pine Woods Die to cut the tree shape. I attached the Whisper White oval to a Shaded Spruce scalloped oval cut using the same dies before attaching it to the card front using dimensionals.
To decorate the inside of the card, I cut the tree shape using the Pine Woods Die into the lower left hand corner of Whisper White card.

I love this card and decided to make a second one swapping the paper and ink for Cherry Cobbler. I love the way they both look but I guess I am a little bit traditional because I like the one with the greeting tree best. What about you?
Bye for now,
Kris
Product Used:


I just love this card Kris, Pretty tree. The EF background is delicate in the background.
LikeLike
Thanks Mary for visiting my blog and leaving such lovely comments, I’m glad you like it.
LikeLike