The Beach

Today’s page shows off the only photo I could find of our visits to Lake Cathie beach. We spent a lot of time there when we first moved to Kew from Dubbo. I created the printed the journaling block onto Very Vanilla card and attached it as well as the photo and two pieces of Sea and Sand Designer Series Paper to Seaside Spray card. I did use the retired Corner Rounder on the Designer Series paper and the journaling block to match the photo. I attached the panel to a 12″ x 12″ Very Vanilla card. I cut Very Vanilla card three times using the large die from the Seaside Seashells Dies. I used a Blending Brush to add Soft Sea Foam ink to the “seaweed” part of the die and then stamped the shells using Sahara Sand, Blushing Bride and Seaside Spray. I did stamp off some of the images to give some variation in the shades.
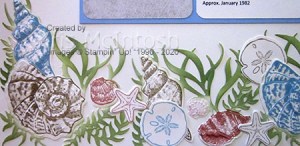
I also stamped some “starfish” and “sand dollars” using the same inks and cut them out using the co-ordinating Seaside Seashells Dies. I cut each of the dies in half and then some of the halves into pieces and attached them across the bottom of the page. I love the way I could add colour to the “seaweed” using the Blending Brush. Although it’s not a fantastic photo, it brings back happy memories of the time my grandmother spent with us.
Bye for now,
Kris
Product Used:


Try Stampin’ On Tuesday Challenge #488
The challenge at Try Stampin’ On Tuesday this week immediately brought the Darling Donkey stamp set to mind. To begin I embossed Basic White card using the Subtle 3D Embossing Folder and attached it to scored and folded Night of Navy card. I cut a piece of Balmy Blue card using the the Happy Dies and attached it across the centre of the embossed Basic White card.

I cut two banners from Basic White card using the Happy Dies and coloured the flags using the Night of Navy, Balmy Blue and Daffodil Delight Stampin’ Blends. I attached one banner across the top left hand corner and one banner across the bottom of the card. I stamped the donkey from the Darling Donkey stamp set onto Whisper White card using Basic Gray ink. I coloured the image using Smoky Slate and Light Flirty Flamingo Stampin’ Blends. I cut out the donkey image using the Layering Circle Dies and stamped “birthday” from the Itty Bitty Greetings stamp set below the donkey using Night of Navy ink.
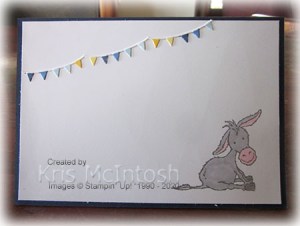
I attached the image to a Night of Navy scalloped circle cut using the Layering Circle Dies and then the card front using dimensionals. To decorate the inside of the card I cut Basic White card using the banner from the Happy Dies and coloured it using the Night of Navy, Balmy Blue and Daffodil Delight Stampin’ Blends. I attached the banner across the top left hand corner of Basic White card. I stamped another donkey from the Darling Donkey stamp set onto the lower right hand corner of the Basic White card using Basic Gray ink. I coloured the donkey using the Smokey Slate and Light Flirty Flamingo Stampin’ Blends.
I love this card. How could you not, with such gorgeous little donkey’s. A big thank you to Try Stampin’ on Tuesday for the inspiration.
Bye for now,
Kris
Product Used:


Sand & Sea
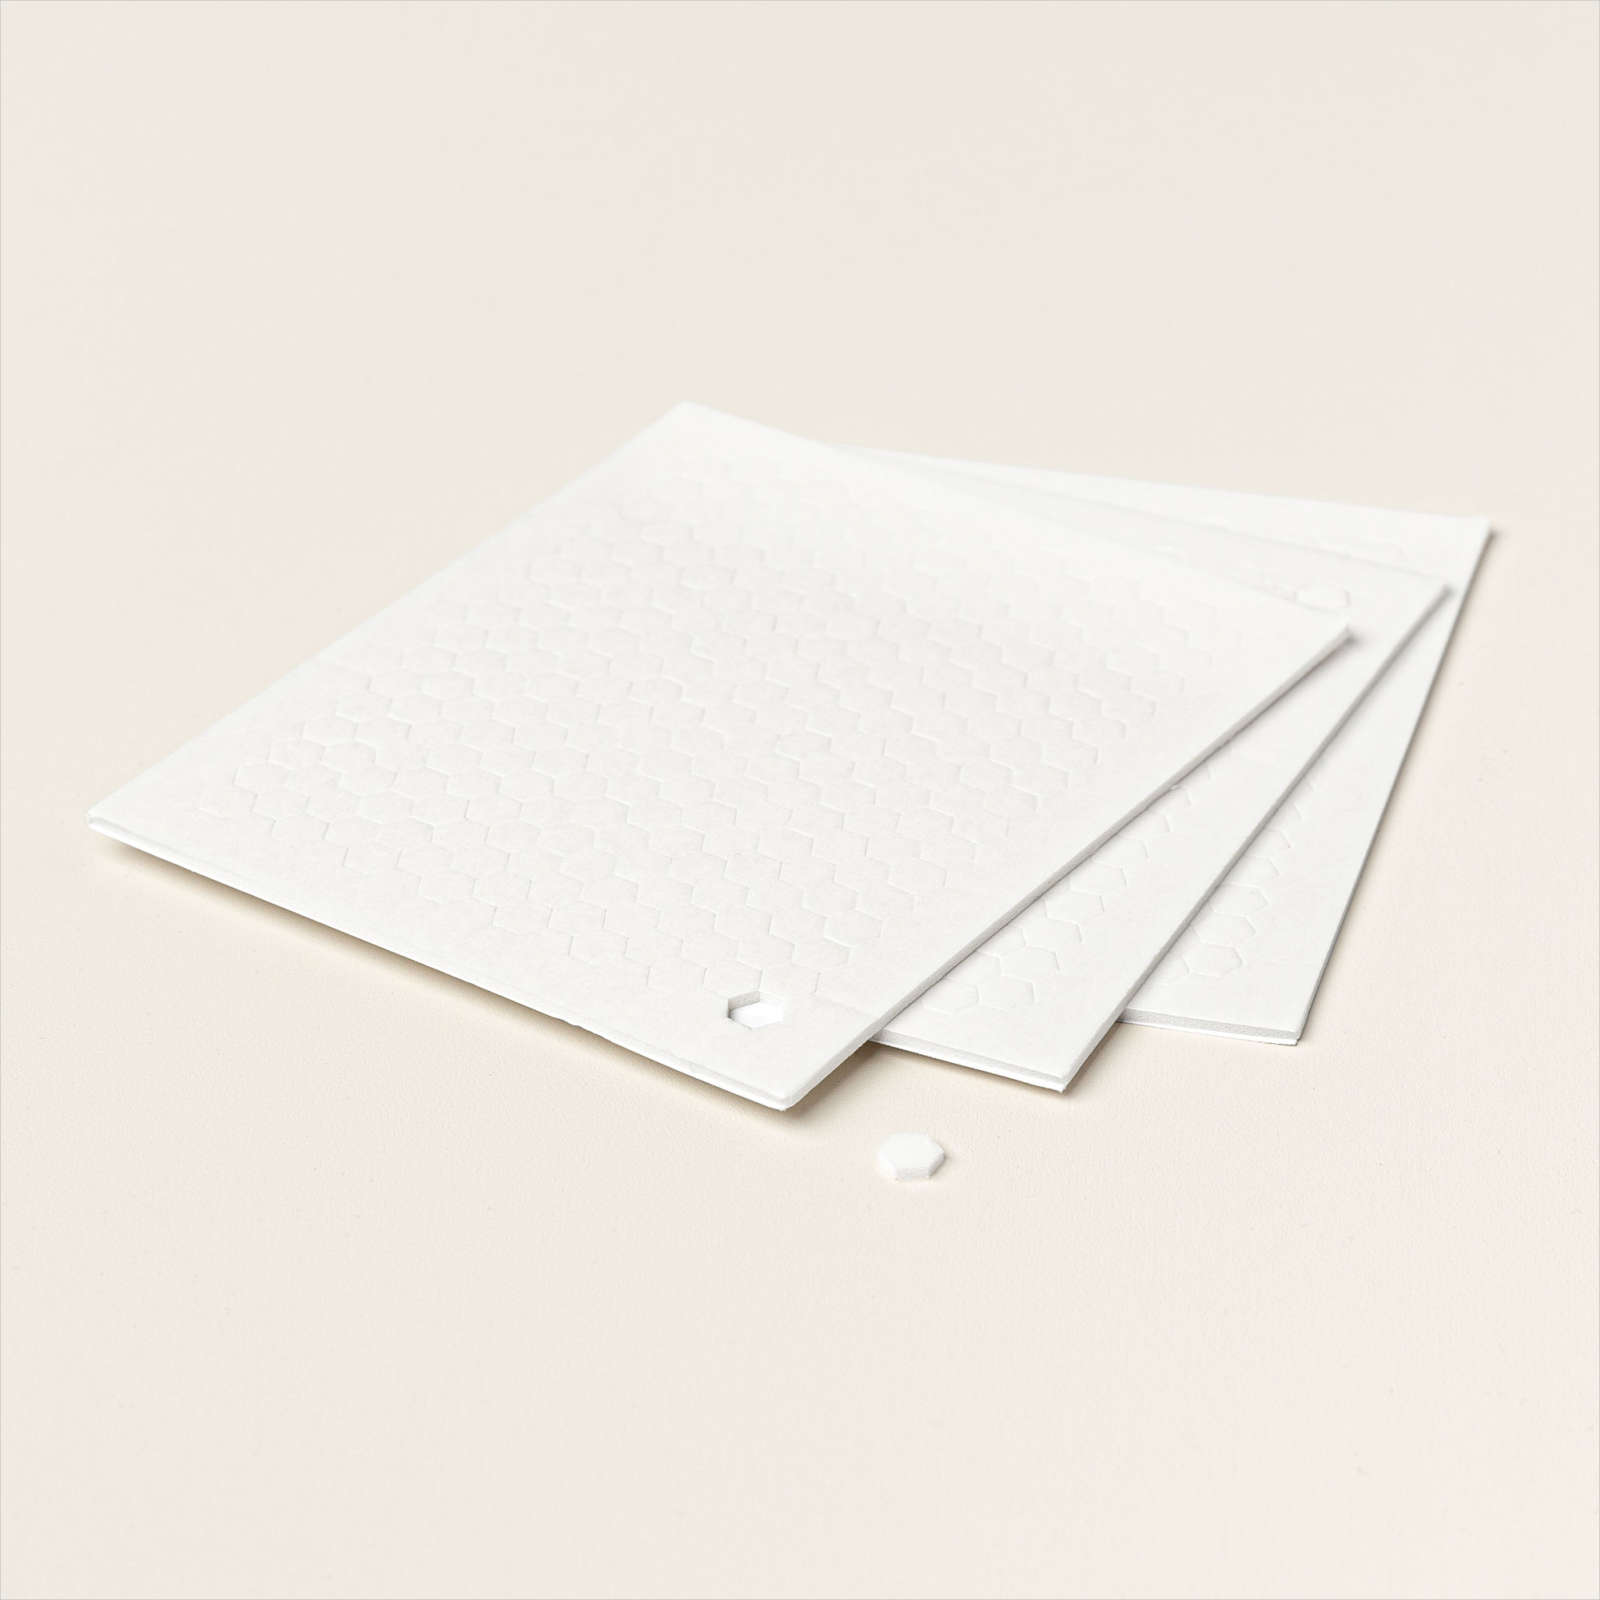
Yesterday on my Facebook Live I shared some of the products from the Sand & Sea Product Suite, which is one of the product suites from the January-June Mini Catalogue. The suite has a stamp set and co-ordinating dies, Designer Series Paper, embossing folder, stickers and beautiful opal rounds. So just a hint yesterday of what you can do this with great product suite. Today I am sharing a set of three cards using this beautiful product suite.
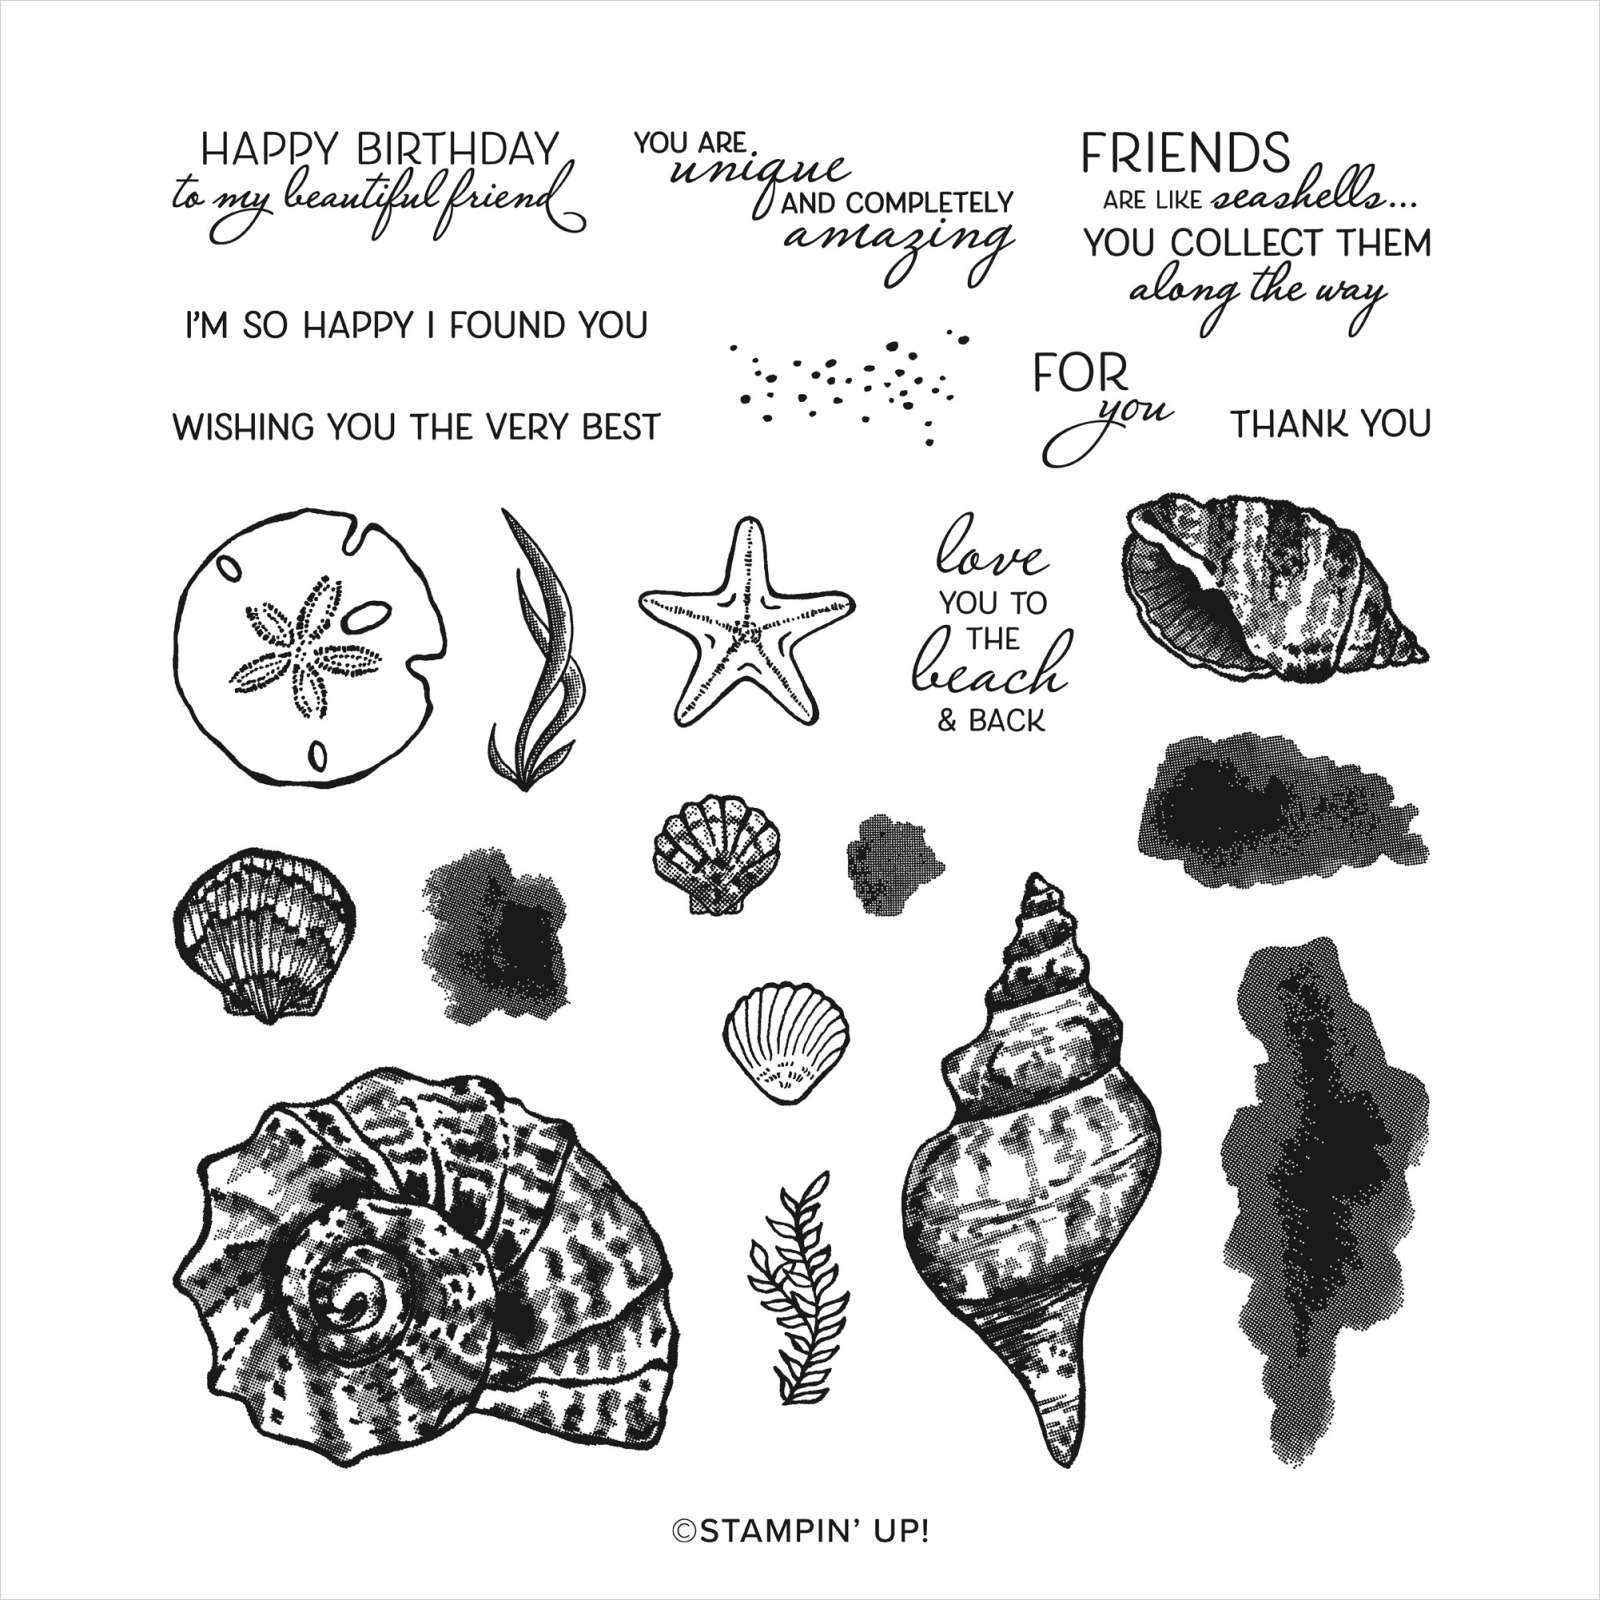
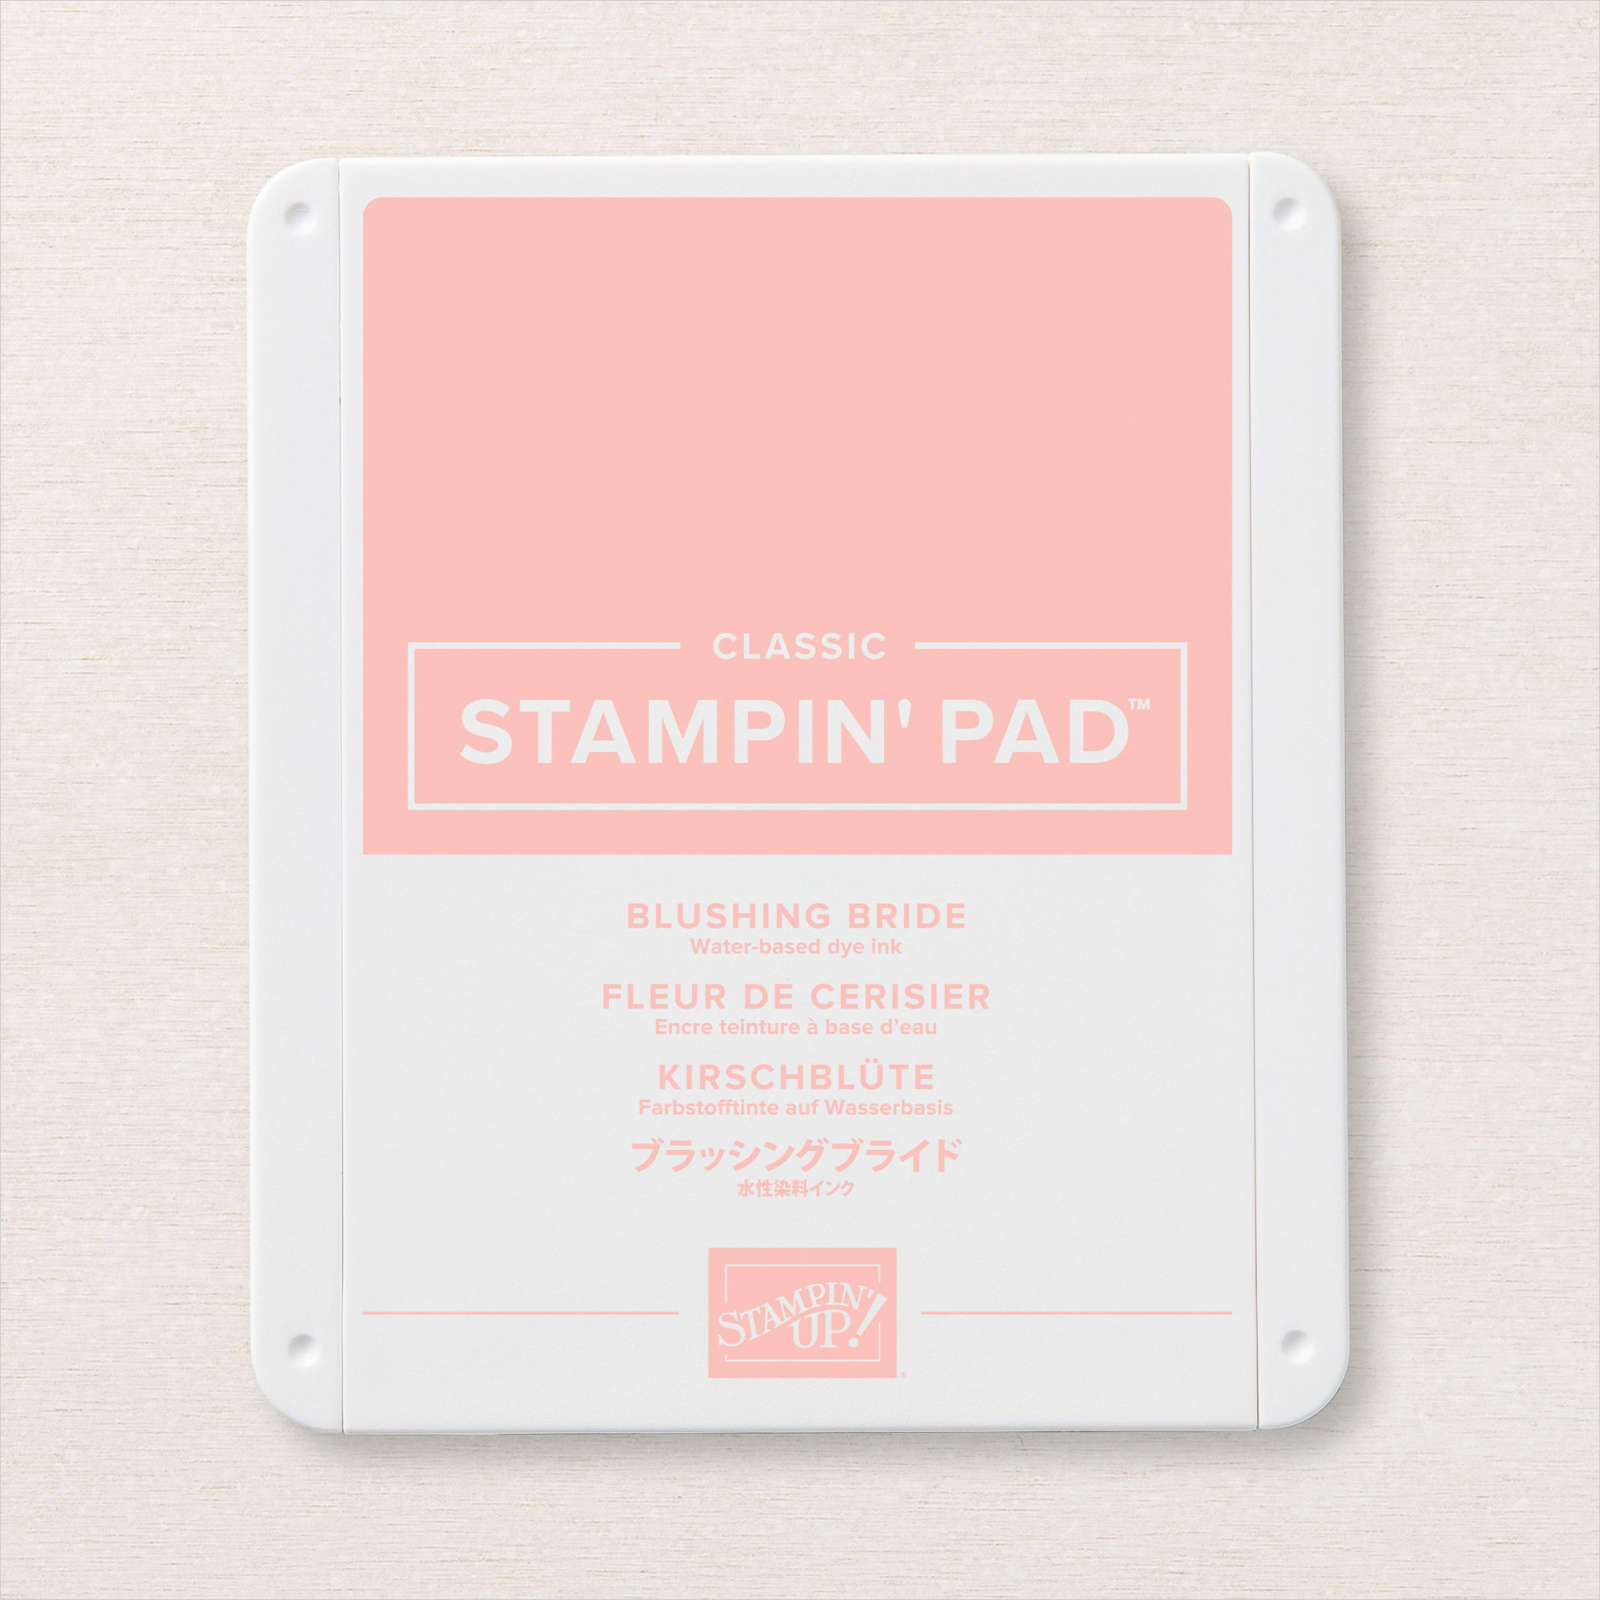
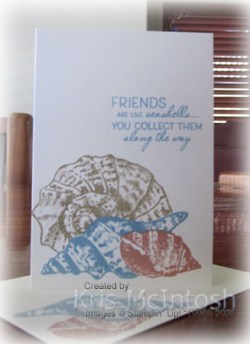
I didn’t share a Note Card yesterday so thought I would share my creation today. I stamped the shell from the Friends are Like Seashells stamp set onto the Note Card using Blushing Bride ink. I masked the image using a post-it-note mask and then stamped the second shell using Seaside Spray ink.

Without removing the first make, I masked the second shell using a post-it-note mask and then stamped the largest seashell from the Friends are Like Seashells stamp set using Sahara Sand ink and removed the two masks. I stamped the greeting from the Friends are Like Seashells stamp set using Seaside Spray ink.

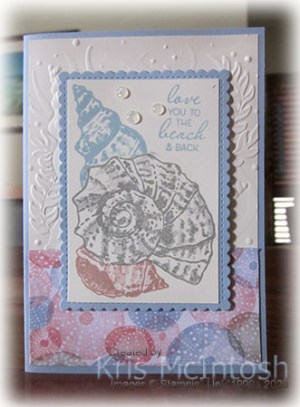
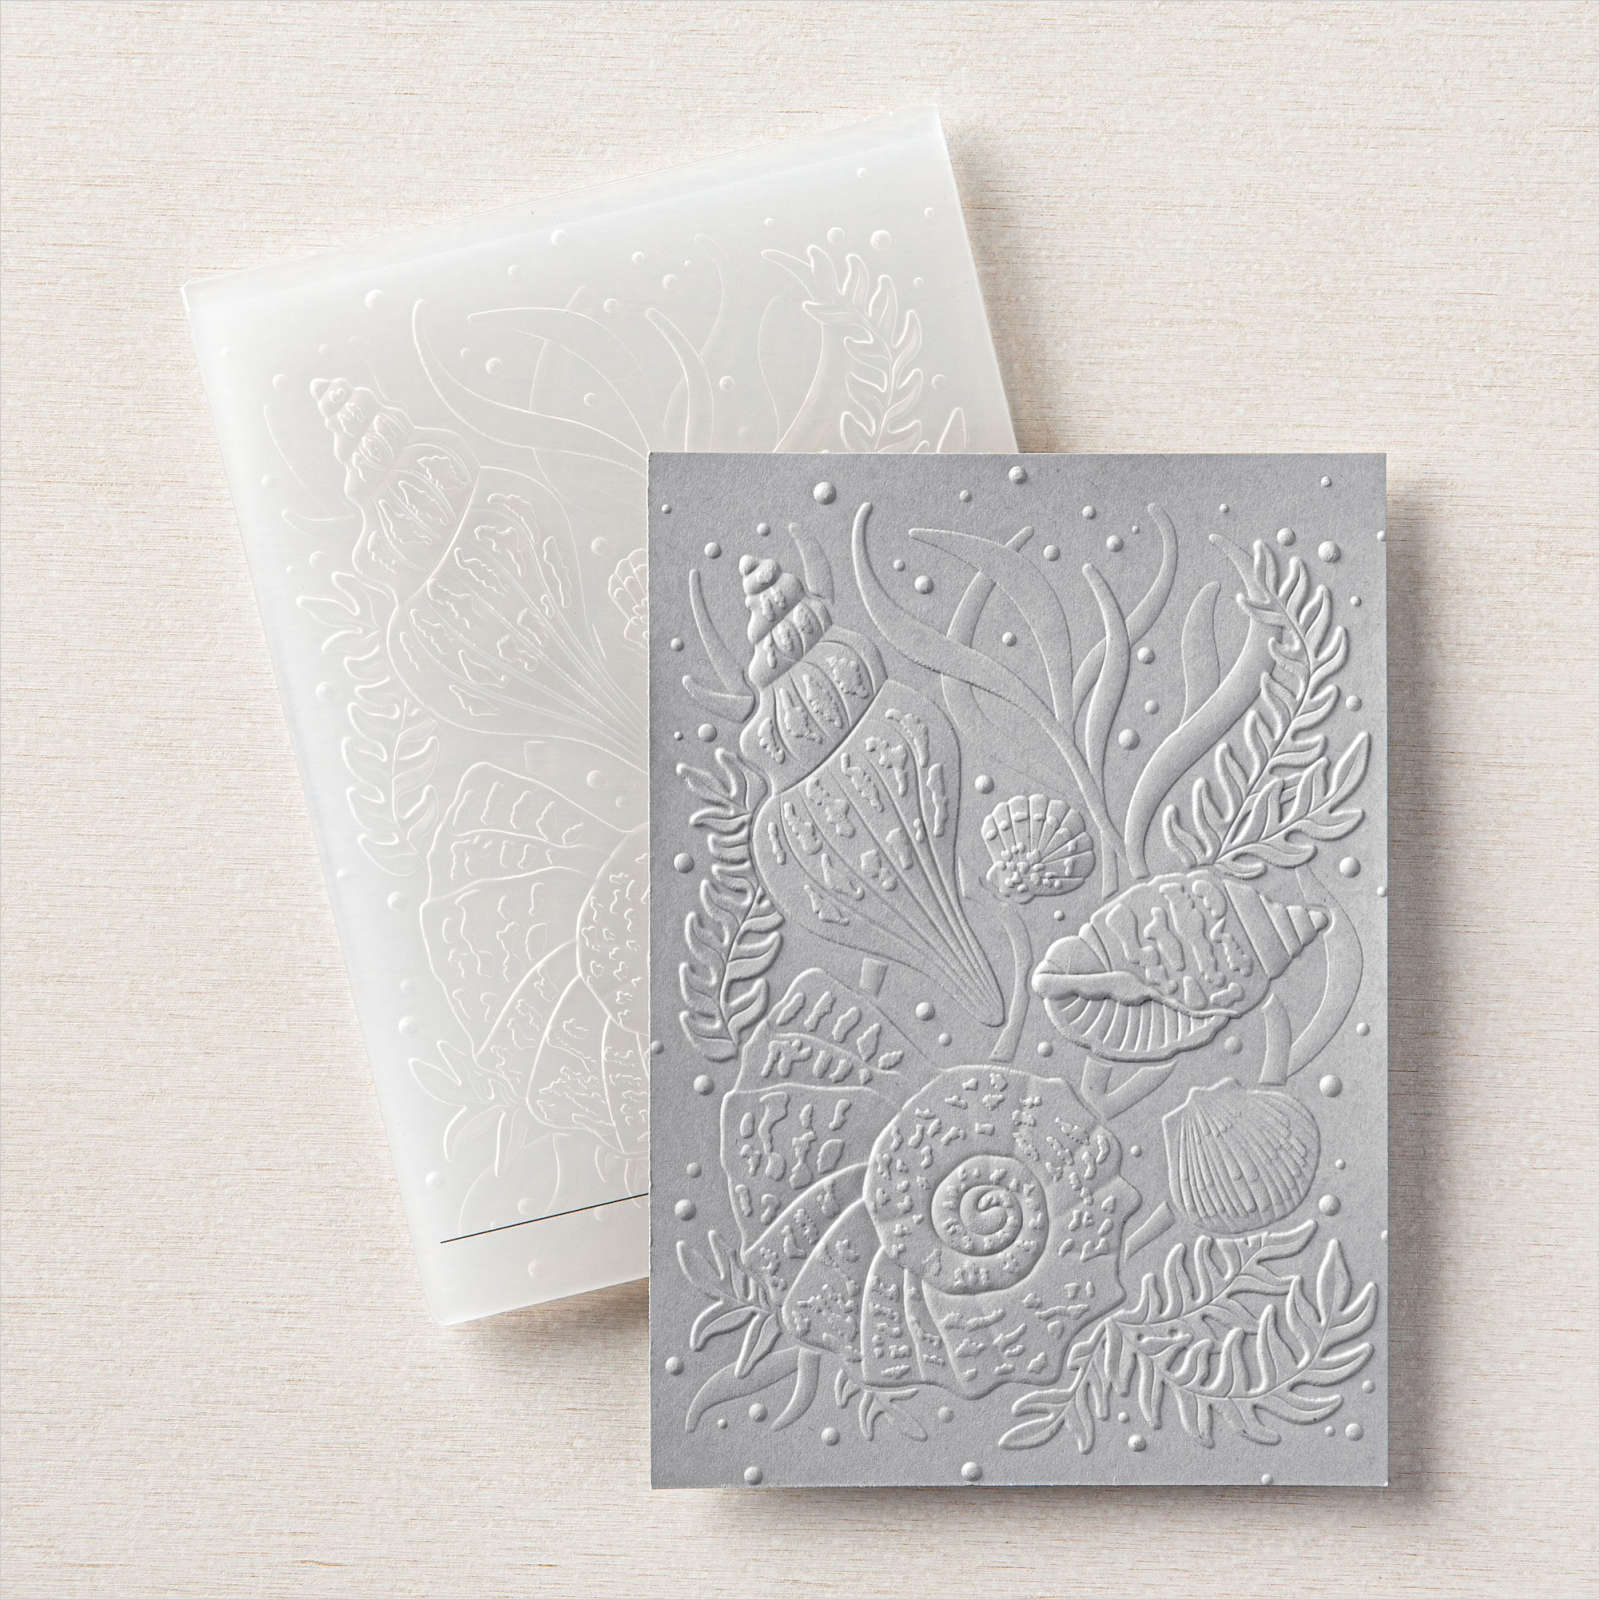
I also decorated the envelope using the two smaller shells, this time stamping the Seaside Spray shell first. For the second card I embossed Very Vanilla card using the Seashells 3D Embossing Folder and attached a piece of the Sand & Sea Designer Series Paper across the bottom. The whole panel is attached to scored and folded Seaside Spray card. I stamped the largest seashell from the Friends are like Seashells stamp set onto Very Vanilla card using Sahara Sand ink.

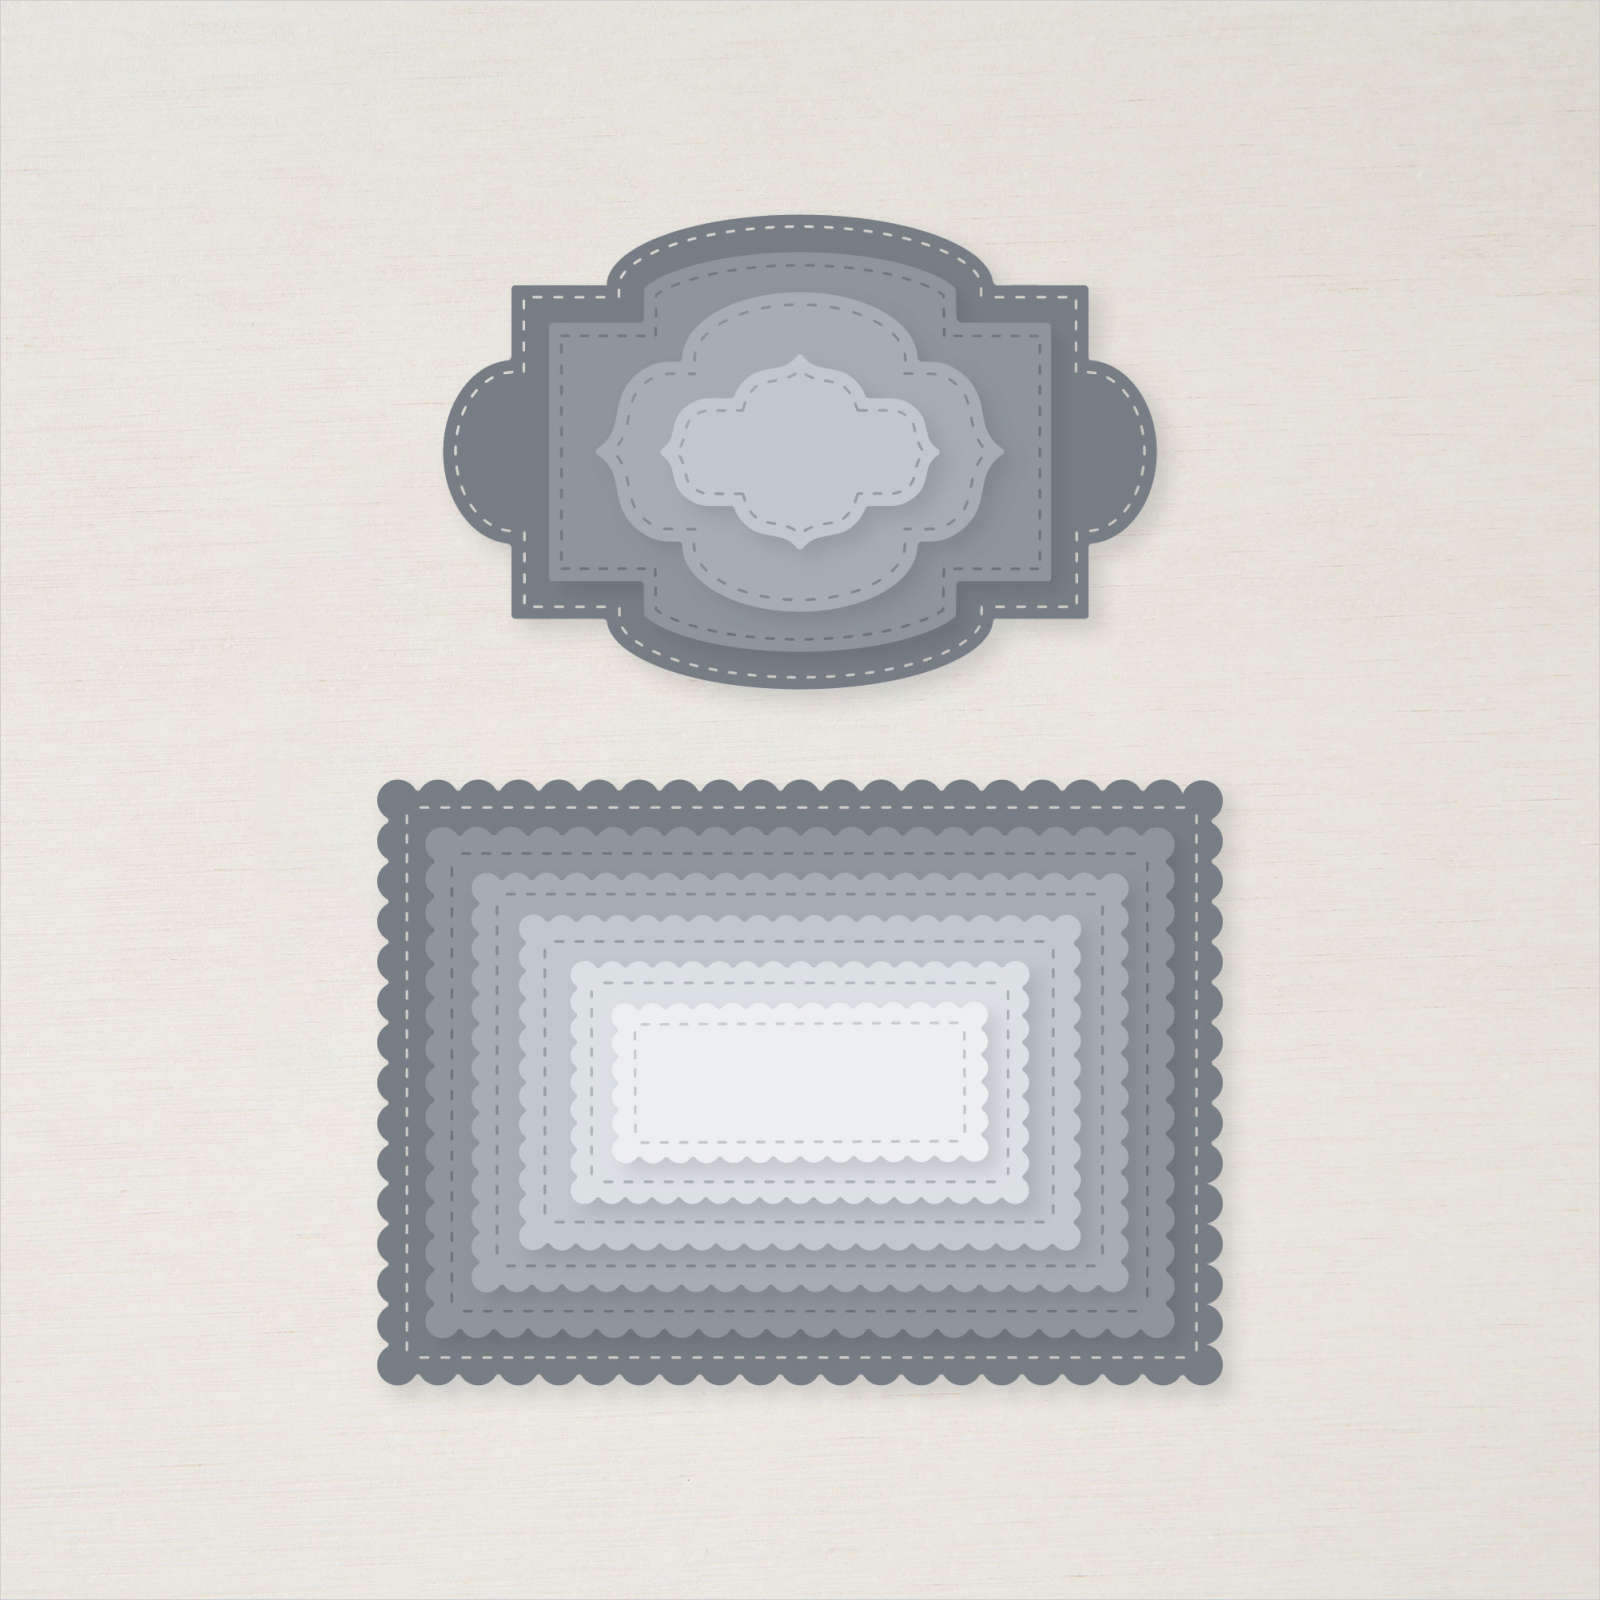
I cut a mask from a post-it-note and covered the stamped seashell before stamping a smaller seashell using Flirty Flamingo ink. With the mask still in place, I stamped another seashell from the Friends Are Like Seashells stamp set using Seaside Spray ink. I removed the post-it-note mask and stamped the greeting from the Friends Are Like Seashells stamp set using Seaside Spray ink. I attached the stamped Very Vanilla card to a Seaside Spray scalloped rectangle cut using the Stitched So Sweetly Dies.
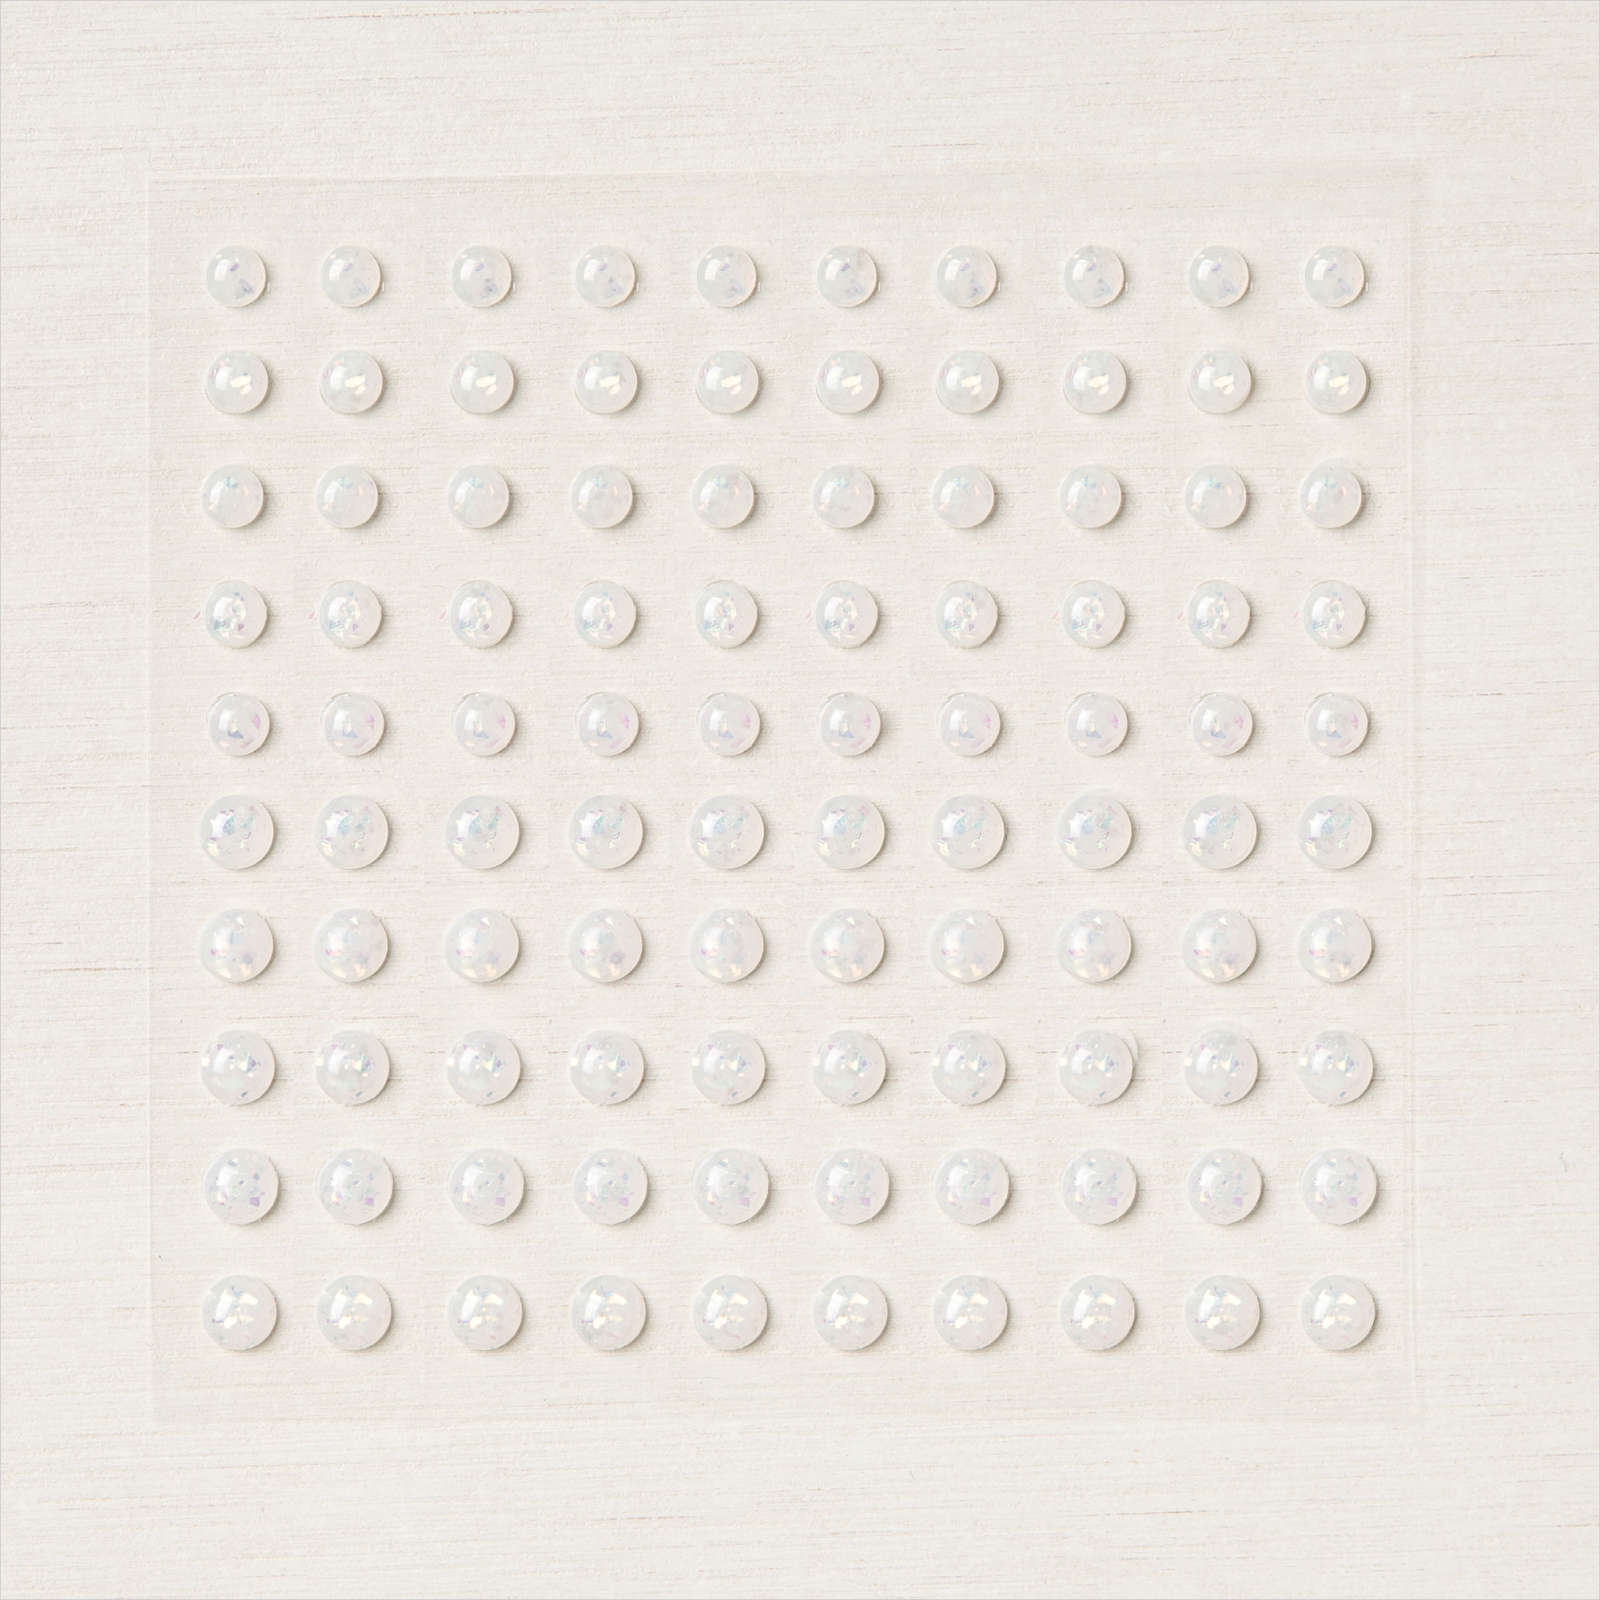
The image panel is attached to the card front using dimensionals. To finish off the card front I added 3 Opal Rounds to the image panel. To decorate the inside of the card, I stamped the seashell image from the Friends Are Like Seashells stamp set onto the left hand corner of Very Vanilla card using Seaside Spray ink. For the last card, I basically created the same card, but this time, embossing Very Vanilla card, adding the Sand & Sea Designer Series Paper and attaching to a card base of Seaside Spray.

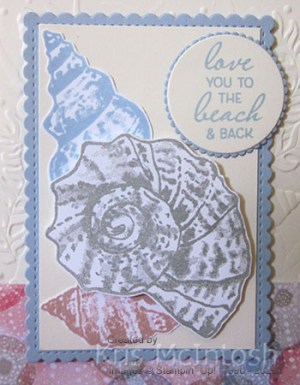
The image panel is slightly different. This time I stamped the shell images onto Very Vanilla card using the same inks and cut them out using the Seaside Seashells Dies. I attached the two smaller shells flat to the Very Vanilla card and the large shell is added using dimensionals. The Very Vanilla card is attached to the Seaside Spray stitched rectangle cut using the Stitched So Sweetly Dies and then the card front using dimensionals. I stamped the greeting from the Friends are Like Seashells stamp set onto Very Vanilla card using Seaside Spray ink. I cut out the greeting using the Layering Circle Dies. I cut Seaside Spray card using a scalloped circle from the Layering Circles Dies and attached the greeting. The greeting is attached to the card front using mini dimensionals where necessary.
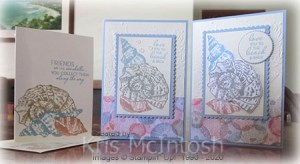
I think they all look lovely, don’t you? This is going to be such a fun product suite to work with and I just know you are going to love it.
Bye for now,
Kris
Product Used:


Dragonfly Birthday
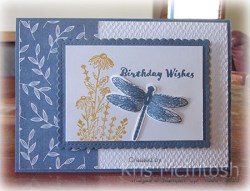
Today’s card was inspired by this one on Pinterest by Simply Sweet in Ink Designs. I changed up the pattern of Designer Series Paper and added an extra layer but basically kept to the design. I embossed Whisper White card using the Tasteful Textile 3D Embossing Folder and attached a piece of Misty Moonlight paper from the Dandy Garden 6″ x 6″ Designer Series Paper to the left hand side. The embossed panel is attached to scored and folded Misty Moonlight card.

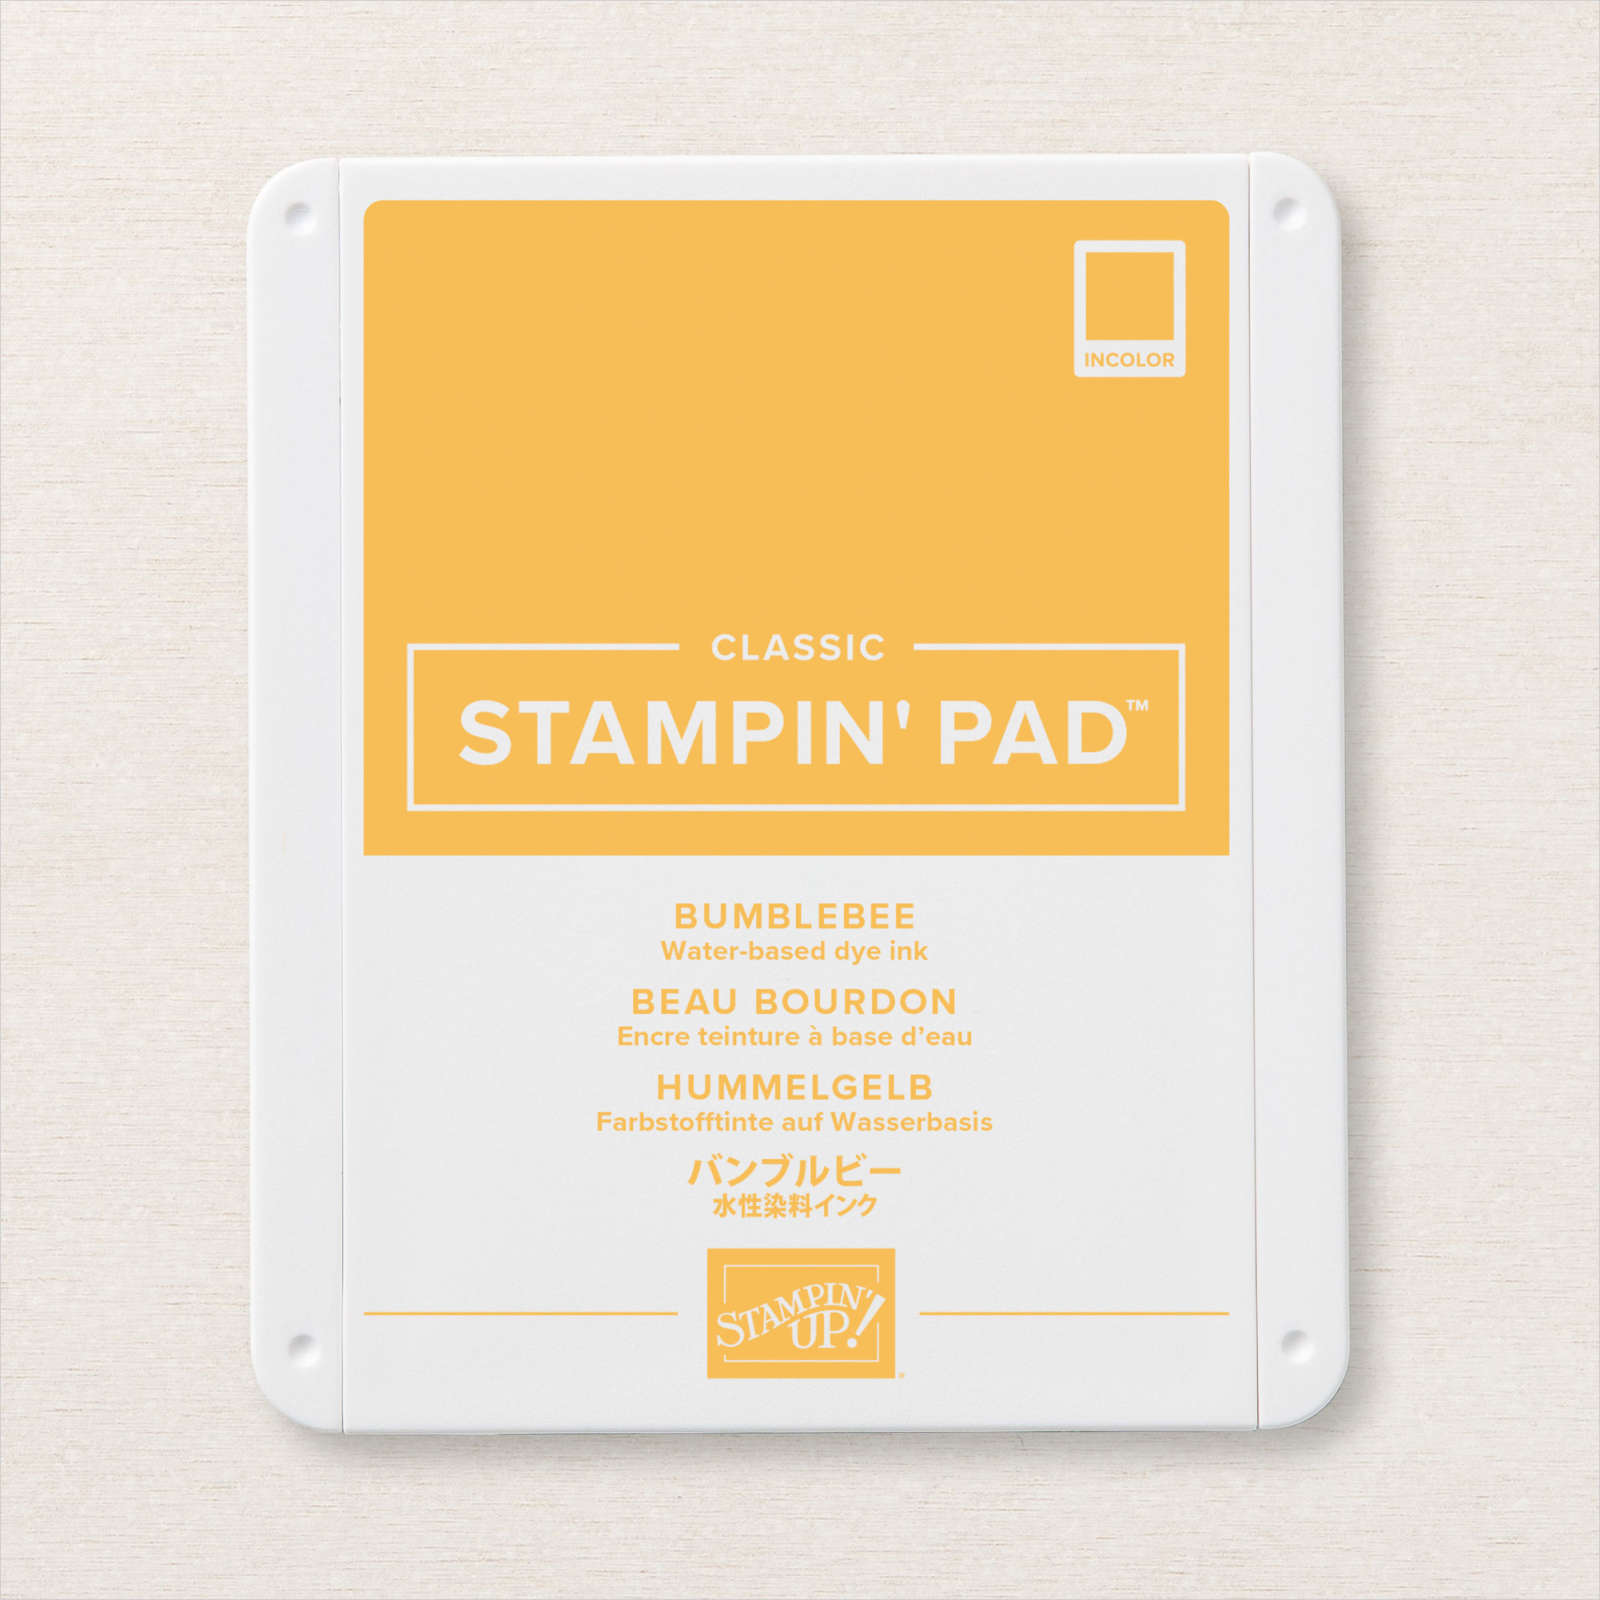
I stamped the floral image from the Dragonfly Garden stamp set onto Whisper White card using Bumblebee ink and added the greeting from the Itty Bitty Birthday stamp set using Mist Moonlight ink. I attached the stamped Whisper White card to a scalloped rectangle cut using the Stitched So Sweetly Dies. The image panel is attached to the card front using dimensionals. I stamped the dragonfly from the Dragonfly Garden stamp set onto scrap Whisper white card using Misty Moonlight ink.

I added the wing fill image from the same stamp set using Misty Moonlight ink which I stamped onto scrap paper first. I punched out the dragonfly using the Dragonflies Punch. I curled the wings slightly using my bone folder and attached the butterfly to the image panel using mini dimensionals underneath the wings and glue dots in the centre of the body. To decorate the inside of the card, I stamped the dragonfly image from the Dragonfly Garden stamp set onto Whisper White card using Misty Moonlight ink. I added the wing fill image using the same ink which is stamped onto scrap paper first. I added the greeting from the Dragonfly Garden stamp set using Misty Moonlight ink. I really loved the finished card so created another one using a different patterned paper from the Dandy Garden 6″ x 6″ Designer Series Paper.

They look so pretty, don’ they? Thanks for Simply Sweet in Ink Designs for the inspiration.
Bye for now,
Kris
Product Used:


Tropical Birthday
Today’s cards are inspired by one shared by Kathryn Brown on a Demonstrator only Facebook Page I belong to. Her cards used a background stamp but I wasn’t able to achieve the same finish as she did so I decided to skip that step.

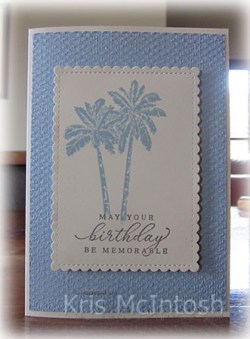
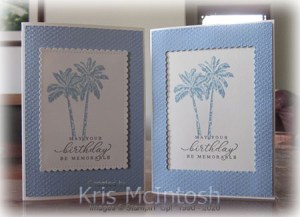
I embossed Seaside Spry card using the Tasteful Textile 3D Embossing Folder and attached it to scored and folded thick Very Vanilla card. I cut Very Vanilla card using the largest rectangle from the Stitched So Sweetly Dies and stamped the palm trees from the Timeless Tropical stamp set onto the die cut using Seaside Spray ink. I stamped the greeting from the same stamp set below the trees using Basic Grey ink.

The image panel is attached to the card front using dimensionals. To decorate the inside of the card, I stamped the palm trees using Seaside Spray ink. I decided to create a second card switching up the die cutting. This time, I cut the largest Stitched So Sweetly Rectangle Die from the centre of Seaside Spray card. I embossed the frame using the Tasteful Textile3D Embossing Folder and attached it to the card front using dimensionals. I stamped the palm trees from the Timeless Tropical stamp set inside the frame using Seaside Spray ink. I also stamped the greeting from the same stamp set inside the frame using Basic Gray ink. Once more to decorate the inside of the card, I stamped the palm trees using Seaside Spray ink.
These cards are so pretty in real life.
Thank you Kathryn for the inspiration.
Bye for now,
Kris
Product Used:

Sweet 16
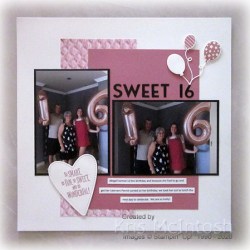
My eldest granddaughter turned 16 in December. She was so excited about getting her Learner Driver’s Permit and had to visit the Motor Registry on her birthday so Ron and I took her out to lunch the day after. This page shows off some photos taken before we went out. I attached a piece of In Good Taste Designer Series Paper down the left hand side of the 12″ x 12″ Very Vanilla page. I attached a piece of Rococo Rose card to the right hand side of the page, partially covering the Designer Series Paper.

I attached my photos to Basic Black card and then the card front. I cut the title from Basic Black card using the Playful Alphabet Dies. I stamped the starry and striped balloons from the So Much Happy stamp set onto Very Vanilla card using Rococo Rose ink.

I cut out the balloons using the co-ordinating Happy Dies. I also cut one balloon and the balloon strings from Very Vanilla card using the Happy Dies. I attached the balloon strings to the top of the “6” and added the balloons over the ends using dimensionals. I stamped the greeting from the A Grand Kid stamp set onto Very Vanilla card using Rococo Rose ink and cut it out using the Be Mine Stitched Dies. I attached the heart to the page using dimensionals. The journaling is printed onto Very Vanilla card and cut into strips. I can’t believe how quickly Abigail has grown from a gorgeous tiny baby into this amazing young woman.
Bye for now,
Kris
Product Used:


Approaching Perfection
One of the stamp sets you can earn for free during Sale-A-Bration is the one I used to create the card I am sharing with you today. I made two cards, one is very simple stamping and the other slightly stepped up. For the first card, I used my Stamparatus to set up the candle image so that I could stamp it evenly across the Whisper White card using Magenta Madness ink.

I used the Stamparatus to stamp the balloon image from the Approaching Perfection stamp set between the candle images using Magenta Madness ink. I used the Stamparatus to stamp “happy birthday” which is from the same stamp set onto the lower right hand corner of the Whisper White card. I wrapped the bottom of the candles with Magenta Madness Ribbon and tied a knot. The stamped panel is attached to scored and folded Magenta Madness card. To decorate the inside of the card, I stamped another of the greetings from the Approaching Perfection stamp set onto Whisper White card using Magenta Madness ink.

For the second card, I once more used the Stamparatus to stamp the candle and balloon images from the Approaching Perfection stamp set across Whisper White card, this time using Misty Moonlight ink. I embossed Misty Moonlight card using the Painted Texture 3D Embossing Folder and attached it below the stamped images. I wrapped the top of the embossed card using Silver Metallic Edge Ribbon and tied a knot. The whole panel is attached to scored and folded Misty Moonlight card.

I stamped “happy birthday” from the Approaching Perfection stamp set onto Whisper White card and punched it out using the Label Me Fancy Punch. The greeting is attached to the lower right hand corner using dimensionals. To decorate the inside of the card, I stamped the greeting from the Approaching Perfection stamp set onto Whisper White card using Misty Moonlight ink. I love both versions of this card, the first one because it creates a quick and easy card for beginner stampers and the second one because it will appeal to those who like a little more detail. What do you think?
Make sure to take a look at this stamp set which you can earn for FREE with a $90.00 spend during January and February 2021.
Bye for now,
Kris
Product Used:


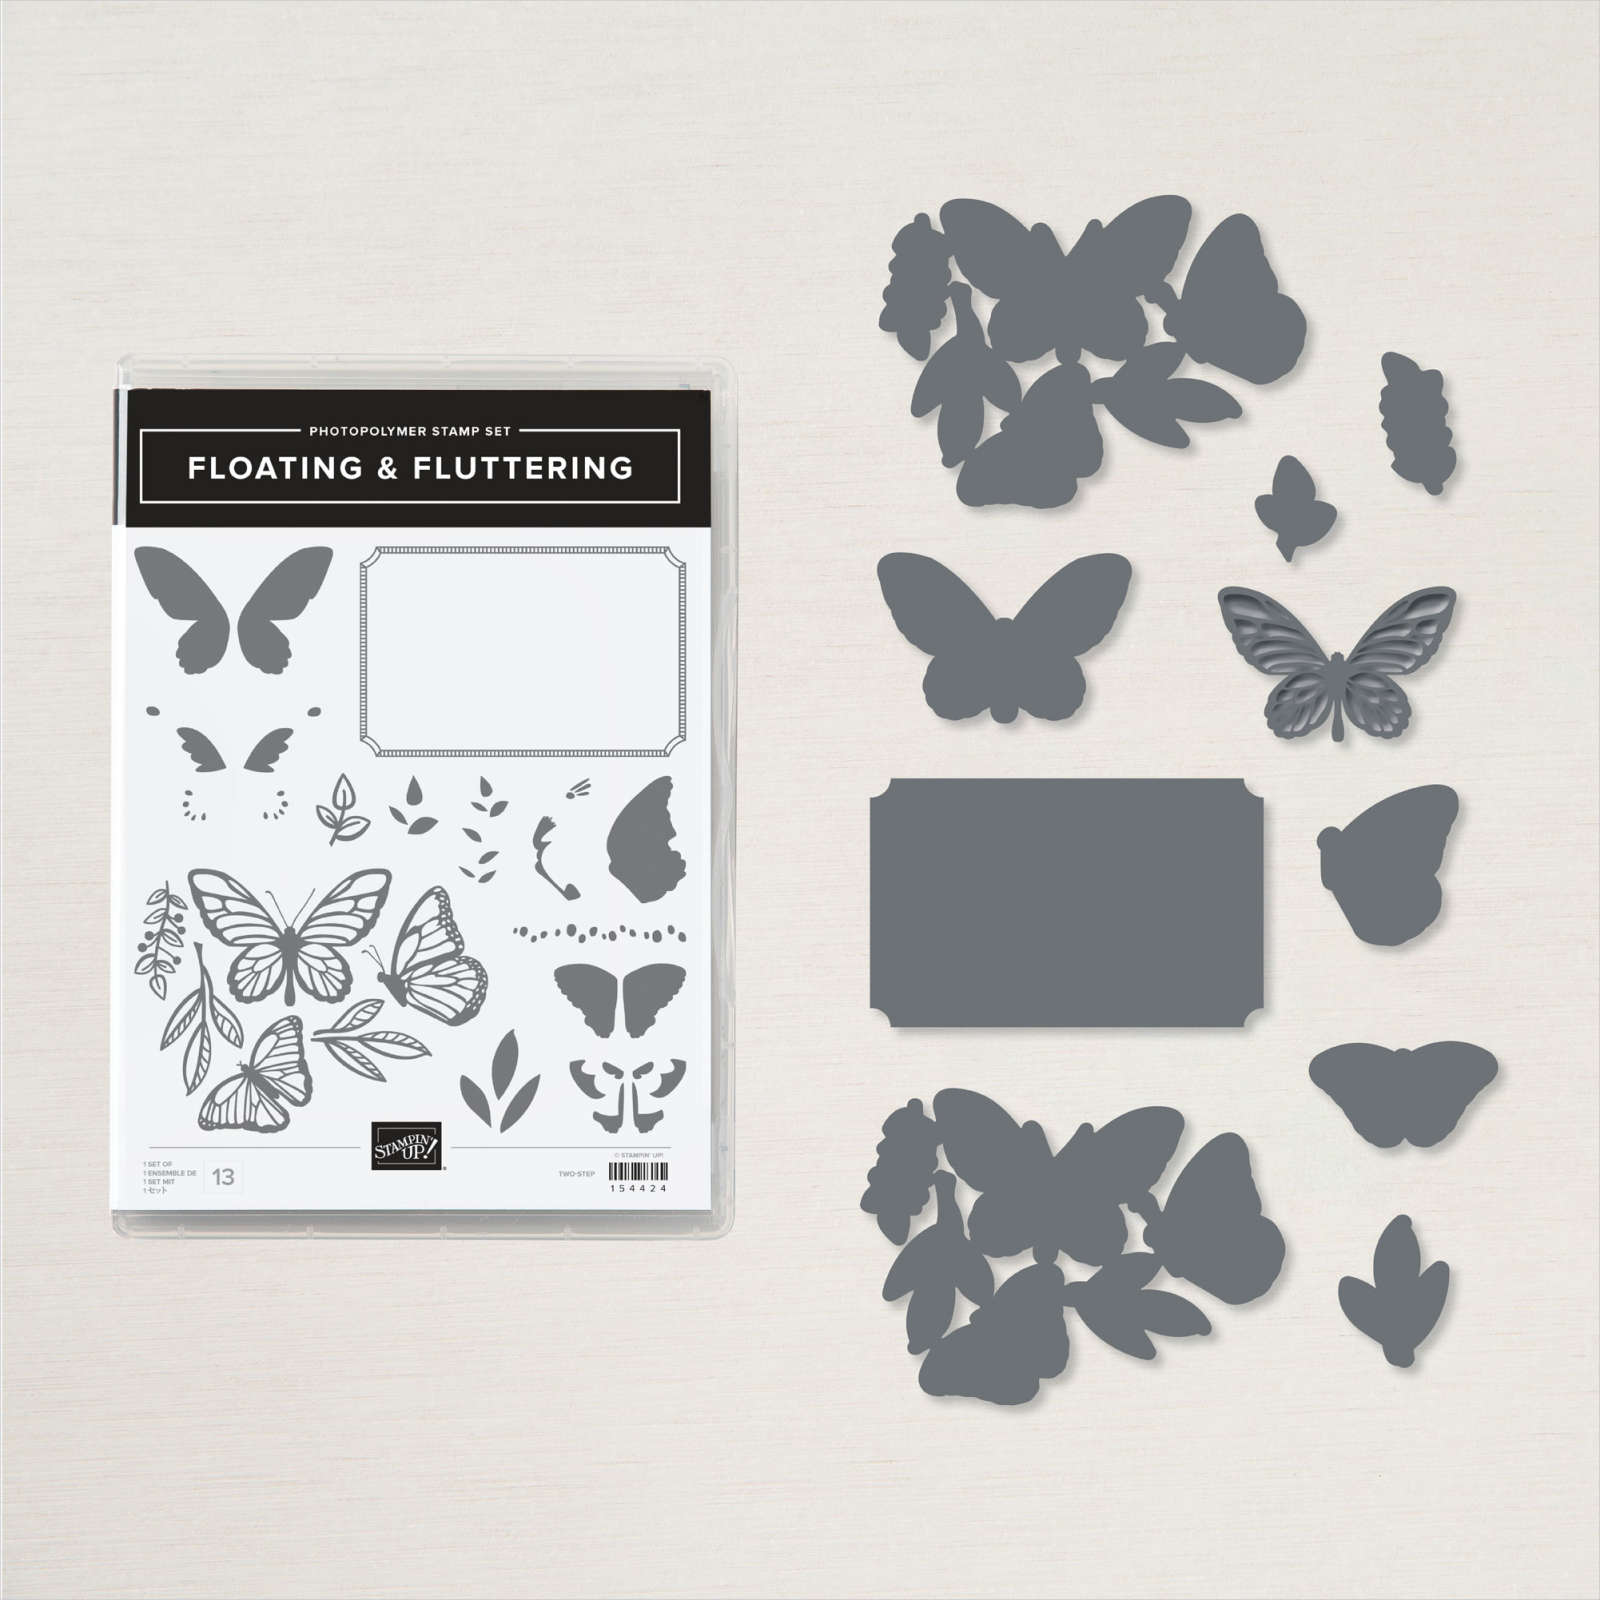
Floating & Fluttering

I featured the Floating & Fluttering stamp set yesterday in my live and thought I would share these cards which were actually my first attempt at using this stamp set. I actually created this card in two colour ways but each card is constructed in the same manner. I embossed Smoky Slate card using the Ornate Floral 3D Embossing Folder and attached it to scored and folded Calypso Coral card. I stamped the butterfly image from the Floating & Fluttering stamp set onto Whisper White card using Memento Tuxedo Black ink.
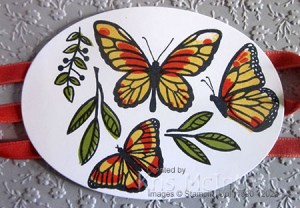
I added colour to the butterflies with So Saffron ink first and then with Calyso Coral ink to add the detail. The leaves are filled with Pear Pizzazz ink. I cut out the image using the largest oval from the Layering Ovals Dies. I added Calypso Coral ribbon from the Ornate Garden Ribbon Combo Pack to the back of the oval before attaching the panel to the card front using dimensionals. To decorate the inside of the card, I stamped “happy birthday” from the Peaceful Moments stamp set onto Whisper White card using Memento Tuxedo Black ink.

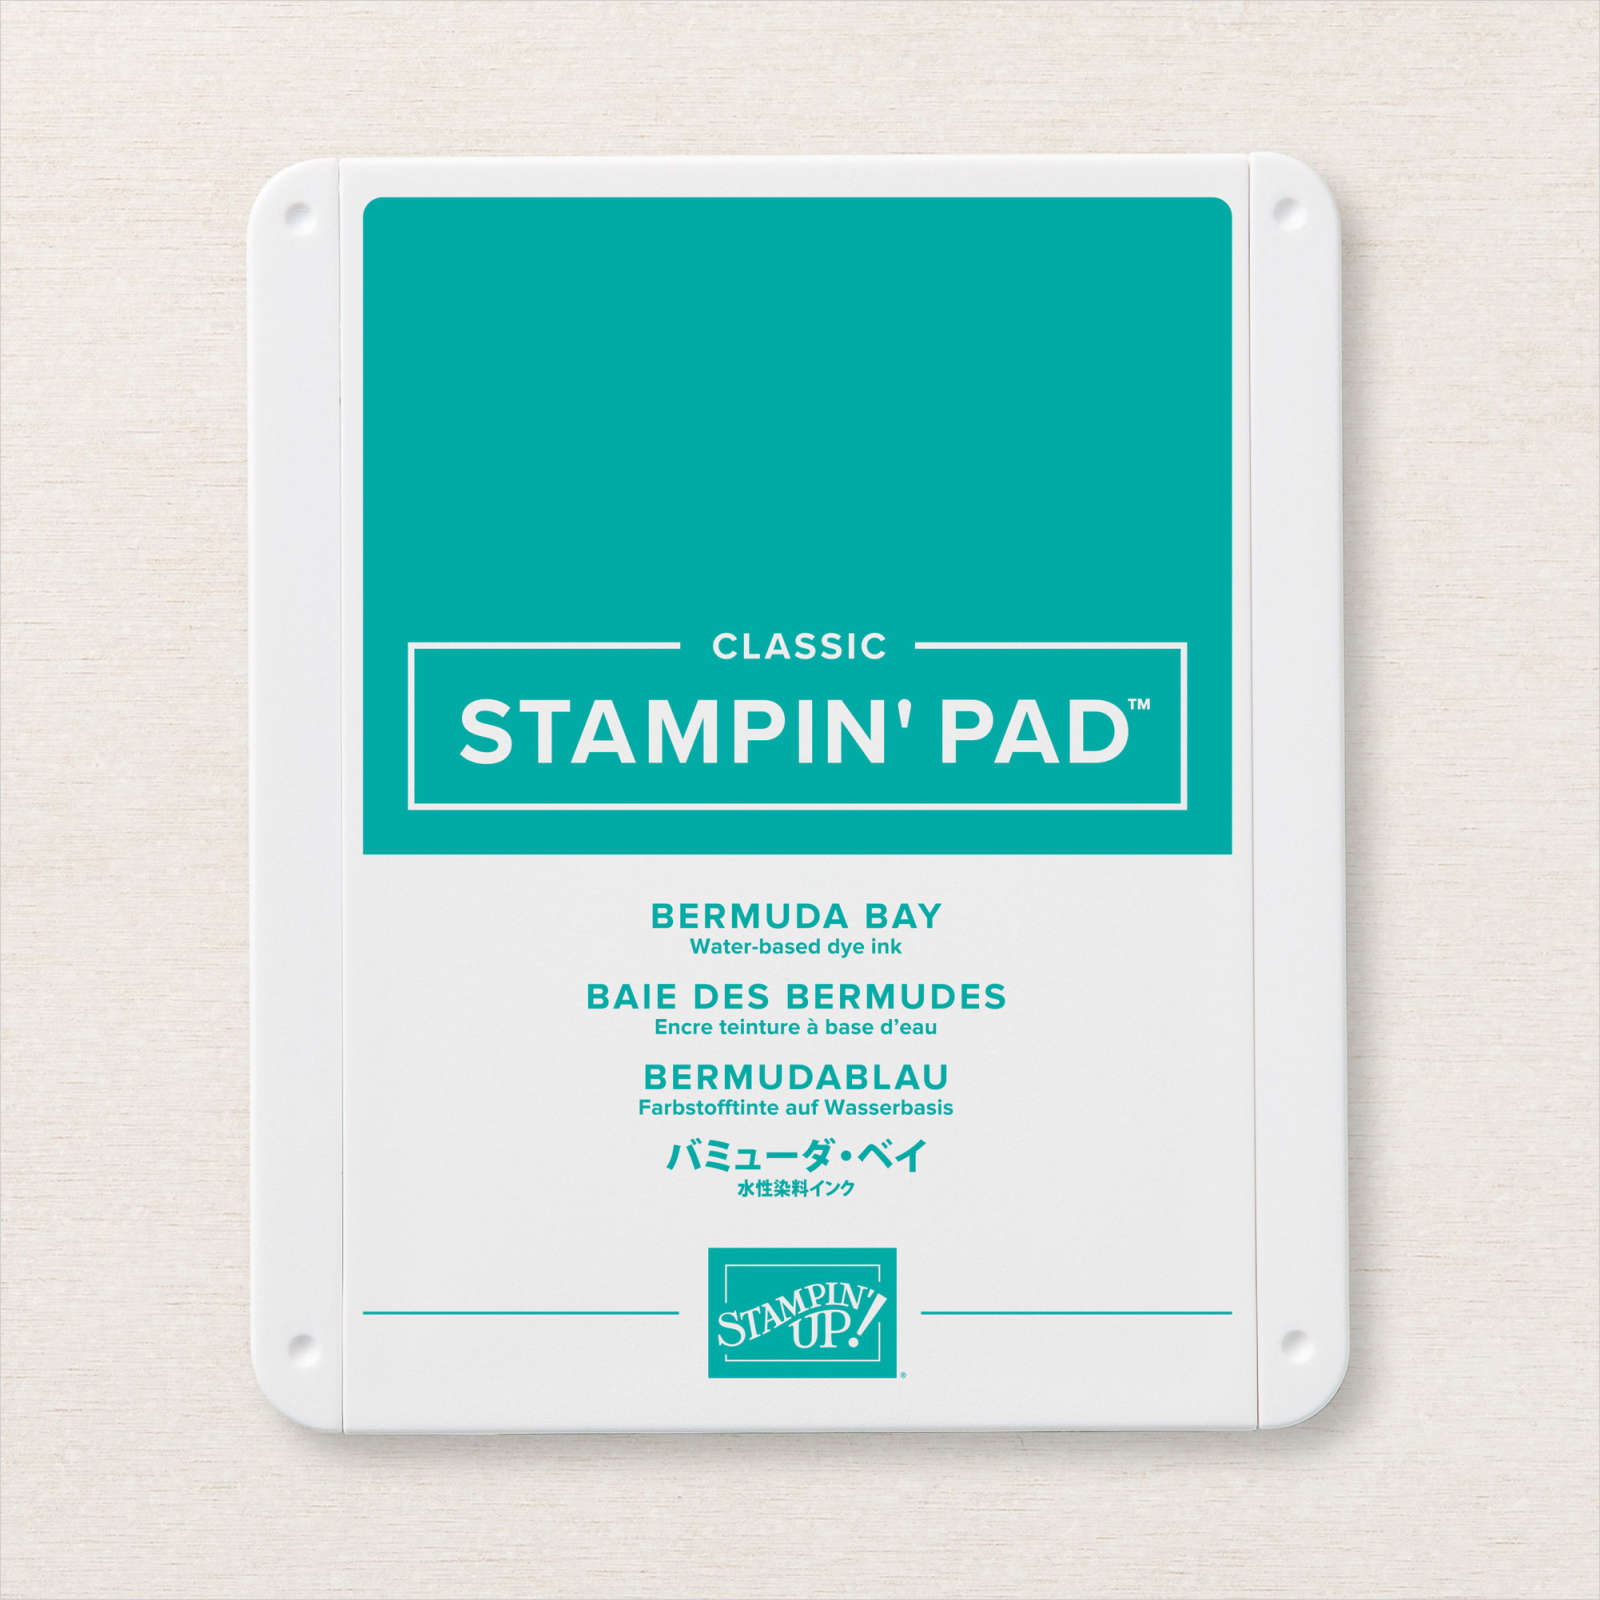
I stamped the butterfly image once more onto scrap Whisper White card using Memento Tuxedo Black ink and filled the images using So Saffron, Calypso Coral and Pear Pizzazz ink. I used the co-ordinating Fluttering Dies to cut out two of the butterflies which I attached around the greeting. The second card uses Bermuda Bay card as the base and the ribbon is Gold Metallic Edge Ribbon. I used Coastal Cabana, Bermuda Bay and Granny Apple Green ink to add colour to the images.

I am really happy with my first attempt using this wonderful bundle. If you don’t have a demonstrator and would like a copy of the January to June 2021 Mini Catalogue, then please contact me so that we can organise for you to receive one.
Bye for now,
Kris
Product Used:


Happy 90th Birthday
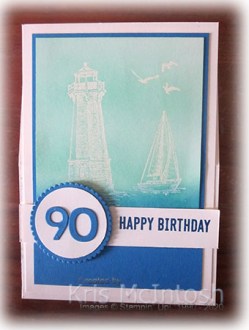
My Dad celebrated his 90th birthday last Saturday and today I thought I would share the card I made for him with you. I stamped the lighthouse, boat and birds from the Sailing Home stamp set onto Very Vanilla card using Versamark ink. I sprinkled the images with Clear Embossing Powder and heat set it. I used a Blending Brush to add Coastal Cabana ink to the top section of the stamped card and Pacific Point ink to add colour to the bottom section of the panel.

I attached the stamped panel to Pacific Point card and then Very Vanilla card. I attached the panel to the bottom section of scored and folded Thick Very Vanilla card to create an easel card. I stamped “happy birthday” from the Itty Bitty Birthday stamp set onto the right hand side of Very Vanilla card using Pacific Point ink.

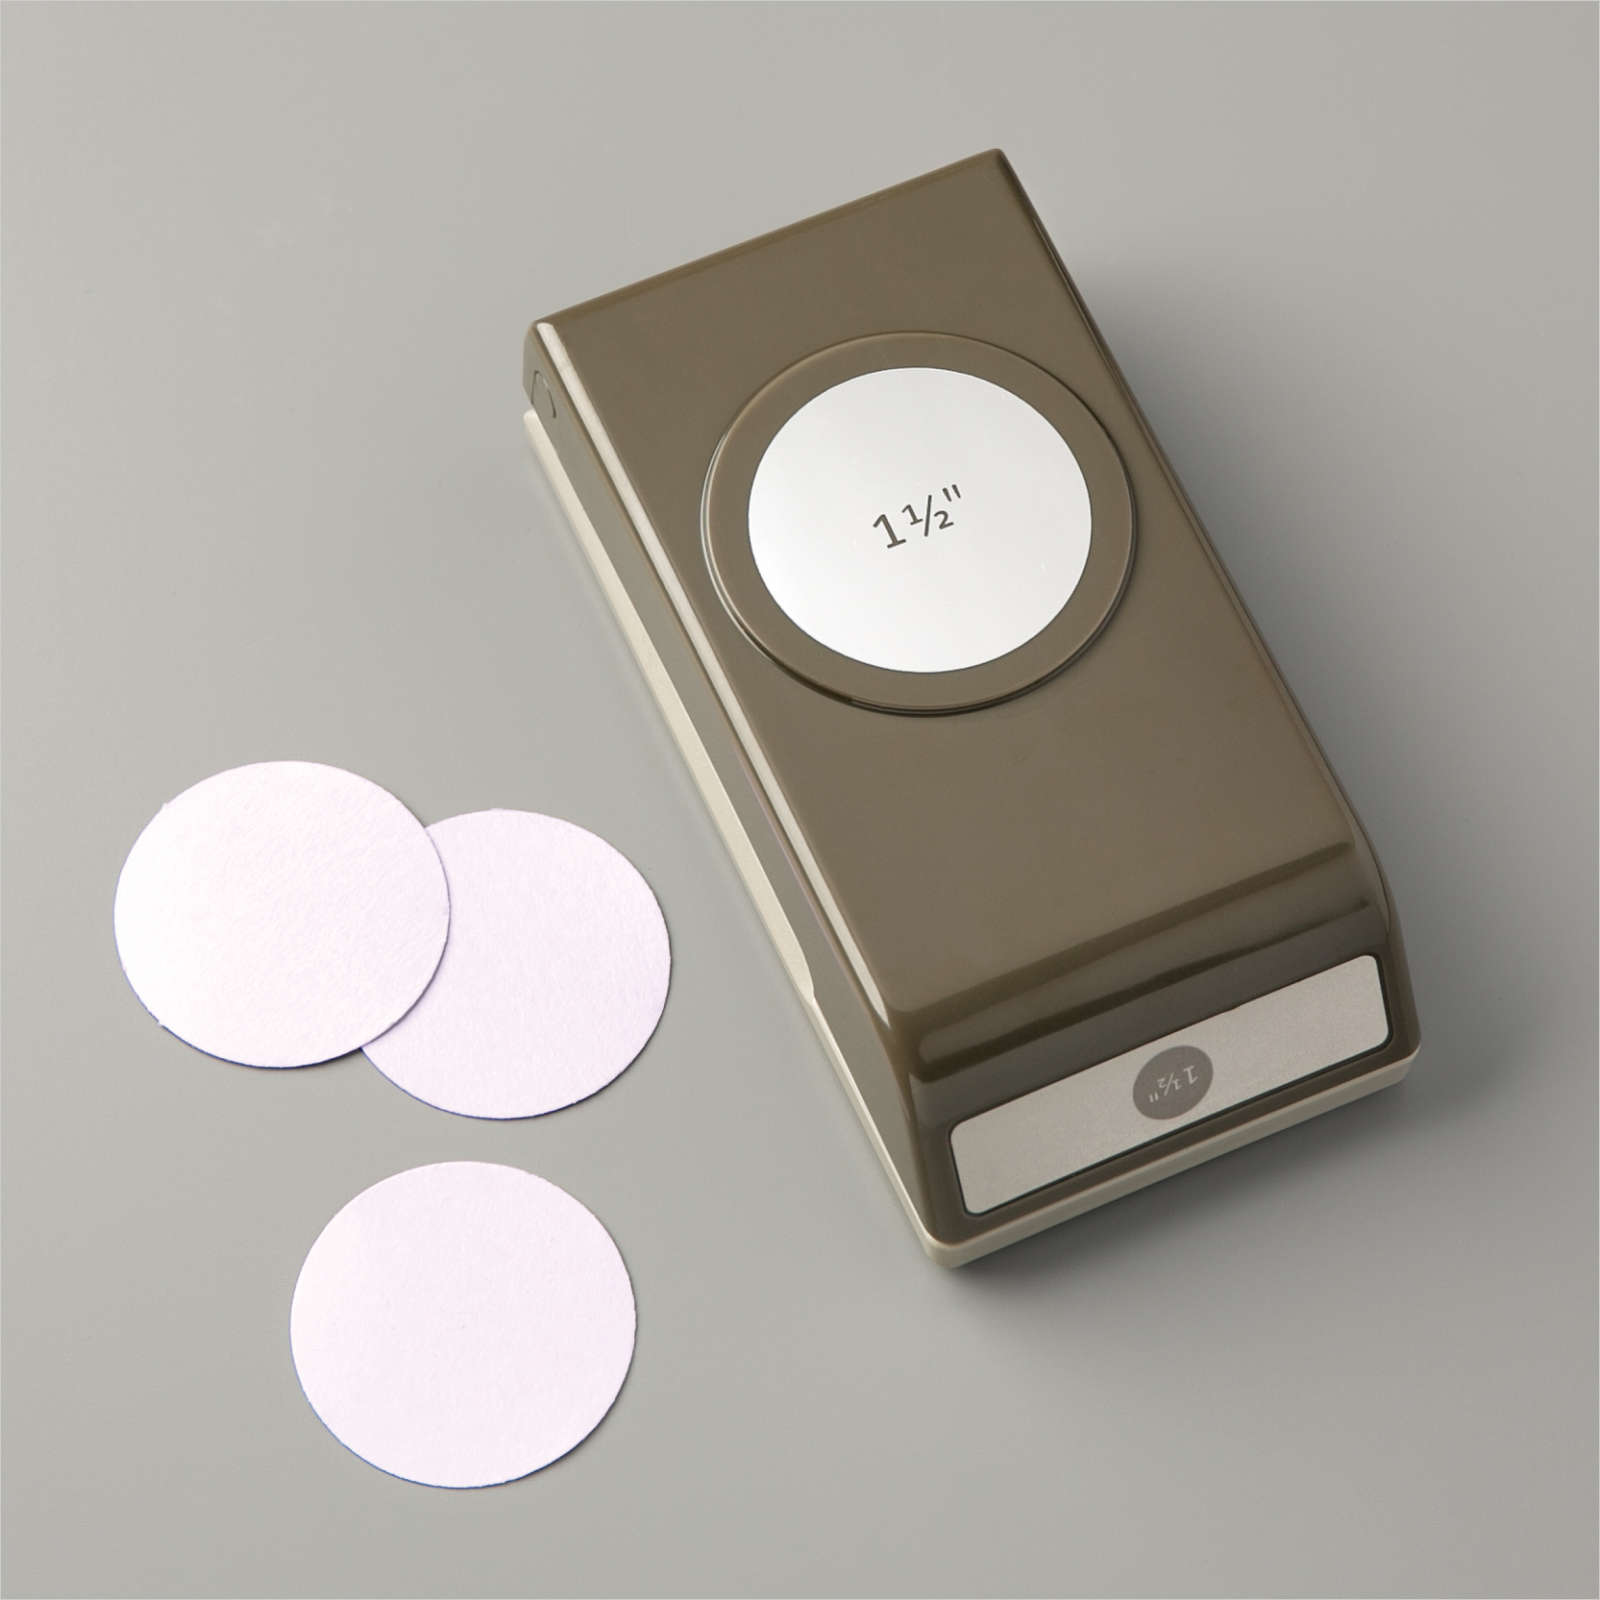
I attached the panel across the bottom of the stamped panel. I punched Very Vanilla card using the 1-1/2″ Circle Punch and attached it to a Pacific Point scalloped circle cut using the Layering Circle Dies. I attached the circles to the left hand side of the greeting. I cut “90” from Pacific Point card using the Playful Alphabet Dies and attached them to the centre of the Very Vanilla circle. I stamped the greeting from the A Good Man stamp set onto Very Vanilla card using Pacific Point ink and attached it to Pacific Point card. The whole piece is attached across the inside of the Thick Very Vanilla card base using dimensionals.
I love easel cards, they create such a “wow” and still fold flat to fit in a standard envelope.
Bye for now,
Kris
Product Used:


Happy Birthday Mum

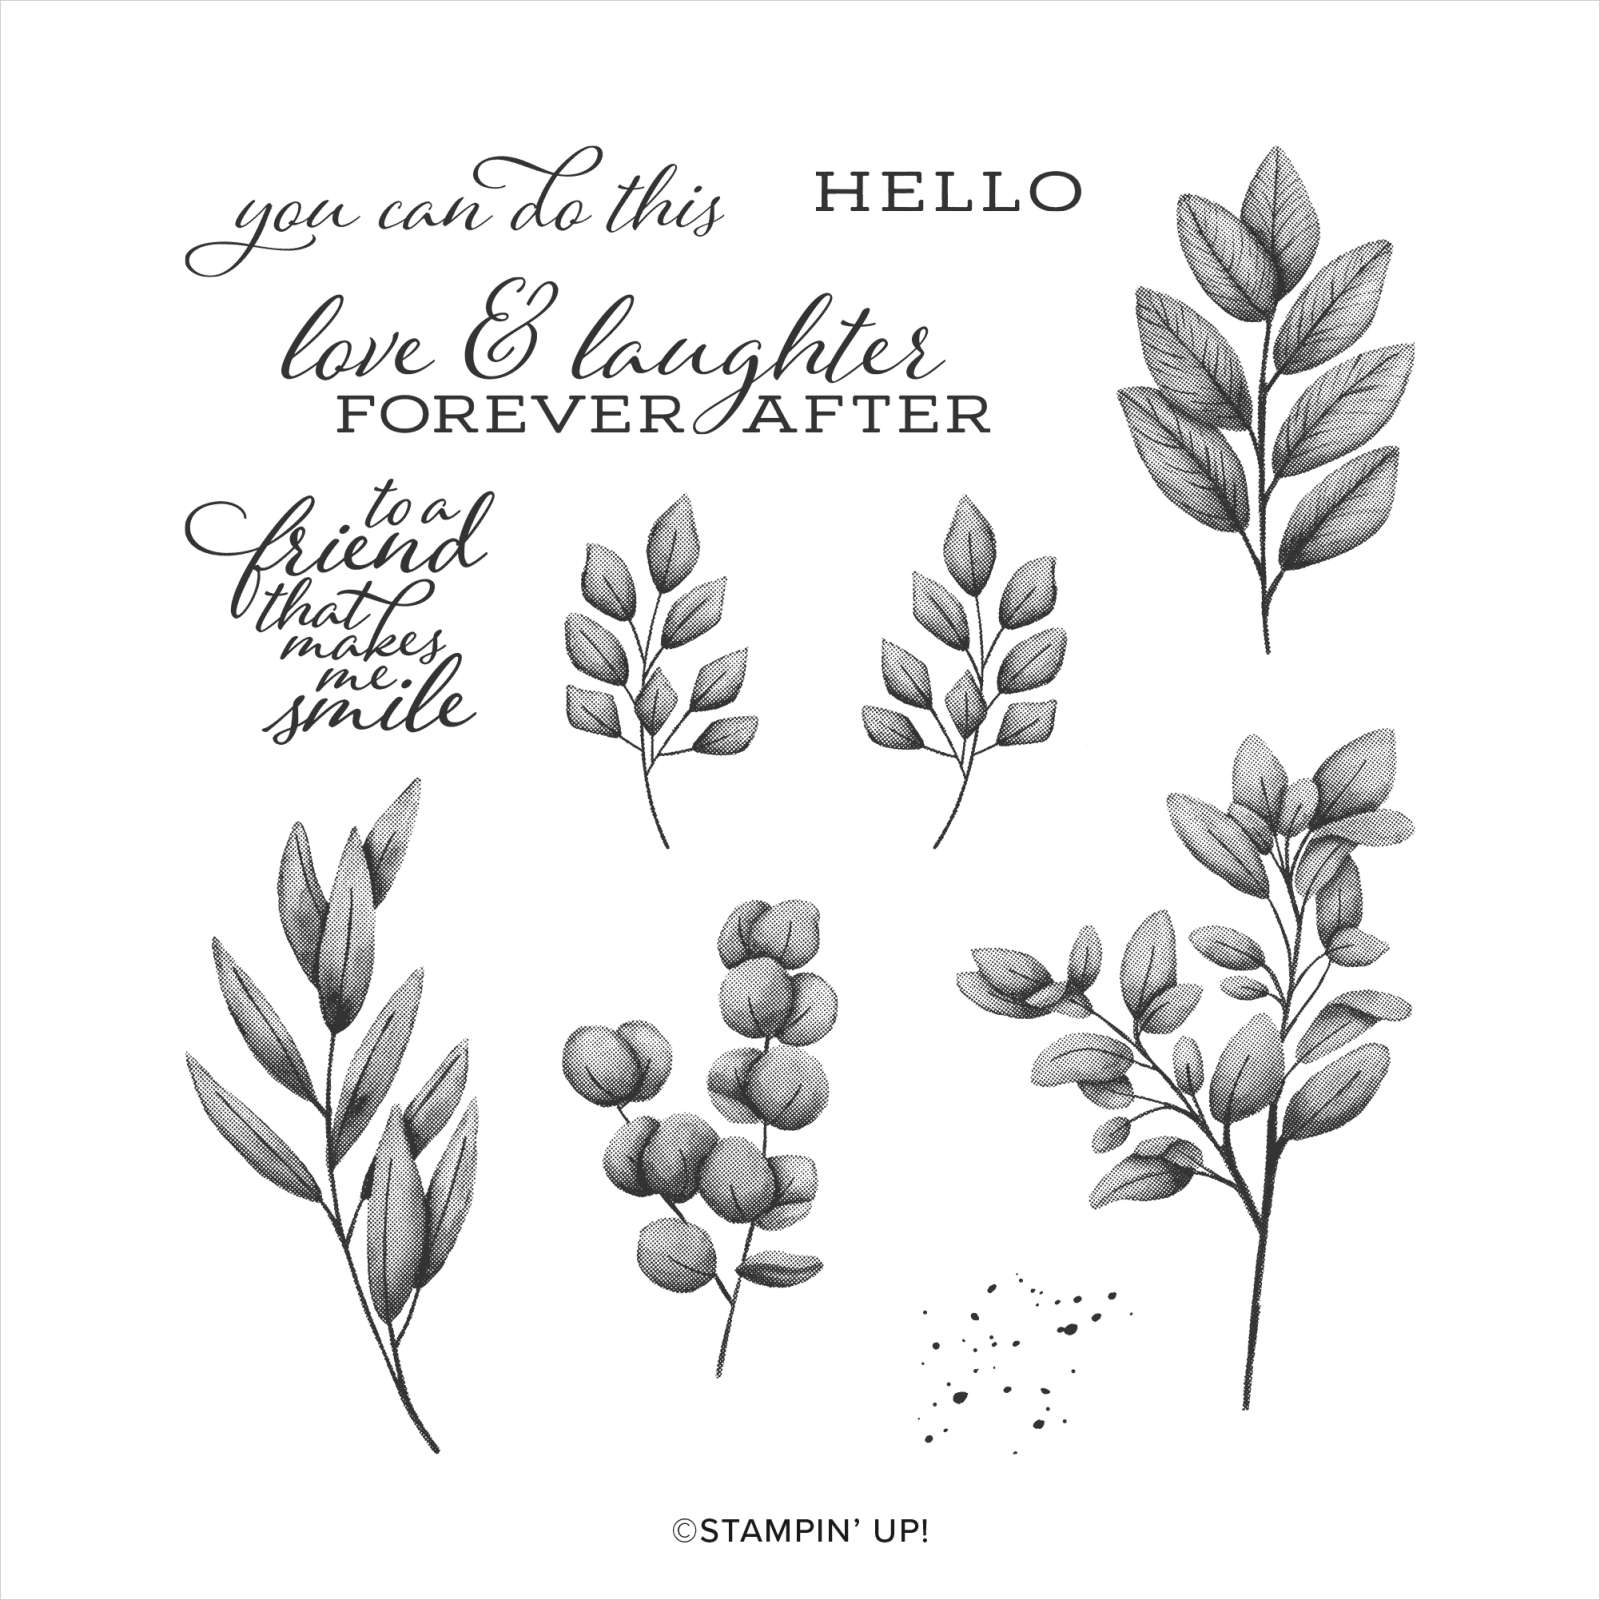
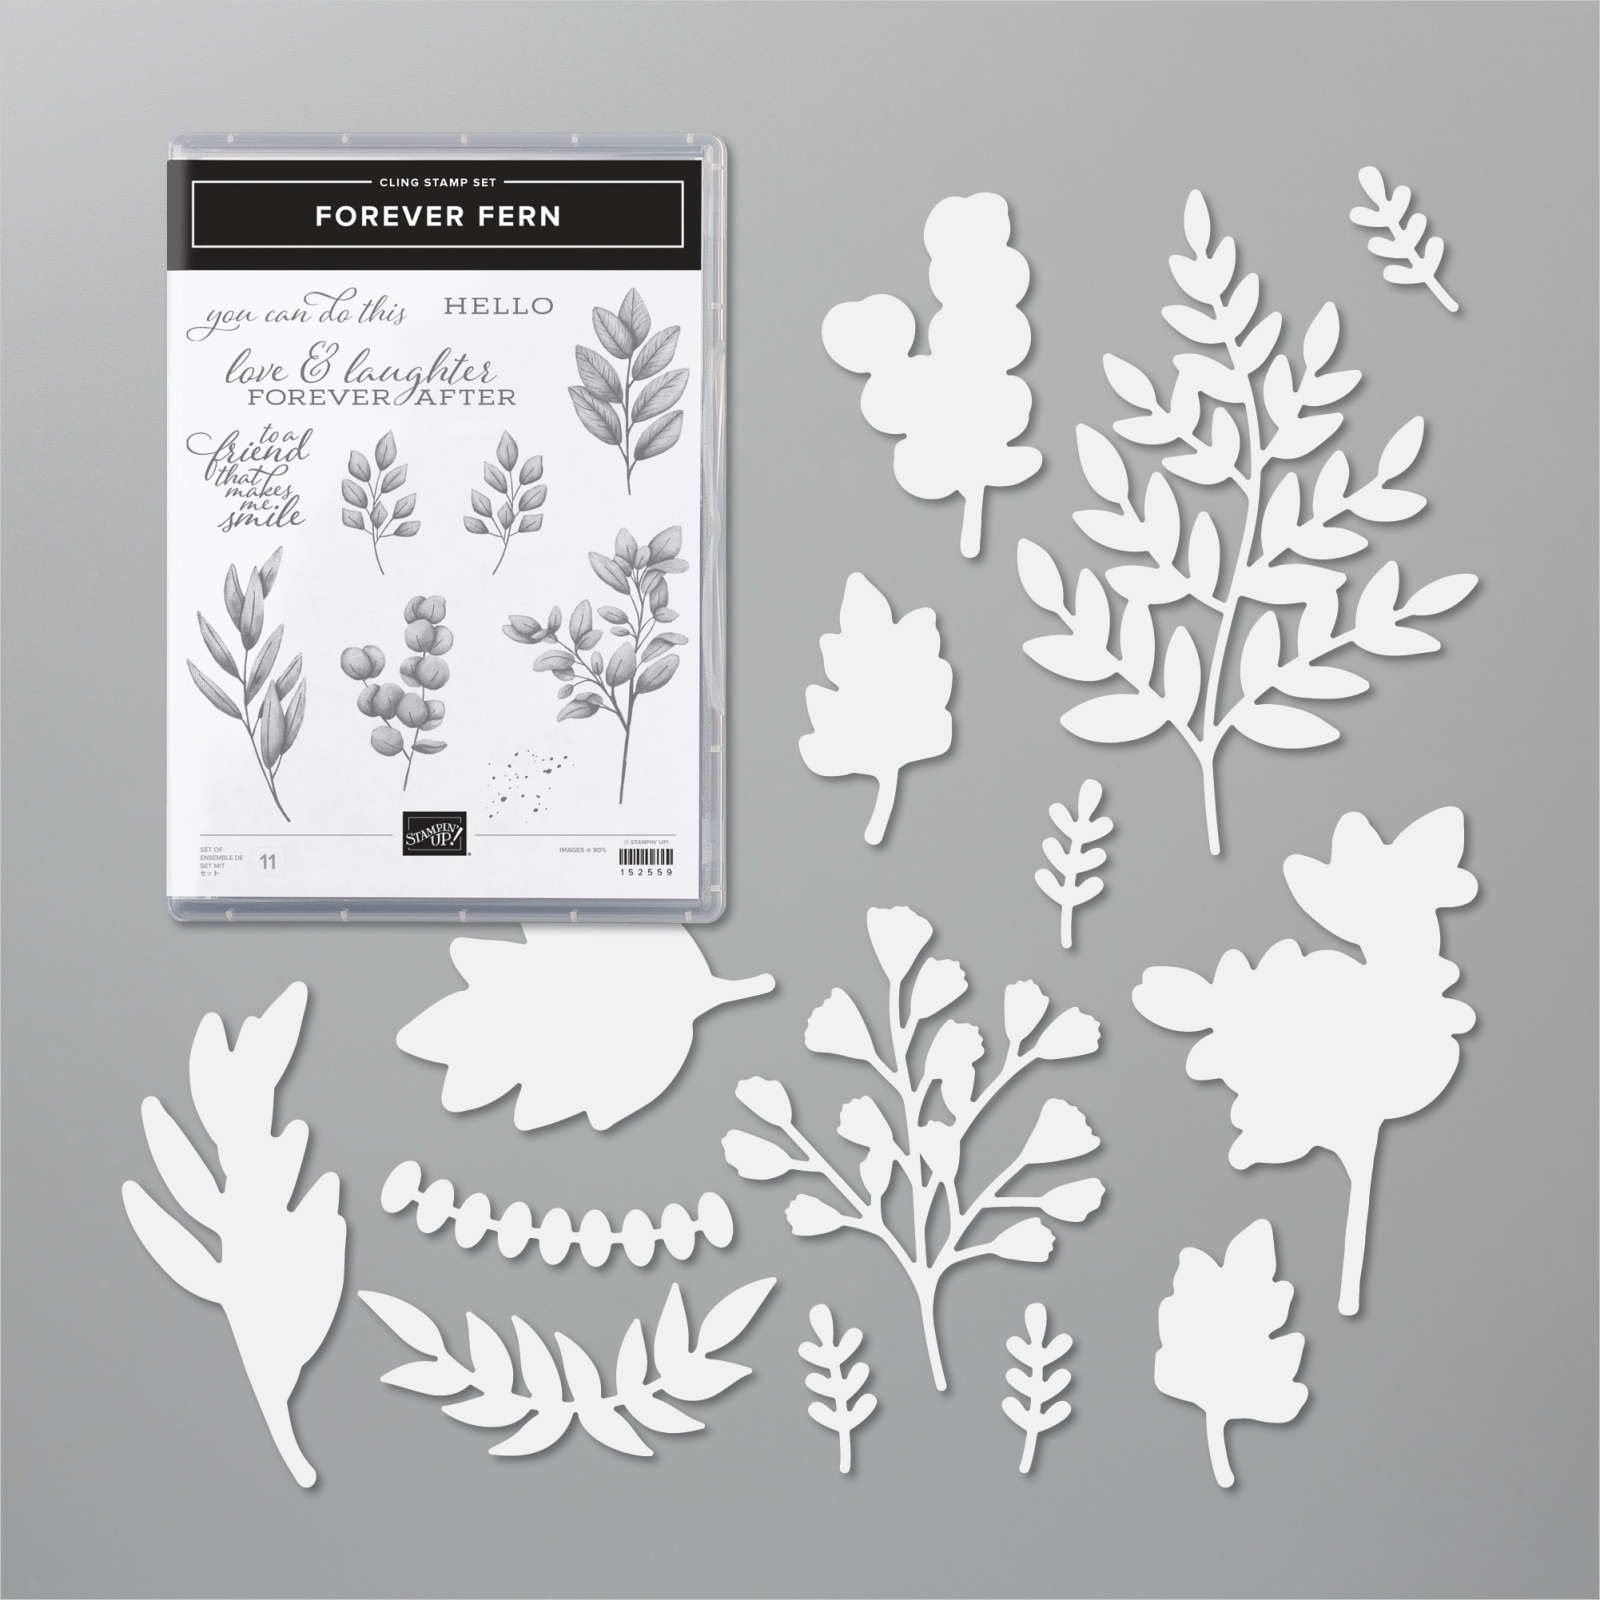
My Mum and Dad celebrate their birthday on the same day, the 2nd January and today I thought I would share the card I made for her. I embossed Blackberry Bliss card using the Subtle 3D Embossing Folder and attached it to scored and folded Thick Whisper White card. I cut the largest leaf from Soft Sea Foam card using the Forever Flourishing Dies and attached it to the top left hand corner of the embossed Blackberry Bliss card. I stamped two large leaves from the Forever Fern stamp set onto Whisper White card using Pear Pizzazz ink.

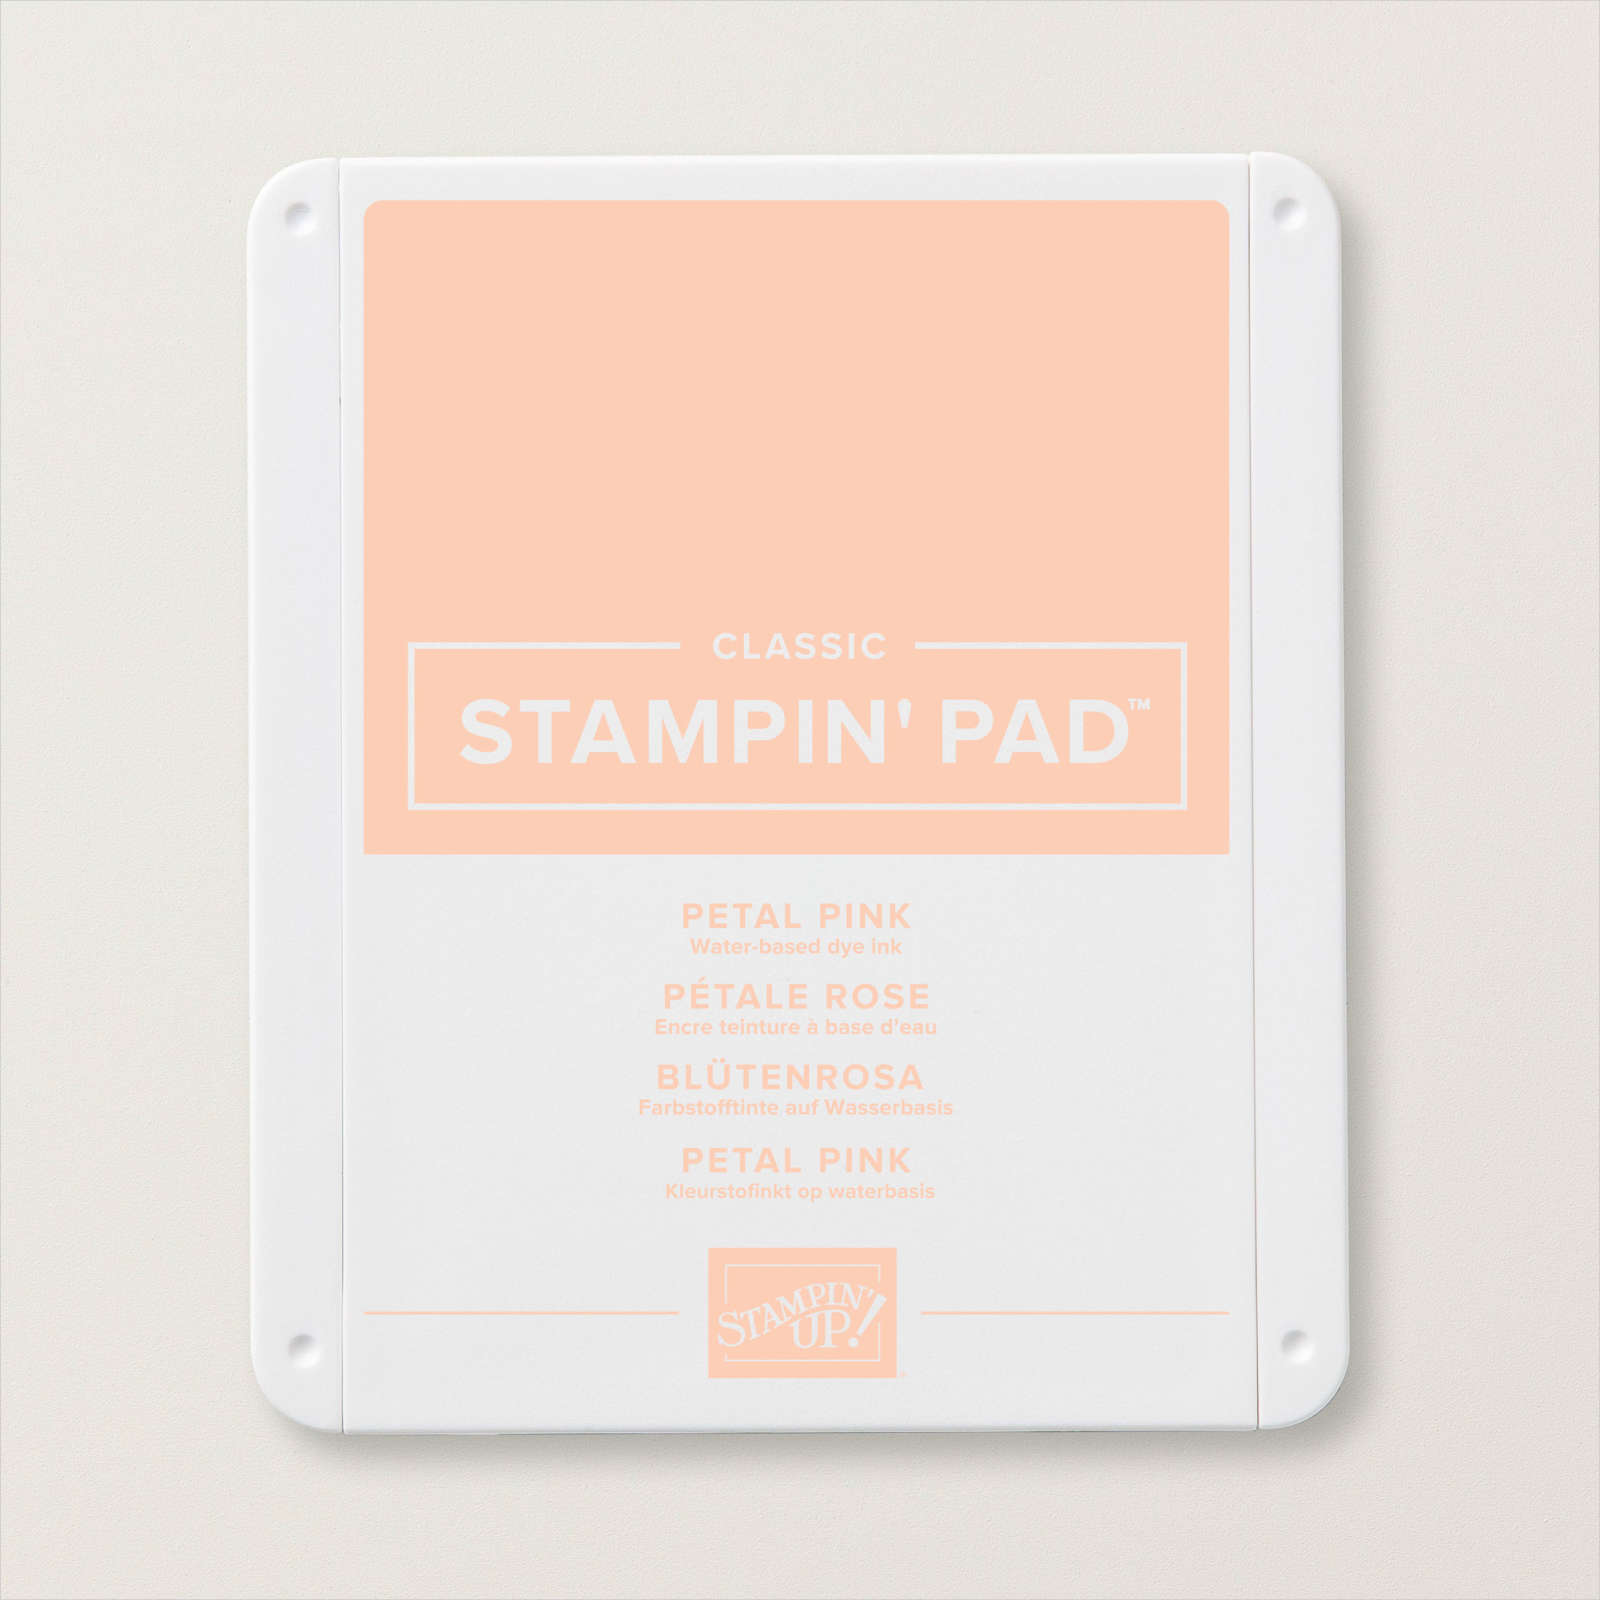
I stamped two small leaves from the Forever Fern stamp set onto Whisper White card using Soft Sea Foam ink. I stamped two of the berry images from the Forever Fern stamp set onto Whisper White card using Petal Pink ink.

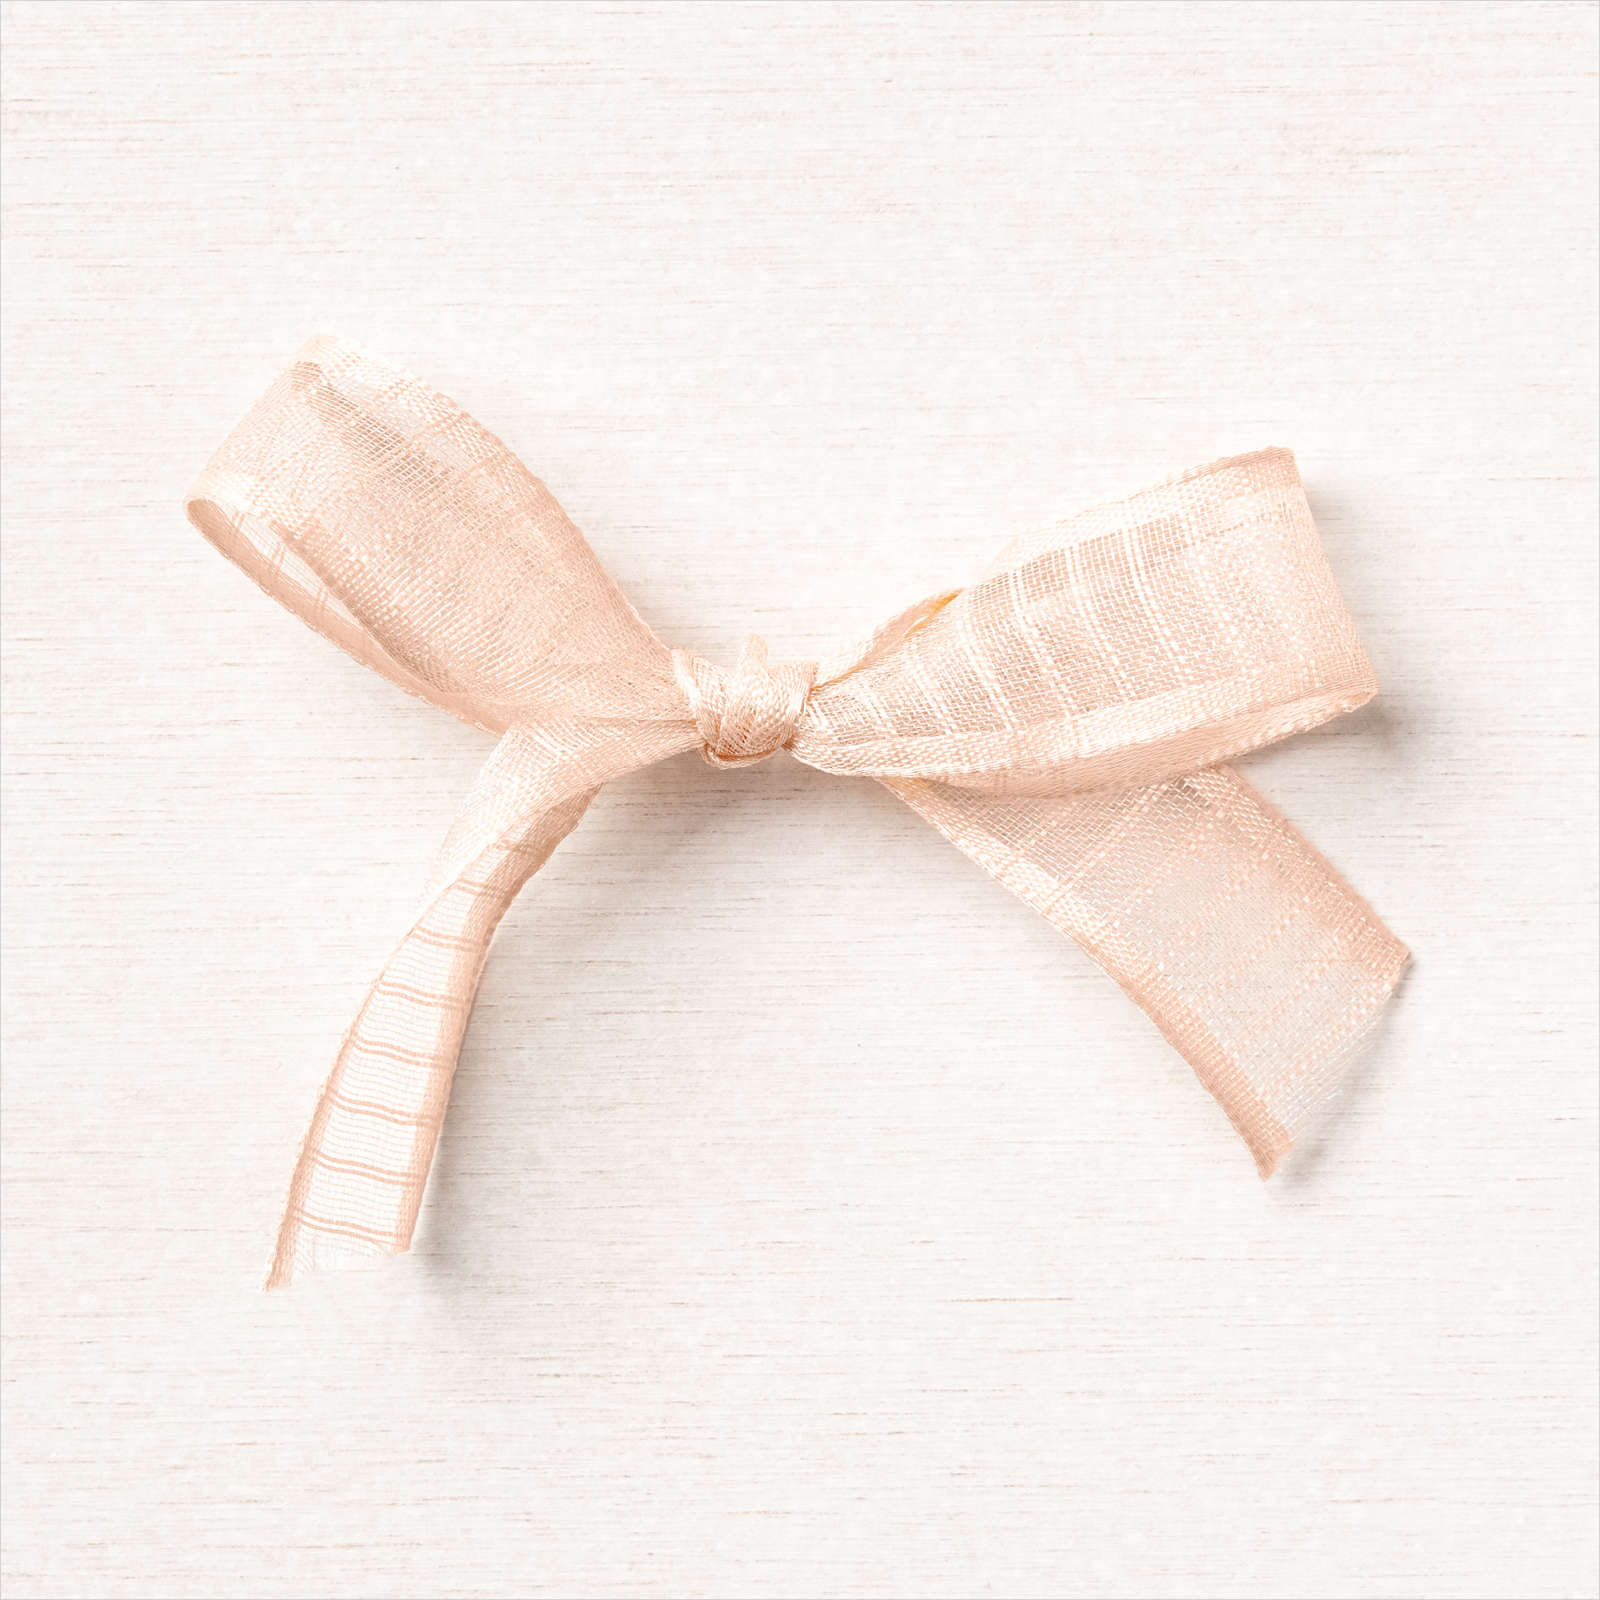
I die cut all the images using the co-ordinating Forever Flourishing Dies. I layered all of the leaves onto the card front and added two leaves from the Forever Gold Laser Cut Specialty Designer Series paper. I tied a bow in a length of Petal Pink 5/8″ Organdy Striped Ribbon and attached it over the ends of the leaves. To decorate the inside of the card, I stamped a greeting from the Strong and Beautiful stamp set using Rich Razzleberry ink and addded “happy birthday” from the Peaceful Moments stamp set.
I love the finished card and so did my Mum.
Bye for now,
Kris
Product Used: