Try Stampin’ on a Tuesday 395

Today’s card is created using the current sketch challenge at Try Stampin’ on a Tuesday. I began by stamping the palm tree trunks from the Beach Happy stamp set onto Shimmery White card using Soft Suede ink. I stamped the palm leaves from the same stamp set using Old Olive ink. The sand image from the High Tide stamp set is stamped using Crumb Cake ink. The sea image, also from the High Tide stamp set, is stamped using Bermuda Bay ink.  I stamped the chair and umbrella image from the Beach Happy stamp set onto scrap Shimmery White card using Memento Tuxedo Black ink. I stamped the chair fill image using Mango Melody ink and the umbrella fill image using Poppy Parade ink. I cut out the image and attached it to the stamped panel using dimensionals.
 I wrapped Very Vanilla card twice using the 3/16″ Braided Linen Trim and attached it to scored and folded Crumb Cake card. I attached the stamped panel over the top of the 3/16 “Braided Linen Trim using dimensionals. I tied a bow onto the left hand side of the card using the same 3/16″ Braided Linen Trim and frayed out the ends.
To decorate the inside of the card, I stamped the palm tree from the Beach Happy stamp set using Soft Suede and Old Olive inks. I added the greeting from the Beach Happy stamp set using Soft Suede ink.
Simple really but I like the way it turned out. I’d love to hear what you think.
Bye for now,
Kris


Cousins – Family
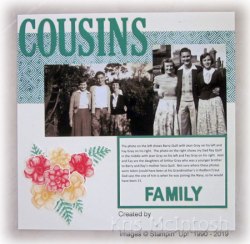
I am running a little late today with my post, sorry! These photos are of my Dad and his brother, taken with their cousins. Dad isn’t sure where the photos are taken but says that that picture of him was taken when he was joining the Navy so he was 21. My Dad is the one in the photo on the right. Anyway I couldn’t resist using the gorgeous Painted Seasons Designer Series Paper as the backdrop for the photos. I decided to use this lovely pattern and attached it across a Very Vanilla 12″ x 12″ page. I cut the main title from Call Me Clover card using the Large Letters Framelits Dies. I used the retired Little Letters Thinlits Dies to cut the second title from Call Me Clover card. 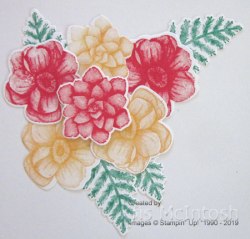 The journaling was created on my computer and attached to Call Me Clover card before attaching to the page. To decorate the left hand corner I stamped the flowers from the Painted Seasons stamp set onto Very Vanilla card using Poppy Parade ink and also Mango Melody ink. I stamped the leaves from the Painted Seasons stamp set onto Very Vanilla card using Call Me Clover ink. The flowers and leaves are cut out using the Four Seasons Framelits Dies which will be available for purchase on the 1st March. I layered the leaves and flowers onto the left hand corner with the flower in the centre attached using dimensionals. Don’t forget that this gorgeous paper and the Painted Seasons stamp set is available FREE with a qualifying order during Sale-a-Bration.
Once more this is a relatively simple page but one that emphases the photos and the story for my girls and their children.
Bye for now,
Kris
Product Used:


New SAB items
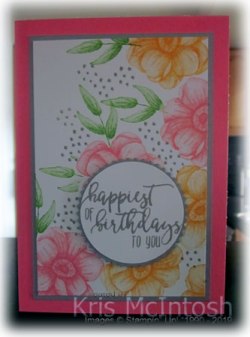
Today is the day Stampin’ Up! is releasing some new product you can earn for free during Sale-A-Bration. One of the products being released is the Painted Seasons Bundle. This consists of a beautiful stamp set and gorgeous co-ordinating Designer Series Paper. The card I am showing you today was shared by a Donna Gray an Australian Demonstrator. Donna has a facebook live video you can watch here that shows how she created her card. I created a card just like Donna’s using Highland Heather, Gorgeous Grape, Soft Sea Foam, Gray Granite and So Saffron, which is very pretty. However, I wanted to create a birthday card for a friend and so I experimented with some different colours. 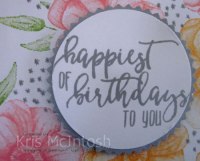 I stamped the larger single flower from the Painted Seasons stamp set onto Whisper White card using Flirty Flamingo ink. I stamped the same flower again but this time using Mango Melody ink.
  I stamped the leaves using Granny Apple Green ink. Donna stamps her leaves without it, but I used a post-it-note mask to cover the flowers before stamping. I added the small “dotty” image using Gray Granite ink. The stamped panel is attached to Gray Granite card and then scored and folded Flirty Flamingo card. I stamped the greeting from the Picture Perfect Birthday stamp set onto Whisper White card using Gray Granite ink. I punched out the greeting using the 2″ Circle Punch and attached it to Gray Granite card punched using the Starburst Punch. The greeting is attached to the card front using dimensionals.
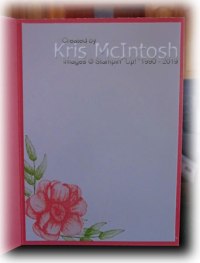
To decorate the inside of the card, I stamped the flower using Flirty Flamingo ink onto the lower left hand corner of Whisper White card. I masked the flower and stamped the leaf image using Granny Apple Green ink.
Here are both cards together, they are both gorgeous don’t you?

Thank you so much Donna for sharing your creativity. I recommend you watch the video and then create a card of your own. I’d love to see what colour combo’s you can come up with.
Bye for now,
Kris
Product Used:


Birthday Wishes

I used the sketch at Freshly Made this week to create this card. I stamped the bokeh image from the Beauty Abounds stamp set using Flirty Flamingo ink. I stamped the same image, between the first set of images, this time using Mango Melody ink. The stamped Whisper White card is attached to Basic Black card and then to scored and folded Flirty Flamingo card. I cut “birthday” and “wishes” from Basic Black card using the Well Written Framelits Dies.  The words are attached across the stamped panel. I cut Flirty Flamingo card and Mango Melody card using the small flower from the Well Written Framlits Dies and attached the flowers around the greeting. Lastly I added Basic Pearls to the centre of each flower.
 To decorate the inside of the card, I stamped the bokeh image from the Beauty Abounds stamp set twice using Flirty Flamingo ink and once using Mango Melody ink.
Such a simple card but I really love it. Thank you Freshly Made for another great sketch.
Bye for now,
Kris
Product Used:


Graceful Garden Four Ways

Today’s cards are the result of another afternoon of colouring in the air conditioning trying to escape the heat in Brisbane. For this card I stamped the flower from the Graceful Garden stamp set onto Whisper White card using Memento Tuxedo Black ink. The flower is coloured using Real Red and Old Olive Stampin’ Blends. I stamped the Buffalo Check Background onto Whisper White card using Old Olive ink. To make this truly successful I used the Stamparatus so that I could re-ink and stamp as many times as I wished to get a perfect image. I cut Real Red card using the Rectangle Stitched Framelits Dies and attached it to Whisper White card. I attached the Buffalo Check piece onto the left hand side of the Whisper White card, partially covering the Real Red rectangle.  The whole piece is attached to scored and folded Real Red card. I cut a slightly smaller rectangle from Whisper White card using the Rectangle Stitched Framelits Dies. I stamped the background image from the Graceful Garden stamp set using Smoky Slate ink. I attached the flower to the stamped panel and then the card front using dimensionasl.
To decorate the inside of the card, I stamped the small flower from the Graceful Garden stamp set onto the upper right hand corner of Whisper White card using Memento Tuxedo Black ink. 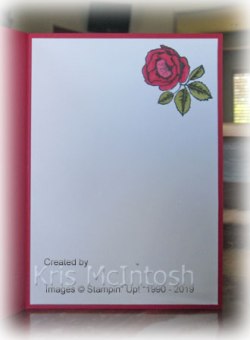 The image is coloured using the Real Red and Old Olive Stampin’ Blends.
As I said I coloured several flowers in the one sitting. The second card uses Cherry Cobbler card for the card base and the larger rectangle. The flower is coloured using Cherry Cobbler and Old Olive Stampin’ Blends. The Buffalo Check is stamped in Old Olive ink and the background in Smoky Slate ink. The smaller flower is also used to decorate the inside of the card.
The third card uses Lovely Lipstick and Granny Apple Green Stampin’ Blends to colour the flowers. The Buffalo Check Background is stamped in Granny Apple Green ink and the background in Smoky Slate ink. The card base and large rectangle use Lovely Lipstick card.
The last card is coloured using Rich Razzleberry and Old Olive Stampin’ Blends. The Buffalo Check Background is stamped using Old Olive ink and the background using Smoky Slate ink. The card base and the large rectangle use Rich Razzleberry card.
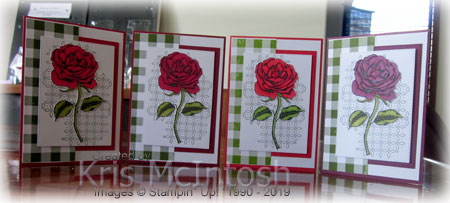
So there you have it, four gorgeous (well I think they are gorgeous) cards using the beautiful flower from the Graceful Garden stamp set. I really wanted to showcase the Rectangle Stitched Framelits Dies and the beautiful Buffalo Check background, did I do it? I would love to hear what you think.
Bye for now,
Kris
Product Used:


Note Card Set
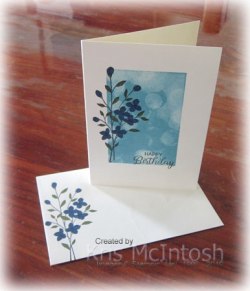
I saw a card on Pinterest (sorry I can’t find it now, let me know if it is yours) which I thought was pretty and decided to take the idea and use it to create a quick set of Very Vanilla Note cards. I used several different colours, however this first one uses Bermuda Bay to stamp the Bokeh Dots background image. I set up all the stamped images on the Stamparatus because I knew I wanted to make more than one card. I stamped the image from the Timeless Textures stamp set over the left hand edge of the background using Memento Tuxedo Black ink. I stamped the greeting from the Beautiful Bouquet stamp set using Memento Tuxedo Black ink. I coloured the flower using the Dark Night of Navy and Dark Old Olive Stampin’ Blends.  I also stamped the flower image onto the lower left hand corner of the envelope and coloured it using the same Stampin’ Blends.
The second Note card has the background stamped in Petal Pink with the image coloured using the Dark Real Red and Dark Old Olive Stampin’ Blends. Again the envelope has the flower stamped and coloured using the same Stampin’ Blends.
The third Note card has the background stamped in Crushed Curry with the image coloured using the Dark Cajun Craze and Dark Old Olive Stampin’ Blends. The envelope is decorated in the same manner as the others using the co-ordinating colours.
The last one has the background stamped using Soft Sea Foam ink and the image is coloured using the Dark Flirty Flamingo and Dark Old Olive Stampin’ Blends. Once more the envelope is decorated in the same manner using the co-ordinating colours.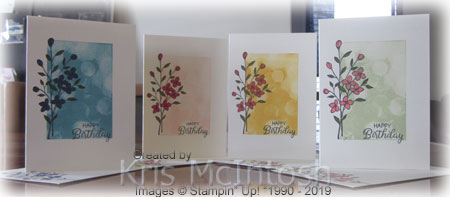
Such a simple card to create but I think these have turned out pretty, don’t you?
Bye for now,
Kris
Product Used:


My Grandmother

Today’s page showcases a photograph of my grandmother taken when she was around 1 or 1-1/2. It is certainly not a very flattering photo of her but at this stage the only one that I have of her as a little girl. This page is very simple, the main focus being the photograph. I used retired neutral coloured Designer Series Paper, cut into 2″ x 6″ strips attached across the top of 12″ x 12″ Whisper White card. I added a strip of Crumb Cake card which I punched using the Decorative Border Punch. Since the Crumb Cake card is only A4 I cut the strip and made sure to hide the gap behind the photo. 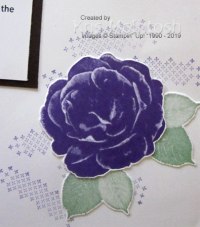 The decoration in the bottom right hand corner is created by stamping the background from the Healing Hugs stamp set using Gorgeous Grape ink which I stamped off first. I stamped the flower from the Healing Hugs stamp set onto scrap Whisper White card using Gorgeous Grape ink and cut it out. The leaves are stamped onto scrap Whisper White card using Mint Macaron ink and cut out. The journaling is once more created on my computer and printed onto Whisper White card. I hope you are feeling inspired to create your own Memory Keeping pages for you and your family to enjoy.
Bye for now,
Kris
Product Used:


Relax

Today I am sharing a card with you that is a result of my first play with the Beach Happy stamp set. I bought this set because I think it will co-ordinate with several others that I already own, however, this is the first time it has seen ink, but hopefully not the last. I have a friend who just retired and I wanted to create a card for her. I stamped the palm tree stems in Soft Suede ink and added the leaves in Old Olive ink onto Shimmer Paper. I stamped the beach chair and umbrella using Memento Tuxedo Black ink. The striped image to fill the chair is stamped in Real Red ink and the fill image for the umbrella is stamped in Cajun Craze ink. I punched a Post-It-Note with the 1-1/4″ Circle Punch and added it to the card front. I used Crumb Cake ink and an Aqua Painter to create a sandy beach. I used the Aqua Painter and Bermuda Bay ink to create the sea. 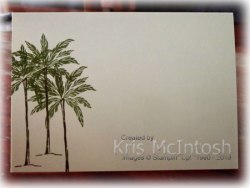 The sky is added using an Aqua Painter and Coastal Cabana ink. I removed the Post-It-Note and using the Aqua Painter filled the area with Daffodil Delight ink. Lastly I added the greeting from the Beach Happy stamp set using Memento Tuxedo Black ink. The panel is attached to scored and folded Thick Very Vanilla card.
Now I think my painter’s eye was a little off and maybe the sea should not be quite so “downhill”, however, I am happy with the overall effect. Adding the colour around the images, makes the image maybe not so perfect, but is slightly more realistic (in my humble opinion).
To decorate the inside of the card, I stamped the palm tree stem three times using Soft Suede ink and added the leaves using Old Olive ink.
I’d really love to hear what you think of this card.
Bye for now,
Kris
Product Used:


Geared Up Garage
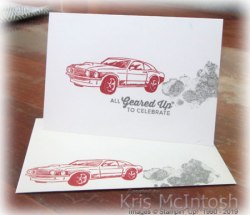
Have you seen this gorgeous guy suite in the Occasions Catalogue. It has a stamp set, dies, designer series paper and some embellishments. Such fun. Today I have three cards to share with you. The first one is simple stamping. I stamped the smoke image from the Geared Up Garage stamp set onto a Note card using Basic Gray ink which I stamped onto scrap paper first. I stamped the car image from the same stamp set using Real Red ink. 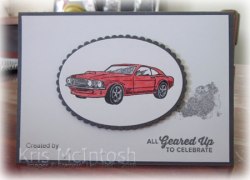 The greeting which is from the same stamp set is stamped using Basic Gray ink. I decorated the envelope using the car and smoke images to match.
The second card is slightly stepped up and would suit someone who stamps to create cards for their family and close friends. This time I stamped the smoke image onto Whisper White card using Basic Gray ink which I had stamped off once. I also stamped the greeting from the Geared Up Garage stamp set using Basic Gray ink. The stamped Whisper White card is attached to scored and folded Basic Gray card. 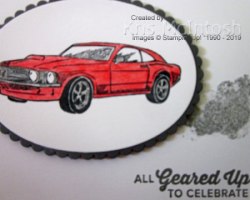 I stamped the car image from the Geared Up Garage stamp set onto Whisper White card using Memento Tuxedo Black ink. I coloured the image using the Dark Real Red and Light Smoky Slate Stampin’ Blend and cut out the image using one of the Layering Ovals Framelits Dies. The image is attached to a Basic Gray scalloped oval cut using the Layering Ovals Framelits Dies and then the card front using dimensionals. To decorate the inside of the card, I stamped the smoke image onto Whisper White card using Basic Gray ink which I stamped off once first.
  I stamped “happy birthday” from the Beautiful Bouquet stamp set over the top using Basic Gray ink.
The third card is a little more stepped up and would suite someone like me who “has to have it all”. This time I stamped the greeting from the Geared Up Garage stamp set onto the lower right hand corner of Whisper White card using Basic Gray ink. The stamped card is attached to scored and folded Basic Gray card. 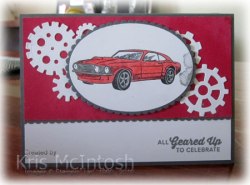 I punched a strip of Basic Gray card using the Decorative Ribbon Border Punch and attached it behind one long edge of a piece of the Classic Garage Designer Series paper. This panel is attached to the top of the card front. I cut the large cog wheel image from Whisper White using the co-ordinating Geared Up Garage Framelits Die.
 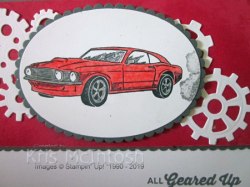 I stamped the car image from the Geared Up Garage stamp set onto Whisper White card using Memento Tuxedo Black ink and coloured it using the Dark Real Red Stampin’ Blend and the Light Smoky Slate Stampin’ Blend. I stamped the smoke image behind the car using Basic Gray ink, which I had stamped onto scrap paper first. The image is cut out using one of the Layering Oval Framelit Dies and attached to a Basic Gray scalloped oval cut using the same dies.
 I cut the cog wheel image across the centre and attached the two pieces to the card front so that they would show behind the image panel which is attached using dimensionals. To decorate the inside of the card, I punched a strip of Basic Gray card using the Decorative Ribbon Border punch. The punched piece is attached behind one long edge of the same Designer Series Paper used on the front of the card. The panel is attached across the bottom of Whisper White card. I stamped the smoke image using Basic Gray ink which I had stamped onto scrap paper first. I stamped the greeting from the Beautiful Bouquet stamp set over the smoke image using Basic Gray ink.

So what do you think, three cards using the same basic supplies but three different looks.
Bye for now,
Kris
Product Used:


Case this Sketch 307
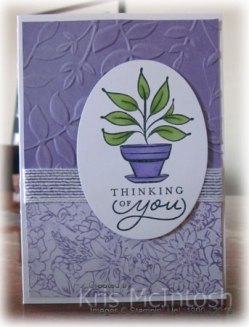
The card I am sharing today uses the sketch challenge at Case This Sketch as the starting point. I embossed Highland Heather card using the Layered Leaves Dynamic Embossing Folder. I spritzed the card before I embossed it using a mixture of Isopril (rubbing alcohol) and Champagne Mist Shimmer Paint. I don’t know if you can see it in the photos but the embossed card is quite sparkly. I attached a piece of the Botanical Butterfly Designer Series Paper across the bottom of the embossed panel and wrapped the top edge of the designer series paper using the Whisper White 5/8″ Flax Ribbon. The panel is attached to scored and folded thick Whisper White card. I stamped the image from the Just Because (Hostess only) stamp set using Memento Tuxedo Black ink.
  I coloured the image using Highland Heather and Granny Apple Green Stampin’ Blends.
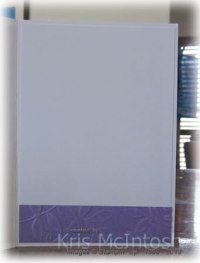
To decorate the inside of the card, I embossed Highland Heather card using the Layered Leaves Dynamic Embossing Folder which is attached to the bottom of Whisper White card.
I think this card is so pretty it will be making it’s way into my classes this month. Thanks so much to Case This Sketch for the inspiration. Why don’t you tell me what you think, would you like to create this card?
Bye for now,
Kris
Product Used:







