Ayr
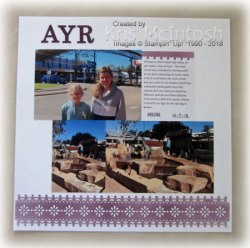
Ayr is not far south of Townsville and a lovely place to stop and stretch your legs or even stay a while. We didn’t have time to stay a while, so we had a wander around the town to stretch our legs. The main street has this fantastic arch with the town name which was a great backdrop for a photo of the girls. Even after all this road tripping they still look happy! The theatre area has a fabulous display of animals and their habitats. It was fun for the girls to spot all this different animals. My page for these photos is once more 12″ x 12″ Whisper White. I took a piece of the Delightfully Detailed Laser Cut Designer Series Paper and coloured it using the Sponge Brayer and Blackberry Bliss ink before attaching it across the bottom of the page. I also used a piece to create a mask for the journaling card to add more Blackberry Bliss ink across the top. The alphabet dies are once more the retired Timeless Type Alphabet Dies. 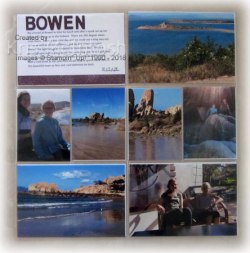 I know that these are retired and I use them a lot but the alphabet dies which are current would have been just too large to use on most of my pages. The letters are cut from Blackberry Bliss card. I have also used the Tabs for Everything stamp set to add the date and “amazing”.
Bowen was our stop-over town for the night and after we arrived and set up we took the girls up to the lookout so that they could get 360 degree views of the islands along the coast and the town. It is such a pretty place. The girls loved exploring the rocks along the beach at Horseshoe Bay. The journaling card is created using Whisper White card with a narrow strip of one of the Delightfully Detailed Memories and More cards across the bottom. I have used the Tabs for Everything stamp set to add the date. The title is cut from Blackberry Bliss using the retired Little Letters Thinlits Dies.
I hope you are still enjoying seeing these pages.
Bye for now,
Kris
Product Used:


Farmhouse Christmas
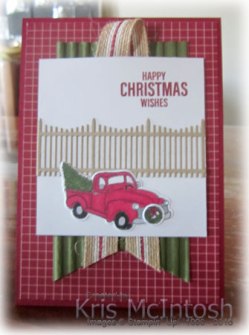
You will find the Festive Farmhouse Product Suite on pages 12 and 13 of the Holiday Catalogue. I like the images in the Farmhouse Christmas stamp set because they are adaptable to use for Australian Christmas cards. This card is my version of one of those on page 12. I attached the Festive Farmhouse Designer Series Paper to scored and folded Cherry Cobbler card. I cut a “v” in one end of Mossy Meadow card and then embossed it using the Corrugated Dynamic Embossing Folder. I attached the embossed card to the card front and added a layer of the 5/8″ Striped Burlap Trim. I cut a strip of Crumb Cake card using the fence die in the Farmhouse Framelits Dies, which I attached across the centre of the Whisper White card.  I stamped the greeting from the Farmhouse Christmas stamp set onto the top right hand corner of the Whisper White card using Cherry Cobbler ink. I stamped the car image onto Whisper White card and coloured it using a Mossy Meadow and Basic Black Stampin’ Write Markers and Cherry Cobbler and Smoky Slate Stampin’ Blends. The image is cut out using the co-ordinating Farmouse Framelits Die. I also stamped the small wreath image onto Whisper White card using Memento Tuxedo Black ink and coloured it using the Dark Cherry Cobbler Stampin’ Blend and the Mossy Meadow Stampin’ Write Marker.
  The image is cut out using the co-ordinating Farmhouse Framelits Dies. I attached the wreath to the front of the car before attaching the whole piece to the stamped Whisper White card. The image panel is attached to the card front using dimensionals.
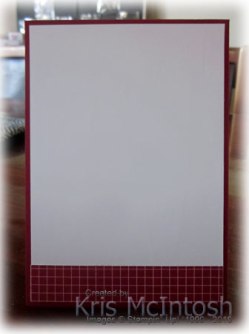
To decorate the inside of the card, I attached a narrow strip of the same Festive Farmhouse Designer Series Paper across the bottom of Whisper White card.
Aren’t the images in this stamp set fun. I love the car and that tiny wreath. Oh and let’s not forget that gorgeous fence. One great thing about the Farmhouse Framelits Dies is that it contains two dies to cut out the wreath and there is also a die which will cut 6 cute little bows all at the same time. So it will be easy to create multiples of the small images in this stamp set.
Bye for now,
Kris
Product Used:


More Winter Woods

This card was inspired by another of the cards in the Holiday Catalogue but I have changed it up a little. I stamped the tree trunk image across Crumb Cake card using Soft Suede ink before embossing using the Corrugated Dynamic Embossing Folder. The embossed card is attached to scored and folded Merry Merlot card. I stamped the tree image across Very Vanilla card using Mossy Meadow ink before embossing the top two-thirds using the Softly Falling Embossing Folder.  I stamped the greeting from the Winter Woods stamp set onto the lower right hand corner using Merry Merlot ink before attaching the piece to the card front using dimensionals. I cut another piece of Very Vanilla card using the edgelit die in the In The Woods Framelits Dies. The Very Vanilla card is attached to the card front using dimensionals.
  I stamped the single tree image onto Very Vanilla card twice using Mossy Meadow ink. I used two different dies from the In The Woods Framelits Dies to cut out the trees – the outline die to cut out one tree and the detailed die to cut out the other tree. The detailed die cuts the tree slightly smaller but with little pieces that you can raise to give more texture. I attached the detailed tree to the full tree and then attached it to the card front, using dimensionals where necessary.
To decorate the inside of the card, I stamped the tree trunk image from the Winter Woods stamp set across a narrow strip of Crumb Cake card using Soft Suede ink. The panel is embossed using the Corrugated Dynamic Embossing Folder before attaching to the bottom of Very Vanilla card.
This card has a fair bit going on but I am loving the way it all came together, what about you?
Bye for now,
Kris
Product Used:


A Winter Wreath

This card is loosely based on another of the cards in the Holiday Catalogue using the Winter Woods stamp sets. I stamped the greeting from the Winter Woods stamp set onto Very Vanilla card using Merry Merlot ink. The stamped panel is attached to Mossy Meadow card and then scored and folded Merry Merlot card. I used the Stamparatas and small leaf image in the Winter Woods stamp set to create a wreath on Very Vanilla card using Mossy Meadow ink. I cut out the wreath panel using one of the dies in the Layering Squares Framelits Dies and attached it to a Merry Merlot scalloped square cut using the same dies.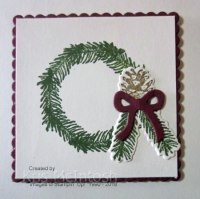 The image panel is attached to the card front using dimensionals. I stamped two more leaves onto Very Vanilla card using Mossy Meadow ink and cut them out using the In The Woods Framelits Dies.
 I stamped the pine cone onto Very Vanilla card using Soft Suede ink and cut it out using the co-ordinating In The Woods Framelits Die. The pinecone and leaves are attached to the stamped wreath. I cut a bow from Merry Merlot card using the die from the Bouquet Bunch Framelits. The bow is attached over the leaves and pine cone.
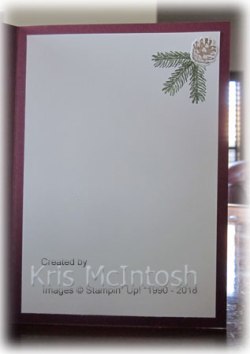
To decorate the inside of the card, I stamped the leaf image from the Winter Woods stamp set three times onto the top right hand corner of Very Vanilla card using Mossy Meadow ink. I stamped a pine cone onto scrap Very Vanilla card using Soft Suede ink and cut it out using the co-ordinating In The Woods Framelits Die. The pine cone is attached over the ends of the leaves.
This card doesn’t really look like the one in the catalogue, but it certainly gave me the inspiration to create this card.
Bye for now,
Kris
Product Used:


Simple Winter Woods

When I saw the Winter Woods stamp set in the Holiday Catalogue (page 27), I couldn’t help but be drawn to the beautiful Christmas Tree image, although it doesn’t feature on this card. This is my version of one of the cards in the catalogue. I stamped the tree trunk image across Crumb Cake card using Soft Suede ink before embossing using the Corrugated Dynamic Embossing Folder.  I wrapped the card using the Very Vanilla Festive Farmhouse Bakers Twine around the card before attaching to Merry Merlot card. The whole panel is attached to scored and folded Thick Very Vanilla card. I cut the leaf from Mossy Meadow card using the In The Woods Framelit Die and then embossed the leaf in the die using the Embossing Mats to give it some great texture.
 I stamped the greeting from the Winter Woods stamp set onto Very Vanilla card and punched it out using the Everyday Label punch. I attached the leaf behind the greeting panel and attached the whole piece to the card front using dimensionals.
To decorate the inside of the card, I cut a leaf from Mossy Meadow card and embossed it using the Embossing Mats. The leaf is attached to the lower left hand corner.
I absolutely adore this card, the texture is amazing even though it is a simple card. What do you think?
Bye for now,
Kris
Product Used:


Sunrise

We got up early the morning we left Rollingstone to watch the sun rise over the water. It was freezing cold and a little cloudy on the horizon but it was worth it. Even the girls didn’t stay in bed!
I created the page by using the Pattern Party Decorative Masks and the Shimmery White Embossing Paste to add interest in the top left and bottom right hand corners of the 12″ x 12″ Whisper White page. I’m not sure if you can see it in the photos but this Paste not only gives dimension but it also gives great sparkle. Once the Embossing Paste was dry, I add the photos.  The title is cut from Basic Black card using the retired Timeless Type Alphabet Dies. The journaling is printed onto Whisper White card, cut into strips and attached to Basic Black card before attaching to the page.
Another simple page, but one that I love. The photos bring back some happy memories. I love how I can create pages using traditional style Memory Keeping and use them alongside pocket pages to create my holiday stories.
Bye for now,
Kris
Product Used:


May this Season

be filled with peace. Isn’t that a lovely greeting for Christmas? This is one more case from the Holiday Catalogue, this time I created a card using the little gift box as inspiration. I cut each of the four corners of Soft Sea Foam card using the small corner die from the Detailed Poinsettia Thinlits Dies. I stamped the greeting onto the centre of the card using Shaded Spruce ink. The die cut panel is attached to scored and folded Shaded Spruce card.  I stamped the image from the Peaceful Poinsettia stamp set twice onto Whisper White card using Memento Tuxedo Black ink. The images are coloured using the Real Red and Shaded Spruce Stampin’ Blends before being cut out using the co-ordinating Detailed Poinsettia Thinlits Die.
  You can see that in some of the flower I have used the Light and Dark Real Red Stampin’ Blends togehter and in some sections just the Light or the Dark Stampin’ Blend, to give a bit more dimension to the flower. The images are attached to the card front above and below the greeting.
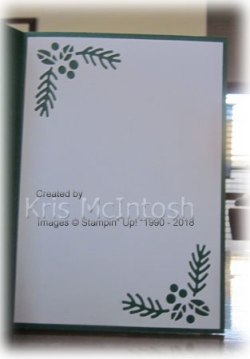
To decorate the inside of the card, I have once more elected to use the small corner die from the Detailed Poinsettia Thinlits Dies to cut the top left and bottom right hand corner of Whisper White card.
To finish off the card, I added Basic Pearls to the leaves instead of colouring in the berries and also to the centres of the flowers. I think the pearls are just the finishing touch needed for this card. What do you think?
Bye for now,
Kris
Product Used:


Accented Birthday
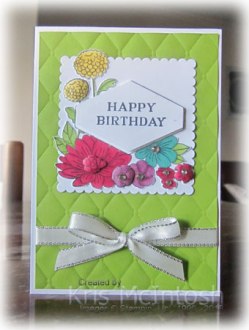
Today’s card was made as a special order for my Mum to give to a friend of hers. I embossed Granny Apple Green card using the Tufted Dynamic Embossing Folder. This time instead of spritzing with water, I spritzed with a mixture of Frost White Shimmer Paint and rubbing alcohol (Isopril in Australia). This gave a hint of shimmer to the card when it was dry. I don’t think you can see it in the photos but it is there. I attached Silver Metallic Edge Ribbon to either side of the embossed card before attaching to scored and folded Thick Whisper White card. Once the embossed card was attached, I tied the ribbon in a bow. I cut Whisper White card using the largest scalloped square from the Layering Squares Framelits Dies and attached it to the card front.  I stamped the floral image from the Accented Blooms stamp set twice onto Whisper White card using Memento Tuxedo Black ink. I coloured one image completely and just a few of the flowers on the second one using Bermuda Bay, Daffodil Delight, Granny Apple Green, Rich Razzleberry and Cherry Cobbler Stampin’ Blends.
  I cut out one complete image and just the select sections from the second image – the centre of the Cherry Cobbler flower, one Rich Razzleberry small flower, one Cherry Cobbler small flower and the smaller of the yellow flowers. I attached the full image to the Whisper White scalloped square. I decided to use my new Take Your Pick tool, selecting the large stylus to give the individual cut pieces a little extra dimension before attaching them to the full image using mini Dimensionals. I stamped “happy birthday” from the Perennial Birthday stamp set onto Whisper White card using Memento Tuxedo Black ink. I punched the greeting using the Tailored Tag Punch. The greeting is attached to the card front using dimensionals. For the final touch I added some Basic Rhinestones to the centres of some of the flowers.
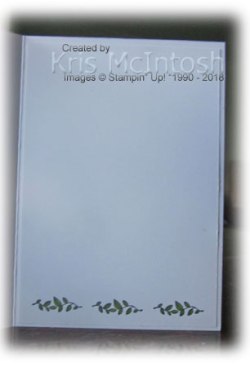
I kept the inside of the card pretty simple, stamping the leaf image from the Accented Blooms stamp set across the bottom of Whisper White card. I coloured the leaves using the dark Granny Apple Green Stampin’ Blend before attaching the panel to the inside of the card.
Bye for now,
Kris
Product Used:


Eastern Birthday

Today’s card uses a template that was shared by Julie Burt on a Demonstrator only Facebook page. Unfortunately Julie does not have a blog or facebook page at this stage, but when she does I will be sure to let you know. I followed Julie’s template to cut Thick Whisper White card to create the card base and added Smoky Slate card to each panel. The main panel is decorated with a large motif from the retired Eastern Gold Vinyl Stickers. I also used another of the stickers on Melon Mambo card and cut it out using the co-ordinating Eastern Medallions Thinlits Dies. 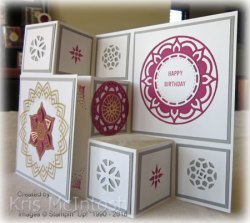 The Sticker is attached to Whisper white card with the Melon Mambo flower in the centre. The middle panel on the card has a medallion cut from Melon Mambo card using the Eastern Medallions Thinlits Dies with a retired Eastern Gold Vinyl Sticker in the centre. I decorated four of the remaining small panels by cutting Whisper White card using the two smallest circles in the Eastern Medallions Thinlits Dies. Once the Whisper White card is attached to the Smoky Slate card, it is really quite pretty. The last two small panels have been stamped with a small star image from the Eastern Beauty stamp set using Melon Mambo ink. The last large panel has the largest medallion from the Eastern Medallions Thinlits Dies cut from Melon Mambo card.
  To release this image and create a single piece, I cut around the medallion using one of the Layering Circle Framelits Dies. I stamped “happy birthday” from the Thoughtful Banners stamp set onto Whisper White card using Melon Mambo ink and cut out the greeting using the die in the Stitched Labels Framelits Dies. The greeting is attached to the centre of the Melon Mambo medallion.
To decorate the inside of the card, I stamped the image from the Eastern Beauty stamp set using Melon Mambo ink. I love the way this card stands up like a tri-shutter card but it has that cute little closed card on the left, so you can write a message. The card is a little oversized so you will have to create your own envelope but that is easy using the Envelope Punch Board. So thank you once again Julie for your wonderful template.
This card is for a lovely friend who is celebrating her birthday today. Happy Birthday Gloria. She loves this stamp set, so although I have used some retired product on this card, I know that she will love it.
Bye for now,
Kris
Product Used:


Merry Little Christmas

Here is another card I cased from the Holiday Catalogue. I embossed a piece of Crumb Cake card using the Corrugated Dynamic Embossing Folder and attached it to another piece of Crumb Cake card before attaching to scored and folded Crumb Cake card. I stamped the greeting from the Peaceful Poinsettia stamp set onto Whisper White card using Real Red ink and cut it out using the Layering Ovals Framelits Dies. I used the Detailed Poinsettia Thinlits Dies to cut two poinsettia flowers from Real Red card. I also used the dies to cut the leaves from Garden Green card.  I attached one flower and one set of leaves to the back of the greeting panel on the top left and the bottom right. I attached the whole piece to the card front using dimensionals. I stamped the small holly image from the Peaceful Poinsettia stamp set onto Whisper White card using Memento Tuxedo Black ink.
  The image is coloured using Real Red and Old Olive Stampin’ Blends before being cut out using the co-ordinating Detailed Poinsettia Thinlits Die. I attached one image to the top left and the other image to the bottom right of the greeting panel.
To decorate the inside of the card, I embossed a narrow strip of Crumb Cake card using the Corrugated Dynamic Embossing Folder which is attached across the bottom of Whisper White card. I cut Garden Green card using the leaf die from the Detailed Poinsettia Thinlits Dies. I also cut Real Red card using the same die. I attached the green leaf over the corrugated Crumb Cake card and then using my Take Your Pick, I added the Real Red circles to represent the berries. I must say I love having this tool on my desk, it certainly helps with the “fiddly” things on my creations.
Bye for now,
Kris
Product Used:







