More Memory Keeping
 Today I am going to share with you a scrap page I made using the Moments Like These Project Life Card Collection. I had three photos of Ethan playing the cello at his very last band performance. Ethan loves music but he just wanted to play the guitar and his teacher wasn’t appreciative of his efforts to make the cello work like a guitar! Anyway he has since left the band but I wanted to preserve this memory. I printed my pictures (not fabulous but I can still see Ethan) at 3″ x 4″ size and matted them onto Whisper White card 3-1/4″ x 4-1/4″. I selected three 3″ x 4″ cards from the Moments Like These Card Collection and attached them to Cajun Craze card 3-1/4″ x 4-1/4″.
 The photos and cards are attached to Basic Black 12″ x 12″ card, which will soon be available to purchase as a pack of 12 sheets (yay). I stamped the “you are” and “awesome” from the Marquee Messages stamp set onto one card using Memento Tuxedo Black ink to create the title for my page. I stamped the guitar from the Country Livin’ stamp set onto Crumb Cake card using Early Espresso ink, cut it out and attached it to another card. I also inked the “Rock Star” greeting from the Marquee Messages stamp set and stamped it onto the same card using Memento Tuxedo Black ink. The last card contains my journalling.
 As you can see a really simple page, but I love that I can personalise the cards by using the stamps that I have on hand. I know that sometimes the thought of preserving our memories can be daunting, especially these days when you might have hundreds of photos from the one event to choose from. I like to keep it simple and I love combining simple pages like this with my pocket pages. So don’t be put off by those amazingly talented people you see sharing on the net, just share the photos and your thoughts and the memories will be restored. My grandchildren love seeing my scrapbooks out, so that they can ooh and aah over the times we have shared.
I have been doing quite a lot of memory keeping lately and will have more pages to share with you over the coming weeks.
Bye for now,
Kris
Product Used:


Baby Card
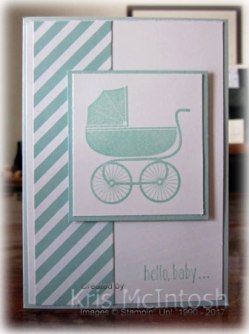
I had a request from one of the ladies in my Beachmere Class for a baby boy card. It’s kind of nice that people know exactly what kind of card they need ahead of time – boy or girl, instead of having to wait till the baby is born and then create something quickly, or use generic colours so that it could suit a boy or a girl. Anyway, this lady wanted a baby boy card, so this is what I created.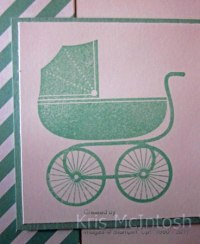
I attached a piece of Pool Party designer series paper from the Subtles Designer Series Paper Stack (retiring and sold out – but I’m sure you could substitute with something you have on hand) to the left hand side of Whisper White card and attached it to scored and folded Pool Party card. 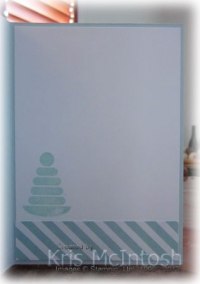 I stamped the greeting from the Baby Bear stamp set onto the lower right hand corner using Pool Party ink. I stamped the pram image from the Something For Baby stamp set (retiring) onto Whisper White card using Pool Party ink and attached it to Pool Party card and then the card front using dimensionals.
To decorate the inside of the card I attached a strip of the same Pool Party designer series paper across the bottom of Whisper White card and stamped the toy image from the Something for Baby stamp set on the left hand side.
This is a really quick and simple baby card, but still quite lovely. Sometimes simple is the best, don’t you think?
Bye for now,
Kris

Use this Hostess Code when you place an online order during April and receive a gift from me.
Product Used:


Memory Keeping Class

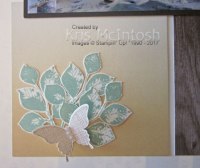
This month’s Memory Keeping Class uses the All Year Long Project Life Card 4″ x 4″ cards. I chose four neutral colour cards to add in a grid form to my Very Vanilla 12″ x 12″ page. Before attaching the cards I stamped the “sun ray” image from the Kinda Eclectic stamp set onto the top left hand corner using Crushed Curry ink. I also stamped the dotted border image onto the lower right hand corner using Crumb Cake ink. Once I attached the 4″ x 4″ cards, I added my photo which has been attached to Early Expresso card to give it some definition. I stamped the leaf image from the Kinda Eclectic stamp set three times onto Very Vanilla card using Mint Macaron ink and cut them out.  I stamped the large butterfly from the same stamp set onto Very Vanilla card using Crumb Cake ink and punched it out using the Elegant Butterfly Punch. I attached the leaves and the butterfly to the 4″ x 4″ card on the lower left hand side and added some Basic Pearls to the centre of the butterfly. I printed my journaling onto Very Vanilla card, cut it into strips and attached it over the 4″ x 4″ card on the lower right hand side.
 As you can tell I am a fairly “simple” scrapbooker, I love to let my photos tell the story and using the cards that are created to fill the pocket pages is so simple. I can add the rest of the photos from our trip to Cania Gorge into co-ordinating Pocket Pages.
As you are all by now aware Stampin’ Up! will not longer be carrying Project Life when the new catalogue is released at the beginning of June. While I am sad about this, I can tell you that the product that will replace it will be equally fantastic, so pocket page memory keeping will still be with us. 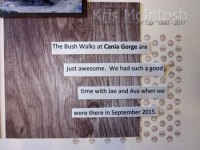 You will find the retiring Project Life by Stampin’ Up! cards and accessories on the retired product page on my website. If there is something you really want or need, do not delay placing your order, as products are selling out fast.
If you live near me and want to make this page, my class is being held next Friday 28th April at 6.30pm. Details are on my Classes and Workshops page. Space is limited, so let me know if you want to come as soon as you can.
Bye for now,
Kris

Use this Hostess Code when placing an online order during April and receive a gift from me.
Product Used:


Designer Series Paper
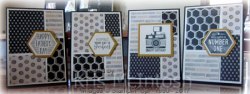 Are you a hoarder of Designer Series Paper? I struggle to cut the papers and use them up. I did pretty well this year but I still have a fair bit lying around which will retire at the end of May.
  Sooo, I thought I would drag out an old card sketch and use some.
This sketch is really a good one, because with four pieces of Designer Series Paper, you can create four different, but similar cards. I used Basic Black as my card base which is cut 10.5cm wide.  I added a layer of Very Vanilla card which is 10cm x 14.3cm. I cut each piece of Urban Underground Specialty Designer Series paper (Sold out) 9cm x 13.3cm. Lining up the short end on the paper trimmer I cut at 6cm. The wide piece I turned to the right and cut off 5cm. The narrow piece I turned to the left and cut of 5cm. Once you have cut each piece, you simply move the pieces around until you have one piece from each designer series paper on the card front.
  To create the focal piece, I used four different sentiments which I stamped onto Very Vanilla card using Memento Tuxedo Black ink. I used the hexagon sentiment from the Urban District Stamp set, the hexagon sentiment from the Nailed It stamp set, the camera and greeting from the Pun Intended Hostess stamp set and the last greeting
  is from the Suite Sentiments stamp set. Unfortunately all of these stamp sets and the DSP are retiring and may already have sold out! I cut the hexagon greetings and the “hoping your day is perfect” using the hexagon framelits from the Build It Framelits Dies (sold out). I drew around the outside edge of the same framelit onto Delightful Dijon card and hand cut three pieces to add to the back of the sentiments.
  The camera and greeting is cut using one of the Layering Squares Framelits Dies and attached to Delightful Dijon card cut with one of the scalloped squares from the same framelits. Each of the greetings is attached to the card front using dimensionals.
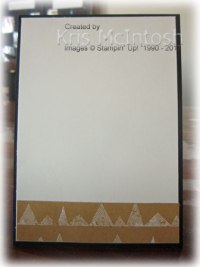
To decorate the inside of the card, I cut a narrow piece of a different paper from the Urban Underground Specialty Designer Series paper and attached it to the bottom of Very Vanilla card.
A simple set of card, but I think they look great and what a way to use up my leftover DSP. What do you think?
Bye for now,
Kris

Use this Hostess Code when placing an online order during April and receive a gift from me.
Product Used:


Happy Easter
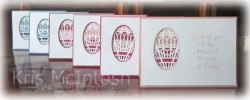
Yes I know yesterday was the day to wish everyone Happy Easter but in case you haven’t noticed, Sunday is one of the two days in the week that I don’t post to my blog. I take the day to relax and spend time doing other things. Yesterday I was able to spend the day with my youngest daughter and her lovely family. I don’t send out any Easter cards but I do make one each for my grandchildren.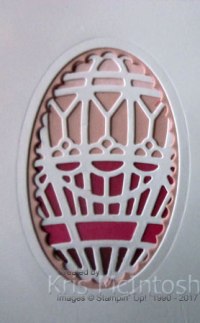
This year’s card is inspired by lots of cards I have seen over time posted on blogs, demonstrator pages and Pinterest.
I started by cutting an oval from the left hand side of Whisper White card using the Layering Ovals Framelits Dies and stamping the greeting from the Suite Sayings stamp set onto the right hand side using various inks – Blushing Bride, Melon Mambo, Rose Red, Cherry Cobbler, Marina Mist and Pacific Point. ( I realise that by having the card with the lightest ink at the front you can hardly read the greeting. It says – Wishing you all the beautiful blessings of Easter – kind of nice isn’t it?). To create the “Easter Egg”, I cut a frame from one of the pink or blue colours using the Layering Ovals Framelits Dies to match the stamping and attached it behind the oval cut out. I used the Up and Away Thinlits Dies to cut the various shades of pink or blue, including additionally Pink Pirouette, Soft Sky, Pacific Point, Dapper Denim and Night of Navy. I also cut six Whisper White detailed balloons using the same set of dies. I attached the pieces of pink or blue card behind the balloon and then attached the balloon behind the oval. I trimmed away whatever part of the balloon I didn’t need and attached the Whisper White card to the scored and folded card bases using dimensionals.
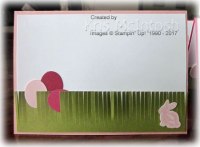 To decorate the inside of the cards I cut one long edge of a piece of Wild Wasabi card using the Fringe Scissors (now on the retired list) to create a grass effect and attached it across the bottom of Whisper White card (make sure that you only attach the solid piece of card, not the fringe). I stamped the little bunny from the Every Occasion stamp set (now on the retired list) onto Whisper White card using various shades of pink or blue and cut them out. I attached the bunny to the right hand side of the grass. I used a retired oval punch to once more punch varying shades of pink and blue “easter eggs” and attached them to the left hand side of the grass, partially hiding some of the egg.
I love how cute these cards are and so did my grandchildren.
Don’t forget to check out the retired list regularly to see what is still available and make sure that you do not wait too long to place your order, things are selling out fast.
Bye for now,
Kris

Use this Hostess Code during April when you place an online order and receive a gift from me.
Product Used:


Just Playing

Today I had a little bit of a tidy up in my craft room and found some card kits that I really liked and decided to re-work the design using the retiring Hostess stamp set Gift of Love . I stamped the flower image onto Very Vanilla card using Memento Tuxedo Black ink. I coloured the image using the Calypso Coral and Old Olive Watercolour Pencils and a Blender Pen. I attached a piece of Cupcakes and Carousels Designer Series Paper across the bottom of the stamped panel and wrapped the join with Whisper White 5/8″ Organza Ribbon (also retiring) and tied a knot.  I attached the stamped panel to the scored and folded Tip Top Taupe card. I stamped the greeting from the Vertical Greetings stamp set onto the right hand side of Very Vanilla card using Calypso Coral ink and attached it to the inside of the card. Because the front panel is cut narrower than the back panel of the card, you can see the greeting when the card is closed.
A very simple card, but still very lovely. I really do like this Hostess stamp set and will miss it when the catalogue retires.
Bye for now,
Kris

Use this Hostess Code when you place an Online Order during April and receive a gift from me.
Product Used:


Balloons

While I was still playing with the sketch from Freshly Made, I thought I would extend myself and create a card using the Balloon Adventures stamp set and matching Balloon Pop-Up Thinlit Dies. I started by adding three strips of Animal Party Washi Tape across the top of Whisper White card before attaching to scored and folded Crumb Cake card. I stamped the balloon string three times onto Whisper White card using Crumb Cake ink. I used the Balloon Pop-Up Thinlit Dies to cut three balloons, one from Tangerine Tango, one from Crushed Curry and one from Emerald Envy. I attached the balloons to scrap Crumb Cake card and trimmed around them. I attached the two outside balloons and then the Emerald Envy balloon using dimensionals. I wrapped the Whisper White card with 1/8″ Emerald Envy Tafetta ribbon and tied a bow before attaching the panel to Crumb Cake card and then the card front using dimensionals.
Now comes the fun part, I used the Balloon Pop-Up Thinlit Die to cut Crumb Cake card and carefully folded the score lines before attaching to the inside of the card. I once more cut three balloons, one from Tangerine Tango, one from Crushed Curry and one from Emerald Envy to attach over the die cut balloons. 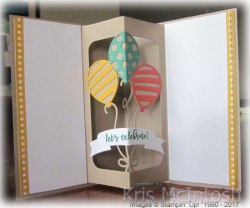 I also cut the banner part once more from scrap Whisper White card. I stamped the greeting from the Balloon Adventures stamp set onto the Whisper White banner using Emerald Envy ink and attached it over the Crumb Cake banner. I attached Whisper White card to each side of the balloon pop-up and also added a row of Animal Party Washi Tape down each side.
Wow, I am impressed, this is such a fun card. It is such a surprise to open the card and find that gorgeous pop-up. I know my grandchildren would just love this. The only thing is, the Balloon Adventures stamp set and the Balloon Pop-Up Thinlit Dies didn’t make it into the 2017 Annual Catalogue, they are on the retired list. So if you want this one, don’t delay in placing your order.
Now to find someone special to send this card to.
Bye for now,
Kris

Use this Hostess Code when placing an online order during April and receive a gift from me.
Product Used:
Some of these links may not work now that the retired list is out. If you can’t find what you are looking for try searching the retired list at my store.


So in Love Watercolour

This is the last card I created when I was having a play with the Watercolour Paper. It makes me so sad that this beautiful flower won’t be making it into next year’s catalogue.
I stamped the flower from the So In Love stamp set onto Watercolour Paper using Versamark ink. I also stamped the leaf image from the Rose Wonder stamp set twice onto Watercolour Paper using Versamark ink. I covered all of the images with White Embossing Powder and heat set them. I used my Aqua Painter to add water all over the embossed images, so that it pooled a little inside the embossed lines. I used the Aqua Painter to pick up ink from the lid of Rich Razzleberry ink pad to add colour to the flower and to pick up ink from the lid of my Old Olive ink pad to add colour to the leaves. I left the images to dry and then cut them out.
I embossed Whisper White card using the Softly Falling Embossing Folder and attached a piece of Falling in Love Designer Series Paper across the bottom of the embossed card. I wrapped the top of the Designer Series paper with Very Vanilla 1/4″ Satin Ribbon. The whole panel is attached to scored and folded Rich Razzleberry card. I attached the leaf images across the top of the ribbon using Glue Dots. I cut a circle from Whisper White card using the Stitched Shapes Framelits Dies and attached the flower to the centre.  I attached the image panel to a scalloped circle cut from Rich Razzleberry card using the Layering Circle Framelits Dies. The whole piece is attached to the card front using dimensionals.
To decorate the inside of the card I attached a narrow strip of the Falling in Love Designer Series paper across the bottom of Whisper White card and wrapped the top of the designer series paper using the Very Vanilla 1/4″ Satin Ribbon.
I think this is a really pretty card which lends itself to many occasions, which is why I didn’t add a greeting to this card – I will decide when the time comes.
By now you should all have seen the retired list. If there is something on that list that you want or need do not delay in placing your order. Some items have already sold out and I would hate for you to be disappointed. I have been a little sad to see some stamp sets go but I have seen the new catalogue (a demonstrator perk) and I believe that I will find equally awesome replacements.
Bye for now,
Kris

Use this Hostess Code when you place an online order during March and receive a gift from me.
Product Used:
It’s possible some of these links won’t work if the item is on the retired list. If you can’t get a direct link, check out the Retired list at the online store and find it there.


Watercoloured Rose
Before I share my card with you. I just have to tell you that the retired list is out. All of the items on the list will only be available while stocks last. So if you need something, do not wait to order. I suggest that you sit down with your catalogue and go through and put an X on the retiring items, so that you can compare with your wish list. Most items on the retired list will be discounted, so that is a bonus as well. Click on the link below to download your copy of the retired list.
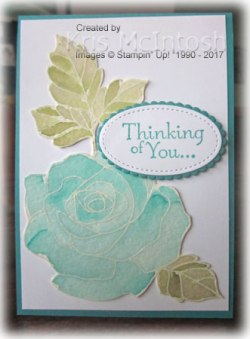
My card is another one I created using Watercolour Paper. This time I stamped the large image from the Rose Wonder stamp set onto Watercolour Paper using Versamark ink. I sprinkled the image with White Embossing Powder and heat set it. I used my Aqua Painter to add enough water across the image so that the water pooled inside the embossed lines. I used my Aqua Painter to pick up Bermuda Bay ink from inside the lid and colour the rose and Old Olive ink to colour the leaves. I let the image dry and then cut it out.
I attached the image to Whisper White card and then scored and folded Bermuda Bay card. I inked part of the stamp from the Thoughts and Prayers stamp set onto Whisper White card using Bermuda Bay ink and cut out the greeting using an oval from the Stitched Shapes Framelits Dies. I attached the greeting to a Bermuda Bay scalloped oval cut using the Layering Ovals Framelits Dies and then the card front using dimensionals.
 To decorate the inside of the card I stamped the three leaf part of the large image I used on the front of the card onto Watercolour Paper using Versamark ink. I sprinkled the stamped image with White Embossing Powder and heat set it. I coloured the image in the same manner as the image on the front of the card, waited for it to dry, and cut it out. The leaves are attached to the lower left hand corner of Whisper White card.
I really love this card, the Rose image is so beautiful, I don’t know why I haven’t used this one much. What about you, do you like it?
Bye for now,
Kris

Use this Hostess Code when placing an order online during April and receive a gift from me.
Product Used:


Floral Sketch

This is another card I made using the sketch that Freshly Made provided for a challenge recently. I applied one strip of Floral Boutique Washi Tape across Whisper White card. I stamped the border image from the Floral Phrases stamp set below the Washi Tape using Night of Navy ink. I added another row of Washi Tape below the stamped border. The Whisper White card is attached to scored and folded Night of Navy card. I cut a circle from Whisper White card using a Layering Circle Framelit Die and embossed the circle using the Softly Falling Embossing Folder. 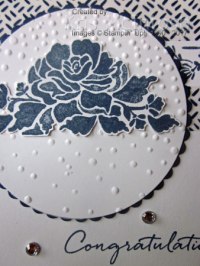 I cut a scalloped circle from Night of Navy card and attached the embossed Whisper White circle before attaching to the card front. I stamped the flower from the Floral Phrases stamp set onto scrap Whisper White card using Night of Navy ink, cut it out and attached it to the embossed circle. I stamped the greeting from the Floral Phrases stamp set below the circle using Night of Navy ink.
 Lastly I added three large Basic Rhinestones.
(I wasn’t planning on adding the rhinestones but a little ink spot changed my mind. Love how you can mask an error by being creative don’t you.)
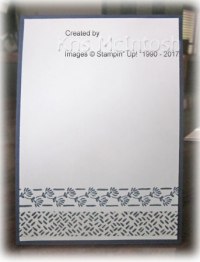
To decorate the inside of the card I applied one strip of Floral Boutique Washi Tape across the bottom of Whisper White card. I stamped the floral border image from the Floral Phrases stamp set just above the Washi Tape using Night of Navy ink. I just love the Floral Phrases Product Suite – it’s just so classy and adds so much style to any card you make using it. Don’t you think?
Bye for now,
Kris

Use this Hostess Code when placing an online order during April and receive a gift from me.
Product Used:







