Happy Birthday Ron

Today my husband celebrates his 60th birthday. How time flies!
Anyway a special birthday needs a special card, so I set about creating one. I stamped the balloons from the Sketched Birthday stamp set onto Very Vanilla card using Bermuda Bay, Smoky Slate and Tangerine Tango ink. I stamped “make a wish” from the Perfect Pennants stamp set next to the balloons using Bermuda Bay ink. I punched the 10cm edge of Smoky Slate card using the Scallop Edge Border Punch and then embossed it using the Argyle Embossing Folder.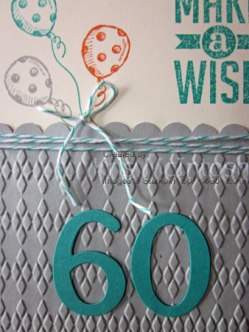 I wrapped the top of the card with Bermuda Bay Baker’s Twine and attached it to the stamped Very Vanilla card. The whole piece is attached to scored and folded Bermuda Bay card. I tied a bow in a length of the Bermuda Bay Baker’s Twine and attached it to the balloon strings using a Glue Dot.
 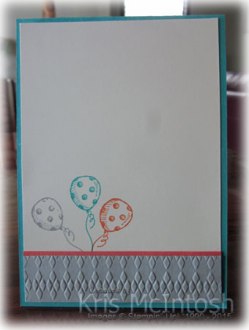 I cut the numbers from Bermuda Bay card using the retired Typeset Alphabet Dies and attached them to the embossed Smoky Slate card.
Inside I stamped the balloons once more and attached more embossed Smoky Slate card. I also added a strip of Tangerine Tango card to “liven” it up a bit.
I’d really love to hear what you think of this card, Ron loved it.
Bye for now,
Kris
Product Used:


Happy Birthday Ava
My youngest granddaughter Ava celebrated her 5th birthday with a morning tea on Good Friday, although her birthday was actually earlier in the week.
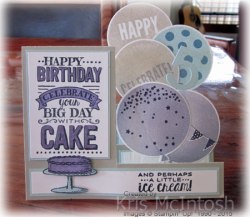 I created a Side Step card following the instructions on Splitcoast Stampers. I used Sahara Sand card for the base and added layers of Soft Sky and Whisper White. I stamped the greeting from the Big Day stamp set (Sale-A-Bration stamp set) onto Whisper White card using Memento Tuxedo Black ink.
 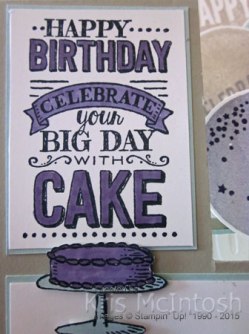 I coloured parts of the image using my Wisteria Wonder Blendibilities (also sadly unavailable). I stamped the cake from the same stamp set using Memento Tuxedo Black ink and this image is coloured using Wisteria Wonder and Soft Sky Blendibilities. After colouring the image I cut it out and added it to the card front using dimensionals. I used the Celebrate Today stamp set to create five balloons using Crumb Cake, Wisteria Wonder and Soft Sky ink. The additional layers were added using Island Indigo and Elegant Eggplant ink.
 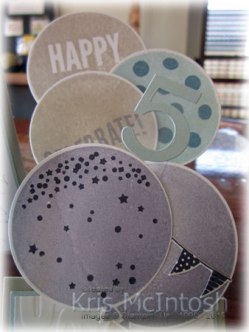 I used the matching Balloon Framelits Dies to cut out the balloons and the banner. I also cut a No. 5 from Soft Sky card using the Typeset Alphabet Dies (retired), attached it to Window Sheet and then added it between the balloons. I love creating cards that are slightly different for my grandchildren.
To house her present I re purposed a gift bag I had in my stash. I added a A4 sheet of Whisper White to Pretty in Pink card and attached it to the front of the bag (which also covered the shop logo). Once again I used the Celebrate Today stamp set to create my five balloons using Crumb Cake, Early Expresso, Wisteria Wonder and Elegant Eggplant inks.. I attached Linen Thread to the ends of the balloon and used the letter “R” to anchor the other end. I cut the letters for “happy birthday” from Wisteria Wonder using the retired Typeset Alphabet Dies.  I think the card and gift bag turned out so cute. I know that Ava thought so, what do you think?
Bye for now,
Kris
Product Used:


Guess what the Easter Bunny left
Happy Easter to each and every one of you. Hope you are having a lovely long weekend with your family and friends. I will be seeing my girls and grandchildren later today to give them their Easter gifts.
 I know they get lots of chocolate from the Easter Bunny and other family members but it is Easter, and you do need chocolate, right? Anyway I used the Berry Basket Die to create my baskets, after seeing something similar on Pinterest. I used the Kraft Cardstock that is now available in the catalogue and boy are they fantastic. 12 x12″ and quite heavy, so perfect for a basket that has to carry a little weight. I stamped the Woodgrain Background onto the basket pieces using Crumb Cake ink before assembling. While they look complicated, they are really quite easy to put together. The bows are made using the Bow Builder Punch and different coloured paper – Pink Pirouette, Melon Mambo and Tempting Turquoise and one has been made using paper from the Moonlight DSP Stack. I used my Fringe Scissors to cut up some of the brown paper Stampin’ Up! supplies me with to put into the bottom of my baskets. Then the fun part, you know when children are involved everything as to be perfectly even, so, you can’t just throw a handful of eggs into the basket, each one has to be counted, so no-one gets more (or less) than anyone else!
If you haven’t used the Berry Basket Die, I hope this inspires you to give it a try. They really are super easy to put together and surprisingly large.
Once again, Happy Easter, and, if you are on the road travelling, please be careful.
Bye for now,
Kris
Product Used:


Happy Easter
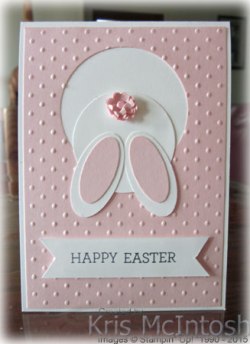
Here is a fun Easter card I created using punch art. You will see many examples using this bunny all over the internet and especially on Pinterest. I punched a 2-1/2″ Circle from Pink Pirouette card and embossed it using the Perfect Polka Dots Embossing Folder. I attached it to scored and folded Whisper White card. I punched a 2″ Circle and two Large Ovals from Whisper White card. I used the retired Small Oval Punch to cut two ovals from Pink Pirouette card. The punched pieces are attached together to create the back of a bunny and attached to the card front over the 2-1/2″ Circle cut out. 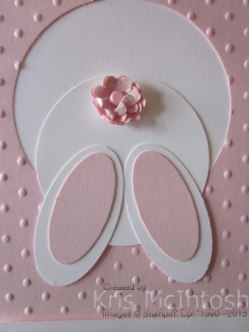 I created my bunny tail by punching two small flowers from Pink Pirouette card using the Boho Blossom Punch. I used a retired pink brad to attach the flowers together and then added them to the card front using a Glue Dot. I stamped “happy easter” using the words from the Crazy About You stamp set onto Whisper White card using Memento Tuxedo Black ink. I cut a “v” in each end and attached it to the card front using dimensionals.
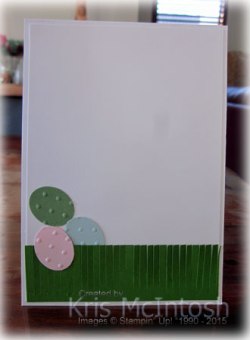 Inside the card I used the Fringe Scissors to cut Wild Wasabi card and attached it to the bottom of Whisper White card. I punched Pink Pirouette, Wild Wasabi and Soft Sky card using the current Small Oval Punch. I embossed the ovals using the Perfect Polka Dots Embossing Folder and attached them so that one egg is under the fringe, one is on top of the fringe and the third one is “stacked” on top of the other two. This panel is attached inside the card.
We made this card in our class at Beachmere this week and some of the cards were created using Soft Sky card for the card front instead of Pink Pirouette card.
I’d love to hear what you think of this one.
Bye for now,
Kris
Product Used:


Guy Greetings and a Challenge
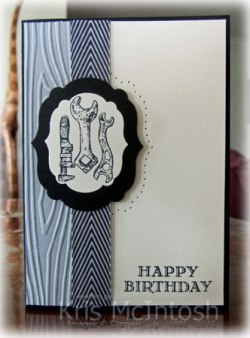
I love the sketch on Technostampers blog this week and used it to make a card for my Beachmere class next week.
I embossed Smoky Slate card using the Woodgrain Embossing Folder and attached it to the left hand side of Very Vanilla card. I wrapped the edge of the embossed card with Basic Black 3/4″ Chevron Ribbon and stamped “Happy Birthday” from the Guy Greetings stampset onto the lower right hand corner of the Very Vanilla card using Memento Tuxedo Black ink.  I stamped the “tool” image from the Guy Greetings stamp set onto Very Vanilla card using Memento Tuxedo Black ink and cut it out using the smallest Labels Collection Framelit Die before attaching it to Basic Black card cut using the second smallest Labels Collection Framelit Die. Using the image panel as a guide for placement, I pierced the shape of a larger Label Collection Framelit using the Festive Paper Piercing Pack onto the Very Vanilla card.
  I attached the Very Vanilla card to scored and folded Basic Black card using dimensionals and then attached the image panel, also using dimensionals.
Inside I kept it simple with a strip of Smoky Slate card embossed with the Woodgrain Embossing Folder and a narrow edge of Basic Black card.
I don’t use my Paper Piercing Packs often enough but I do love the subtle texture that it adds to your cards. Our Paper Piercing Tool is so fine and leaves a really delicate impression, especially when combined with the large Paper Piercing Mat.
I love the way this turned out and I am sure the ladies at Beachmere will too. They have been asking for male cards – but not with a ship or a fish, so this stamp set may be my saviour.
Bye for now,
Kris
Product used:


Adventure Bound
 I needed to make a card for friends who are going on an extended working holiday around Australia. I base my card loosely on the Freshly Made Sketch 178, I forgot to add the banner behind my image panel. Oh well! Anyway I was kind of pleased with the way this card turned out and thought I would share it here.
I stamped “adventure bound” from the Project Life Remember This Stamp set onto the lower edge of Whisper White card using Memento Tuxedo Black ink. 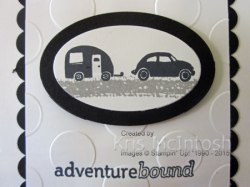 After stamping I embossed Whisper White card using the Large Polka Dot Embossing Folder. I punch one long edge of two narrow pieces of Basic Black card and attached them to each side of the embossed panel. This panel is attached to scored and folded Whisper White card.
  I stamped the long image from the Work of Art Stamp set onto Whisper White card using Smoky Slate ink and stamped the car and caravan images from the Project Life Let’s Get Away stamp set using Memento Tuxedo Black ink. I cut the images using the smallest oval from the Ovals Collection Framelites Dies and attached it to Basic Black card with the second smallest oval. The image panel is attached to the card front using dimensionals.
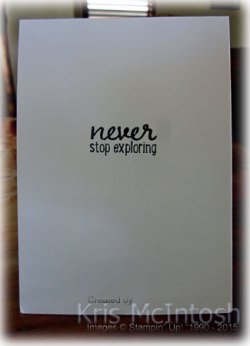
Inside I stamped “never stop exploring” from the Project Life Let’s Get Away stamp set using Memento Tuxedo Black ink.
A very simple card but one that I hope will be well received.
Bye for now,
Kris
Product Used:


Memory Keeping Class
 My next Memory Keeping Class is this coming Friday 27th March. The idea of these classes is for you (and me) to spend time creating our own Memory Albums. I will create a page for you using the gorgeous Love Story Project Life Card Collection – you might like to bring along three 3″ x 4″ photos for your layout. You can choose to create the page as is or use the cards and accessories in any way you wish. Anyone who attends will get to use my stamps, inks and accessories to create their own projects or memory pages. I will also give each attendee a Project Life Pocket Page by Stampin’ Up!
I will be creating the 3″ x 4″ cards for your page in My Digital Studio, which leads me to a very sad place. Unfortunately Stampin’ Up! will be discontinuing My Digital Studio on the 31st May, 2015. While I understand this was a difficult decision for Stampin’ Up! to make, I can’t help but be sad because I love MDS.  However, the good news is that for those of you as well as myself who already have this programme, we can continue to enjoy using it. I must remind you however, that you will not be able to access your downloads or the programme itself after the 31st May, so please make sure that you have backed up your downloads in a safe place. The My Digital Studio website will also no longer be available after the 31st May this year. You will, I am sure, still be able to find loads of information on the internet.
If, like me, there are downloads you still need then you can purchase and download up the 31st May. Your programme can also be used with digital downloads that you can purchase online. So be aware of this end date and make sure you have your back-up done before 31st May. I will be happy to continue to help those of you who have purchase this programme in the future in any way I can.
Space is limited for these classes so please contact me early to reserve your place. More details on my Classes and Workshop Page is you are interested.
Bye for now,
Kris
Product Used:


Casing the Catalogue
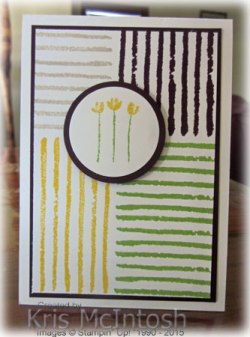 The current Occasions Catalogue has some really gorgeous card examples to give you and me lots of ideas for creating our own cards. I really loved the example on page 18 which uses the line image from the Painted Petals stamp set and thought I would create my own version. It’s really simple to get the look right because there is a “You can make it” box which gives you the information on what has been used to create the card.
I added the line image to Whisper White card using Sahara Sand, Blackberry Bliss, Wild Wasabi and Daffodil Delight. 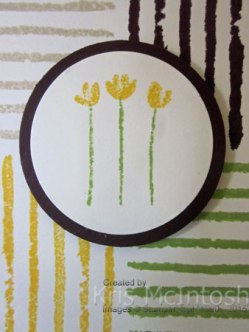 My stamp set is photo-polymer and being able to see through the image made it super simple to place the lines exactly where I wanted them. I attached my stamped card to Blackberry Bliss card and then scored and folded Whisper White. I decided to stamp the small flower image using Wild Wasabi and Daffodil Delight inks onto Whisper White card and then punch it using the 1-3/4″ Circle Punch.
  I added a Blackberry Bliss 2″ Circle behind the stamped circle before attaching it to the card front using dimensionals.
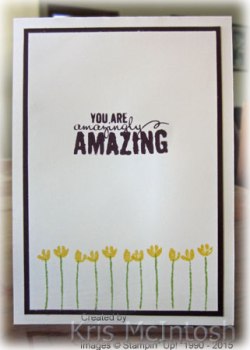
Inside the card, I stamped the same flower image across the bottom of Whisper White card to create a border, cute isn’t it? I stamped the greeting which also comes from the Painted Petals stamp set using Blackberry bliss ink. The stamped Whisper White is attached to Blackberry Bliss card before being attached to the inside of the card.
This card was so easy to make and looks really fantastic. So, if you are like me, and get stuck for an idea, have a look in your catalogue(s) and CASE an example.
Bye for now,
Kris
Product Used:


Let’s add a Bow Tie

Don’t you love that cute Bow Builder Punch in the new Occasions Catalogue. The bows are so easy to make and add that something extra special to your projects. I have seen this punch used to create bow ties for “shirt” cards and thought that I would give it a try. I created this card for a recent class at Beachmere Retirement Resort.
I embossed the top two thirds of Whisper White card using the Perfect Polka Dots Embossing Folder. I stamped the bottom portion of the card using the “happy birthday” stamp from the Sassy Salutations stamp set and Soft Suede ink. I attached the embossed card to scored and folded Crumb Cake card. I cut a square of polka dot designer series paper from the Neutrals Backgrounds Designer Series Paper Stack, cut a slit in the centre of one edge and folded the corners back to create a “shirt collar”. 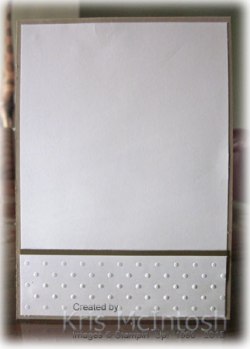 I attached a narrow strip of Soft Suede card to the bottom edge of the designer series paper before attaching it to the card front. I punched the pieces for the bow from the Best Year Ever Designer Series Paper (free during Sale-a-bration) and attached it to the card front using Glue Dots. I added two buttons made using the Simply Pressed Clay and the Buttons and Blossoms Simply Pressed Mold using Tombow Multipurpose Glue. I punched two circles from Soft Suede card using the Owl Builder Punch and added them to the centre of each button.
Inside the card I added a strip of Soft Suede card to one long edge of Whisper White card embossed using the Perfect Polka Dot Embossing Folder. The embossed panel is attached to the lower edge of Whisper White card.
Simple, but so cute. Can you image the possibilities?
Bye for now,
Kris
Product Used:


Look Who’s Turning Seven
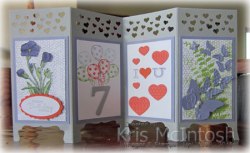
My granddaughter Elyssa celebrates her seventh birthday today. It seems to me that birthdays for my grandchildren are rolling around very fast (does that mean I am getting old?, maybe). We celebrated her birthday yesterday and although it wasn’t a party with her cousins, Mum, Aunty, Great Grandparents and myself and Ron, it seemed like one.
Life seems to have been very busy lately and I hadn’t made her a card, so a couple of days ago I got busy creating a Screen Divider card. This was such fun to make and the Screen is really quite easy to put together.  I followed the instructions I found on Splitcoast Stamper but I cut my Smoky Slate card 11″ x 14.8cm (I know, strange, but it seems logical to me to use imperial and metric measurements in the same card) and scored according to the directions on Splitcoast. I punched along the top of the Smoky Slate card using the Confetti Hearts Border Punch and along the bottom to create the “legs” using the Decorative Label Punch. I created four image panels using Whisper White card which I attached to Wisteria Wonder card.
 For the front panel, I stamped Whisper White card with the hexagon image from the Butterfly Basics stamp set using Smoky Slate ink. The stamped Whisper White card is attached to Wisteria Wonder card. I stamped the flower image from the Butterfly Basics stamp set onto Whisper White card using Memento Tuxedo Black ink. The image is coloured using Wisteria Wonder, Wild Wasabi and Daffodil Delight Blendibilities and then cut out. (Unfortunately due to a manufacturing issue you cannot currently order Blendibilities, I will advise as soon as these are once more available.) The flower is attached to the stamped Whisper White card. I stamped “happy birthday wishes” from the Petite Pairs stamp set onto Whisper White card using Smoky Slate ink and punched it using the Large Oval Punch.
  I attached the greeting to a Calypso Coral Scalloped Oval and then to the panel over the bottom of the flower.
I masked the bottom of the second Whisper White panel and stamped the balloon image from the Sketched Birthday stamp set onto Whisper White card using Smoky Slate, Wild Wasabi and Wisteria Wonder ink. I stamped the balloon onto scrap Whisper White card using Calypso Coral ink and cut them out. I attached the Calypso Coral balloons over the stamped balloons, one using Glue Dots and the other a dimensional. I cut a number 7 from Smoky Slate card using the Typeset Alphabet Dies (retired) and attached it below the balloon strings.
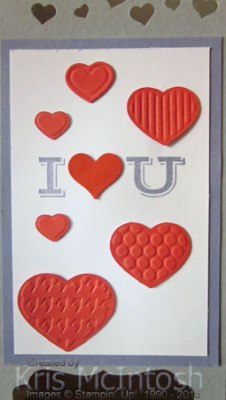
 For the third panel, I stamped the “I heart you” image from the Pictogram Punches stamp set using Wisteria Wonder ink. I punched a heart from Calypso Coral card using the heart punch from the Itty Bitty Accents Punch Pack and attached it over the stamped heart. I cut Calypso Coral card using the Fashionable Hearts Embosslits Die twice and attached the hearts around the stamped greeting (seven hearts).
For the fourth panel, I stamped the Whisper White card all over using the hexagon image from the Butterfly Basics stamp set using Smoky Slate ink. 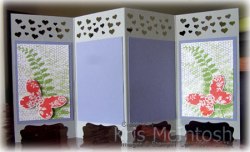 I stamped the leaf image from Butterfly Basics using Wild Wasabi ink several times over the panel. I used the Beautiful Wings Embosslit Die to cut seven butterflies from Wisteria Wonder card and attached them over the stamped panel. I added Basic Pearls to the centre of each Butterfly.
I decorated the four panels on the reverse side of card as well. I created two stamped panels for each end by stamping the hexagon image from the Butterfly Basics stamp set onto the Whisper White card using Smoky Slate ink. 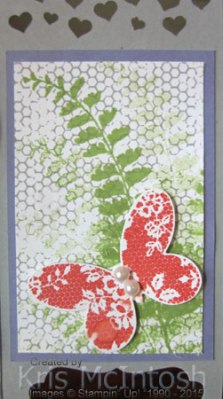 I stamped the leaf image over the top several times using Wild Wasabi ink. I stamped the butterfly from the Butterfly Basics stamp set onto Whisper White card twice using Calypso Coral ink and cut them out using the matching Butterflies Thinlets Die. I wrote my message on Whisper White card to add to the two central panels with the addition of a Calypso Coral butterfly on each panel. I added two large Basic Pearls to the centre of each butterfly.
I absolutely adore this card. I love that each of the panels has the number seven hidden in them and I know that Elyssa loved that too. If you haven’t tried one of these card, then you must, they are so much fun and the best part is that they stand beautifully so that the recipient can enjoy all your hard work.
Bye for now,
Kris
Product Used:







