Happy Birthday to my Hubby
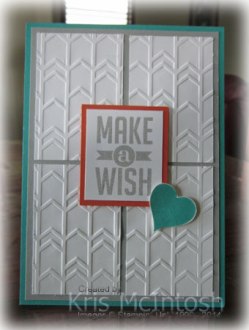 Today is my husband’s birthday and I wanted to share the card I made for him with you. This card is made using another sketch from SUDSOL (online demonstrator only group). Sometimes I need these sketches to kick start my creativity, how about you?
Anyway, I added Sahara Sand card to scored and folded Bermuda Bay card and then attached Whisper White card, embossed using the Arrow Embossing folder and cut into four. I stamped the greeting from the Perfect Pennants stamp set onto Whisper White card using Sahara Sand ink, attached it to Tangerine Tango card and then the card front using dimensionals. 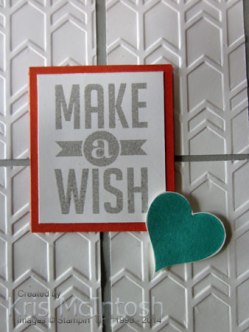 I stamped the heart from the Perfect Pennants stamp set onto Whisper White card using Bermuda Bay ink, cut it out and attached it to the card front also using dimensionals.
Inside the card I stamped “happy birthday” from the Sassy Salutations stamp set onto Whisper White card using Sahara Sand ink. I stamped the polka dot strip from the Tape It stamp set onto the bottom left hand corner using Bermuda Bay ink. 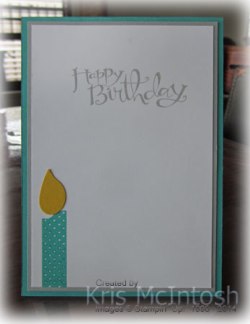 I punched a wing from Daffodil Delight card using the Bird Builder Punch to create a “flame” for my candle. I attached the Whisper White card to Sahara Sand card before attaching inside the Bermuda Bay card.
I’d love to hear what you think.
Bye for now,
Kris
Product Used:


Congratulations
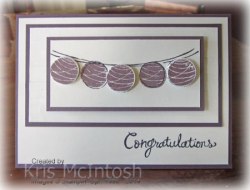 Here is another card I made using the same sketch I used for the card in my last post. I just turned the sketch on it’s side. This time I used the Happy Congratulations stamp set which is in the Occasions Catalogue (I might add this is the first time this stamp set has seen ink).
I stamped the greeting from the Happy Congratulations stamp set onto Whisper White using Elegant Eggplant ink and attached it to scored and folded Perfect Plum card. I embossed Whisper White card using the Stripes Embossing Folder, attached it to Perfect Plum card and then to the card front. I stamped the banner stamp using Elegant Eggplant ink and filled in two of the circles using the bauble stamp and Perfect Plum ink. 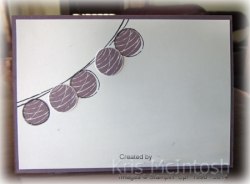 I stamped three more baubles onto scrap card using Perfect Plum ink and punched them out using the 3/4″ Circle Punch. I attached the punched baubles using dimensionals. The banner piece is attached to Perfect Plum card and then the card front using dimensionals.
Inside the card I stamped the banner using the same inks. This time I stamped three baubles and attached two punched baubles using Glue Dots.
I really love this card and will be sharing it at my Beachmere Class next week.
Bye for now,
Kris
Product Used:


Happy Watercolour
 I truly love the look of watercolouring but as most of my friends know I am not one to colour in if I can help it. Which is why I love the Happy Watercolour stamp set. I can get the look of colouring in without stressing over it.
I used a sketch at an online demonstrator group to create this card. I stamped the birthday greeting from the Express Yourself stamp set onto Whisper White card using Strawberry Slush ink. I attached the stamped card to scored and folded Sahara Sand card. I embossed Strawberry Slush card using the Arrow Embossing Folder, attached it to Sahara Sand card and then the card front.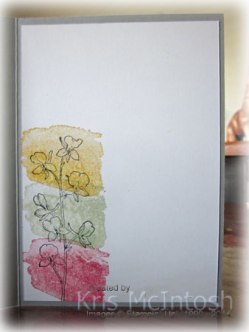 I stamped the large background stamp from the Happy Watercolour stamp set onto Whisper White card using Strawberry Slush, Pistachio Pudding and Crushed Curry ink. I did stamp each colour onto scrap paper first to give the image a more translucent look. The flower image from the same stamp set is stamped over the top using Stazon Jet Black ink. The stamped piece is attached to Sahara Sand card and then the card front using dimensionals. I also added three small Basic Rhinestones next to the greeting to complete the sketch.
To decorate the inside of the card I once again stamped the background image and flower. I think this is so pretty, what do your think?
Bye for now,
Kris
Product Used:


Another CASE
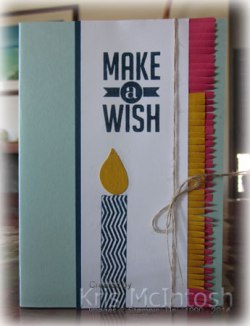 This card was inspired by one that was shared in our Stampin’ Up! Demonstrator Magazine. I absolutely loved the colours but changed the greeting and added the candle to create a birthday card.
I stamped the greeting from the Perfect Pennants stamp set onto Whisper White card using Midnight Muse ink. I also stamped the chevron image from the Tape It stamp set using the same ink. I punched Crushed Curry card using the Bird Builder Punch to create the “flame” for my candle. 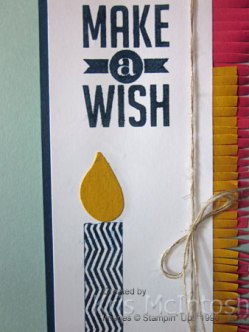 I wrapped the Whisper White card with Linen Thread and tied a bow. I attached Midnight Muse card to the back of the left hand edge of the stamped card. I used the Fringe Scissors on a piece of Strawberry Slush and Crushed Curry card before attached them to the back of the right hand side. This piece is then attached to scored and folded Pool Party Card.
 I decorated the inside of the card by embossing a strip of Whisper White card using the Perfect Polka Dots Embossing Folder. I attached a narrow strip of Midnight Muse to the bottom of the embossed card and a narrow strip of Crushed Curry card to the top of the embossed card. To finish if off I attached a strip of Strawberry Slush card cut with the Fringe Scissors.
I think this is a fantastic card. It’s also a great layout – one that could be used over and over again to create many different styles of card. I’d love to hear what you think?
Bye for now,
Kris
Product Used:


MDS Monday 59
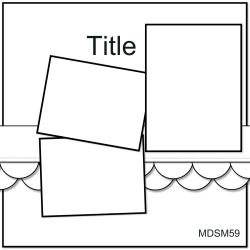
I am almost out of time to post for this challenge. It was another great sketch and gave me an opportunity to show off some photos of my husband and his friends having a “jam session” while we were away in our caravan recently.
Here is the sketch:
Here is my page.
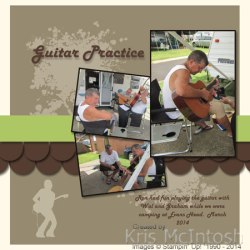
I used the square punch to create my background layer and also the green strip across the page. I also used the circle punch to create the layered trim. To add some interest to the background I used the Extreme Elements Stamp Brush Set and also the Extreme Guitar Stamp Brush Set. These elements were coloured Very Vanilla and the opacity reduced to around 40%. The colours on the layout were all added using the colour picker tool to select them from my photos. I really am loving using My Digital Studio to create my scrapbook pages.
Bye for now,
Kris
Product Used:


Chocolate Holder Gift For You
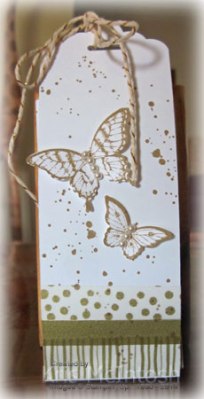 I saw a little treat holder on Pinterest and it made me think about doing something similar. So I searched around for some appropriate chocolate and finally bought chocolates from Aldi. You get five little chocolate bars in a pack and they are the perfect size for this project.
 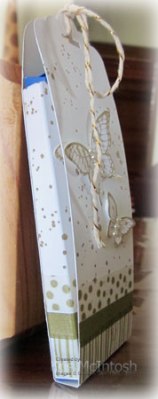 Since I was really happy with the design and how gorgeous it looks, I decided to make a PDF to share it with you. I won’t bore you with the details here, just download the PDF to get the dimensions.
But I will tell you I used the adorable Watercolour Washi Tape and the Gold Baker’s Twine from the Occasions Catalogue. I have found that if you use Baked Brown Sugar with this type of gold then you have a perfect match. I used the splatter stamp from the Gorgeous Grunge stamp set and the two butterflies can be found in the Papillon Potpourri stamp set.
Of course this treat holder also gave me another excuse to use the Scallop Tag Topper Punch. What a fantastic punch it is too – I love it.
 I’d love to know what you think, and to see what you make using the instructions. All of the supplies needed to recreate this treat holder can be purchased at my online store.
Bye for now,
Kris
Product Used:


Happy Birthday Ava
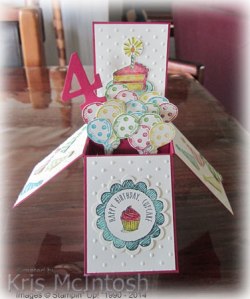 I love the cards in a box that are all over the internet and especially on Pinterest. They are so cute and by following this great video tutorial by Tanya Bell mine will fit into a standard C6 envelope.
I made this particular card for my granddaughter Ava who celebrates her fourth birthday today.
I used Raspberry Ripple card to construct my box and added Birthday Basics Designer Series Paper to Basic Gray card and then to the outside bottom sections of the box. I embossed Very Vanilla card using the Perfect Polka Dots Embossing Folder to decorate the fold out panels and also the back panel of the box. 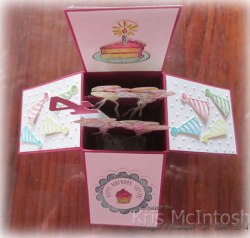 I used the images from the Sketched Birthday stamp set to decorate my box. Each of the images is stamped either in Stazon Jet Black ink and coloured using a Blender Pen and the ink in the lid of the ink pad or stamped using Raspberry Ripple, Gumball Green, Bermuda Bay or Summer Starfruit ink.
 Most of the images were cut out by hand but the greeting on the front of the box was punched using the 1-3/4″ Scallop Circle Punch. I used a piece of Window Sheet to attach the number 4, which is cut from Raspberry Ripple card using the Typeset Alphabet Bigz Die.
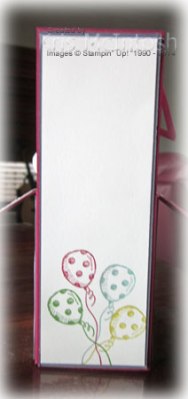
I added a piece of Very Vanilla card which I stamped with the balloon image, one in each of the four colours to Basic Gray card and then the back panel. This will give me room to write my message to Ava.
I know that Ava is going to love the fact that it is a “pop up” style card. If you haven’t created one of these cards yet, then I suggest that you do, they are so much fun and a really quite easy once you know how.
Of course I couldn’t just stop at a card, I had to make a gift bag as well. I used a pre-purchase “white” bag and added my own decoration. Once again I embossed Very Vanilla card using the Perfect Polka Dots Embossing Folder. I added strips of Raspberry Ripple card which I punched using the Scallop Trim Border Punch. The hats are made using the Pennant Parade stamp set and the four colours previously used. I punched the hats using the Petite Pennants Builder Punch and the pom poms were punched using the circle punch from the Itty Bitty Shapes Punch Pack. The letters for her name were cut from Raspberry Ripple card using the Typeset Alphabet Bigz Die. I stamped and hand cut the balloons.
I think they make a great gift set – what about you?
All of the supplies used to construct this card can be purchased at my online store.
Bye for now,
Kris
Product Used:


Happy Day Box & Cards
Here is the bonus project for the March edition of Craft Project Central. This gorgeous project has been created by Holly Krautkremer.
 This pretty fun box and card set is so bright and cheery. It is easy to assemble and it would make the perfect gift for a friend, family, co-worker or neighbor. This project would be great for a class too show casing the Happy Day Stamp Set and Eastern Elegance Designer Series Paper. It will be sure to brighten anyone’s day!
Bonus projects can be obtained by subscribing to two or more months in a row, putting the Craft Project Central badge on their blog, or by referring a friend and once they subscribe, letting Craft Project Central know.
I am sure that you have already subscribed to this fantastic month of projects but if you haven’t you may still do so. If you qualify for the bonus project you will receive the instructions for 11 tutorials for the fantastic price of $10.00.
Bye for now,
Kris
Retro Fresh Washi
 I saw a sketch at Sudsol a few weeks ago which I really loved, but unfortunately didn’t have time to use during the challenge. However, I finally had a chance to use it and I am happy to say I still love it.
I added a strip of each of the three designs of the Retro Fresh Washi Tape across Very Vanilla card and then attached it to scored and folded Coastal Cabana card. 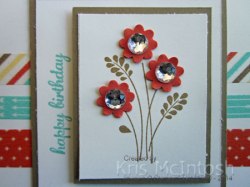 I stamped “happy birthday” from the Express Yourself stamp set down the left hand side of another piece of Very Vanilla which I attached to Baked Brown Sugar card and then the card front. I stamped the flower image from the Embellished Events stamp set onto Very Vanilla card using Baked Brown Sugar ink. I attached the stamped panel to a layer of Baked Brown Sugar card and then the card front using dimensionals.
 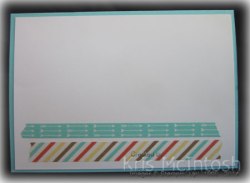 I punched three small flowers from Tangerine Tango card using the Boho Blossoms Punch and attached them over the stamped flowers using Glue Dots. Lastly I added a Large Rhinestone Basic Jewel to the centre of each flower. Inside the card I added two strips of the Retro Fresh Washi Tape to Very Vanilla card.
Such a simple card to put together but I think it packs a lot of power.
If you love this card as much as I do you can purchase all of the supplies needed to complete this card at my online store.
I’d love to hear what you think.
Bye for now,
Kris
Woo-Hoo Owl Card and Gift Box Set
This gorgeous project (which I know my grandchildren will love) is designed by Tanya Bell (another Aussie – Woohoo!) for the March edition of Craft Project Central.
 Tanya has some amazing projects on her blog, so please take a visit and don’t forget to let her know home much you love them.
This sweet little owl will warm the heart of any owl lover. The coordinating card and gift box are both easy to make and feature some of the lovely Framelits sets from Stampin’ up!
You need to subscribe to the March edition of Craft Project Central to get the instructions for this great project. Only $10.00 for ten projects – amazing!
Bye for now,







