Shaded Birthday

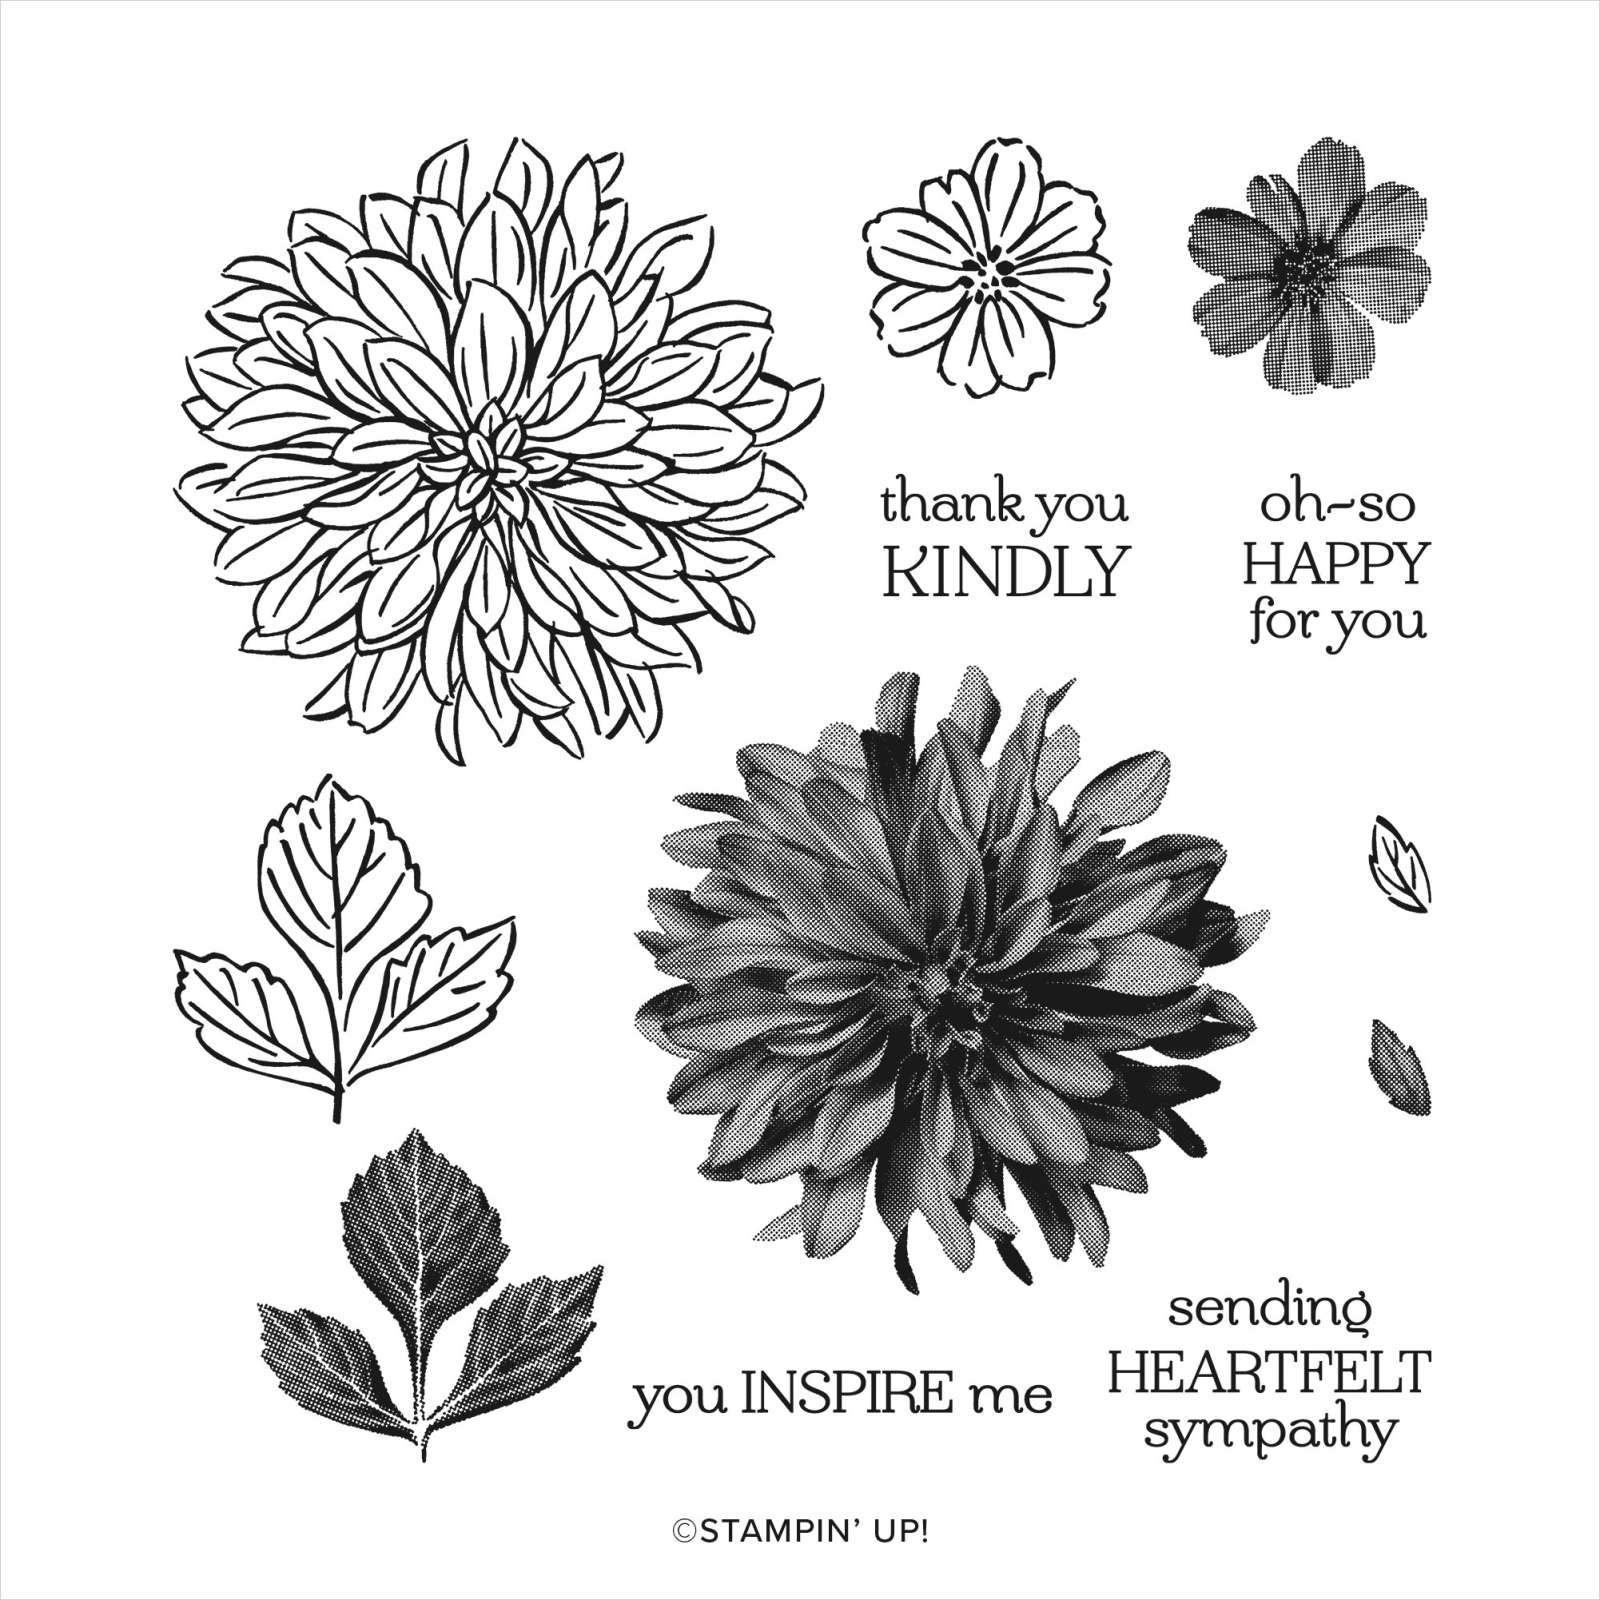
I am sharing a card with you today using a stamp set that I didn’t even see in the Annual Catalogue until the Sale-A-Bration catalogue arrived. You see, you can earn some dies for free during Sale-a-bration that co-ordinate with this lovely stamp set! I attached a piece of Fresh Freesia 2021-2023 In-Colour Designer Series Paper to scored and folded Thick Basic White Card. I cut Basic White card using one of the rectangle dies from the Scalloped Contour Dies and stamped “happy birthday” from the Shaded Summer stamp set onto the lower left hand corner using Soft Succulent ink.
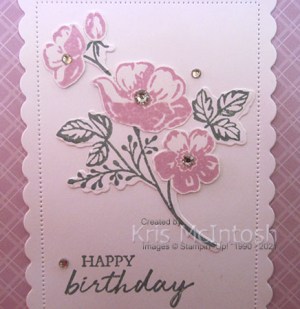
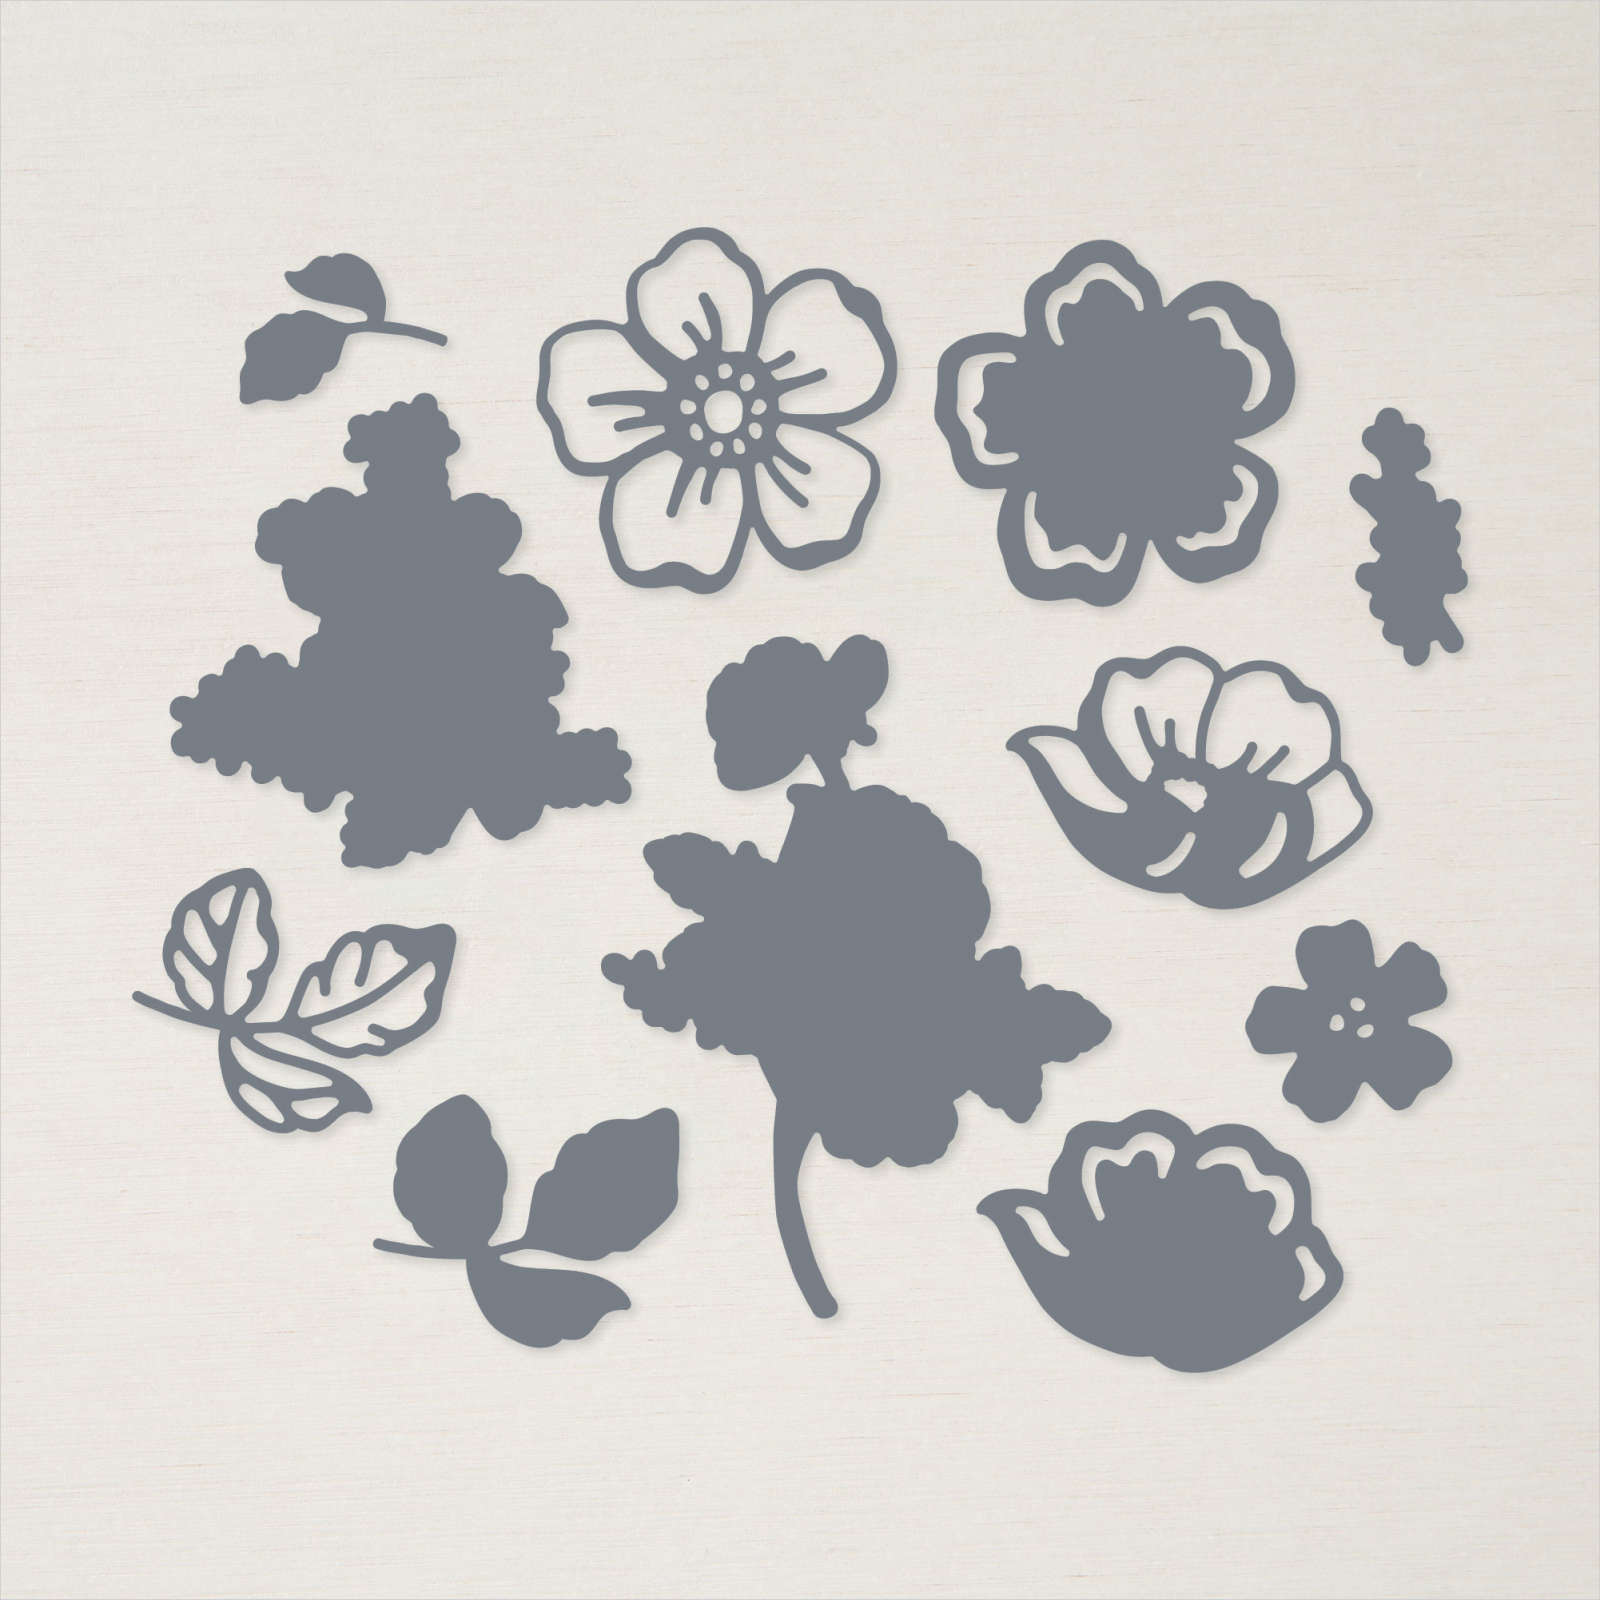
I attached the stamped die cut to the centre of the Designer Series Paper panel. I stamped the floral image from the Shaded Summer stamp set onto Basic White card using Soft Succulent ink and used the co-ordinating Summer Shadows Die to cut it out. I stamped the same image onto scrap Basic White card using Fresh Freesia ink and cut out the flowers only.
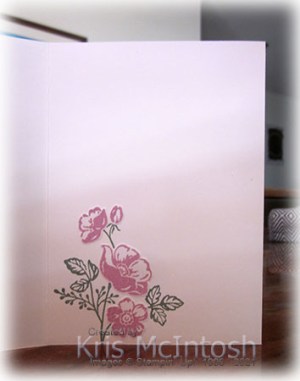
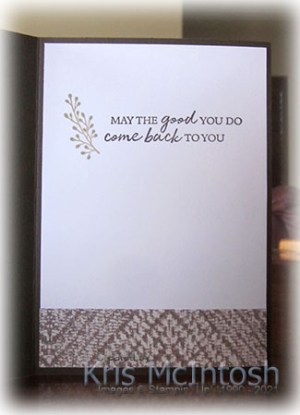
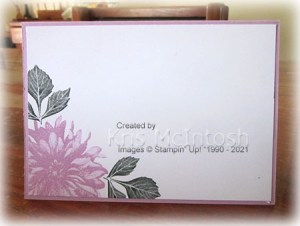
I attached each of the flowers over the co-ordinating flower on the image stamped in Soft Succulent ink. I did trim away some of the Soft Succulent die cut to make the flowers stand out better before attaching the whole piece to the stamped Basic White rectangle. Just to add a little bling, I added some Basic Rhinestones to and around the floral image. To decorate the inside of the card, I stamped the same floral image from the Shaded Summer stamp set onto the lower left hand corner of the inside of the card using Soft Succulent ink. I also stamped the image onto scrap Basic White card using Fresh Freesia ink, cut out the flowers and attached them over the Soft Succulent stamped image. This is such a pretty stamp set with lots of love sentiments, made even better by being able to earn the co-ordinating dies for free. I hope I have inspired you to take another look at this stamp set when you are putting together your Wish List.
Bye for now,
Kris
Product Used:
Happy Father’s Day

Hope that all the Dad’s and Grandfather’s had a wonderful day yesterday. I thought I would share the card I made for my Dad with you today. I embossed Basic White card using the Painted Texture 3D Embossing Folder. I attached a piece of In Good Taste Designer Series Paper which I cut on an angle across the bottom of the embossed card. I cut Night of Navy card using the “rope” die from the Smooth Sailing Dies and attached it to the top edge of the Designer Series Paper. The Basic White panel is attached to scored and folded Night of Navy card. I cut Basic White card using the Layering Circle Dies and masked a large section. I used a Blending Brush to add Night of Navy ink to the lower section of the circle. I removed the masks and masked the coloured section of the circle before adding Coastal Cabana ink using a Blending Brush. I attached the Basic White circle to a Night of Navy scalloped circle cut using the Layering Circle Dies.
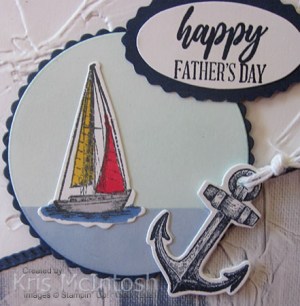
The circle panel is attached to the card front using dimensionals. I stamped the small sailing ship from the Sailing Home stamp set onto Basic White card using Memento Tuxedo Black ink. I stamped the anchor image from the Sailing Home stamp set onto Basic White card using Night of Navy ink. I cut out the images using the co-ordinating Smooth Sailing Die. I coloured the sailing ship using the Light Night of Navy, Light Smoky Slate, Dark Daffodil Delight and Dark Poppy Parade Stampin’ Blends. I attached the sailing ship to the coloured Basic White panel. I tied a length of White Bakers Twine from the Baker’s Twine Essentials Pack through the anchor and attached it to the card front using dimensionals where necessary.
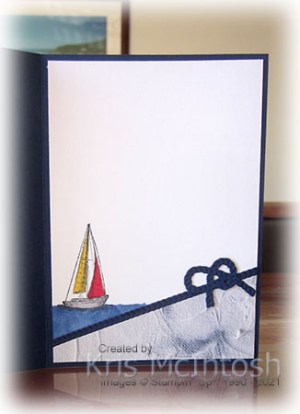
I stamped “happy father’s day” from the A Wish For Everything stamp set onto Basic White card using Night of Navy ink. I punched out the greeting using the Double Oval Punch. The greeting is attached to a Night of Navy scalloped oval punched using the Double Oval Punch. The greeting is attached to the card front using dimensionals where necessary. To decorate the inside of the card, I stamped the small sailing ship onto the lower left hand corner of Basic White card. I coloured the image using the same Stampin’ Blends as the image on the front of the card. I attached the piece of Designer Series Paper I had left after cutting the piece for the front of the card which is also on a diagonal. I cut another “rope” image from Night of Navy card using the Smooth Sailing Die. I also cut the “rope knot” from Night of Navy card using the same dies. I attached the “rope” and then the “knot” across the top of of the Designer Series Paper.
I love the way this card turned out. Although my Dad was not into “sailing ships” he was in the Navy for a long time and he still loves the sea.
Bye for now,
Kris
Product Used:


Scotts Head

The photos on today’s pages were found in my box of photos and go back to November 2018. We stayed a week and caught up with a group of our friends. I attached pieces of the black patterned Pattern Party Designer Series Paper across both Basic White 12″ x 12″ pages. I did cut a “v” in each end of the narrow strips of Designer Series Paper using the Tailored Tag Punch. I attached the photos to the page without adding any cardstock layers.

The title is cut from Basic Black card using the Playful Alphabet Dies. I wanted to add some decoration and decided to add some shells and seaweed images from the Friends are Like Seashells stamp set. I used Blushing Bride, So Saffron, Flirty Flamingo Sahara Sand and Mossy Meadow ink to stamp the images. I decided to fussy cut the images and not use the co-ordinating Dies. I arranged the seashells and seaweed on the bottom corners of both pages.
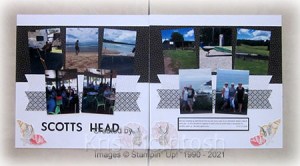
I am happy with the way these pages turned out. I got a lot of photos on the pages because the photos were all 3″ x 4″. Let me know what you think.
Bye for now,
Kris
Product Used:


Shaded Summer Birthday

Today’s card once more uses the Shaded Summer stamp set and Summer Shadow Dies which I featured on this weeks Facebook Live. I used the Textures and Frames stamp set to add So Saffron ink across the Basic White Panel. I stamped happy birthday from the Shaded Summer stamp set before attaching the Basic White panel to Gorgeous Grape card and then scored and folded Pear Pizzazz card. I cut the large more solid flower die from Summer Shadow Dies from Highland Heather and Petal Pink card.

I die cut the large detailed flowers from Gorgeous Grape and Blushing Bride card. I attached the co-ordinating flowers together before attaching them to the lower left hand corner of the Basic White card. I die cut Petal Pink, So Saffron and Highland Heather card using the small solid flower from the Summer Shadow Dies. Each of the flowers is attached to the Basic White card using mini dimensionals.

I die cut the solid leaf from the Summer Shadow Dies from Soft Sea Foam card and the detailed leaf from the same dies from Pear Pizzazz card. I attached the leaves together before attaching the leaf to the card front with the stem underneath the Highland Heather flower. I added Basic Rhinestones to the centres of all of the flowers. To decorate the inside of the card I stamped the greeting from the Peaceful Moments stamp set onto Basic White card using Gorgeous Grape ink. I attached another leaf die cut from Soft Sea Foam and Pear Pizzazz card using the Summer Shadow Dies.
I’ve surprised myself again with this card, it has turned out so much better than I imagined.
Bye for now,
Kris
Product Used:


Thank You

Yesterday in my Facebook Live I shared some cards made using the Shaded Summer stamp set from the Annual Catalogue and the Summer Shadow Dies which are Free with a qualifying order during Sale-A-Bration. For today’s card, I stamped the greeting from the Shaded Summer stamp set onto the lower right hand corner of Basic White card using Early Espresso ink. I embossed the stamped Basic White card using the Tasteful Texture 3D Embossing Folder before attaching a piece of In Good Taste Designer Series paper to the left hand side.

The panel is attached to scored and folded Early Espresso card. I cut a rectangle from Early Espresso card using the Stitched Rectangle Dies and attached it to the card front using dimensionals. I cut a circle from Sahara Sand card and punched and then used the same circle to cut away to top of the circle before embossing the card with the Painted Texture 3D Embossing Folder. I cut a straight edge in the piece of card I cut from the circle and attached it to make a base for my “flower pot”.
I stamped the image from the Shaded Summer stamp set onto Basic White card using Sahara Sand ink. The image is coloured using the Dark Flirty Flamingo, Dark Granny Apple Green and Dark Daffodil Delight Stampin’ Blends. I cut out the image using the co-ordinating Summer Shadow Dies. I attached the floral image to the top of the Sahara Sand “flower pot” before attaching the whole piece to the Early Espresso stitched rectangle. To decorate the inside of the card, I stamped another greeting from the Shaded Summer stamp set onto Basic White card using Early Espresso ink. I stamped the leafy image from the Shaded Summer stamp set beside the greeting using Sahara Sand ink. I used the Dark Granny Apple Green Stampin’ Blend to add a little colour the image. I attached a piece of the same pattern In Good Taste Designer Series Paper across the bottom of the stamped panel.
I have to say that this card turned out way better than I expected it to. I hope you like it too.
Bye for now,
Kris
Product Used:


Season’s Greetings
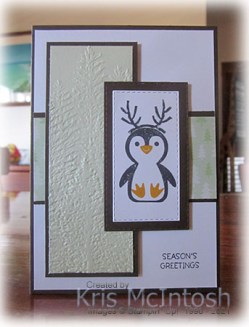
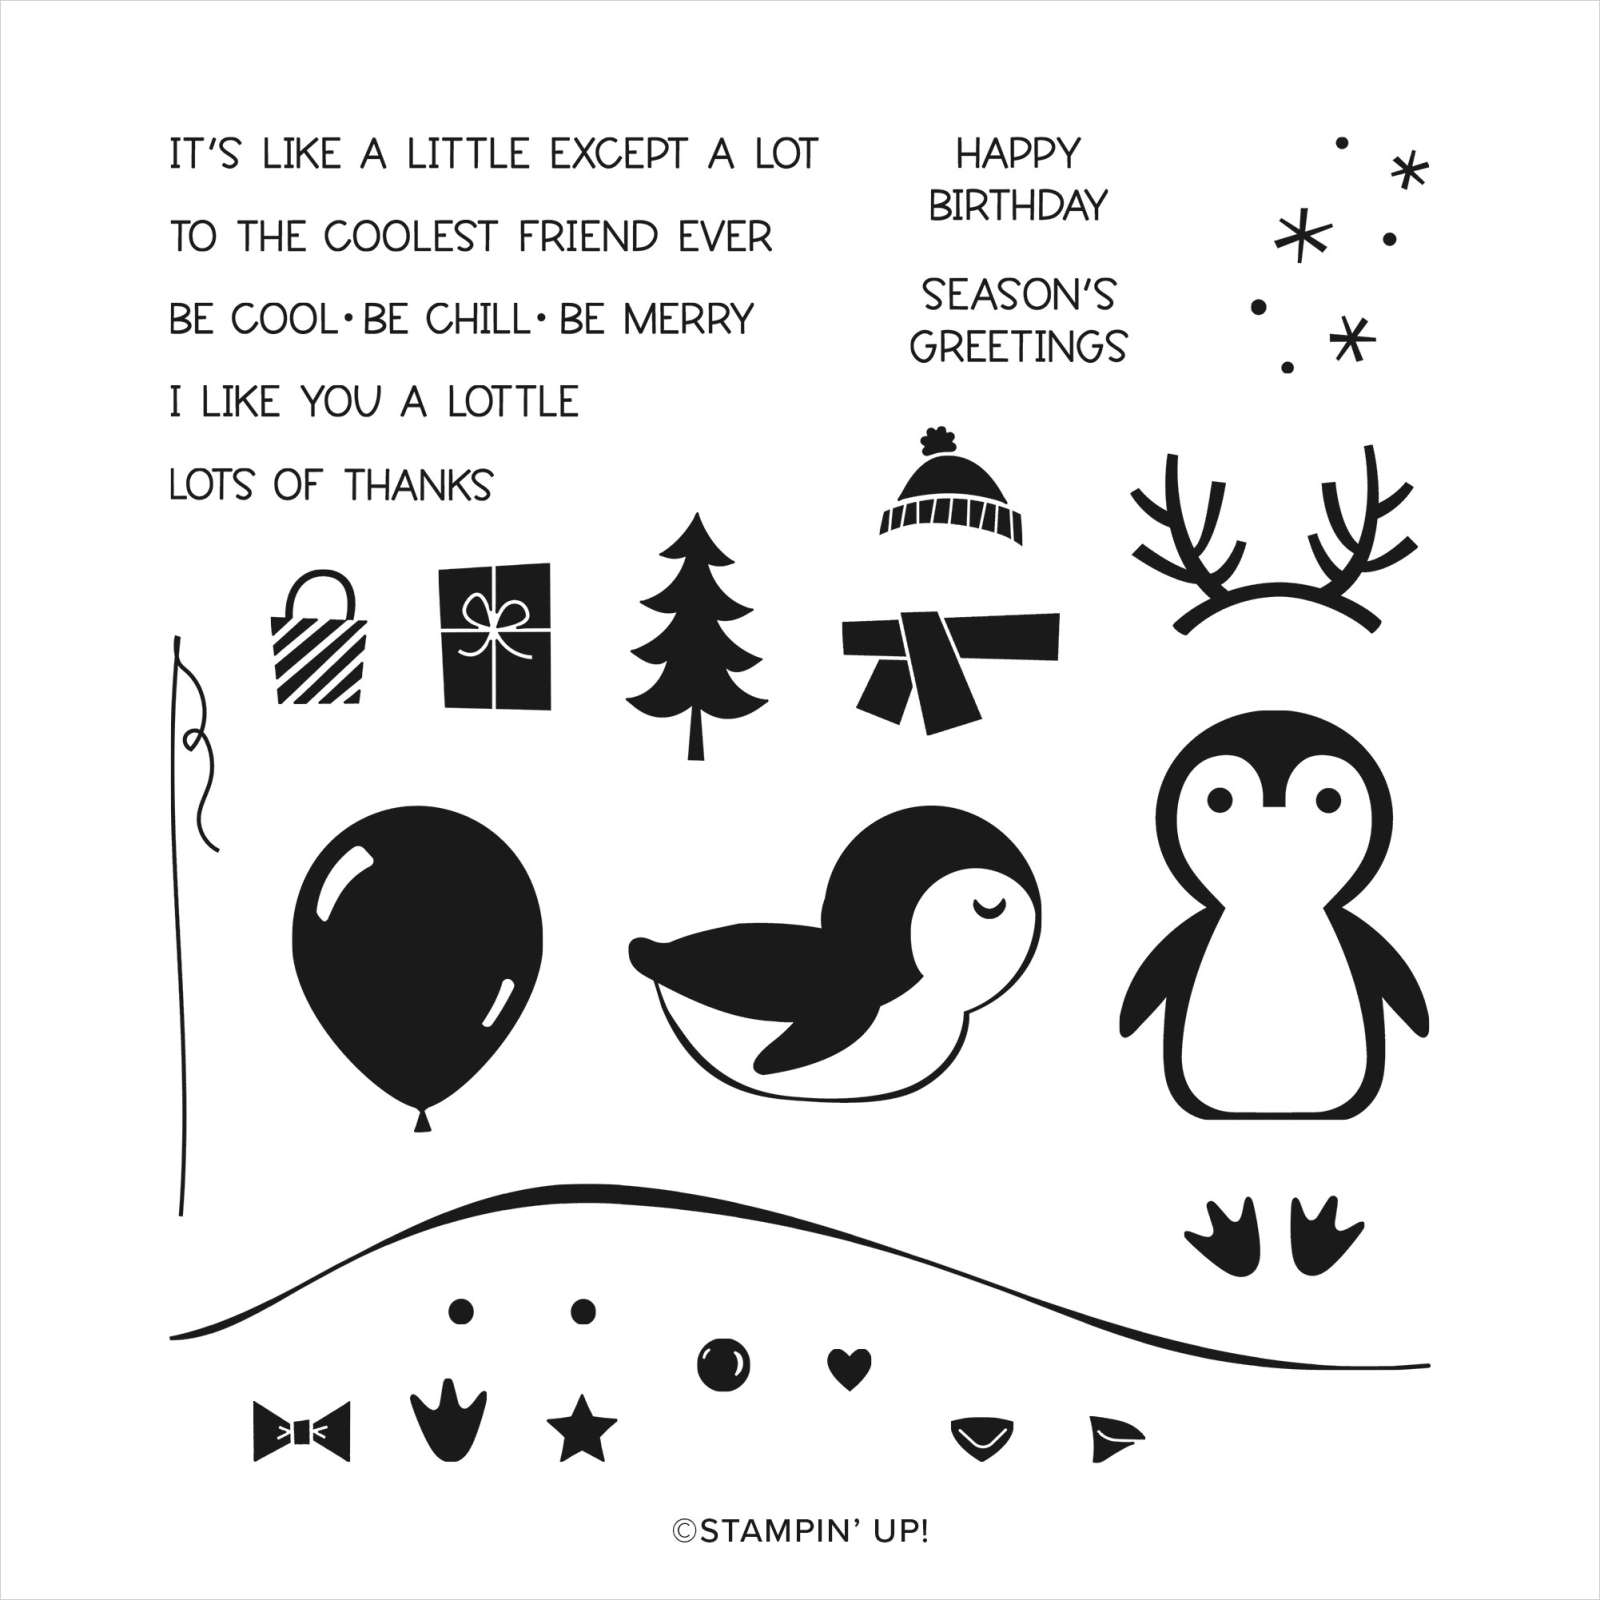
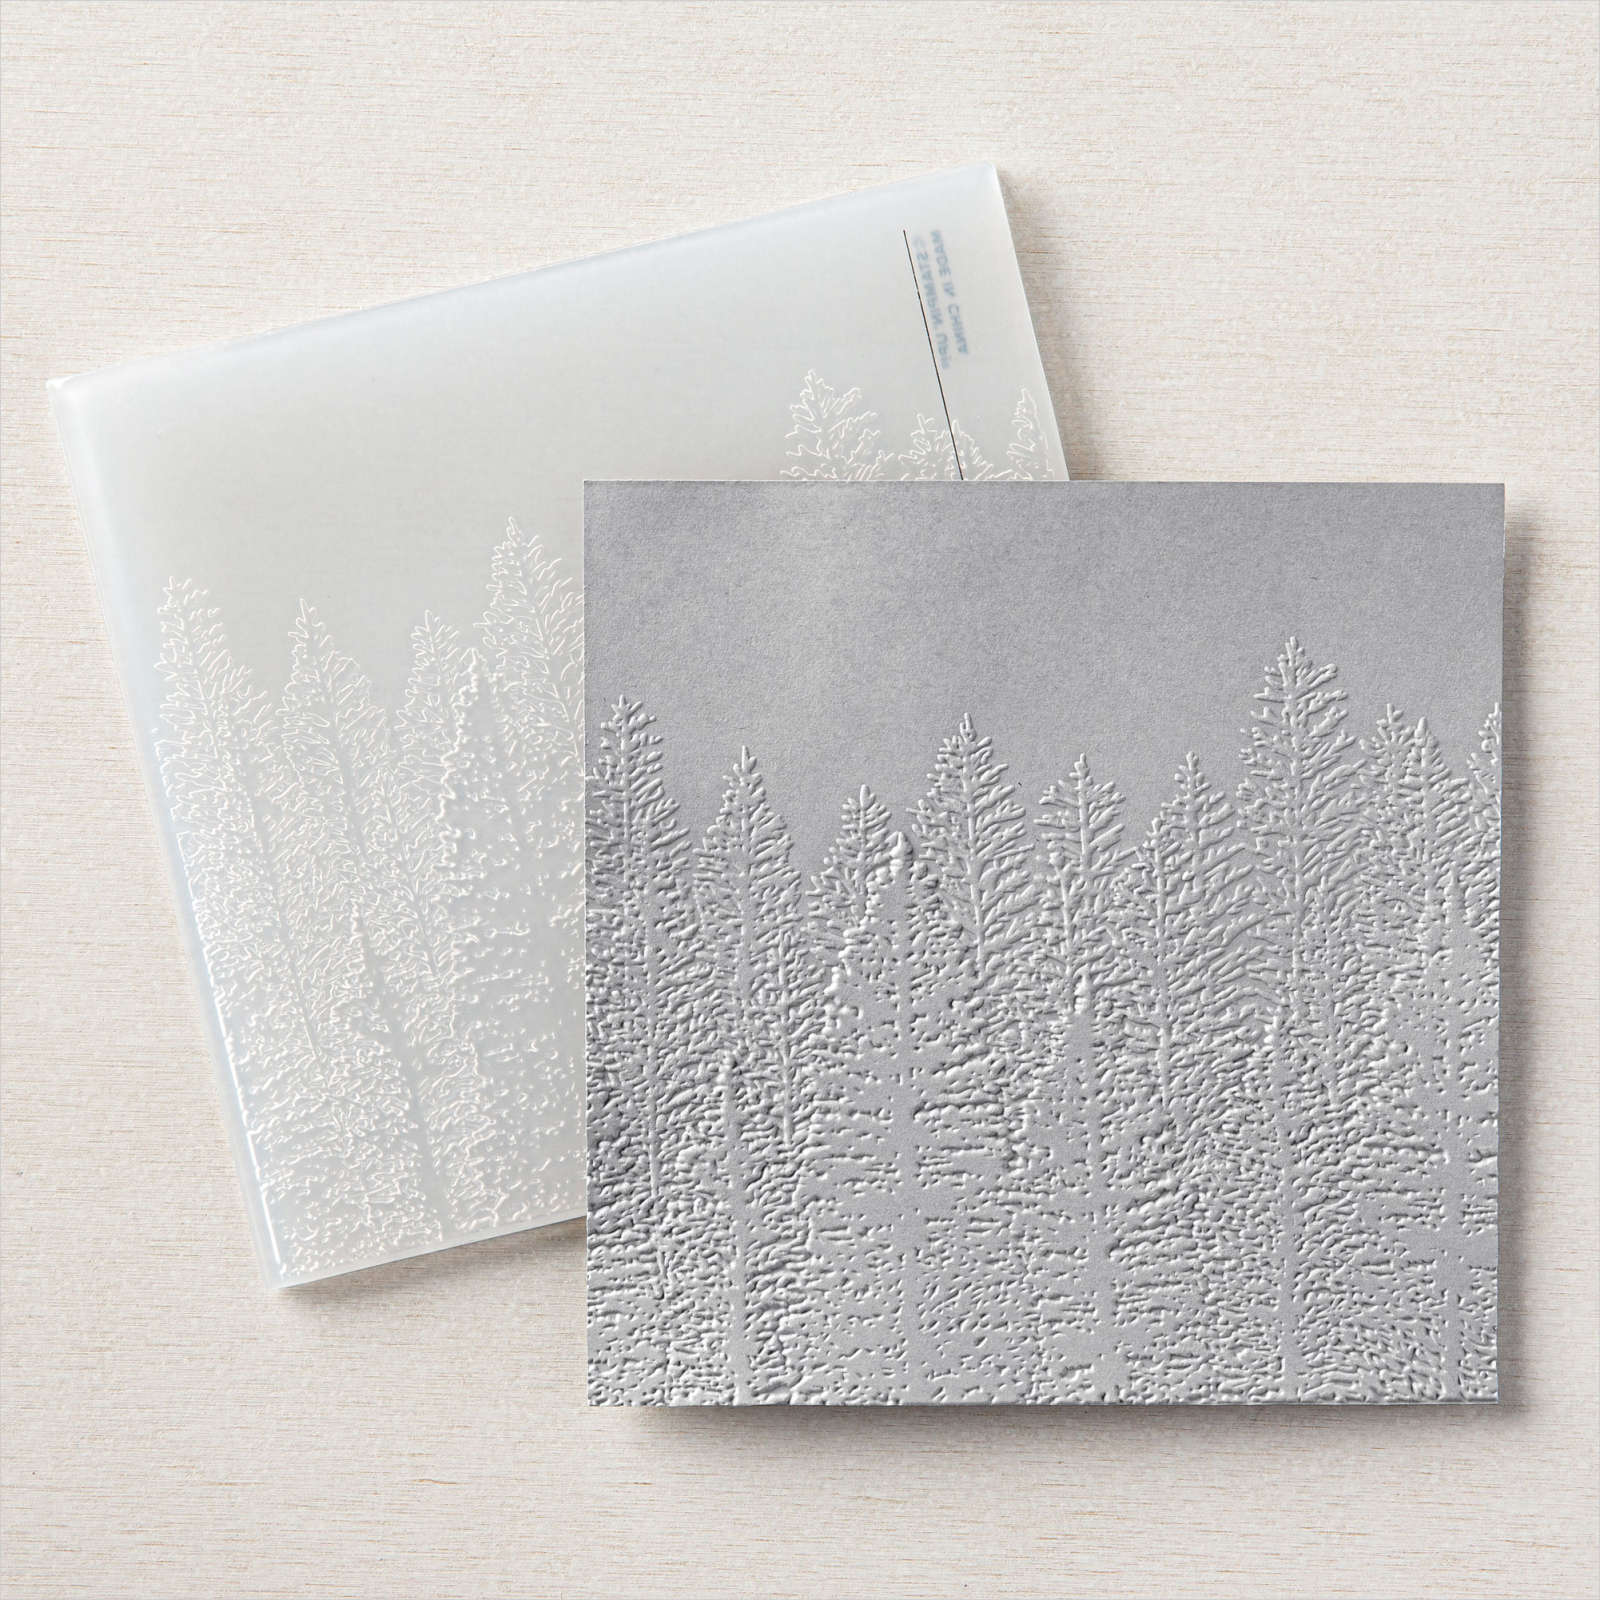
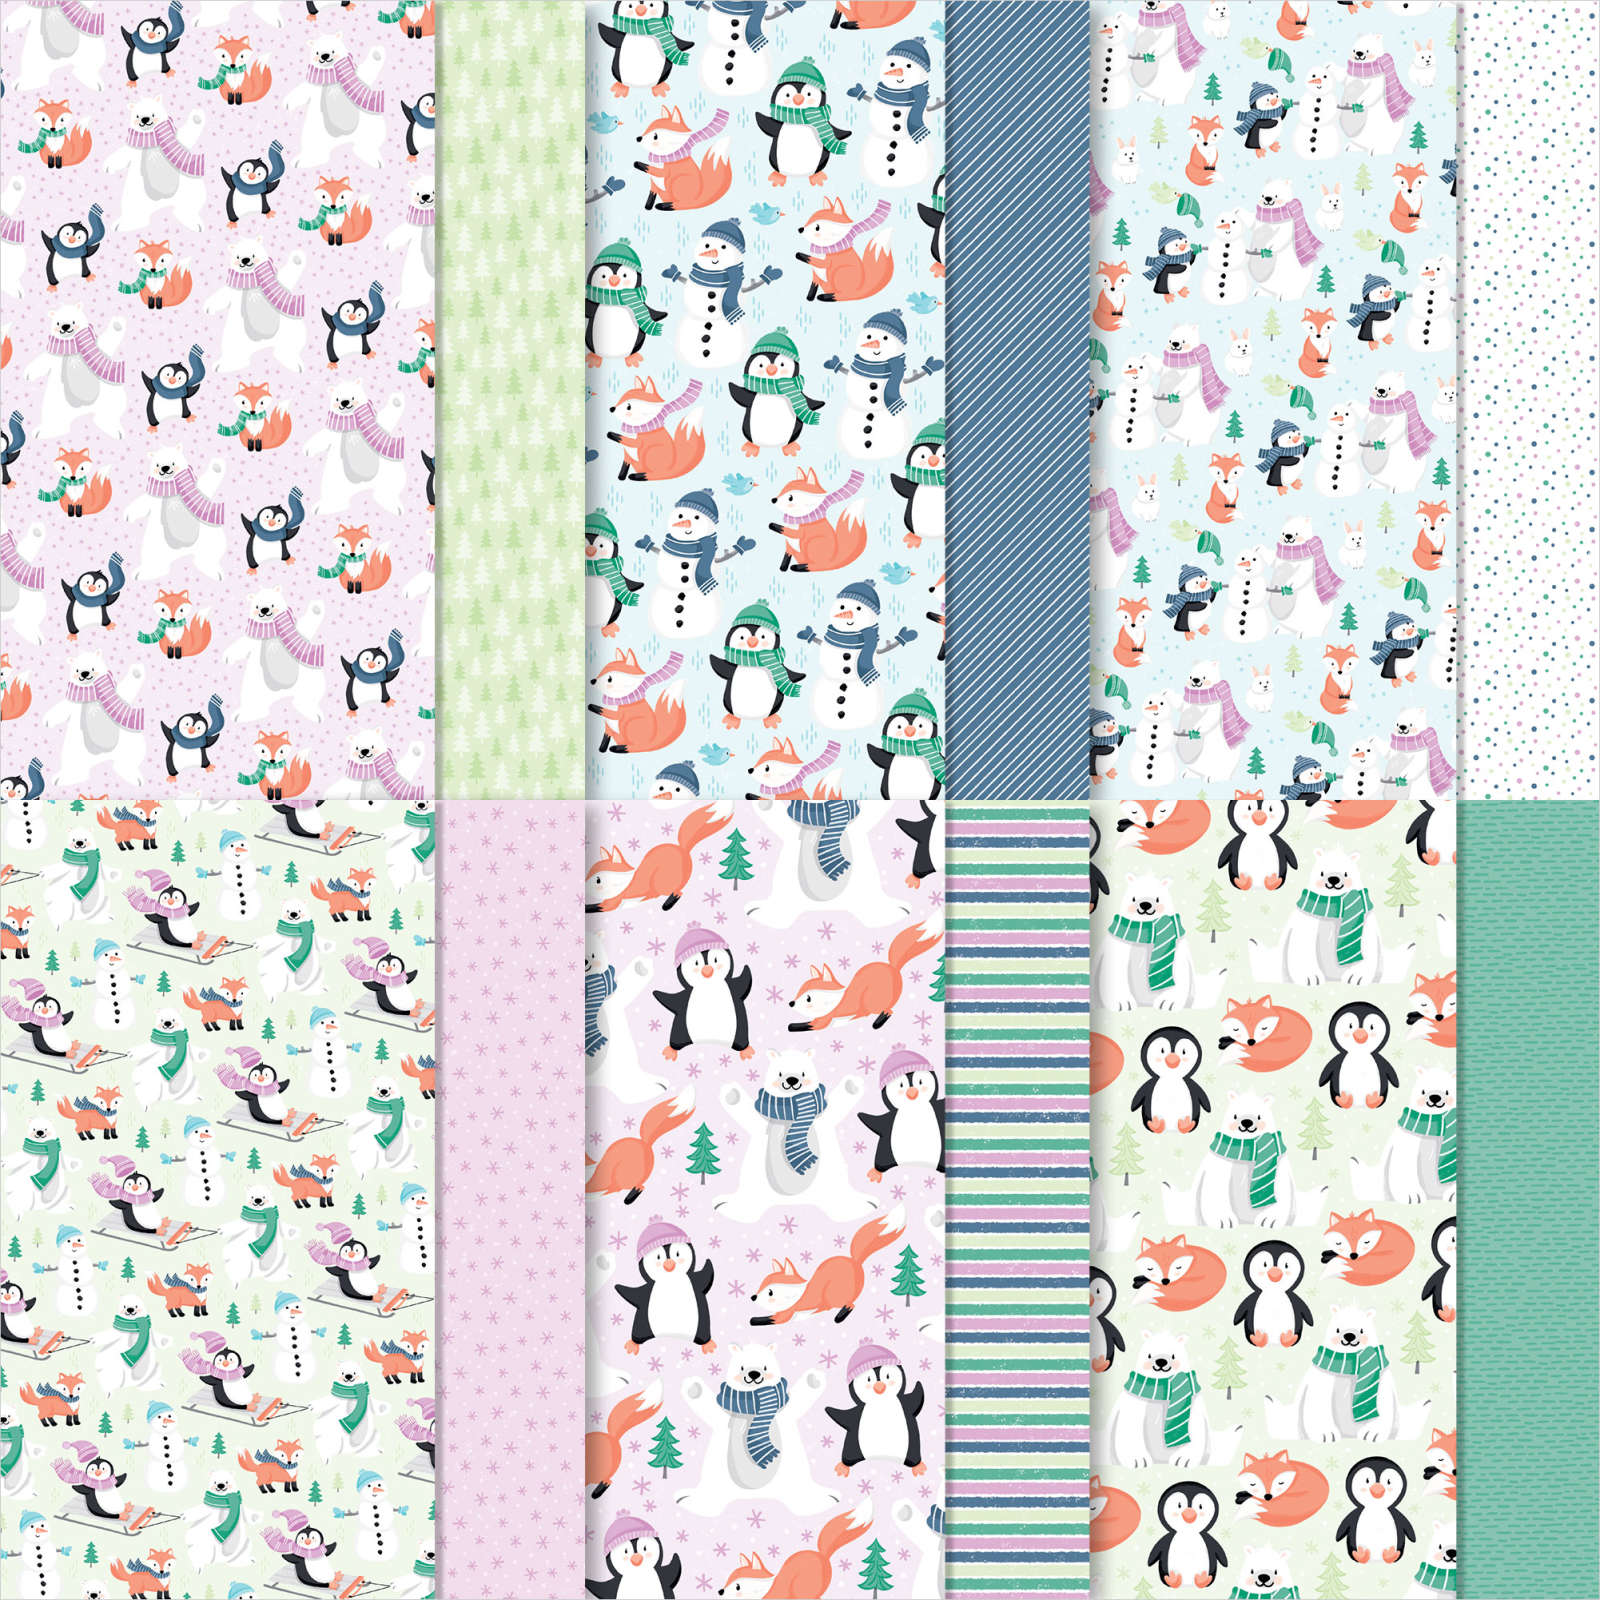
Today’s card uses the very cute Penguin Place stamp set. I attached a piece of Penguin Playmates Designer Series Paper to Early Espresso card. The panel is placed across the centre of Basic White card before being attached to scored and folded Early Espresso card. I stamped the greeting from the Penguin Place stamp set onto the lower right hand corner using Memento Tuxedo Black ink. I embossed a piece of Soft Sea Foam card using the Evergreen Forest 3D Embossing Folder before attaching it to Early Espresso card. The embossed panel is attached to the left hand side of the card front using dimensionals.
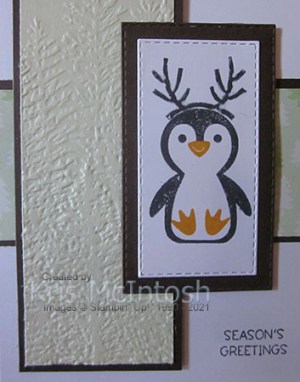
I cut Basic White and Early Espresso card using the Stitched Rectangle Dies. I stamped the antler image from the Penguin Place stamp set onto the Basic White rectangle using Memento Tuxedo Black ink. I stamped the penguin image from the same stamp set below the antlers using the same ink.

I stamped the nose and feet images from the Penguin Place stamp set using Crushed Curry ink. The stamped rectangle is attached to the Early Espresso rectangle. The image panel is attached to the card front using dimensionals where necessary so that it sits slightly over the embossed panel. To decorate the inside of the card, I stamped the curved line image across the bottom of Basic White card using Soft Sea Foam ink. I stamped the second penguin image from the Penguin Place stamp set onto the curved line image using Memento Tuxedo Black ink. I added the beak and single foot images from the Penguin Place stamp set using Crushed Curry ink. Lastly I stamped the greeting from the Penguin Place stamp set using Memento Tuxedo Black ink.
The Penguin Place stamp set is so cute and it has some great images so that you can use it for Christmas or for a birthday of other celebration.
Bye for now,
Kris
Product Used:


Dahlia Birthday

Today’s card uses one of the stamp sets that you can earn for free during Sale-A-Bration with a $180.00 spend. It’s a beautiful distinctive stamp set and I am sure will be a firm favourite with many of you. I began by stamping the distinctive flower from the Delicate Dahlia stamp set onto the top left and bottom right corners of Basic White card using Fresh Freesia ink.

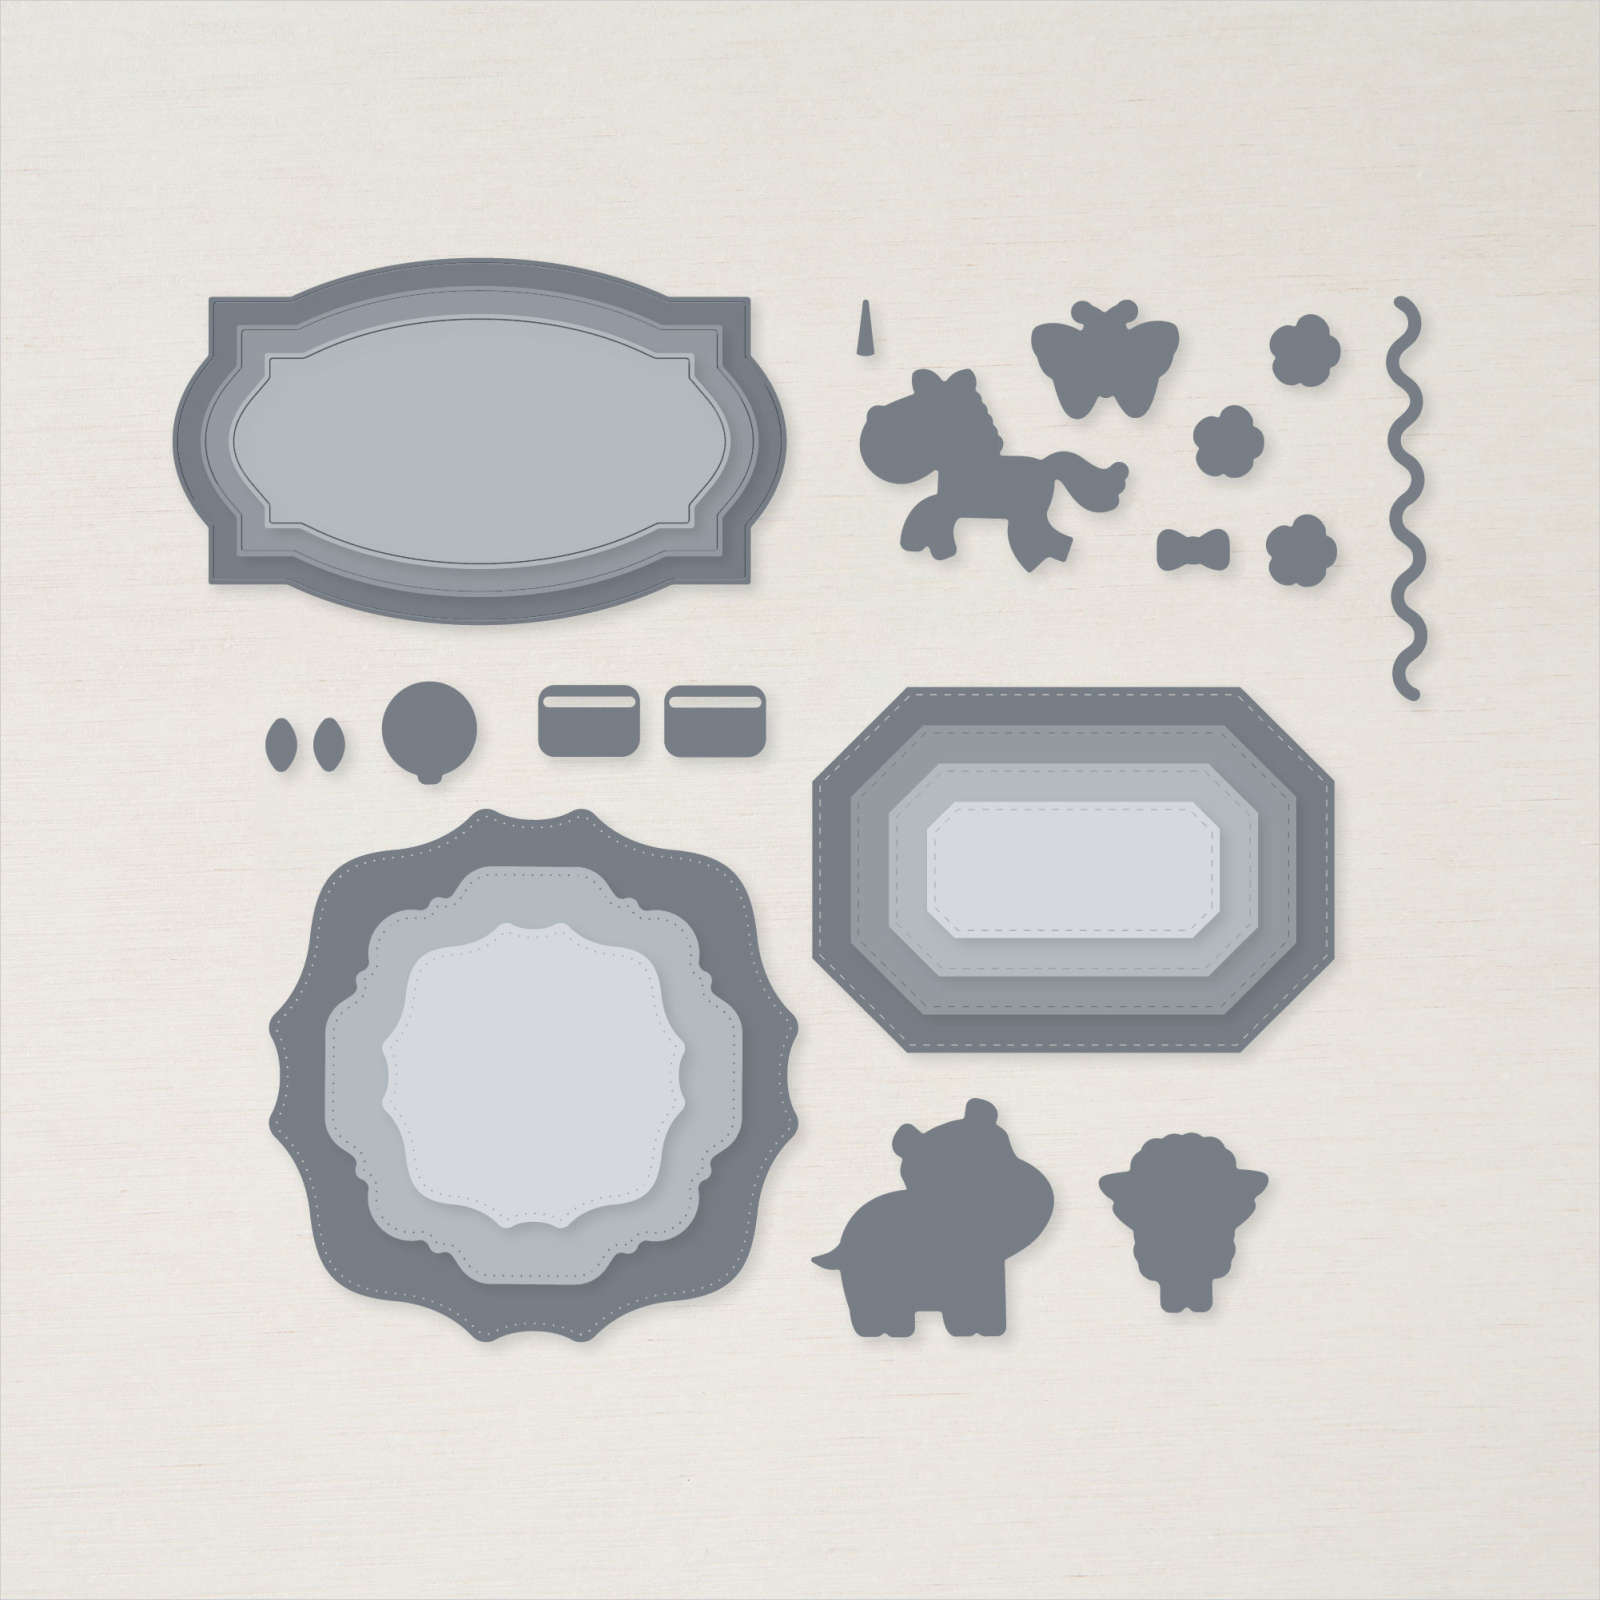
I stamped “happy” from the Biggest Wish stamp set onto Basic White card using Fresh Freesia ink and stamped “birthday” from the same stamp set partially over the top using Evening Evergreen ink. I cut out the greeting using the Hippo and Friends Dies and attached it to Fresh Freesia card cut using the same dies. I attached the greeting to the card front using dimensionals.
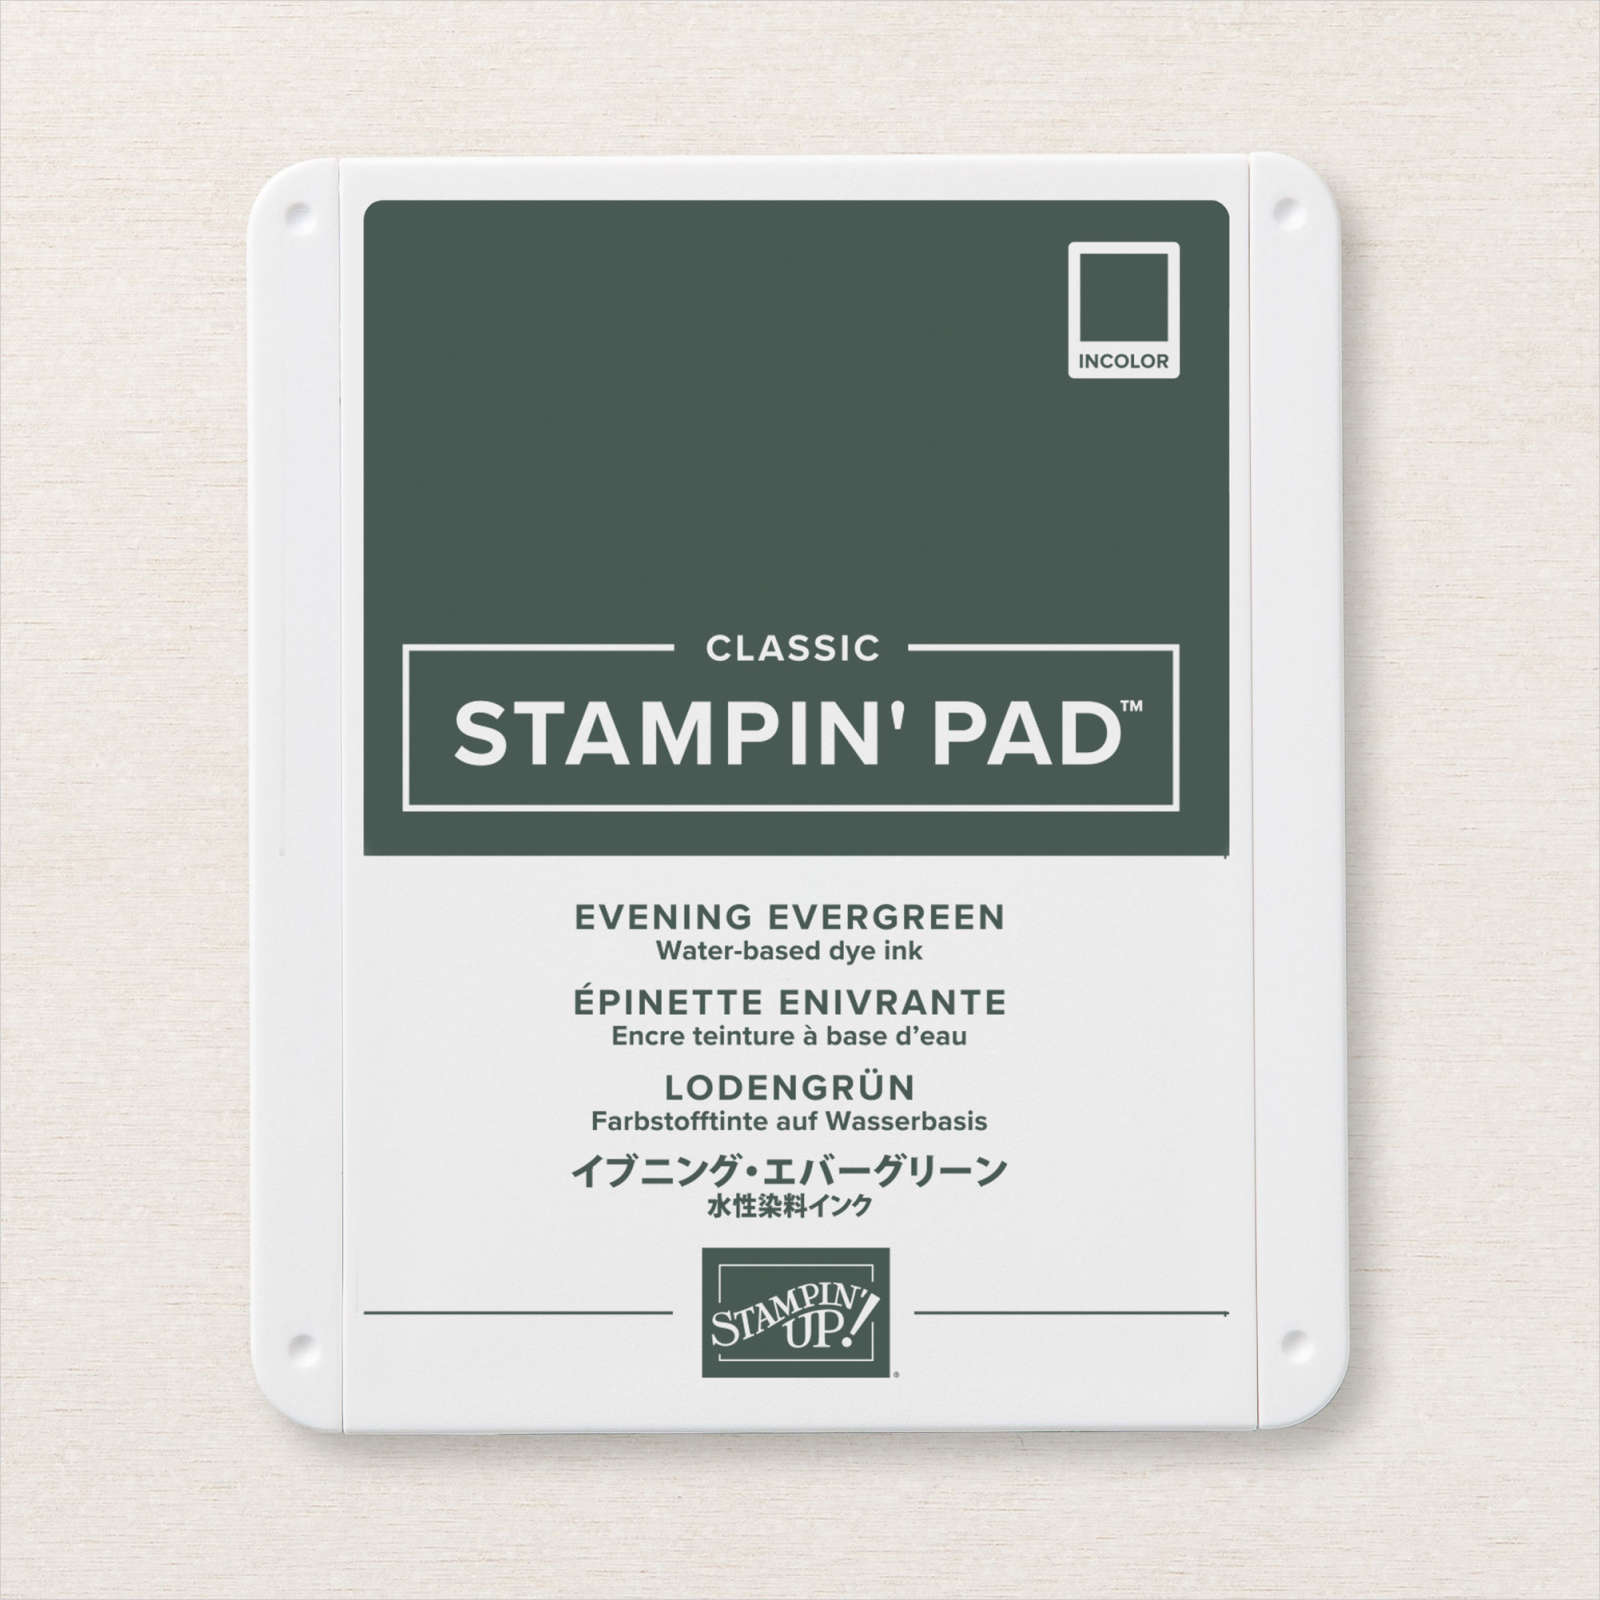
I stamped the distinctive flower from the Delicate Dahlia stamp set onto Basic White card using Fresh Freesia ink and cut it out. I stamped the distinctive leaves from the Delicate Dahlia stamp set twice onto Basic White card using Evening Evergreen ink and cut them out. I attached the leaves to the back of the Dahlia and then the card front using dimensionals, partially covering the greeting panel. To decorate the inside of the card, I stamped the distinctive flower from the Delicate Dahlia stamp set onto the lower left hand corner of Basic White card. I stamped the leaves from the same stamp set twice around the flower using Evening Evergreen ink.
I love how pretty this flower is, don’t you.
Bye for now,
Kris
Product Used:


Happy Day

I found these photos when I was looking through old photos. They were taken on a day when we visited my daughter and her family and had lunch at their local tavern. I followed a sketch (sort of) to add lots of different patterns of black and white paper from the Pattern Party Designer Series Paper to a Basic White 12″ x 12″ page. I attached my photos to Basic Black card before attaching them to the page. I stamped the large dahlia and two small dahlias from the Delicate Dahlias stamp set onto Basic White card using Crushed Curry ink and cut them out.
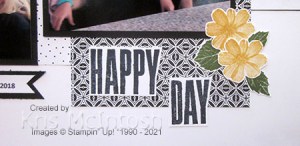
I stamped two sets of leaves from the Delicate Dahlias stamp set onto Basic White card using Old Olive ink and cut them out. I attached the large flower and one set of leaves so that it sits partially behind both photos. I cut the second set of leaves into two pieces and layered the small dahlias and leaves onto the lower right hand corner of the large photo. I used the Biggest Wish stamp set to stamp “happy” and “day” (using the Birthday) onto Basic White card using Memento Tuxedo Black ink. I cut out the words separately and attached them to the page. I printed the journalling onto Basic White card and cut it into a narrow strip with a “v” in one end. I attached the journalling to Basic Black card before attaching it to the page.
I love the end result. How about you? Do you love it too?
Bye for now,
Kris
Product Used:

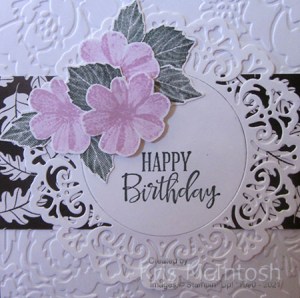
Delicate Birthday

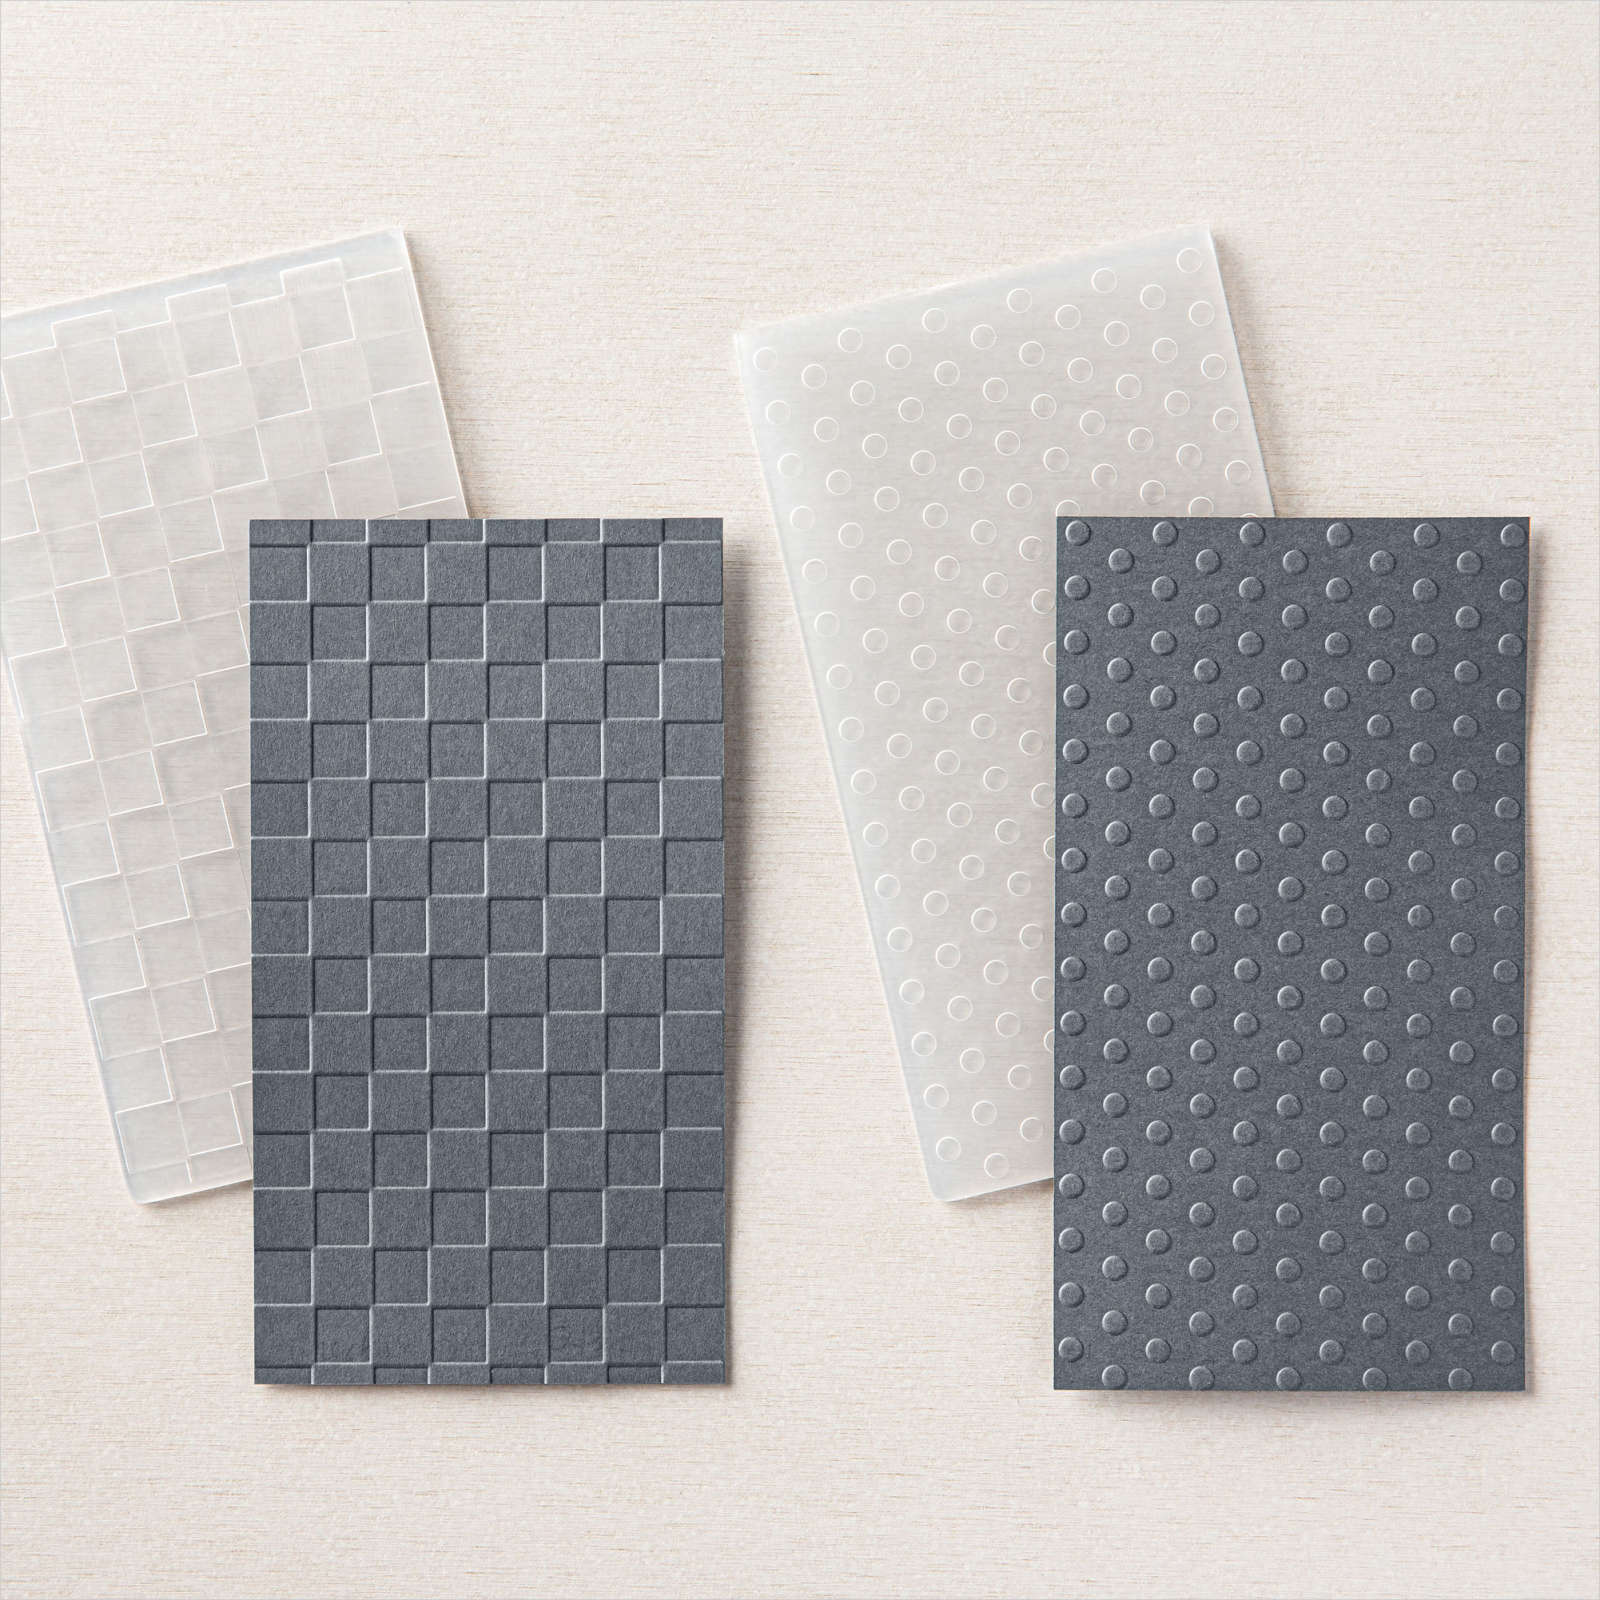
Today’s card uses the gorgeous Delicate Dahlia stamp set which is available FREE with a qualifying order during Sale-a-Bration. This is the last card in my series of cards since I featured this stamp set on my Facebook Live last week. To begin I embossed the top section of Basic White card using the polka dot folder from the Checks & Dots Embossing Folders. I stamped the greeting from the Shaded Summer stamp set onto the bottom section of the embossed card using Polished Pink ink.

I attached a piece of Soft Succulent 2021-2023 In-Colour Designer Series Paper to Soft Succulent card before attaching it across the Basic White panel. The Basic White panel is attached to scored and folded Soft Succulent card.
I stamped the large Dahlia from the Delicate Dahlia stamp set onto Basic White card using Polished Pink ink and cut it out. I stamped the leaf image from the Delicate Dahlia stamp set onto Basic White card using Evening Evergreen ink and cut it out. The leaf and flower are attached to the card front partially covering the designer series paper. To decorate the inside of the card, I stamped the greeting from the Peaceful Moments stamp set onto Basic White card using Evening Evergreen ink. I stamped the small distinctive stamp from the Delicate Dahlia stamp set beside the greeting using Polished Pink ink.
I really love this beautiful floral stamp set, don’t you.
Bye for now,
Kris
Product Used:

More Dahlia’s

Yesterday in my Facebook Live, I shared some cards using the Delicate Dahlia stamp set which you can earn for FREE with a qualifying order during Sale-a-bration. For today’s card I began by embossing Basic White card using the Pretty Flowers Embossing Folder. I attached a strip of Pattern Party Designer Series Paper across the embossed card before attaching to scored and folded Evening Evergreen card. I cut Basic White card using one of the Encircled in Beauty Dies.
I stamped the greeting from the Peaceful Moments stamp set onto the die cut circle using Evening Evergreen ink. I attached the detailed die cut to the card front with the stamped circle in the middle. I stamped three of the small distinctive flower images from the Delicate Dahlia stamp set onto Basic White card using Fresh Freesia ink and cut them out.

I stamped the large distinctive leaf image from the Delicate Dahlia stamp set twice onto Basic White card using Evening Evergreen ink and cut them out. I trimmed the centre leaf from the leaf images before layering the leaves and flowers onto the top right hand section of the Basic White die cut. The last flower is attached using dimensionals. To decorate the inside of the card, I stamped the greeting from the Peaceful Moments stamp set onto Basic White card using Evening Evergreen ink. I stamped the small distinctive flower from the Delicate Dahlia stamp set beside the greeting using Fresh Freesia ink.
This is such a gorgeous stamp set and who doesn’t love to get something for free. So now is a perfect time to stock up on all the things on your wish list so you can earn gorgeous FREE product like this Delicate Dahlia stamp.
Bye for now,
Kris
Product Used: