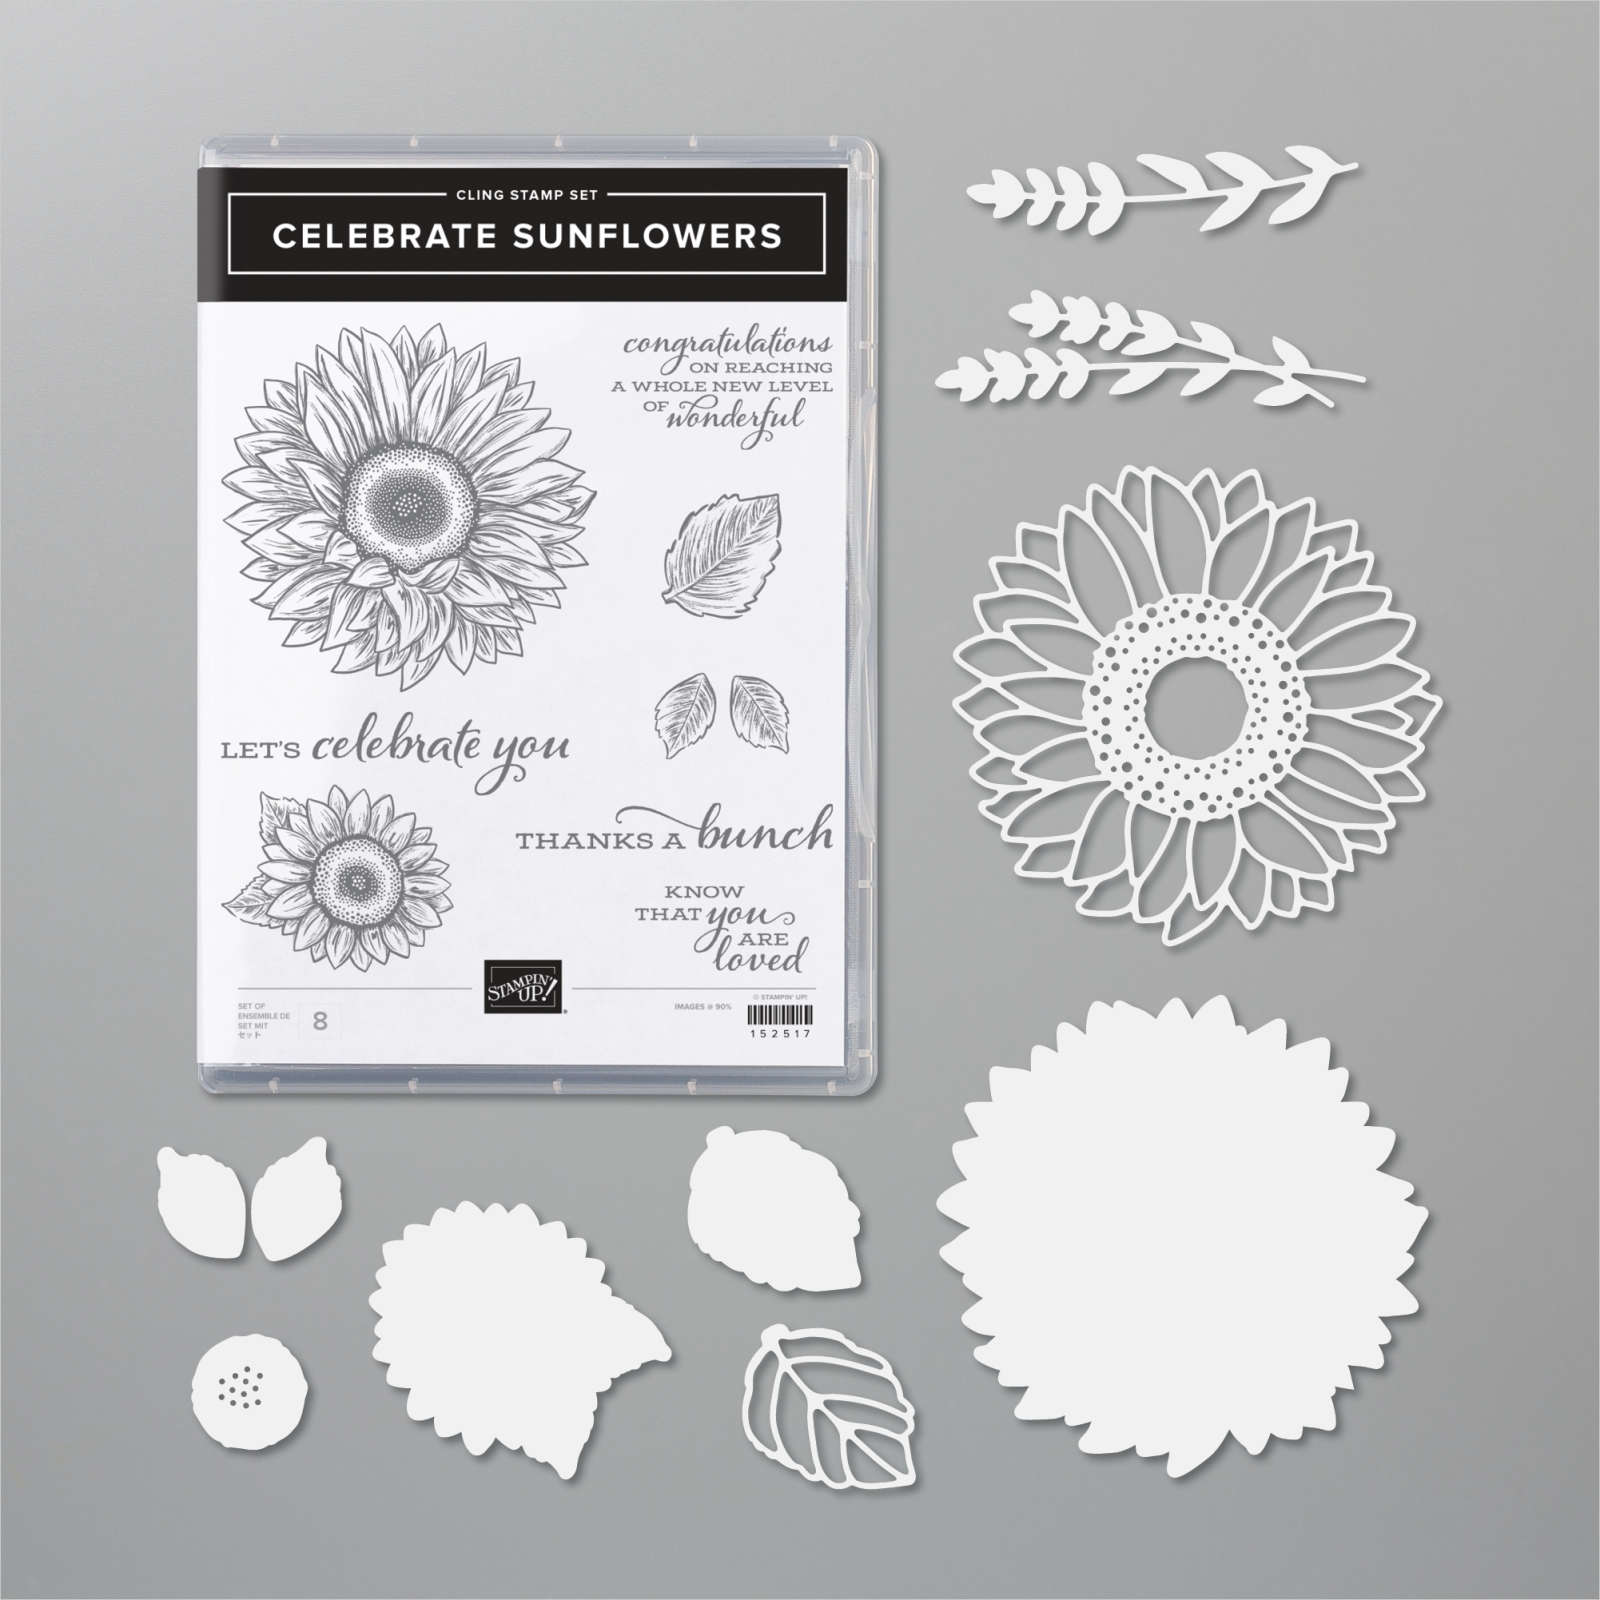
A trio of Sunflowers
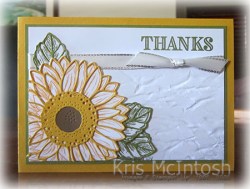
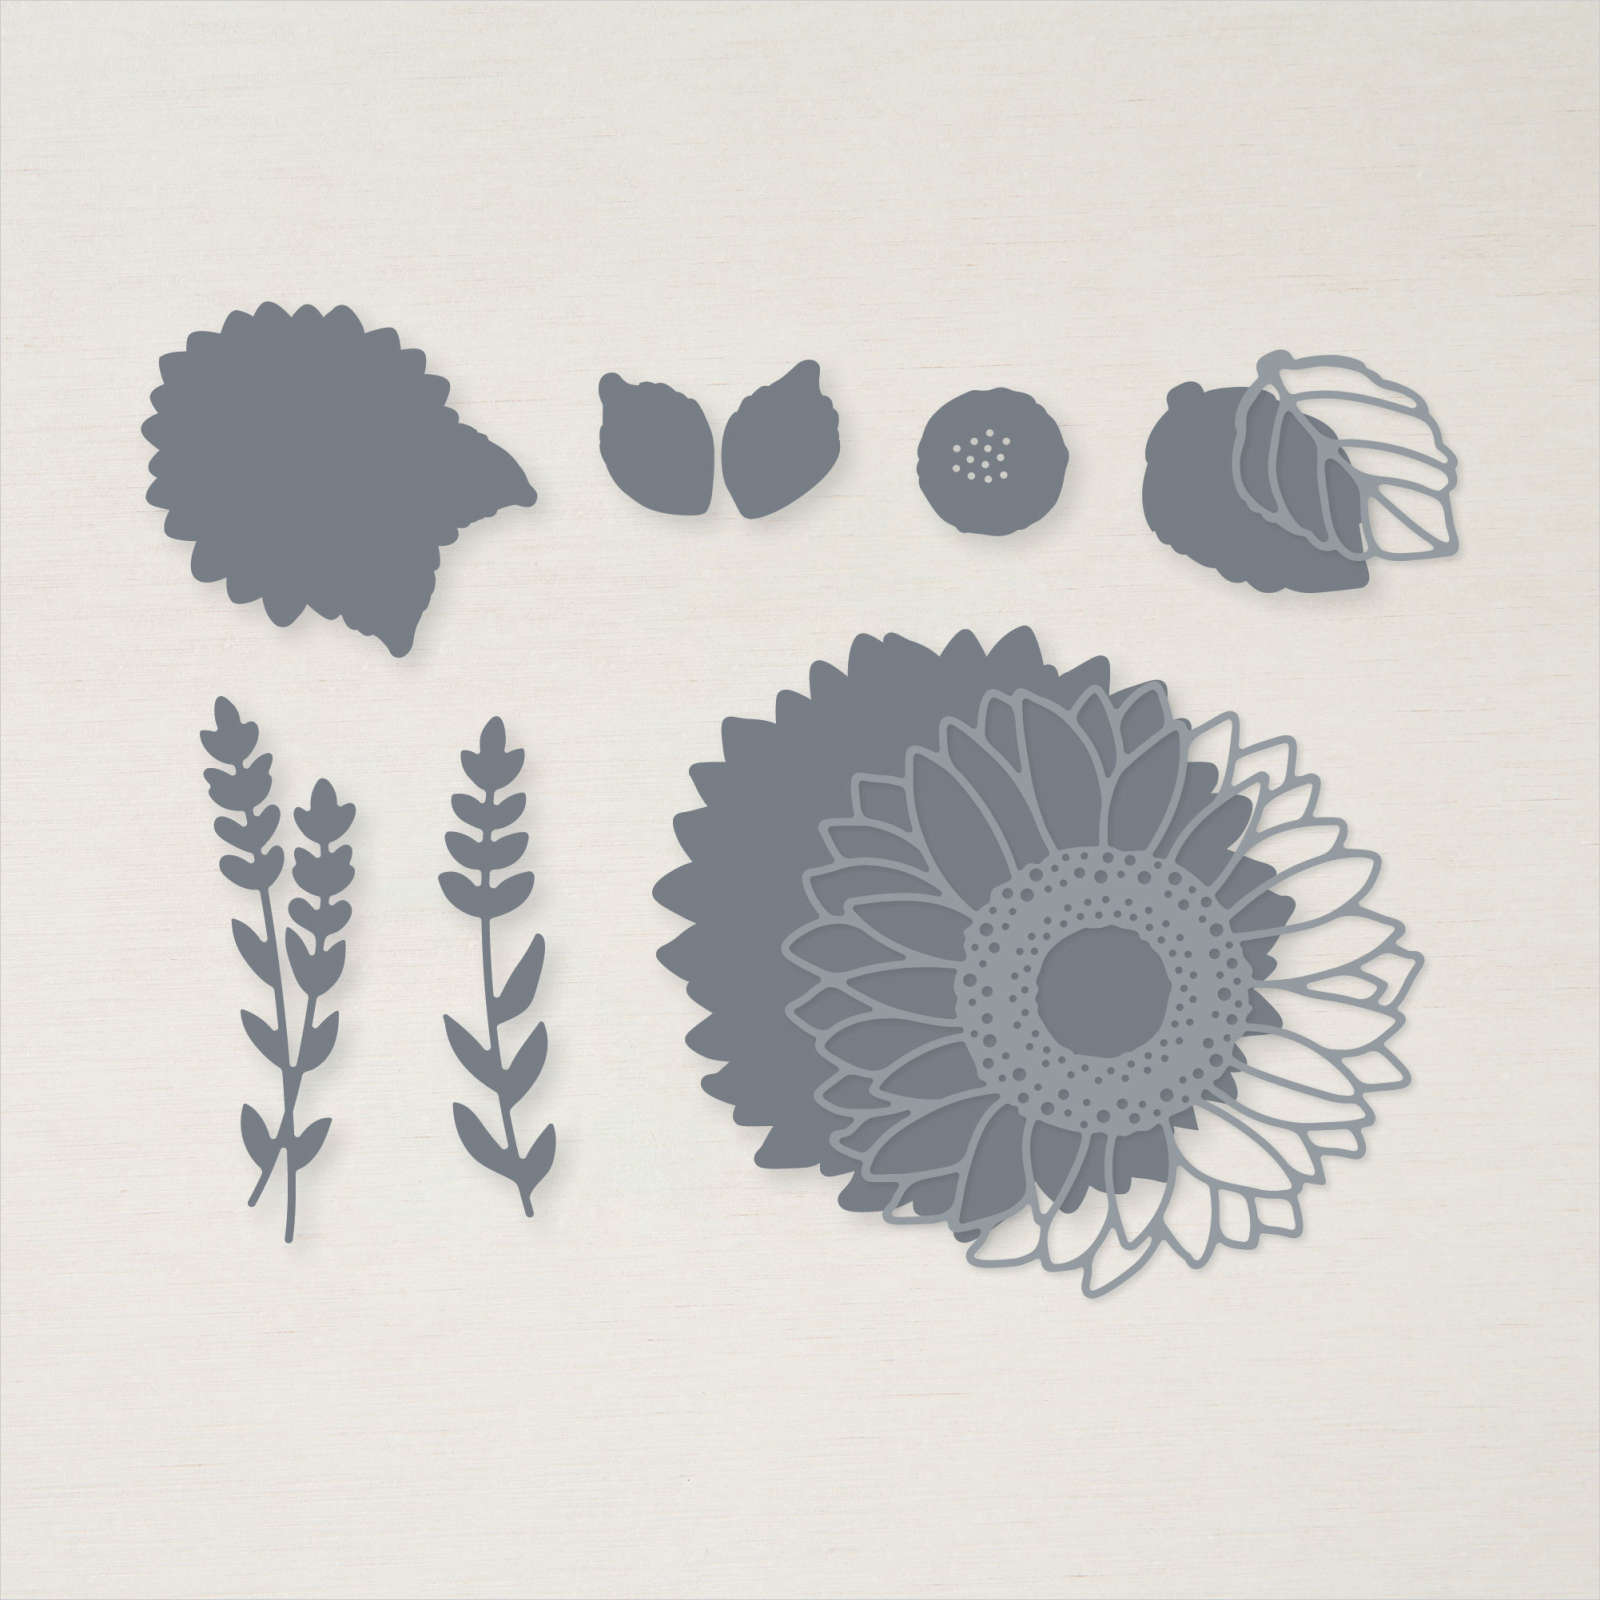
I had some kits left over from a recent class I conducted at Beachmere and decided to use the die cuts on some different cards. I created three cards in all with pretty much the same product. For the first card I stamped the top right hand corner of Whisper White card with a greeting from the Ornate Thanks stamp set and Old Olive ink. I embossed the Whisper White card below the greeting using the Old World Paper 3D Embossing Folder. I wrapped the top of the embossing using the Silver 3/8″ Metallic Edge Ribbon and tied a knot. I had previously stamped the leaf image from the Celebrate Sunflowers stamp set onto Whisper White card using Old Olive ink.  I had also die cut the leaf from Old Olive card using the Sunflower Dies. I attached the die cut leaves to the stamped leaves. I had previously stamped the sunflower from the Celebrate Sunflower stamp set onto Whisper White card using Crushed Curry ink and cut it out using the co-ordinating Sunflower Die. I had also die cut Crushed Curry card using the Sunflower Die. The flower centre had previously been cut from Soft Suede card using the Sunglower Dies. I attached the flower centre to the stamped flower and then attached the die cut over the top.
  I attached the die cut leaves to the stamped leaves and attached them to the back of the flower. I placed the flower onto the lower left hand corner of the embossed Whisper White card and trimmed away the excess flower. The panel is attached to Old Olive card and then scored and folded Crushed Curry card.
To decorate the inside of the card, I stamped another greeting from the Ornate Thanks stamp set using Old Olive ink. I attached a strip of Old Olive card behind one long edge of Whisper White card embossed using the Old World Paper 3D Embossing Folder. The embossed panel is attached to the bottom of the stamped Whisper White card.
The second and third card are created in much the same way, however, these two cards use greetings from the Peaceful Moments stamp set.
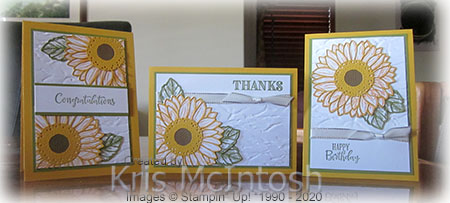
I absolutely adore how these cards turned out and by using different sentiments I have three cards for three different occasions. It makes me happy that I could use these left over kits. Let me know what you think.
Bye for now,
Kris
Product Used:


On our way home

from our few days in Toowoomba we stopped in at the Queensland Transport Museum at Gatton. The children had a great time looking at all the trucks and planes on display including the ford in the foyer. We also visited the Lights on the Hill Trucking Memorial which is in the park behind the Museum. We have been listening to Graham Rodger sing about this Memorial for many years so definitely wanted to visit. My pages begin with Very Vanilla 12″ x 12″ card. I attached a piece of the Plush Poinsettia Specialty Paper to Early Espresso card before attaching to the Very Vanilla page. I traced around a plate to cut a circle for each page from Very Vanilla card and cut them out. I sponged Old Olive ink to the edges before attaching them to the pages. I stamped the leaf image from the Positive Thoughts stamp set onto Very Vanilla card ten times using Old Olive ink. The leaves are cut out using the co-ordinating Nature’s Thoughts Dies. I also stamped the flower from the Positive Thoughts stamp set onto Very Vanilla card using Pacific Point card five times. The flowers are cut out using the co-ordinating Nature’s Thoughts Dies. I also cut the flower centres from Pacific Point card using the Nature’s Thoughts Dies. On the first page I attached the photos down the right hand side of the page.
  The flower centres are attached to each of the flowers before leaves and flowers are attached around the edge of the sponged circle on the left hand side of the page. I created the journaling on the computer and printed onto Very Vanilla card. I cut out the journaling using the Rectangle Stitched Dies and attached it to an Early Espresso rectangle cut using the same dies. The journaling panel is attached between the photos and the flowers and leaves. I cut the title from Pacific Point card using the Playful Alphabet Dies.
  Lastly I added a Basic Rhinestone to the centre of the flowers.
The Specialty Paper panel is attached to the right hand side of the second page and the sponged circle to the left. I attached the photo to Early Espresso card before attached to the left hand side of the page. The leaves and flowers are attached around the edge of the sponge circle and also have Basic Rhinestones added to the flower centres. The journaling panel is created in the same manner as the first page.
I thought this might be a little fussy when I first started creating but I love the pages. They bring back so many happy memories of our short break away. I hope we can do more in the not too distant future.
Bye for now,
Kris
Product Used:


Birthday Treat
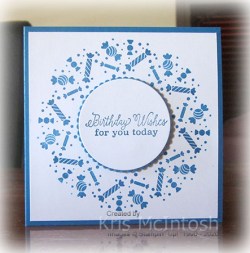
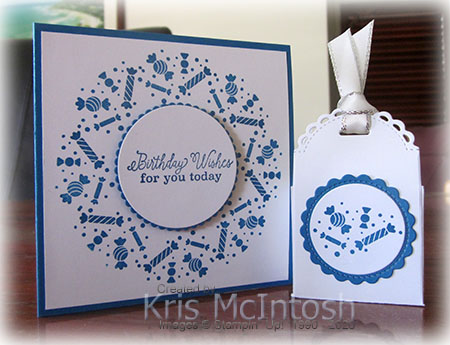
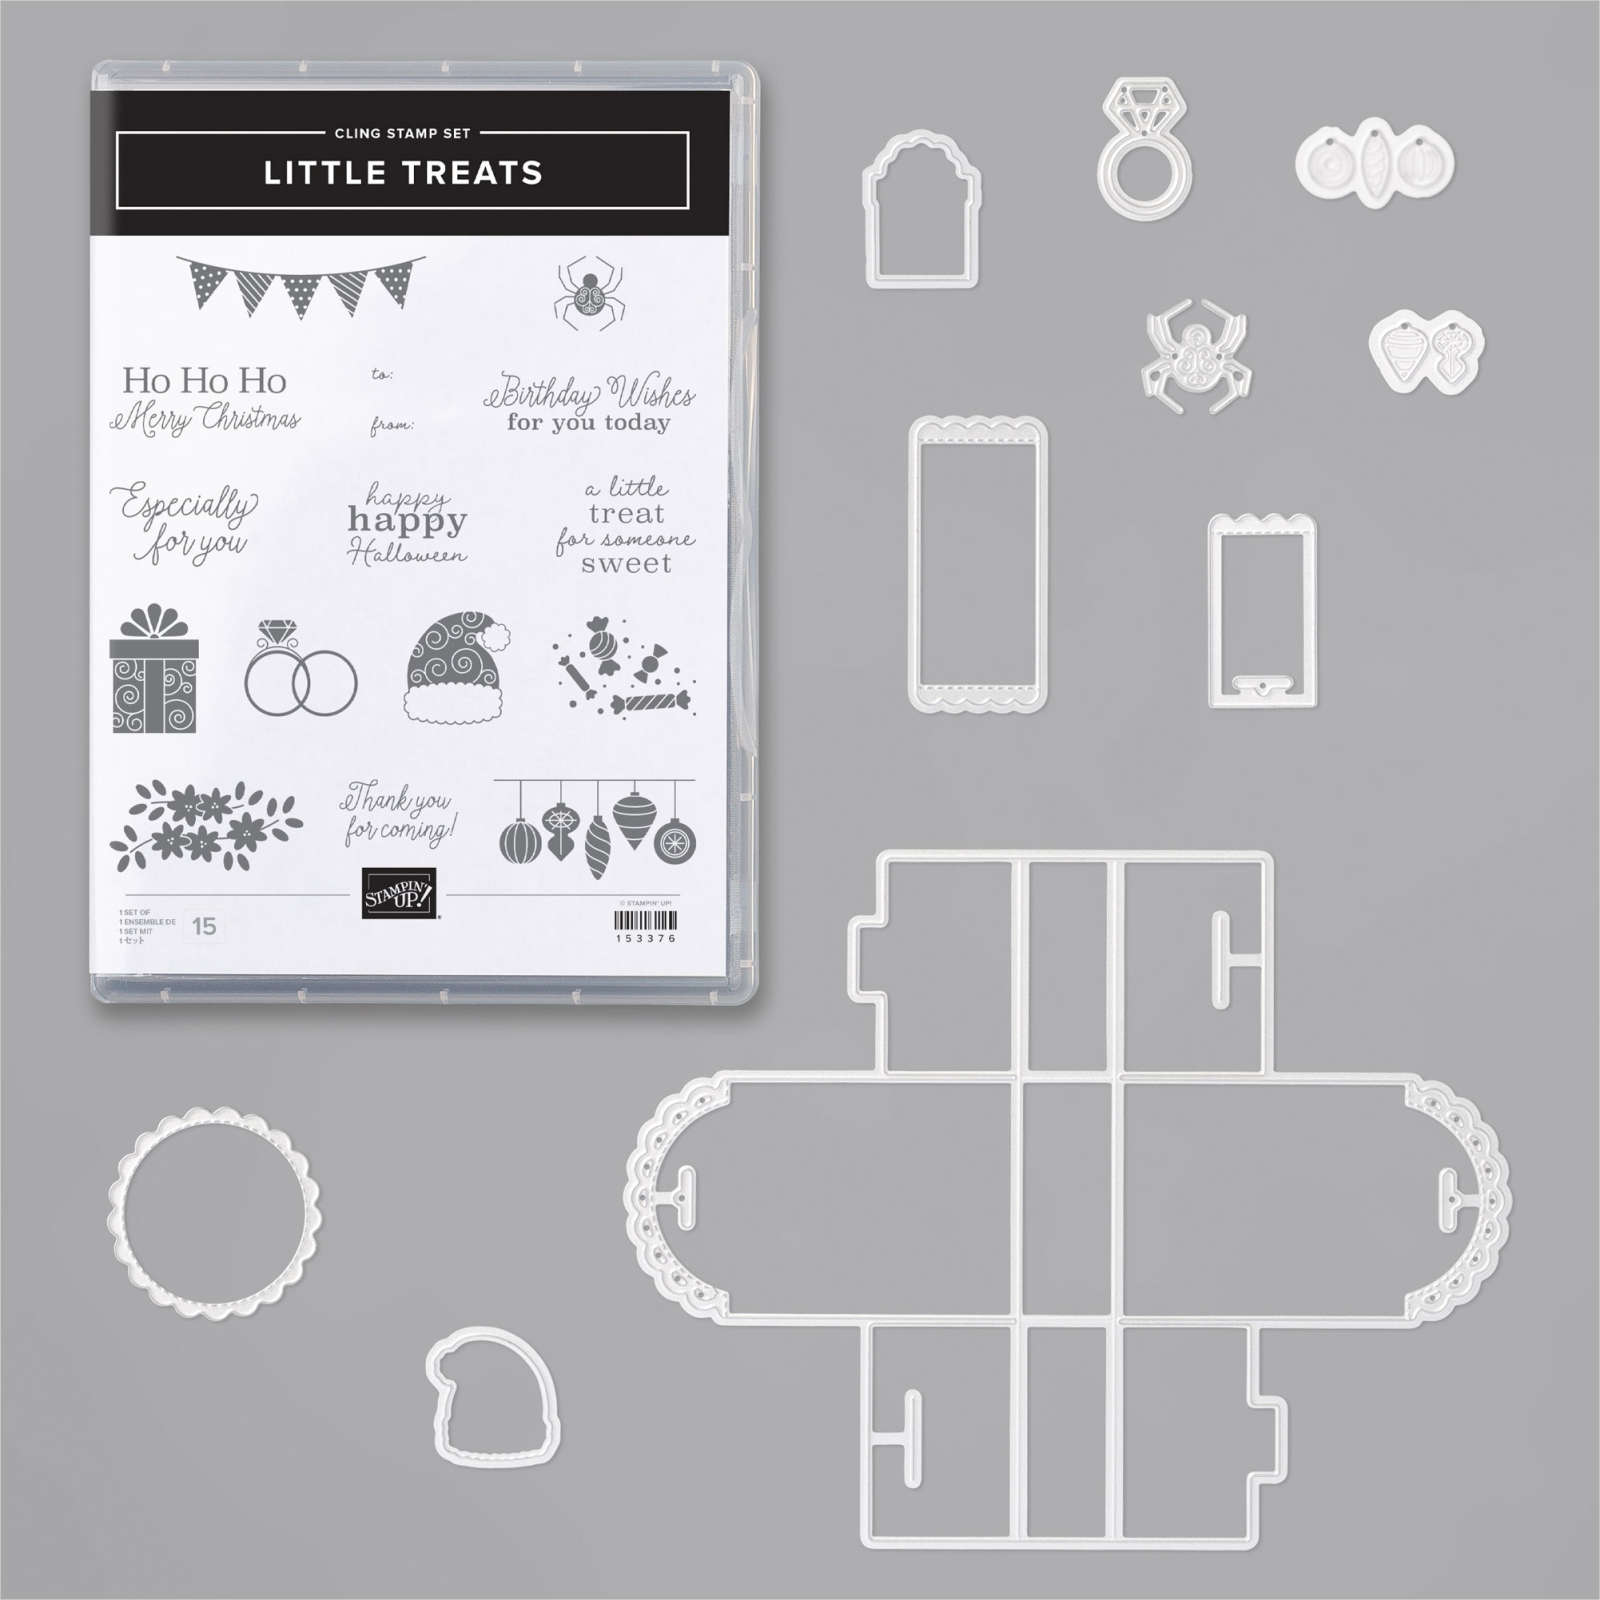
I had another play with the Little Treats stamp set and the Stamparatus. This card is 10.5cm square, which is not the usual card size I would create, however, it is a good size to work with to create a wreath. So, I used the Stamparatus and a wreath template I created long ago to stamp the bon-bon image using Pacific Point ink. I attached the stamped panel to scored and folded Pacific Point card.  I stamped the greeting from the Little Treats stamp set onto Whisper White card using Pacific Point ink and cut it out using the Layering Circles Dies. The greeting is attached to a scalloped circle cut from Pacific Point card.
  The greeting panel is attached to the centre of the wreath on the card front using dimensionals.
To decorate the inside of the card, I used the Stamparatus to do some hinged stamping across the bottom of Whisper White card using the bon-bon image from the Little Treats stamp set and Pacific Point ink.
Since I was using the Little Treats stamp set, I decided to create a co-ordinating treat box using the Little Treat Box Dies. I cut the box from Whisper White card. This box doesn’t really need the addition of glue to assemble it. You just fold on all the score lines and insert the tab into the slit to create the box.  I did add some adhesive to the inside of the front and back just because I wanted it to be a little straighter. I stamped the bon-bon image from the Little Treats stamp set onto scrap Whisper White card using Pacific Point ink and cut it out using one of the Layering Circle Dies. I also stamped “it’s your day” from the Itty Bitty Birthday stamp set onto scrap Whisper White card using Pacific Point ink. The greeting is cut out using the same die from the Layering Circle Dies. I cut Pacific Point card twice using the circle die from the Little Treat Box Dies and attached a stamped panel to the centre of each one. I attached one image panel to each side of the treat box. I used a length of Silver 3/8″ Metallic Edge Ribbon to hold the top of the box together.
Isn’t this just adorable? Such a fun way to celebrate a birthday.
Bye for now,
Kris
Product Used:


Little Treats

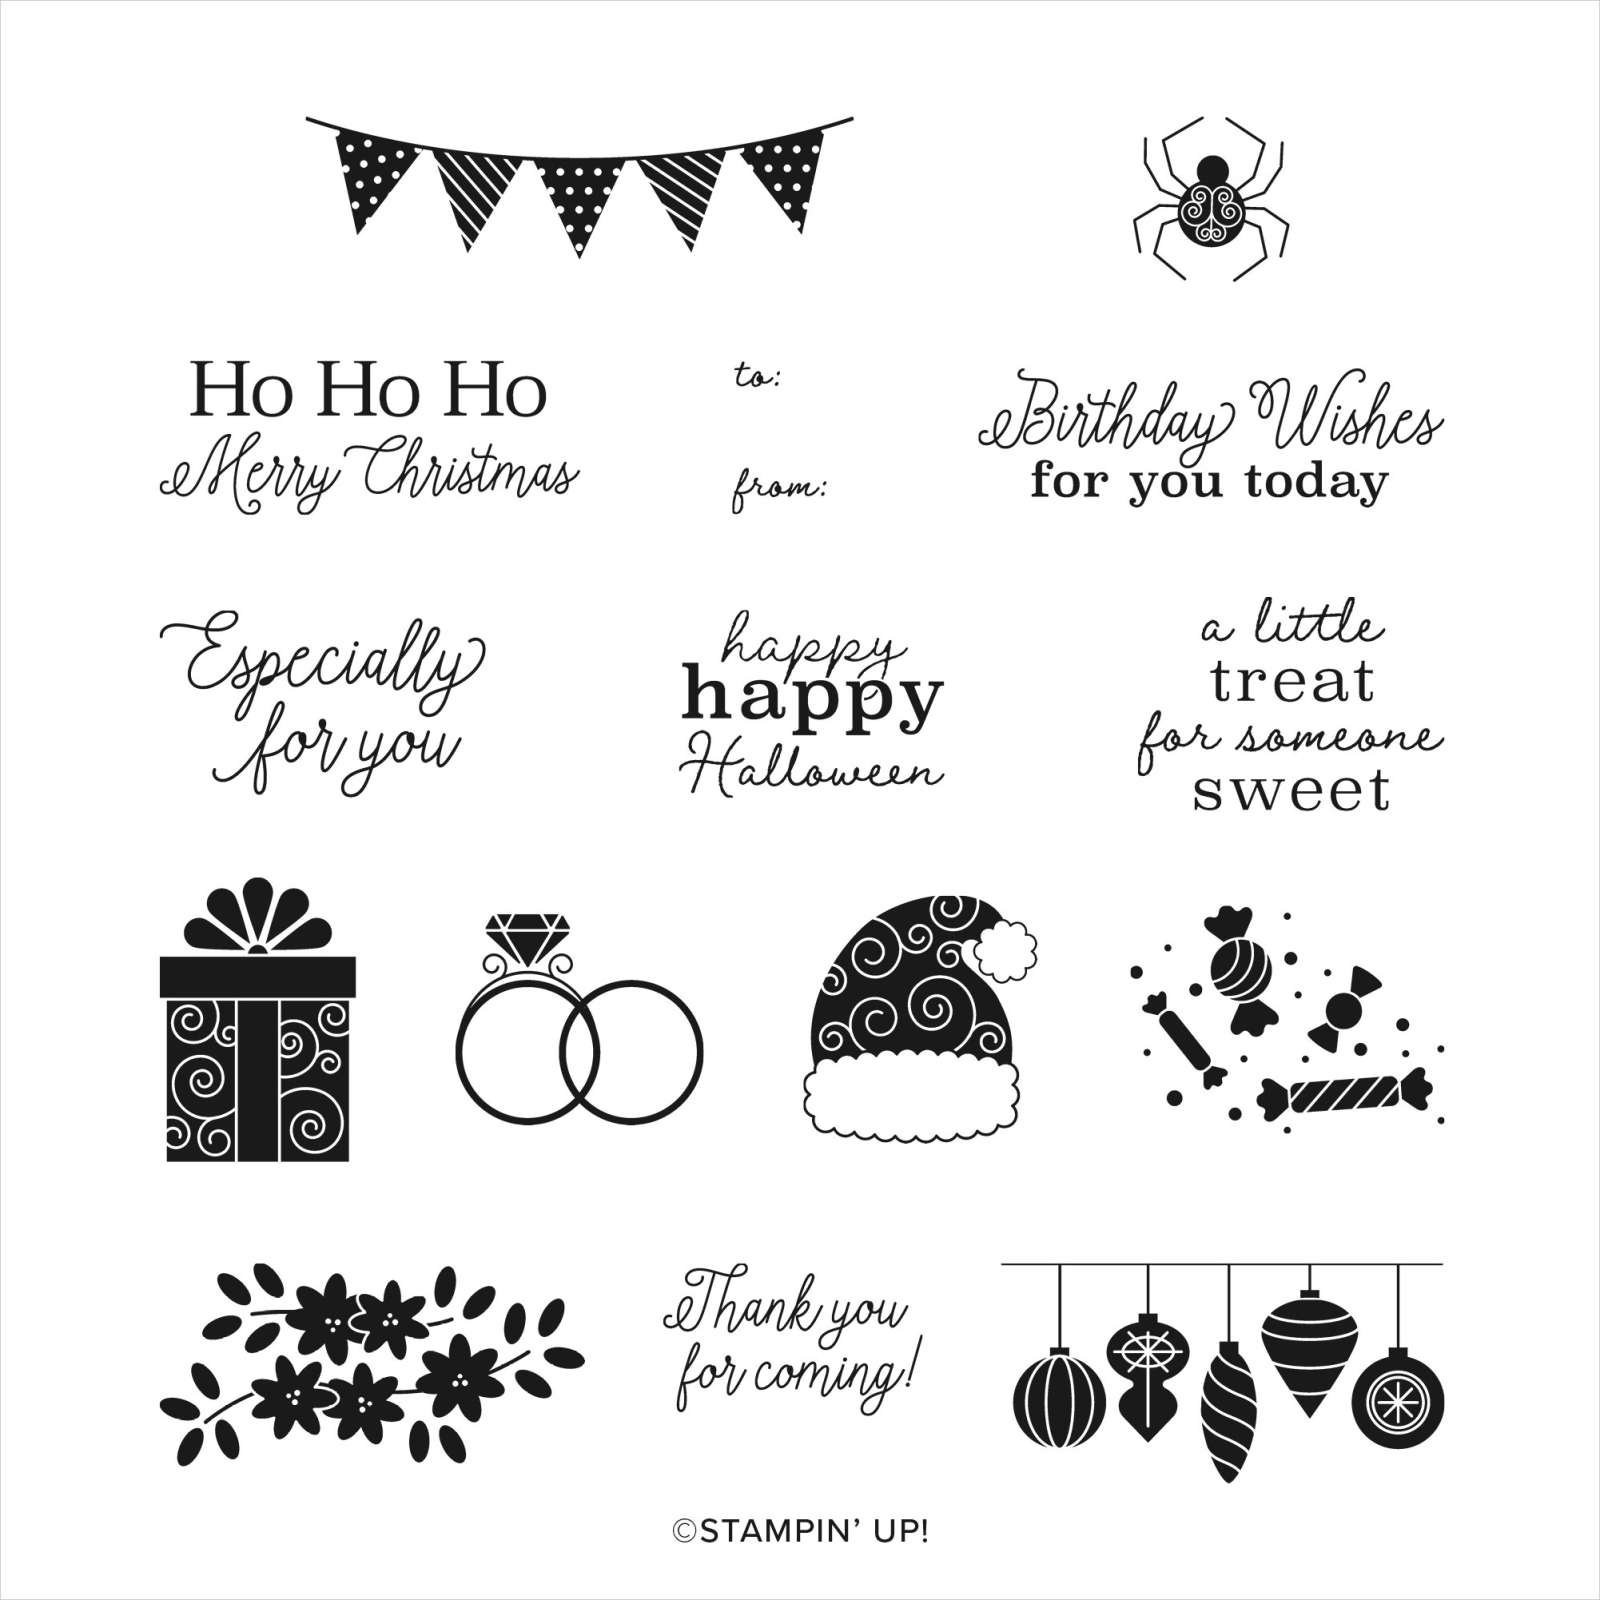
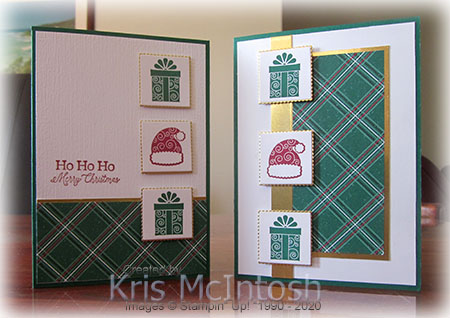
Yesterday on my Facebook Live, I shared a card and a treat box made using the Little Treats Bundle. Today I have a couple of cards using this same bundle to share. The first card has a piece of the ‘Tis The Season 6″ x 6″ Designer Series Paper attached to Gold Foil card, which is added to the right hand side of Whisper White card. I added a strip of Gold Foil card down the left hand side of the Designer Series Paper panel before attaching the Whisper White card to scored and folded Shaded Spruce card. I stamped the parcel image from the Little Treats stamp set twice onto Whisper White card using Shaded Spruce ink.  I also stamped the Santa hat image from the Little Treat stamp set onto Whisper White card using Cherry Cobbler ink. All of the images are cut out using the Layering Squares Dies. I also cut three scalloped squares from Gold Foil card using the same dies. I attached each of the images to a Gold Foil scalloped square and then the card front using dimensionals.
To decorate the inside of the card, I stamped the greeting from the Little Treats stamp set onto Whisper White card using Cherry Cobbler ink. I attached a narrow strip of Gold Foil card behind one long edge of the same paper from the ‘Tis The Season 6″ x 6″ Designer Series Paper. The designer series paper panel is attached to the bottom of the stamped Whisper White card.
For the second card, I stamped the greeting from the Little Treats stamp set onto Whisper White card using Cherry Cobbler ink before embossing the panel using the Subtle 3D Embossing Folder. I attached a narrow strip of Gold Foil card behind one long edge of the same pattern paper from the ‘Tis The Season 6″ x 6″ Designer Series Paper. The designer series paper panel is attached to the bottom of the stamped and embossed Whisper White card before attaching to scored and folded Shaded Spruce card. The present image and the Santa hat image are once more stamped onto Whisper White card using Shaded Spruce and Cherry Cobbler ink. The images are cut out using the Layering Square Dies and attached to Gold Foil scalloped squares cut using the same dies. The images are attached to the card front using dimensionals.
To decorate the inside of this card, I attached a narrow strip of Gold Foil behind one long edge of the ‘Tis The Season 6″ x 6″ Designer Series Paper. The panel is attached to the bottom of Whisper White card.
I love how these cards turned out, don’t you? This is such a fun stamp set which lends itself to more than just Christmas.
Bye for now,
Kris
Product Used:


Warm & Toasty
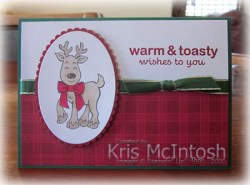
Have you seen this fun stamp set in the August-December 2020 Mini Catalogue. It can be found on 42. Don’t have a catalogue or a demonstrator then please contact me so we can organise to get a catalogue to you.  I attached a piece of ‘Tis The Season 6″ x 6″ Designer Series Paper across the bottom of Whisper White card before stamping the greeting from the Warm & Toasty stamp set onto the upper right hand corner using Cherry Cobbler ink. I coloured a length of Silver Metallic Edge Ribbon using the dark Shaded Spruce Stampin’ Blend and when it was dry tied a knot and attached it across the top of the Designer Series Paper.
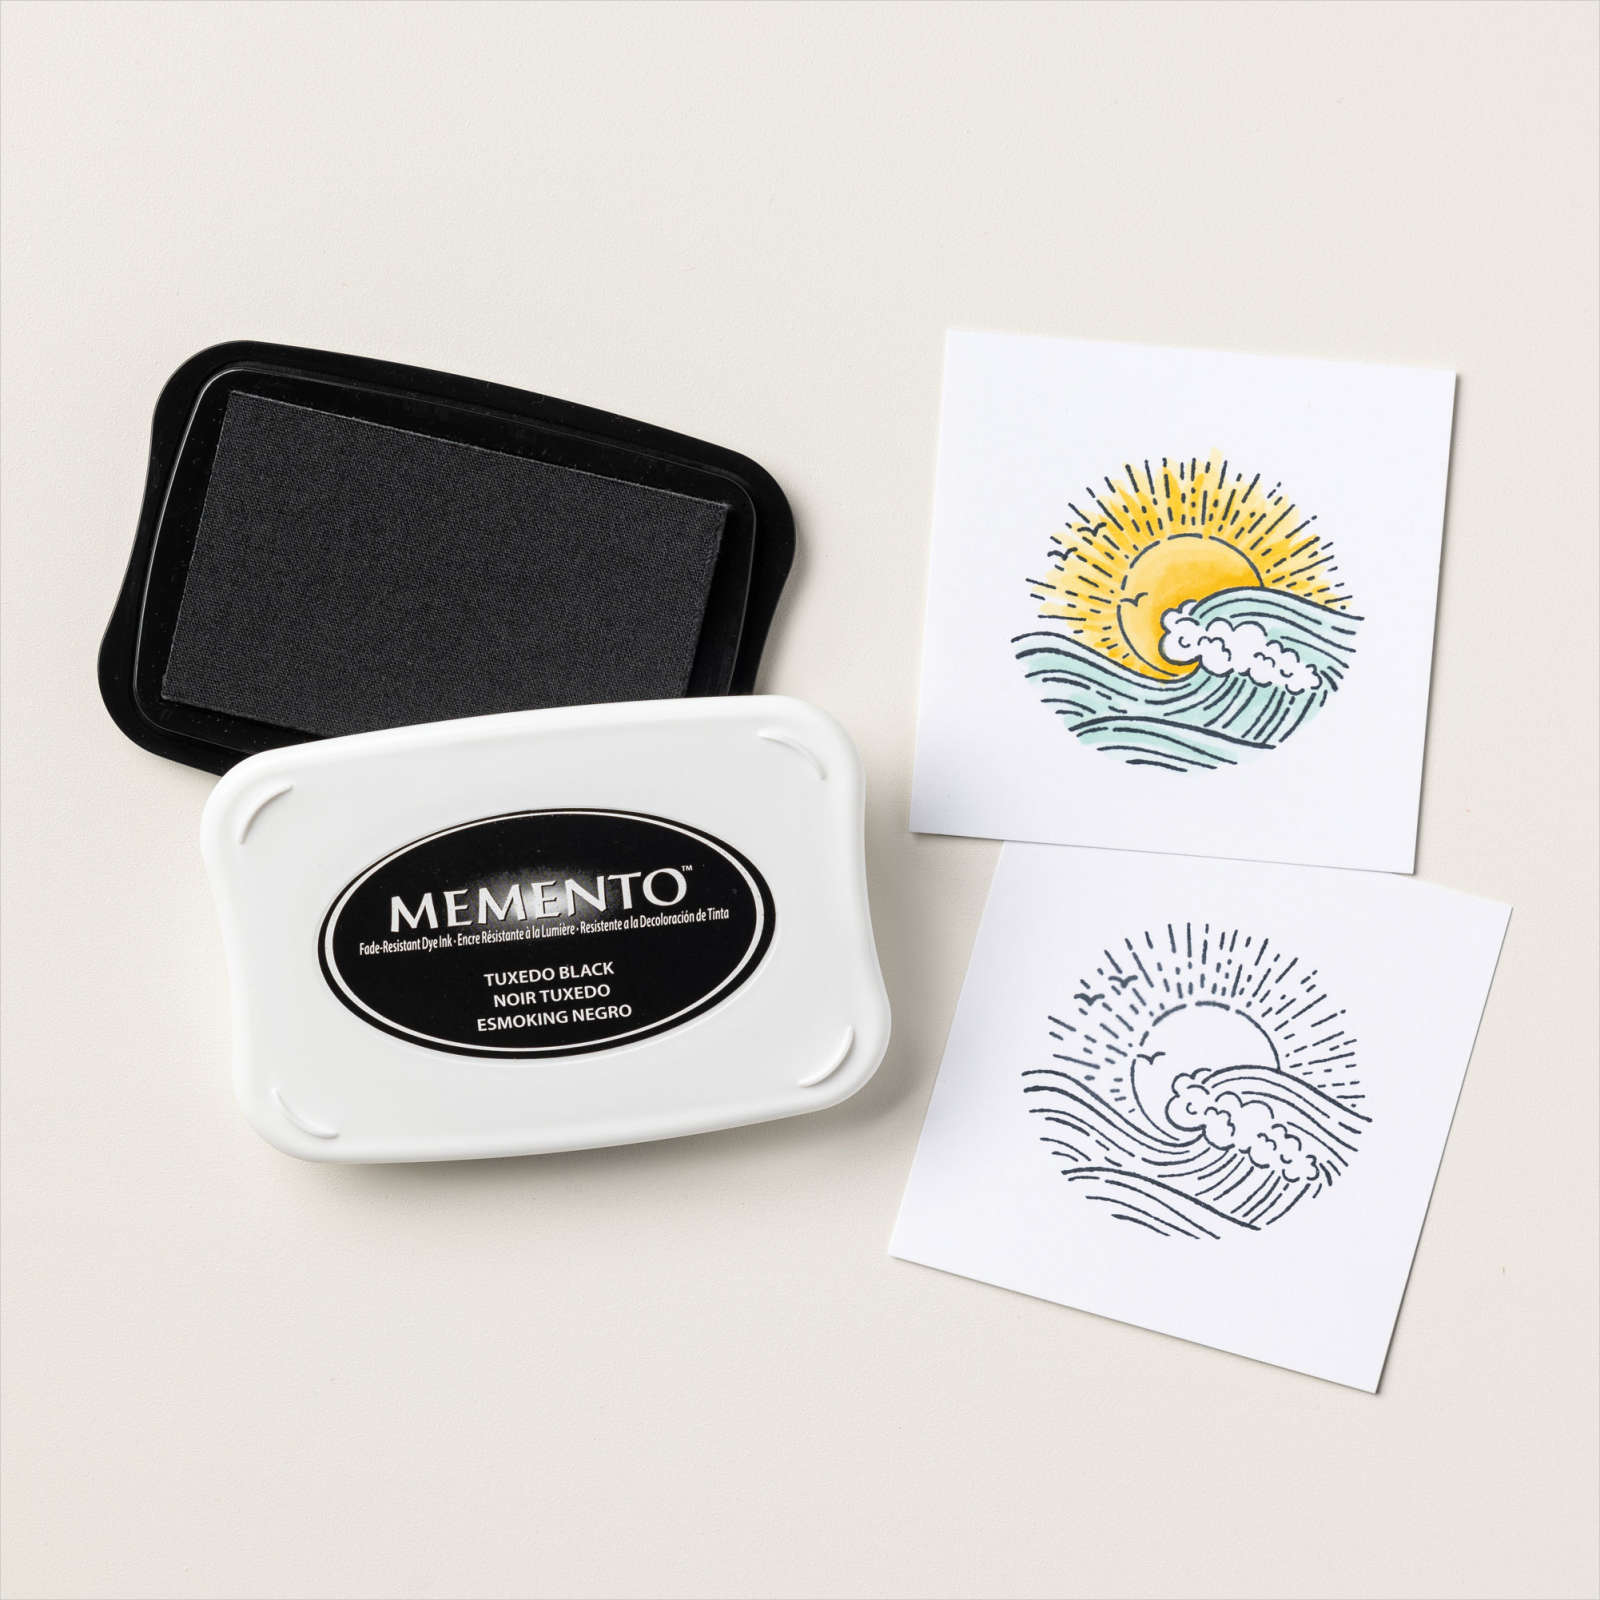
  The whole panel is attached to scored and folded Shaded Spruce card. I stamped the reindeer image from the Warm & Toasty stamp set onto Whisper White card using Memento Tuxedo Black ink and coloured it using the Crumb Cake and Cherry Cobbler Stampin’ Blends. I cut out the image using Layering Ovals Dies and attached it to a Cherry Cobbler scalloped oval cut using the same dies. The image panel is attached to the card front using dimensionals.
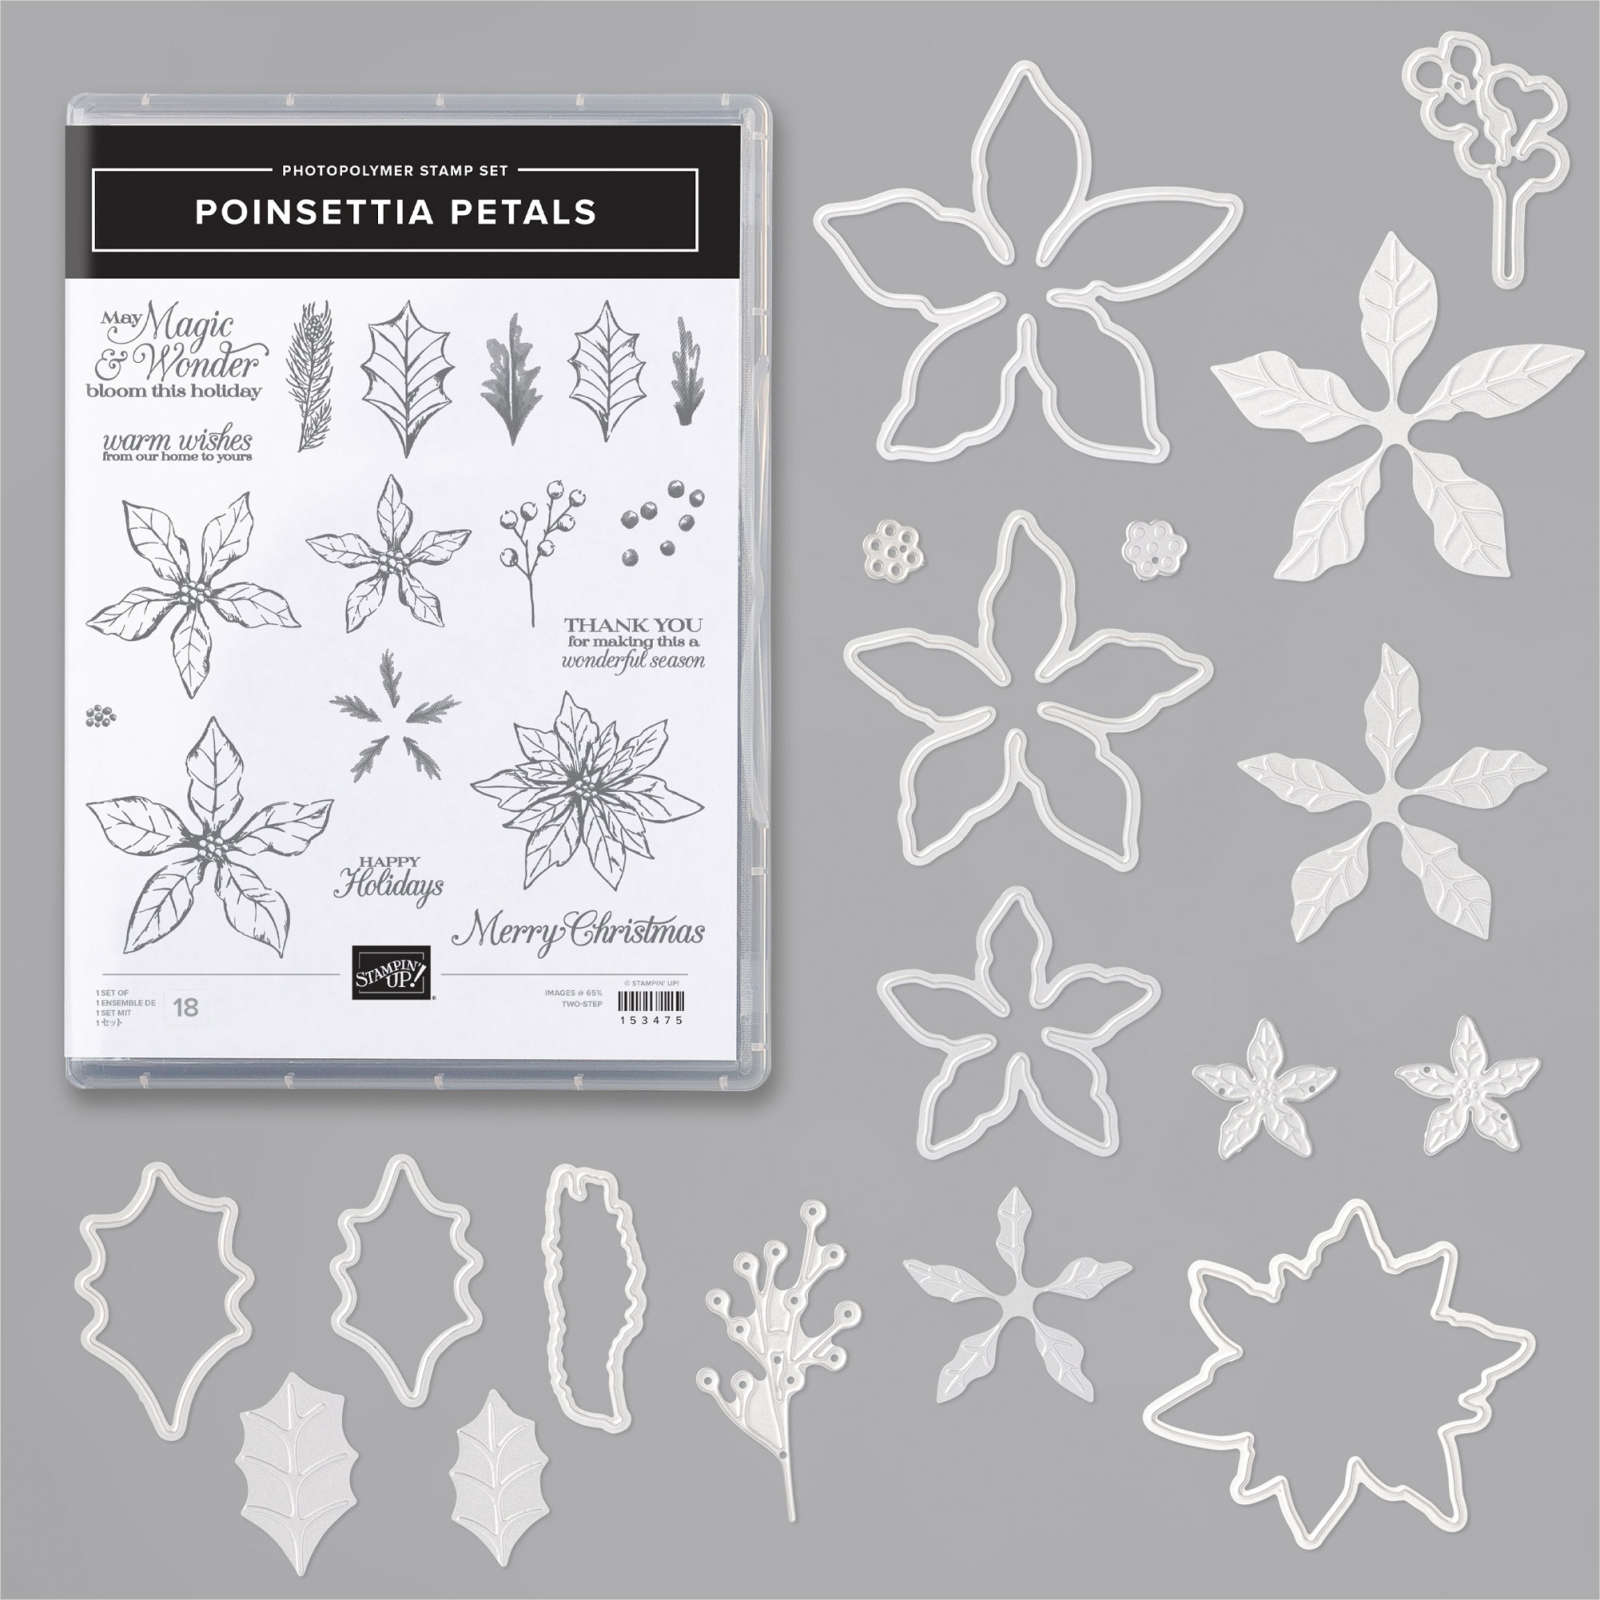
To decorate the inside I stamped the greeting from the Poinsettia Petals stamp set using Real Red ink.
This is truly a lovely stamp set to use for Christmas cards for your younger family members and friends. I’d love to hear what you think.
Bye for now,
Kris
Product Used:


Manly Thanks
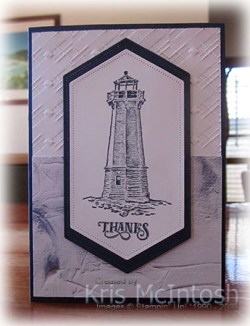
I needed to make a couple of Thank You cards for my Dad’s two doctors and couldn’t go past the Sailing Home stamp set. I embossed Whisper White card using the Absolutely Argyle 3D Embossing Folder and attached a piece of In Good Taste Designer Series Paper across the bottom. The panel is attached to scored and folded Night of Navy card.  I stamped the lighthouse image from the Sailing Home stamp set onto Whisper White card using Night of Navy ink. I added the greeting from the same stamp set using Night of Navy ink and cut out the panel using the Stitched Nested Labels Dies.
  I cut another label from Night of Navy card and attached the image panel. The whole piece is attached to the card front using dimensionals.
To decorate the inside of the card, I attached a thin strip of Night of Navy card behind one long edge of Whisper White card embossed using the Absolutely Argyle 3D Embossing Folder. The panel is attached to the bottom of Whisper White card before I stamped the sailing ship image from the Sailing Home stamp set using Night of Navy ink.

I hope the doctors receiving these love them as much as I do and maybe it will inspire them to take time for themselves as well as looking after their patients.
Bye for now,
Kris
Product Used:


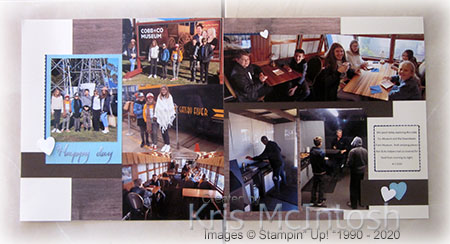
More Toowoomba
We had a lovely time exploring Toowoomba when we visited in the July school holidays. The pictures on today’s pages show off our visit to the Cobb & Co Museum and the Downsteam Train Museum, both amazing places! I used Very Vanilla 12″ x 12″ card for the base for each page. On the first page, I added the photos to the right hand side and then attached a strip of the In Good Taste Designer Series Paper.  One photo is mounted onto Balmy Blue card which is embossed using the Subtle 3D Embossing Folder. I cut Night of Navy card using the edge die in the Be Mine Stitched Dies and attached it behind the left hand side of the photo panel. I also embossed a piece of Early Espresso card using the Subtle 3D Embossing Folder. The photo panel is attached over the embossed Early Espresso card.
  I cut a heart from Whisper White card using the Be Mine Stitched Dies. I used the die cuts from the Flowers For Every Season Memories and More cards to create the title. I simply cut the “to” from the “today” die cut. The second page has a piece of the same In Good Taste Designer Series Paper attached down the left hand side. The strips of Early Espresso card are again embossed using the Subtle 3D Embossing Folder and the hearts are cut from Whisper White and Balmy Blue card using the Be Mine Stitched Dies. I created the journaling on the computer and printed onto Very Vanilla card. I cut the journaling using the Layering Square Dies, attached it to a Night of Navy scalloped square cut using the same dies before adding it to the page. Such happy memories.
I hope you like today’s pages.
Bye for now,
Kris
Product Used:


Plush Poinsettia
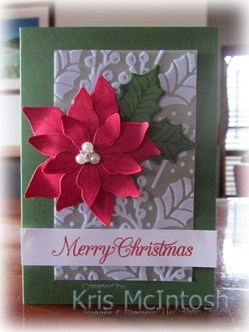
I have already shared a card using the Plush Poinsettia Specialty Paper where I cut pieces from the paper and added them to my card. However today I am CASing a project from page 16 of the August to December Mini Catalogue and using this Paper as my background. I cut a piece of the Plush Poinsettia Specialty Paper and attached it to scored and folded Garden Green card. I stamped the smaller single leaf image from the Poinsettia Petals stamp set onto Garden Green card using Garden Green ink. I also stamped the three layering flowers onto Real Red card using Real Red ink. I cut out all of the pieces using the co-ordinating Poinsettia Dies. I used my bone folder to add a little bit of a curl to each of the flower petals before layering them together. I attached the flower to the card front using dimensionals.
  I tucked the leaves underneath the flower and glued them flat to the card front. I stamped “Merry Christmas” from the Poinsettia Petals stamp set onto Whisper White card using Real Red ink. I attached the greeting to the card front using dimensionals. I also added a Beaded Pearl to the centre of the flower.
I kept the inside of the card simple by stamping a greeting from the Poinsettia Petals stamp set onto Whisper White card using Real Red ink.
I love this card and I love the Plush Poinsettia Specialty Paper and you have to love the way those Beaded Pearls just add so much to your project! Let me know what you think.
Bye for now,
Kris
Product Used:


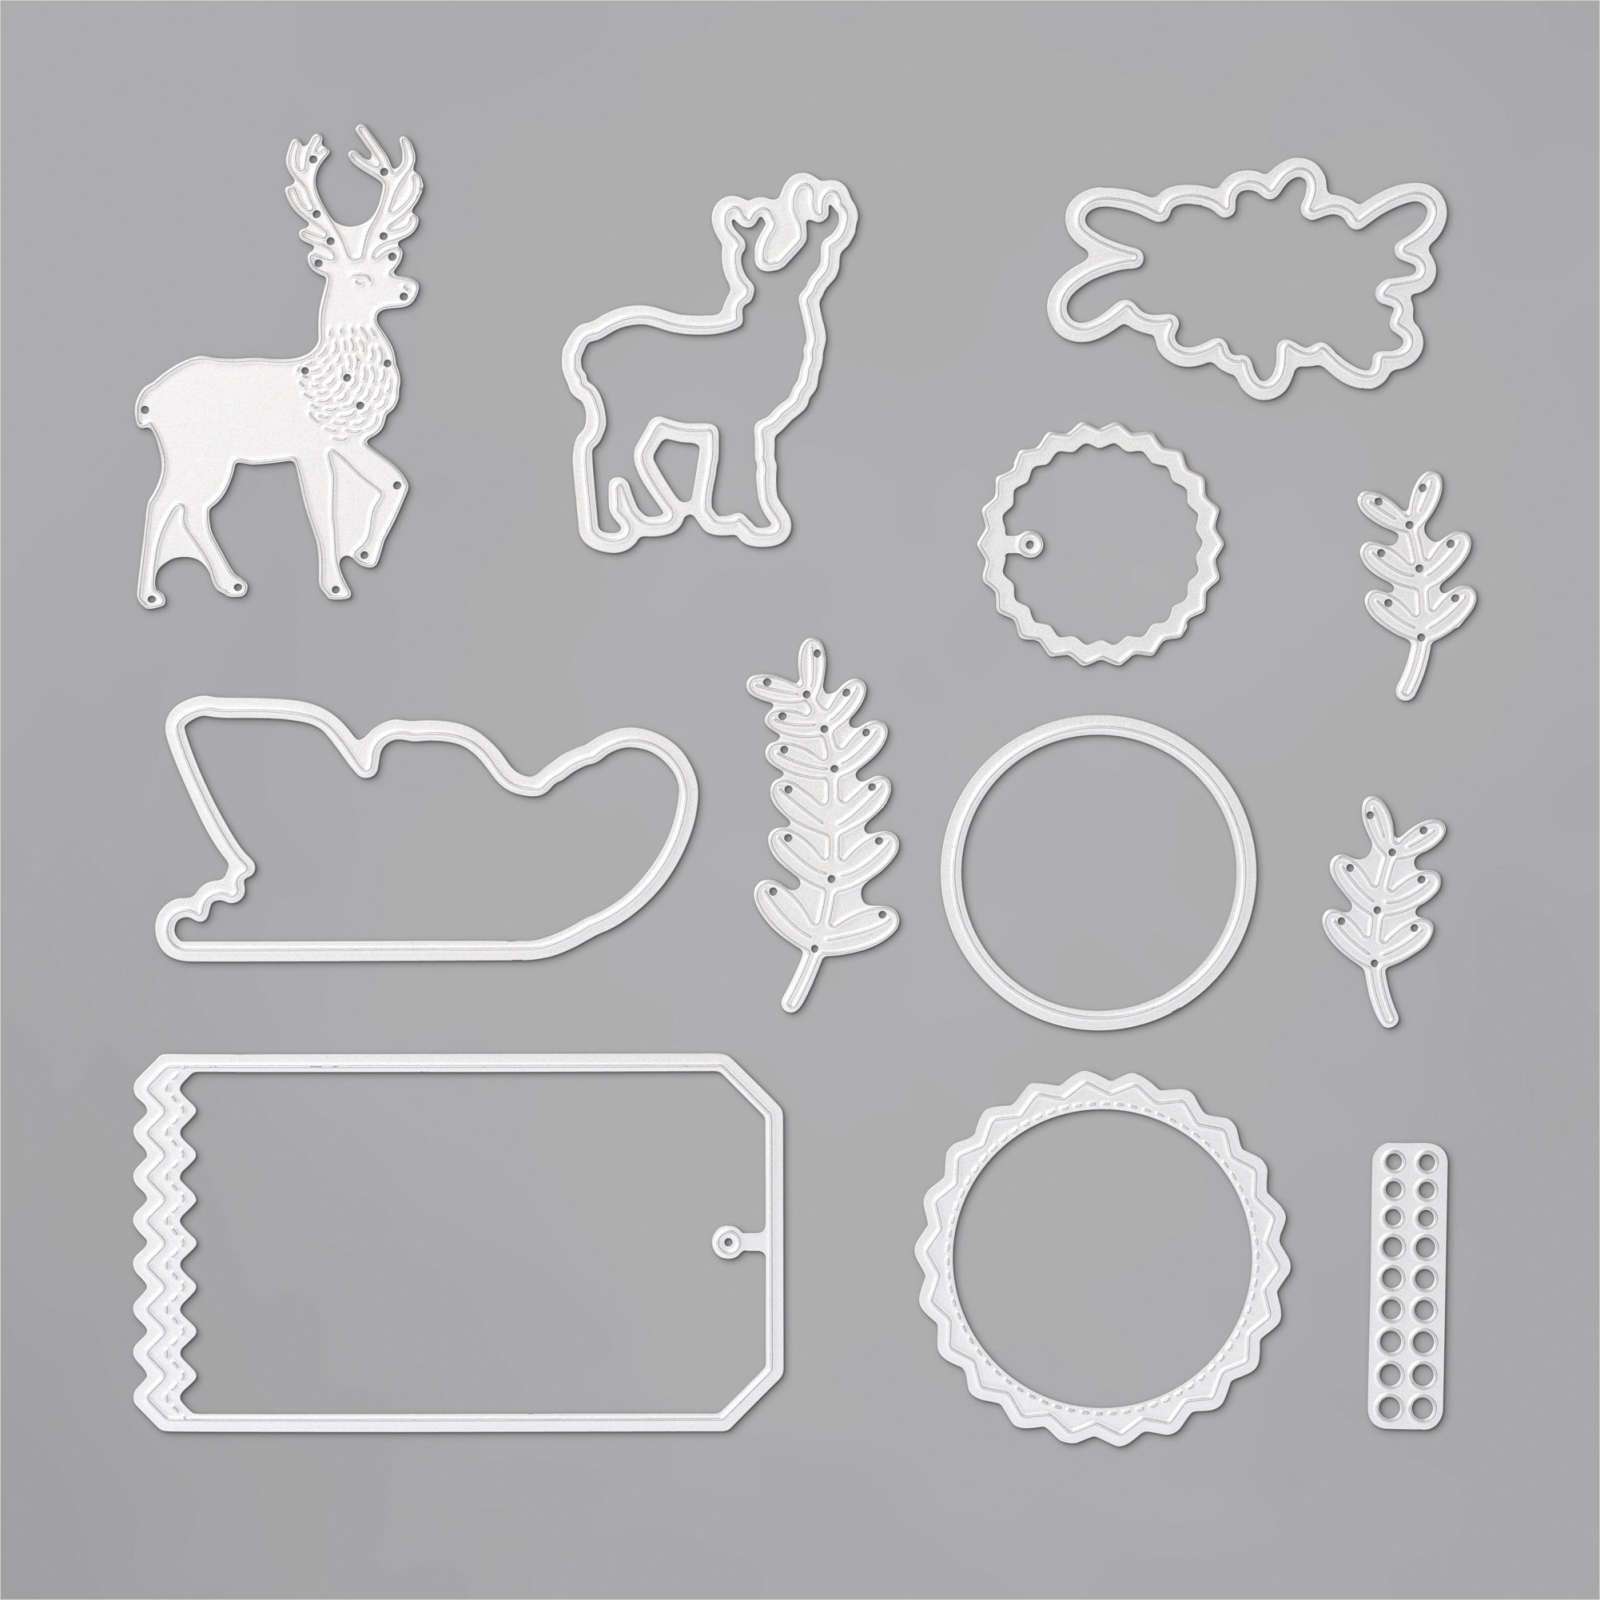
Wishes & Wonder

stamp set is part of the bundle I shared on my Facebook Live yesterday. I bought the Wishes & Wonder stamp set and the co-ordinating North Pole Wonder Dies because I thought they would work well with the In The Pines bundle. So this card uses some product from both suites. I began by embossing Whisper White card using the Evergreen Forest 3D Embossing Folder (I love this embossing folder, don’t you?). I cut Old Olive card twice using the same border die from the Pine Wood Dies. I embossed the pieces using the Subtle 3D Embossing Folder, making sure to reverse one of the pieces first. I attached the die cuts on top of each other across the bottom of the embossed card. I cut one small and two large trees from Old Olive card using the Pine Wood Dies.  I tucked the large trees under the bottom piece of Old Olive card and the small tree behind the top piece of embossed card. I stamped the reindeer image from the Wishes & Wonder stamp set onto Whisper White card using Soft Suede ink and cut it out using the co-ordinating North Pole Wonder Die. The reindeer is attached to the card front using mini dimensionals under the top part of the reindeer. I stamped the greeting from the Wishes & Wonder stamp set onto Whisper White card using Old Olive ink. I used the co-ordinating North Pole Wonder Die to cut out the image. I cut Soft Suede card using another of the North Pole Wonder Dies and attached the greeting. The whole piece is attached to the top right hand side of the embossed Whisper White card.
 The whole Whisper White panel is attached to scored and folded Soft Suede card.
To decorate the inside of the card, I cut Old Olive card using the same border die from the Pine Wood Dies and embossed it using the Subtle 3D Embossing Folder. The panel is attached across the bottom of Whisper White card. I cut the small tree from Old Olive card using the Pine Wood Die and attached it to the left hand side of the Whisper White card, tucking the tree trunk underneath the embossed card.
I had fun creating this card and know that I will continue to enjoy using these fantastic products.
Bye for now,
Kris
Product Used:


Flowery Thanks
I am still making thank you cards for the different wards that my Dad has been cared for in St. Vincents Northside. These cards are kind of cased from something I saw on the internet. I embossed Whisper White card using the Subtle 3D Embossing Folder and attached it to scored and folded Bumblebee card. I stamped the floral image from the Four Season Floral stamp set onto Whisper White card using Memento Tuxedo Black ink. I coloured the image using Magenta Madness and Just Jade Stampin’ Blends.  I punched out the image using the Postage Stamp Punch. I used my Magenta Madness Stampin’ Write Marker to ink just the “thank you” from a greeting in the So Sentimental stamp set and stamped onto Whisper White card. I cut out the greeting using the Postage Stamp Punch. I also punched two pieces from the Flowers For Every Season Designer Series Paper using the same punch.
  I attached all of the punched pieces to Bumblebee card before attaching the panel to the card front.
To decorate the inside of this card, I attached a narrow strip of Bumblebee card behind one long edge of Whisper White card which is embossed using the Subtle 3D Embossing Folder.
I loved the way this card looked and since I still needed more cards, I created another one using Just Jade ink and card and a different pattern from the Flowers for Every Season Designer Series Paper.

I think they look really pretty, don’t you.
Bye for now,
Kris
Product Used: