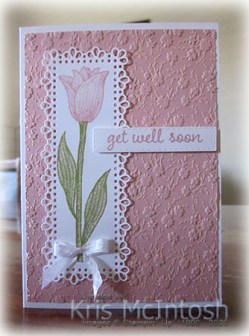
Get Well Soon
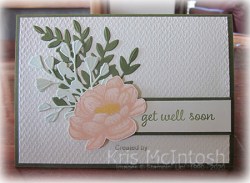
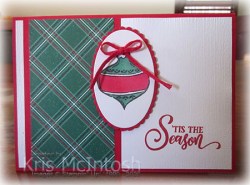
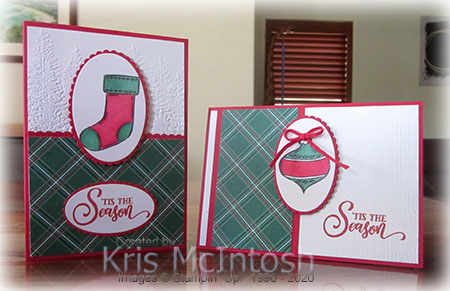
I shared this card with you recently which features some left over die cuts created for a project and then not used. Today’s card uses the remaining die cuts. I embossed Very Vanilla card using the Tasteful Textile 3D Embossing Folder and attached it to scored and folded Mossy Meadow card. I attached the leaves cut from Mossy Meadow and Soft Sea Foam card using the Forever Flourishing Dies. I stamped “get well soon” from the Timeless Tulips stamp set onto Very Vanilla card using Mossy Meadow ink.  I attached the greeting to Mossy Meadow card and then the card front using dimensionals. I stamped the flower from the Tasteful Touches stamp set onto Very Vanilla card using Petal Pink ink. I coloured the flower using the Dark Petal Pink and Dark Daffodil Delight Stampin’ Blends. I cut out the flower and attached it to the card front using dimensionals so that it would sit partially on the greeting band.
 To decorate the inside of the card, I attached another leaf cut from Mossy Meadow card using the Forever Flourishing Dies. I attached a narrow strip of Mossy Meadow card behind one long edge of Very Vanilla card embossed using the Tasteful Textile 3D Embossing Folder. The embossed panel is attached across the bottom of the Very Vanilla card covering the end of the die cut leaf. I stamped the flower from the Tasteful Touches stamp set onto Very Vanilla card using Petal Pink ink and coloured it using the Dark Petal Pink and Dark Daffodil Delight Stampin’ Blends. I cut out the flower and attached it partially over the embossed card.

So, just to refresh your memory, here are both cards together. I think they look lovely, don’t you.
Bye for now,
Kris
Product Used:


Summer Fun
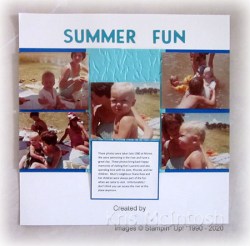
Today’s page shows off some photos of a day at the river when we were visiting my husband’s family in Moree. Not sure if this spot still exists but we had quite a few days swimming here. I embossed a piece of Coastal Cabana card using the Old World Paper 3D Embossing Folder.  I attached the embossed card to Pacific Point card and then Very Vanilla 12″ x 12″ card. I attached all the photos using dimensionals. I created the journaling on the computer and printed it onto Very Vanilla card. I attached the journaling to Pacific Point card and then to the page just below the central photo. I cut the title from Coastal Cabana card using the Playful Alphabet Dies.
This is a really simple page, I let the photos tell the story. However, I am glad that these photos have now made it out of the box and onto a page. I am sure my grandchildren will love seeing their Mum as such a young baby.
Bye for now,
Kris
Product Used:


Always Thinking of You
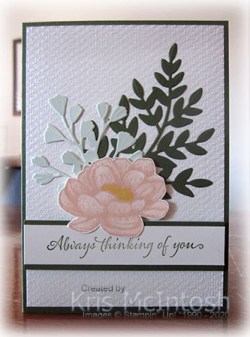
Today’s card was created after I had done some preparation work for a memory keeping project but in the end didn’t use the pieces. So I thought I would create a card for a special friend. I embossed Very Vanilla card using the Tasteful Textile 3D embossing Folder and attached it to scored and folded Mossy Meadow card. I attached the Mossy Meadow leaf and the Soft Sea Foam leaf cut using the Forever Flourishing Dies to the card front. I stamped “always thinking of you” from the Very Versailles stamp set onto Very Vanilla card using Mossy Meadow ink. I attached the greeting to Mossy Meadow card and then the card front over the ends of the die cut leaves using dimensionals.  I stamped the flower from the Tasteful Touches stamp set onto Very Vanilla card using Petal Pink ink. I coloured the flower using the Dark Petal Pink and Dark Daffodil Delight Stampin’ Blends. I cut out the flower and attached it to the card front partially over the greeting panel using dimensionals.
To decorate the inside of the card, I attached a leaf cut from Soft Sea Foam card using the Forever Flourishing Dies to the lower left hand corner of Very Vanilla card. I attached a narrow strip of Mossy Meadow card behind one long edge of a strip of Very Vanilla card embossing using the Tasteful Textile 3D Embossing Folder. The embossed panel is attached to the bottom of the Very Vanilla card covering the end of the die cut leaf. I stamped the flower from the Tasteful Touches stamp set onto Very Vanilla card using Petal Pink ink. I coloured the flower using the Dark Petal Pink and Dark Daffodil Delight Stampin’ Blends. The flower is attached over the embossed card.
I really love how this card turned out, don’t you? There are some more die cuts left over, so I will pop back with another creation soon.
Bye for now,
Kris
Product Used:
Tag Buffet
Yesterday on my Facebook Live I created each of the tags from the Tag Buffet Project Kit. To create these tags you need to purchase the Tag Buffet stamp set separately. I made a couple of cards to share today using this stamp set, just to show that it is useful far beyond the Project Kit.  For the first card, I stamped the greeting from the Tag Buffet stamp set onto the lower right hand corner of Whisper White card using Real Red ink. I embossed the stamped Whisper White card using the Subtle 3D Embossing Folder and attached it to scored and folded Real Red card.
  I cut one long edge of a piece of Real Red card using the border from the Be Mine Stitched Dies and attached a piece of the ‘Tis the Season 6″ x 6″ Designer Series Paper. The Designer Series Paper panel is attached to the left hand side of the embossed Whisper White card.
  I stamped the bauble image from the Tag Buffet stamp set onto Whisper White card using Memento Tuxedo Black ink. I coloured the image using the Real Red and Shaded Spruce Stampin’ Blends. I cut out the image using one of the Layering Ovals Dies and attached it to a Real Red scalloped oval cut using the same dies. The image panel is attached to the card front using dimensionals. I tied a bow in a length of Real Red Braided Linen Trim and attached it to the top of the bauble.
 To decorate the inside of the card, I stamped the greeting from the Tag Buffet stamp set onto Whisper White card using Real Red ink.
For the second card, I embossed Whisper White card using the Evergreen Forest 3D Embossing Folder. I cut the edge of a strip of Real Red card using the border die from the Be Mine Stitched Dies. I attached the border piece behind one edge of a piece of ‘Tis the Season 6″ x 6″ Designer Series Paper before attaching the panel to the bottom of the embossed card. I attached the whole piece to scored and folded Real Red card. I stamped the stocking image from the Tag Buffet stamp set onto Whisper White card using Memento Tuxedo Black ink. I coloured the image using Real Red and Shaded Spruce Stampin’ Blends before cutting out the image using the Layering Ovals Dies. I attached the image panel to a Real Red scalloped oval cut using the same dies. The image panel is attached to the card front using dimensionals. I stamped the greeting from the Tag Buffet stamp set onto Whisper White card using Real Red ink. I cut out the greeting using the Layering Ovals Dies, attached it to Real Red scalloped oval and then the card front.
To decorate the inside of the card I stamped the same greeting from the Tag Buffet stamp set onto Whisper White card using Real Red ink.
I think these cards turned out rather lovely, don’t you. I hope I have inspired you to take another look at this stamp set and see its possibilities.
Bye for now,
Kris
Product Used:


Hawaiian Birthday
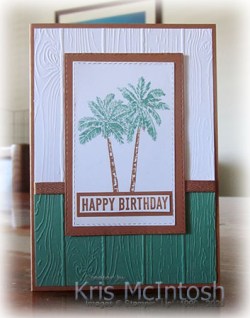
Today’s card uses the Timeless Tropical stamp set, one I have neglected for a little while. Sometimes when a new catalogue launches you forget about the stamp sets sitting on your shelf! This one was inspired by one I found on Pinterest by Melissa Kerrman. Of course it doesn’t really look like Melissa’s card but it certainly inspired me to get creative, so thank you Melissa. I attached a piece of Just Jade card across the bottom of Whisper White card before embossing the panel using the Pinewood Planks Embossing Folder. I wrapped the top of the Just Jade card using the Cinnamon Cider In-Colour Ribbon before attaching to scored and folded Cinnamon Cider card. I inked the palm tree image from the Timeless Tropical stamp set using Just Jade and Cinnamon Cider Stampin’ Write Markers. I cut out the image using one of the Stitched Rectangle Dies. I also cut a rectangle from Cinnamon Cider card using the same dies. I attached the image rectangle to the Cinnamon Cider rectangle and then the card front using dimensionals.
  I stamped the greeting from the Itty Bitty Birthday stamp set onto Whisper White card using Cinnamon Cider ink and cut it out using my Paper Snips. I attached the greeting to Cinnamon Cider card and then the image panel on the card front.
To decorate the inside of the card, I inked the palm tree image from the Timeless Tropical stamp set using the Just Jade and Cinnamon Cider Stampin’ Write Markers. The image is stamped onto the lower left hand corner of Whisper White card.
I love this card, so bright and cheery and perfect for your special someone. I don’t know why I have neglected this stamp set for so long.
Bye for now,
Kris
Product Used:


Get Well Soon
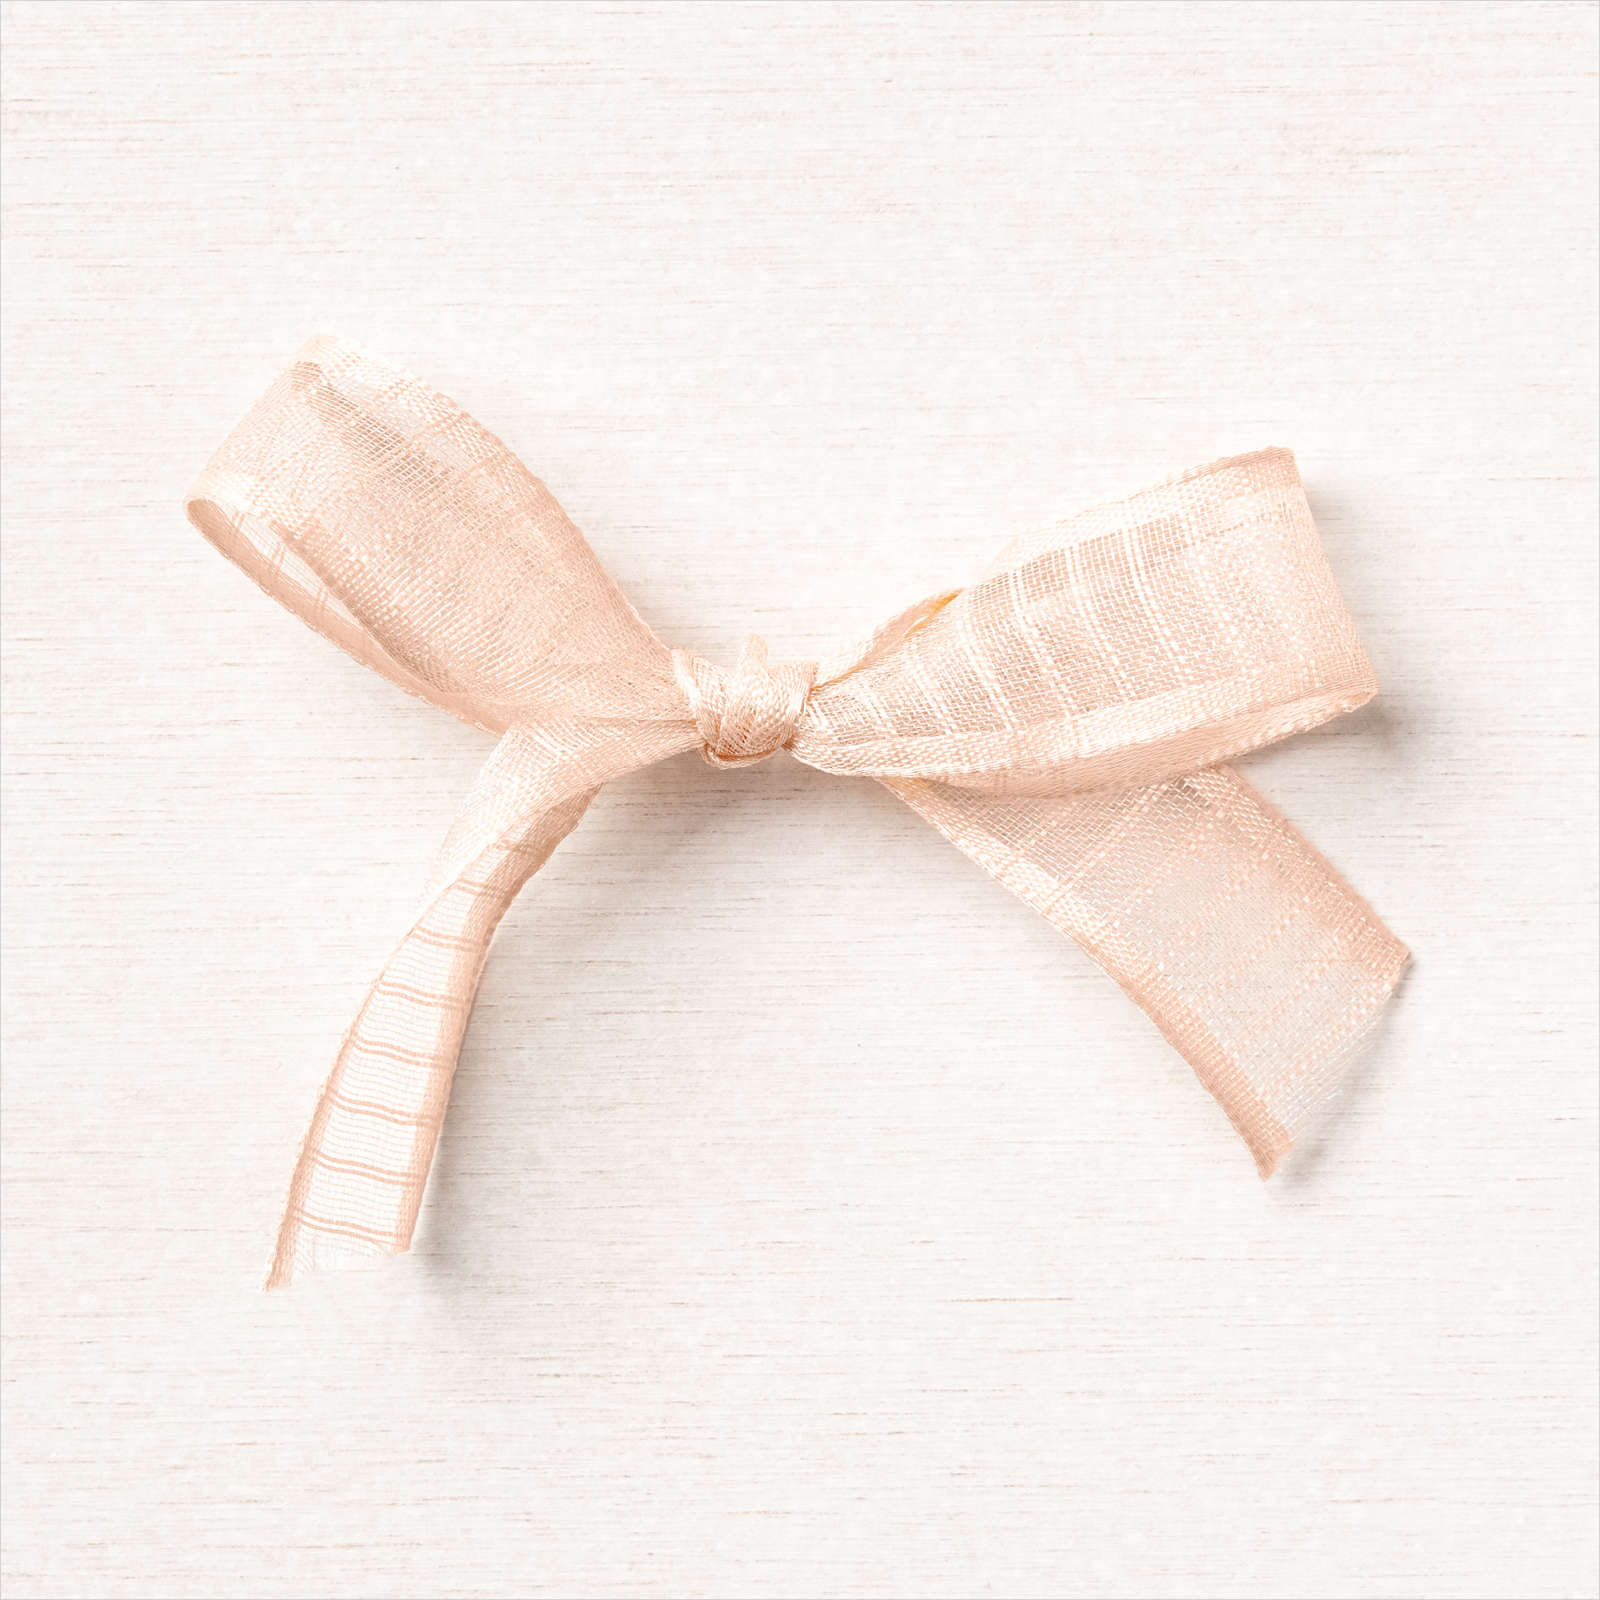
Today’s card is one I made using another stamp set which has sat unused on my shelf for quite some time. I am not sure why as it is such a lovely stamp set to play with and has gorgeous greetings too. I embossed Blushing Bride card using the Ornate Floral 3D Embossing Folder and attached it to scored and folded Thick Whisper White card. I cut Whisper White card using one of the die from the Ornate Layers Dies. I stamped the small tulip image from the Timeless Tulips stamp set onto the die cut using Blushing Bride ink. I masked the bottom of the die cut using a Post-it-Note and stamped the stem image from the Timeless Tulips stamp set using Pear Pizzazz ink.  I also stamped one of the leaves from the Timeless Tulips stamp set twice using Pear Pizzazz ink. I attached the Whisper White die cut to the left hand side of the card front. I stamped the greeting from the Timeless Tulips stamp set onto Whisper White card using Blushing Bride ink and cut it out using one of the Stitched Rectangle Dies.
  The greeting is attached to the card front using dimensionals. I tied a bow in a length of Whisper White 1/4″ Crinkled Seam Binding and attached it to the flower stem.
To decorate the inside of the card, I stamped the small tulip image from the Timeless Tulips stamp set using Blushing Bride ink. I stamped the stem and leaf images from the Timeless Tulips stamp set using Pear Pizzazz ink.
Such a pretty card and relatively simple to create. I think it would make me feel better just looking at it. What about you?
Bye for now,
Kris
Product Used:


Port Macquarie
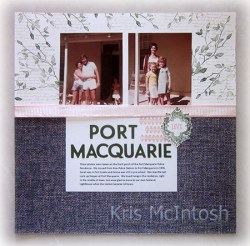
Today’s page shows off a couple of photos taken on the front porch of the Police residence in Port Macquarie. I am not sure about the fashion in these shots! I attached a piece of In Good Taste Designer Series Paper across the bottom of Very Vanilla 12″ x 12″ card. I wrapped the top of the Designer Series Paper with Petal Pink 5/8″ Organdy Striped Ribbon. I stamped the leaf image from the Very Versailles stamp set around the edges of the Very Vanilla card using Mossy Meadow ink.  I also stamped the “wordy” image from the Very Versailles stamp set using Crumb Cake ink. The photos are attached in the centre of the stamping. I created my journaling on the computer and printed it onto Very Vanilla card and stamped the lacey image from the Very Versailles stamp set onto the top right hand corner using Petal Pink ink. The journaling panel is attached to the Designer Series Paper just below the ribbon. The title is created using Mossy Meadow card and the Playful Alphabet Dies.
  I stamped the medallion image from the Very Versailles stamp set onto scrap Very Vanilla card using Mossy Meadow ink. I stamped “love” from the Well Said stamp set in the centre of the medallion using Petal Pink ink. I fussy cut the medallion and attached it to the top right hand corner of the journaling panel.
I am really happy with this layout. It’s nice to have these photos (even if the fashion is not so great) out of the box on my shelf and onto a page. Looking at the photos bring back many happy memories of this time in our life.
Bye for now,
Kris
Product Used:


Love
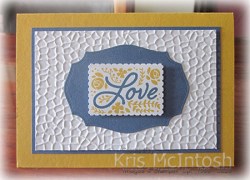
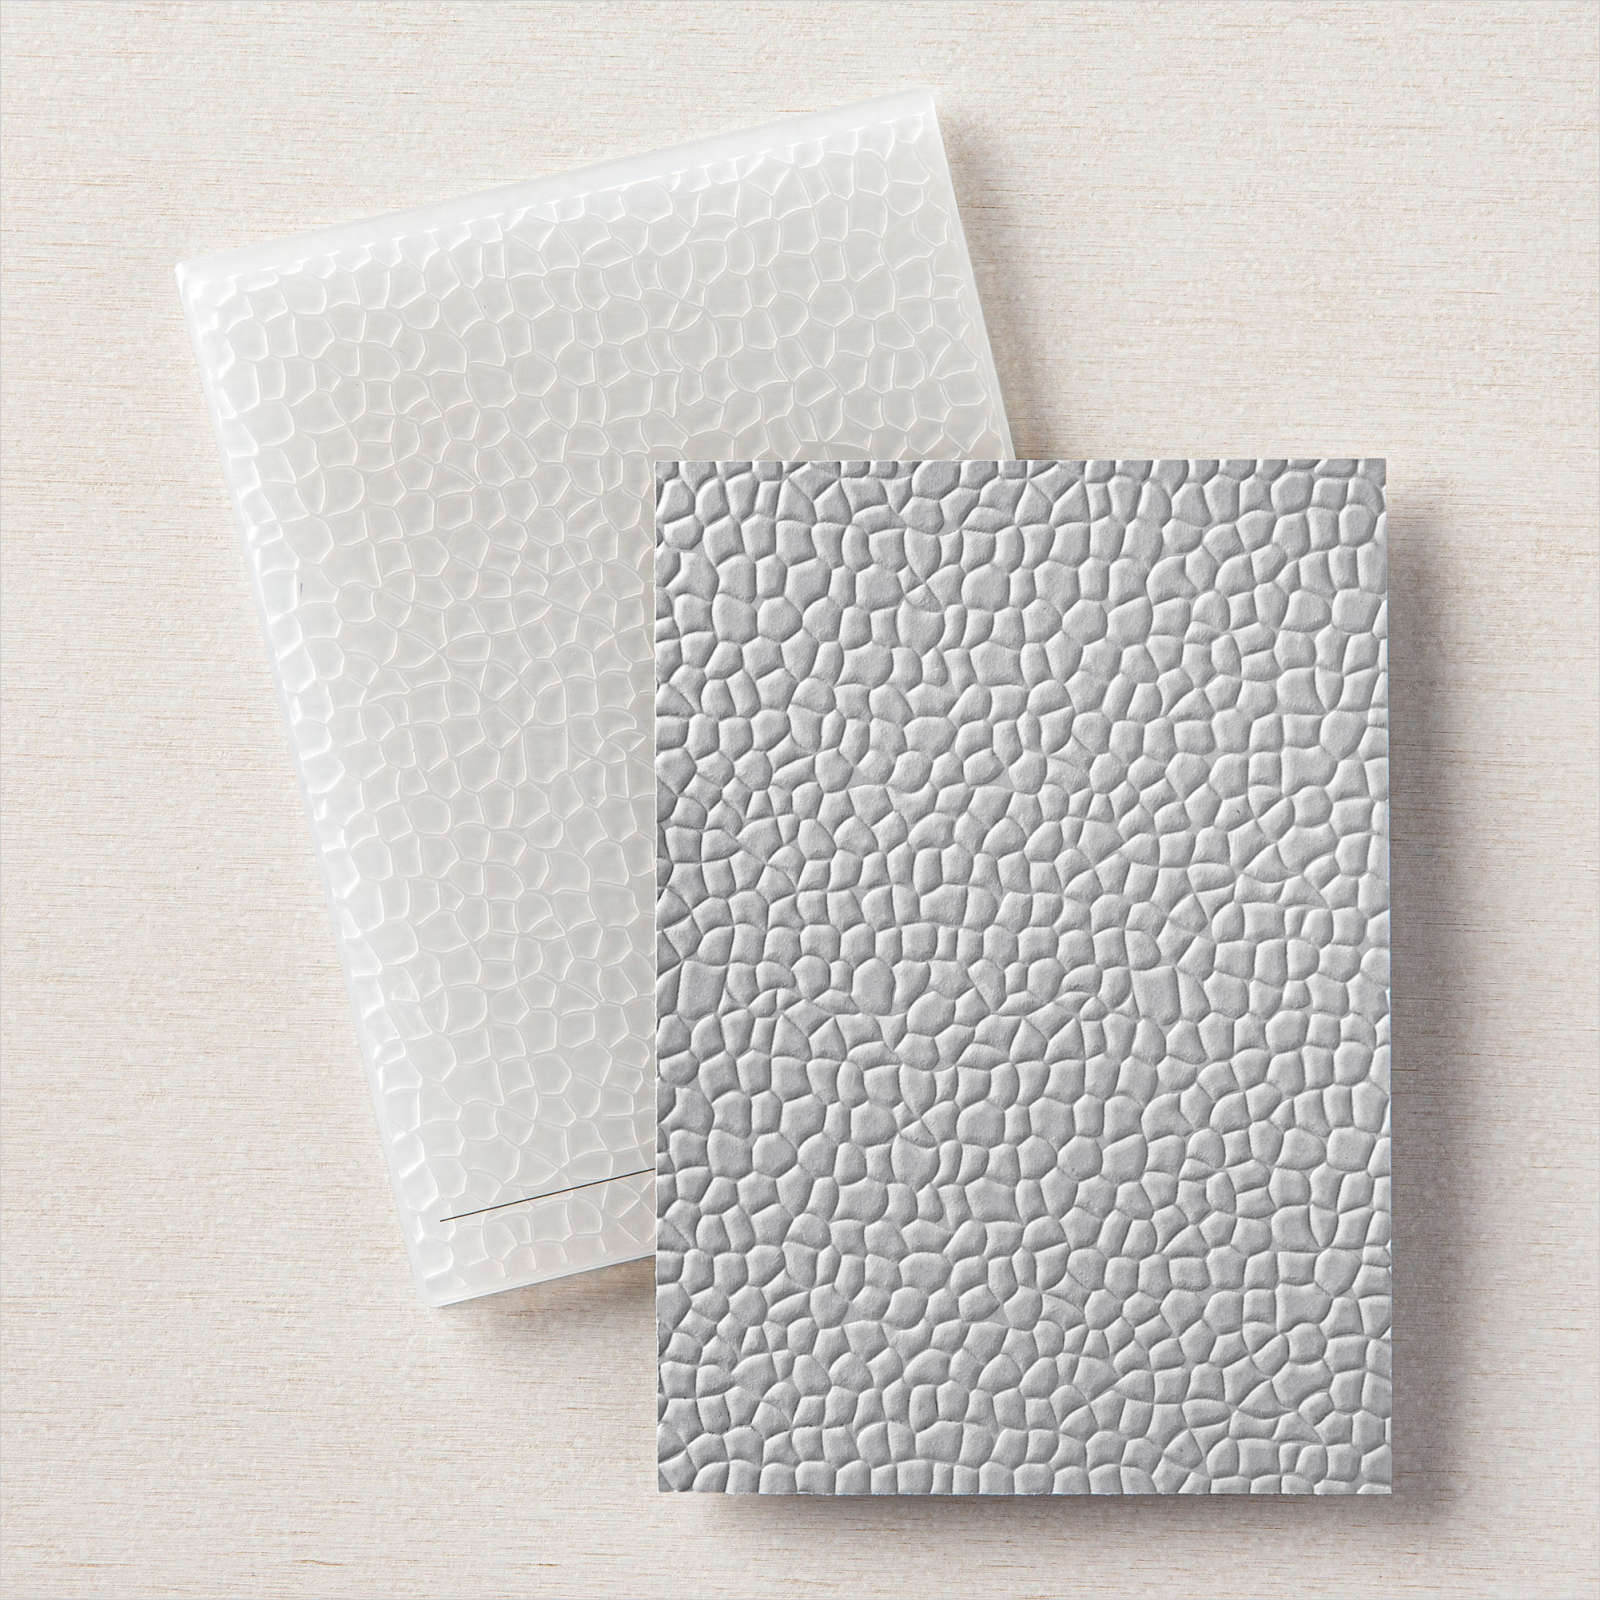
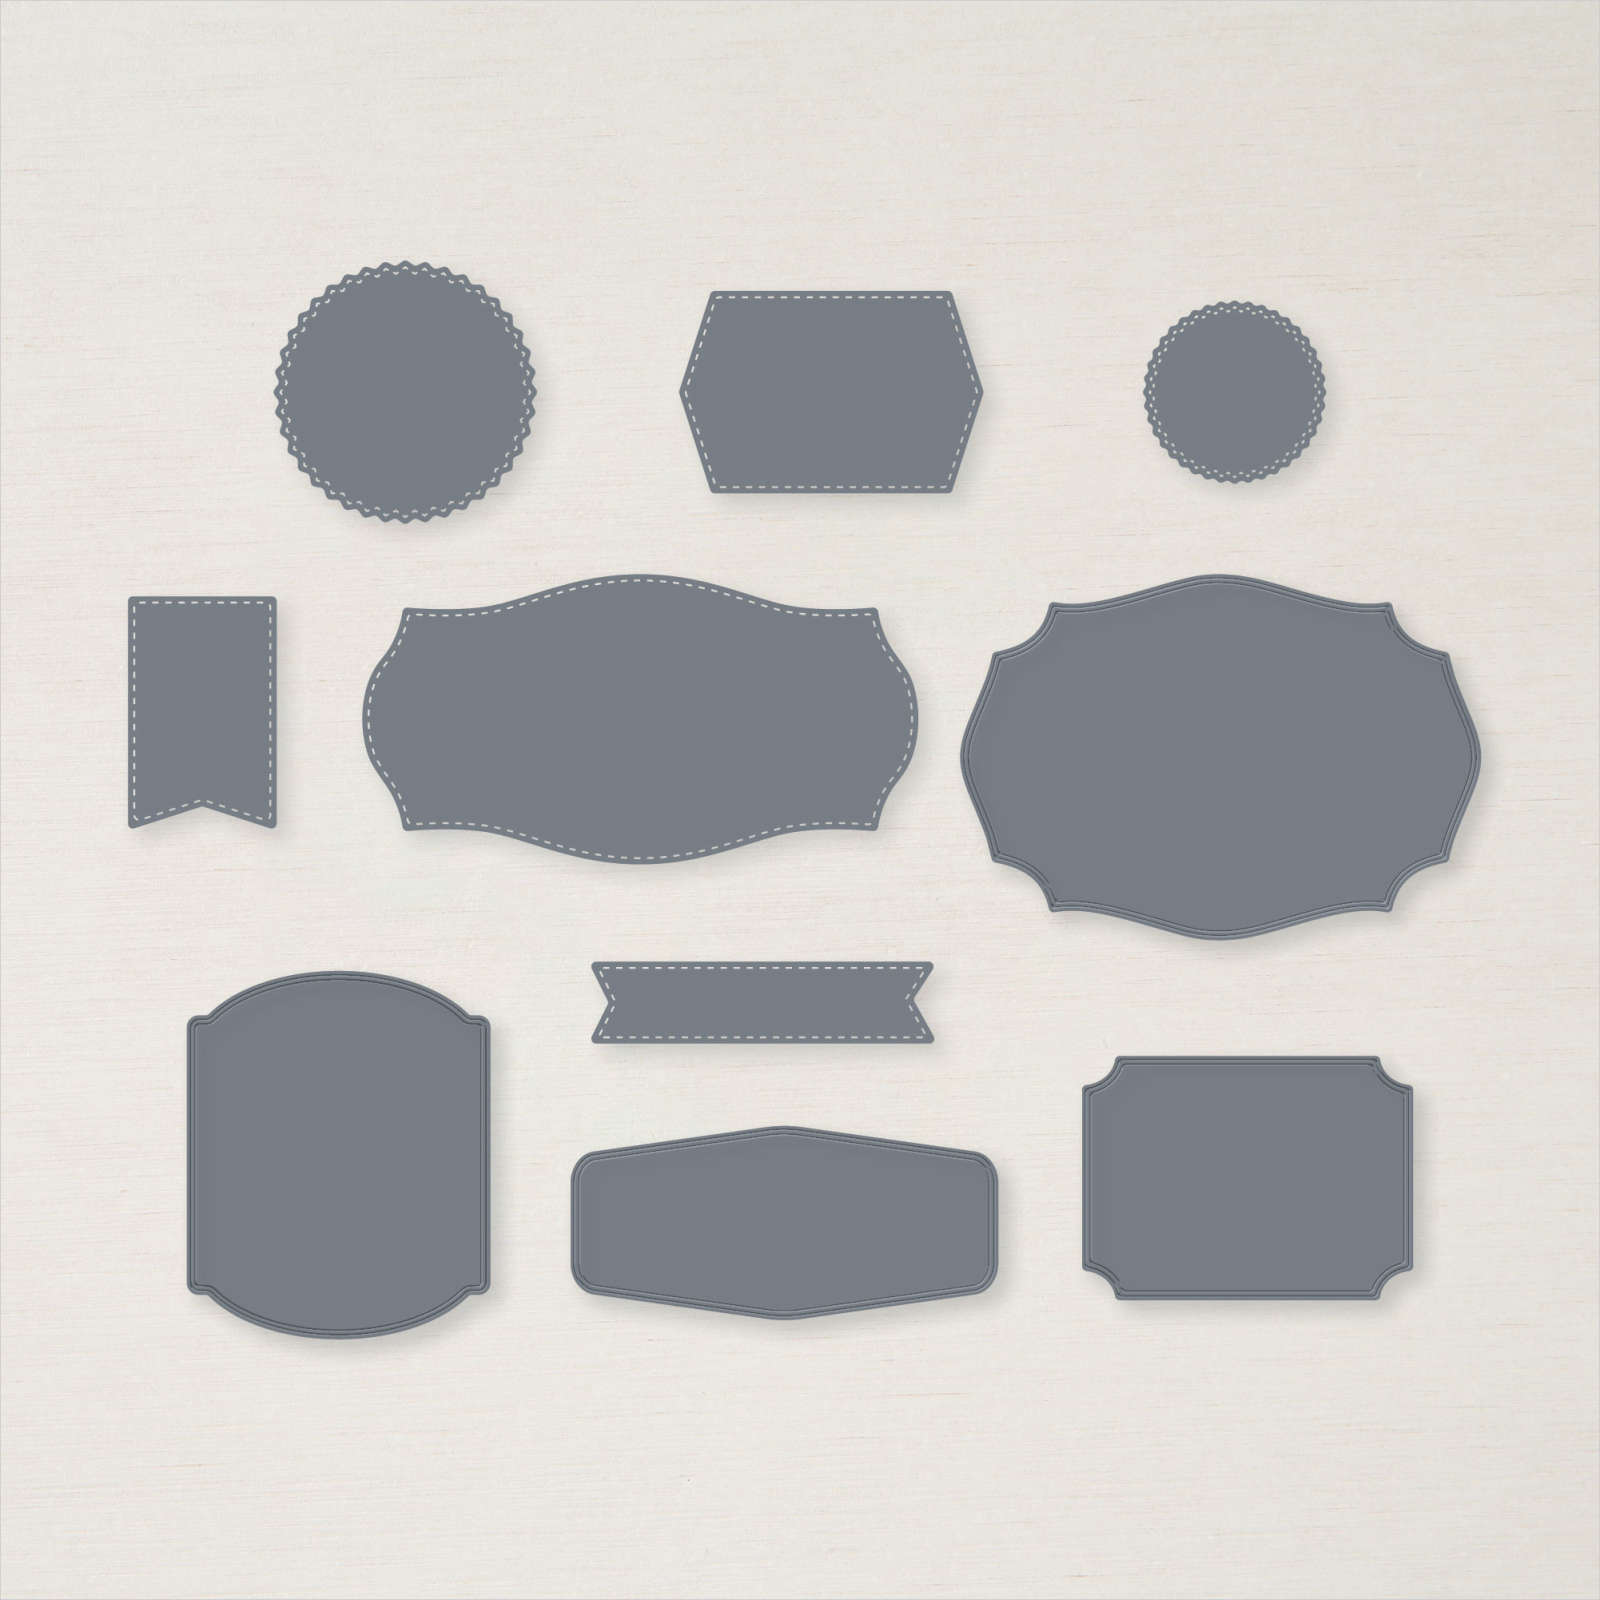
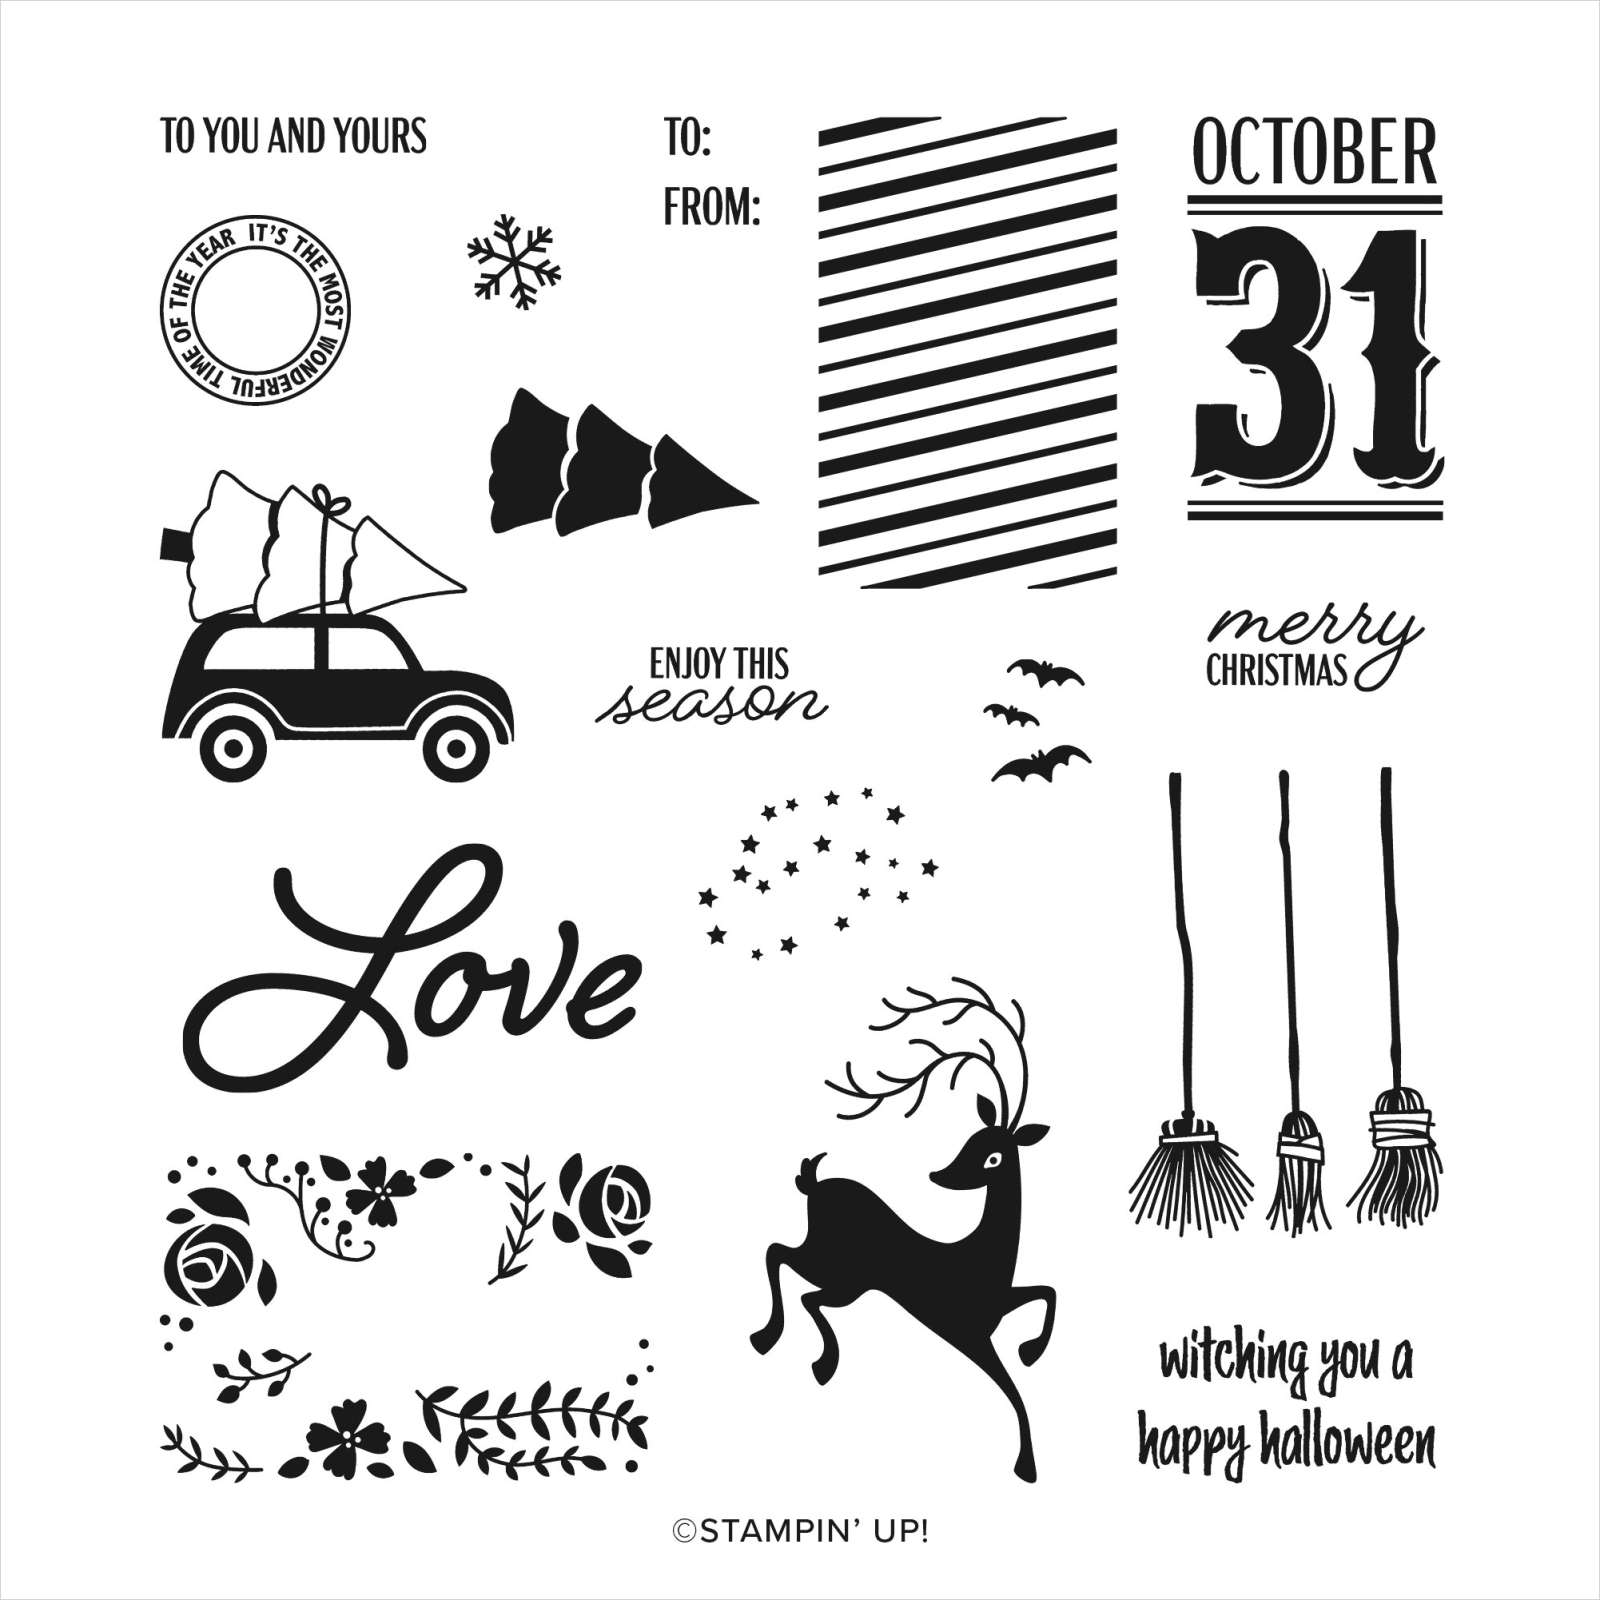
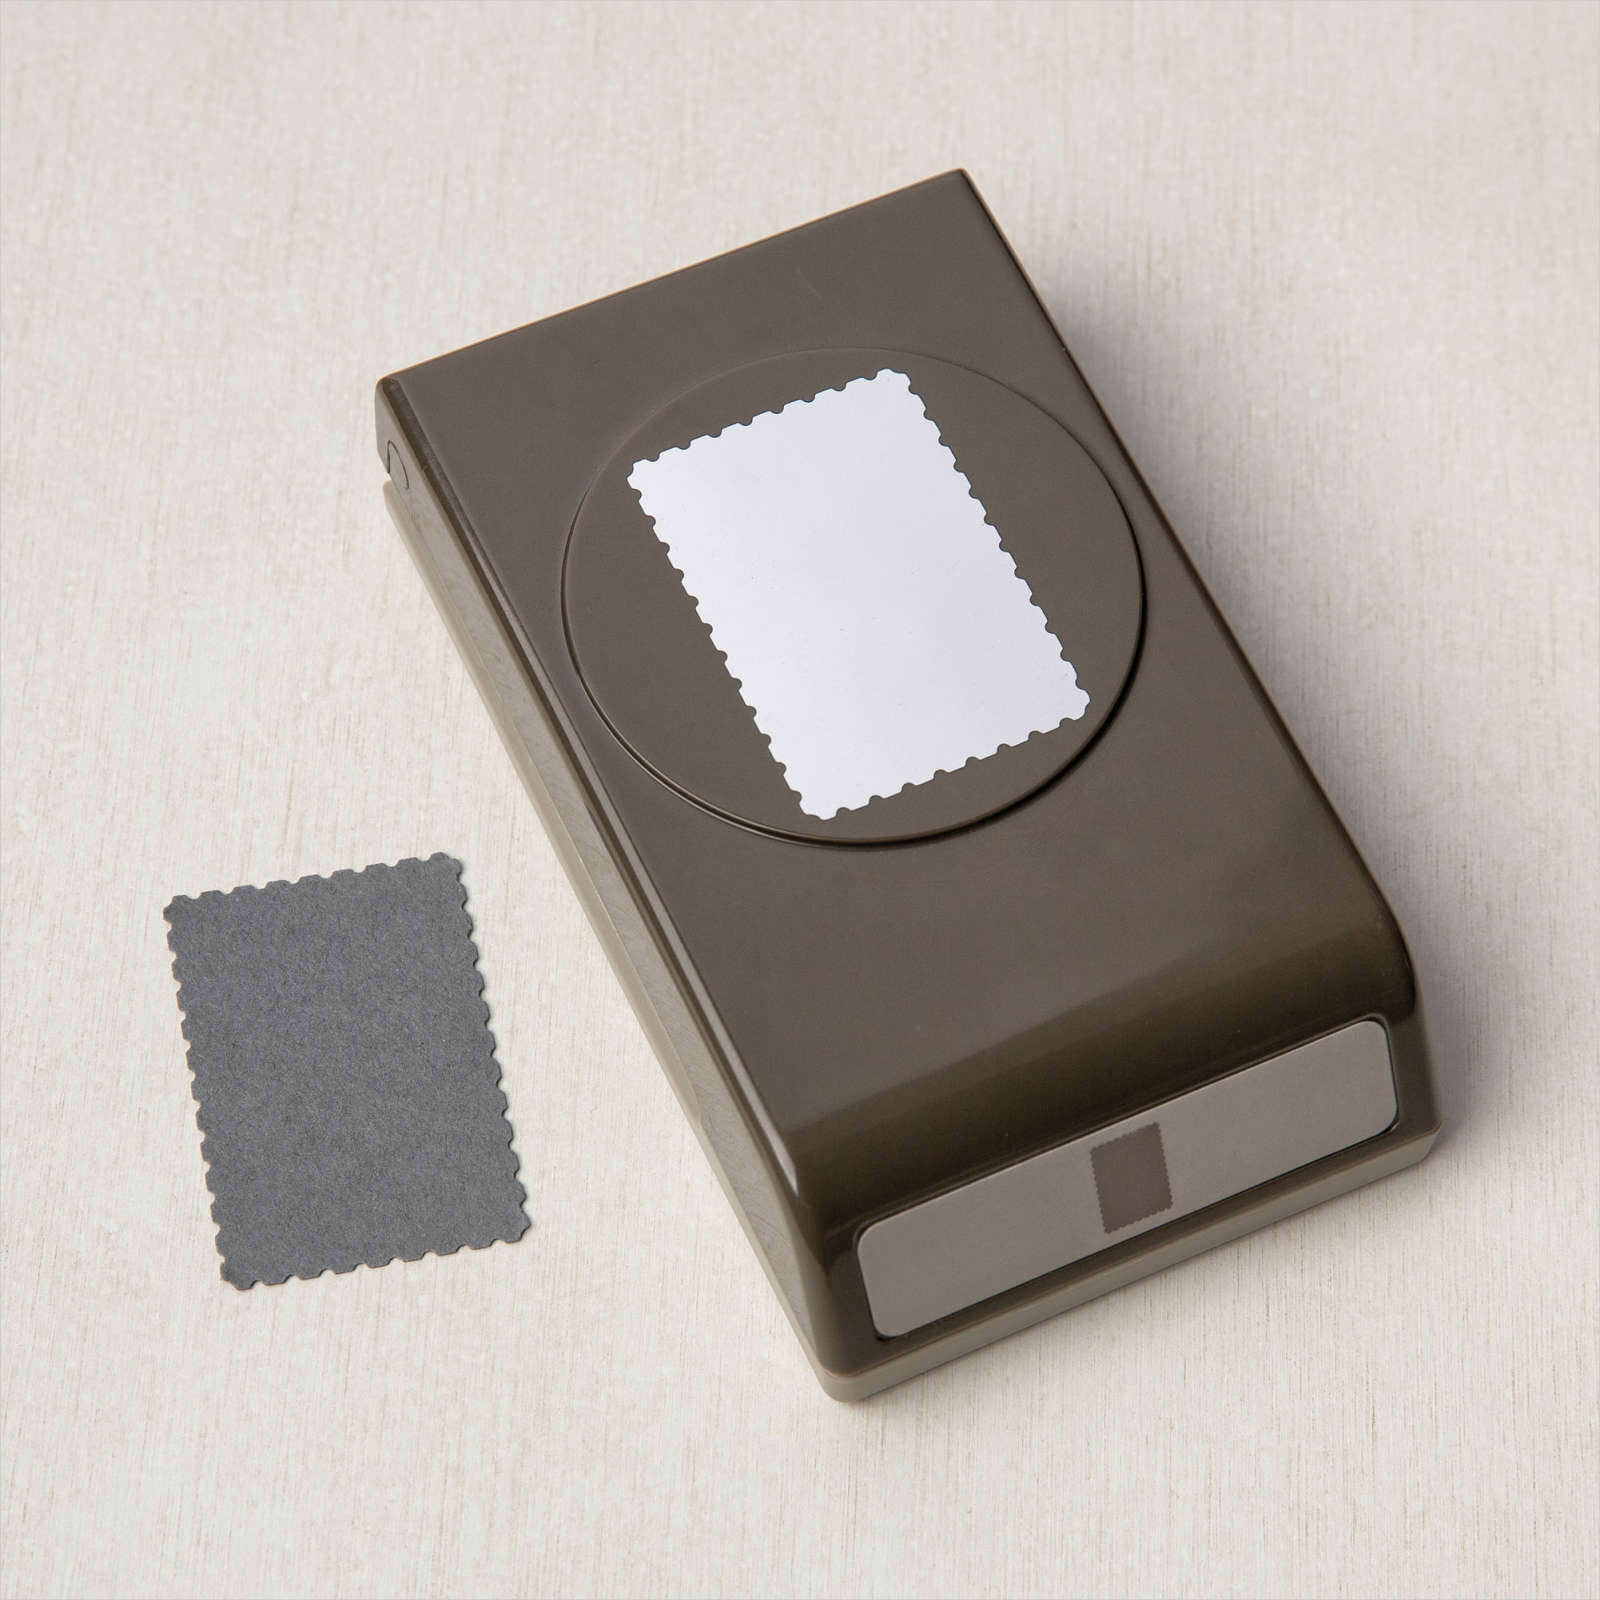
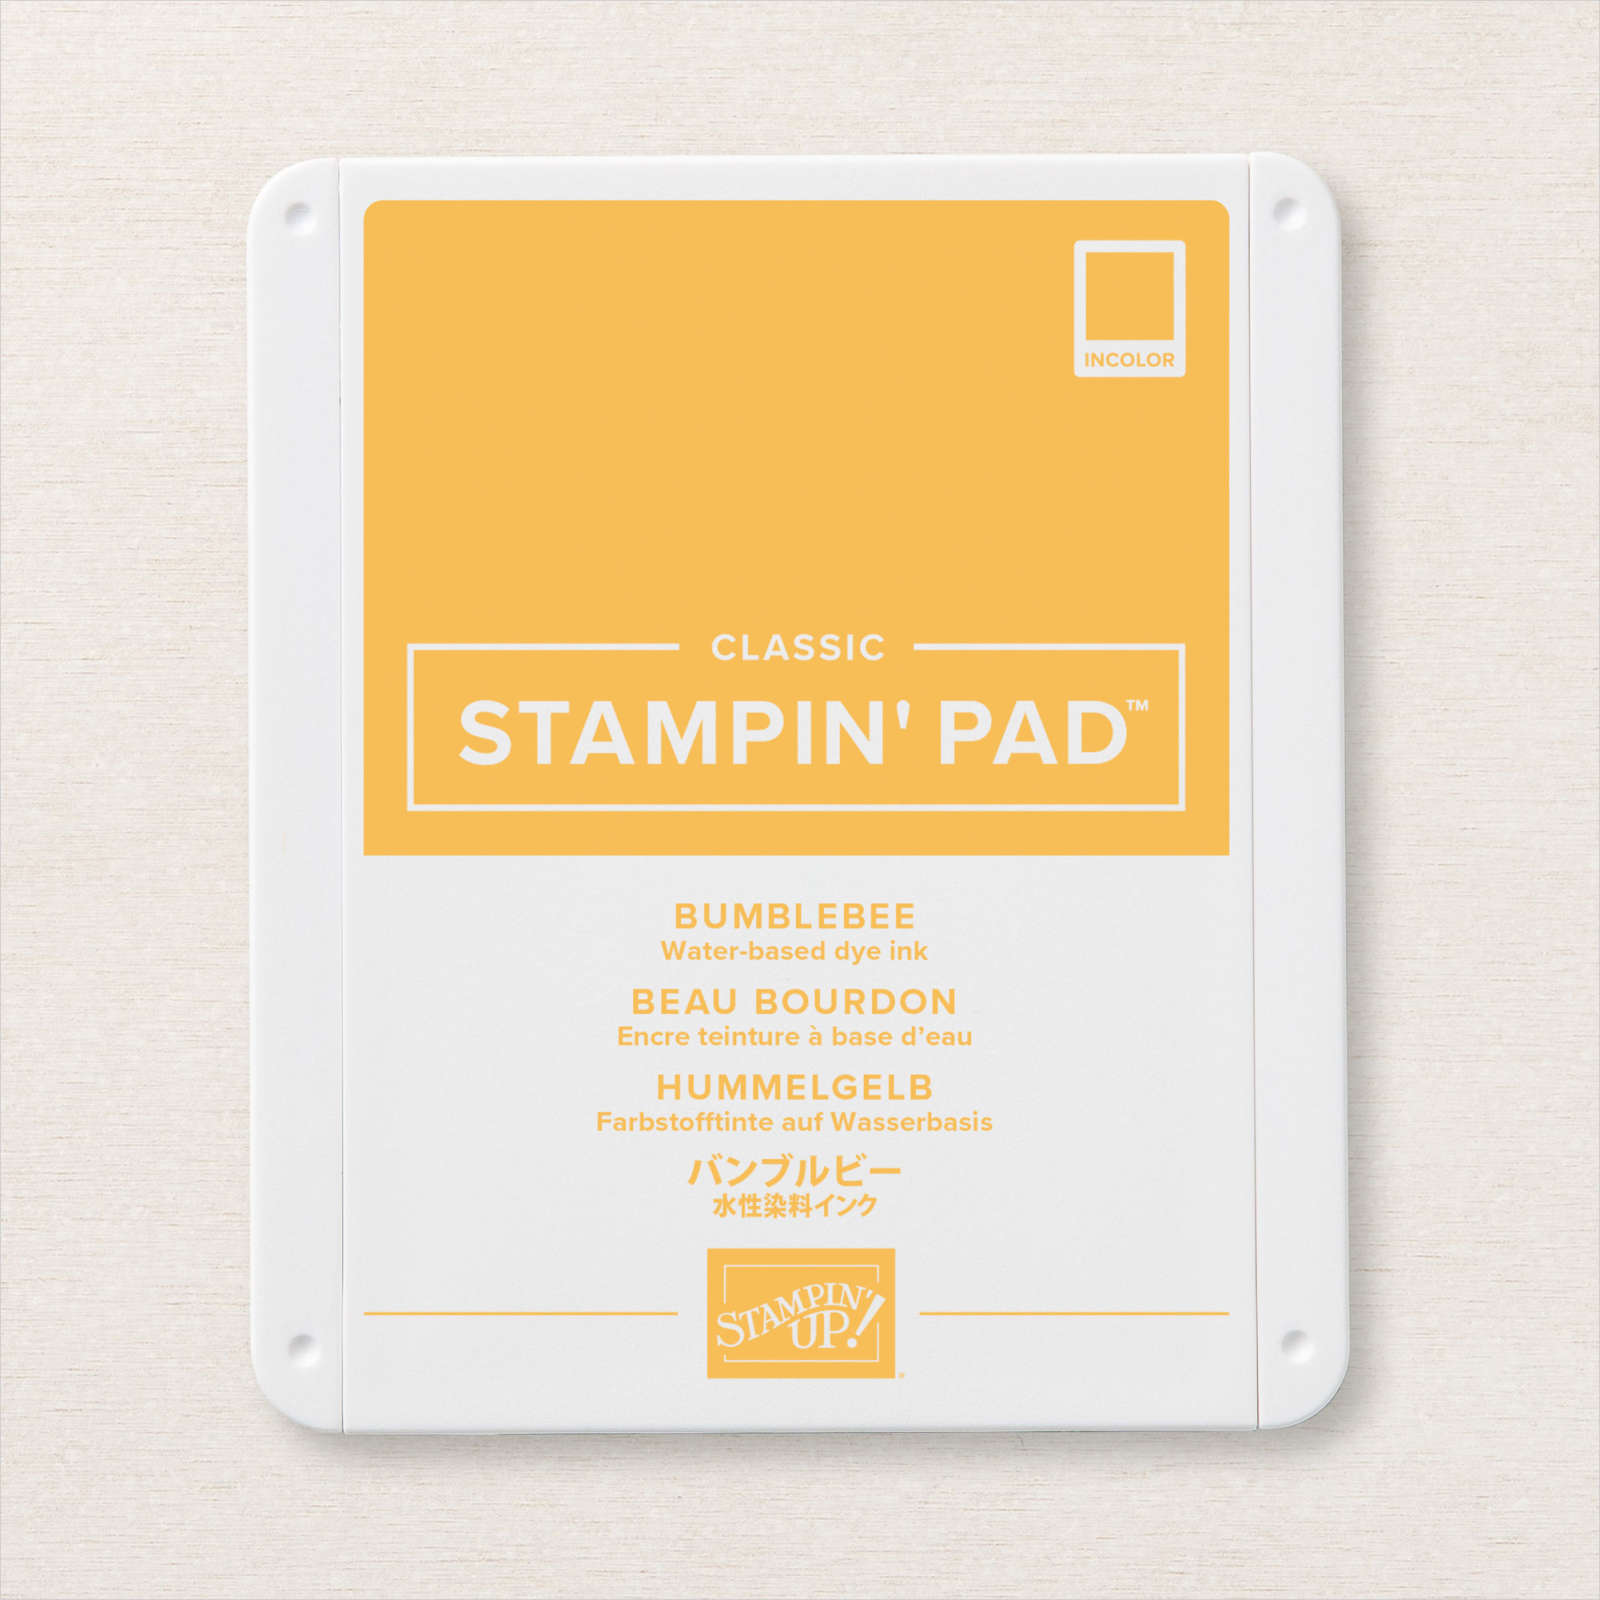
Here is another card using the Festive Post stamp set and co-ordinating Postage Stamp Punch which I shared on my Facebook Live this week. I embossed Whisper White card using the Hammered Metal 3D Embossing Folder and attached it to Misty Moonlight card. The whole panel is attached to scored and folded Bumblebee card.  I cut Misty Moonlight card using one of the dies from the Tasteful Labels Dies and attached it to the centre of the embossed Whisper White card. I stamped the floral image from the Festive Post stamp set onto Whisper White card using Bumblebee ink.
  The word “love” which is also one of the images from this stamp set fits inside the floral outline! I stamped “love” using Misty Moonlight ink. I punched out the image using the Postage Stamp Punch and attached it to the card front using dimensionals.
To decorate the inside of the card, I stamped the greeting from the So Sentimental stamp set using Misty Moonlight ink.
Simple but effective, don’t you think?
Bye for now,
Kris
Product Used:


Festive Deer
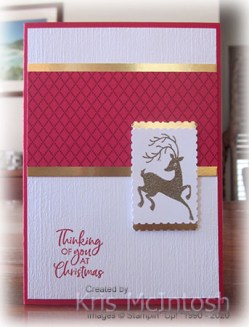
Today’s card uses the Festive Post stamp set which I shared on my Facebook Live yesterday and a layout shared on Lisa Curcio’s blog. It’s a great layout and can work with almost any stamp set you have a mind to use! I stamped the greeting from the Itty Bitty Christmas stamp set onto the lower left hand corner of Whisper White card using Real Red ink. The stamped Whisper White card is embossed using the Subtle 3D Embossing Folder. I attached a piece of the ‘Tis The Season 6″ x 6″ Designer Series Paper onto Gold Foil before attaching the panel to the embossed card. The whole piece is attached to scored and folded Real Red card.  I stamped the deer image from the Festive Post stamp set onto Whisper White card using Versamark ink, sprinkled it with Gold Embossing Powder and heat set it. The image is punched out using the Postage Stamp Punch. I punched Gold Foil card using the same punch and cut the piece in half.
  I attached one half of the Gold Foil piece behind the top edge of the image panel and the other piece behind the bottom of the stamped panel. The image piece is attached to the card front using dimensionals.
To decorate the inside of the card I stamped a greeting from the Wishes & Wonder stamp set onto Whisper White card using Real Red ink. I attached a narrow strip of Real Red card behind one long edge of Whisper White card embossed using the Subtle 3D Embossing Folder. The embossed panel is attached across the bottom of the stamped Whisper White card.
I really love this card. It’s so me! Simple but has a real “wow” factor, due in part to the colours, Real Red and Gold are always fantastic together. I’d love to know what you think.
Bye for now,
Kris
Product Used:


Fab Friday Challenge #196

I saw a sketch challenge on Tuesday Morning Sketches which was kind of cute and I thought I could adapt it to use the Zany Zebras stamp set. Then I saw the current colour challenge at Fab Friday and decided to combine the two. I cut circles from Cajun Craze, Bumblebee and Cinnamon Cider card using the Layering Circles Dies. I attached the circles to Very Vanilla card and embossed the panel using the Subtle 3D Embossing Folder. I attached the embossed panel to scored and folded Cajun Craze card.  I stamped the zebra image from the Zany Zebras stamp set onto Very Vanilla card using Cajun Craze ink and cut it out using the Layering Circles Dies. I cut a scalloped circle from Cajun Craze card using the same dies and attached the image panel. The whole piece is attached to the card front using dimensionals.
  I stamped “happy birthday” from the Zany Zebras stamp set onto Very Vanilla card using Cajun Craze ink and punched it out using the Classic Label Punch. I re-inserted the greeting into the punch to cut a “v” notch in one end. I trimmed the other end square before attaching to a piece of Cajun Craze card, trimmed to match the greeting panel. The greeting is attached to the card front using mini dimensionals.
To decorate the inside of the card, I stamped “wild about you” from the Zany Zebra stamp set onto Very Vanilla card using Cajun Craze ink. I attached a narrow strip of Cajun Craze card behind one long edge of a piece of Very Vanilla card embossed using the Subtle 3D Embossing Folder.
I love this card! Thanks so much to Tuesday Morning Sketches (although I didn’t make the deadline) and Fab Friday for the colour combination. I probably never would have used these colours together without the challenge. I’d love to hear what you think.
Bye for now,
Kris
Product Used: