Cased from Sara
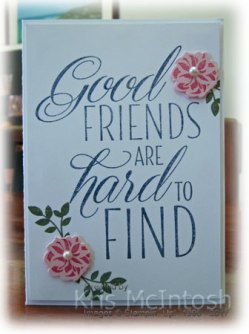
I bought the Lovely Friends stamp set and the co-ordinating Lovely laurel Thinlits in my pre-order and when getting ready for my catalogue launch I was a little stumped for a card. Sooo, I watched the video from Onstage Live in which Sara (CEO Stampin’ Up!) demonstrated how the stamps and Thinlits worked. (This is a resource only available to demonstrators at the moment.) Anyway her card was so pretty I couldn’t go past CASing it exactly as she had made it.
I stamped the good friends greeting from the Lovely Friends stamp set onto Whisper White card using Night of Navy ink. Did you know that Night of Navy can be considered a neutral? – it works so well with so many colours. Anyway after that I stamped the leaves from the same stamp set around the greeting using Always Arthichoke ink.  I stamped the large flower detail stamp onto Pink Pirouette card using Rose Red ink and then cut them out using the co-ordinating Lovely Laurel Thinlits Die. The flowers are attached to the stamped card using dimensionals. I added a large Basic Pearl to the centre of the flower. I attached the stamped card to scored and folded Thick A4 Whisper White card using dimensionals because I wanted the stamped panel to stand out from the card base a little.
The fun part comes on the inside. I cut out the two pieces to create the garland from Always Artichoke card. You add Tear and Tape adhesive on the little flaps on the end of each piece. You need to make sure that the adhesive is on the “right” side of the card so that it will attach correctly. 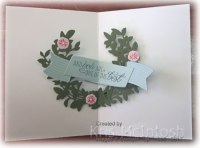 Fold along the score line so that the flap sits to the back, with the pieces intersected and lying on top of each other, right sides together, place the edge of the flap against the score line. Attach the bottom piece and close the card to attach the top piece. Open the card and you will see the garland pop up. To create the banner, you need to cut two of the pieces with the banner shape and one for the centre of the banner.
 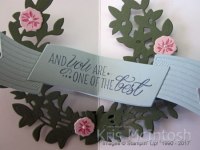 I cut my pieces from Soft Sky card. You need to add Tear and Tape to the flap on the end of each of the banner pieces making sure that you add it to the “right” side of your card. Intersect the pieces and lay them flat, with the flaps folded to the back and with the small gap in the centre of the two flaps lying over the centre fold of your card, attach it to the card base. Stamp the second half of the greeting onto the centre piece of the banner using Night of Navy ink. I added Tear and Tape to the back of the ends of the centre of the banner and attached it over the centre of the banner pieces already attached to the card. Make sure that you fold on the central score line, so that the greeting closes together. Open and close your card a couple of times and it will work perfectly.
To decorate a little more (just like Sara) I stamped the small flower detail stamp onto Pink Pirouette card and cut them out using the matching Lovely Laurel Thinlits Die. The flowers are attached to the banner using Glue Dots and a small Basic Pearl is added to the centre.
I love this card and hope that you do too. It is so beautiful and just amazing when you open it up. If I find a video that shows you how to do it I will share the link with you all.
Bye for now,
Kris
Product Used:


Wood Words

Here is the card that I made to showcase the Wood Words stamp set for my catalogue launch on the weekend. I found a sketch I liked which I think shows off the elements and co-ordinating products perfectly. I attached a piece of Wood Textures Designer Series Paper across the bottom of Whisper White card. I wrapped the join with Crushed Curry 3/8″ Mini Chevron Ribbon and attached the Whisper White card to Early Espresso card.  The panel is attached to Whisper White card and then scored and folded Early Espresso card. I stamped the focal image from the Wood Words stamp set onto Whisper White card using Rose Red ink and cut it out using a Layering Ovals Framelits Die. I attached the stamped oval to a Early Espresso scalloped oval cut using the same dies and then the card front using dimensionals.
 I stamped the circle image from the Wood Words stamp set onto Whisper White card using Rose Red ink and punched it out using the 1″ Circle Punch. I stamped “for you” from the same stamp set onto the centre of the circle and attached to the card front using a dimensional.
To decorate the inside of the card, I stamped the large focal image twice across the bottom of Whisper White card using Rose Red ink .
Simple but lovely, I think. What about you? What do you think?
Bye for now,
Kris
Product Used:


Catalogue Launch

Today I shared the new catalogue with around twenty-five of my customers and all of my downline. It was a fun afternoon. Most important of all everyone received a brand new catalogue. So much time was spent oohing and aahing over the gorgeous new product. The catalogue is beautiful. The photos are gorgeous and the layout of the catalogue makes it easy to see at a glance the stamp set and any bundle or co-ordinating products. Everyone appreciated that.
I created boards to show off the stamp sets and co-ordinating products which I had purchased on pre-order, as well as some cards using the new products. I was also really excited to share our new Memories and More product line. This replaces our previous Project Life by Stampin’ Up! range and I think will be even better for our customers. The Memories and More product line is designed to co-ordinate with stamp sets and other accessories to give a complete range to use in our Memory Keeping or card making or even when 3d creating. So exciting!
Everyone also had the opportunity to browse my retired product and perhaps bag a bargain or two. We spent a lot of time talking and laughing and sharing our love of Stampin’ Up!
Stampin’ Up! provided us with plenty of inspiration to share out catalogue. I created packs which included of course the catalogue, a name tag, a book mark, a colour combination chart for the new in-colours and a catalogue survival kit. I used the new in-colour ribbons and card stock to create everything included. The name tags were a great help because many of the ladies had not met each other.
I am blessed with a lovely group of customers and my downline is the best. So it was wonderful to spend time with these lovely women.
I’ll be back soon with some new projects to share.
Bye for now,
Kris
Touches of Texture Take 3
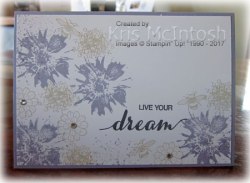 This card was inspired by one that I found on Pinterest by Cynthia Van Der Wilk. I changed the main colour and the orientation but just loved her card. I stamped the greeting which comes from the Dare to Dream stamp set onto Whisper White card using Memento Tuxedo Black ink. The flower image from the Touches of Texture stamp set is stamped onto the Whisper White card using Wisteria Wonder ink.
  I stamped the “letter” image around the flowers using Sahara Sand ink. The smaller flower is also stamped using Sahara Sand ink as is the bee image. I stamped the large dotted background over some of the already stamped images using Wisteria Wonder ink. The stamped card is attached to scored and folded Wisteria Wonder card.
  Lastly I added some Basic Rhinestones to the centres of the smaller stamped flower.
To decorate the inside, I stamped the images as I did on the front of the card onto the left hand corner of Whisper White card.
This is my favourite card of the three I have shared with you. Not sure if that is because of the style or the colours. So thanks Cynthia for sharing your card.
Bye for now,
Kris
Product Used:


It’s Here
I can’t believe it is so late in the day before I get to share with you that the new catalogue has landed. Yes you can now purchase products from the new catalogue. Woo hoo!
Today has been one of those days that just flew by and nothing really went to plan. I have been busy all day getting ready for my catalogue launch on Saturday. It seems like there are just not enough hours in the day at the moment to achieve all of the things I want to achieve. Anyhow instead of a card, I am sharing this great video from Stampin’ Up! with a little bit of a look at what is in the new catalogue.
I guess you are now pretty excited to see this fabulous new catalogue, so if you do not already have a demonstrator, please contact me so that I can organise to get one into your hands. In the meantime you can click on the link in the right hand column and view the catalogue online. Not quite the same, but better than nothing.
I promise to be back tomorrow with a new creation for your enjoyment.
Bye for now,
Kris
Delightful Birthday

I have a friend who celebrated her birthday yesterday and I thought I would share the card I made for her with you. This one is once more full of new product but it is only a couple of days now till the new catalogue launches.
I cut two pieces of Fresh Fig designs from the Fresh Florals Designer Series Paper Stack and attached them to the left hand side of Whisper White card. I stamped the greeting from the Vertical Greeting stamp set onto the right hand side of the Whisper White card using Fresh Fig ink. 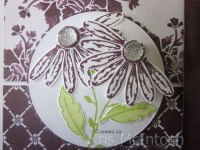 I wrapped the edges of the designer series paper with Fresh Fig 1/2″ Finely Woven Ribbon and attached the Whisper White card to scored and folded Fresh Fig card. I stamped the flower stem from the Daisy Delight stamp set twice onto Whisper White card using Lemon Lime Twist ink. I stamped the solid leaf twice onto scrap Whisper White card using Lemon Lime Twist ink which I stamped off once first. I stamped the outline leaf over the top of the solid leaf using Lemon Lime Twist ink and cut them out. The hand cut leaves are attached to the flower stems. I cut out the images using a circle from the Layering Circle Framelits Dies and attached it to a scalloped circle cut from Fresh Fig card.
 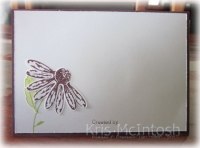 The image panel is attached to the card front. I stamped the daisy from the Daisy Delight stamp set onto Whisper White card using Fresh Fig ink. I punched the flowers out using the co-ordinating Daisy Punch, cut the flowers in half and stacked them on top of each other to create the flowers. (The Daisy Delight stamp set and the Daisy Punch are available to purchase as a bundle when the new catalogue goes live.) I stamped the flower centre onto scrap Whisper White card using Fresh Fig ink and punched them out using the 1/2″ Circle Punch. I attached the flower centres to the flowers and attached one flower to the left hand stem. I attached the second flower to the right hand stem using dimensionals.
  Lastly I added a Clear Faceted Gem to the centre of each flower.
To decorate the inside I stamped the flower stem onto the lower left hand corner of Whisper White card using Lemon Lime Twist ink. I stamped and cut out the leaf image and attached it to the flower stem. I stamped cut, layered and attached another flower stamped using Fresh Fig ink. I also stamped the flower centre using Fresh Fig ink, punched it out using the 1/2″ Circle Punch and attached it to the flower.
After creating this card, I needed to find some packaging for the gift. I had a large plain white gift bag in my stash and created a panel to go across the front of the back to match the card. I stamped the stem, leaves and flower and created a circle panel as I did for the front of the card. I also used a new die, the Happy Birthday Thinlit to create a greeting from Fresh Fig card. The circle and the greeting are attached to Whisper White card and then Fresh Fig card. 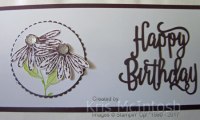 I love how this co-ordinates the card and the gift for a total Wow.
Anyway, I love this card and gift bag. At first I thought it might have been a little too dark using just the one colour, but the addition of the Lemon Lime Twist is absolutely perfect and gives it just the right amount of zing. I am also loving those faceted gems, so pretty. I can’t wait for this new catalogue to go live. What about you, are you getting excited.
Bye for now,
Kris
Product Used:


Touches of Texture Take Two
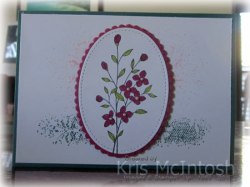
Here is the second card I made whilst I was playing – er I mean experimenting with the Touches of Texture stamp set. I once more stamped the border background image across the bottom of Whisper White card using Tranquil Tide ink. I stamped the large dotted background twice above the border using Powder Pink ink. I attached the stamped card to scored and folded Tranquil Tide card. 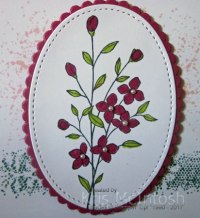 I stamped the flower image onto Whisper White card using Memento Tuxedo Black ink. I coloured the image using Berry Burst and Lemon Lime Twist Stampin’ Write Markers. The image is cut out using the largest oval in the Stitched Shapes Framelits Dies and attached to a scalloped oval cut from Berry Burst card using the Layering Ovals Framelits Dies. The image panel is attached to the card front using dimensionals. Lastly I added small Basic Pearls to the centres of some of the flowers.
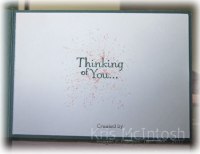 To decorate the inside of the card, I inked “thinking of you” from the Thoughts and Prayers stampset using Tranquil Tide ink and stamped the greeting onto the centre of Whisper White card. I stamped the large dotted background image over the top using Powder Pink ink.
This is still quite a simple card. Letting the stamps speak for themselves and not too much fuss or decoration. I think I like this one slightly better than the last one, what do you think?
Bye for now,
Kris
Product Used:


Touches of Texture
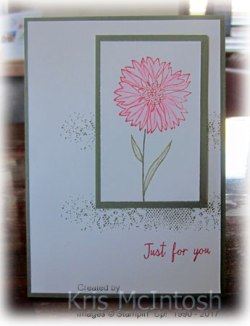
When I found out that Gorgeous Grunge was retiring and that Touches of Texture was not, I decided I needed to buy it. Today is the first time I have had a play with this stamp set. I have seen many gorgeous cards created using elements from this stamp set but my card today is fairly simple.
I stamped the border background image twice onto Whisper White card using Always Artichoke ink. I stamped the greeting from the Watercolour Wings stamp set below the border using Rose Red ink.  I attached the stamped card to scored and folded Always Artichoke card. I stamped the stem and leaf image onto Whisper White card using Always Artichoke ink and then used my Aqua Painter to move the ink, so that the image appears more coloured.
  I stamped the flower using Rose Red ink and once more used my Aqua Painter to spread the ink to colour the flower. I attached the stamped card to Always Artichoke card and then the card front using dimensionals.
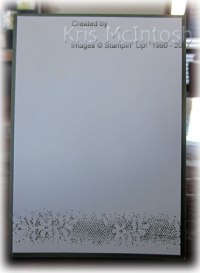
To decorate the inside I stamped the border image across the bottom of Whisper White card using Always Artichoke ink.
I don’t know if I am truly loving this card or not but I am happy to have used the stamp set and realise that it has a lot more potential. I’d love to hear what you think.
Bye for now,
Kris
Product Used:


Delightful Daisies
 Firstly let me apologise for not posting yesterday. With my catalogue launch only about 8 days away I have been trying to get some samples done to showcase some of the new product from the 2017-2018 Annual Catalogue. So sorry about yesterday but hopefully I won’t miss any more posts.
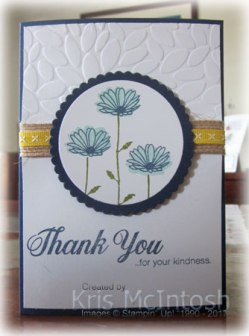
Today I am sharing a card that I made using a new stamp set Daisy Delight. What a great stamp set! I am sure you have already seen many examples on social media. So many possibilities. Anyway, I started by embossing the top third of Whisper White card using the Petal Burst Embossing Folder. I stamped the greeting from the Daisy Delight stamp set onto the bottom of the embossed card using Night of Navy ink. 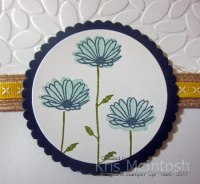 The greeting uses two stamps from the set. I wrapped the bottom of the embossing with 5/8″ Burlap Ribbon and then over the top with Daffodil Delight 1/4″ Double Stitched Ribbon. The embossed card is attached to scored and folded Night of Navy card. I stamped the stem image onto Whisper White card using Old Olive ink. The solid flower is stamped using Soft Sky ink and the detail flower over the top using Night of Navy ink.
  The image panel is cut using a circle from the Layering Ovals Framelits Dies and attached to a Night of Navy scalloped circle cut using the same dies. The image circle is attached to the card front using dimensionals.
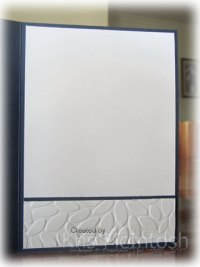
To decorate the inside of the card I embossed Whisper White card using the Petal Burst Embossing Folder, attached a narrow strip of Night of Navy card behind one long edge and then attached it to the bottom of Whisper White card.
The more I have this set out, the more I realise its great potential. I am sure I will be sharing many samples using this lovely stamp set.
Bye for now,
Kris
Product Used:


It’s all about the shoes
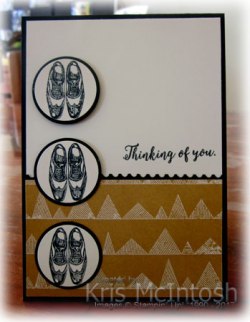
I wanted to create a male card for my class at Beachmere this week and saw a card that had been created by Irenes Bastelzimmer who is a very talented Stampin’ Up! demonstrator. It was a cute card created back in 2012 with current Stampin Up! So this is my version of her card which you can find on Pinterest as well.
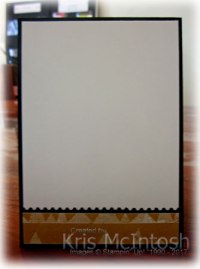
I punched a narrow strip of Basic Black card using the Ticket Tear Border Punch and attached it behind one long edge of a piece of the now retired and sold out Urban Underground Designer Series paper. 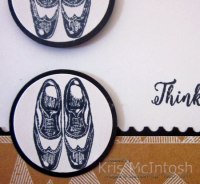 The designer series paper is attached to the bottom of Very Vanilla card. I stamped “thinking of you” from the Colourful Seasons stamp set (new to the 2017-2018 annual catalogue) above the designer series paper using Memento Tuxedo Black ink. (Now that I have posted this online, I think I stamped the greeting a little crooked – oh well.) The stamped panel is attached to scored and folded Basic Black card.
 I stamped the shoe image from the Guy Greetings stamp set onto Very Vanilla card using Memento Tuxedo Black ink. The images are punched out using the 1-1/4″ Circle Punch and attached to Basic Black 1-3/8″ circles. I attached the image circles to the left hand side of the card front. The second circle has dimensionals under the top and the top image is attached using dimensionals only.
To decorate the inside of the card, I attached a piece of Basic Black punched with the Ticket Tear Border Punch behind one long edge of a narrow strip of the same designer series paper I used on the front of the card. The panel is attached to Very Vanilla card.
A very simple card but one that I think most guys would like because it is so simple. What do you think?
Bye for now,
Kris
Product Used:







