Dahlia Flower Wall Art and Card
What a fantastic project Christy Fulk has put together for the March edition of Craft Project Central. This Dahlia Flower Wall Art will brighten up any room in your home. It is very easy to customize the colors to match the colors in any room. Multiples of this art can be made, and hung together, to cover a larger space on a wall. The card coordinates with the wall art, and makes a perfect duo when making it as a gift. This would make a great class, too.
Don’t forget to get your subscription for this months edition of Craft Project Central.
Bye for now,
Kris
Just Saying Card Tote
This is the latest tutorial available in the March edition of Craft Project Central. This gorgeous set has been designed by Yapha Mason, she has some amazing things to share if you visit her blog. Don’t forget to leave a comment while you are there.
 This adorable stationery set includes six single-sided notecards and six 3” x 3” mini cards as well as matching pencils. Carry all of the items in a cute tote with a separate pocket for each!
You can get the instructions to make this really cute set for the extremely low price of $10.00, which includes the step by step instructions for 10 projects just by subscribing to the March edition of Craft Project Central. Amazing!
Bye for now,
Kris
Scallop Tag Topper Closure
What a mouthfull, but I don’t know what else to call this card. Tanya Bell (what a treasure) has a great video for creating these type of cards on her blog. It’s easy to follow and gave me the confidence to try out my own version, which by the way is pretty close to one she shared.
 I cut Basic Black card following Tanya’s instructions to create the card base using the Scallop Tag Topper Punch. To decorate the inside, I embossed Whisper White card using the Flower Garden Embossing Folder. I added my Happy Watercolour Designer Series Paper to Sahara Sand card and then to the card front. The greeting from the Label Love stamp set is stamped in Tangerine Tango onto Whisper White card and punched using the Artisan Label Punch.
  A Basic Black Artisan Label is cut in half and attached to the back of the top and bottom of the greeting. The greeting is then attached to the card front. I used Basic Black 1/8″ Tafetta Ribbon to tie the card shut.
Considering how complicated they look, these cards are super simple to make. Thanks Tanya for the inspiration.
If you would like to make one of these, you can purchase all of the supplies necessary at my online store.
Bye for now,
Kris
Spring Wreath
Have you had enough of Winter? Are you ready for Spring? This beautiful floral wreath is the perfect project for the upcoming Spring season! Full of color and fun flowers this wreath is sure to delight! It’s perfect for Easter and would look beautiful as a wall decoration or as front door décor.
 This gorgeous wreath was designed by Dani Dziama for this months edition of Craft Project Central. Aren’t those flowers just gorgeous. If you were a little undecided about signing up for this month’s edition of Craft Project Central then this beautiful projects should make up your mind. It’s only $10.00 for ten projects – amazing value.
Bye for now,
Kris
Photo Frame Birthday
 This card was inspired by a couple that I saw on Pinterest, but of course I had to add my own take on the idea.
I stamped Whisper White card with the Grid Background stamp using Soft Suede ink. I cut the “photo-frame” from Bermuda Bay card using the small frame from the On Film Framelits. I stamped the large flower from the Flower Shop stamp set onto Whisper White card using Tangerine Tango ink and punched it with the Pansy Punch.  I stamped the two small flowers from the Petite Petals stamp set onto Whisper White card using Tangerine Tango ink and punched them using the Petite Petals Punch. The leaves are punched from Old Olive card using the Two Step Bird Builder Punch.
  I arranged the flowers and the leaves over the corner of the “photo-frame”. I stamped “happy birthday” from the Teeny Tiny Sentiments stamp set onto Daffodil Delight card and used the arrow framelit from the On Film Framelits Dies to cut it out. I attached it to the card using Glue Dots over the top of the frame. I also added a Basic Pearl to the centre of the Petite Petals flowers and a Large Basic Pearl to the centre of the Flower Shop flower.
Inside the card I stamped the Grid Background and added the large Flower Shop flower and some leaves over the top.
Gorgeous is what I think it is, what about you? Remember you can purchase all of the supplies needed to make this card from my online store.
Bye for now,
Kris
Retro Fresh Album and Card
Here’s a great project from Monika Davis for the March edition of Craft Project Central.
 Are you ready for a vacation? This little mini album is perfect for those precious memories and photos. You can take it with you, and work on it while on vacation, or use it as a brag album after your trip. This is also the perfect present with the matching greeting card to someone who loves to travel and take pictures. Makes a fun Stamp Camp project too.
To get the instructions to re-create this gorgeous gift set, subscribe to Craft Project Central. For just $10.00 you can the instructions for 10 gorgeous projects including this one.
Bye for now,
Kris
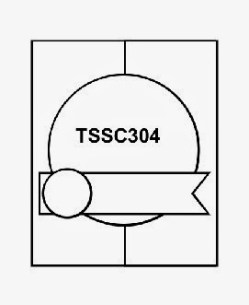
Techno Stamper Challenge 304
I used the sketch challenge at Techno Stamper to create this card.
I embossed the right half of Very Vanilla card using the Woodgrain Embossing Folder and attached it to scored and folded Cajun Craze card.  I stamped the Hardwood Background onto Very Vanilla card using Crumb Cake ink, attached it to Marina Mist card and then the left hand side of the card front. I stamped the tyre tread from the Rev Up The Fun stamp set onto Very Vanilla card using Cajun Craze ink. I stamped the motor bike from the same stamp set using Marina Mist ink and also the “smoke” using Crumb Cake ink and then punched the piece using the 2-1/2″ Circle Punch. I attached it to Cajun Craze card cut using one of the Circle Framelit Dies and then the card front using dimensionals.
  I stamped “make a wish” from the Sweet Essentials stamp set onto Very Vanilla card using Cajun Craze. I cut a “V” in one end and attached to Marina Mist card. I added a Vintage Brad to the flag before attaching it to the card front using dimensionals.
I kept the inside pretty simple, just stamping the tyre tread, bike and “smoke” using the same inks.
I don’t get to participate in as many challenges as I would like, but was glad that I was able to make use of this great sketch. I’d love to hear what you think of my creation.
Bye for now,
Kris
Let the Fringe Begin
Wow, this is truly gorgeous. I love these funky fringe scissors and this project is high on my list of “to do”.
 Regina Andari has created these gorgeous projects for the March edition of Craft Project Central. Perhaps you’ve looked at Stampin’ Up!’s Fringe Scissors and wondered what—besides paper grass—you can create with them. This tutorial will show you how to create a closed-loop bow, an open fringe bow, a fun fringe card, and twisted fringe trim for cards, scrapbook pages, gifts, and other projects.
I’m sure by now you have already subscribed to Craft Project Central but if you haven’t, don’t delay. You can get the instructions for 10 projects, including this one for just $10.00. Once you’ve subscribed then pop on over to Regina’s blog and take a look at more of her gorgeous work and don’t forget to leave a comment. We all love comments.
Bye for now,
Kris
Happy Birthday Elyssa
My granddaughter Elyssa is celebrating her 6th birthday today. I can’t believe how quickly she is growing up! Today I will share the card I made for her. I think I may have mentioned before that there is a little bit of pressure when I make these cards, because all the grandchildren check it out to see what Nan has made and whether it measures up or not.
I was inspired to create this LaLaLoopsy punch art figure for the front of my card by this one that I saw on Pinterest. The creator Wendy Cranford even has a video to show how to create her version. I must admit I didn’t watch the video but the photo was enough to get me started. It is perfect for Elyssa as she loves LaLaLoopsy.

I used Pink Pirouette card for the face, arms and legs (1-3/4″ Circle, Large heart and Word Window Punches). The hair and feet are Tangerine Tango. I used the Fringe Scissors to add some dimension to the fringe and to create the “ponytails”. The dress is cut from Gingham Garden DSP using one of the Dress Up Framelits. The hair bows are just two Small Hearts punched from the same paper with the addition of a Large Basic Pearl. The eyes are punched from Basic Black using the Owl Builder Punch. I hand drew the eyelashes and to create the mouth I used a 3/4″ Circle to trace around. To add the cheeks I used my blender pen and a little Pink Pirouette ink.
The card is cut from Whisper White using the Label Pop’n Cuts Base. I added a piece of Whisper White to cover the front and back which I embossed using the Perfect Polka Dots Embossing Folder. I added a trim of Island Indigo card punched using the Scallop Trim Border Punch.

Inside the card I added more embossed Whisper White card with the same Island Indigo trim. Although I did stamp Make a Wish from the Perfect Pennants stamp set in Island Indigo onto the panel for the bottom of the card before I embossed.  To make my “happy” banner, I used MDS. I used the Banner Blast Digital Download to create the small banners and changed the colours to Melon Mambo, Island Indigo and Daffodil Delight. I used the Timeless Type Alphabet Digital Download to add the letters. I printed them onto Whisper White card and then used the Banner Blast Punch to cut them out. They are attached to a length of Whisper White Bakers Twine and then to toothpicks which I secured to the back of the pop up using sticky tape. I added the bows with a really small amount of Tombow Multipurpose Glue. The frame from the Four Frames stamp set is stamped in Melon Mambo.
  I stamped “birthday” from the Fabulous Phrases stampset using Island Indigo ink. I used the Deco Framelit Dies to cut out the greeting and also the Island Indigo and Whisper White card.
I stamped the candles from the Cycle Celebration stamp set using Melon Mambo and Daffodil Delight ink. I cut the candles out and added them beside the greeting. I must admit I really love the finished card.

Of course, I had to decorate the gift bag to match. I embossed Whisper White card and added a strip of Island Indigo card which I punched using the Scallop Trim Border Punch to the top and bottom. This card is attached to a purchased White gift bag. I created another LaLaLoopsy Doll and added Happy Birthday. The letters were cut from Island Indigo card using the Timeless Type Junior Alphabet (retired).
I’m happy to say that the card and the matching bag were a big hit with Elyssa and the other grandchildren. Of course, Elyssa like what was in the bag too.
I’d love to hear what you think?
Bye for now,
Kris
Zoo Babies Brag Book and Card
This fabulous brag book designed by Laurie Zoellmer is the second project for the March edition of Craft Project Central.
 This easy to assemble Brag Book makes a perfect gift for the proud-new parents or grandparents! This brag book will easily hold 10 photographs. The “photo” theme is carried through with our “faux Polaroid frame” card! Faux Polaroid frame cards are very trendy now, and sure to be a hit!
If you would like to create this beautiful project, just subscribe to the March edition of Craft Project Central for the bargain price of $10.00 for 10 projects. You should also take a tour of Laurie’s blog and check out more of her amazing work and while you are there leave a comment to let her know how much you love it.
Bye for now, Kris.


