Another Challenge
 I was looking around for inspiration to create some cards for my classes at Beachmere when I saw this week’s sketch challenge at Splitcoaststampers.
I attached Bermuda Bay card to Very Vanilla card and embossed the whole piece using the Alphabet Press Embossing Folder. I wrapped the join with 7/8″ Natural Trim before attaching to scored and folded Very Vanilla card. I attached a piece of Birthday Basics Designer Series Paper over the top of the Natural Trim.  I made mine go the full length of the card front because I obviously didn’t pay enough attention to the sketch. I stamped the elephant from the You’re Amazing stamp set onto Very Vanilla card using Basic Gray ink. I cut the image out using one of the Circle Framelit Dies and attached it to a slightly larger circle cut from Gumball Green card. The image panel is attached to the card front using Stampin’ Dimensionals.
  I stamped the elephant onto Summer Starfruit card using Basic Gray ink and cut out the hat only and attached it over the stamped one. I couldn’t resist adding a few Basic Rhinestones to the hat just for fun.
Inside the card I attached another strip of the Birthday Basics Designer Series Paper with a narrow strip of Summer Starfruit card behind the top edge.  I stamped the balloon using Basic Gray ink and the greeting using Island Indigo ink. Both these images are from the You’re Amazing stamp set.
I think the ladies at Beachmere are going to like this one. What about you?
Bye for now,
Kris
Petal Parade meets Just Add Ink
The current challenge at Just Add Ink is a sketch challenge. 
I just love this sketch and knew straight away that I was going to use the Petal Parade stamp set and the Sweet Sorbet Designer Series Paper. Both of these items are available free to you with a qualifying order from the Sale-A-Bration catalogue.

I embossed Whisper White card using the Decorative Dots Embossing Folder (also available free with a qualifying order from the Sale-A-Bration catalogue). I punched a 2-1/2″ Circle from the Sweet Sorbet Designer Series Paper, attached it to a larger circle of Basic Black card cut with one of the Circle Framelit Dies before adding it to the embossed card. I wrapped the Whisper White card with Pool Party 1/2″ Seam Binding and tied a knot before attaching the Whisper White card to scored and folded Pool Party card.
I stamped the larger image from the Petal Parade stamp set onto Whisper White card using Crisp Cantaloup ink and punched it out using the 1-3/4″ Circle Punch. I stamped the smaller image from the same stamp set onto Whisper White card using Summer Starfuit ink and punched it out using the 1-1/4″ Circle Punch. I attached both images to the card front using Stampin’ Dimensionals, over the ribbon and each other. Lastly I added a Basic Rhinestone to the centre of each of the flower images.
On the inside I stamped the leafy image using Summer Starfruit ink. I attached a strip of Basic Black card to the Designer Series Paper and attached it over the stamped image. I stamped “happy birthday” from the Sassy Salutations stamp set using Crisp Cantaloup ink.
I have to say that the pattern I used from the Designer Series Paper wasn’t one that I liked at first, but it works so well in combination with the other colours and of course I think lot’s of white space helps keep it balanced. What do you think?
Bye for now,
Kris
Occasions Catalogue and Sale-A-Bration
 It’s that fantastic time of year when we get loads of new product in the Occasions Catalogue and the opportunity to earn free product with a qualifying order from the Sale-A-Bration catalogue. Yahoo! If you haven’t received your copy of these fabulous new catalogues and you don’t have a Stampin’ Up! Demonstrator then please contact me. There really is nothing like holding a new catalogue in your hands and browsing to your heart’s content.
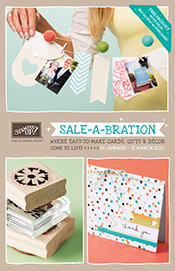
How does it work? Well, for every order your place for $90.00 you will earn one free item from the Sale-A-Bration catalogue. There are four stamp sets, Designer Series Paper, an Embossing Folder, a Punch (which matches one of the stamp sets), a card kit, treat kit, a banner kit as well as two digital options. Something for everyone. I have shared a few examples of what is available both in the Occasions Catalogue and the Sale-A-Bration catalogue in my recent posts, however, there are many more options for you to choose from. You can also earn additional benefits by Hosting a Party and with qualifying sales of $500.00 or more you get an extra $50.00 to spend on free product. So for a $500.00 party you would earn $80.00 worth of free product plus an additional $50.00. Add in the free product for every $90.00 spend and you will have a treasure trove of goodies. There is also an option to join Stampin’ Up! during Sale-A-Bration for $169.00. You get $255.00 worth of product for your joining fee and a continue 20% discount on your purchases and income from your sales. Contact me if you would like to know more about the details of these fabulous offers.
 And if that isn’t enough, from today you can also purchase the Texture Boutique Embossing Machine for $49.95 (Aus). This is a great little machine and so portable. If you have ever wanted to be able to add texture to your cards, scrapbook pages or 3d items, quickly and easily then this is the machine for you. Purchase a couple of embossing folders with the machine and you can earn the Sale-A-Bration Decorative Dots Embossing folder free.
It’s such an exciting time – I do hope you take advantage and earn lots of freebies.
Bye for now,
Kris
A Lovely Birthday Card
One of the stamp sets which you can have for free with a qualifying order during Sale-A-Bration is this gorgeous set called You’re Lovely. I used this set to complete a Sketch Challenge for Sudsol (a Demonstrator only group).
 I embossed Pistachio Pudding card using the Decorative Dots Embossing Folder (Sale-A-Bration) and attached it to scored and folded Whisper White card. I cut two strips of Sweet Sorbet Designer Series Paper (Sale-A-Bration) and attached them to the card front, the dotted piece is raised on Stampin’ Dimensionals. I stamped the floral image from the You’re Lovely stamp set onto Whisper White card using Stazon Jet Black ink. I coloured the flowers using Crisp Cantaloup, Pistachio Pudding and Summer Starfruit Stampin’ Write Markers and cut the image using the matching Deco Framelit Die.
  I stamped “happy birthday wishes” from the Petite Pairs stamp set onto Whisper White card and cut it using the smallest Banner Framelit (Occasions Catalogue). I attached the greeting banner to the front of the flower panel and another slightly larger Banner Framelit behind the flower panel. I attached the whole piece to a Summer Starfruit card cut with a larger Deco Framelit. This piece is attached to the front of the card using Stampin’ Dimensionals.
Inside the card I added a strip of Pistachio Pudding card embossed using the Decorative Dots Embossing Folder and a strip of Basic Black card, along with the second half of the greeting stamped in Pistachio Pudding ink.
This card is kind of busy but I really like the layout.
Bye for now,
Kris
Sudsol Case Challenge #226
 Sudsol, a demonstrator only group that I belong to posts a challenge every week to CASE an example from Stampin’ Success which is a demonstrator only magazine. I created one using similar colours to the magazine example and then liked it so much I made two more in different colours.
For the first card I stamped the background image from the Happy Watercolour stamp set onto Whisper White card three times using Pool Party ink. I stamped the flower over the top using Stazon Jet Black ink and stamped the greeting using the same ink. I stamped the background image onto scrap Whisper White card using Calypso Coral ink twice and stamped the flower over the top.  I cut one full flower and one partial flower. I attached the full flower over the stamped flower using Stampin’ Dimensionals and then attached the partial flower again using Stampin’ Dimensionals. Lastly I added a Large Pearl Basic Jewel to the centre of the flower. I attached the stamped Whisper White card to Calypso Coral card and then to scored and folded Whisper White card.
  I stamped the large background image onto the inside of the card three times using Pool Party ink and then over stamped the flower using Stazon Jet Black ink.
I stamped a second card using Daffodil Delight ink for the background image and Rich Razzleberry ink for the flower. The third card uses Pistacho Pudding ink for the background image and Strawberry Slush for the flower.
I love these cards, so simple but so elegant. I think I will box these and give them to someone special as a gift.
You will be able to purchase this fabulous stamp set after the 28th January from my online store when the new Occasions Catalogue is released. This is a gorgeous catalogue with some really great new product.
Bye for now,
Kris
Mosaic Case
This is a card we made recently at my Beachmere Class. I found this one on Pinterest by Kerry Willard Bray and thought it was really pretty. Of course you can never CASE a card unless you add something of your own and I did add an extra layer and changed the greeting.
 I stamped the Grid Background stamp onto Crumb Cake card using Baked Brown Sugar ink. The long image from the Mosaic Madness stamp set and the greeting from the Morning Meadow stamp set are both stamped using Baked Brown Sugar ink as well. I attached the stamped card to scored and folded Crumb Cake card using Stampin’ Dimensionals. I stamped the mosaic images from the Mosaic Madness stamp set onto Whisper White card using Pistachio Pudding, Coastal Cabana, Strawberry Slush and Backed Brown Sugar ink and punched them using the Mosaic Punch.
  The mosaic images are attached to the card front using Stampin’ Dimensionals. I also added Basic Pearls in various sizes to each of them.
On the inside, I left the card fairly plain, just stamping the Grid Background in the centre using Baked Brown Sugar ink. Thanks to Kerry for the inspiration.
Now if you love this card as much as I do and you would like to re-create it, just pop on over to my online store to purchase all the supplies necessary.
Bye for now,
Kris
New Page – My Digital Studio
I wanted to create a page to give you a place to start to find information about My Digital Studio. The programme is fantastic and it comes with a fabulous range of downloads when you purchase it. However, it is sometimes hard to find some of that information for yourself. So I thought if I put it all together in one place, it is a great jumping off point for you. I have also included some of the most recent downloads, so that you can keep up to date. As I have frequently recommended, once you have purchased this programme, then joining the My Digital Studio webpage is a must. This site is free and offers all sorts of videos, competitions and shares by some amazing designers – two of whom are now from Australia (yay).
Here is another page I created in MDS. This one we created at my first My Digital Studio Class. The page again showcases adding one picture to several photo boxes at the same time.
 I added Love Letter Designer Series Paper (124012) No. 3 which came with my original purchase of MDS. Then I arranged three photo boxes to suit my photo, grouped them and added the one photo to fill the three boxes. The title is from the Word Play Stamp Brush Set (124432) which again came with my original purchase. I didn’t even change the colour. I added a text box for the location name and date. A simple page and quick to do but a great way to scrap your photos quickly and beautifully.
Again I hope that you find the addition of the My Digital Studio page helpful for those of you who have already purchased the programme and also for those thinking about it.
Bye for now,
Kris
MDS Monday Challenge 49
I really love how quickly a page can come together using My Digital Studio and by using the awesome sketch at MDS Monday.
Here is the sketch….

and here is my page.
 I took this photo last year when we visited Cunnamulla. Happy hour on the river bank, chatting, laughing, sharing stories and enjoying the beautiful view. Just gorgeous isn’t it.
My background paper is one from the Downtown Grunge Photobook Template (126056) which came with My Digital Studio when I purchase it. I added the photo boxes and grouped them so that my photo could spread over all of them. The rosettes are from the Designer Rosettes Digital Download (131525). The pearls from the Basic Pearls and Rhinestones (124330) were also part of my original purchase. I also added a square punch behind the photo boxes, which I re-sized and filled with a colour I picked from my photo.
I love the look of this with just a “pop” of colour from the rosettes. If you would like to re-create this page then all of the items, including My Digital Studio can be purchased through my online store.
Bye for now,
Kris
Happy Birthday Sarah
My eldest daughter Sarah is celebrating her birthday today. I was able to enjoy a lovely lunch with her, my other daughter Emma, grandchildren, my Mum and Dad as well as my sister Karyn and her granddaughter Tahlia at the Woorim Surf Life Saving Club. We were lucky that the day turned quite sunny and was lovely looking from the verandah out to sea.
 I cased the card I made for Sarah from one that Narelle Farrugia shared here. I attached a piece of Smoky Slate Designer Series paper from the Neutrals Designer Series Paper Stack to Smoky Slate card and then to scored and folded Whisper White card. I embossed Pistachio Pudding card using the Hexagon Embossing Folder, attached it to Smoky Slate card and then the card front. I stamped the floral image from the Six Sided Sampler three times onto Whisper White card. I cut the images by hand, attached them to Smoky Slate card which I punched using the Hexagon Punch and then to the card front.
  I stamped the swirly image from the Everything Eleanor stamp set onto Whisper White card using Pistachio Pudding ink, cut it out and attached it to the card front using Glue Dots. I stamped the flower from the Everything Eleanor stamp set onto Whisper White card four times. I cut out two whole flowers and two partial flowers, stacking them together with dimensionals before attaching them to the card front. I stamped happy birthday from the Itty Bitty Banners stamp set onto Whisper White card using Smoky Slate ink, cut it out and attached it to Calypso Coral card cut using one of the Itty Bitty Framelits dies.
  I added a Basic Pearl to centre of each of the flowers as my finishing touch. Inside the card I stamped the flower using Calypso Coral ink, masked it and then stamped the swirl image over the top using Pistachio Pudding ink. I stamped the flower again onto scrap Whisper White card and cut out a partial flower which I attached over the stamped flower and then added a Basic Pearl.
A big thank you to Narelle for the inspiration to create this card which both Sarah and I loved.
As always if you would like to recreate this card you can purchase all the items you need from my online store.
Bye for now,
Kris
MDS Monday Card
The latest challenge at MDS Monday is a card sketch.

And here is my creation.
 I added Basic Black card stock as my background layer and then added a square punch which I resized and filled with Whisper White card stock. I added the hexagon punch shapes and filled each one with a different paper from the Season of Style Designer Series. My greeting comes from the Snowflake Soiree Stamp Brush Set Digital Download which I recoloured Cherry Cobbler. I added Season of Style Washi tape to the top and bottom edges of the card front.
I am really enjoying these digital challenges. I hope that my creation inspires you to try My Digital Studio.
Bye for now,


