New Product and a Sneak Peak
Here is a card I made using the gorgeous new In-Colour Coastal Cabana and the Chalk Talk stamp set from the newly released catalogue.
 I embossed Whisper White card using the Framed Tulips Embossing Folder and attached it to scored and folded Coastal Cabana card. Then I embossed another piece of Whisper White using the Stylish Stripes Embossing Folder which is being released in the Seasonal Catalogue on the 1st September. Again I attached the embossed card to Coastal Cabana card and then the card front using dimensionals.
  I stamped both images from the Chalk Talk stamp set onto Whisper White card using Coastal Cabana ink. I punched the greeting stamp using the Extra Large Oval Punch and cut the tag image using the matching Chalk Talk Framelits. How wonderful to have stamp sets with matching framelits, much less fussy cutting. I am sure my class attendees will love that! I attached the greeting to the tag using dimensionals and then the card front again using dimensionals.
To decorate the inside I embossed a strip of Whisper White using the Stylish Stripes Embossing Folder, added a strip of Coastal Cabana card and attached it to Whisper White card.

I haven’t had a lot of time to “play” with my goodies from the new catalogue as I have been away touring Outback Queensland with my hubby. We travelled up the coast from Brisbane to Ayre and then across to Mt Isa, then down through Barcaldine to Cunnamulla and then back across to Brisbane – a distance of just under 5,000klm. We had an amazing time but I think that I was getting withdrawals towards the end. Of course I won’t be telling my hubby that!
I hope you have enjoyed this card, I just love the colour combo, don’t you?
Bye for now, Kris.
Take Two for Sunny Challenge 85
We are now half way through the current Sunny Challenge so I thought I would share another take on this week’s sketch.
 I stamped the Hello Doily image onto Very Vanilla card using Crumb Cake ink and ran it through the Big Shot using the Square Lattice Embossing Folder. I attached a piece of Daffodil Delight Polka Dot Designer Series paper from the Polka Dot Parade Designer Series to Crumb Cake card which has one long edge punched with the Scallop Border Punch. The designer series piece is attached to the embossed Very Vanilla card and then to scored and folded Old Olive card. I stamped the image from the Mixed Bunch stamp set onto Very Vanilla card using Crushed Curry ink and punched it using the Blossom Punch.
  I also used the same punch on a scrap of Old Olive card. I curled the petals of the stamped flower “up” and the Old Olive flower “down” using the bone folder. I attached the flowers together using Glue Dots and making sure to stagger the petals. The flower is attached to the card front using dimensionals. I added a button (retired) and a large Basic Pearl to the centre of the flower. I stamped happy birthday from the Teeny Tiny Sentiments stamp set onto Very Vanilla card using Old Olive ink. I punched the greeting using the Word Window punch and also Daffodil Delight and Old Olive card. I attached the greeting on top of the other word windows with Glue Dots. I used Glue Dots to attach the greeting to the card front under the edge of the flower.
Inside I added a strip of the same designer series paper and Crumb Cake card to Very Vanilla card. I stamped the greeting from the Really Good Greetings stamp set using Old Olive ink.
Sooo, if you haven’t entered our challenge yet, I hope this gives a little more inspiration so that you will.
Bye for now, Kris.
PS. You can buy all the supplies (except the button) used in this card from my Online Store or email me to place your order.
Clean & Simple Birthday
Well I have to admit it, this is another Pinterest case. This gorgeous card was created by Melissa Davies. 
I embossed Pistachio Pudding card using the Mosaic Embossing Folder. I used the Finishing Touches Edgelit on two strips of Basic Black card and attached them to the sides of the embossed card. The bottom of this piece is cut into a “V” shape and then wrapped it with Basic Black 1/8″ Tafetta Ribbon. The greeting from the Label Love stamp set is stamped onto Whisper White card using Pistachio Pudding ink and cut using the Artisan Label Punch. I attached the greeting to a Basic Black 1-3/4″ Circle using dimensionals and then to the embossed card, again using dimensionals. The whole piece is then attached to scored and folded Whisper White card. I attached a flower over the ribbon using Crystal Effects.  The flower is made using the Simply Pressed Clay and the Simply Pressed Blossom Mould. I didn’t add any colour to the clay.
I embossed a strip of Pistachio Pudding card using the Mosaic Embossing Folder, attached it to Basic Black card with one edge cut using the Finishing Touches Edgelit. This piece is attached to the inside of the card. I stamped the greeting from the Create a Cupcake stamp set using Stazon Jet Black ink.
I love it. Thanks Melissa for the inspiration.
Bye for now, Kris.
Sunny Challenge 85
 This weeks Sunny Challenge has been set by me. I have created a sketch for you to use any way you wish. Don’t forget our challenges run for two weeks now, so you have plenty of time to play along.
I attached Whisper White card to scored and folded Rich Razzleberry card. I used a sponge dauber to add Rich Razzleberry ink to a Paper Doily and set it aside to dry. I stamped the rose image from the Best of Flowers stamp set onto Whisper White card using Stazon Jet Black ink and coloured it using Old Olive and Rich Razzleberry Stampin’ Write Markers. I punched the image using the 1-3/4″ Circle Punch. I cut Old Olive card with the 2″ circle from the Circles #2 Die and used the Stampin’ Distress Tool on the edges.
Once the Paper Doily was dry I attached it to the Whisper White card and added a strip of Rich Razzleberry Polka Dot paper from the Polka Dot Parade Designer Series to the left hand side of the card front. I attached the image panel to the Old Olive Circle and then to the card front using dimensionals. Inside the card I added a strip of the same Designer Series Paper to a piece of Rich Razzleberry card which has one long edge punched using the Scallop Trim Border Punch. The designer series paper is attached to the lower edge of Whisper White card. I stamped the greeting from the Loving Thoughts stamp set using Rich Razzleberry ink.
If you need more inspiration then pop on over to Sunny Challenges and see what the Design Team has created.  Once you have made your card, 3d item or scrap page, add it to Mr. Linky. As always I look forward to seeing your creations.
Bye for now, Kris.
Free Designer Series Paper
From today until the 31st August, if you purchase three packs of designer series paper you will get one pack free. Fantastic!

There is some fine print, the offer doesn’t include Specialty Designer Series Paper, Paper Stacks or Hostess Designer Series Paper. So if you love designer series paper and want to get your hands on more for less money, then take advantage of this great offer. Contact me or your own demonstrator or you can order online through my Demonstrator Website. Remember this offer is only current until the 31st August, so don’t wait to grab your bargain.
Bye for now, Kris.
One Layer By The Tide
I found a great tutorial by Amy Celona for a Stationary Box and pictured with the box was a card. Amy’s card and box were created using Crumb Cake card, Crumb Cake ink and Soft Suede ink. I decided to recreate the card using shades of blue.
I inked my Clear Mount Block E using Pool Party ink and lightly spritzed it with water before stamping onto Naturals Ivory card. I stamped the seaweed image from the By The Tide stamp set onto the lower left hand corner using Island Indigo ink. The fish from the same stamp set is stamped using Island Indigo ink onto the top right hand corner. I inked the word image, also from the By The Tide stamp set using island indigo ink and dabbed a little of the ink off with a clean tissue before stamping onto the card front.  The seahorse and shell images from the By The Tide stamp set were also onto scrap Naturals Ivory card using Island Indigo ink and cut them out. I used my bone fold to add a little curve to the seahorse and the shell before attaching them to the card front using a dimensional under the curve. I used a button I created using the Simply Pressed Clay and the Buttons Simply Pressed Clay Molds. Before the button completely air dried I used a little Crumb Cake re-inker and my Aqua Brush to add some colour. I dyed a piece of Whisper White Baker’s Twine using Island Indigo ink. Once the button and the twine was dry, I tied the twine through the button and attached it to the card front using Crystal Effects.
Inside the card I stamped the seaweed image using Pool Party ink before stamping the fish over the top with Island Indigo ink. The greeting from the Bring on the Cake stamp set is also stamped using Island Indigo ink.
What a fun card to make. I think we will have to do this one at my class at Beachmere in the near future.
Bye for now, Kris.
Using MDS
I have been having some fun playing with My Digital Studio. I love how easy it is to create scrapbook pages which I usually spend hours and hours playing with before I am happy. With My Digital Studio it just takes a click of the finger to try something and if you don’t like it just use the “undo” button. Gotta love that! Anyway here is a page I completed of some photos taken on a recent holiday.

I started with a blank 12″ x 12″ page and then added some Pacific Point card stock as well as some Bashful Blue cardstock. I added my photos and a Whisper White mat. I added Circle Punches filled with Whisper White and then stamps from the The Open Sea stamp set. The letters used are Timeless Type Junior Alphabet filled with Pacific Point. I added some Baker’s Twine and coloured using the colour picker tool and one of the shades in the photo of the Singing Ship Monument. I also added one of the Vintage Overlays to give some texture to the Pacific Point card stock, not sure if you can see that or not.
What I truly love about MDS is that I can play and change colours. I can use stamp sets or images that may have retired from the current catalogue but remain current in My Digital Studio. Its not to late to register for the Make a Statement Digital Tour. During the tour you will be given instructions to complete a photo book. How fantastic! Registration closes for the Melbourne Tour tomorrow but Sydney, Brisbane and Perth have no closing date yet. The tour costs $35.00 and you get My Digital Studio free as part of your registration. You need to have the programme downloaded onto your laptop to participate in the tour.
I think that this page fits the current Sunny Challenge too. It’s a male page – right? Captain Cook was a male and ships are a male thing, aren’t they? Why don’t you try My Digital Studio to add something to our challenge. I’d love to see your creations.
Bye for now, Kris.
Butterflies and Vellum
This is a card I cased from Pinterest by Miriam. I changed the colours and added an extra couple of layers but basically just copied her gorgeous card.
I used my Gingham Standard Wheel and Baked Brown Sugar ink to create a panel on Whisper White card. Then I used both the folders from the Needlepoint Border Embossing Folders to add embossing above and below the wheeled image. The Whisper White card is attached to Strawberry Slush card. The whole piece was then attached to scored and folded Whisper White card using dimensionals. I cut Baked Brown Sugar card using the Delicate Doilies Sizzlit and attached it over the wheeled image. I stamped the greeting from the Label Love stamp set onto Whisper White card using Strawberry Slush ink and punched it using the Artisan Label Punch. The greeting is attached to the card front using dimensionals. I cut two sets of leaves from Vellum Cardstock using the Little Leaves Sizzlit and attached them to the Baked Brown Sugar doily using Glue Dots.  I punched Strawberry Slush card using the Elegant Butterfly Punch and attached it to the card front using a Glue Dot in the centre of the body and a 1/2 dimensional under each wing. I punched Vellum Cardstock using the Bitty Butterfly Punch and attached it to the centre of the Strawberry Slush butterfly. I added a strip of four Basic Rhinestones to the centre of the butterflies.
I punched one long edge of Strawberry Slush card using the Scallop Trim Border Punch and attached it inside the card. I added a strip of Whisper White which is wheeled using Baked Brown Sugar ink and the Gingham Standard Wheel. This time the Elegant Butterfly is punched from Baked Brown Sugar card with a Vellum Cardstock Bitty Butterfly on top.
Well, what do you think? Isn’t it gorgeous?
Bye for now, Kris.
Sunny Challenge 84/13
This week our Sunny Challenge has been set by Gwen and all she wants us to do is make something with a male theme.
 I embossed Very Vanilla card using the Square Lattice Embossing Folder and attached it to scored and folded Smoky Slate card (this is a truly beautiful colour). I cut a piece of This and That Designer Series paper and trimmed one end into a “V” shape. I attached it to Smoky Slate card and cut it to match the “V” shape before attaching it to the card front. I stamped the “globe” image from the By The Sea stamp set onto Very Vanilla card using Pool Party ink, which I stamped off once to lighten the colour. I stamped the ship over the top using Smoky Slate ink. Then I used the “striped” image from the Gorgeous Grunge stamp set and stamped over the whole piece using Crumb Cake ink. I punched one long edge of Pool Party card using the Scallop Border Punch and attached the image panel to it before attaching the whole piece to the card front.
  I stamped the greeting using Smoky Slate ink onto Very Vanilla card and punched it using the Large Oval Punch. I attached the greeting to a Pool Party Scalloped Oval and then the card front.
I stamped the globe image onto the lower left hand corner of Very Vanilla card using Pool Party ink which I stamped off onto scrap paper first. I stamped the anchor image over the top using Smoky Slate ink and then stamped the striped image from the Gorgeous Grunge stamp using Crumb Cake ink. I attached this piece to the inside of the card.
I love the way this turned out. It is kind of calming and pretty but not too pretty to give to a guy.  Let me know what you think.
For more inspiration take a visit to Sunny Challenges and Creations and see what the design team has created for you. Once you have made your card, or scrap page or 3d item, pop back and add it to Mr. Linky. I can wait to see your take on this week’s challenge.
Bye for now, Kris.
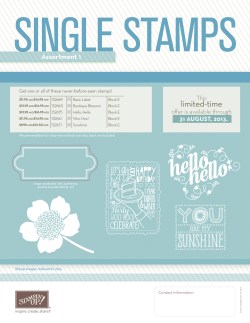
Hello, Hello
I have had time to play again and this time I wanted to use the single stamp Hello, Hello. This stamp is one of five stamps which Stampin’ Up! is offering for purchase as a single stamp until the 31st August or until sold out. It’s a great opportunity to get your hands on some fabulous stamps without having to buy a whole set.
 I started my card by embossing Whisper White card using the Perfect Polka Dots Embossing Folder and attached it to scored and folded Calypso Coral card. I embossed Wild Wasabi card using the Square Lattice Embossing Folder, attached it to Chocolate Chip card and then to the top left hand corner of the card front. I stamped the Hello, Hello greeting onto Whisper White card using Chocolate Chip ink, attached it to Chocolate Chip card and then to the card front using dimensionals.
  I stamped the flowers from the Stippled Blossom stamp set using Calypso Coral, making sure I stamped off the solid image onto scrap paper first. The leaves are stamped using Wild Wasabi and also stamping off first for the solid image. I cut out the flowers and leaves and arranged them on the card front around the greeting.
I stamped and cut out another flower and set of leaves to attach to Whisper White card to decorate the inside of the card.
I love this greeting stamp, it is actually large enough to make the focal image of your card without any other decoration.
Don’t forget to order your single stamp before they run out. Contact your Stampin’ Up! demonstrator or if you don’t have one, you can order through me online or via email.
Bye for now, Kris.


