Best of Everything Box
This gorgeous project for the December edition of Craft Project Central was created by Sharon Burkert. Please pop over to her blog to see more of her gorgeous work and don’t forget to leave a comment.
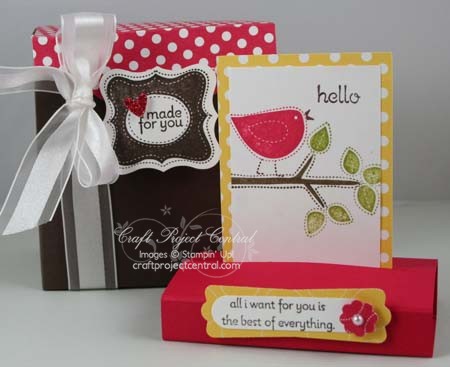
Have you noticed how so many things look cuter when they are little? Here’s a quick and easy box and three different fun fold cards scaled down to 3” x 3”! I can’t wait to make these really gorgeous little cards.
This is the bonus project for the December Edition of Craft Project Central and you need to meet the qualifying criteria (subscribing to two or more months in a row, putting the Craft Project Central badge on your blog, or referring a friend and when they subscribe, letting us know). So instead of 10 tutorials for $10.00 you could get 11 tutorials for $10.00, that’s even better value.
Now I wonder what gorgeous projects they have coming up for January!
Bye for now, Kris.
A Challenge Card
 I had some time today to play and decided to use the sketch at Try Stampin’ On Tuesday. I also used some product which as a demonstrator I was able to earn prior to the start of Sale-A-Bration. During Sale-A-Bration which begins on the 22nd January, you will be able to earn this stamp set FREE with a qualifying order of $100.00.
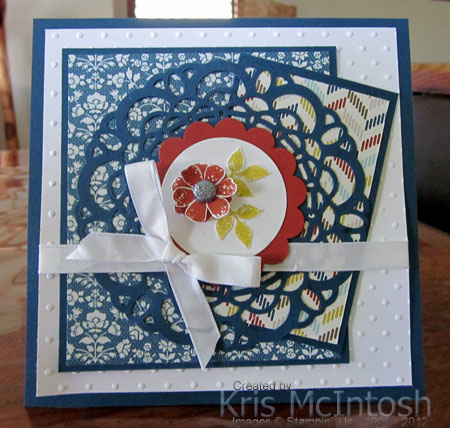
I embossed Whisper White card using the Perfect Polka Dot Embossing Folder. I attached a piece of Comfort Cafe Designer Series Paper to Midnight Muse card and attached it to the left hand side of the embossed Whisper White card. I attached a smaller piece of the reverse side of the Comfort Cafe Designer Series Paper to Midnight Muse card and attached it to the right hand side of the embossed Whisper White card at an angle.  I cut the Paper Doily Sizzlit from Midnight Muse card and attached it over the designer series paper. This piece was wrapped with Whisper White 3/8″ Tafetta Ribbon and then attached to a 14cm square Midnight Muse card front. I stamped the small flower from the Bloomin’ Marvelous stamp set twice onto Whisper White card using Cajun Craze ink and cut them out. I stamped the leaf image from the same stamp set twice onto Whisper White card using Summer Starfruit ink and cut them out. I curled the petals of one flower up and the other flower down. I attached the flowers together with a quarter of a dimensional. I pierced a hole through both flowers and inserted a Silver Glimmer Brad through the centre. I punched a 1-3/4″ Circle from Whisper White card, attached it to a Cajun Craze 2-3/8″ Scallop Circle and then to the centre of the doily. I attached the leaves to a 1-3/4″ Circle of Whisper White card and then the flower over the ends of the leaves using half a dimensional. I tied a bow in another piece of Whisper White 3/8″ Tafetta Ribbon and attached it to the card front using a Mini Glue Dot.
Well what do you think of this card. If you would like to see more cards using this sketch, pop on over to Try Stampin’ on Tuesday.
Bye for now, Kris.
8 x 8″ Scrap page
When I attended Regionals this year, I made a decision to not even attempt the Make and Takes on the day but to do them later at home. The stamp set we received as part of Registration was Clockworks. I hadn’t been tempted by this when browsing the catalogue but using it has given me a greater appreciation.

The scrap page is 8″ x 8″ and uses some gorgeous colours together. I didn’t have the same greeting set so my sentiment comes from the Word Play stamp set. I love all the texture created with a little scoring and stamping. I think the addition of the Vintage Faceted Buttons just gives it enough sparkle. I will add my photo later, when I have had it printed.

I’m loving the size of this page and thinking about incorporating some scrapbook classes next year based on this size. I’d love to hear if you would be interested in attending something like that.
Bye for now, Kris.
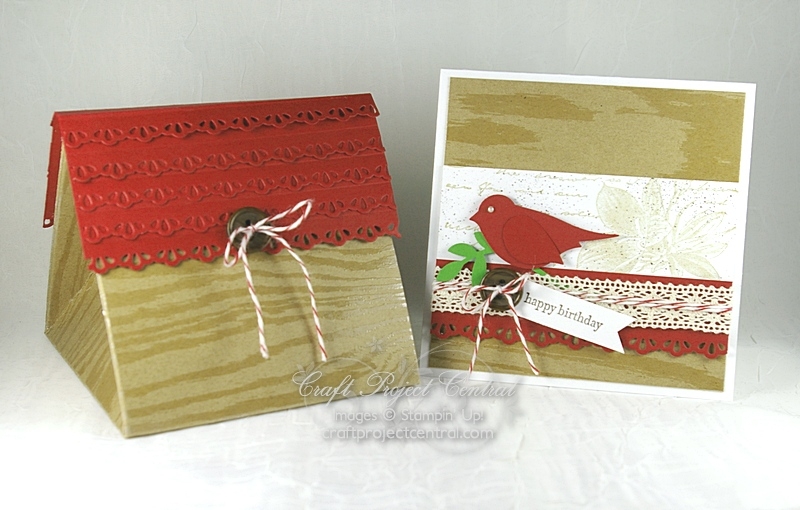
Bird House Box and Card
Here is another great project from the December Edition of Craft Project Central. This gorgeous box and matching card was created by Monika Davis. Be sure to visit her blog and check out what else she has been creating and don’t forget to leave a comment.
Merry Christmas
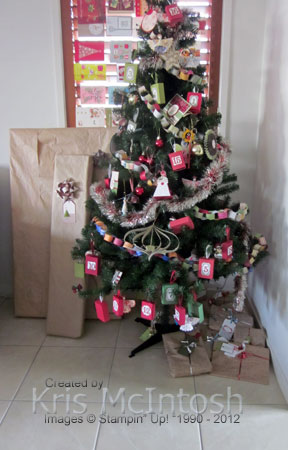
I have scheduled this post so that I can enjoy Christmas Eve with my grandchildren seeing the beautiful Christmas lights and decorations. I wish all of my followers a very Merry Christmas. May your day be filled with fun, laughter, family and friends.
Before I go I thought I would share a picture of my tree, with the parcels wrapped and ready to be opened tomorrow. All the parcels are wrapped in the brown paper that Stampin’ Up! so thoughtfully supplies with each of my orders. Sometimes I stamp or wheel a design over the paper and sometimes I leave it plain. I always add a tag which I have made and sometimes a designer paper bow.
So again Merry Christmas and I’ll see you all again soon.
Bye for now, Kris.
Desk Organisation Set
Here is another wonderful project from the December Edition of Craft Project Central. We all need a little organisation in our lives and it is even better when it is so pretty. This fantastic project was designed by Julie Beltramo. Take a visit to her blog to see what else Julie has been doing and don’t forget to leave a comment. We all love comments.
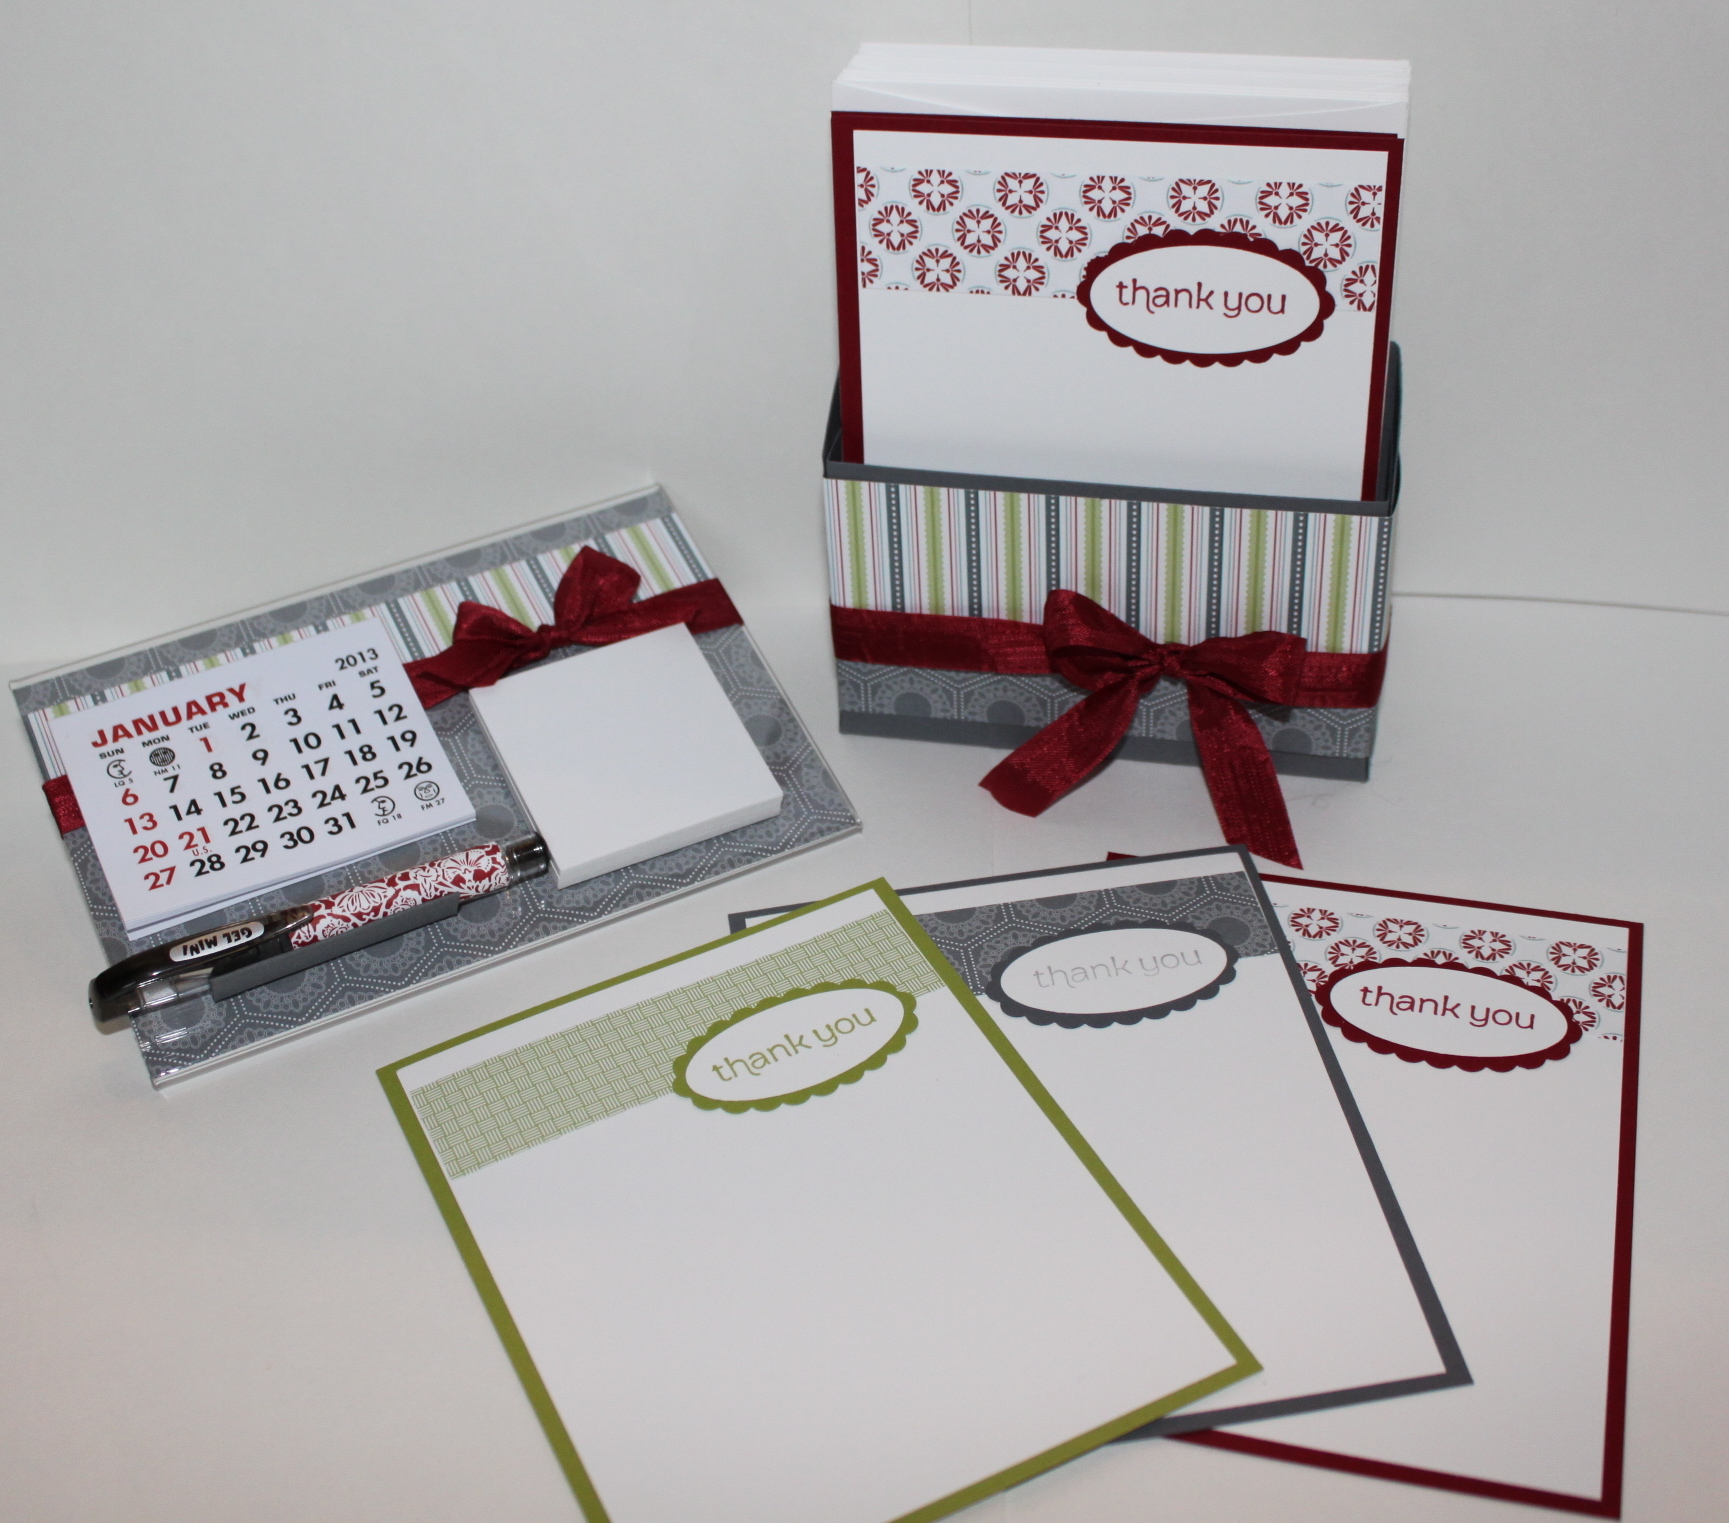
This set is the kick-off to organizing your desk for the New Year! The acrylic calendar, pen and post-it set is a compact, but a mighty little set-up for your desktop. And the set of twelve note cards and envelopes, with it’s coordinating stand-up box will be handy when you need to send off a quick thank you! The complete set will not only get you organized, but also be a great gift to give someone for the start of their New Year too!
Remember if you would like the instructions for this gorgeous set, then just visit Craft Project Central and sign up for the December Edition. I think it is such fantastic value at only $10.00 for 10 step by step photo tutorials.
Bye for now, Kris.
You’ve been “elffed”
These are the Christmas cards I made for my grandchildren. I have to thank Sandy Hancock for sharing this idea recently. If you read her blog post you will see this idea has been around for a while, but her post is the one that inspired me.

I made two cards like the one on the left for my grandsons and four cards like the one on the right for my granddaughters. I did move the sentiment around on each of the cards, just so they wouldn’t mix them up. It wasn’t until I had handed them out that I realised that I had forgotten to decorate the toes. In Sandy’s post they had Silver Glimmer Paper circles on each toe and I was going to add them but completely forgot. They do look fantastic anyhow, so thanks Sandy for giving me this wonderful idea for the grandchildren. They loved them.
Bye for now, Kris
Cardinal Luminary and Card
I keep saying it but I think the December Edition at Craft Project Central has just some amazing projects and today’s is no exception. This gorgeous luminary and card were made by Laurie Zoellmer, please visit her blog and check out her beautiful work and don’t forget to leave a comment.
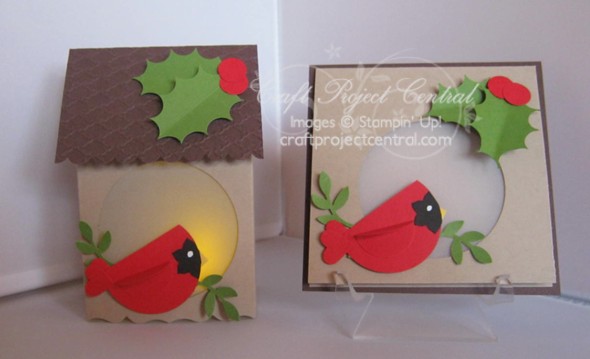
That cute little cardinal is just so gorgeous and I love the birdhouse style luminary. If you would like the instructions for this project, then just visit Craft Project Central and sign up for the December Edition.
Bye for now, Kris.
Contemporary Christmas Trees and Card
Here is another amazing project from the December Edition of Craft Project Central. I love those tall trees and know just the person who can make the stands for me! I think they will look wonderful on the table just inside my front door. This beautiful project was designed by Heidi King – visit her blog and see all her gorgeous work and don’t forget to leave a comment.
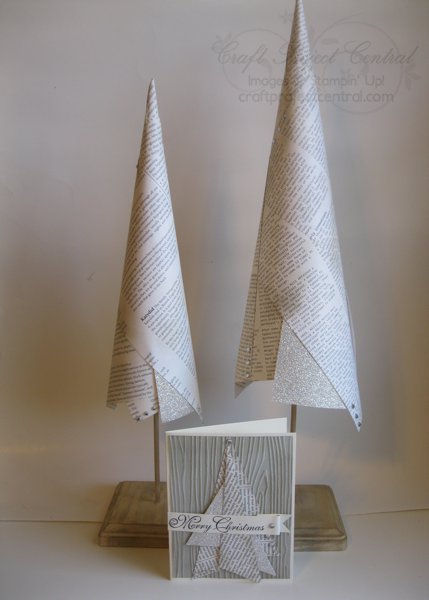
And what a wonderful card. I love the way the pieces are all crazy cut and joined. Remember all you have to do to get the instructions for this gorgeous project is to subscribe to the December Edition of Craft Project Central. Remember it only costs $10.00 for 10 tutorials.
Bye for now, Kris.
Wedding Card
You know that I am a big fan of Craft Project Central and I do love to do the challenges when possible. The sketch for this month is another fabulous one and I finally had time to make a card.
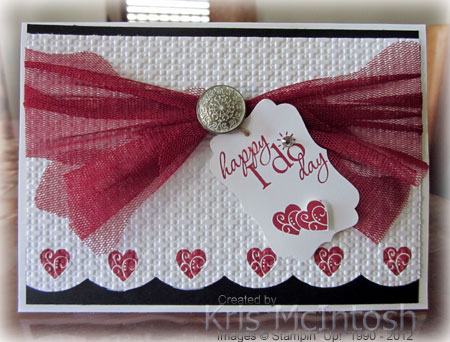 I cut the edge of Whisper White card using the Large Scallop Edgelit. I stamped the small heart from the Tiny Tags stampset onto scrap Whisper White card. I used the Small Heart Punch to cut them out. The images are smaller than the punch but it doesn’t matter. I attached them to the Whisper White card inside each of the scallops and then embossed using the Square Lattice Embossing folder. Now you cannot see the extra white around the images only the stamped hearts themselves. I attached the embossed card to a layer of Basic Black card and wrapped it with Cherry Cobbler 3-1/2″ Scallop Tulle and tied a knot. The whole piece was then attached to the front of scored and folded Whisper White card. I stamped “happy I do day” from the Word Play stamp set using Cherry Cobbler ink onto Whisper White card and punched it using the Decorative Label Punch.
  I stamped the heart image in the bottom left corner of the punched shape and stamped another one on scrap Whisper White and cut it out. I attached the cut image over the stamped image using a piece of dimensional. I punched a hole in the top of the Label using the 1/16″ Hand Held Punch and threaded a piece of Linen Thread. I tied the linen thread around the knot in the Tulle and then wrapped it with one of the Vintage Brads, locking the legs of the brad behind the tulle. Finally I added a dimensional to the corner of the back of the Label so that it would sit where I wanted it to and a small Basic Rhinestone to the “o” in the greeting.
I think it turned out great. What do you think? Don’t forget if there are enough entries, someone can win a Free subscription to Craft Project Central just for entering.


