Fab Friday 197
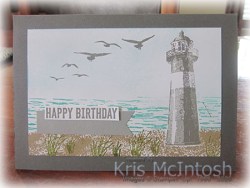
I loved the current sketch challenge at Fab Friday. Just wide open space to do with as you wish. I decided that my High Tide stamp set hadn’t seen enough ink lately and used it to make my card. I began by stamping the “sand” image from the High Tide stamp set across the bottom of Whisper White card using Crumb Cake ink. I stamped the first image for the Lighthouse using Smoky Slate ink and the second Lighthouse image using Basic Gray. I used a post-it-note mask to cover the Lighthouse image before stamping the “sea” image from the High Tide stamp set across the top of the “sand” using Bermuda Bay ink.  With the mask still in place I used a sponge to add some Balmy Blue ink to the “sky” area of the card. I also stamped the birds from the High Tide stamp set using Basic Gray ink. I removed the mask and stamped one of the “grass” images from the High Tide stamp set across the “sand” using Mossy Meadow ink. The image panel is attached to scored and folded Basic Gray card. I stamped “happy birthday” from the Itty Bitty Birthday stamp set onto Whisper White card using Basic Gray ink.
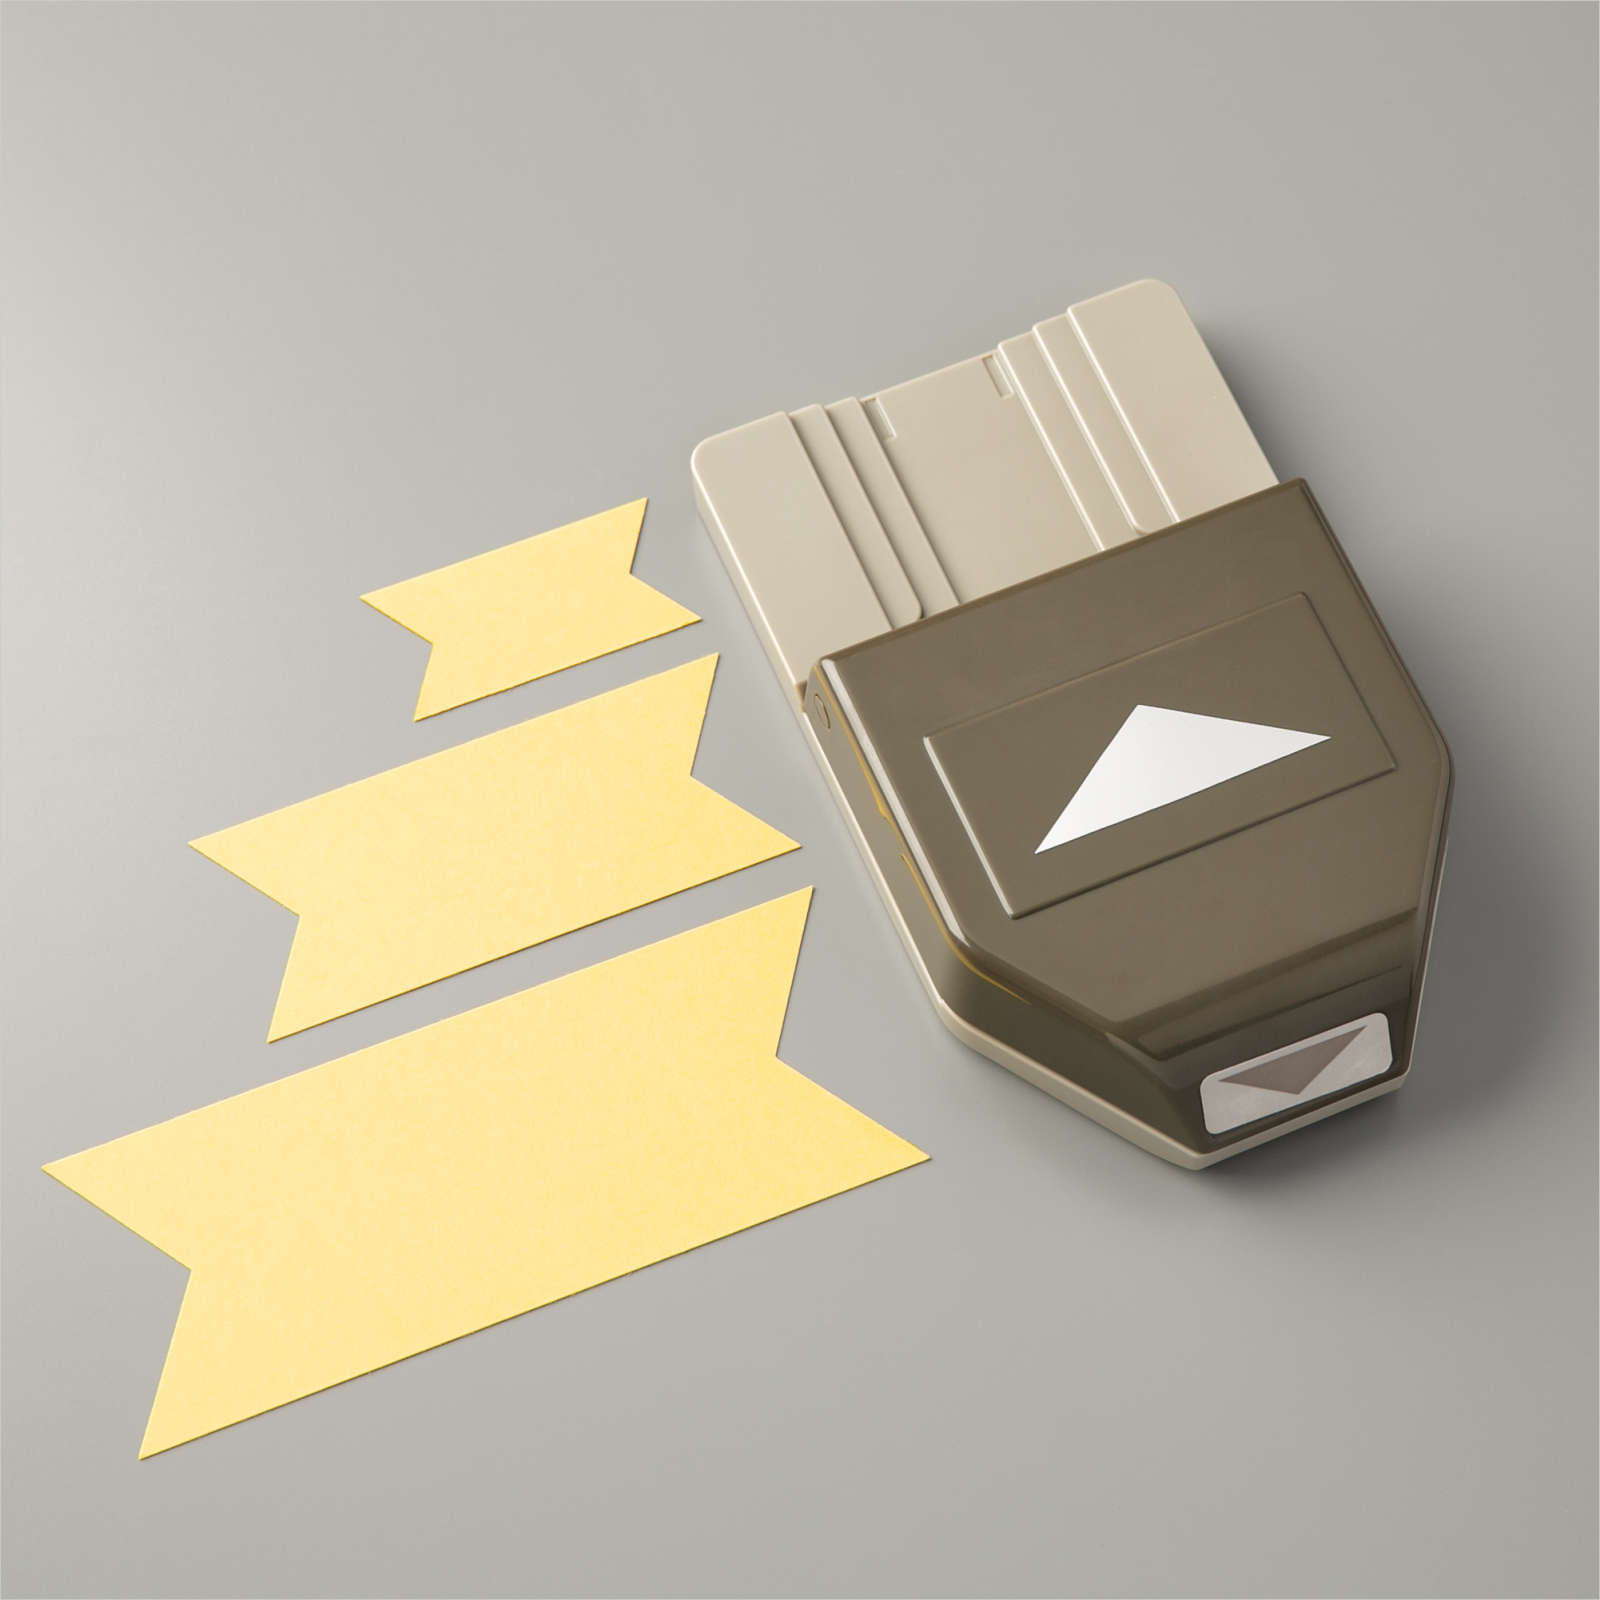
  I trimmed around the greeting and attached it to piece of Basic Gray card which is punched on one end using the Triple Banner Punch.
To decorate the inside of the card, I stamped “lets celebrate you” from the Itty Bitty Birthday stamp set onto Whisper White card using Basic Gray ink. I stamped the “sand” image from the High Tide stamp set onto the lower left hand corner of the stamped Whisper White card using Crumb Cake ink. I stamped the “grass” image using Mossy Meadow ink and the birds from the High Tide stamp set using Basic Gray ink.
I love this card, thanks Fab Friday for the challenge.
Bye for now,
Kris
Product Used:


Stockton

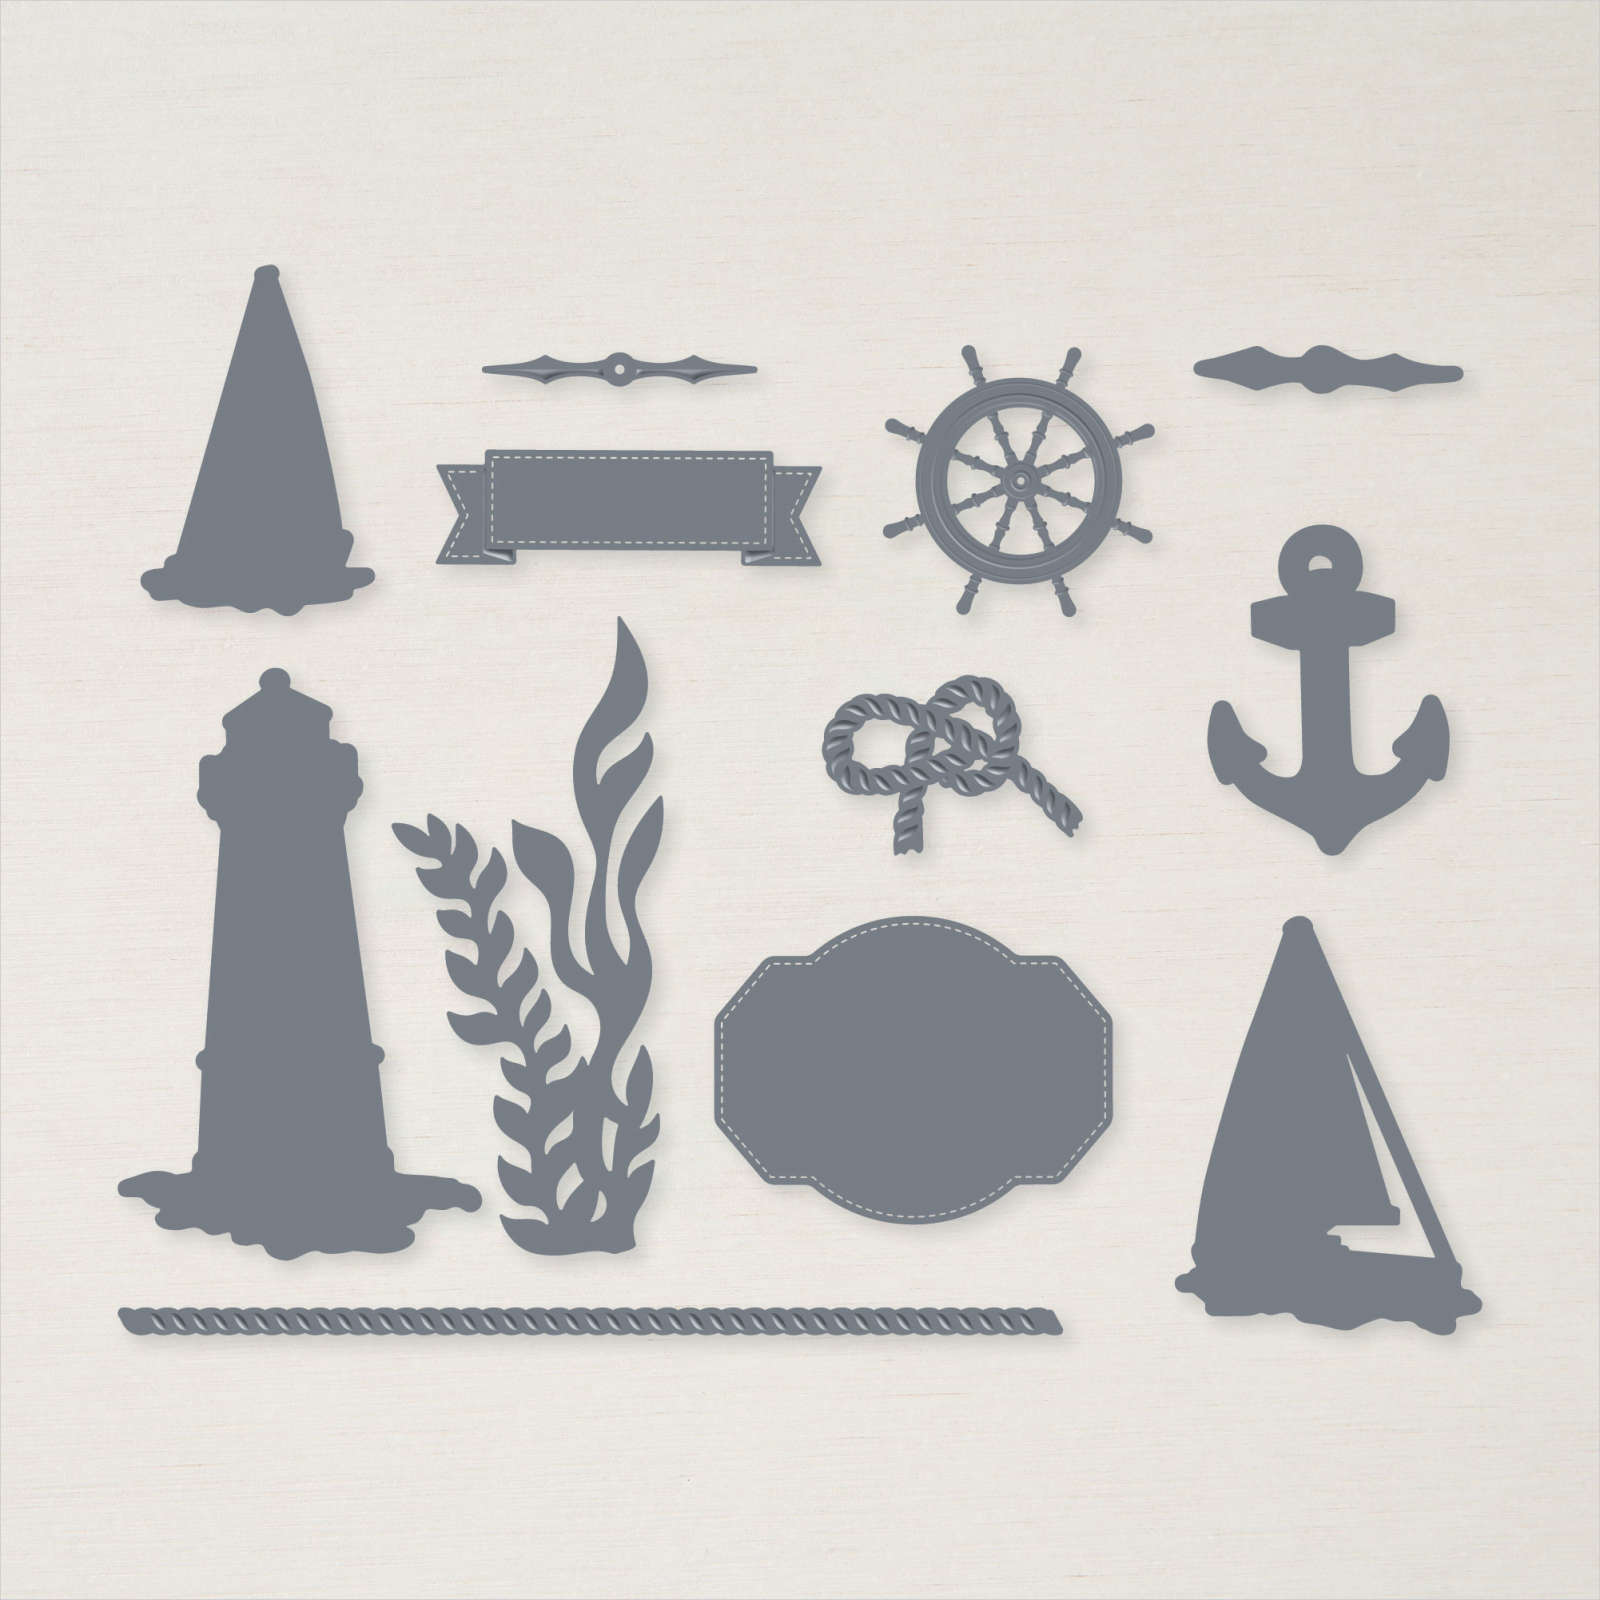
Today’s pages show off some photos from our visit to Stockton in March this year. What a lifetime ago that seems. Since then COVID-19 has changed the world! Ron and I love our Friendship Week catch up and truly hope that things are ok so that we can catch up again in March next year. I followed a sketch layout from Scrapbooking Global (a Facebook Page I belong to) to create this page. I cut 3-1/4″ off a 12″ x 12″ sheet of Designer Series Paper from the now retired Come Sail Away Designer Series Paper. I cut Night of Navy card with the scalloped edge die from the Be Mine Stitched Dies and attached one piece to the right hand side of the large piece of Designer Series Paper and one piece to the left hand side of the smaller piece of Designer Series Paper. The small piece of Designer Series Paper is attched to the right hand side of a 12″ x 12″ Whisper White page and the large piece is attached to the left hand side of a 12″ x 12″ Whisper White page.
  I trimmed another sheet of Designer Series Paper from the Come Sail Away Desginer Series Paper to 12″ x 11″ and then cut it in half. One half is attached to the right hand side of the first page and the second piece is attached to the left hand side of the second page. I also attached another strip of the Come Sail Away Designer Series Paper to the left hand page. I created my journaling on the computer and printed onto Whisper White card. I cut another strip of Night of Navy card using the scalloped edge die from the Be Mine Stitched Dies and attached it to the right hand edge of the journaling panel. The panel is attached to the right hand page. Each of my photos is attached to Night of Navy card before being attached to the pages. I cut the title from Night of Navy card using the Playful Alphabet Dies and attached it just above the journaling panel.
  To embellish the page I stamped the lighthouse image, the anchor image, and the large ship image from the Sailing Home stamp set onto Whisper White card using Night of Navy ink. I cut each of the images out using the co-ordinating dies from the Smooth Sailing Dies. I stamped the compass image onto Whisper White card using Night of Navy ink and cut it out using the Layering Circles Dies. I attached the compass image to a Night of Navy scalloped circle cut using the same dies. I attached each of the images to the pages, some with mini dimensionals.
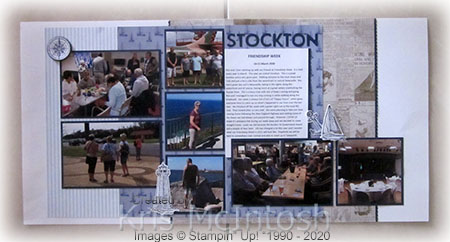
I know I have used retired Designer Series Paper on these pages but what a great way to use them up. Such lovely memories.
Bye for now,
Kris
Product Used:


Get Well Soon
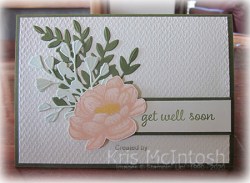
I needed to make a card for a friend who has been feeling unwell and used the now closed Hand Stamped Sentiments sketch challenge to create this card. I stamped the greeting from the Timeless Tulips stamp set onto the lower right hand corner of Very Vanilla card using Early Espresso ink before I embossed the panel using the Timeless Texture Embossing Folder. The embossed panel is attached to scored and folded Flirty Flamingo card. I attached one strip of In Good Taste Designer Series Paper to the left hand side of the embossed panel. I punched a “v” in one end of another strip of In Good Taste Designer Series Paper using the Triple Banner Punch and attached it over the first piece of Designer Series Paper. I removed two of the die cut leaves from the Forever Gold Specialty Designer Series Paper and attached them to the card front. I stamped the leaf image from the Floral Essence stamp set onto Very Vanilla card three times using Granny Apple Green ink.  I used the retired Leaf Punch to punch them out. I attached the stamped leaves to the card front partially covering the die cut leaves. I stamped the large and small solid flowers from the Floral Essence stamp set onto Very Vanilla card using Flirty Flamingo ink and cut them out. I coloured the centre of the small flower using the Dark Daffodil Delight Stampin’ Blend.
  I attached the small flower to the centre of the large flower using dimensionals before attaching the flower to the card front so that it covered the ends of the leaf stems.
To decorate the inside of the card, I stamped the leaf image from the Floral Essence stamp set onto the lower left hand corner of Very Vanilla card. I stamped the large and the small solid flowers onto Very Vanilla card using Flirty Flamingo ink and cut them out. I coloured the centre of the small flower using the Dark Daffodil Delight Stampin’ Blend. I attached the small flower to the centre of the large flower and attached them to the Very Vanilla card so that covered the end of the stamped leaf.
I really love the end result – thank you Hand Stamped Sentiments for the inspiration. I hope my friend likes it as much as I do.
Bye for now,
Kris
Product Used:


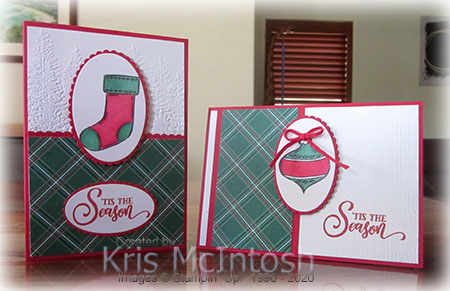
Even More Tag Buffet

Yesterday on my Facebook Live, I showed how to make 6 cards using the pieces from the Tag Buffet Project Kit used to create 6 tags. I had two of the front tags left over so I thought I would show you the cards I made using these pieces. For the first card, I stamped “Merry Christmas” from the Tag Buffet stamp set onto the bottom of Whisper White card using Real Red ink. I embossed the stamped Whisper White card using the Tasteful Textile 3D Embossing Folder. The embossed panel is attached to scored and folded Real Red card. I cut Real Red card to create a mat for the tag piece and attached it to the card front.  I stamped the stocking image from the Tag Buffet stamp set onto Shimmery White card using Memento Tuxedo Black ink. I also stamped the holly leaf image from the Tag Buffet stamp set onto Shimmery White card using Memento Tuxedo Black ink. I used my new Water Painter to colour the images using Real Red and Shaded Spruce ink.
 I cut out the pieces and attached the stocking to the centre of the tag. I attached the holly leaves on top of the stocking and added some Real Red Rhinestones to look like holly berries. I used some of the 24″ of Gold Thread that I didn’t use yesterday to create a small bow to add to the top of the tag.
To decorate the inside of the card, I stamped “with love for you” from the Tag Buffet stamp set onto Whisper White card using Real Red ink.  I attached a narrow strip of Real Red card behind one long edge of Whisper White card which I embossed using the Tasteful Textile 3D Embossing Folder. The embossed panel is attached across the bottom of the card. I stamped the stocking image from the Tag Buffet stamp set onto Shimmery White card using Memento Tuxedo Black ink and coloured the image using the Water Painter and Real Red and Shaded Spruce inks.
  The stocking is cut out and attached to the right of the stamped greeting.
For the second card, I stamped “Merry Christmas” from the Tag Buffet stamp set onto the bottom of Whisper White card using Shaded Spruce ink. I embossed the stamped card using the Tasteful Textile 3D Embossing Folder and attached the panel to scored and folded Shaded Spruce card. I cut a mat for the tag from Shaded Spruce card and attached it to the card front. I stamped the bauble image from the Tag Buffet stamp set onto Shimmery White card three times using Memento Tuxedo Black ink. I coloured the images using a Water Painter and Real Red and Shaded Spruce ink. I attached lengths of Gold Twine to the back of each of the baubles and attached them to the tag. I attached the tag to the card front. I wrapped a small piece of Gold Twine around the top of the baubles and tied a knot.
To decorate the inside of the card, I added the greeting from the Tag Buffet stamp set using Shaded Spruce ink. I embossed Whisper White card as before and attached a narrow strip of Shaded Spruce card behind one long edge. The panel is attached to the bottom of the stamped card. I stamped the bauble onto Shimmery White card using Memento Tuxedo Black ink. I coloured the image as before, cut it out and attached it to the left of the stamped greeting.
I must admit that I am having lots of fun playing with the Tag Buffet Project Kit and the Tag Buffet stamp set. I absolutely love these cards! What about you.
Bye for now,
Kris
Product Used:


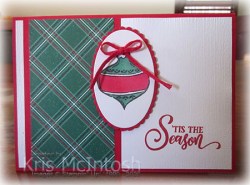
More Tag Buffet
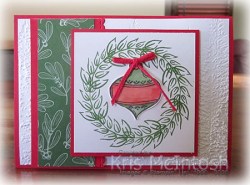
Today I am sharing another card I made using the Tag Buffet stamp set. I began by embossing Whisper White card using the Evergreen Forest 3D Embossing Folder and attached it to scored and folded Real Red card. I cut one edge of Real Red card using the border die from the Be Mine Stitched Dies. I attached a piece of ‘Tis The Season 6″ x 6″ Designer Series Paper to the Real Red card before attaching the panel to the left hand side of the card front. I used the Stamparatus to stamp the leaf image from the Tag Buffet stamp set to create a wreath on Whisper White card.  I attached the stamped panel to Real Red card and then the card front using dimensionals. I stamped the bauble image from the Tag Buffet stamp set onto Shimmery White card using Memento Tuxedo Black ink. I used an Water Painter to colour the image using Real Red and Garden Green ink. I cut out the bauble and attached it to the centre of the wreath.
  I tied a bow in a length of Real Red Braided Linen Trim and attached it to the top of the bauble.
To decorate the inside of the card, I stamped the greeting from the Tag Buffet stamp set onto Whisper White card using Real Red ink. I attached a narrow strip of Real Red card behind one long edge of Whisper White card embossed using the Evergreen Forest 3D Embossing Folder. The embossed panel is attached to the bottom of the stamped Whisper White card.
I really like the effect of the stamped wreath – another way to use this great stamp set.
Bye for now,
Kris
Product Used:


Get Well Soon
I shared this card with you recently which features some left over die cuts created for a project and then not used. Today’s card uses the remaining die cuts. I embossed Very Vanilla card using the Tasteful Textile 3D Embossing Folder and attached it to scored and folded Mossy Meadow card. I attached the leaves cut from Mossy Meadow and Soft Sea Foam card using the Forever Flourishing Dies. I stamped “get well soon” from the Timeless Tulips stamp set onto Very Vanilla card using Mossy Meadow ink.  I attached the greeting to Mossy Meadow card and then the card front using dimensionals. I stamped the flower from the Tasteful Touches stamp set onto Very Vanilla card using Petal Pink ink. I coloured the flower using the Dark Petal Pink and Dark Daffodil Delight Stampin’ Blends. I cut out the flower and attached it to the card front using dimensionals so that it would sit partially on the greeting band.
 To decorate the inside of the card, I attached another leaf cut from Mossy Meadow card using the Forever Flourishing Dies. I attached a narrow strip of Mossy Meadow card behind one long edge of Very Vanilla card embossed using the Tasteful Textile 3D Embossing Folder. The embossed panel is attached across the bottom of the Very Vanilla card covering the end of the die cut leaf. I stamped the flower from the Tasteful Touches stamp set onto Very Vanilla card using Petal Pink ink and coloured it using the Dark Petal Pink and Dark Daffodil Delight Stampin’ Blends. I cut out the flower and attached it partially over the embossed card.

So, just to refresh your memory, here are both cards together. I think they look lovely, don’t you.
Bye for now,
Kris
Product Used:


Summer Fun
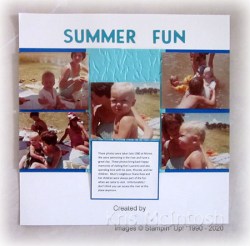
Today’s page shows off some photos of a day at the river when we were visiting my husband’s family in Moree. Not sure if this spot still exists but we had quite a few days swimming here. I embossed a piece of Coastal Cabana card using the Old World Paper 3D Embossing Folder.  I attached the embossed card to Pacific Point card and then Very Vanilla 12″ x 12″ card. I attached all the photos using dimensionals. I created the journaling on the computer and printed it onto Very Vanilla card. I attached the journaling to Pacific Point card and then to the page just below the central photo. I cut the title from Coastal Cabana card using the Playful Alphabet Dies.
This is a really simple page, I let the photos tell the story. However, I am glad that these photos have now made it out of the box and onto a page. I am sure my grandchildren will love seeing their Mum as such a young baby.
Bye for now,
Kris
Product Used:


Always Thinking of You
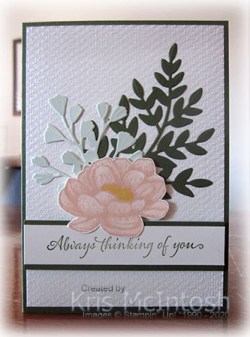
Today’s card was created after I had done some preparation work for a memory keeping project but in the end didn’t use the pieces. So I thought I would create a card for a special friend. I embossed Very Vanilla card using the Tasteful Textile 3D embossing Folder and attached it to scored and folded Mossy Meadow card. I attached the Mossy Meadow leaf and the Soft Sea Foam leaf cut using the Forever Flourishing Dies to the card front. I stamped “always thinking of you” from the Very Versailles stamp set onto Very Vanilla card using Mossy Meadow ink. I attached the greeting to Mossy Meadow card and then the card front over the ends of the die cut leaves using dimensionals.  I stamped the flower from the Tasteful Touches stamp set onto Very Vanilla card using Petal Pink ink. I coloured the flower using the Dark Petal Pink and Dark Daffodil Delight Stampin’ Blends. I cut out the flower and attached it to the card front partially over the greeting panel using dimensionals.
To decorate the inside of the card, I attached a leaf cut from Soft Sea Foam card using the Forever Flourishing Dies to the lower left hand corner of Very Vanilla card. I attached a narrow strip of Mossy Meadow card behind one long edge of a strip of Very Vanilla card embossing using the Tasteful Textile 3D Embossing Folder. The embossed panel is attached to the bottom of the Very Vanilla card covering the end of the die cut leaf. I stamped the flower from the Tasteful Touches stamp set onto Very Vanilla card using Petal Pink ink. I coloured the flower using the Dark Petal Pink and Dark Daffodil Delight Stampin’ Blends. The flower is attached over the embossed card.
I really love how this card turned out, don’t you? There are some more die cuts left over, so I will pop back with another creation soon.
Bye for now,
Kris
Product Used:

Tag Buffet
Yesterday on my Facebook Live I created each of the tags from the Tag Buffet Project Kit. To create these tags you need to purchase the Tag Buffet stamp set separately. I made a couple of cards to share today using this stamp set, just to show that it is useful far beyond the Project Kit.  For the first card, I stamped the greeting from the Tag Buffet stamp set onto the lower right hand corner of Whisper White card using Real Red ink. I embossed the stamped Whisper White card using the Subtle 3D Embossing Folder and attached it to scored and folded Real Red card.
  I cut one long edge of a piece of Real Red card using the border from the Be Mine Stitched Dies and attached a piece of the ‘Tis the Season 6″ x 6″ Designer Series Paper. The Designer Series Paper panel is attached to the left hand side of the embossed Whisper White card.
  I stamped the bauble image from the Tag Buffet stamp set onto Whisper White card using Memento Tuxedo Black ink. I coloured the image using the Real Red and Shaded Spruce Stampin’ Blends. I cut out the image using one of the Layering Ovals Dies and attached it to a Real Red scalloped oval cut using the same dies. The image panel is attached to the card front using dimensionals. I tied a bow in a length of Real Red Braided Linen Trim and attached it to the top of the bauble.
 To decorate the inside of the card, I stamped the greeting from the Tag Buffet stamp set onto Whisper White card using Real Red ink.
For the second card, I embossed Whisper White card using the Evergreen Forest 3D Embossing Folder. I cut the edge of a strip of Real Red card using the border die from the Be Mine Stitched Dies. I attached the border piece behind one edge of a piece of ‘Tis the Season 6″ x 6″ Designer Series Paper before attaching the panel to the bottom of the embossed card. I attached the whole piece to scored and folded Real Red card. I stamped the stocking image from the Tag Buffet stamp set onto Whisper White card using Memento Tuxedo Black ink. I coloured the image using Real Red and Shaded Spruce Stampin’ Blends before cutting out the image using the Layering Ovals Dies. I attached the image panel to a Real Red scalloped oval cut using the same dies. The image panel is attached to the card front using dimensionals. I stamped the greeting from the Tag Buffet stamp set onto Whisper White card using Real Red ink. I cut out the greeting using the Layering Ovals Dies, attached it to Real Red scalloped oval and then the card front.
To decorate the inside of the card I stamped the same greeting from the Tag Buffet stamp set onto Whisper White card using Real Red ink.
I think these cards turned out rather lovely, don’t you. I hope I have inspired you to take another look at this stamp set and see its possibilities.
Bye for now,
Kris
Product Used:

Hawaiian Birthday
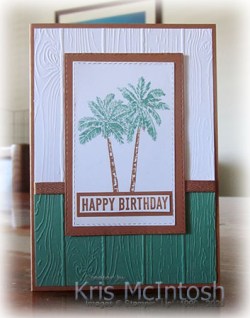
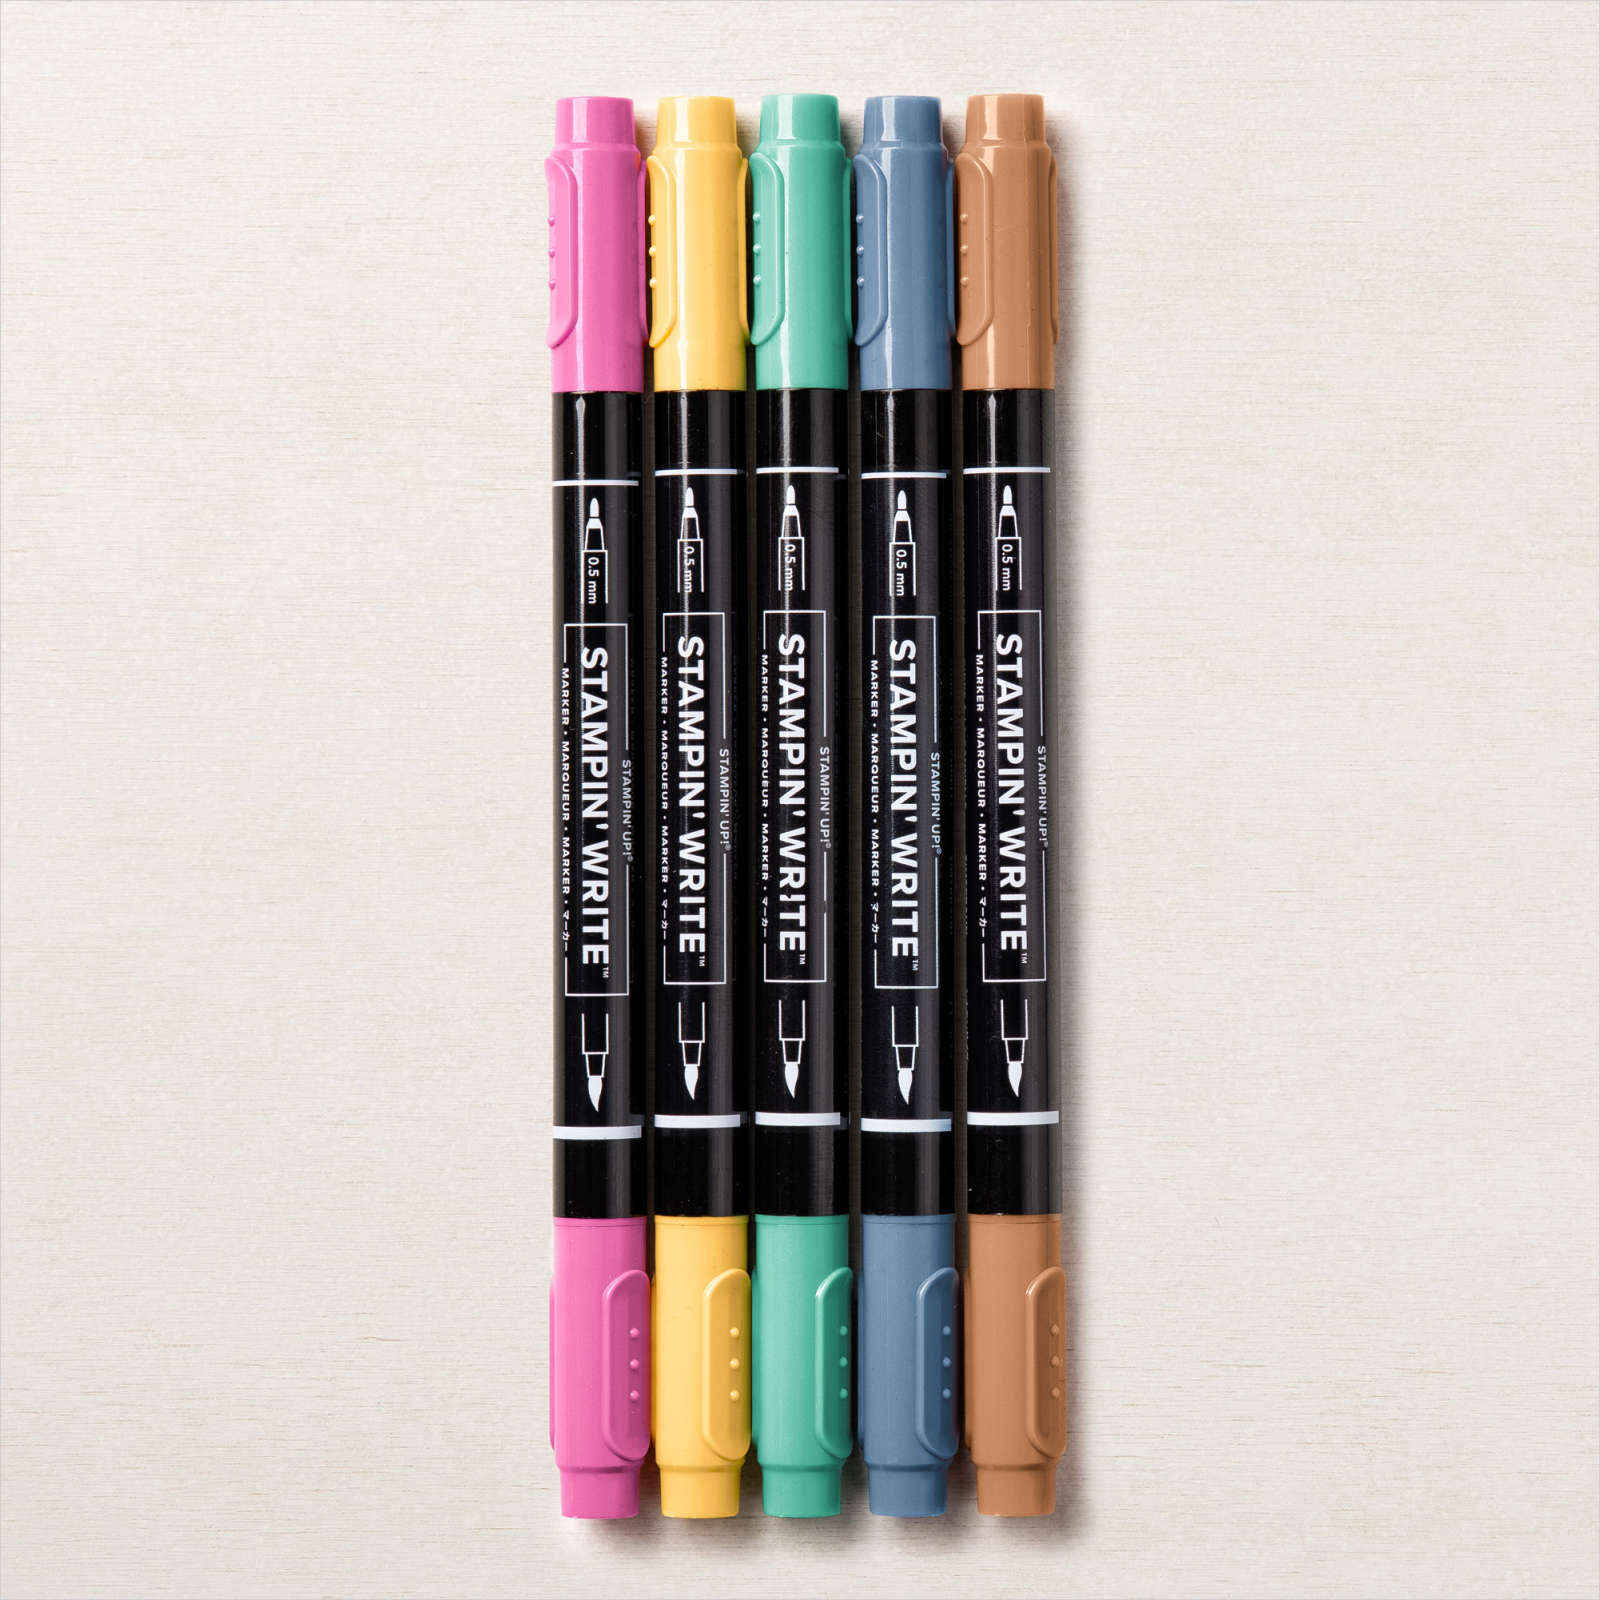
Today’s card uses the Timeless Tropical stamp set, one I have neglected for a little while. Sometimes when a new catalogue launches you forget about the stamp sets sitting on your shelf! This one was inspired by one I found on Pinterest by Melissa Kerrman. Of course it doesn’t really look like Melissa’s card but it certainly inspired me to get creative, so thank you Melissa. I attached a piece of Just Jade card across the bottom of Whisper White card before embossing the panel using the Pinewood Planks Embossing Folder. I wrapped the top of the Just Jade card using the Cinnamon Cider In-Colour Ribbon before attaching to scored and folded Cinnamon Cider card. I inked the palm tree image from the Timeless Tropical stamp set using Just Jade and Cinnamon Cider Stampin’ Write Markers. I cut out the image using one of the Stitched Rectangle Dies. I also cut a rectangle from Cinnamon Cider card using the same dies. I attached the image rectangle to the Cinnamon Cider rectangle and then the card front using dimensionals.
  I stamped the greeting from the Itty Bitty Birthday stamp set onto Whisper White card using Cinnamon Cider ink and cut it out using my Paper Snips. I attached the greeting to Cinnamon Cider card and then the image panel on the card front.
To decorate the inside of the card, I inked the palm tree image from the Timeless Tropical stamp set using the Just Jade and Cinnamon Cider Stampin’ Write Markers. The image is stamped onto the lower left hand corner of Whisper White card.
I love this card, so bright and cheery and perfect for your special someone. I don’t know why I have neglected this stamp set for so long.
Bye for now,
Kris
Product Used: