Butterflies and Vellum
This is a card I cased from Pinterest by Miriam. I changed the colours and added an extra couple of layers but basically just copied her gorgeous card.
I used my Gingham Standard Wheel and Baked Brown Sugar ink to create a panel on Whisper White card. Then I used both the folders from the Needlepoint Border Embossing Folders to add embossing above and below the wheeled image. The Whisper White card is attached to Strawberry Slush card. The whole piece was then attached to scored and folded Whisper White card using dimensionals. I cut Baked Brown Sugar card using the Delicate Doilies Sizzlit and attached it over the wheeled image. I stamped the greeting from the Label Love stamp set onto Whisper White card using Strawberry Slush ink and punched it using the Artisan Label Punch. The greeting is attached to the card front using dimensionals. I cut two sets of leaves from Vellum Cardstock using the Little Leaves Sizzlit and attached them to the Baked Brown Sugar doily using Glue Dots.  I punched Strawberry Slush card using the Elegant Butterfly Punch and attached it to the card front using a Glue Dot in the centre of the body and a 1/2 dimensional under each wing. I punched Vellum Cardstock using the Bitty Butterfly Punch and attached it to the centre of the Strawberry Slush butterfly. I added a strip of four Basic Rhinestones to the centre of the butterflies.
I punched one long edge of Strawberry Slush card using the Scallop Trim Border Punch and attached it inside the card. I added a strip of Whisper White which is wheeled using Baked Brown Sugar ink and the Gingham Standard Wheel. This time the Elegant Butterfly is punched from Baked Brown Sugar card with a Vellum Cardstock Bitty Butterfly on top.
Well, what do you think? Isn’t it gorgeous?
Bye for now, Kris.
Sunny Challenge 84/13
This week our Sunny Challenge has been set by Gwen and all she wants us to do is make something with a male theme.
 I embossed Very Vanilla card using the Square Lattice Embossing Folder and attached it to scored and folded Smoky Slate card (this is a truly beautiful colour). I cut a piece of This and That Designer Series paper and trimmed one end into a “V” shape. I attached it to Smoky Slate card and cut it to match the “V” shape before attaching it to the card front. I stamped the “globe” image from the By The Sea stamp set onto Very Vanilla card using Pool Party ink, which I stamped off once to lighten the colour. I stamped the ship over the top using Smoky Slate ink. Then I used the “striped” image from the Gorgeous Grunge stamp set and stamped over the whole piece using Crumb Cake ink. I punched one long edge of Pool Party card using the Scallop Border Punch and attached the image panel to it before attaching the whole piece to the card front.
  I stamped the greeting using Smoky Slate ink onto Very Vanilla card and punched it using the Large Oval Punch. I attached the greeting to a Pool Party Scalloped Oval and then the card front.
I stamped the globe image onto the lower left hand corner of Very Vanilla card using Pool Party ink which I stamped off onto scrap paper first. I stamped the anchor image over the top using Smoky Slate ink and then stamped the striped image from the Gorgeous Grunge stamp using Crumb Cake ink. I attached this piece to the inside of the card.
I love the way this turned out. It is kind of calming and pretty but not too pretty to give to a guy.  Let me know what you think.
For more inspiration take a visit to Sunny Challenges and Creations and see what the design team has created for you. Once you have made your card, or scrap page or 3d item, pop back and add it to Mr. Linky. I can wait to see your take on this week’s challenge.
Bye for now, Kris.
Hello, Hello
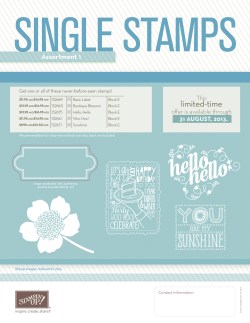
I have had time to play again and this time I wanted to use the single stamp Hello, Hello. This stamp is one of five stamps which Stampin’ Up! is offering for purchase as a single stamp until the 31st August or until sold out. It’s a great opportunity to get your hands on some fabulous stamps without having to buy a whole set.
 I started my card by embossing Whisper White card using the Perfect Polka Dots Embossing Folder and attached it to scored and folded Calypso Coral card. I embossed Wild Wasabi card using the Square Lattice Embossing Folder, attached it to Chocolate Chip card and then to the top left hand corner of the card front. I stamped the Hello, Hello greeting onto Whisper White card using Chocolate Chip ink, attached it to Chocolate Chip card and then to the card front using dimensionals.
  I stamped the flowers from the Stippled Blossom stamp set using Calypso Coral, making sure I stamped off the solid image onto scrap paper first. The leaves are stamped using Wild Wasabi and also stamping off first for the solid image. I cut out the flowers and leaves and arranged them on the card front around the greeting.
I stamped and cut out another flower and set of leaves to attach to Whisper White card to decorate the inside of the card.
I love this greeting stamp, it is actually large enough to make the focal image of your card without any other decoration.
Don’t forget to order your single stamp before they run out. Contact your Stampin’ Up! demonstrator or if you don’t have one, you can order through me online or via email.
Bye for now, Kris.
Another Christmas in July Card
Here is my second card for the current Sunny Challenge. This one is again done in non-traditional colours but I kind of like that.
 I embossed Wisteria Wonder card using the Chevron Embossing Folder and attached it to scored and folded Whisper White card. I stamped the “solid” tree from the Evergreen stamp set onto Whisper White card using Crumb Cake ink and over stamped with the “outline” tree using Always Artichoke ink. I attached the image panel to Always Artichoke card and then Crumb Cake card which has one edge punched using the Scallop Border Punch. The image panel is attached to the card front using dimensionals. I stamped the greeting from the Petite Pairs stamp set onto Whisper White card using Always Artichoke ink and punched it using the Large Oval Punch.
  The greeting is attached to an Always Artichoke Scallop Oval and then the card from using dimensionals under the right hand side, so that I could position it partly over the image panel. I punched a star from Silver Glimmer Paper using the star from the Merry Minis Punch Pack and attached it to the top of the tree. I used Dazzling Details Silver Sparkle to add “ornaments” to the Christmas Tree. I had to set the card front aside for a while to let the Dazzling Details dry a little.
On the inside of the card I stamped the “word” image using Always Artichoke ink. This is a fairly simple card but I am quite happy with it. How about you, do you like it?
If you haven’t joined the challenge yet, you still have until next Friday night to add your creation to Mr. Linky.
Bye for now, Kris.
PS. In case you are wondering, the Evergreen stamp set I have used and the Merry Minis Punch Pack are on the Carryover List and still available for order. If you do not have a Stampin’ Up! Demonstrator then you can order from me either online or send me an email.
Upsy Daisy Birthday
I had some time to play with the Upsy Daisy image in the Best of Flowers stamp set. This image is really small compared to the one in the original stamp set but it is really cute.
 I embossed Whisper White card using the Perfect Polka Dots Embossing Folder and attached it to scored and folded Pool Party card. I embossed a strip of Smoky Slate card using one of the folders from the Delicate Designs and attached it to the card front. I stamped the image onto Whisper White card using Calypso Coral ink, attached it to Calypso Coral card and then the card front using dimensionals. I stamped the greeting from the Petite Pairs stamp set onto Whisper White card using Smoky Slate ink, punched it using the Large Oval Punch and attached it to a Pool Party Scalloped Oval.
  I attached the greeting using a dimensional under the right hand side so that I could position it partially over the image panel.
I attached a narrow piece of embossed Smoky Slate card to a strip of Calypso Coral which has one long edge punched using the Scallop Trim Border Punch. This embossed/punched piece is attached to Whisper White card which has a greeting from Petite Pairs stamped using Smoky Slate ink. The Whisper White card is attached to the inside of the Pool party card. 
I really love the images in the Best of Flower stamp set. This is the first in a series of Best Of stamp sets which are being released this year to celebrate Stampin’ Up!’s 25 year Anniversary. A second set Best of Butterflies has also been released and there will be another set released in August. These stamp sets will be available for purchase until April 2014. This is a great way to collect lots of your favourite images from the last 25 years. Most of the images will be released in a smaller format than the original image. Check them out here.
I hope I have inspired you to take a closer look at these gorgeous stamp sets and perhaps to make one or two or more of them your own. If you would like to recreate this card, you can purchase all of the supplies here.
Bye for now, Kris.
Sunny Challenge 83/13
This week’s challenge has again been set by Vicky. She supplied a sketch and wants us to make a Christmas in July card.
You may have noticed that there are no Christmas or Holiday stamp sets or accessories in the new Stampin’ Up! catalogue, however, a few sets have carried over, even though they are not listed. So if you are a little stumped for what to use at the moment, you might like to check out the carry over list or try using Lovely as a Tree like me.
 I embossed Whisper White card using the Perfect Polka Dots embossing Folder and attached it to scored and folded Night of Navy card. I stamped the image onto Whisper White card using Night of Navy ink, covered the image panel with Versamark and embossed using a combination of Heat & Stick Powder and Dazzling Diamonds. I’m not sure that you can see how gorgeous this looks but believe me it is very dazzling. The image panel is attached to Night of Navy card and then the card front using dimensionals. I stamped the greeting from the More Merry Messages stamp set onto Whisper White card using Night of Navy ink and punched the greeting using the Extra Large Oval Punch.
  I attached the greeting to a Decorative Label cut from Night of Navy card before attaching to the card front slightly over the image panel using dimensionals.
I stamped the single tree from the Lovely as a Tree stamp set using Night of Navy ink onto the left hand side of Whisper White card. I stamped another of the greetings from the More Merry Messages stamp set onto the same piece of Whisper White card using Night of Navy ink. The Whisper White card is attached inside the Night of Navy card.
 This is a large card, 5-1/2″ square, so it will need to be hand delivered.
For more inspiration visit Sunny Challenges and Creations and see what the design team has created. Once you have made your card, 3d item or scrap page, pop back and add it to Mr. Linky. We know that you are all busy but we love seeing your creations.
Bye for now, Kris.
Sparkling Butterflies
Thought I would share this card we made at a recent class. I found a similar card on Pinterest and thought it was beautiful and an excellent showcase for the gorgeous Flower Garden Embossing Folder. Of course my card is a little different from Shana’s but I thank her for the inspiration.
 The Pool Party Core’dinations card is embossed with the Flower Garden Embossing Folder and then sanded to show the beautiful whie core of the card. I also sanded around the image and along the edges to give it a more distressed look. The card is wrapped with Whisper White 1/2″ Organza Ribbon and tied in a knot before attaching to scored and folded Whisper White card. The butterflies are punched from Silver Glimmer Paper and wrapped with a length of Early Expresso Baker’s Twine before attaching to the card front with Glue Dots and dimensionals.
Inside the card, I embossed the Flower Garden image once again and then used a sponge dauber and Pool Party ink to highlight the design.
The card is simple but oh so elegant and I love the sparkle from the butterflies. What do you think?
Bye for now, Kris.
More Retiring Product
Since there are so many retiring products and the Sunny Challenge is to use some of them, I created another card using Vicky’s sketch.
 I embossed Very Vanilla card using the Framed Tulips Embossing Folder and attached it to scored and folded Chocolate Chip card. I embossed Certainly Celery card using the retiring Vintage Wallpaper Embossing Folder and attached it to the card front using dimensionals. I stamped the large teacup image from the Tea Shoppe stamp set (also retiring) onto Very Vanilla card using Regal Rose ink. I punched the four corners using the 1″ circle punch and then embossed the panel using the Square Lattice Embossing Folder. The embossed panel is attached to the card front using dimensionals. I stamped the tea cup image again onto Very Vanilla card using Regal Rose ink, cut out the flowers and attached them over the embossed image using dimensionals.
I didn’t add a greeting and this time I didn’t decorate the inside. I will leave that until I am ready to give this card to someone.
Can you believe you only have a couple of days to buy what you love from the current catalogue? You can begin ordering from the new catalogue on Tuesday 2nd June. If you haven’t got a catalogue, then visit my website and view it online, or contact me to find out how to get one. Once you have decided what you want to buy, then visit my online store to place your order.
Bye for now, Kris.
New Product Sneak Peak
I am so in love with the products from the Stampin’ Up! catalogue which will be released on the 1st July. I have had a box of goodies sitting on the floor in my work room for about 2 weeks. I have had some of the things out to play but haven’t shared anything with you yet. This is the first and I think it is so darn cute. I found a card on Pinterest and followed it back to Gail Emmons blog where she had a tutorial for creating the Blackboard card. I did vary the measurements to fit a standard Aussie card.
 I created the blackboard in Basic Black card (obvious isn’t it). I stamped the Woodgrain Background stamp onto Soft Suede Card and cut the strips to frame the “blackboard” on the front of the card. I stamped the image from Sketched Birthday using Versamark ink and embossed it in Whisper White. Then I used a clean cloth dabbed into my Whisper White Craft Pad to add a little “chalk” around the image. I attached a piece of Whisper White Baker’s Twine across the top of the blackboard using a Glue Dot on each end. I stamped the balloons from the same stamp set onto Whisper White card twice each using Real Red, Pacific Point and Old Olive. I cut the balloons out and attached them over the ends of the Whisper White Baker’s Twine. I stamped the party hat, also from the same stamp set onto Whisper White card using Old Olive, Pacific Point and Real Red ink and cut them out. They are attached to the Baker’s Twine using a Glue Dot.
  I tied two lengths of Whisper White Baker’s Twine into bows and attached them over the balloons using Glue Dots. Lastly I stamped “happy birthday” from the Sketched Birthday stamp set onto Whisper White card using Real Red ink and cut it using the largest Bitty Framelit. The greeting is again attached to the card front using Glue Dots.
Isn’t this just the cutest card? Thanks so much for the inspiration Gail. I am going to have to try this technique again. So much fun.
Don’t forget to keep you eye out for the new catalogue release so you can purchase this great stamp set from my online store.
Bye for now, Kris.
Make a Statement Digital Tour
I am really excited to share this amazing news with you all. Stampin’ Up! is going to have training days for My Digital Studio in Australia and New Zealand.
The tour dates for Australia are –
Melbourne – Saturday 3rd August
Sydney – Saturday 10th August
Brisbane – Saturday 17th August
Perth – Saturday 24th August
These will be half day events and the cost is $35.00 BUT registration includes a free copy of the My Digital Studio programme. You will need to have the programme pre-loaded onto your laptop to participate in the course. This is a fantastic chance to not only learn more about this amazing programme but also get a “free” copy of the programme. WooHoo. Way to go Stampin’ Up!.
Just to get you a little more excited, here is a video from Stampin’ Up!.
To learn more and to register for this event just visit http://www.mydigitalstudio.net/home . If you are not a member of this site, just sign up – it’s free and open to everyone. Once you have signed in click on Learning and then Events. I hope that you can join this fantastic event.
Bye for now, Kris.


