SC 76/12
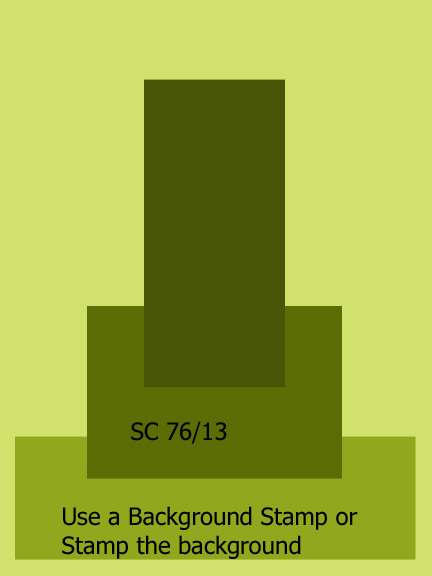 This week’s Sunny Challenge has been set by me. I created a simple sketch and you just need to either use a background stamp or stamp the background. I created my challenge some time ago and obviously forgot to check the dates because I have used the now retired SAB stamp set Feeling Sentimental. I’ll have to see if I can make another card using current Stampin’ Up! product!
I decided to stamp my background and I used the En Francaise Background Stamp onto Very Vanilla card using Crumb Cake ink. I also sponged the edges of the card using Crumb Cake ink. I attached the stamped card to scored and folded Basic Black card. I embossed Cherry Cobbler card using the Chevron Embossing Folder, attached it to Basic Black card and then to the lower edge of the card front. I attached Marina Mist striped Designer Series Paper from the Subtles Designer Series Paper Stack, attached it to Basic Black card and then to the card front using dimensionals under the top half only. I stamped the telephone box image from the Feeling Sentimental stampset onto Very Vanilla card using Cherry Cobbler ink and sponged the edges of the card using Crumb Cake ink. I attached the image panel to Basic Black card and then to the card front with dimensionals under the top half of the image only. I stamped the greeting “Celebrate” onto Very Vanilla card using Cherry Cobbler ink and punched it using the Large Oval Punch. The image is attached to a Basic Black Scallop Oval and then the to card front using dimensionals. I really love the way this card looks. Feeling Sentimental is a really lovely stamp set, perfect for vintage style cards, I hope you got yours free during Sale-A-Bration.
I’m sure that Gwen and Vicky have created something gorgeous using “current” Stampin’ Up! product. So pop over to Sunny Challenges and check out the inspiration and then once you have created your card, 3d item or scrap page add it to Mr. Linky. Remember our challenges run for two weeks now so you have plenty of time. As always I am really looking forward to seeing your creations.
Bye for now, Kris.
En Francaise Background Stamp (wood mount only) Item. 112358 ($30.95)
Feeling Sentimental – Free during Sale-A-Bration now retired
Basic Black A4 card stock – Item 121688 ($11.95)
Very Vanilla A4 card stock – Item 106550 ($14.95)
Cherry Cobbler A4 card stock – Item 121681 ($11.95)
Subtles Designer Series Paper Stack – Item 117152 ($37.95)
Cherry Cobbler ink – Item 126966 ($9.95)
Crumb Cake ink – Item 126975 ($9.95)
Large Oval Punch – Item 119855 ($27.95)
Scallop Oval Punch – Item 119856 ($29.95)
Chevron Embosing Folder – Item 127749 ($13.95)
Dimensionals – Item 104330 ($6.95)
Snail – Item 104332 ($11.95) – refill Item 104331 ($7.95)
I am really excited
to share with you some fantastic news. As of today Stampin’ Up! has introduced online ordering. So you can purchase any of your favourite Stampin’ Up! products online, directly from me. Just click on the link to take you to my Web Page and once there hit the Shop Now Button just under my name and contact details. (You can also shop by going to Products, then Shop Now.) Once you reach the online store you will be asked to create an account, just a couple of steps and don’t forget to make a note of your account details. Any qualifying orders you place online can earn you Stampin’ Rewards, online Hostess Benefits.
In conjunction with online ordering we now have the fantastic My Digital Studio available online to purchase and download. WooHoo. So, if you do decide to place an online order you can do so via my Stampin’ Up Web page. Just take a little look at this video to see what amazing things you can create in My Digital Studio.
I am really excited to be able to offer you my online store and also this fantastic new product.
Bye for now, Kris.
Take Two for SC 75/13
The current Sunny Challenges and Creations challenge is only half way through so there is still plenty of time for you to join us. I thought I would share another “Get Well” card with you for a little more inspiration.
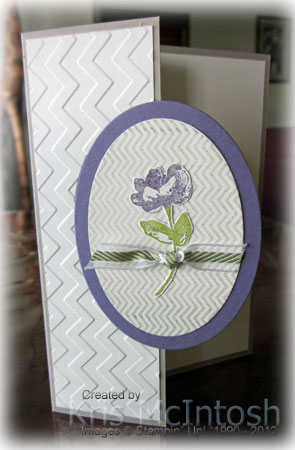 I started with a standard sized Crumb Cake card and cut the front panel down to 5cm (about 2″). I embossed a piece of Very Vanilla card using the Chevron Embossing Folder and added it to the front panel. I stamped the background image from the Oh Hello stamp set onto Very Vanilla card using Crumb Cake ink and cut it out using the matching Ovals Collection Framelit. I cut one size larger oval from Perfect Plum card and attached the stamped oval to the centre. I added adhesive on the left hand side of the back of the image panel and attached it over the embossed Very Vanilla card. I inked the flower image from the Oh Hello stamp set using Perfect Plum and Old Olive Stampin’ Write Markers, stamped onto Very Vanilla card and cut it out. I attached the flower image to the centre of the oval. I tied a knot in a piece of Old Olive Striped Organdy Ribbon and attached it over the flower stem using a Glue Dot.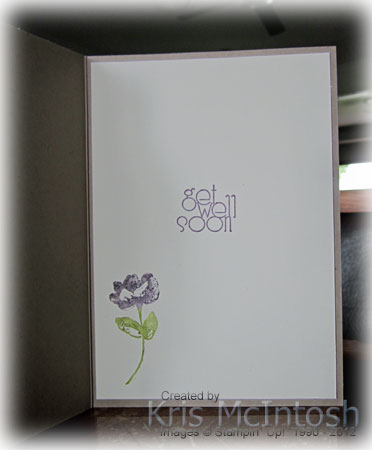
For the inside of the card, I inked the flower image using the same Stampin’ Write Markers and stamped onto the lower left hand side of Very Vanilla card. I stamped “Get Well Soon” from the Delightful Dozen stamp set using Perfect Plum ink and making sure that you can’t see it when the card is closed.
We’ve had quite a few entries this week but we would love you to add your creation, so come on, I’m sure we all need to have one or more of these cards in our stash.
Bye for now, Kris.
Sean’s Birthday Card
My son-in-law celebrated his birthday on Monday and this is the card I made for him.
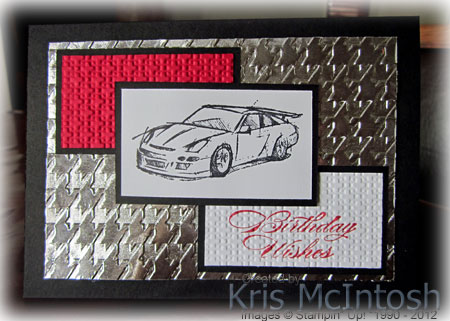 I attached a piece of aluminium foil (can you tell I love this technique) to Whisper White card using an Anywhere Glue Stick, trimmed the edges so it was nice and neat and then embossed it using the Houndstooth Embossing Folder. I attached the embossed card to scored and folded Basic Black card. I embossed a piece of Real Red card using the Square Lattice Embossing Folder, attached it to Basic Black card and attached it to the card front. I stamped “birthday wishes” from the Bring on the Cake stamp set onto Whisper White card using Real Red ink.
 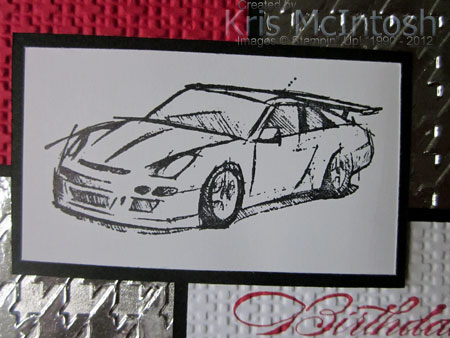 I embossed the greeting piece using the Square Lattice Embossing Folder, attached it to Basic Black card and then to the card front. I stamped the “racing car” image from the Need For Speed stamp set onto Whisper White card using Stazon Jet Black ink. I attached the image panel to Basic Black card and then to the card front using dimensionals.
I just love how easy this card was to make and how impressive it looks. The background shines and shimmers and really looks like metal. Try it yourself and see what results you can come up with.
Bye for now, Kris.
Punch Art
I was asked by a lady to create an engagement card and when I asked what kind of things she thought the recipient might like, she said the lady loved frogs. Sooo, with the help of a video from Aly at Aly Stamps this is what I created.
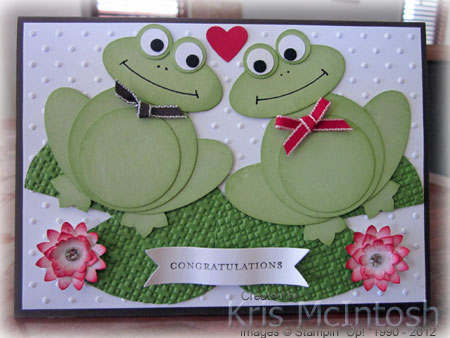 My base card is Early Expresso and I added a layer of Whisper White which I embossed using the Perfect Polka Dots Embossing Folder. My lily pads are Gumball Green card cut with one of the Ovals Collection Framelits and embossed with the Square Lattice Embossing Folder. My frogs are made from Certainly Celery card and each piece is sponged around the edges with the same ink. The gentleman frog has a tie made from Early Expresso 1/8″ Tafetta Ribbon and the lady frog has a bow tied from Real Red 1/8″ Tafetta Ribbon. My waterlilies are created by punching Whisper White card with the Boho Blossom Punch and sponging the edges with Real Red ink.
 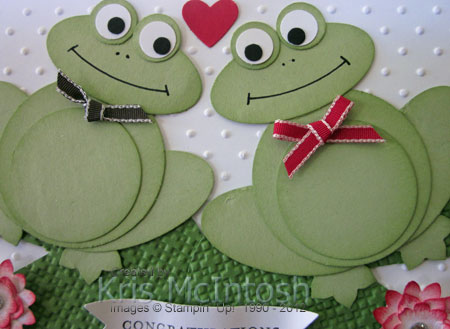 I attached the pieces together with Glue Dots and gave them a little shaping before adding a Basic Rhinestone to the centre. The greeting comes from the Teeny Tiny Sentiments stamp set and is stamped in Early Expresso ink on Whisper White card. I cut the greeting using one of the Bitty Banners Framelits. I used by Bone Folder to curl the greeting banner in both directions before attaching it with a dimensional in the centre and Glue Dots on the ends. The last little addition is a Real Red heart punched using the Small Heart Punch.
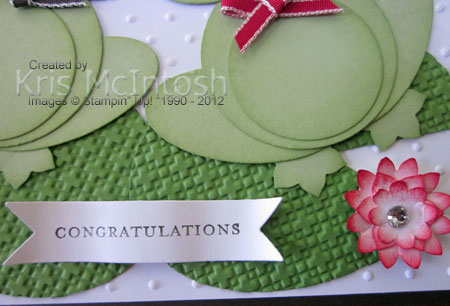 My customer loved the card and hopefully so will the recipients. Creating punch art can be a little time consuming but it is rewarding and fun at the same time.
I’d really like to hear what you think of this one.
Bye for now, Kris.
Sunny Challenge 75/13
This week’s challenge has been brought to us by Gwen and she has once again been very easy on us. All we need to do is create our project with the theme “Get Well”.
 This is the kind of card, that we need to keep on hand and one that I seldom make! I cut my Certainly Celery card in half lengthwise. Then I used the new Simply Scored Borders Scoring Plate to create two rows of embossing on the lower edge of the front of my card. I stamped the leaves from the Field Flowers stamp set onto Whisper White card using Certainly Celery ink. I attached this panel to Crumb Cake card and then to the card front. I stamped the large solid flower onto scrap paper twice using Pretty in Pink ink and stamped the large outline flower over the top using Rose Red ink. I cut the flowers out and attached them to the card front, the lower flower is added with dimensionals. I stamped “get well soon” from the Delightful Dozen stamp set onto Whisper White card and punched it out using the 1-1/4″ Circle Punch. I attached the greeting to a Crumb Cake 1-3/8″ Circle, then a Rose Red 1-3/4″ Scallop Circle and then to the card front.
It is a simple card but one that I really like. It is happy and cheery and hopefully would make the recipient feel better.
As you know I usually leave the inside of my cards blank so that they can be decorated to suit the actual person I am giving the card to. Well this week I decided that I would add a little something to the inside. I stamped the flower stem from the Secret Garden stamp set onto Whisper White card using Certainly Celery ink and then stamped the flower using the Pretty in Pink and Rose Red ink. 
Now for some more inspiration pop on over the Sunny Challenges and Creations and see what the Gwen, Vicky and the guest designers have created. Once you have made your card, scrap page or 3d item, add it to Mr. Linky. We love seeing your projects and hopefully this week all of you will have time to play along. Remember, if we get ten entries we will have two Rays of Sunshine, and if we get more than twenty who knows we might even have three Rays of Sunshine.
Bye for now, Kris.
Male Card
As you know making male cards is not my strong point. I think it has to do with coming from a family of all girls and only having two daughters of my own. I also think that there are only a limited amount of stamp sets that have a male theme. There are hundreds of sets with flowers and even lots of children themes but not many for the guys. So when I saw Dapper Dad in the current Seasonal Catalogue I just had to have it. This is a card that I created for my class at Beachmere.
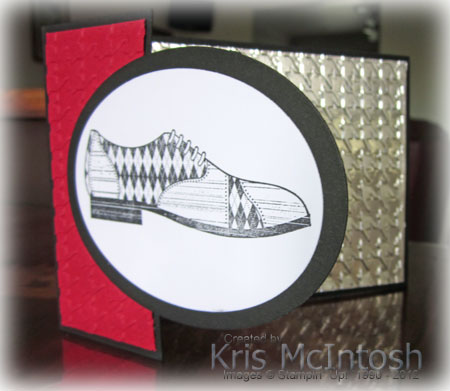 I started with Basic Black card and cut the front panel down to 5cm (2″). I used the Anywhere Glue Stick to cover a piece of Whisper White card and then attached aluminium foil making sure that the shiny side was visible. I trimmed the foil down to the size of the card and then embossed it using the Houndstooth Embossing Folder and attached it to the inside of the card. I embossed a small panel of Real Red card using the same embossing folder and attached it to the front of the 5cm section. I cut Whisper White card using one of the Ovals Collection Framelits and stamped the shoe image using Stazon Jet Black ink.
 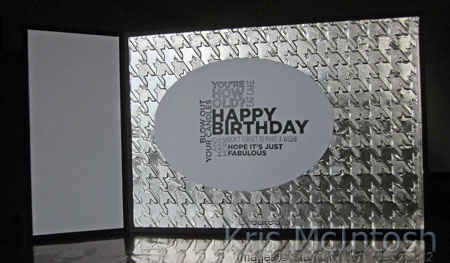 I cut an oval one size larger from Basic Black and attached the shoe panel to the centre. I used Sticky Strip only under the left hand side and attached it to the card front over the Real Red embossed card. I cut another Whisper White oval the same as the one for the shoe and stamped the birthday greeting from the Delightful Dozen stamp set again using Stazon Jet Black ink. I attached this inside the card making sure that it is hidden by the Ovals on the front when it is closed. I also added a small panel of Whisper White card on the inside so that there was somewhere to write a personal note.
I think this is a great masculine card. Using aluminium foil is a fantastic way to get a manly feel without going to a lot of expense. Let me know what you think.
Bye for now Kris.
Card Box
 I followed a tutorial by the fabulous Tanya Bell to create a box from the cardboard which is included as the backing for your Designer Series Paper from Stampin’ Up!. Tanya has made a video tutorial and it is so easy to follow.
I decorated my box with a piece of the Print Poetry Designer Series paper, Certainly Celery and Perfect Plum card. I made the flower for the front using the Build a Blossom Stampset, Perfect Plum ink, Whisper White card and the matching Blossom Petals Builder Punch. I gave the flower some dimension by curling the petals with my bone folder, firstly so that the petals turned down and then flipping them over and turning the ends up. I attached the flower with dimensionals underneath the petals to keep the shape. The ribbon is the fabulous Natural 7/8″ Cotton Ribbon which carried over from the Holiday Mini.  The closure on the back is made with one of the framelits from the Apothecary Framelits Collection. Sometimes simple ideas are the best.
I’d love to hear what you think of my version of this great idea – Thanks Tanya.
Bye for now, Kris.
Purple Birthday Wishes
This is the first time I have used the Oh Hello stamp set even though I have had it since the release of the Seasonal Catalogue.
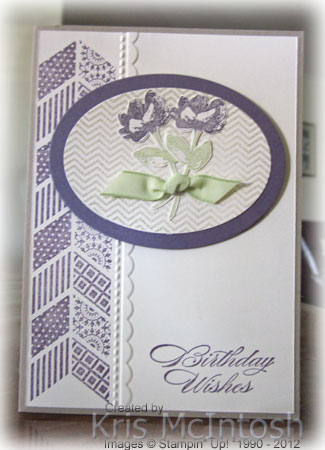 I stamped the image on the left hand side of Very Vanilla card using Perfect Plum ink. I also used my stamp-a-ma-jig to keep the images straight. Next I embossed alongside the stamping using one of the Needlepoint Border Embossing Folders. I also stamped happy birthday from the Bring on the Cake stamp set using Perfect Plum ink. The image panel is attached to scored and folded Crumb Cake card. I stamped the background image onto Very Vanilla card using Crumb Cake ink and cut it using the matching Oval Collection Framelit. I layered the stamped oval onto a Perfect Plum Oval cut one size larger. I attached the oval panel to the card front using dimensionals. I inked the flower image using Perfect Plum and Certainly Celery Stampin’ Write Markers and stamped it twice onto Very Vanilla card. I and cut out the images and I attached the flowers to the centre of the oval panel.
 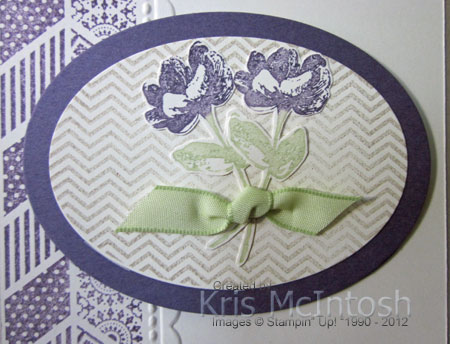 I tied a knot in the piece of Certainly Celery 1/2″ Tafetta Ribbon and attached it over the flower stems using Glue Dots.
This is a great stamp set and one I need to use a lot more. Let me know what you think.
Bye for now, Kris.
Anniversary Wishes
 My lovely daughter Emma and her husband Jason are celebrating their wedding anniversary today. Happy Anniversary. I made my card after seeing a video tutorial by Mary Fish. Mary made her card using the Elegant Butterfly Punch and it is truly gorgeous, however, I used the Hearts Collection Framelits for my card. Thanks for the inspiration Mary.
I used one of the Hearts CollectionFramelits to cut a piece of Whisper White card and then used the Occasions Paper Piercing Pack from the Seasonal Catalogue to pierce holes around the outside of the heart shape. 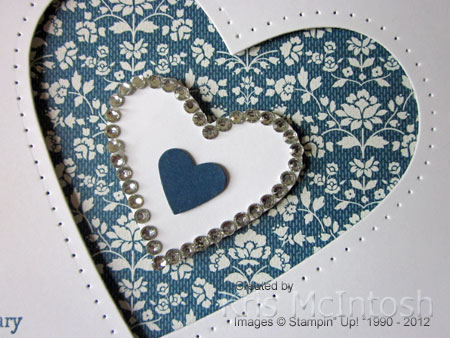 I stamped “happy anniversary” from the Teeny Tiny Sentiments stamp set using Midnight Muse ink. I attached a piece of Comfort Cafe Designer Series Paper to the front of folded Whisper White card. I attached the card with the heart shaped window over the top using dimensionals. I cut another heart from Whisper White card using the smallest Heart CollectionFramelit, added Basic Rhinestones around the edge and attached it using dimensionals inside the larger heart. I punched Midnight Muse card using the Small Heart Punch and attached it inside the Whisper White heart.
I love the way this card has turned out. Super simple and super elegant. What do you think?
Bye for now, Kris.







