Gift Packaging
I am a little late sharing the gift bag that I decorated to hold Elyssa’s birthday present. Elyssa loves clothes and before she started school this year would quite likely wear at least 3 different sets of clothes each day. So that’s what I bought her for her birthday, lots of clothes. However, you need something to give them in so I decorated a plain white gift bag which I purchased at Spotlight (Australia).
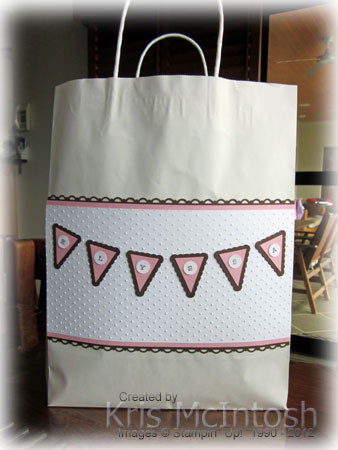 I embossed a piece of Whisper White card using the Perfect Polka Dots Embossing Folder. This attached it to Pretty in Pink card, then to Chocolate Chip which has both long edges punched using the Scallop Trim Border Punch and then to the front of the gift bag. I stamped the letters of Elyssa’s name using a long retired stamp set onto Whisper White card and punched them out using the 1/2″ Circle Punch. I cut Pretty in Pink and Chocolate Chip card using the Petite Pennants Build Punch. I attached all of the pieces together and then attached them to the front of the bag. I don’t use this punch often enough but really love the way the pennant fits across the bag. I wanted to decorate the back of the bag but didn’t want to make another pennant.
 Soooo remember the little Heart Shaped Door Hanger which I shared in this post that I made using a tutorial from the Stamp Academy. Well, I decided that it was too delicate to just pop inside the bag so I hung it over the handle on the back of the bag and it was just perfect. Remember you can take a look at this tutorial by clicking on the Stamp Academy link in my side bar and then on the Free Video link. I’m sure you will be impressed enough to want to join this fantastic site.
Bye for now, Kris.
Happy Birthday Elyssa
My beautiful granddaughter Elyssa turns 5 today. I made her birthday card using the Stampin’ Up! exclusive Pop ‘n Cuts Dies.
 I cut the inside of my card using Whisper White card with the Dress Form insert in place. I cut the top of the dress form off so that I could create my cup cake pop up. I stamped the cupcake bases from the Create-A-Cupcake stampset onto Whisper White card using Chocolate Chip ink. I punched the images using the Cupcake Builder Punch. I used the same punch to cut the “icing” from Pretty in Pink card. I embossed theses pieces using the Elegant Lines Embossing Folder. I attached the cupcakes to Whisper White card which I embossed using the Perfect Polka Dots Embossing Folder.
 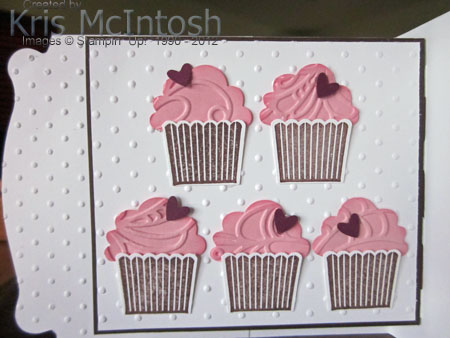 I punched the little hearts from Rich Razzleberry card using the Owl Builder Punch. The embossed Whisper White card is attached to Chocolate Chip card and then the dress form piece. I cut another piece of Whisper White using the Pop ‘n Cut Base and embossed it using the Perfect Polka Dots Embossing Folder. I trimmed the piece so that it fitted behind the cupcakes and covered the “hole” where the dress form pops up. I cut another piece of Whisper White and embossed it again using the Perfect Polka Dots Embossing Folder, attached it to Pretty in Pink card which has both long edges punched using the Scallop Trim Border Punch and then to the card base.
 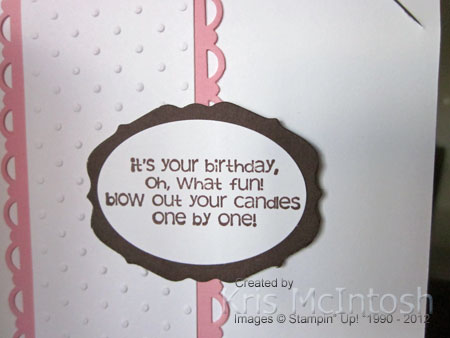 I stamped the greeting from the Bring on the Cake stamp set onto Whisper White card using Chocolate Chip ink and punched it using the Extra Large Oval Punch. I attached it to one of the tags from the Lots of Tags Sizzlits and then to the card base.
To cover the holes where the die pops up, I cut a piece of Pretty in Pink card which is only 6″ x 4″ and scored on the 6″ length at 1-3/4″. I punched one long edge of a strip of Chocolate Chip card using the Scallop Trim Border Punch, attached it behind the edge of the Pretty in Pink card and then attached the base inside. 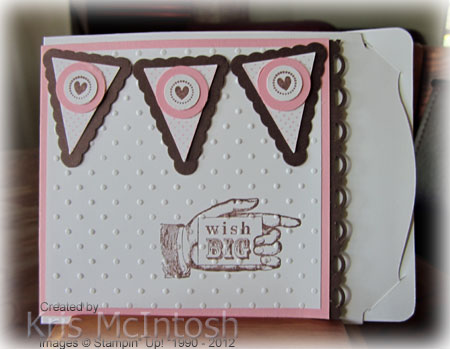 I stamped “wish big” from the Bring on the Cake stamp set onto the bottom right hand corner of Whisper White card, embossed it using the Perfect Polka Dot Embosing Folder before attaching it to the card front. I stamped the “dotted” image from the Pennant Parade stamp set onto Whisper White card using Pretty in Pink ink. I used the Pennant Builder Punch to cut them out and attached them to Chocolate Chip card cut with the same punch. I stamped the hearts from the Itty Bitty Bits stamp set onto Whisper White card using Chocolate Chip ink, punched them out using the 1/2″ Circle Punch and added them to Chocolate Chip 3/4″ Circles. I attached all these pieces together and attached them to the card front.
It is so addictive, thinking about all the ways you can use these Pop n’ Cuts. Let me know what you think.
Bye or now, Kris.
Dress Up Framed Art
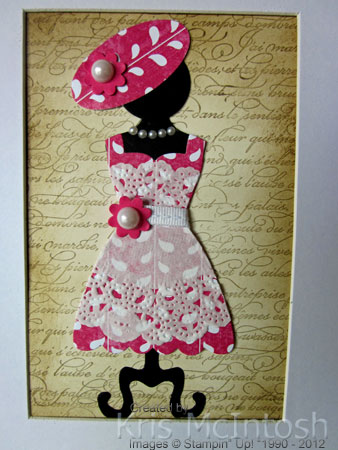
I have been inspired by the number of framed art pieces I have seen on different blogs and of course on Pinterest to create a framed art piece using the Dress Up Framelits.

I purchased my frame at K Mart (Australian store) because they were so pretty and each opening was only 4″ x 6″. I wanted to create 3 different but similar pieces for each one. I cut the dress forms from Basic Black card and also punched a 1″ Circle from Basic Black to look like a head.
The lady on the left uses a piece of Sunshine and Sprinkles Designer Series Paper with the addition of a Paper Doily cut with the framelit to create the over dress. A piece of Whisper White 1/4″ Stitched Grosgrain decorates the waist and covers the joins in the two doily pieces. I added a small flower punched from Melon Mambo card using the Boho Blossoms Punch decorated with a Basic Pearl. The hat is an Extra Large Oval decorated the same as the waist of the dress. I added some Basic Pearls to the neck of the dress form.
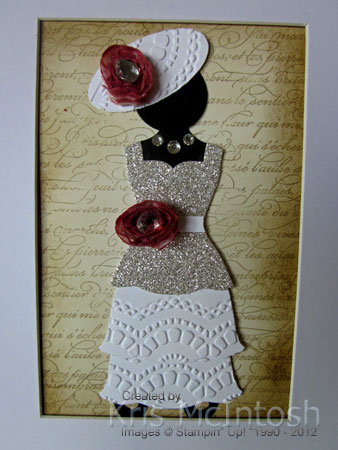
The middle lady is made using Whisper White Card and Silver Glimmer Paper. I cut the skirt twice from Whisper White card and embossed both pieces using one of the Delicate Designs Embossing Folders. I also recut the bottom of the Silver Glimmer Paper with the Dress Framelit so that the curves were the same on all three pieces. I decorated the waiste with a strip of Whisper White card and one of the flowers from the Flower Trim, coloured with a Sponge Dauber and Cherry Cobbler ink. The flower is attached with a Glue Dot and I added a Large Basic Rhinestone to the centre. The hat is again cut with the Extra Large Oval Punch, embossed with the same embossing folder and trimmed in the same manner as the waist of the dress. The neck is decorated with some Basic Rhinestones.
The third dress is again cut from some of the Sunshine and Sprinkles Designer Series Paper. I cut a Paper Doily to match the bottom of the dress and added a little piece behind the neckline. Whisper White 1/4″ Stitched Grosgrain again wraps the waist. A flower punched with the Boho Blossom Punch from Melon Mambo card and a Basic Pearl finishes the waist decoration. The hat is again punched using the Extra Large Oval Punch and decorated the same as the dress. Again Basic Pearls have been added to the dress form neck.

The panels behind the dresses are Very Vanilla card stamped with the En Francaise Background using Crumb Cake ink. I made a mask with a rectangle opening 4″ x 6″ and sponged inside the mask using Crumb Cake ink and then added a little Soft Suede over the top around the edges.
I absolutely adore the finished product and I know at least 3 or 4 young ladies who will want to have one of these.
I would really love to hear what you think.
Bye for now, Kris.
Floral Window Box and Card
This is the bonus project for the February edition of Craft Project Central. Remember how I have told you that you get 10 tutorials for $10.00, well you can actually get 11 tutorials. To get the instructions for this amazing set designed by the fabulous Kim Score, you need to subscribe to the February edition and meet one of the bonus project requirements of subscribing to two or months in a row, putting the Craft Project Central badge on your blog, or referring a friend and when they subscribe, let Craft Project Central know.
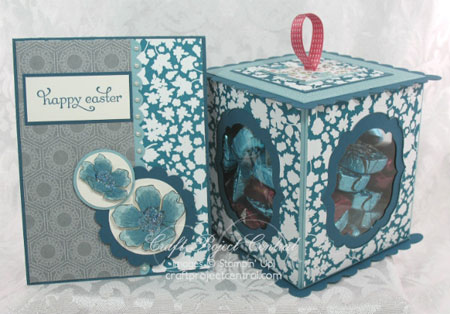
This gorgeous gift set would suit me very well, look at how much chocolate you can fit in that gift box! Gorgeous isn’t it! Please take a visit to Kim’s blog to see more of her fabulous work and don’t forget to leave a comment.
The March edition of Craft Project Central is already underway and it looks as if it will be just as amazing as the February edition.
Bye for now, Kris.
Sunny Challenge 74/13
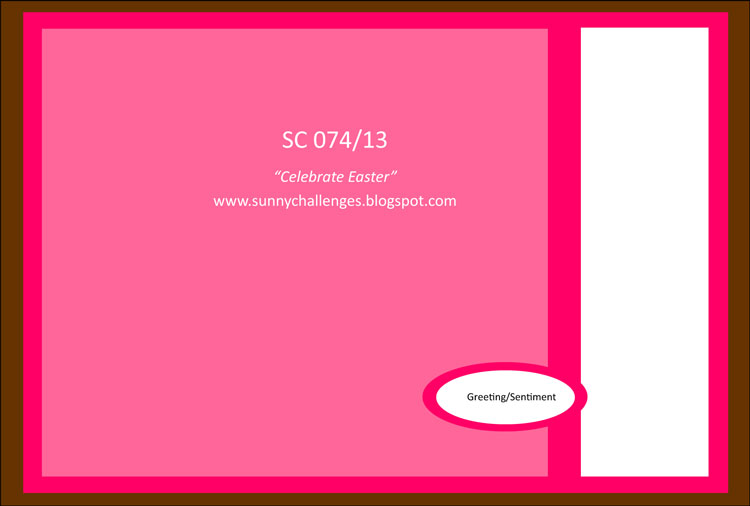 Here we go again with another great challenge. This week Vicky has presented us with a great sketch and the theme is Easter. I know that you all need Easter cards for your family and friends, or maybe you need to create a scrap page to show off the photos you took of the children/grandchildren hunting for eggs last year. Maybe you need to create something for the children to put their collected eggs in. Well this challenge is your opportunity to share with us all.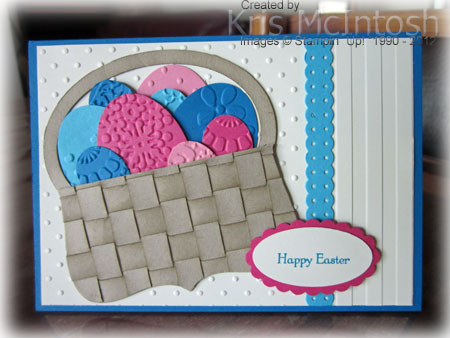
I started my card by embossing a piece of Very Vanilla card with two embossing folders, Perfect Polka Dots on the left two thirds of the card and Stripes on the right narrow panel. I masked the join in the two embosing folders by adding a strip of Tempting Turquoise card which is punched using the Dotted Scallop Border Punch. I attached the Very Vanilla card to scored and folded Pacific Point card. I created my basket by cutting 1cm wide strips of Crumb Cake card and sponging the edges with Crumb Cake ink. Then I weaved them together and laid them on top of a piece of Crumb Cake card which I cut using the Top Note Die. 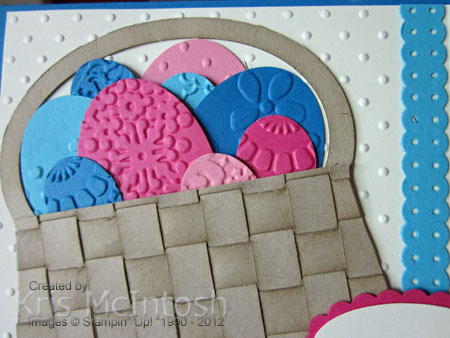 Once I glued down the woven card, I trimmed the Top Note to the size I wanted to fit on my card front. I created the handles by cutting Crumb Cake card using two of the Oval Framelits to create a narrow piece and then sponging the edges using Crumb Cake ink. Then I punched Raspberry Ripple, Pacific Point, Tempting Turquoise and Regal Rose card using the Extra Large Oval Punch and the Small Oval Punch. I embossed the ovals using various Embossing Folders and then layered them behind the top of the Top Note basket. I stamped “happy easter” from the Teeny Tiny Sentiments stamp set onto Very Vanilla card using Pacific Point ink and punched the greeting using the Large Oval Punch. I attached the greeting to a Raspberry Ripple Scallop Oval and then to the card front using dimensionals only under the right hand side.
I am really happy with the way this card turned out. It is a little time consuming but sometimes it’s nice to just play around and see what effect you can get with a little effort.
Now for some more inspiration pop on over to Sunny Challenges and Creations and see what the Design Team and Guest Designers have created for you. Once you have made your card, 3d item or scrap page, then add it to Mr. Linky. As always we look forward to seeing your entries.
Bye for now, Kris.
Dapper Dad
I was inspired by a suite of cards I saw on Pinterest to create this one using the Dapper Dad stamp set.
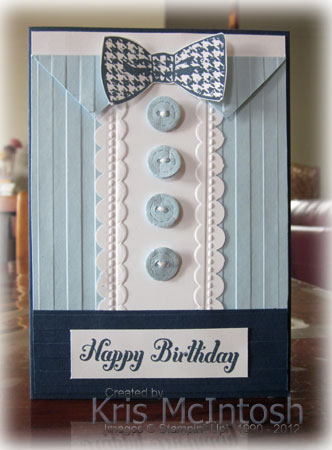 I started by cutting the collar shape onto a 10cm x 14.3cm piece of Bashful Blue card. Once I had done my cutting, I embossed the card using the Stripes Embossing Folder. Next I took a strip of Whisper White card and punched both long edges with the Scallop Border Punch. I also embossed using one of the Needlepoint Border Embossing Folders. I attached this strip to the embossed Bashful Blue card and added a dimension under each “collar” piece to hold it in place. This piece was then attached to Whisper White card and then to scored and folded Night of Navy card. I embossed a piece of Night of Navy card with the Stripes Embossing Folder, so that the stripes run across the card when attached over the bottom of the Bashful Blue card. I stamped the tie from the Dapper Dad stamp set onto Whisper White card using Night of Navy ink and cut it out. I attached it to the card front using a Glue Dot in the middle and a dimensional under each side. I cut four buttons using the Buttons #5 Sizzlit from Bashful Blue card. I pushed out the buttonholes and attached three 1/2″ Circles of the same colour to the back of each button to give it some dimension. I pushed the buttonholes through the stacked card and then added a little Whisper White Bakers Twine which I held in place using a Glue Dot. I attached the buttons to the card front using Glue Dots. Lastly I stamped “happy birthday” from the Bring on the Cake Stamp set onto Whisper White card and attached it to the card front.
I really love the way this has turned out. It’s a fun concept to play with. Let me know what you think.
Bye for now, Kris.
Card Gift Box Set
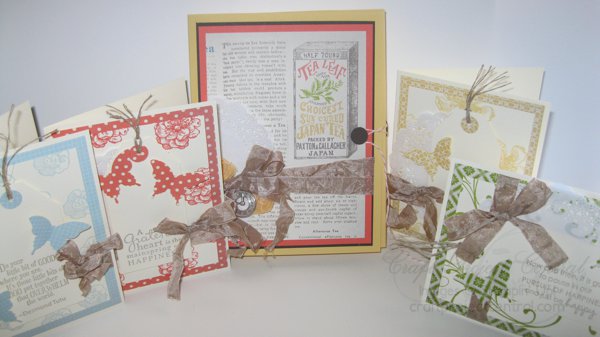
Another amazing project from Craft Project Central. This time the designer is the very talented Heidi King. To see more of her lovely work please visit her blog and let her know how much you love it.
More By The Tide
This card gave me an opportunity not only to play with the stamp set By The Tide but also to do some heat embossing and masking.
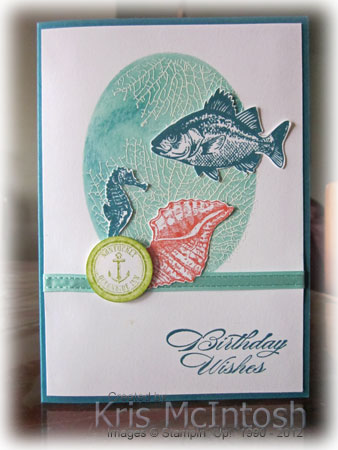 I created a mask in some copy paper using one of the Oval Framelits and stamped the seaweed image onto Whisper White card inside the frame using Versamark ink. I heat embossed using White Embossing powder and then inked inside the oval using Pool Party ink with a little Island Indigo ink around the edges to create a little depth in the “water”. I stamped “happy birthday” from the Bring on the Cake stampset onto the bottom right hand corner using Island Indigo Ink. I wrapped the Whisper White card with a piece of Sycamore Street Pool Party Ribbon and attached it to scored and folded Island Indigo card. I stamped the fish and the seahorse onto Whisper White card using Island Indigo ink and cut them out. I stamped the shell onto Whisper White card using Calypso Coral ink and cut it out.
 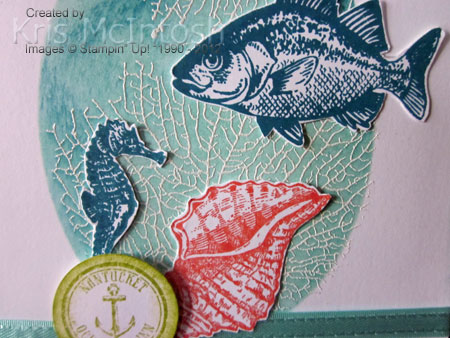 The three images were then attached to the card front. I stamped the “Nantucket” image onto Whisper White card using Lucky Limeade ink and punched it using the 1″ Circle Punch and then sponged the edges using Lucky Limeade ink. This image is attached to the card front using a dimensional.
This card was actually inspired by one that Connie Babbert shared on her blog. Thanks Connie. Of course I added some extra bits and pieces to make it my own.
What do you think?
Bye for now, Kris.
Winner – Free Subscription
The lucky winner of one month’s free subscription to Craft Project Central is
Jasmin
I loved receiving all your lovely comments on my project and look forward to having you visit me in the future. I wish I could give you all a free subscription.
Bye for now, Kris.
Altered Bird House and Card
I am truly amazed by the projects for the February edition of Craft Project Central. This one by Monika Davis is no exception. You can see more of Monika’s fabulous work by visiting her blog, and don’t forget to leave a comment and let her know how much you love it.
 This beautiful altered birdhouse would be a lovely décor item in any house. Use it to decorate your desk, use it as a special pencil holder, or just give it away as a piece of art. Great for a stamp camp, or as a class project.
If you would like to create these two beautiful pieces, then sign up for the February edition of Craft Project Central. I know that you will not be disappointed.
Bye for now, Kris.







