Car Coupon Keeper and Emergency Cards
What a great project designed by Chris Galbraith for Craft Project Central. Please take the time to visit Chris and see all her amazing work and don’t forget to leave a comment.
My Digital Studio
As you all already know I am really excited about Stampin’ Up! releasing My Digital Studio to the Australian market.
I haven’t had lots of time to play with this programme but it is really easy to use and the end product is fantastic. I shared a couple of scrap pages with you using photos that my daughter Sarah took and today I am going to show you how she used My Digital Studio to create a double page layout which showcases the photos beautifully.

I love traditional scrapbooking but sometimes it is difficult to find the time to create the layouts. I can see me using My Digital Studio quite a bit to record holidays. In fact already I have created a scrapbook of our caravan holiday last year. I created the pages using one of the photo book templates that came with the programme. I am going to get them printed and I will share it with you when I receive it.
I truly think that one of the best things will be creating pages in My Digital Studio and then adding some extra bits of ribbon and embellishments to make hybrid pages.
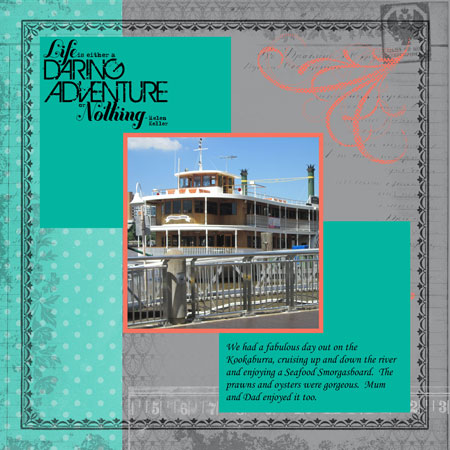
Here is another quick page I created using a 12″ x 12″ template, all I had to do was add a photo and a little journalling to create a layout about our day out on the Brisbane River.
I’d love to hear what you think about using My Digital Studio.
Bye for now, Kris.
Floral Scrapbook Wallhanging
Isn’t this scrapbook page designed to hang on your wall just gorgeous. This is the latest project from the April edition of Craft Project Central and was designed by the very talented Christy Fulk.
Scrapbook Class
Yesterday I held a scrapbook class where we made two double page spreads. This is one of them.
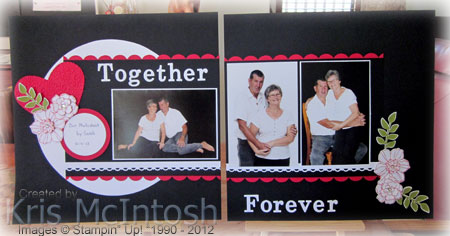
My husband and I don’t get too many photos taken just of ourselves, so when my daughter Sarah suggested a photoshoot I was all for it. I had to persuade my husband a little but in the end it was a lot of fun and we got some great shots. They were the perfect fit for these pages.
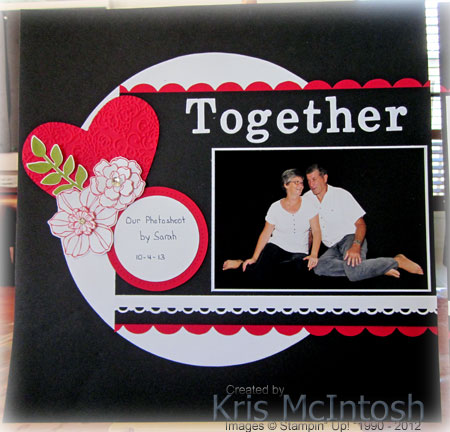
I used Basic Black as the basis for the page and added a circle of Whisper White to the left page. The Real Red scallop trim was cut using the Tasteful Trim Die and the strip of Whisper White is punched using the Scallop Trim Border Punch. The Real Red heart was cut using one of the Hearts Framelits and embossed using the Lacy Brocade Embossing Folder. I punched a Whisper White 2-1/2″ circle and added it to a 3″ Circle of Real Red cut using the 3″ Circle Originals Die. A little paper piercing just adds the finishing touch.
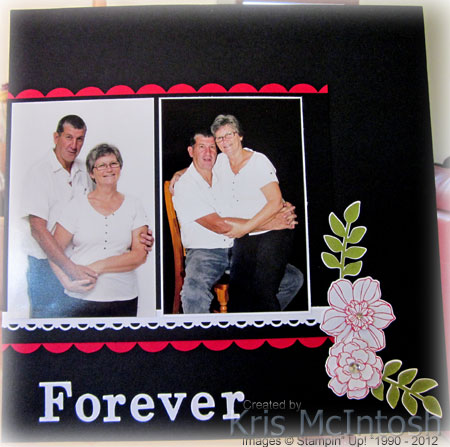
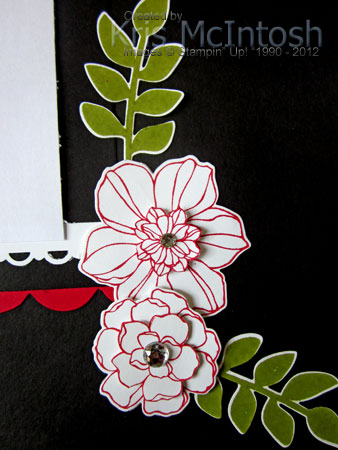
The Secret Garden flowers are stamped in Real Red ink onto Whisper White card and cut using the matching framelit, however, I did cut smaller sections of a couple of flowers to add to the centre and give a little more dimension. Each of the flowers has a Basic Rhinestone for just a little bling. The leaves from the Secret Garden stamp set are stamped in Old Olive and again cut using the matching framelit I used the now retired Timeless Type Alphabet to cut my title.
I love how the pages have turned out and so did the ladies attending class.
Bye for now, Kris.
Baby Gift Pail and Co-ordinating Thank You Notes
Here is another adorable project from the April edition of Craft Project Central. This gorgeous Baby Gift Pail was designed by the very talented Heidi King. Be sure to visit Heidi and see more of her fabulous work and don’t forget to let her know how much you love it.

This adorable whale makes the perfect wrapping for any baby shower! The neutral colours are perfect for a boy or girl. Add that special gift inside and you are ready to go.
If you would like the instructions for this tutorial then all you need to do is visit Craft Project Central and sign up for the April edition – at only $10.00 for 10 tutorials it is fantastic value.
Bye for now, Kris.
I’m So Organised
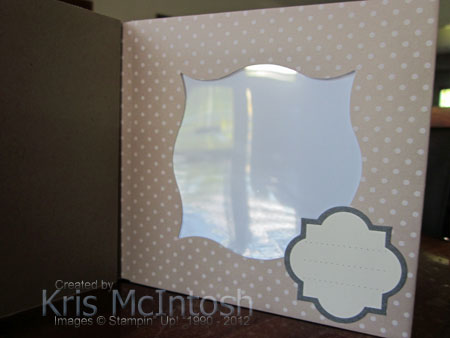
It’s that time of the year when we start thinking about saying goodbye to our current catalogue and welcoming in our new one. Sooo, I have been having a look at my stash and seeing what I need to use and not hoard. I found I still had a four of the gusseted treat envelopes from the Season of Sweets Designer Kit released for the Holiday Catalogue and used them to make this cute little photobook. The tutorial for this little booklet is one of those “try before you buy” video tutorials on the Stamp Academy website. Just click on the Free Video link to see all the tutorials to give you an idea of what you can get if you sign up to this fantastic site.
 So now I have a cute little stocking filler for next year. The album didn’t take any time to make and the instructions are super simple to follow. I used some of the stickers supplied with the Season of Sweets Designer Kit to add a little journal block to each page. All the recipient has to do is add the photos and a little information and the album is done. Quick, Simple and Beautiful.
Remember this is my way of offering you online classes 24/7. Each tutorial is accompanied by a video and printable PDF instructions. Once you have signed up to a particular class you have access to the tutorials for as long as you are a member. Watch the video on this link for more information.
Bye for now, Kris.
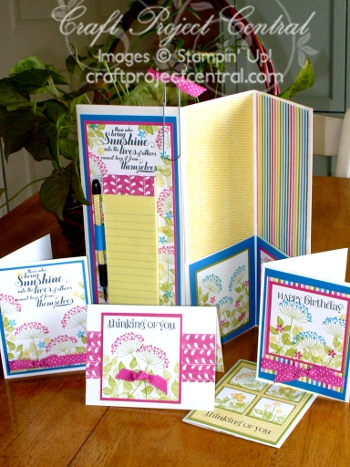
Portable Storage for Embossing Folders and Framelits
Well it’s time for my project at Craft Project Central.
 If you would like the instructions to make this portfolio, then pop on over to Craft Project Central and sign up for the April edition. You will receive the instructions for this project and 10 others for the fantastic price of $10.00.
Get Even More
for your money when you either Host a Workshop or become a Stampin’ Up! demonstrator between the 15th April and the 30th May.
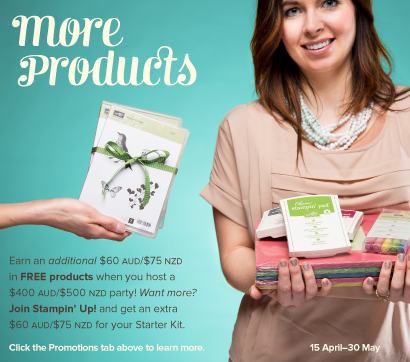
There never has been a better reason to place an order with me. Host a workshop with a value of $400.00 and you get an additional $60.00 to spend on product of your choice. So instead of $60.00 to spend you get $120.00 to spend. WooHoo! Who doesn’t like to get extra free product. I know that I do. So if you have been thinking about hosting a workshop or even holding a catalogue workshop where you collect orders from your family and friends – now is the time to do so. Placing an order has never been simpler, just visit my online store and you can shop 24/7.
Of course, if you think that is fantastic why not take advantage of the recruting offer and get an additional $60.00 worth of product in your Starter Kit. So join Stampin’ Up! for $169.00 and select $300.00 of Stampin’ Up! product. Amazing isn’t it! On top of that you get all the business supplies you need to get you started on your way. I would love to have you as part of my team. Joining up is easy, just visit my website and click on the Join the Fun button, once you have read all the information, click the Join Now button and it will take you to the online Independent Demonstrator Agreement.
Let me say, that being part of Stampin’ Up! is a fantastic experience. I have made many friends by holding workshops and classes and meeting lots of lovely people. I have also met some fantastic demonstrators on-line and in person who have become great friends. I am also lucky enough to have a fabulous downline.
If you would like more information on either of these fantastic offers, then please do not hesitate to contact me.
Bye for now, Kris.
I’m So Sorry
that I haven’t posted these two projects from the April edition of Craft Project Central sooner, but (believe me it is a big but) I have been away helping clean out my mother-in-law’s home as she has moved to a nursing home. So lots of unpacking cupboards, cleaning and holding a garage sale. So my apologies to all of you and also the creators of these two fabulous projects.
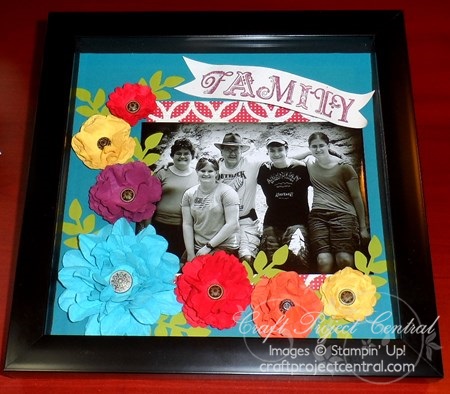
First project is this gorgeous Family Canvas and matching card by Leena Girsa.

Treasured family memories will be beautifully displayed on this vintage-style canvas! With space for three photos, this lovely piece is a beautiful gift for Mother’s Day or to keep and display in your own home.
The second project is this cute owl box and card set designed by Amanda Corbet.

Do you have a friend(s) that loves owls or do you need a fun and funky gift set in a hurry? This Owl Box with six different card designs and matching envelopes is bright enough to cheer up anyones day! Make if for yourself or as gifts for your friends.
I think these are both just gorgeous projects, so if you would like to create them, then just pop on over to Craft Project Central and sign up for the April edition – remember it only costs $10.00 for 10 projects. Don’t forget to visit Leesa and Amanda and let them know how much your love their work.
Bye for now, Kris.
Sunny Challenge 77/13
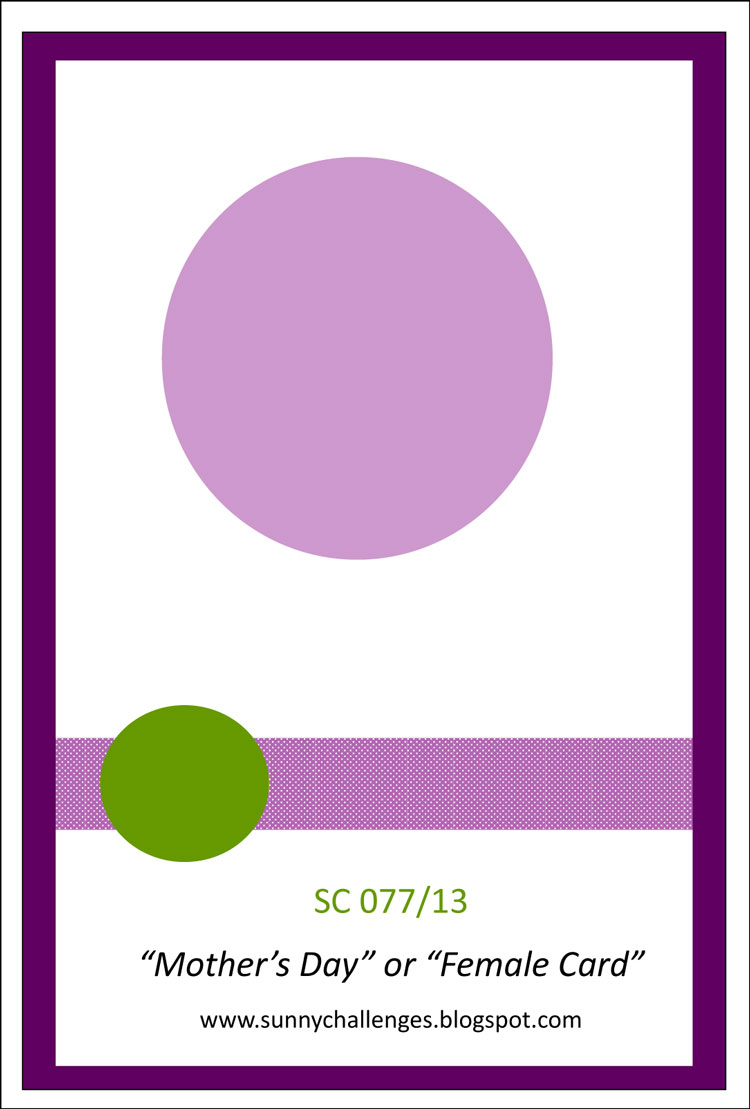 Our challenge this week has been set by Vicky and she has provided a great sketch and asked us to create a Mother or Female card. Now this is right up my alley, I find it so much simpler to create female cards than male cards.
 I embossed the top two-thirds of a piece of Whisper White card using the Perfect Polka Dots Embossing Folder. I stamped the greeting from the Delightful Dozen stamp set into the bottom right hand corner using Raspberry Ripple ink. I attached the embossed Whisper White card to scored and folded Raspberry Ripple card. I embossed a narrow strip of Whisper White card again using the Perfect Polka Dots Embossing Folder. I punched two strips of Raspberry Ripple card using the Dotted Scallop Ribbon Border Punch and attached one piece behind each long edge of the embossed card. I wrapped this piece with Raspberry Ripple 1/2″ Stitched Satin Ribbon and then attached it to the front of the card to cover the end of the embossing. I cut a 2″ circle from Whisper White card using the Circles #2 Originals Die and stamped the image from the Embellished Events stamp set using Gumball Green ink. I punched a 2-3/8″ Scallop Circle from Raspberry Ripple card and attached the image to it. I attached the scalloped image to the card front using dimensionals.
  I added Raspberry Ripple Dahlias to cover the stamped flowers (don’t tell anyone but I’ve had these since the catalogue launched and I think this is the first time I have used them). I tied a piece of Raspberry Ripple 1/2″ Stitched Satin Ribbon around the ribbon already attached to the card and through a large Vintage Faceted Button.
All in all I love the look of this card. What do you think?
Now for some more inspiration pop on over to Sunny Challenges and Creations and see what Vicky and Gwen have created. Once you have created your card, scrap page or possibly a 3d item, add it to Mr. Linky. I need some ideas for Mother’s Day so I can’t wait to see your creations.
Bye for now, Kris.


