Oh, Whale Card and Box Set
Here is another amazing project from Craft Project Central. This gorgeous set of cards and fantastic box tutorial was created by Tara Bourgoin. This is such a fun stamp set which Tara has put to great use. Please take a look at more of her work and don’t forget to leave a comment and let her know how much you love it.

You can get the instructions to complete this fantastic set by visiting Craft Project Central and subscribing to the January edition. Don’t forget that great price $10.00 for 10 tutorials.
Bye for now, Kris.
Let the Sale-A-Bration begin
Well I am a couple of days late getting this posted but I am really excited about this year’s Sale-A-Bration (you can view the catalogue online here). I have already shared with you my tutorial for the Sale-A-Bration set Feeling Sentimental and I want to share much more.
 Firstly, let’s cover some of the details. For every $100.00 that you spend on Stampin’ Up! product you get your choice of one of the FREE items from the Sale-a-Bration catalogue (so for $200.00 your get two FREE items). Most of the items are Sale-A-Bration exclusive and are only available while the promotion lasts (22.1.13 to 31.3.13). Another benefit is that if have an order of $300.00 you also get a pack of Silver Glimmer Paper for FREE. So you can place a $300.00 order yourself and earn 3 Sale-A-Bration items for free PLUS get a pack of Silver Glimmer Paper and this also works if you are the hostess for a $300.00 workshop, the hostess gets the Silver Glimmer Paper. This is on top of the normal Hostess benefits that apply. Now if you get a workshop total of $600.00 then the hostess will get whatever Free items you earn based on your personal sales, PLUS, a pack of Silver Glimmer Paper and a Free Product Bundle (Designer Series Paper, Ribbon & Buttons). Can you believe all this stuff you get for FREE!
For those of you who have been considering becoming a demonstrator then Sale-A-Bration is the perfect time to sign up. You will get all the usual benefits of being a demonstrator but as well you get an additional %25 more product in your starter kit (In Australia chose $294.00 worth of Stampin’ Up product and only pay $169.00). How amazing is that. Need more information – then do not hesitate to contact me.
 Now we have the details down let me share a little tag I made using one of the sets you can earn FREE. This set is called Bloomin Marvelous and contains 8 stamps. I made my tag by cutting Very Vanilla card and attaching it to Island Indigo card. I stamped “oh happy day” onto Very Vanilla card using Island Indigo ink and attached it to Island Indigo card which has one long edge punched using the Scallop Trim Border Punch. I attached this to the base of the tag. I stamped the flower onto the tag using Calypso Coral ink and partially inked the leaf image using Lucky Limeade ink and stamped next to the flower. I stamped the butterfly onto scrap Very Vanilla card using Pool Party ink and guess what? You can use the Bitty Butterfly Punch which will be available in the new Seasonal Catalogue on 1st February to punch it out! Yay, I love it when you can create 3d images with your stamps by cutting but using a punch makes it so much easier. To finish off the tag I punched a 3/4″ Circle of Island Indigo card and attached it to the top of the tag then I added some of the Island Indigo ribbon available for Free in the Sale-A-Bration catalogue.
Well what do you think? Cute set isn’t it? Stay tuned, I have a few more projects to share using these fantastic products.
Bye for now, Kris.
Tea for Two Gift Set
Isn’t this latest project from Craft Project Central just gorgeous. This lovely gift set was designed by Julie Beltramo. Just take a visit to her blog to see more of her amazing work.
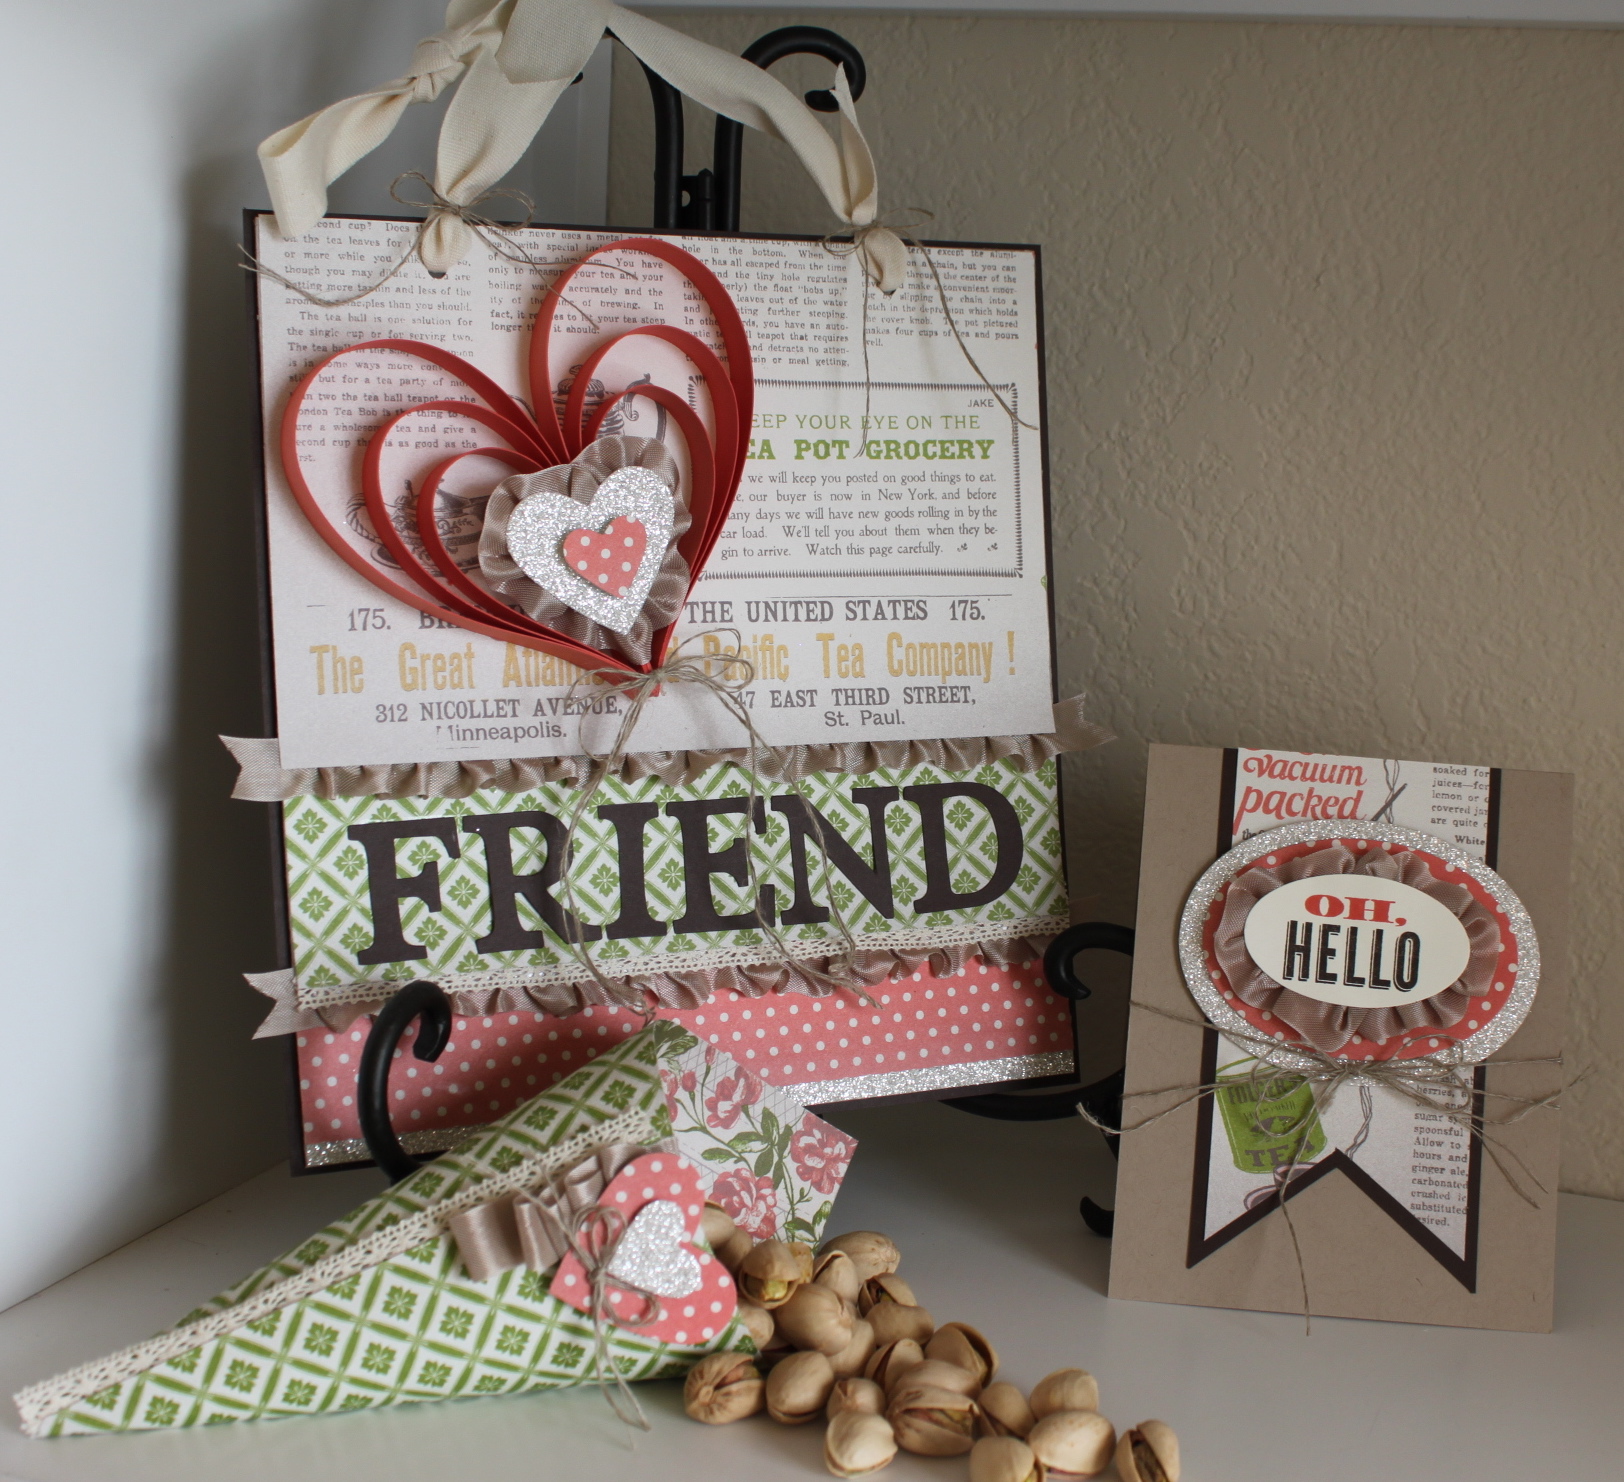
A great gift idea with the gorgeous wall hanging, matching card and the beautiful treat pouch. If you would like the tutorial, just subscribe to the January edition at Craft Project Central for the fantastic price of $10.00 for 10 projects.
Bye for now, Kris.
Online Classes
I have always loved the idea of attending online classes which have unlimited access 24 hours per day. So no matter what time of the day or night I want to create, I can go there and find something new and exciting to create. Well I have finally found the answer, Stamp Academy. This site offers lots of different ways to allow you to be creative and at the same time unique, because none of the projects is offered outside the exclusive membership. I have partnered with Stamp Academy to offer you my loyal blog followers the opportunity to be part of this fantastic site.
I have a Gold Membership level which allows me access to all of the features offered – Technique Classes, New Catalogue Classes, New Mini Classes all for $ 17.95 per month. The best thing about the Gold Membership is that I get access to each new class as it becomes available for as long as I am a member! Each of the projects has a video and PDF for downloading, so not matter what type of crafter you are, either visual or written, you get what you need.
For those of you who are from the US or Canada you already have your hands on the Seasonal Catalogue, however, if you live in Australia/New Zealand it will be released on the 1st February. So the perfect option to begin is the Spring 2013 Edition of Project Parade. This Parade features projects made using the gorgeous product from this amazing Mini Catalogue. This edition costs $24.95 and you will have access to 3-4 projects weekly for 8 weeks. Just to give you an idea here is a cute project which I made using the Hearts A Flutter stamp set and matching framelits. I am going to make one of these for each of my grandchildren as a fun little Valentine.

Aren’t they just adorable. If you would like to learn more about the Stamp Academy or if you would like to subscribe then please click on the Stamp Acadamy link in my sidebar to get you started. If you have any questions, please do not hesitate to contact me.
Bye for now, Kris.
Sunny Challenges and Creations
Well after a long break over Christmas Sunny Challenges and Creations is again up and running. This year we are going to trial running each of our challenges for two weeks. We are hoping that this will give you more time to enter. We know how busy everyone is and how difficult it can be to get challenges completed on time. Anyway our first challenge is an easy one. All you have to do is create a card, scrap page or 3d item with a birthday theme. Here is my card for the challenge.
 I added Whisper White card to scored and folded Basic Black card. I attached Real Red Striped Designer Series Paper from the Brights Designer Series Paper Stack to Basic Black card and attached it to the left hand side of the card front. I embossed Pacific Point card using the Chevron Embossing Folder, attached it to Basic Black card and attached it to the right hand side of the card front. I inked the truck stamp from the I Dig You stamp set using Real Red, Pacific Point and Basic Black Stampin’ Write Markers and stamped onto Whisper White card. I stamped the truck onto scrap Whisper White card using Real Red ink and cut out the cabin. I stamped the truck onto scrap Whisper White card using Pacific Point ink and cut out the trailer. I stamped the truck again onto scrap Whisper White card using Basic Black ink and cut out the tyres. The cut out pieces were adhered over the stamped images, just to give the truck more dimension. I attached the image panel to Basic Black card. The parcel images were stamped using Real Red ink and again using Pacific Point ink onto scrap Whisper White card and cut out.
 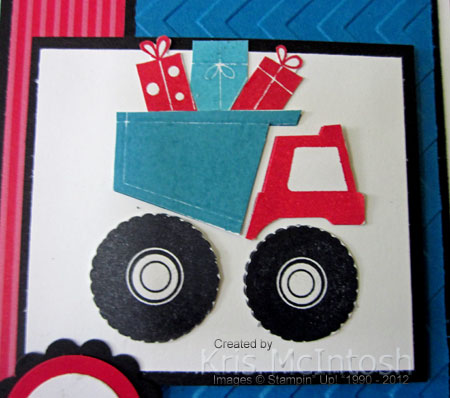 The parcel images were attached to the image panel over the back of the trailer. The truck panel is attached to the card front using dimensionals. I stamped “wish big” from the Pennant Parade stamp set onto Whisper White card using Pacific Point ink and punched it using the 3/4″ Circle Punch. The greeting is attached to a Real Red 1″ Circle and then to a Basic Black 1-1/4″ Scallop Circle. The greeting is attached to the card front using dimensionals.
Ok so now for some more inspiration pop on over to Sunny Challenges and see what the Designers and Guest Designers have created. Once you have created your card, scrap page or 3d item, add it to Mr. Linky. I am really looking forward to seeing what you create for this challenge and don’t forget you now have two weeks to play along.
Bye for now, Kris.
Burlap Valentine Decor
This gorgeous project is the latest in the January Edition of Craft Project Central and was created by the very talented Carrie Rhoades,

The look of burlap has become quite popular for home décor. Here are two fun Valentine projects that will bring the shabby chic look of burlap to your décor. Each pennant on the “sweet love” banner is burlap with designer paper stitched on top. Accents of glittered hearts, dyed ribbon and paper flowers finish off the banner. The framed Amore art piece really pops with rolled paper roses. These two coordinating décor pieces would really show someone how special they are to you or would be a great addition to your own décor this Valentine’s Day.
So if you want to make this delightful duo, then pop over the Craft Project Central and subscribe to the January edition – $10.00 for 10 step by step photo tutorials.
Bye for now, kris.
I’m Feeling Sentimental
When I first saw the Sale-A-Bration catalogue, I fell in love with this stamp set and knew it would look gorgeous with the Early Expresso Core’dination card.
I created three cards and three tags using the images in this set with a real vintage feel. I am posting this now because I want you to have time to order your Early Expresso Core’dination card while it is still current. When the current Holiday mini ends on the 31st January you will no longer be able to purchase the core’dination card in this colour. Contact your Stampin’ Up! demonstrator to make your purchase – don’t have a Stampin’ Up! demonstrator, then contact me.
The tutorial contains step by step photo instructions to create the box, cards and tags and costs $2.50. Just visit my Tutorials for Sale page to make your purchase.
Bye for now, Kris.
Creating Pretty Cards Sketch 19
I love completing challenges when I get the time, and entering the one at Craft Project Central offers the chance of winning a free subscription. The sketch challenges are created by Kris Kilkenny a very talented paper crafter, just visit her blog for some more inspiration.
 I embossed Very Vanilla card using the Fancy Fan Embossing Folder and attached it to the front of scored and folded Cherry Cobbler card. I cut a piece of Cherry Cobbler Polka Dot Designer Series Paper from the Regals Designer Series Paper Stack, cut a flag shape into one end and attached it to the left hand side of the card front. I stamped the greeting from the Your Amazing stamp set using Cherry Cobbler ink onto Very Vanilla card. The greeting is attached to Cherry Cobbler card and then to the card front. The flower is created using the Fancy Flower Punch using a technique that Shannon Moncreiff demonstrated at the Brisbane Regionals.
  My flower is punched from Very Vanilla card and the edges are sponged using Cherry Cobbler ink. After my flower was completed I sprayed it with a mix of Isopril and Champagne Mist Shimmer Paint. This gives the flower lots of sparkle and just to add a little more I added one of the new Large Rhinestone Basic Jewels to the centre. I cut Always Artichoke card using the Little Leaves Sizzlet and attached it to the card front. The flower is attached to the card front over the leaves using Mini Glue Dots.
I love the finished card and especially love that I got to use a new stamp set!
Bye for now, Kris.
Winner – Free Subscription
It is my great pleasure to announce that Erica is the winner of a one month free subscription to Craft Project Central. To win this subscription all Erica had to do was leave a comment on the post about my tutorial for the January Edition of Craft Project Central. So thank you to Erica and all of you who take the time to leave a comment on my blog. I truly appreciate it. I hope that Erica enjoys her subscription to Craft Project Central as much as I do.
Bye for now, Kris.
Valentine Box of Chocolates and Cards
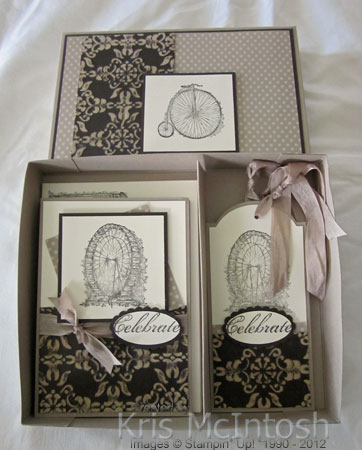
This the latest project in the January Edition of Craft Project Central. This gorgeous box which holds chocolate and a set of heart shaped cards was designed by Heidi King. I love the way it showcases more of the beautiful products in the Seasonal Catalogue (available in Australia on 1st February). Please visit Heidi’s blog to see more of her lovely work and don’t forget to leave a comment.
With Valentine’s day just around the corner this would make a fantastic gift or even a class project. To get the tutorial or you have to do is subscribe to the January Edition of Craft Project Central – $10.00 for 10 tutorials.
Bye for now, Kris.


